The Arrival of Sinterklaas!

Governmental officials making arrangements for a smooth ceremony; Shopkeepers creating innovative themes to motivate purchases; Children excited about the gifts they are going to receive; Parents wondering what gifts to buy this year; Grand parents choosing different presents for their beloved grand children with that special care; Teachers in schools busy arranging events – what are all these for?  These are for the Arrival of Sinterklaas.


Sinterklaas and Zwarte Pieten

Now, who is this Sinterklaas? Sinterklaas is the shortened version of St. Nicholas.  The celebration of the arrival of St. Nicholas – Sinterklaas or simply the Sint is an authentic Dutch Festival. He is also believed to be the source of the ever popular Santa Claus.

Santa Claus, often abbreviated Santa, is a figure in North American culture who reflects an amalgamation of the Dutch Sinterklaas, the English Father Christmas, and Christmas gift-bringers in other traditions. Santa Claus is said to bring gifts to the homes of good children during the late evening and overnight hours of Christmas Eve, December 24. Santa Claus in this contemporary understanding echoes aspects of hagiographical tales concerning the historical figure of gift-giver Saint Nicholas, the man from whom the name of Santa Claus derives and in whose honor Santa Claus may be referred to as Saint Nicholas or Saint Nick.  (http://en.wikipedia.org/wiki/Santa_Claus)


a different sint and piet

This is another clear information about the travel of Sinterklaas magic to America –

When the early Dutch settlers came to America, they naturally brought with them their venerated old bishop. St. Nicholas and their favorite holiday, Sinterklaas. Indeed, after landing in the New World, the Dutch explorers, led by Henry Hudson, built their first church on the island of Manhattan in 1642, dedicating it to Sinterklaas. When the British took control of New Amsterdam in 1664, they adopted the Dutch recognition of Sinterklaas and merged it with their own observance of the Winter Solstice, Father Christmas—the merry, roly- poly, Falstaffian figure in high boots. Eventually, these two old gentlemen commemorated in December, merged into one.

Over the next few generations, Sinterklaas found his way into American literature. In 1809, writer Washington Irving (a man who lived not far from Rhinebeck) created a jolly Sinterklaas for his popular Knickerbocker Tales. Then in 1822, an Episcopal priest named Clement Moore (who also lived near to Rhinebeck) wrote a lighthearted poem called “A Visit from St. Nicholas” which featured a jolly old elf, his descent down a chimney on Christmas Eve, and a sleigh drawn by eight tiny reindeer (Odin’s flying horse!) The Father Christmas image stuck, but he acquired a Dutch name—Santa Claus—a direct derivation from Sinterklaas. http://www.sinterklaasrhinebeck.com/what-is-sinterklaas.php

Every year the Sint arrives in the Netherlands in a steam boat in November. He comes from Spain and then travels throughout the country meeting and greeting people and distributing presents to children. Then comes the special day – The Sinterklaas Feast on December 5 – also called the Sinterklaas Eve – the evening the children receive their gifts. The children keep their shoes outside their houses, traditionally in front of the fire-place, stuffed with hay and carrots for the Sint’s horse. Sinterklaas takes them and leaves the precious presents for the children.  He leaves for Spain on December 6.


shoes in front of the fire-place


The Spain Connection

Why does Sinterklaas come from Spain?

The Saint Nicholas was a Greek bishop of Myra in present-day Turkey. In 1087, his relics were furtively translated to Bari, in southeastern Italy; for this reason, he is also known as Nikolaos of Bari. Bari later formed part of the Spanish Kingdom of Naples.  Due to the fact that the remains of St. Nicholas were in Bari (then a Spanish city), is this tradition that St. Nicholas comes from Spain. St. Nicholas is well-known in Spain as the patron of sailors, so that´s why St. Nicholas comes to the Netherlands always in a steamboat. (http://en.wikipedia.org/wiki/Sinterklaas)


Zwarte Pieten

Zwarte Piet translates as Black Peter. Zwarte in Dutch means Black and Piet might be the Dutch version of Peter. Sinterklaas is accompanied by one Zwarte Piet while he arrives from Spain. Then he gets the help of several zwarte pieten or local helpers. Piet helps Sinterklaas to deliver gifts to children by climbing through chimneys – hence his face is black due to the sooty chimneys.

The eve of December 5th is a special day for all Dutch children. This is when Sinterklaas rides around the country on his white horse. Children put shoes under the chimney and they also place a piece of carrot in them as a reward for the horse. Sinterklaas stops at the roof of the houses and sends a Piet down the chimney to put some kind of gift in the shoes. This is often a piece of chocolate in the form of the receiver’s first initial and pepernoten, small hard cookies. This is a very busy time for Sinterklaas, in the day he visits schools and other places and in the evening people’s homes. He knocks on the door and hands out gifts from his sack. http://www.holland.nl/uk/holland/sights/saint_nicholas.html


zwarte piet and his sack


A New Experience

Thanks to my daughter, Sinterklaas also comes to our house. Till last year, we just celebrated it at her play school. This year, the magic of Sinterklaas has entered our home too – it was also a special experience making the favourite kruidnoten in her primary school!

Come October and the Sinterklaas wave starts to sweep in – shops displaying gift items. Enter November, all decorations set in. Sinterklaas enters Holland and then everywhere one finds celebrations of their favourite saint. On November 19, when Sinterklaas came to our suburb, we went to welcome him. We could not make it to the harbour he arrived, but we could see him at our own Centrum/Central Shopping Lane – called the Lang Straat.


shop with sint, piet and white horse


the sint’s shopping

All the shops with posters of the saint and his helpers…. some quite innovative and some very impressive!  After a wait for some time, first came the Zwarte Pieten with kruidnoten, peppernoten and candies in their jute bags; then arrived the Sint with some good music and warmth. In front of Sinterklaas and behind were piets, piets and more piets of different age groups – some walking, some distributing kruidnoten, some driving vans, some playing instruments and some singing Sinterklaas songs in those open vans…a different experience altogether.


piets in an open van singing sint songs 


piet welcoming customers


sint flying high


Sinterklaas in School

There was a ‘kruidnoten baking day’ and the parents had to help. Kruidnoten or Spicy Cookies are always associated with Sinterklaas. These are the cookies that zwarte piets bring for children. It was an interesting day –  children with their tiny little hands making those small cookies; we baked them and put it in small cups with their names. Children were so excited to see the cookies they made by themselves but did not bring one for mom and dad to taste. (that mom had her share while baking was an expected one).


ready-to-make flour mix


work of those beautiful tiny hands

We used the ready made flour mix available in the market to make the dough for kruidnoten. In a professional way, the teachers in the primary class had demonstrated to the children to make dough with the actual ingredients together. I got this recipe from my daughter’s favourite teacher!


kruidnoten ready!


Ingredients (makes approximately 125 kruidnoten)

  • self-raising flour – 250 gms
  • butter – 150 gms
  • pure cane sugar (Basterd Suiker in dutch) – 125 gms
  • salt – 1/2 tsp
  • milk – 2 tbsp
  • ready-made spice mix from shop – 10 gm

Note: An egg can be added if preferred.

Method of Preparation

  1. Knead all the ingredients together in a large bowl.
  2. Dough should be soft but easy to make small balls
  3. Keep the dough closed for at least half an hour
  4. Make small balls and press slightly to form a flat cookie
  5. Preheat oven at 160 degrees celsius and bake for 15-20 minutes
  6. Leave the cookies to cool – initially the cookies would be soft when done;  When cooled for about 10 minutes, they become crisp
  7. Store in an air-tight container and enjoy crisp kruidnoten with a cup of Hot Chocolate!


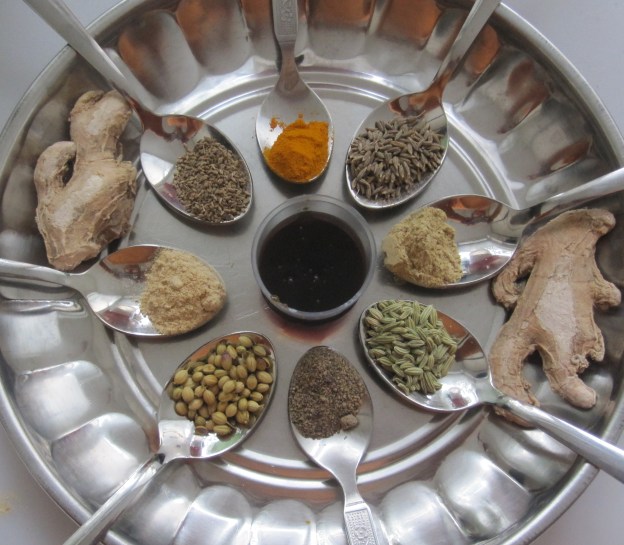
General combination of spices in kruidnoten

taken from http://dutchfood.about.com/od/cookingtipstechniques/ss/Speculaskruiden.htm

  • 4 tsp ground cinnamon
  • 1 tsp ground cloves
  • 1 tsp ground mace
  • 1/3 tsp ground ginger
  • 1/5 tsp ground white pepper (a pinch)
  • 1/5 tsp ground cardamom (a pinch)
  • 1/5 tsp ground coriander seeds (a pinch)
  • 1/5 tsp ground anise seeds (a pinch)
  • 1/5 tsp grated nutmeg (a pinch)


spicy cup of cookies

Other goodies popular with Sinterklaas are the chocolate letters, peppernoten or a soft chewy cookie, marzipan and speculaas cookies.

Children are taught dutch songs on Sinterklaas, do art and craft works based on sinterklaas, decorate their classes with various things related to the Sint and learn a lot about the Saint and his helpers. They take one of their shoes to school and paint it and leave it with hay and carrots and eagerly wait for the day Sinterklaas comes to meet them with gifts. They prepare themselves with a poem to recite in front of the Sint.


kruidnoten


chocolate letter

I am waiting for the Sint’s arrival on 5th of December at my daughter’s school. I also have to hunt for some gifts to keep in her shoes on the eve of Sinterklaas. Speciality lies in the fact that, even at their teens and beyond, children want to believe that the sint and piets deliver those goodies to them in appreciation of their good behaviour! Hurrah it is time for celebration!! 

an interesting gift from a birthday boy

Urulai Kizhangu Poriyal/Potato Dry Curry

Potato is certainly a versatile vegetable.  In gravies and stews,  sandwiches and pies, dosais and parattas,  fried and baked, sometimes even in combination with meat – it fits in anywhere and everywhere like the all-in-one daughter-in-law of mother-in-law’s choice! The all time favourite urulai poriyal of Tamilnadu is usually one of the dry vegetables served on the vaazhai ilai. (for ilai sappadu or banana leaf feast meal see – https://dosaikal.com/2011/10/14/thamizhar-virundhu-feast-of-the-tamils/).

Initially, whenever I made urulai poriyal, the glowy, brownish colour that is usually relished in feast meals or restaurant thalis used to be missing. I felt too much oil must be needed to bring the same texture and colour and not ready to use excess oil, accepted defeat. Then, one day, amma told the secret behind it and now I can make urulai poriyal – with the same colour and glow.. hurrah!

Urulai Kizhangu Poriyal/ Potato Dry Curry 


Ingredients (serves 3)

  • urulai kizhangu/potato – 250 gms
  • onions – medium 2 no.s
  • garlic – 3 cloves (optional)
  • turmeric powder – 1/2 tsp
  • red chilli powder – 1 tsp
  • pepper powder – 1/2 tsp
  • coriander powder – 1 tsp
  • salt – as needed 
  • oil – 2 tbsp
  • kadugu/mustard seeds – 1 tsp
  • ulundahm paruppu/urad dal – 1 tsp
  • curry leaves – a few
  • perungayam/asafoetida – a pinch

Method of Preparation

  1. Cook potatoes in a pressure cooker or microwave till just done
  2. Peel and cut into small pieces and keep aside
  3. Peel, wash and finely chop garlic and onions
  4. Heat oil in an iruppu chatti/kadai, add mustard seeds and let it splutter
  5. Add urad dal and when it turns golden brown add curry leaves
  6. Add chopped garlic and onions and fry
  7. Now, add all dry powders – turmeric, red chilli and coriander and fry a bit – This step gives the brownish colour the dry curry
  8. Do not over fry – this might take away the true spicy flavour of the powders
  9. Add the cooked and cut potatoes and mix well
  10. Add salt as per taste
  11. Cook in medium for 5 minutes; Keep stirring with care to bring the potatoes in the bottom of the kadai to top – this helps in even colouring and blending of spice powders
  12. When poriyal reaches golden brown colour, sprinkle asafoetida and mix well
  13. Serve hot garnished with coriander leaves
  14. Tastes best with Rice and any Kuzhambu (https://dosaikal.com/category/kuzhambugal-gravy-dishes/)


Note:

  1. Red chilli powder can be altered as preferred
  2. Garlic is believed to reduce the gastric problems potatoes tend to give –  and also gives a nice flavour to any curry.. but can be avoided if not preferred.
  3. Onions are also optional too.

Thengai Pal Meen Kuzhambu/Fish Curry with Coconut Milk

After a few years of cooking not so good meen kuzhambu/fish curry or not as good as mother-in-law’s fish curry, this one came as a respite. This fish curry never flopped – might be because of the coconut milk added. Thengai Pal means Coconut Milk in tamil and thengai pal gives an exotic flavour to any curry or payasam, no doubt. 

Meen Kuzhambu holds a special place in Tamilnadu cuisine.  Fresh fish curry is not served immediately and is considered better in taste the next day. The fish is left to absorb the flavour of tamarind with spices till the next day -not in the refrigerator please! I have seen my mother-in-law cook fish kuzhambu specially in a man chatti – earthen pot and leave it till next day. Though I don’t wait till the next day, at least three to four hours of waiting time after the curry is done is advisable.

While traditional Meen Kuzhambu would follow in the near future, this kuzhambu is something for the buffet table I would say. Frozen fish fillet also suits this and in fact, I find fillet tastes best in this kuzhambu/gravy.  Ingredients needed to make this kuzhambu are also easily available in the market – especially not much of spice grinding involved for those ‘quick cooks’!

For those new entrants to the world of non-vegetarianism (quite recently like me) and those who find tasting, consuming and especially cooking fish a troublesome issue, this kuzhambu would be easy work. Might be useful for non-cook husbands too – to introduce their wives to the fish world! Now, let’s plunge into making thengai pal meen kuzhambu.

Here, Tilapia Fish is used as it tastes better. I also use Panga Fish fillet got from the fish store.  But, feel free to use any kind of fish you love.

Thengai Pal Meen Kuzhambu/Coconut Milk Fish Curry


Ingredients (serves 2)

  • Meen – Any fish/fish fillet – 250 gms
  • fenugreek seeds – 1 tsp
  • garlic – 5 cloves
  • chinna vengayam/shallots – 8 nos. or big onion – 1 no.
  • tomatoes – 2 no.s
  • tamarind – lemon sized ball
  • red chilli powder – 2 tsp
  • coriander powder – 1 tsp
  • salt – as needed
  • coconut milk – 1 cup (canned or freshly extracted)
  • any cooking oil – 2 tsp
  • For Tempering
  • nallennai/gingelly oil – 2 tsp 
  • mustard seeds – 1/2 tsp
  • curry leaves – a few


 chinna vengayam/shallots and poondu/garlic


Method of Preparation

  1. Soak tamarind in warm water for 15 minutes. Take the juice and keep aside
  2. Peel the skin of garlic, wash and keep aside
  3. Chinna vengayam or shallots always taste good in any fish curry – just peel the skin, wash and keep aside. If one uses big onion, peel, wash and cut to four pieces.
  4. Heat 1 tsp oil in an iruppu chatti/kadai
  5. Fry 1 tsp fenugreek seeds, garlic and onions in oil
  6. When they turn golden brown, add tomatoes and let them become soft
  7. Cool and blend well
  8. Heat remaining 1 tsp cooking oil in an iruppu chatti, and pour in the blended mixture
  9. Add tamarind juice, red chilli powder, coriander powder and salt and bring it to boil
  10. Let it boil to make a semi-thick gravy. Once fish is added, the gravy would become thinner/watery. Hence, it is advisable to make a thick gravy and then add fish to it
  11. Once the fish is cooked, pour in the coconut milk and cook in medium position for 5 minutes
  12. Tempering with gingelly oil enhances the taste of any south indian kuzhambu. Heat 2 tsp gingelly oil in a separate chatti; Add mustard seeds – when they splutter add curry leaves
  13. Pour this into the meen kuzhambu and serve hot
  14. Thengai Pal Meen Kuzhambu tastes best with Rice.


Note:

  1. Red chilli powder can be altered as per taste
  2. Tamarind pulp available in shops can also be used – add water and make a pourable consistency
  3. Meen Kuzhambu is cooked in nallennai or gingelly oil. If it is not available, one can use any cooking oil.

Grilled Sandwiches without grill

On a weekend morning, when I wanted to serve something quick and simple with coffee – but a hot one in the -1 degree chillness outside – an old-time favourite came to my mind. This is not a traditional one, but something which was not a usual ‘complete meal’ in conservative households when I grew up; might have been a foreigner food those days – surely not anymore!  They are the ‘Sandwiches’!  In my school or college days, a request to invest in a sandwich maker/sandwich griller did not have an encouraging outcome. But making one – not only tasty but hot, crispy outside with a flavourful filling inside used to be very interesting. Like chinese, continental or any other food made the Indianised way – sandwiches are also Indianised, sometimes south Indianised! Fusion music and fusion cooking cannot be avoided you see. Even in the dosai varieties, apart from the usual masala dosa, the stuffing inside the dosais can be of numerous varieties – paneer dosai, paneer-capsicum dosai, cauliflower dosai, manchurian dosai and so on and on and on -non stop.

The same way, the filling inside sandwiches can also vary – anything from fresh vegetables to left over cooked vegetables – especially spicy. If left over dry vegetable is not spicy, a spread of spicy coriander chutney would fit very well as a spread instead of butter/margarine. But wait – this post is not about the filling and preparation of sandwiches – but in the method of making grilled sandwiches without a sandwich maker/sandwich griller. One of my aunts settled in Pune,  a beautiful city in the state of Maharashtra taught me this way (a wonderful cook herself – an expert in home-made bhelpuris to pizzas)! Thankyou Chithi (Aunt)!

Coming back to my need for a hot grilled sandwich – I put my sandwich griller aside and came to the stove to make a grilled sandwich without a grill. A cast iron pan serves best – it holds heat and grills evenly.  This is how I did it –

Ingredients

  • brown bread – 2 slices
  • butter/margarine – 1 tsp
  • potato curry/any other dry vegetable – enough to spread on the slice

Method of Preparation

1. Fill bread with potato curry or any preferred filling with or without cheese

2. Heat a cast iron pan on the stove

3. Grease with 1/2 tsp margarine

4. Place the filled in bread slices on pan

5. Spread 1/2 tsp margarine on the top slice


6. Press it well


7. When it is lightly toasted on one side – turn it


8. Cover with a lid/plate which exactly closes the slice 


9. Place a heavy utensil/pan/stone – anything which would press the sandwich well


10. In sim position, let it be grilled for 2-3 minutes – check at this point


11. The side facing the fire would be evenly brown and crisp

12. Cut it to halves and serve.


If one prefers to make grilled sandwich in a sandwich maker/griller, please go for it!

Mullangi Kuruma/Raddish Kuruma

This is a spicy kuruma I learnt from one my very good friends in Bangalore. Though she makes this better than me, I am not that bad a learner. This goes well with idlis, dosais, aapams, chapatis and rice too! Some children might not like the pungent smell and taste of radish – even grown ups. This is a better way to make them enjoy the goodness of radish.

For some health tips on radish –

White Radish is also called Japanese radish, Oriental radish, Chinese radish, lo bok and Mooli. It is a mild flavoured, very large, white East Asian radish. http://en.wikipedia.org/wiki/Daikon


Radishes are very low-calorie root vegetables.  They are very good source of anti-oxidants, minerals, vitamins and dietary fiber. Fresh Radishes are rich in vitamin C.  Vitamin C is a powerful water-soluble anti-oxidant required by the body for synthesis of collagen. Vitamin C helps body scavenge harmful free radicals, prevention from cancers, inflammation and helps boost immunity. In addition, they contain adequate levels of folate, vitamin B-6, riboflavin, thiamine and minerals such as iron, magnesium, copper and calcium.  (http://www.nutrition-and-you.com/radish.html)


Mullangi Kuruma/Mooli-Radish Kuruma


the coconutty kuruma


Ingredients

  • mullangi/radish – 500 gms
  • garlic – 5 cloves
  • vengayam/onion – 1 no. (big)
  • tomatoes – 2 no.s
  • grated fresh coconut/desiccated coconut – 3 tbsp
  • turmeric powder – 1/2 tsp
  • red chilli powder – 1 tsp
  • garam masala – 1 tsp
  • salt – as needed
  • water – 1 cup
  • oil – 2 tsp
  • coriander leaves to garnish


Method of Preparation

  1. Cut mullangi/radish into long pieces
  2. Cut onions and tomatoes into big pieces and keep them separately
  3. Heat one teaspoon oil in a kadai
  4. Fry garlic cloves and cut onions till golden brown
  5. Add grated coconut and fry well
  6. Add cut tomatoes and fry till they are soft and pulpy
  7. Blend into a paste and keep aside
  8. Take one tea-spoon oil in a pressure cooker, add the paste and fry a bit
  9. Add turmeric powder, red chili powder, garam masala and salt and fry well
  10. Since only one teaspoon oil is used to fry, keep stove in sim position – otherwise it might get burnt
  11. Add cut radish and mix well
  12. Add water and check salt
  13. Cook in high flame till first whistle; Simmer and cook till one more whistle and turn off stove
  14. Garnish with coriander leaves and Kuruma is ready to be served.


kuruma with groundnut


Note:

  1. Coconut can be substituted with groundnuts – 1/2 cup roasted ground nuts can be added while blending fried garlic, onion and tomatoes.
  2. Groundnuts give a glowy oily texture to the kuruma
  3. For the calorie conscious – no coconuts, no groundnuts – omit these and pressure cook. When the kuruma is done, add 1/2 cup milk/skimmed milk to give it a creamy consistency. 

Basic Wheat Cake/Atta Cake

This is another cake with just the basic ingredients. Flour, sugar, butter and eggs are the basic ingredients in any cake. Here again, the all purpose flour is substituted with wheat flour; brown cane sugar in place of white sugar and  cooking oil is used instead of butter. I wanted to bake this cake without eggs – but my daughter who loves the beating part in cake making, insisted using egg. So, egg is used.

This cake does not need much beating. Just mixing one ingredient after the other is enough. It is very quickly done.


Ingredients

  • wheat flour – 1 cup/100 gms
  • sugar – 3/4 cup/75 gms
  • oil – 1/2 cup – 50 ml
  • egg – 1 no.
  • yoghurt/curds – 3/4 cup
  • baking powder – 1/2 tsp
  • baking soda – 1/2 tsp
  • vanilla extract – 1 tsp

Method of Preparation

  1. In a wide bowl, beat egg and sugar – enough to melt sugar
  2. Powdered sugar can also be used for easier melting
  3. Add oil and vanilla extract and mix
  4. Mix baking soda and baking powder with gothumai maavu/wheat flour/atta
  5. Start adding flour little by little to egg, sugar, oil mixture
  6. The batter would be thick half way – now add little yoghurt to set right the consistency
  7. Add all the flour and yoghurt to bring batter to thinner consistency
  8. Grease a baking pan and dust it with a light coating of flour
  9. Pour the batter into the pan
  10. Preheat oven at 200 degrees centigrade and bake for 30 minutes
  11. Check at 30 minutes with a tooth pick – if it comes out clean, cake is ready
  12. Depending upon the oven, it might take another 10 minutes too – so it is better to check at 30 minute point
  13. Remove from oven and let it cool to serve.

 Note:

  1. It is again a small cake with less sugar
  2. Double it for a bigger cake and quantity of sugar can be added if needed.


Kozhi Thokku/Chicken Thokku

This is my first non-vegetarian recipe. Born in a vegetarian family, married into a non-vegetarian family, a cook in true spirit, I am now a non-vegetarian – who likes to experiment on chicken, fish and lamb dishes but would prefer a vegetarian diet for myself. 

As a teenager, though I had tasted chicken secretly (inquisitive to know what it tasted like) with cousins (of course our parents know it all now), bringing meat home and cooking was not an acceptable thing initially.  When I was married I was a complete vegetarian – not even eggs were allowed!  Times have changed since then.

These are some of the reasons why I continue cooking non-vegetarian food –

1. When I started cooking non-veg. food, I found that chicken and lamb struck very well with any masala and gave remarkable results. So, not knowing anything about the intricacies of speciality non-veg. cooking of Tamilnadu, I used (and still use) the same methods of cooking vegetarian spicy dishes and was successful too.

2.  Initially when I started hosting – I could sense that the buffet table was kind of incomplete without the non-vegetarian dish. Even with a lavish spread of vegetarian items, one non-veg. dish did some unexplainable magic.

3. Especially when kids were invited, they were delighted or (if I sound too self-praising) – they were satisfied with rice and chicken  or rice and lamb curry. This made it easier for parents too.

4. This one I think should have topped the list. When my husband introduced me to his well wishers as his newly wed wife, while they welcomed me into the set-up, they expressed their concern about the taste buds of the man of the house and his survival without  chicken, lamb or fish at least once a week. Wherever I was invited, even people whom I met for the first time, took so much care to make me understand how difficult it was to live without chicken and fish, more difficult to live with a wife who wouldn’t cook all those humble curries and the most difficult – to ask (request?!) the newly wed wife to cook some chicken curry where the man knows nothing about cooking!

5. Of course reason no.4 did not make me cook chicken curry – but I must confess – the nature of my husband to forgo non-vegetarian food to make me comfortable made me try this in full swing and I remember I cooked a simple lamb curry and rice as a surprise lunch (taught by one of those friends).  How bad he felt to have put me in such a terrible situation cooking something alien and the big lecture I received on that are different episodes of the story!

It was first ‘cooking for friends but not tasting technique’;  Then came, ‘tasting the gravy to serve but not eating technique’; Then, there was enlightenment – cooking, tasting, eating and more cooking, tasting and eating! It is a stress free life now!

So, ‘forgoing non-veg. food for vegetarian wife technique’ did it all!! 

So, the first call I made was to my mother-in-law and told her I started cooking non-veg. at home.  A very caring mom-in-law that she still is, told me to stop. Though she was happy for her son, she didn’t want me to take the trouble as I grew in a vegetarian family – she didn’t want my parents to feel bad too. Like a true enlightened soul, I stuck to my new Principle. Since then, she has been my special tutor in non-vegetarian studies – especially in the art of cleaning and marinating meat and the special fish kuzhambu – which I have not perfected even after so many years.

So, now to some cooking –

Kozhi Thokku/Chicken Thokku

Thokku can be a thick  gravy or a thick paste. With medium or high level spice, this can go well with rice, chappatis or idli/dosas. Unlike chutneys which are ground to pastes and served immediately, thokkus are cooked for a long time to make it a pasty consistency – and are quite filling too. There can be vegetarian and non-vegetarian thokkus. They can also be stored for at least three days due to the thickening process involved. Certain pickles are made in the thokku form and can be stored for months.

This chicken thokku is an aromatic,  flavourful dish – simple and easy to cook too.

Ingredients (serves 2 persons)

  • kozhi/chicken – 400 gms
  • oil – 2 tbsp
  • chopped coriander leaves – to garnish

Finely chop –

  • ginger – small piece
  • garlic – 4 cloves
  • onions – medium size – 2 no.s
  • tomato – small – 2 nos./big – 1 no.

Dry powders –

  • turmeric powder – 1/2 tsp
  • red chili powder – 1 tsp (adjust according to spice need)
  • coriander powder – 1 tsp
  • pepper powder – 1/2 tsp
  • garam masala – 1 tsp
  • salt – to taste

Optional –

  • finely chopped green chillies – 1 no. to make it more spicy
  • lemon juice – 2 tsp


Method of Preparation

  1. Clean, wash and cut chicken to medium size pieces. Chicken can be boneless or with bones as per family preference
  2. Chop ginger, garlic, onions and tomatoes separately
  3. Usage of more tomatoes makes the colour reddish, consistency pulpy and reduces the taste of garam masala. What we need is a dark brownish colour with a thick paste consistency with the aromatic flavour of garam masala intact. Hence, if the tomato is big, take one and use two if small in size
  4. Heat oil in an Iruppu chatti/Kadai
  5. Fry chopped ginger and garlic till golden brown
  6. Add chopped onions and fry till golden brown
  7. Add chopped tomatoes and all the dry powders one after the other
  8. Mix well and sprinkle little water, not to allow chicken to burn at the bottom of the kadai
  9. Close the kadai and cook in sim position
  10. With the lid closed, chicken would release water and let it cook in the same released gravy
  11. Add very little water if chicken sticks to the kadai. Normally, no extra water would be required
  12. When chicken is done, open the lid and cook till gravy thickens
  13. When a semi thick gravy consistency arrives, it would start coating the chicken; When the coating becomes thicker and turns to dark brown in colour, thokku is done
  14. Garnish with chopped coriander leaves. Serve hot with rice, chappatis, idlis or dosais

Note:

  1. Chopped green chillies can be added along with dry powders to make thokku more spicy. This is purely optional.
  2. One might also add some lemon juice after the stove is turned off. This would give a tangy flavour to the spicy chicken thokku
  3. The quantity of chili powder can be altered according to the spice level of chillies and need of the family.

Paanakam – The Energy Drink of South India

The word Paanakam always reminds me of Sashti. Sashti is the sixth day of new moon and the sixth day of the full moon. Lord Murugan, the God of the Tamils is worshipped specially on Sashti day. Every month has its Sashti days. Lord Murugan is worshipped with special poojais in temples and people fast on those days. Skandha Sashti is the one of the biggest worship days of Lord Murugan, which falls in the month of Aippasi (October-November). It is Murugan defeating the demon Surapadhman or in simple terms – victory of good over evil. Murugan is also called Skandan, so this is skanda sashti!

The defeat of Suran by Lord Murugan is commonly known as Surasamharam – ofcourse a Sanskrit word. In Tamil, we call it Suran Thalai Vettu – colloquially. It actually means Chopping Suran’s Head.

The war is re-enacted in all six major Murugan temples – arupadai veedu- in tamil. Tiruchendhur, near my home towns Tirunelveli and Thoothukkudi is the shore temple where the battle is believed to have happened in pre-historic times. This temple and sashti are therefore very close to my heart. It is in Tiruchendhur that the fierce battle of the demon in various forms and Lord Murugan is re-enacted in a very big scale. http://murugan.org/temples/tiruchendur2.htm

Skanda Sashti Day falls on 31st October 2011.

Not getting into too many religious notes, Skanda Sashti Viradham or Fast always ends with Paanakam – the Lemon and Jaggery energy drink. The fast lasts for six days, starting from the first day of the new moon in the tamil month of Aippasi – starting mostly on the day after Deepavali. Having just one meal of rice and coconut chutney and fruits as breakfast and banana and milk for dinner, I used to very religiously observe viradham/fast when in school. The elders would have a stricter fasting rule. Paanakam also used to be my thirst quencher at school. The sixth day would go without any meal and just fruits and liquids with jaggery – coffee with jaggery and no sugar allowed.  At night, the time when ‘surasamharan – the defeat’ is completed at Tiruchendhur temple, we would do special poojai for Murugan at home in Chennai, and have a cold shower – a compulsory hair wash – then open the fast with Paanakam. The hair wash symbolises getting rid of all evil physically and mentally – with the defeat of the demon. The Paanakam specially at that moment, would taste like real amutham – the nectar of the Gods – running down cool into the starving tummy! This is supposed to be an instant energy drink specially after a fast.

It doesn’t mean we start having our meal after Paanakam. It is only Paanakam and fruits for the night. After defeating the demon, Lord Murugan marries Devayanai the next day – it is called the Thirukkalyanam – or the sacred marriage. After six days of fasting, every family has a feast on Lord Murugan’s marriage – with six kinds of mixed rice delicacies – Kalavai Saadham or Viragina Saatham which literally means mixed rice. Some also call it Chitrannam. Lemon Rice, Tamarind Rice, Coconut Rice, Ven Pongal (salted rice and lentil), Sarkkarai Pongal (sweetened jaggery rice) and seasoned yoghurt rice are the six varieties – some might also substitute with other mixed rice varieties (would be posted shortly). We wait for the morning to come, have a hair wash – the auspicious day being the wedding day – stand in for the poojai – and just get ready to have the special wedding feast meal on Banana leaf! (For more on Banana Leaf Meal read – https://dosaikal.com/2011/10/14/thamizhar-virundhu-feast-of-the-tamils/)

Belief in God or No belief in God – doesn’t matter..   The culture of accepting Gods to be one in the family and feeling oneself part of HIS family just fascinates me!

Now to Paanakam! Not only on special occasions, this drink can be had anytime, anywhere.

Paanakam


the south indian lemonade!


Ingredients (makes 2 glasses) 

  • vellam- powdered/grated jaggery – 1/2 cup
  • elumicham pazham/juice of one lemon
  • Elakkai podi/cardamom powder – 1/2 tsp
  • chukku podi/dry ginger powder – 1/2 tsp
  • salt – a pinch
  • water – as required


Method of Preparation

  1. Dissolve jaggery in water
  2. Strain the liquid for mud in jaggery
  3. Mix cardamom powder and dry ginger powder
  4. Add the lemon juice
  5. Add a pinch of salt
  6. Check for taste and add water if required
  7. Add more jaggery or lemon juice as preferred
  8. Paanakam is ready.

Note:

  1. Jaggery provides glucose and therefore the body gets instant energy
  2. Cardamom powder re-vitalises the taste buds
  3. Dry ginger induces hunger; It also helps in digestion, especially after a fast
  4. I have used palm jaggery instead of sugarcane jaggery
  5. More on sugarcane jaggery and palm jaggery – read https://dosaikal.com/2011/08/26/aval-sarkkarai-pongal-rice-flakes-jaggery-pongal/.

Deepavali Kashayam-Magic Drink for Indigestion

After so much of sweets and oily savouries for deepavali, there has to be some kind of a repair mechanism or de-stressing of the digestive system. There is need for some destressing technique for minds too! Just think back the number of somasis, murukkus or polis and bowls of payasams or halwas that would have gone in during the celebrations and that alone is sufficient enough to be stressed about the calories and fat that has gone into the system. But, not to worry! There is always a way to come out of it. Though burning those calories is not  my arena, de-stressing and cleaning the system by home remedies can fit in here.

After Deepavali and the sweets and snacks along with it, Deepavali Legiyam is something to end the jaw breaking culinary experience and to set right the stomach abuse  in these days of celebration. It is a semi-thick paste made of various herbs – mostly simple home medicines. Usually, this legiyam is made along with the sweets and savouries and in the morning of Deepavali, a gooseberry sized ball of legiyam is forcefully given to everyone, to keep the system clean. In north India, Chawanprash is more popular – this is a kind of legiyam.

It is amazing and even astonishing to know the knowledge our ancestors possessed on the usage of herbs, to take care of simple as well as major ailments.  Especially siddha maruthuvam – Siddha Medicine – where the Siddhars have documented the ailments and remedies in the form of tamil poems on palm leaf. Wikipedia says, ‘The Siddha medicine is one of the oldest medical systems known to mankind . This system of medicine originated from South Indian Tamil traditional medicine’.  For more details on Siddha Medicine – http://en.wikipedia.org/wiki/Siddha_medicine.

Now, ‘Naatu Marundhu’ or the traditional tamil medicine is not Siddha Medicine. It might be a simplified version of home remedies, transferred through generations by the elder members of the household. Hence, it is also called Paatti Vaithiyam or grandma’s home remedies.  There are Naattu Marundhu or traditional medicine shops which sell these home remedy herbs – the simplest of them are mostly available at home.. manjal-turmeric, milagu-pepper, chukku-dry ginger, omam-carom seeds and so on. Whenever there is cough or running nose, indigestion or acidity – these handy helpers help in getting relief from such minor problems. Getting relief by taking precautionary home remedies could save a lot of pain and time. These herbs also boost immunity in children.

As I have always respected the wisdom of our siddhars, I adore the warmth and affection of the grand old grannies who have been passing on the traditional tamil home remedies without demanding any appreciation! If our grannies passed their experienced wisdom mostly unknowingly and as part of the day-to-day routine, there is pressure on the present middle ager to compulsorily impart granny’s knowledge to the younger ones. Or else, like other ancient richness, this paatti vaithiyam would also have to be popularised by the west to be aped by our own people. Regarding this, I came across an excellent piece of work,  while I was searching for an english word for Legiyam – http://sundar72.blogspot.com/2010/04/thanga-bhaspam-velli-bhaspam-legiyams.html.

Now, Legiyams are time-consuming, kashayams or kada in hindi, are easier. Legiyams are pastes and kashayams are medicinal drinks – magical drinks even.  They are concentrated syrups made of a combination of herbs and household spices. Though, I am not used to preparing a deepavali legiyam, I always make different kinds of kashayams to treat minor ailments of the whole family.  This trust worthy kashayam is very useful in cleaning the bowel and helps in better digestion. Because of the ingredients, this might also help in treating simple cold and cough. (The kashayam for cough and cold is a little different.)

Kashayam for better digestion


Ingredients (sufficient for one person)

  • milagu podi/black pepper powder – 1/2 tsp
  • chukku podi/dry ginger powder – 1/2 tsp
  • manjal podi/turmeric powder – 1/2 tsp
  • athimadhuram (available in tamil -naatu marundhu kadai) – 1/2 tsp
  • omam/carom seeds – 1/2 tsp
  • seeragam/cumin seeds – 1/2 tsp
  • perunjeeragam/fennel seeds – 1/2 tsp
  • kothumalli vidhai/coriander seeds – 1/2 tsp
  • vellam/jaggery – 1 tsp (or acc. to taste)
  • water – one glass

Method of Preparation

  1. Take one glass of water (nearly 250 ml) in a vessel and turn on the stove
  2. Add all the powders – pepper, dry ginger, turmeric, athimathuram
  3. Crush or dry grind all seeds – carom, cumin, fennel and coriander – and add to water
  4. Dissolve jaggery in 1 tsp water and strain jaggery water into the kashayam vessel
  5. Boil till the while liquid reduces to half the quantity
  6. Strain it and it is ready to drink.


Note:

  1. If dry ginger is not available, one can use mashed fresh ginger
  2. Crushed black pepper is preferrable than the pepper powder from market
  3. Instead of jaggery, honey can be added after straining hot kashayam
  4. Some might also add spices like jathikkai/nutmeg, cloves and cardamom. I make it with the above things
  5. If athimathuram is not available, one can skip it.

Important Note:

  1. Do not drink kashayam too hot – it might cause hiccups
  2. Do not drink water for atleast 1/2 an hour after any spicy kashayam – it might lead to loose stools
  3. I have just followed aachi’s (grandma) instructions on the above two important points!


The Tricky Athirasam!

***Updated on 03rd November 2016
img_7799

Deepavali as we know is marked by the sweets and savouries made for the occasion. The day of Deepavali starts with the early morning oil bath, new dresses, poojai with the – ever tricky athirasams. Athirasams are fried delicacies made of rice flour and jaggery. The texture of athirasams depend on the jaggery syrup and quality of rice flour. Generally, raw rice is soaked and dried at home and powdered, then used with jaggery syrup to make this exotic sweet. But rice flour from the store (fine quality) can also be substituted. The result might not be the best. I have used rice flour from shop – the shop did not have raw rice but had rice flour – hence I opted to settle with that.

Athirasam as the name suggests means very tasty or might be ‘x’ factor in taste! It certainly has it. All other sweets and savouries are prepared the day before Deepavali and Athirasams are a morning poojai affair. At my parent’s home on the Deepavali morning, as children we would be busy trying the new outfit/outfits and enjoying sparklers and crackers. So, I did not really have the experience in helping or making athirasams  – it was restricted to tasting alone.

After marriage, specially at my husband’s granny’s (paatti) home, I could be part of the athirasam making team of youngsters! The chief cook is always the octogenarian or nonagenarian granny – she doesn’t know her age – but calculating through her first son’s age, she could be in her nineties, but by her active cooking abilities – this is difficult to admit.  She makes flat athirasams on banana leaf, and guides her helpful daughter-in-laws to fry them to perfection, and other grand-children would be pressing excess oil out of the hot athirasams… This was thoroughly a watcher’s delight! First time, I joined the children’s gang to press out oil (atleast a hundred athirasams would be fried); Next deepavali, I graduated or got a double promotion sitting near paatti (grandma) to make flat athirasams on banana leaf. She wouldn’t allow me in front of the oil stove to fry!

img_7799

Making athirasam was so easy this way…but to make it alone for the first time is quite a difficult one. Making the dough for athirasam is a very delicate work which has to be done with caution. If the consistency of the jaggery syrup is not right, the athirasams  might break inside oil or turn out strong enough to break your enemys’ teeth! Being a high level optimist, I felt I was quite lucky this time – (oh, I don’t mean breaking anyone’s teeth but talking about athirasams) though not perfect as amma’s or picture perfect as paati’s athirasams – they tasted good enough though didn’t look the most perfect!

They were not hard but surely lacked the oily glow, one of the special features of athirasams. I didn’t know whether I should be happy about the less oil texture or worry about the missing originality… Then, I decided I would worry about the latter. The reason behind the not-so-good outcome might be the quality of rice flour or the more likely culprit – consistency of jaggery. I am going to try and rectify these known mistakes. Suggestions regarding this are always welcome. But since this is the proven right recipe by amma and paatti for making athirasams…might be you get it better than mine! Next time, I am going to try with raw rice from scratch…ofcourse when it is available in the Indian grocery shop  (better athirasams in the near future).

***Updated on 03rd November 2016
***The next time of good Athirasams arrived recently, from Athai/Aunt, who gave me a perfectly done dough to be stored for months. This has been a loving way of making Athirasam available all the time,  when you are out of your home town. The prepared dough has been stored in the refrigerator. I follow these simple steps for the true joy of Athirasam.

a. I take the required dough out

b. place it in a warm place to bring it to normal temperature

c. Mix very little warm milk to make a smoother dough

d. Fry in hot oil

e. Squeeze the oil out

f. Serve and enjoy tasting every bit of it.

I have certainly graduated with my paagu – syrup in making perfect groundnut or sesame or dry fruit brittles. Athirasam shouldn’t be very far off. But, when I had the opportunity of relishing Athirasam through the caring hands of Athai, didn’t miss the chance.

Nanri Athai.***

Athirasam

img_7783

Ingredients (makes approximately 10 athirasams)

  • arisi maavu/rice flour – 1 cup
  • thuruviya vellam/grated jaggery – 1 cup
  • Elakkai podi/cardamom powder – 1 tsp
  • chukku podi/dry ginger powder – 1/2 tsp
  • yennai/oil – for frying

Method of Preparation

  1. Heat jaggery with 1/4 cup water in a vessel to dissolve
  2. Filter when jaggery is dissolved and make a syrup
  3. The syrup should be single string consistency – When the jaggery is boiling well in the vessel – keep a bowl of water and add a few drops of the syrup. The drop should settle in water and one should be able to make a soft ball out of it – it should not be too sticky. This is the right consistency of syrup.
  4. Turn off the stove.

Making dough

  1. Add rice flour to jaggery syrup and mix with a ladle. There should be no lumps
  2. Do not wait for the dough to become stiff. One can stop adding rice flour if the dough becomes pasty
  3. Jaggery stiffens the dough after a while and hence the dough should be a little sticky
  4. Keep the dough closed overnight.

 Frying Athirasams

  1. Next morning, heat oil in an iruppu chatti/kadai
  2. Apply little oil on an aluminium foil, take a small ball and press it even into flat discs with greased fingers

  1. Deep fry one by one till golden brown
  2. Depending upon the colour of jaggery, athirasams can also be dark brown – mine was done from the darker variety of jaggery
  3. Soon after athirasam is removed from oil, place it on a dabara/kattori and press it with another dabara/kattori to squeeze out excess oil. This helps  in flattening the athirasams

Store in containers. Athirasams become softer after a while.

img_7800

Tip:

  1. If the dough thickens or is stiff after 12 hours – add 1 or 2 tsp of curds/yoghurt and knead well to bring it a soft dough consistency.
  2. Some might also add milk instead of curds.
  3. If one finds the sweetness of athirasams less or more, texture of athirasams soft or hard, can be altered in the next attempt! There is always another chance!!

I wish everyone a very HAPPY DEEPAVALI!