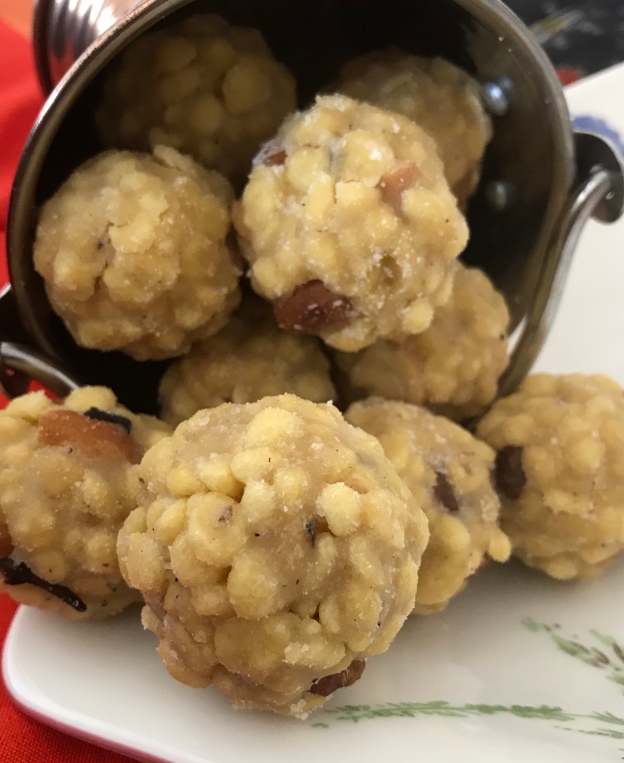
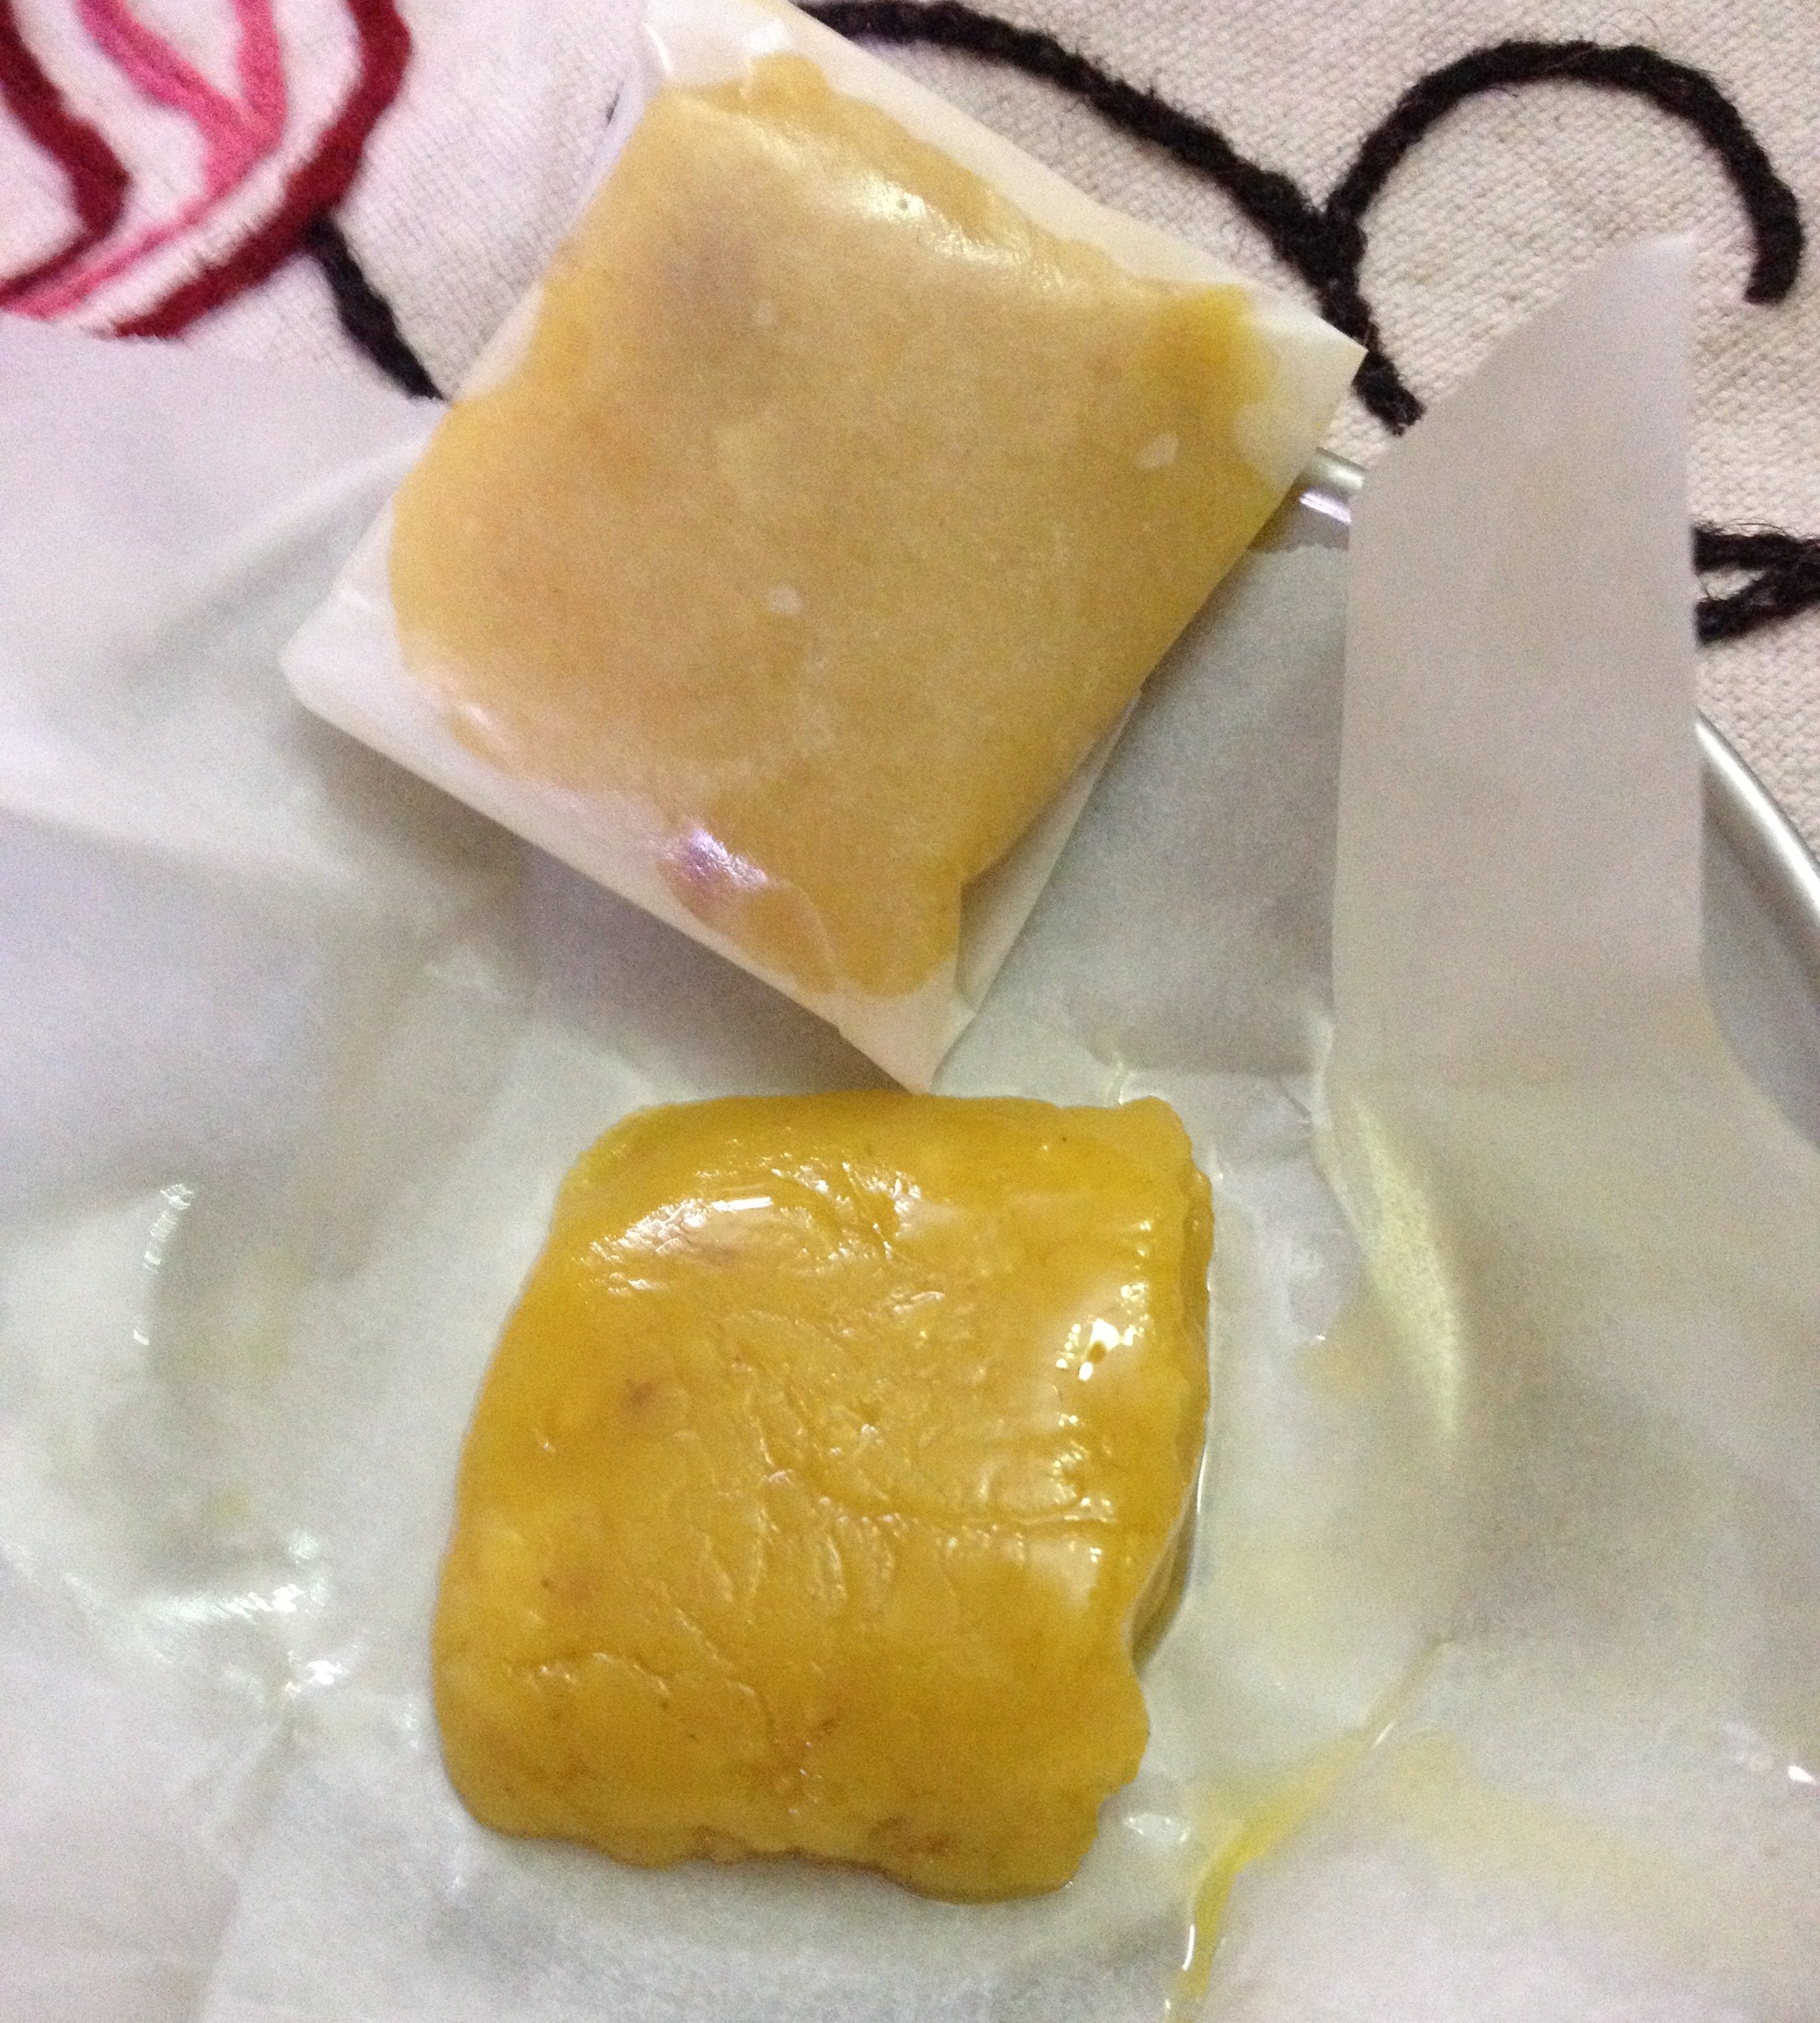
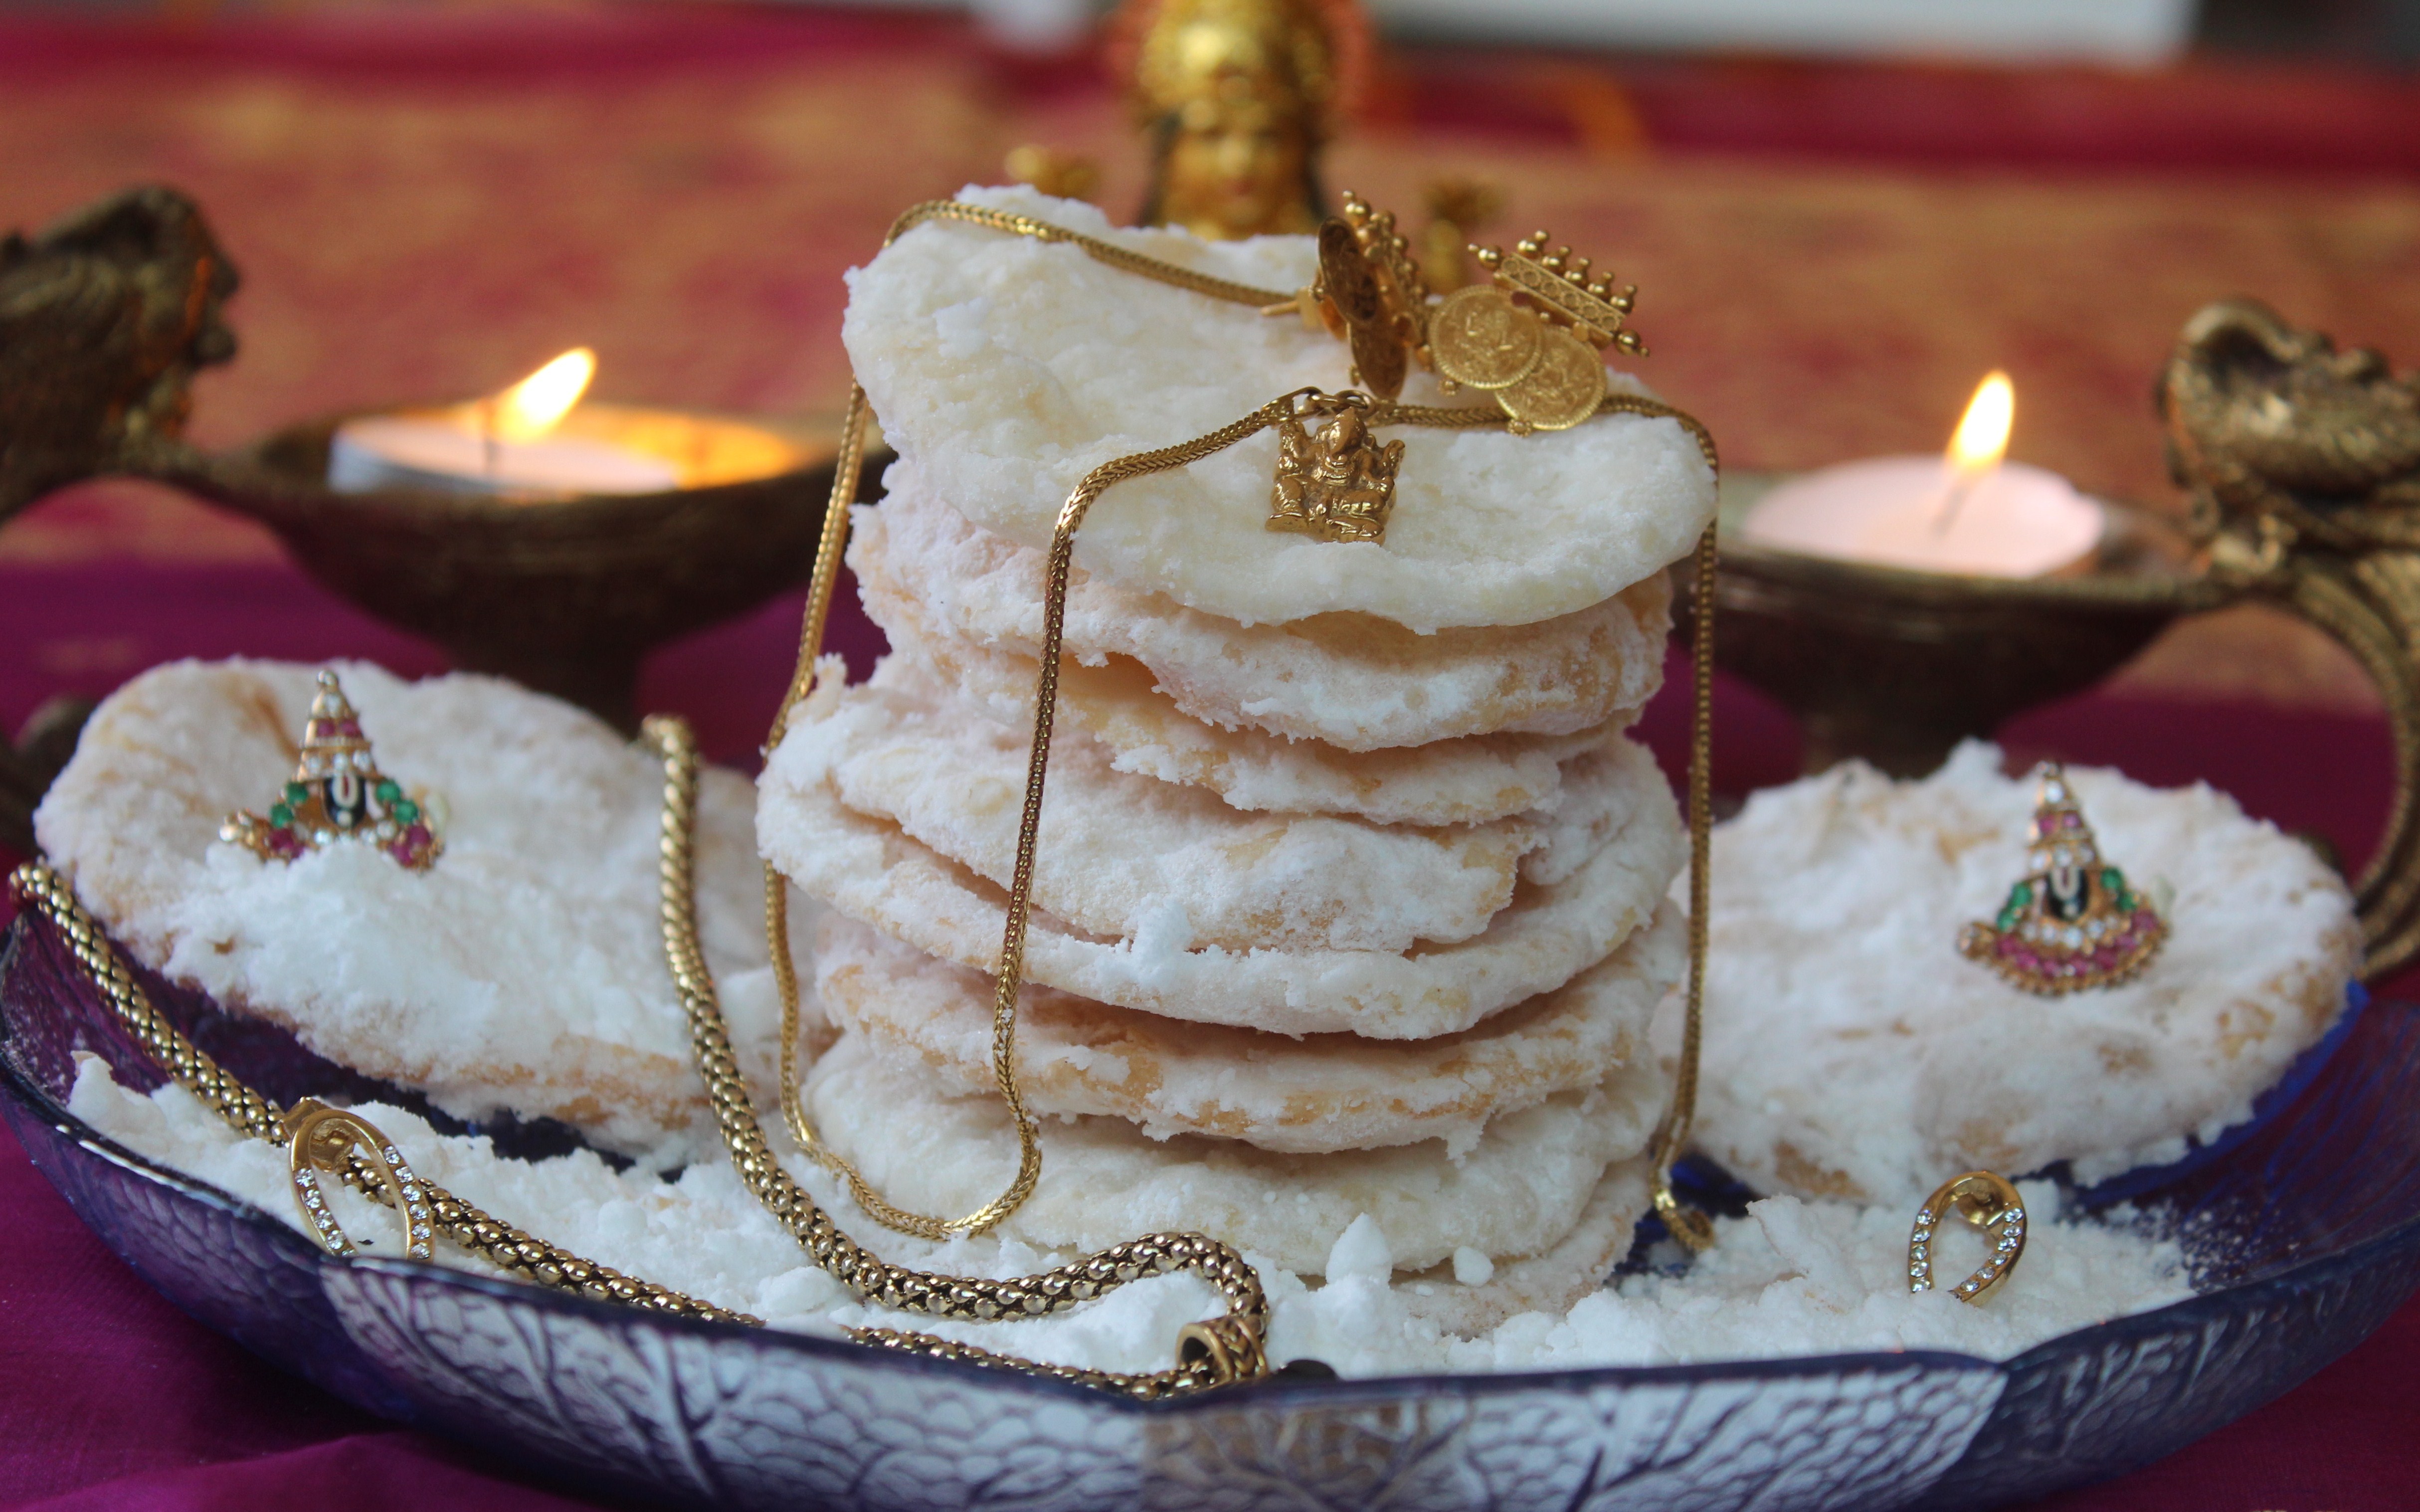
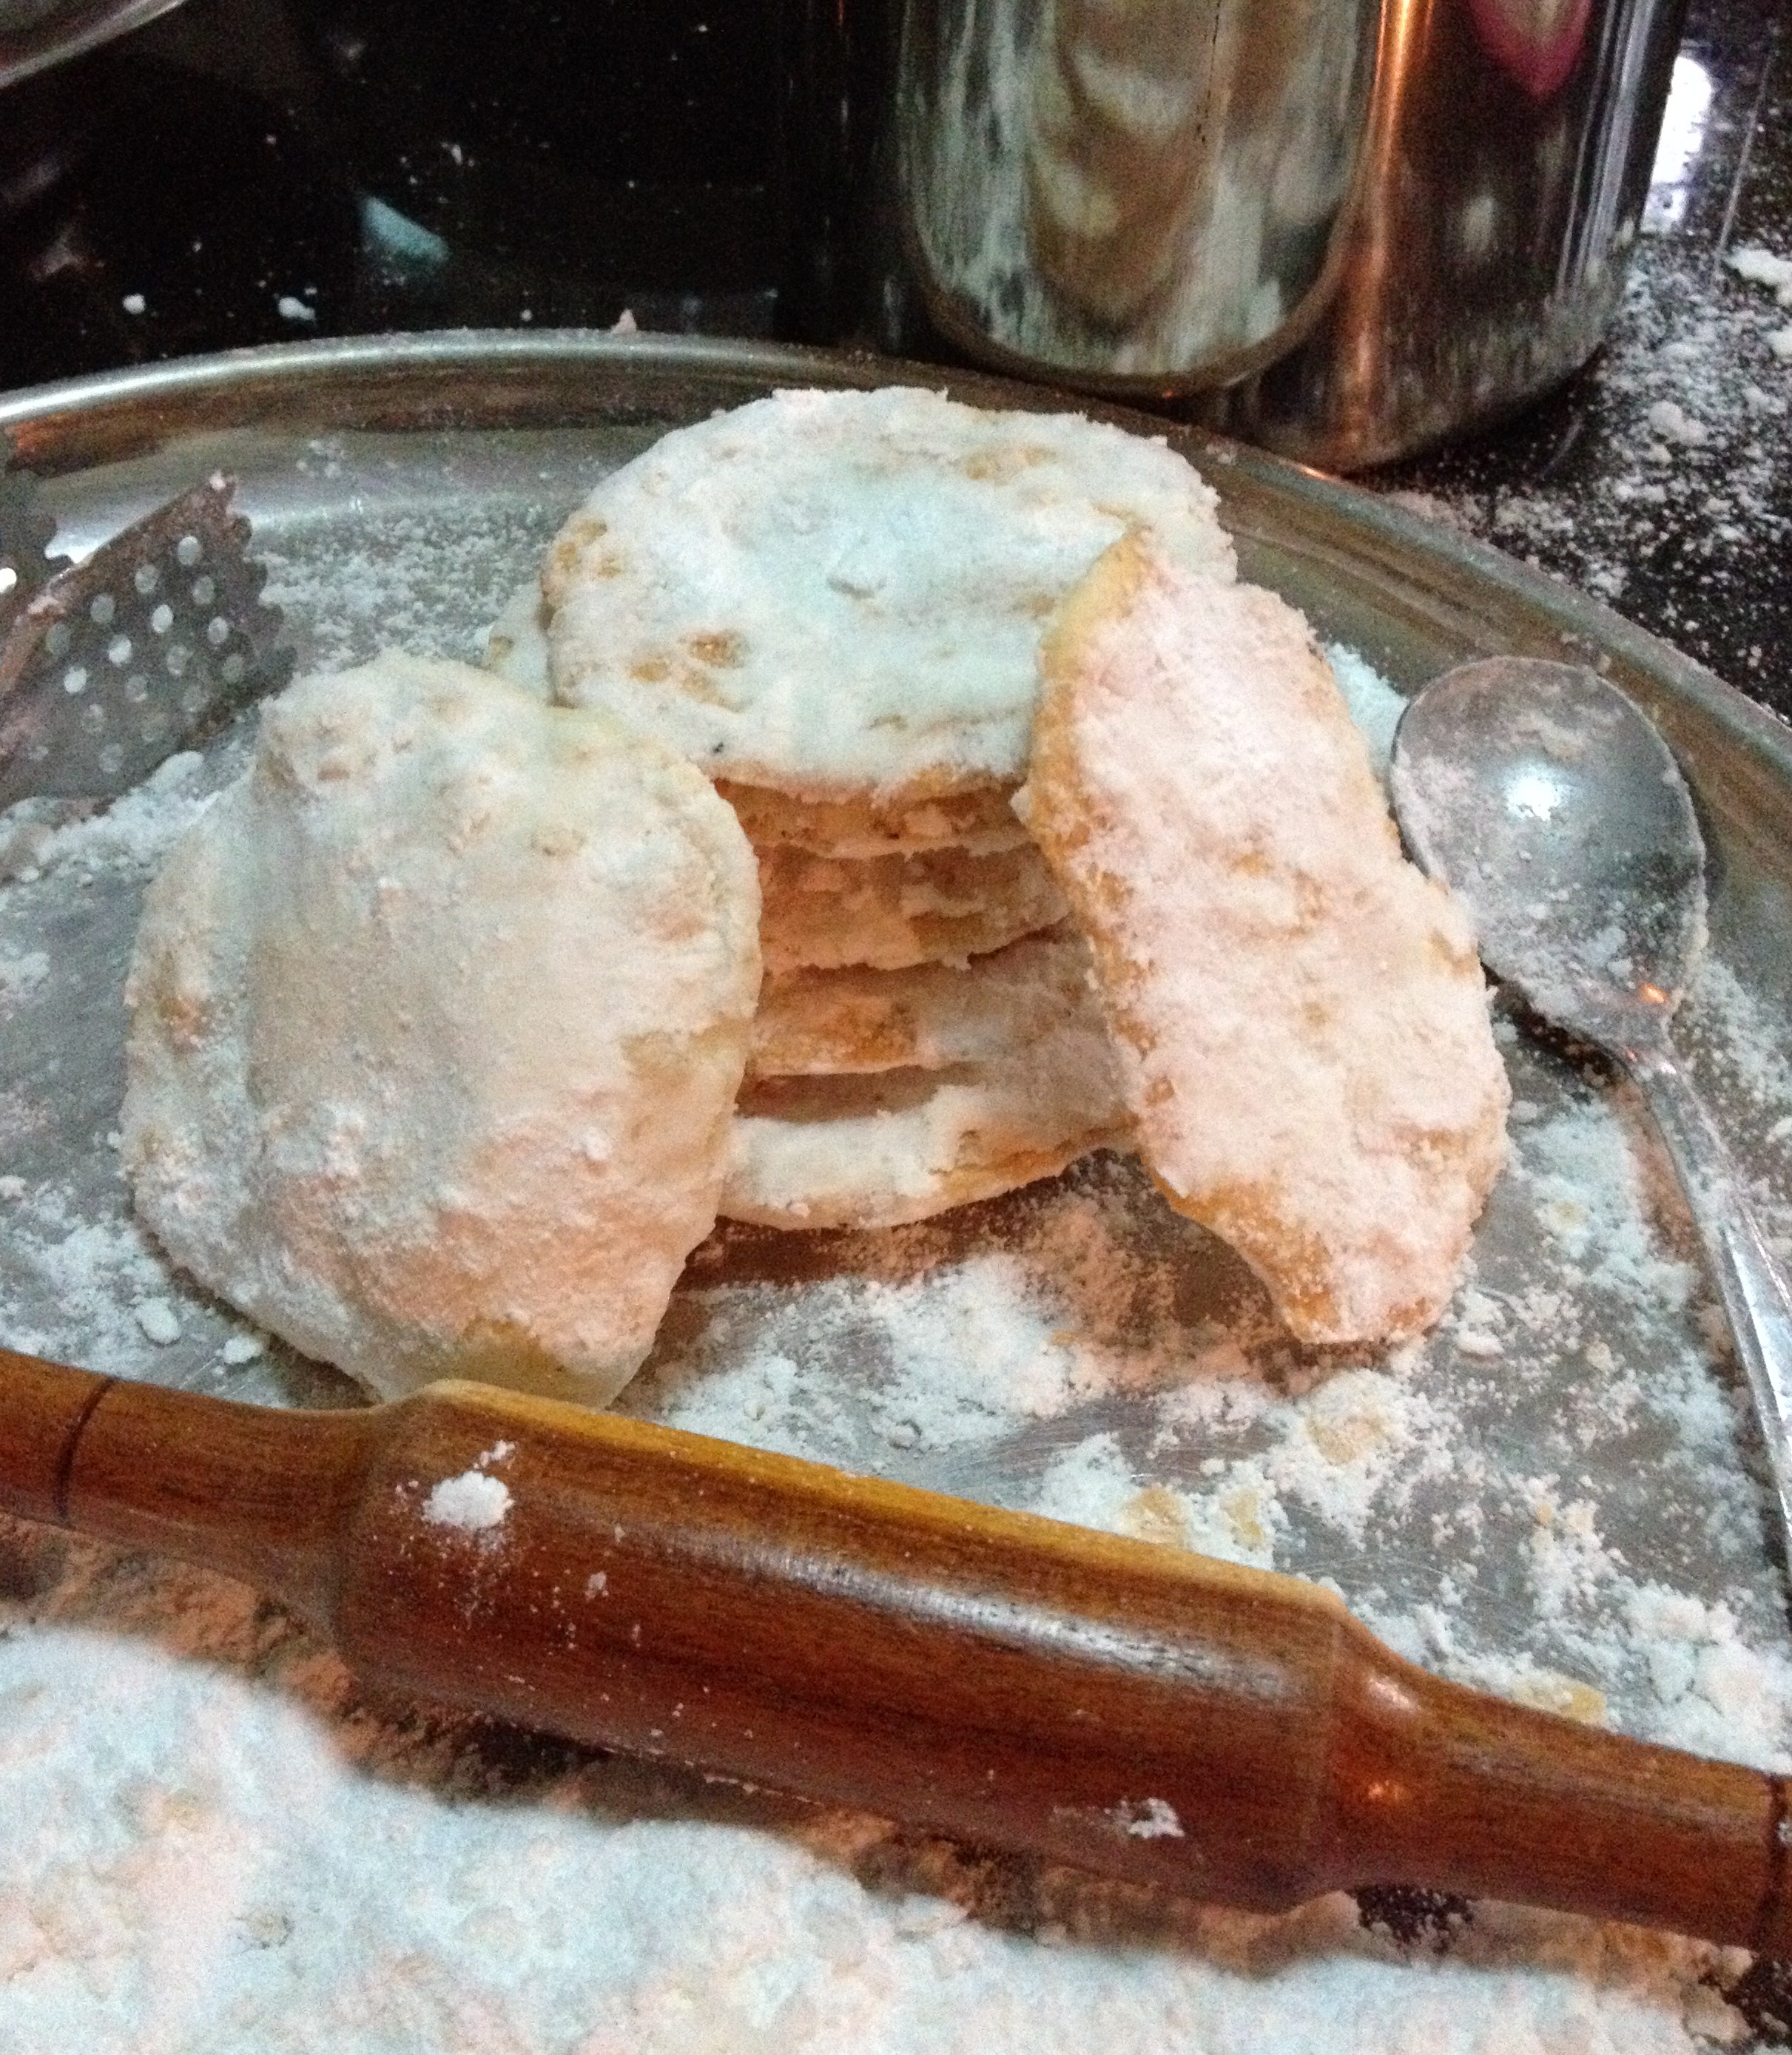
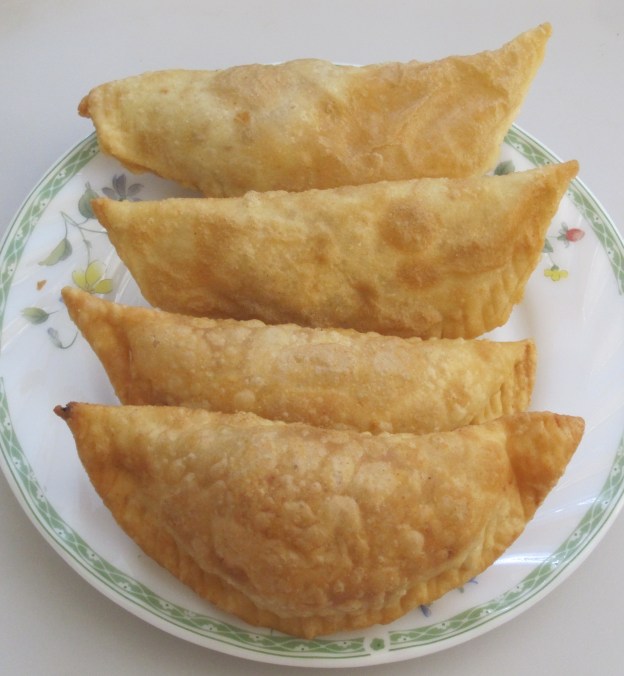
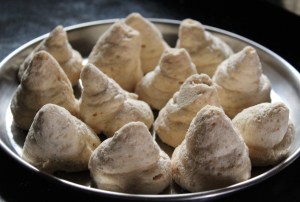
the beautiful macaroon biscuits

The memory of soft, crunchy, melting macaroons summarizes the good old days of Thaatha Veedu or Grandpa’s house. Those were the days we had little or no concern on the fat intake. Just open the flavorful boxes of Ivory Macaroons of Thoothukudi and gobble five to six at one go…this was a normal event. Macaroons to me are synonymous to many many more childhood memories, richly associated with grandparents and a big gang of an extended family.
Nostalgia knows no currency. The simplest kodukkapuli (twisted tamarind) and the arunellikkai (small gooseberries) from the road side vendor outside school, the kuchi ice (stick ice-cream) from the mobile ice-cream man that we got for Rs.1 each and the elite macaroons that thaatha used to send with us after our summer holidays bring in the same ever green memories of the very special home town alike.
There is no record of the time of introduction to macaroon biscuits while we belong to the coastal city of Thoothukudi. When our digestive system became strong enough for semi-solid food, a pinch of powdered macaroons must have gone in between our toothless jaws. The rest of the story of consuming several kilogrammes of macaroons before completion of schooling is history.
True, we would have had countless macaroons, without knowing how it is made. We might not have known how and with what ingredients half of the snacks or goodies we consumed were made of. But with macaroons the case is different. Especially a vegetarian family, enjoying macaroons which are purely made of egg whites and sugar, could be a trend setting relaxation to conservative ideologies.
The good fortune of having made so many lives smile after giving them a packed box of exclusive macaroon biscuits from our home town as gift is enough for our family for many more generations to come. Seems exaggerated?? Could be… But such is the elevated position of ‘The Macaroon Biscuit’ in Thoothukudi.
Ignorance is Bliss
On a lighter side, after so many years, what makes me jittery is the thought of giving the same box of beautifully shaped conical goodies to so many hard core vegetarian families – both the giver and the receiver – unaware of the kilograms of egg whites gone into the box of macaroon biscuits, specially brought as a souvenir from Thoothukudi. Now, Sharing, Caring and making people Happy are some of the greatest Virtues in life you can provide to the world. By this logic, I think we have done only good to those we delivered the Ivory Macaroon Biscuits. I tell to myself – “It’s something like having cakes, pastries and many more mousses taking no count of the eggs or the gelatin involved in the making.”
This long personal story is just not enough to emphasize the special place of ‘macaroons of Thoothukudi’ in my life. Macaroons have played different roles in our intake of sweets and snacks. They could be the after school snack, dessert of the day, special goodies for friends and visiting dear ones, comfort snack during hunger pranks, the most elite souvenir and what not?.. Judge it junk or not junk… Macaroons are beyond all those jargons.
If the reader is reminded of advertisements that concentrate on persuading the customers to buy their product on all occasions, this is truly unintentional.
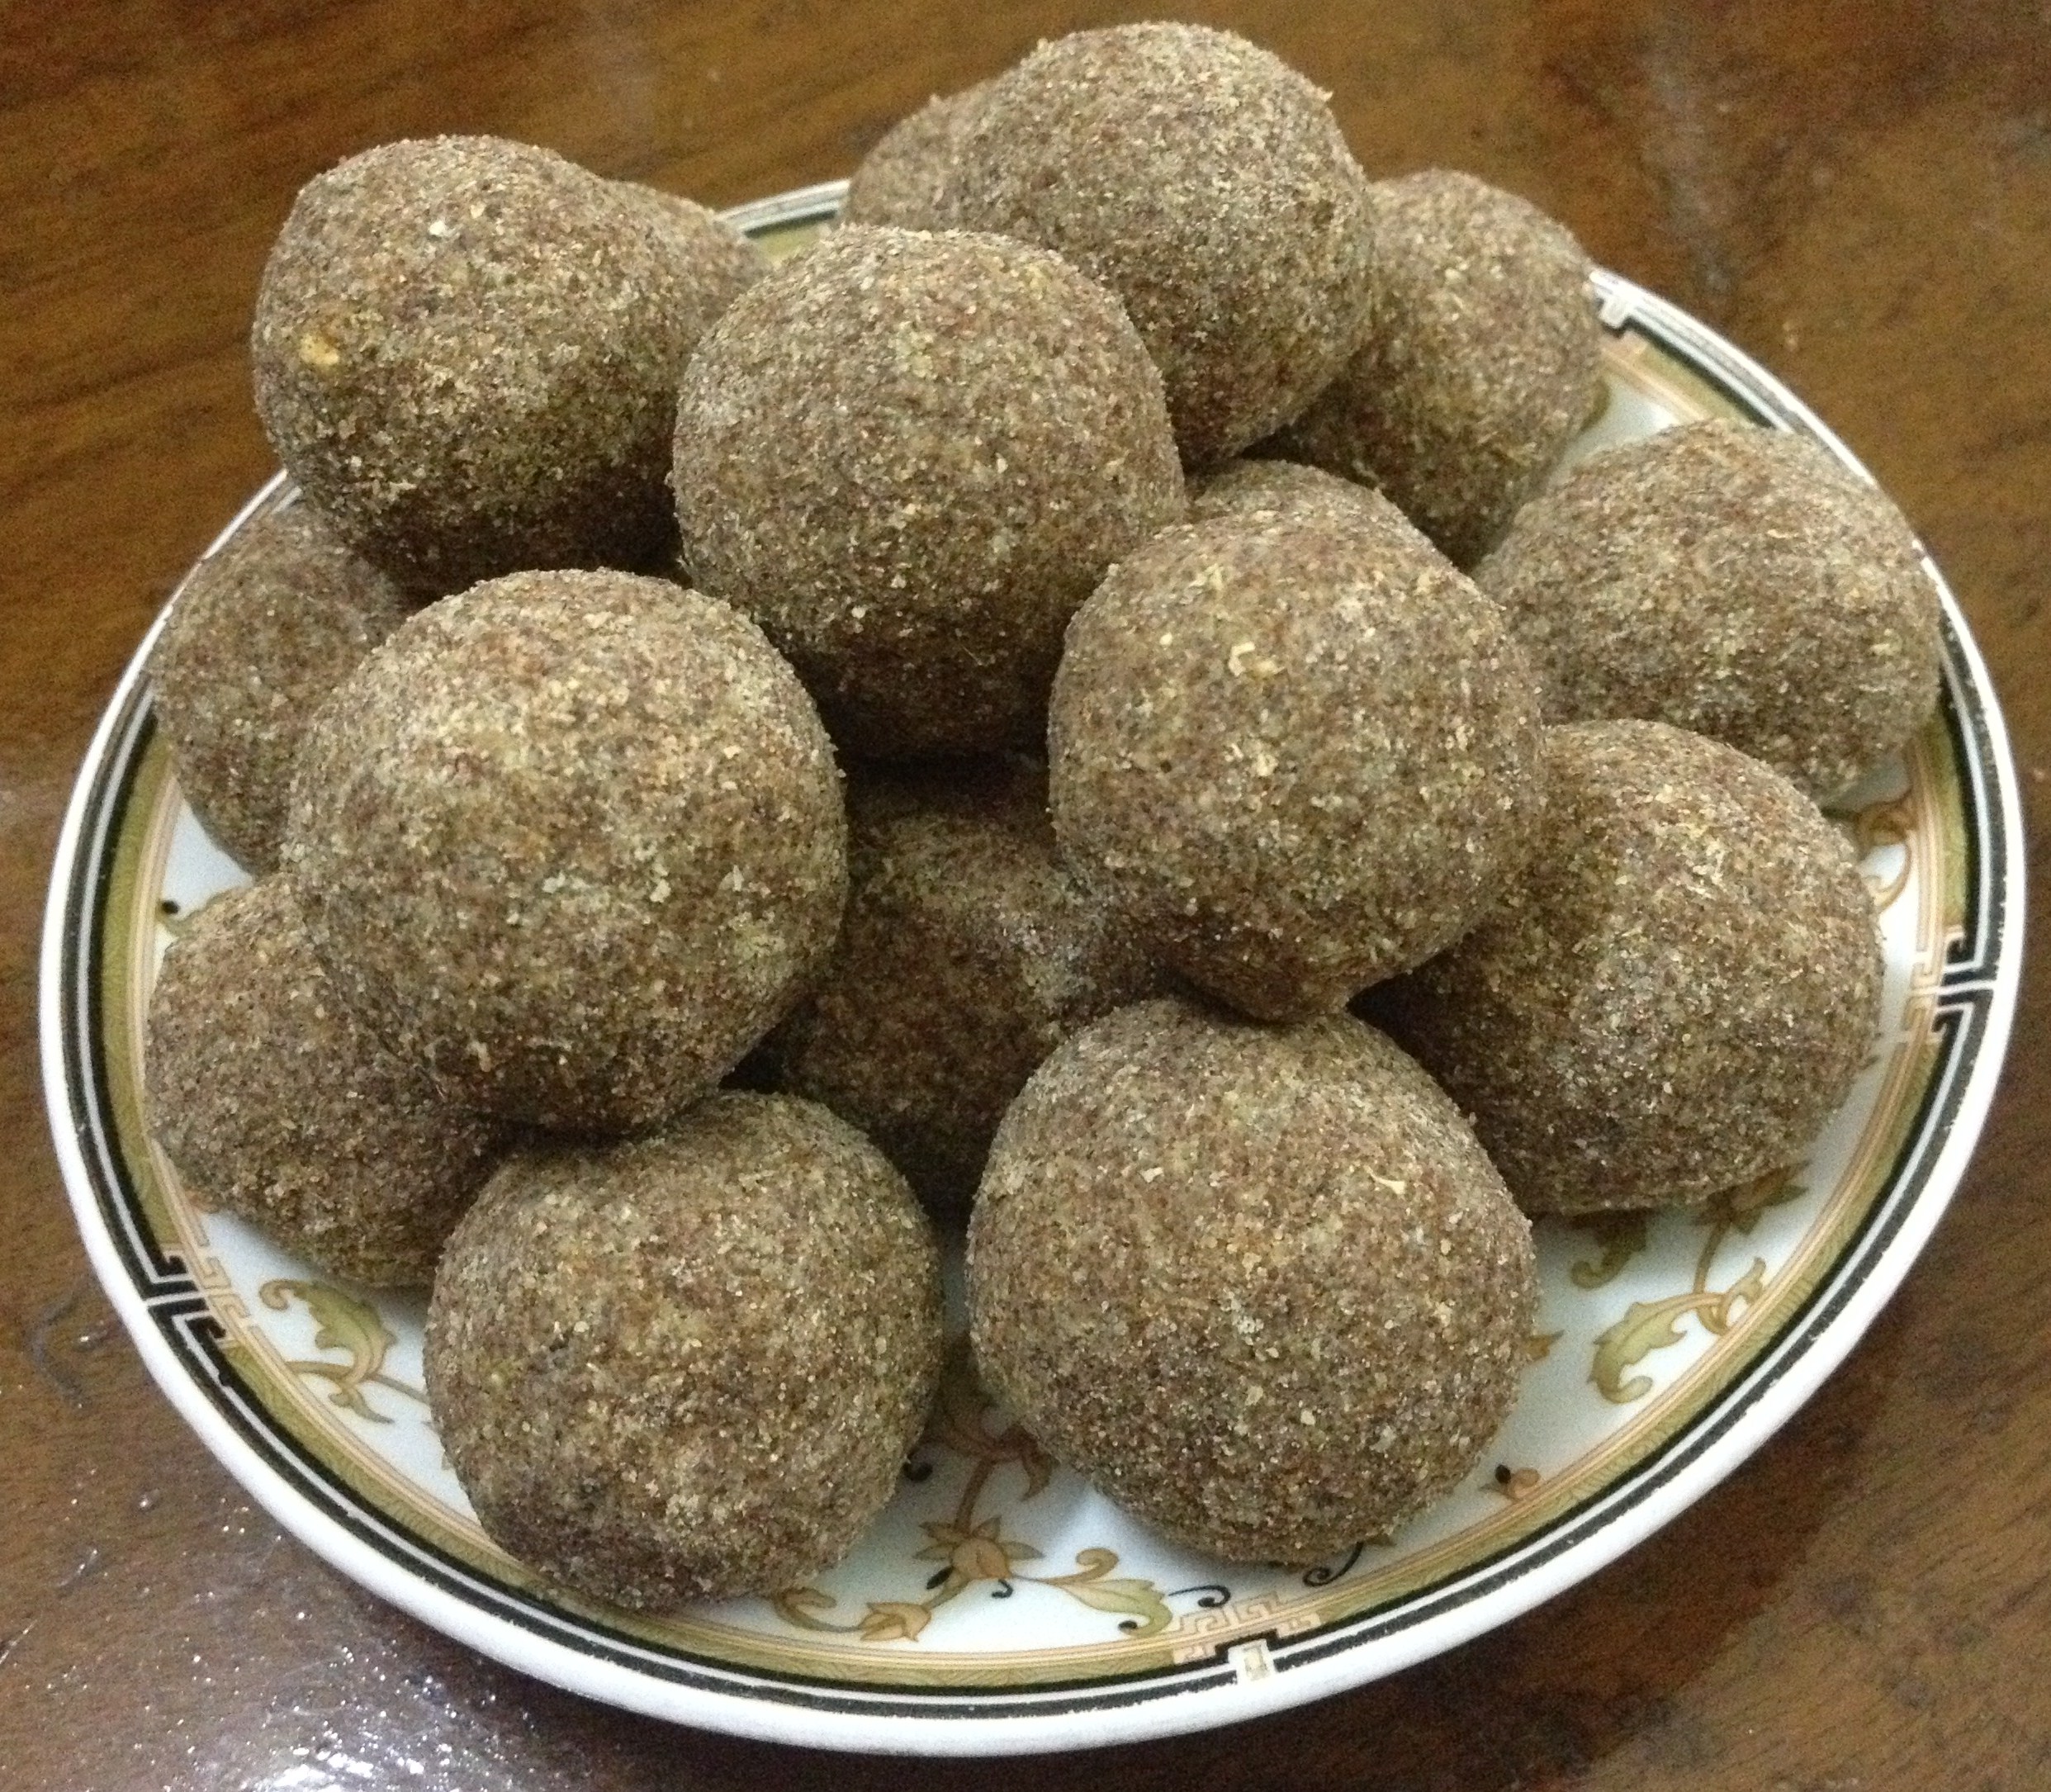
Ivory Macaroons
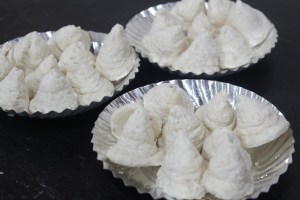
I call them the Ivory Macaroons due to the color. The ivory color of the macaroons, comes from the Cashew nut powder added to the Egg-white and sugar mixture. While French macarons come in varied colors, Thoothukudi macaroons are solely ivory in color and there is no addition to diversify the true cashew nutty flavor.
History of Macaroons in the Southern City of Tamilnadu (India)
Before writing on the making of Macaroons, here is a brief note on the history of the very important Pearl Harbour in Thoothukudi, one of the essential gateways of colonial traders into down south Tamilnadu and the connection of Thoothukudi Macaroons to Meringue, Macaron and Macaroons.
If this tests your patience – Feel free to skip please!
Now, how did Macaroons come to the southern tip of India, from the countries it is believed to have originated? The origins of Macaroons in Thoothukudi must be surely the result of the Colonial Connection. Apart from the cane/palm jaggery based traditional sweets exclusive to down south districts of Tamilnadu, Thoothukudi has always been famous for its bakery products – be it the plum cake or the nutty caramel toffee.
Thoothukudi Sea port
For more evidences on the colonial connection of the city –
The Thoothukudi sea port is an ancient port, very resourceful due to its Pearl Fishing opportunities. From ancient times and during the 16th to 19th century ACE and still a source of strong economy for Pearl Fishing, the city of Thoothukudi is hence called ‘Pearl City’.
As a Pearl Fishing Port,
Thoothukudi was occupied by the Portuguese from 1500 ACE to 1658 ACE –
There were several flourishing trading centres and ports along the Pearl Fishery Coast. Thoothukudi was the headquarters and it was given its due political, commercial and cultural importance by the Portuguese. It is situated almost at the centre of the Pearl Fishery Coast. The annual pearl fishing was undertaken from here. All the islands are spread out before Thoothukudi. It (Thoothukudi) was strategically important in the sense, that the Portuguese could control Sri Lanka from here due to its proximity.
Occupied by the Dutch from 1658 ACE to 1796 ACE –
The Dutch increased their presence on the Fishery Coast, taking possession of towns, forts and ships of the Portuguese. Eventually, the Dutch attacked and captured the Portuguese headquarters at Tuticorin in 1658, bringing to an end the 133-year Portuguese rule over the Fishery Coast. The Dutch East India Company now took control of the entire Fishery Coast, all its seaports, the pearl fisheries.
And occupied by the British from 1796 ACE till independence in 1947.
With the Dutch and British Rule extended over centuries, there is little doubt on the import of the sugary macaroons into the Port City. But, for the search of specifics, this topic would need an extensive research. Please do let me know of any books or information on the travel of Meringues or Macaroons to South India.
The Origins of the Original Macaroon and its connection with Meringue, Macaron and Macaroon
The details learnt from other blogs and websites on the above mentioned trio have been included here purely for the purpose of understanding Macaroons. While trying to know important facts on Macaroons, facts on Meringues become unavoidable. This has helped in better comprehension of the shape of Thoothukudi Macaroons closer to Meringues and the Recipe which belongs to Macarons.
Now, the three words Meringue, Macaron and Macaroon are closely connected and often confused to be the same. Especially for those, who are always elated with their ‘Thoothukudi Mecroon Biscuits’, macaroon or macaron or even a macaroni could just be spelling errors.
But the western world doesn’t think so and wouldn’t want the world to think that’s a mis-spelt word. Search the world wide web and all beautiful details unwrap before you.
Meringue:
Meringue is the simplest of the three, with egg white and sugar whipped to stiff peaks and baked. Swiss, French and the Italian Meringue have their differences in technique but the basic ingredients remain the same.
The book ‘Meringue’ by Linda K. Jackson and Jennifer Evans Gardner talks elaborately on the the history and science of meringue,
Larousse Gastronomique, The New American Edition of the World’s Greatest Culinary Encyclopedia:
“Some historians of cookery believe that the meringue was invented by a Swiss pastry cook called Gasparini, who practiced his art in the small town of Meiringen (now in East Germany). Others maintain that the word comes from the Polish word marzynka and that the preparation was invented by a chef in the service of King Stanislas I Leszcyński, who later became Duke of Lorraine. The king passed on the recipe to his daughter, Marie, who introduced it to the French. Queen Marie Antoinette had a great liking for meringues and court lore has it that she made them with her own hands at the Trianon, where she is also said to have made vacherins, which are prepared from a similar mixture.”
http://boingboing.net/2012/09/04/the-history-and-science-of-mer.html
While wikepedia links Douglas Muster’s research on Meringues to a site called http://www.inmamaskitchen.com, I couldn’t get any details on Muster on Meringue from the link. But in http://www.epicureanpiranha.com/2012/meringue-musings-and-history/, the writer talks of Douglas Muster’s book and states –
‘Muster’s research surprisingly points to England as the country of origin’.
and gives a detailed analysis of Muster’s claim to Meringue as a product of England.
Lady Elinor Fettiplace (c. 1570 – c. 1647) provides the earliest written evidence in what was described as a small bound manuscript, dated 1604, with a short recipe for what she called “white bisket bread”, made with a pound & a half of sugar, & an handfull of fine white flower, the whites of twelve eggs beaten verie finelie, proportions which are still in use today! The quantity of flour is so small that it could be compared to the addition of cornstarch in some of today’s recipes.
Lady Rachel Fane (1612/13 – 1680), who lived quite a distance (given the period in question) from Lady Fettiplace, provides a similar recipe for what she called “Pets”, a name still occasionally used to refer to meringues in the Loire region in France.
Despite having been written in the vernacular of the day and being referred to by different names, these two recipes can easily be understood and currently constitute the earliest known, documented proof of meringue being prepared.
http://www.epicureanpiranha.com/2012/meringue-musings-and-history/
By this, did the artistically shaped Meringue originate in Britain?? So, the British influence brought the so called Macaroon Biscuits into Thoothukudi?
Now, why write more on the Meringue?? Because Meringues seem to be closest in shape to the Macaroons of Thoothukudi.
meringue – closest in shape to our macaroons

image courtesy: http://www.taste.com.au/recipes/14029/basic+meringues
Macaroons and Macarons
After many blogs specifying the differences between Macaroons and Macarons, http://www.popsugar.com/food/Macarons-vs-Macaroons-8038818 seemed to give a clear description of both.
Macaron –

A macaron specifically refers to a meringue-based cookie made with almond flour, egg whites, and granulated and powdered sugar, then filled with buttercream, ganache or fruit curd. The delicate treat has a crunchy exterior and a weightless interior with a soft ending that’s almost nougat like in its chewiness. To add to the confusion, it’s often called a French macaroon.
Macaroon –
 image courtesy: https://lehungryotter.com/2012/09/09/macarons-not-macaroons/
In contrast, the word macaroon is a generic phrase that is applied to a number of small, sweet confections. Mostly, the term is equated with the moist and dense coconut macaroon, which is composed of egg whites, sugar, and dried coconut, often piped with a star-shaped tip, and sometimes dipped in chocolate. The coconut macaroon, or congolais, as it’s known in France, is frequently served during Passover because it contains no flour.
Definition Courtesy: http://www.popsugar.com/food/Macarons-vs-Macaroons-8038818
In a state of confused conclusion, what could be derived is –
- Having seen the shapes of Meringue, Macaron and Macaroons, Thoothukudi Macaroon Biscuits are closer in shape and design to Meringue.
- Macarons which are a blend of basic ingredients – egg whites, sugar and almond flour have lended their original recipe in the making of the South Indian Delicacy, with the inclusion of the local cashewnut from down south tamilnadu, instead of almond flour.
- Macaroons, as mentioned as a generic phrase to the egg white-sugar confections, have given the name to our beloved macaroon biscuits.
Visit to Thoothukudi
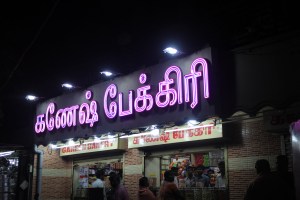
During our recent trip to Thoothukudi, I had the opportunity to visit one of the popular bakeries of the city, Ganesh Bakery to see the making of the Elite Macaroons.
With new and innovative equipment available, making of Macaroons has become easier in a larger scale. But still, the bakers prefer the old fashioned fire wood ovens for its authentic taste.
Making of Macaroons
The Bakery made Macaroon Recipe is for bulk consumption and hence wouldn’t suit a home baker. As for me, I haven’t tried my hands after my first flop.
I found a good and seemingly perfect recipe in http://www.youtoocancook.net/2013/03/thoothukudi-macaroons-south-indian.html, where the pictures show a successful recipe. This recipe is borrowed from the above mentioned blog.
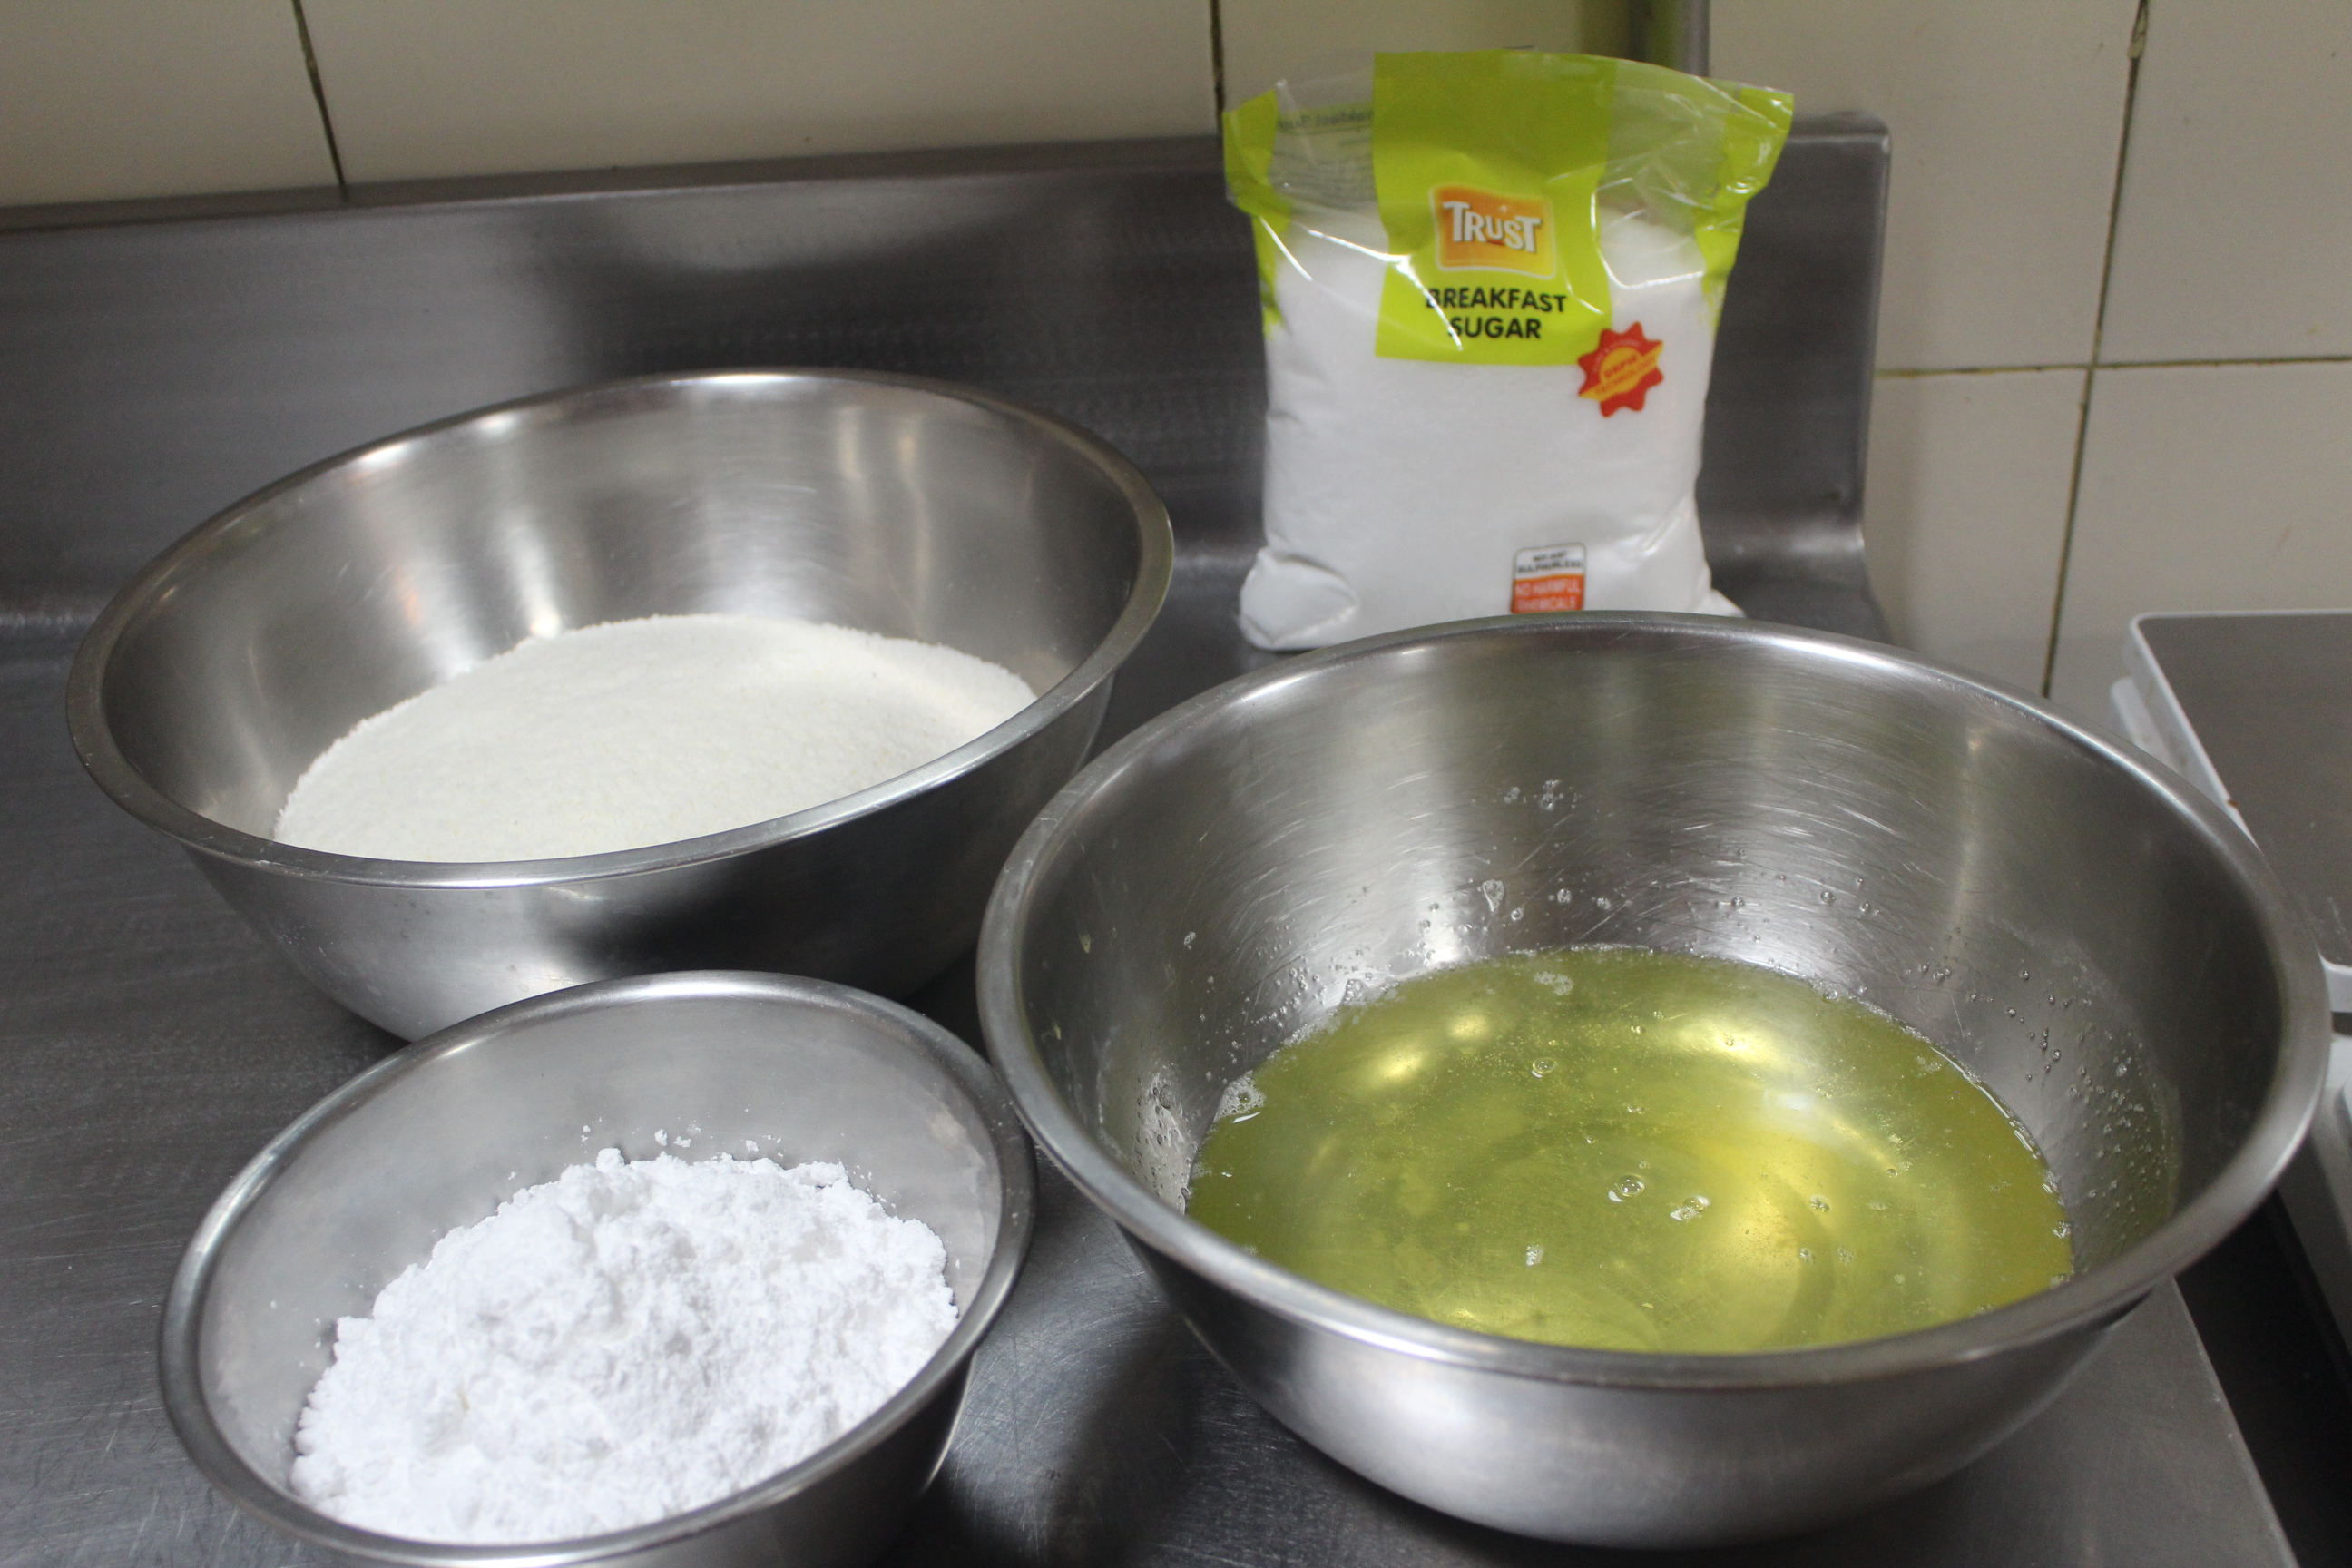
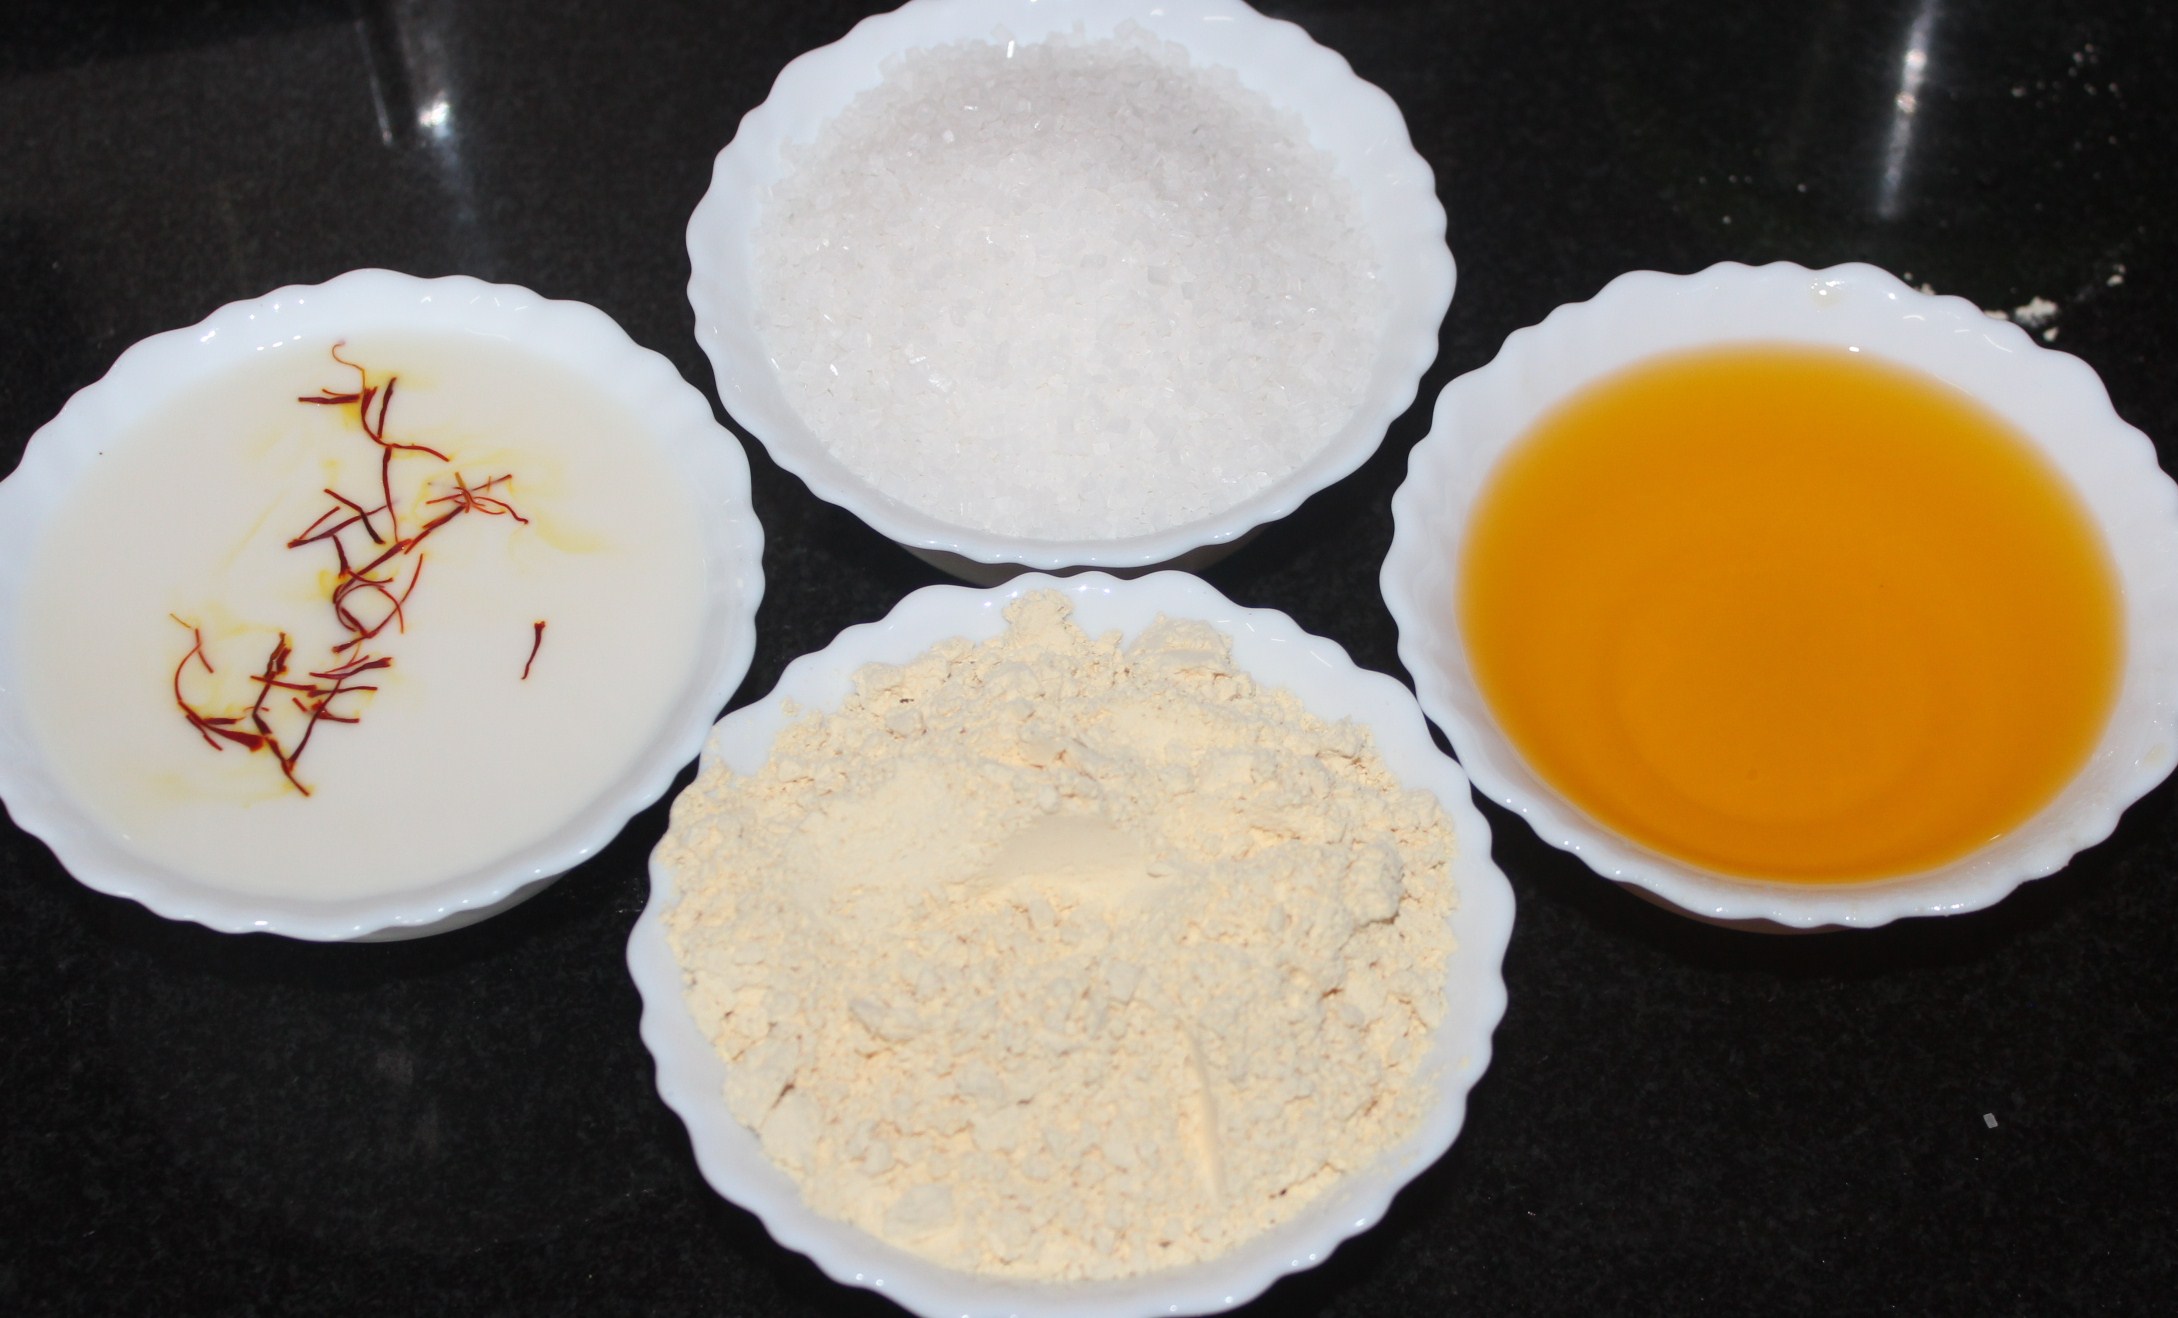
Ingredients (makes 20)
- egg whites – 2 no.s (at room temperature)
- sugar – 120 gms powdered
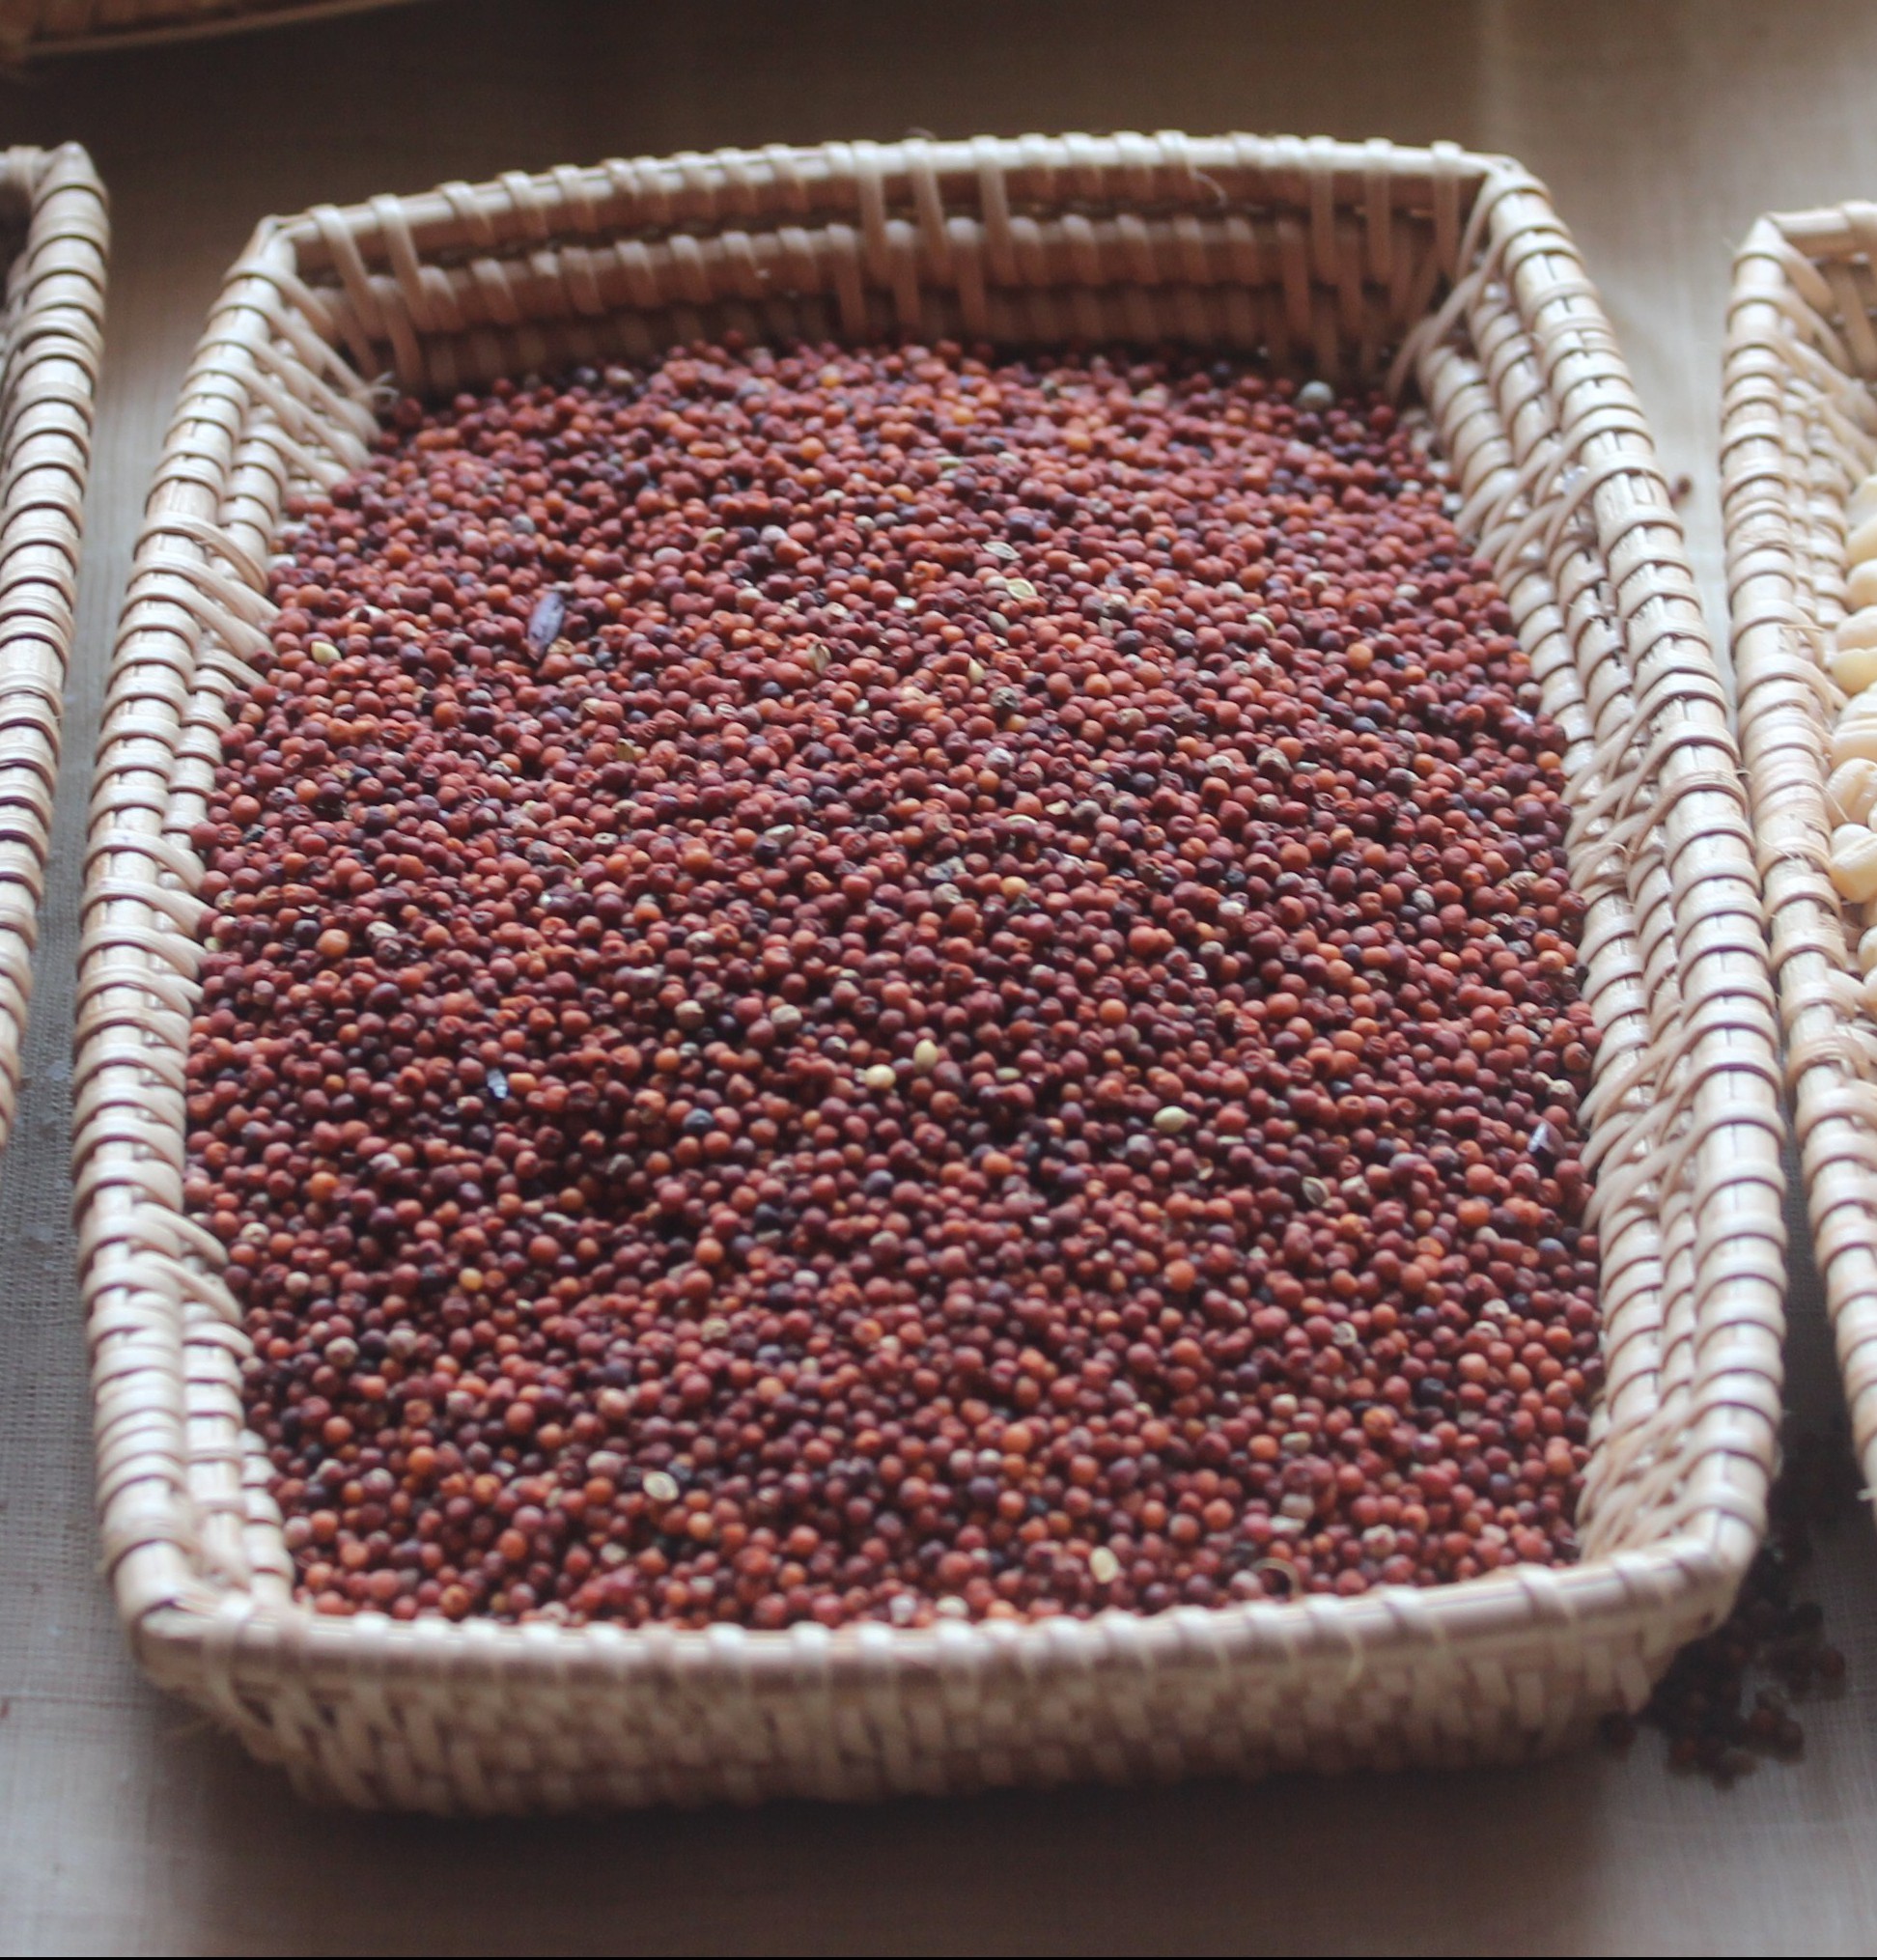
- cashewnut powder – 100 gms coarsely powdered
Method of Preparation
- Follow the below described picture wise procedure in making the batter.
- Preheat oven at 150 degrees C
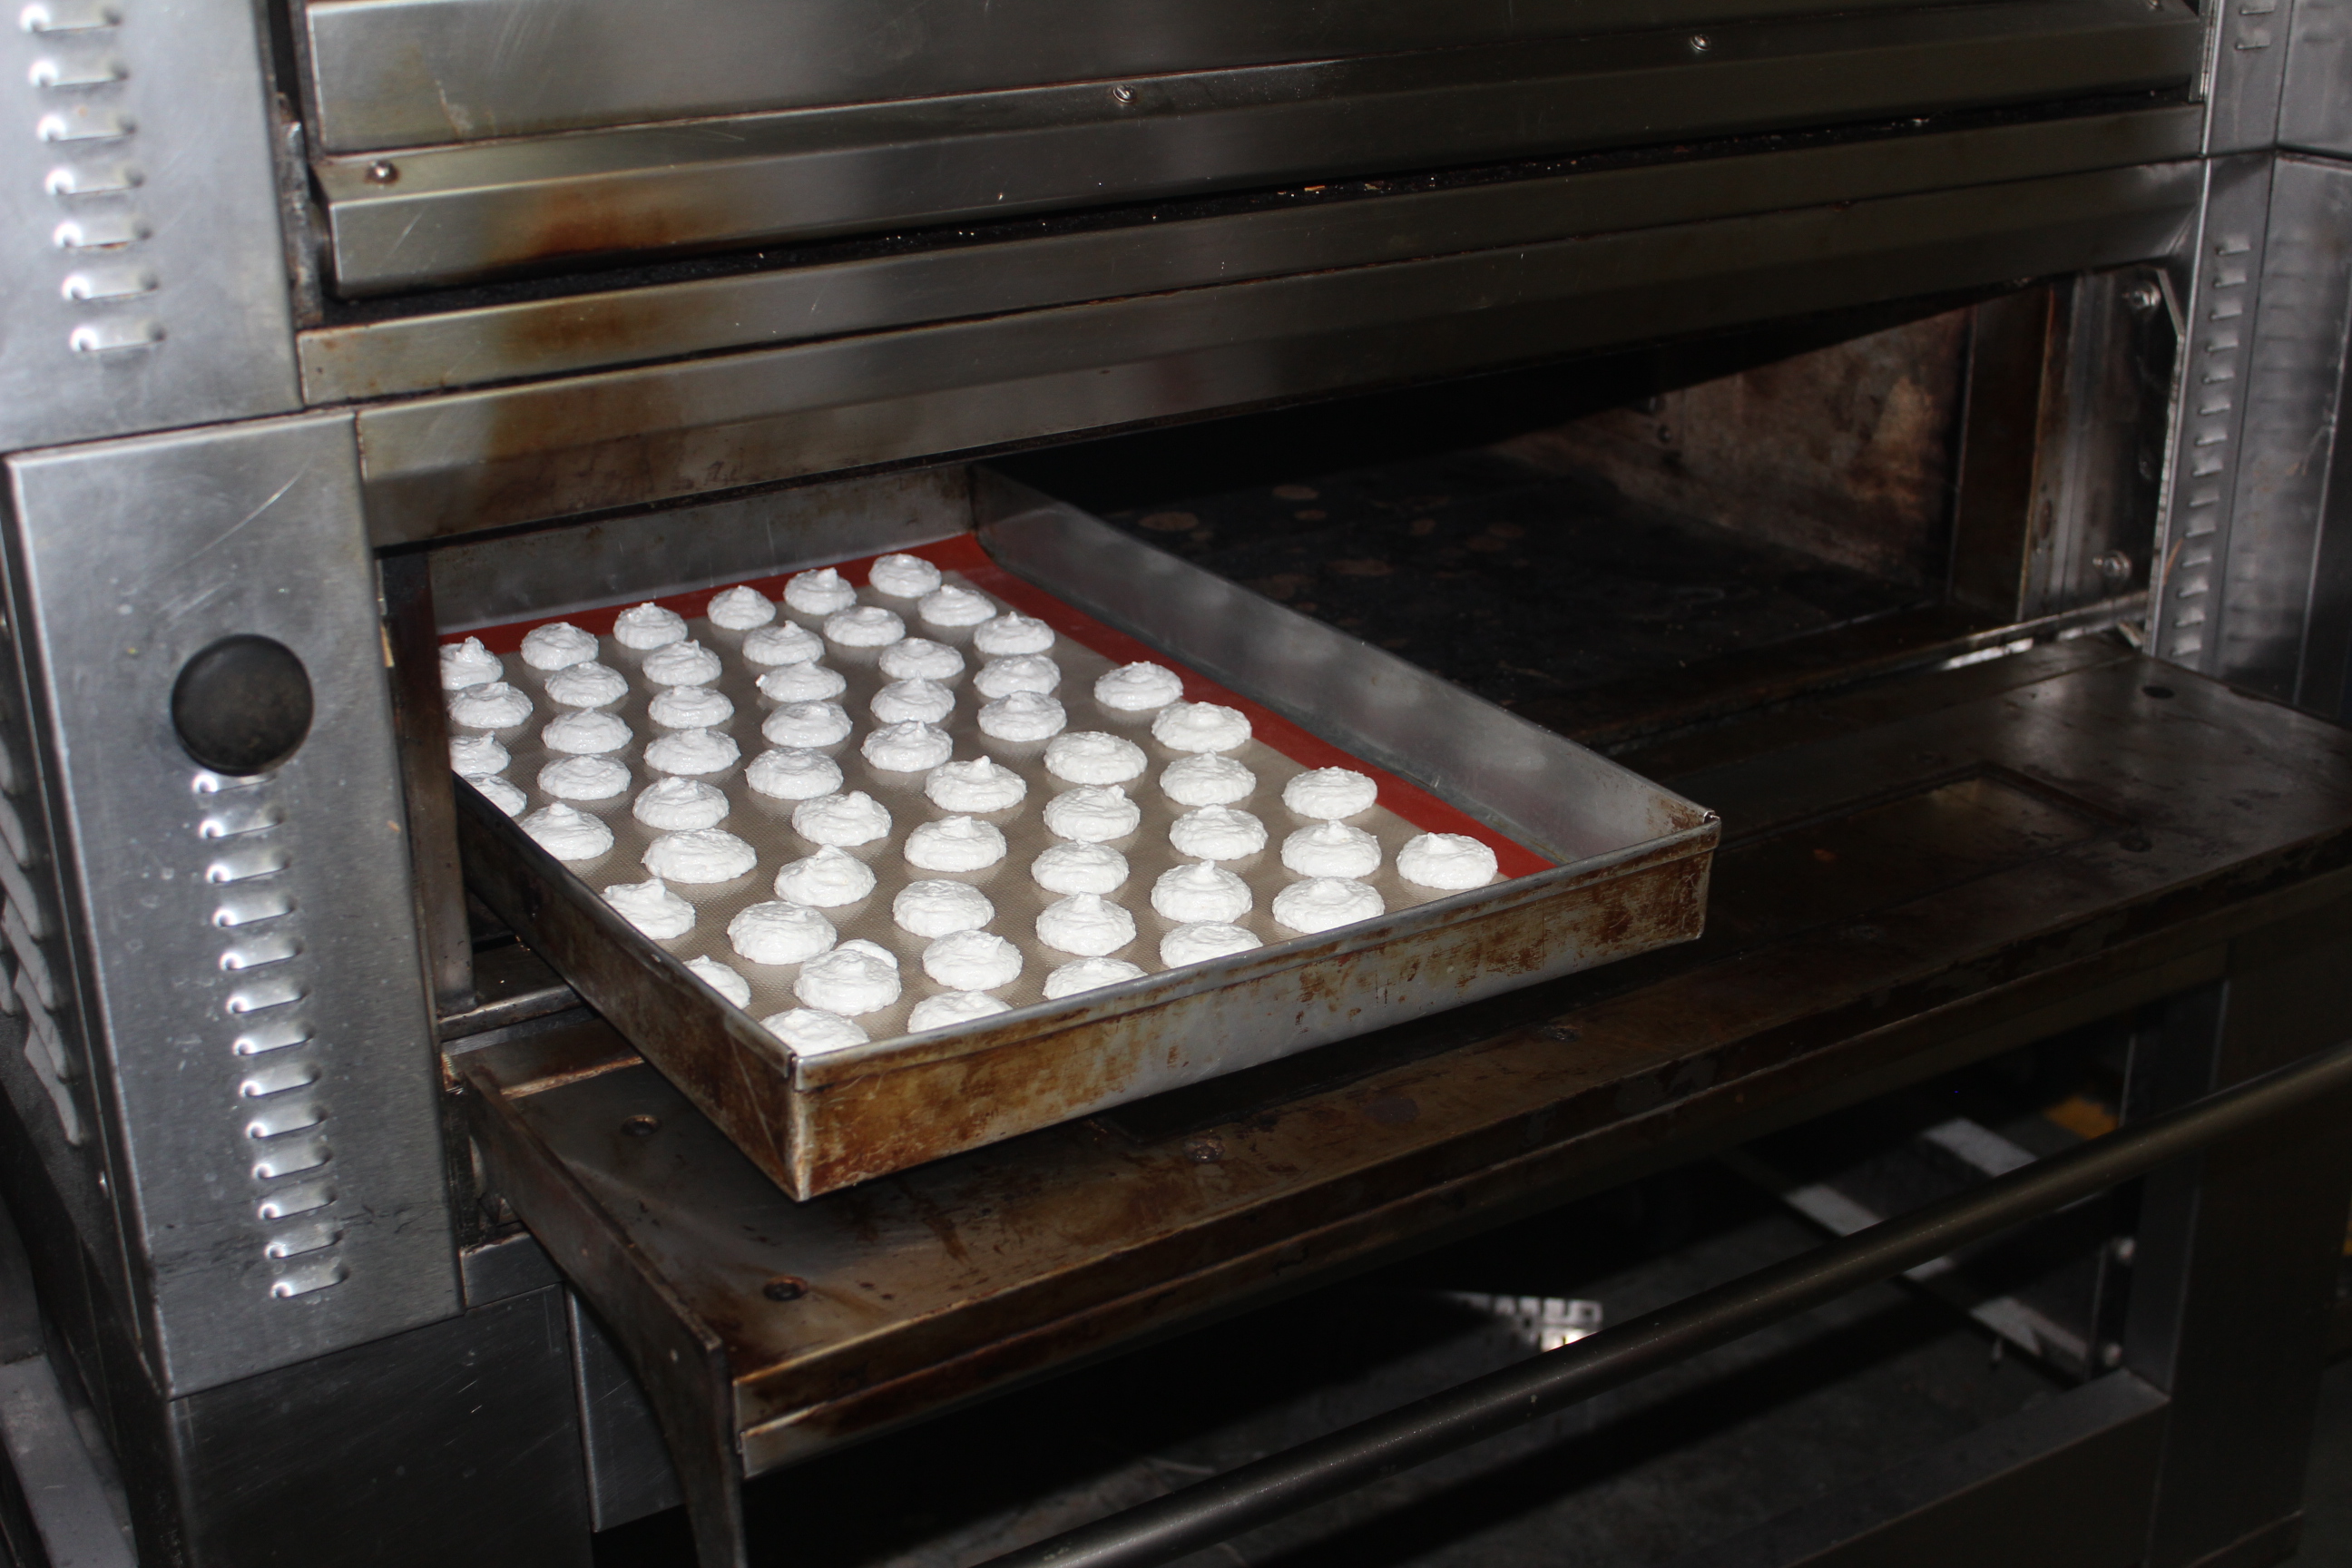
- Bake the macaroons in 100 degrees C for 10 minutes.
This is a step-by-step procedure that the bakery personnel, led by their supervisory head showed us –
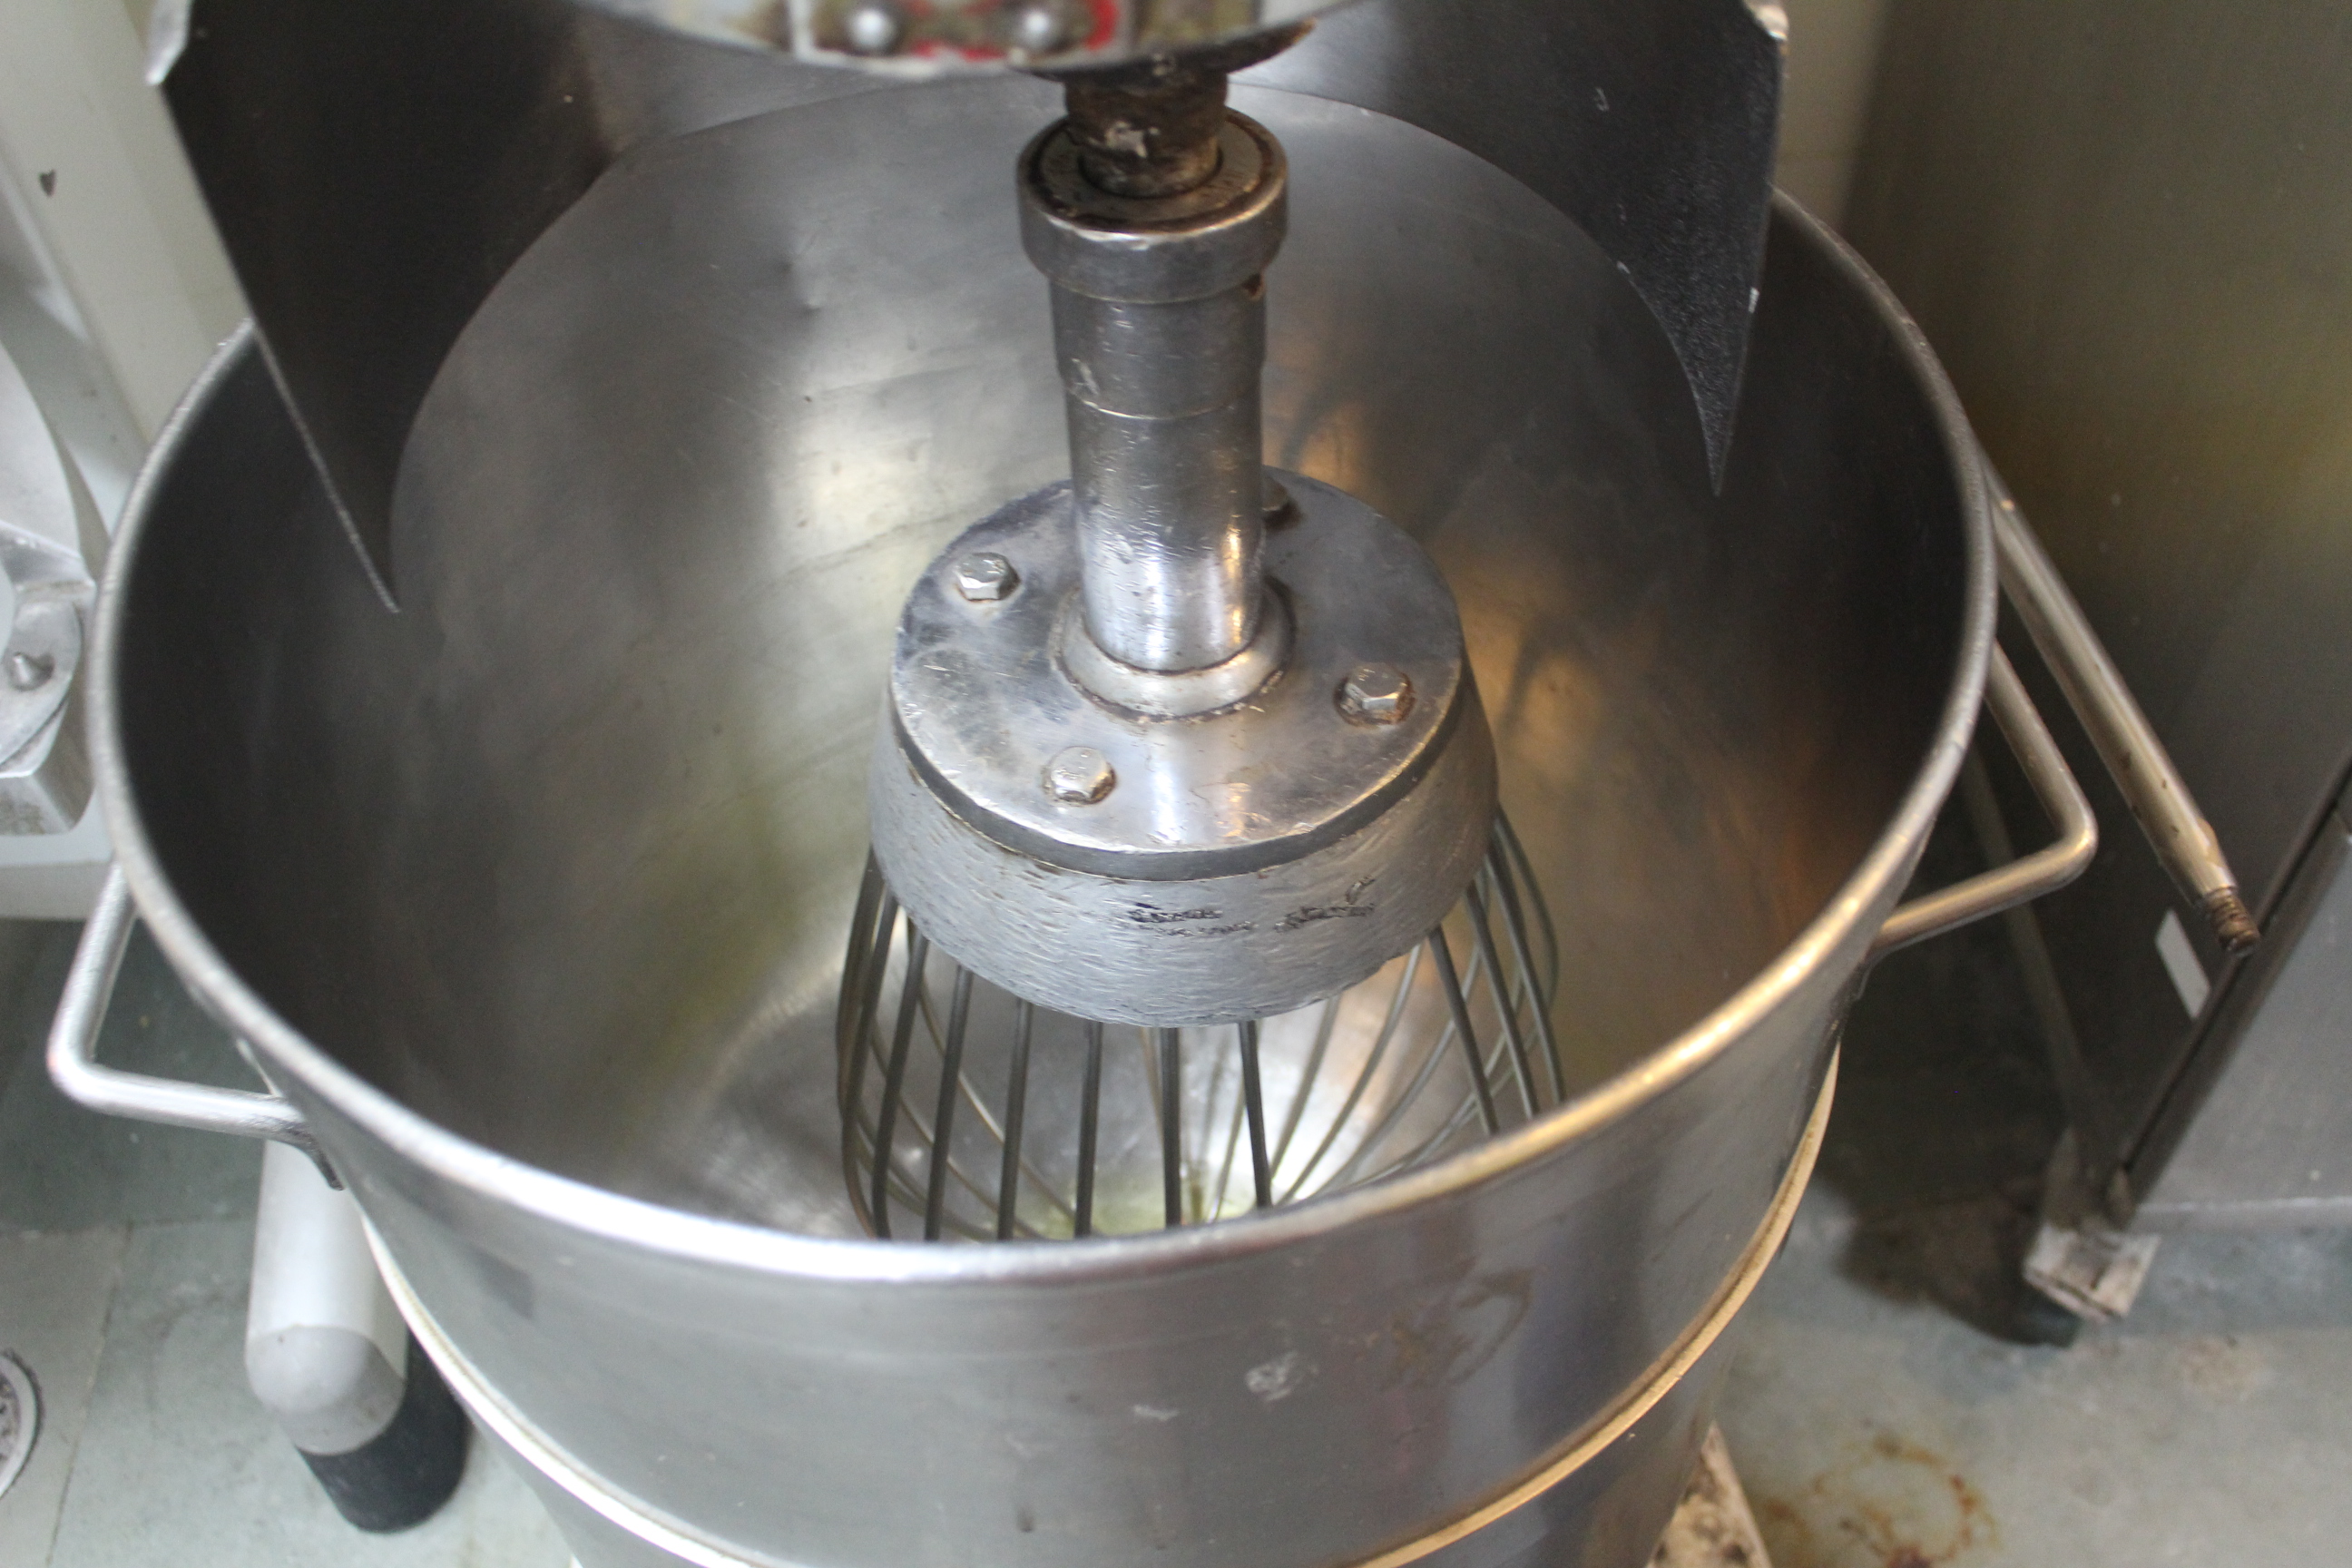
- First step – Beating egg whites
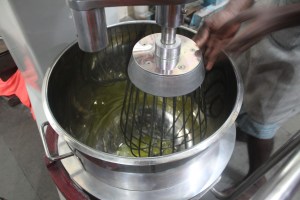
beaten well
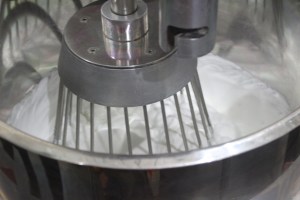
to stiff peaks..
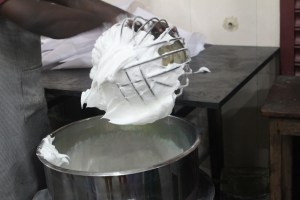
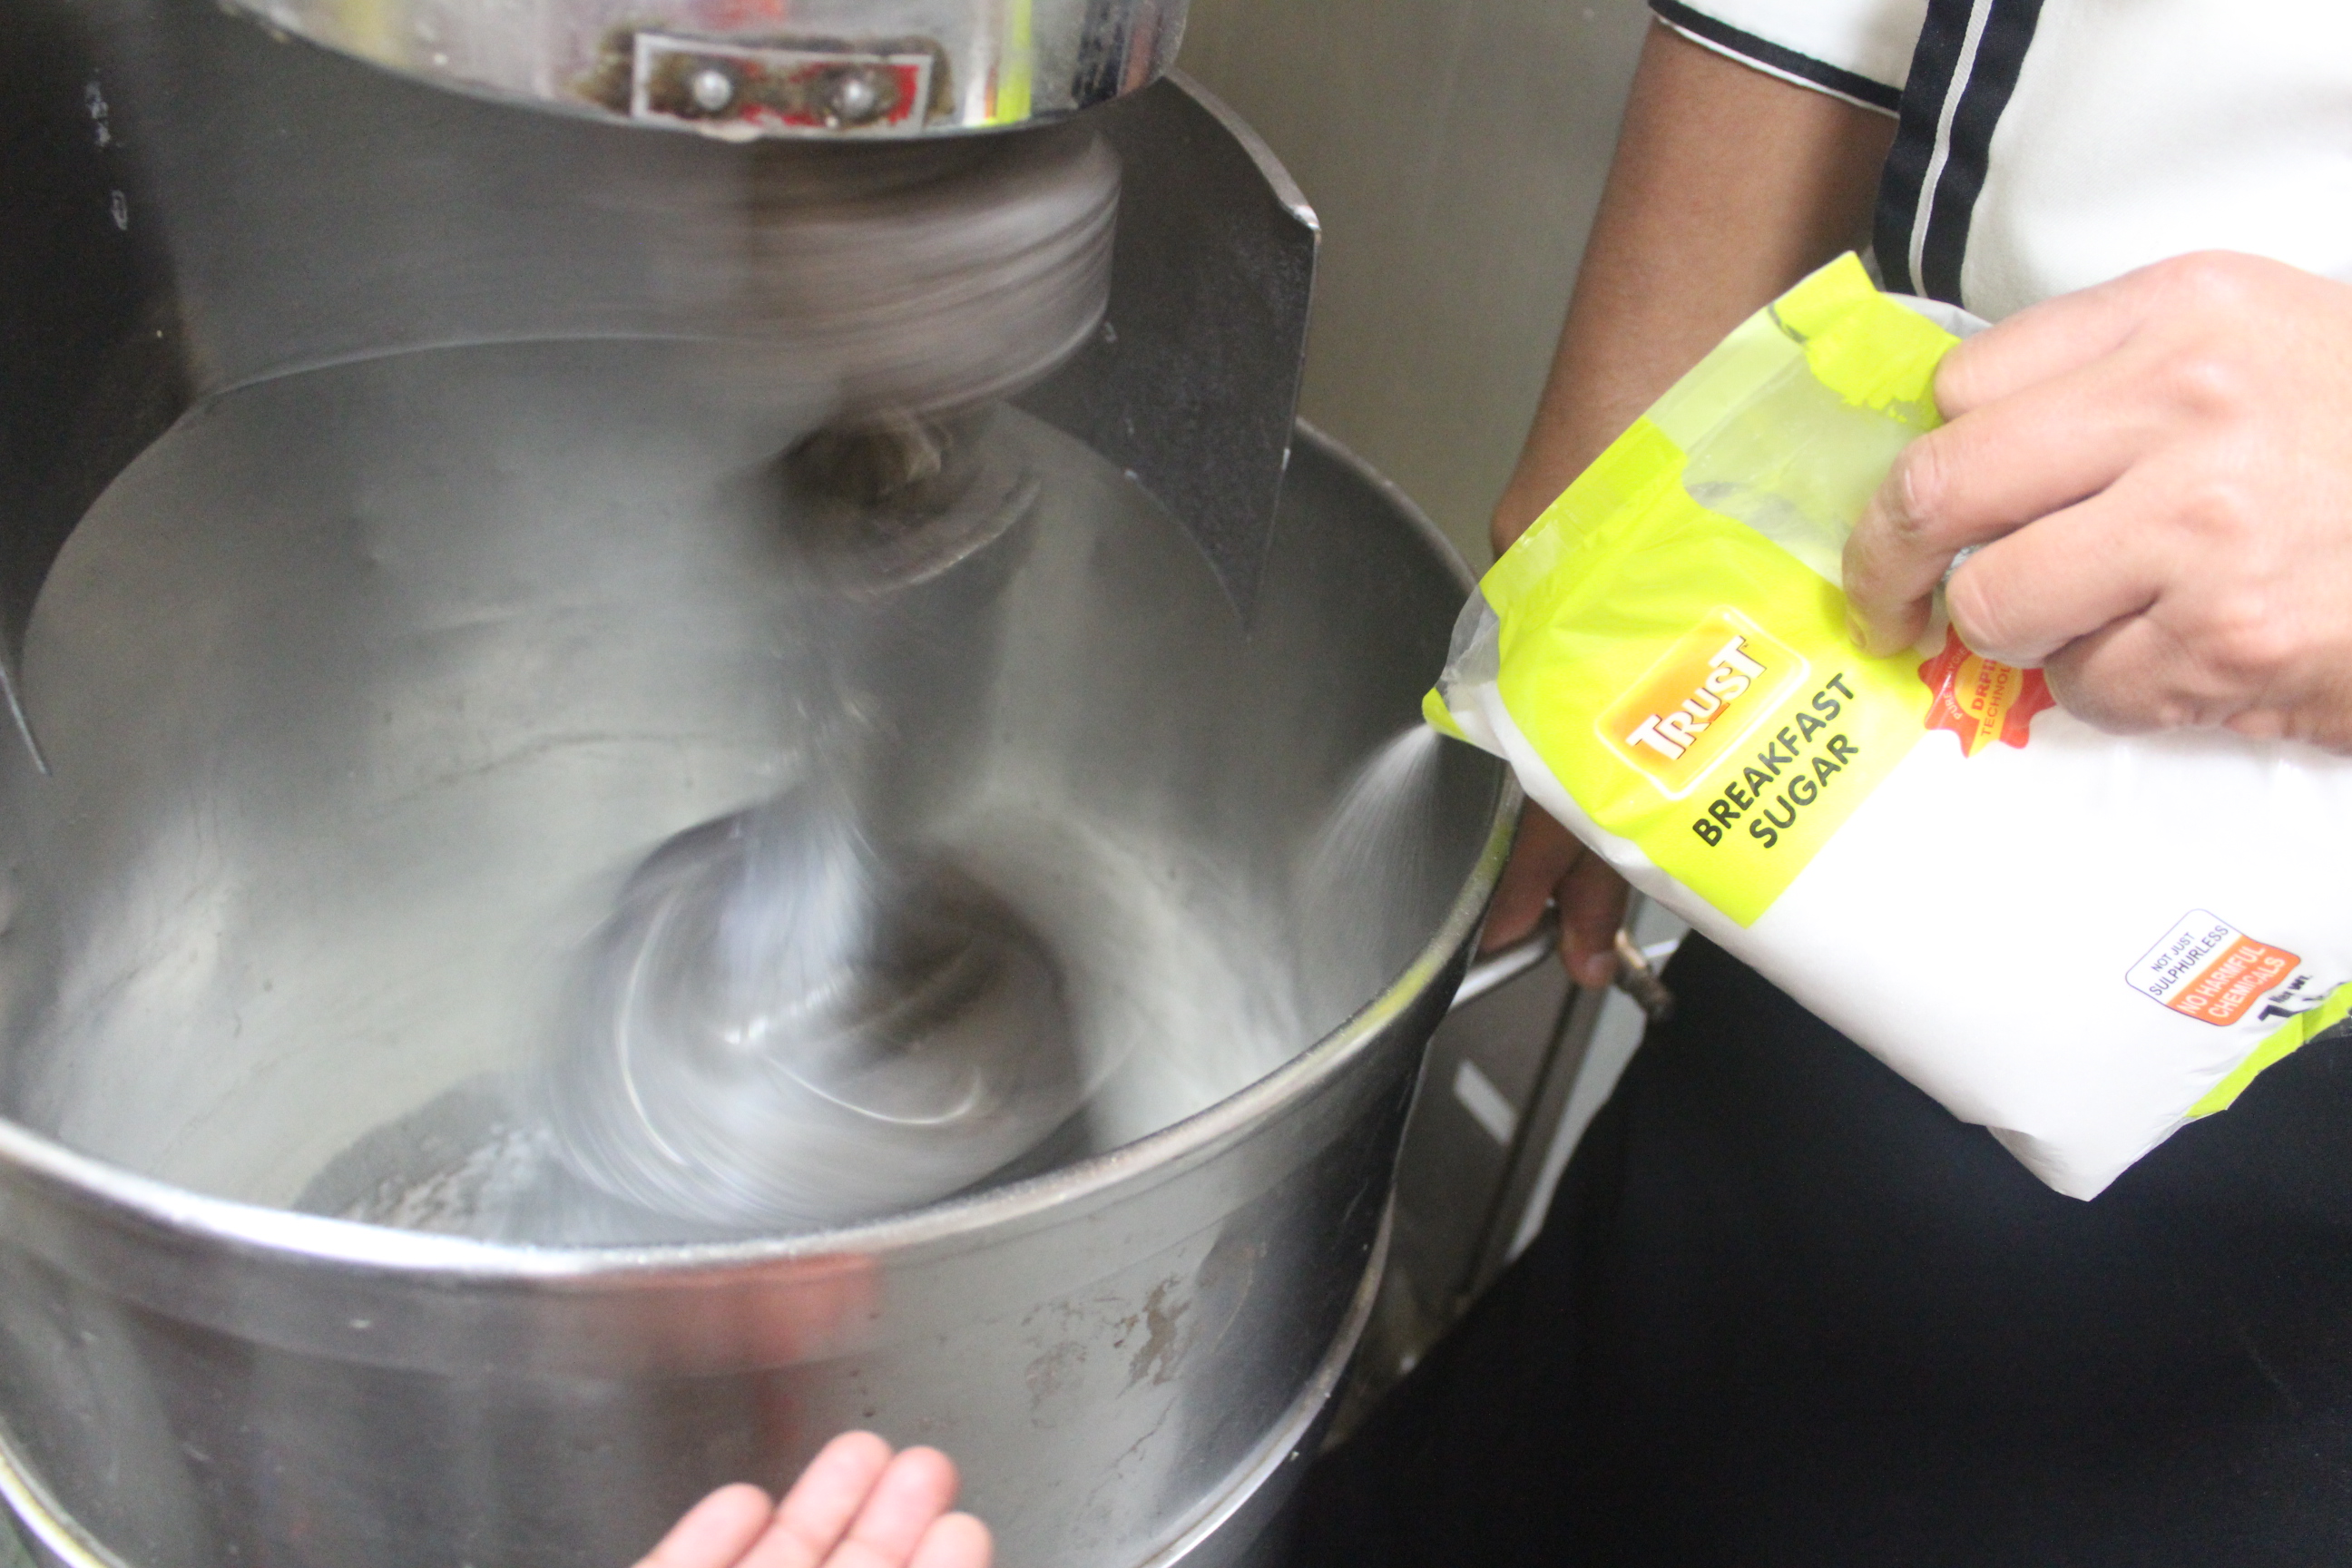
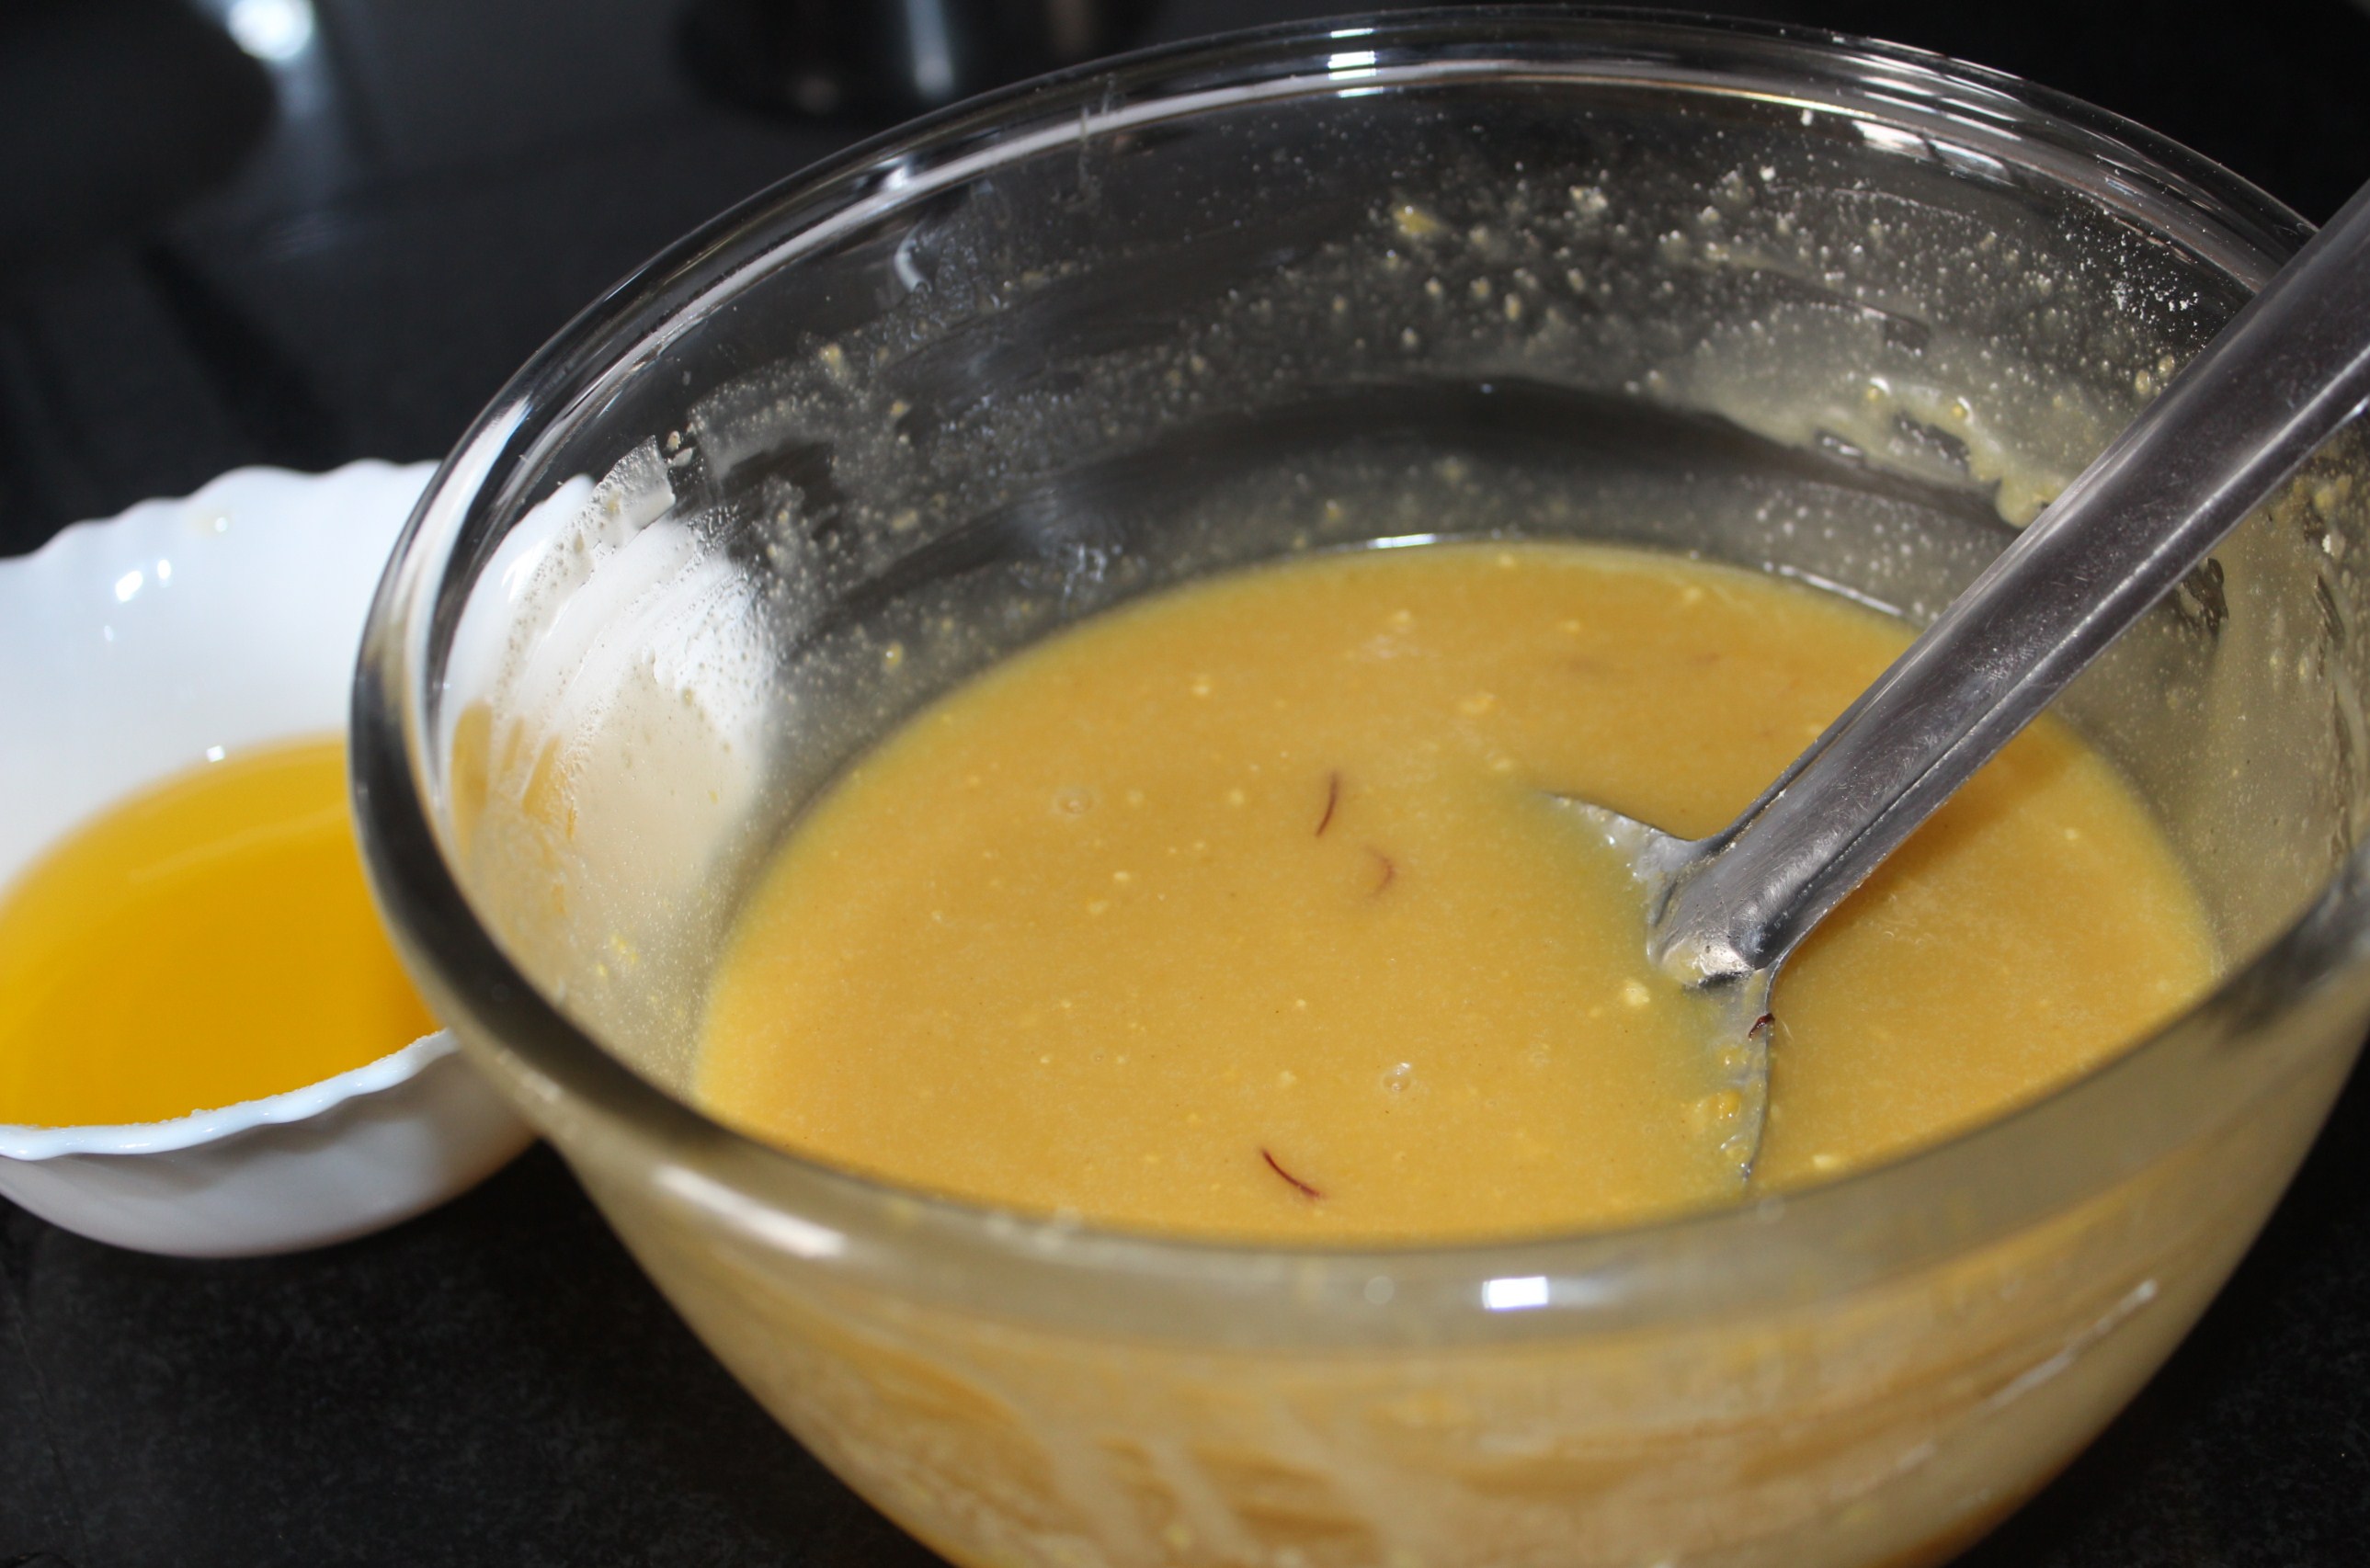
2. Sugar is mixed –
the egg white – sugar batter is still foamy-
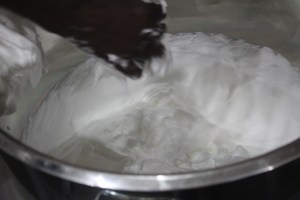
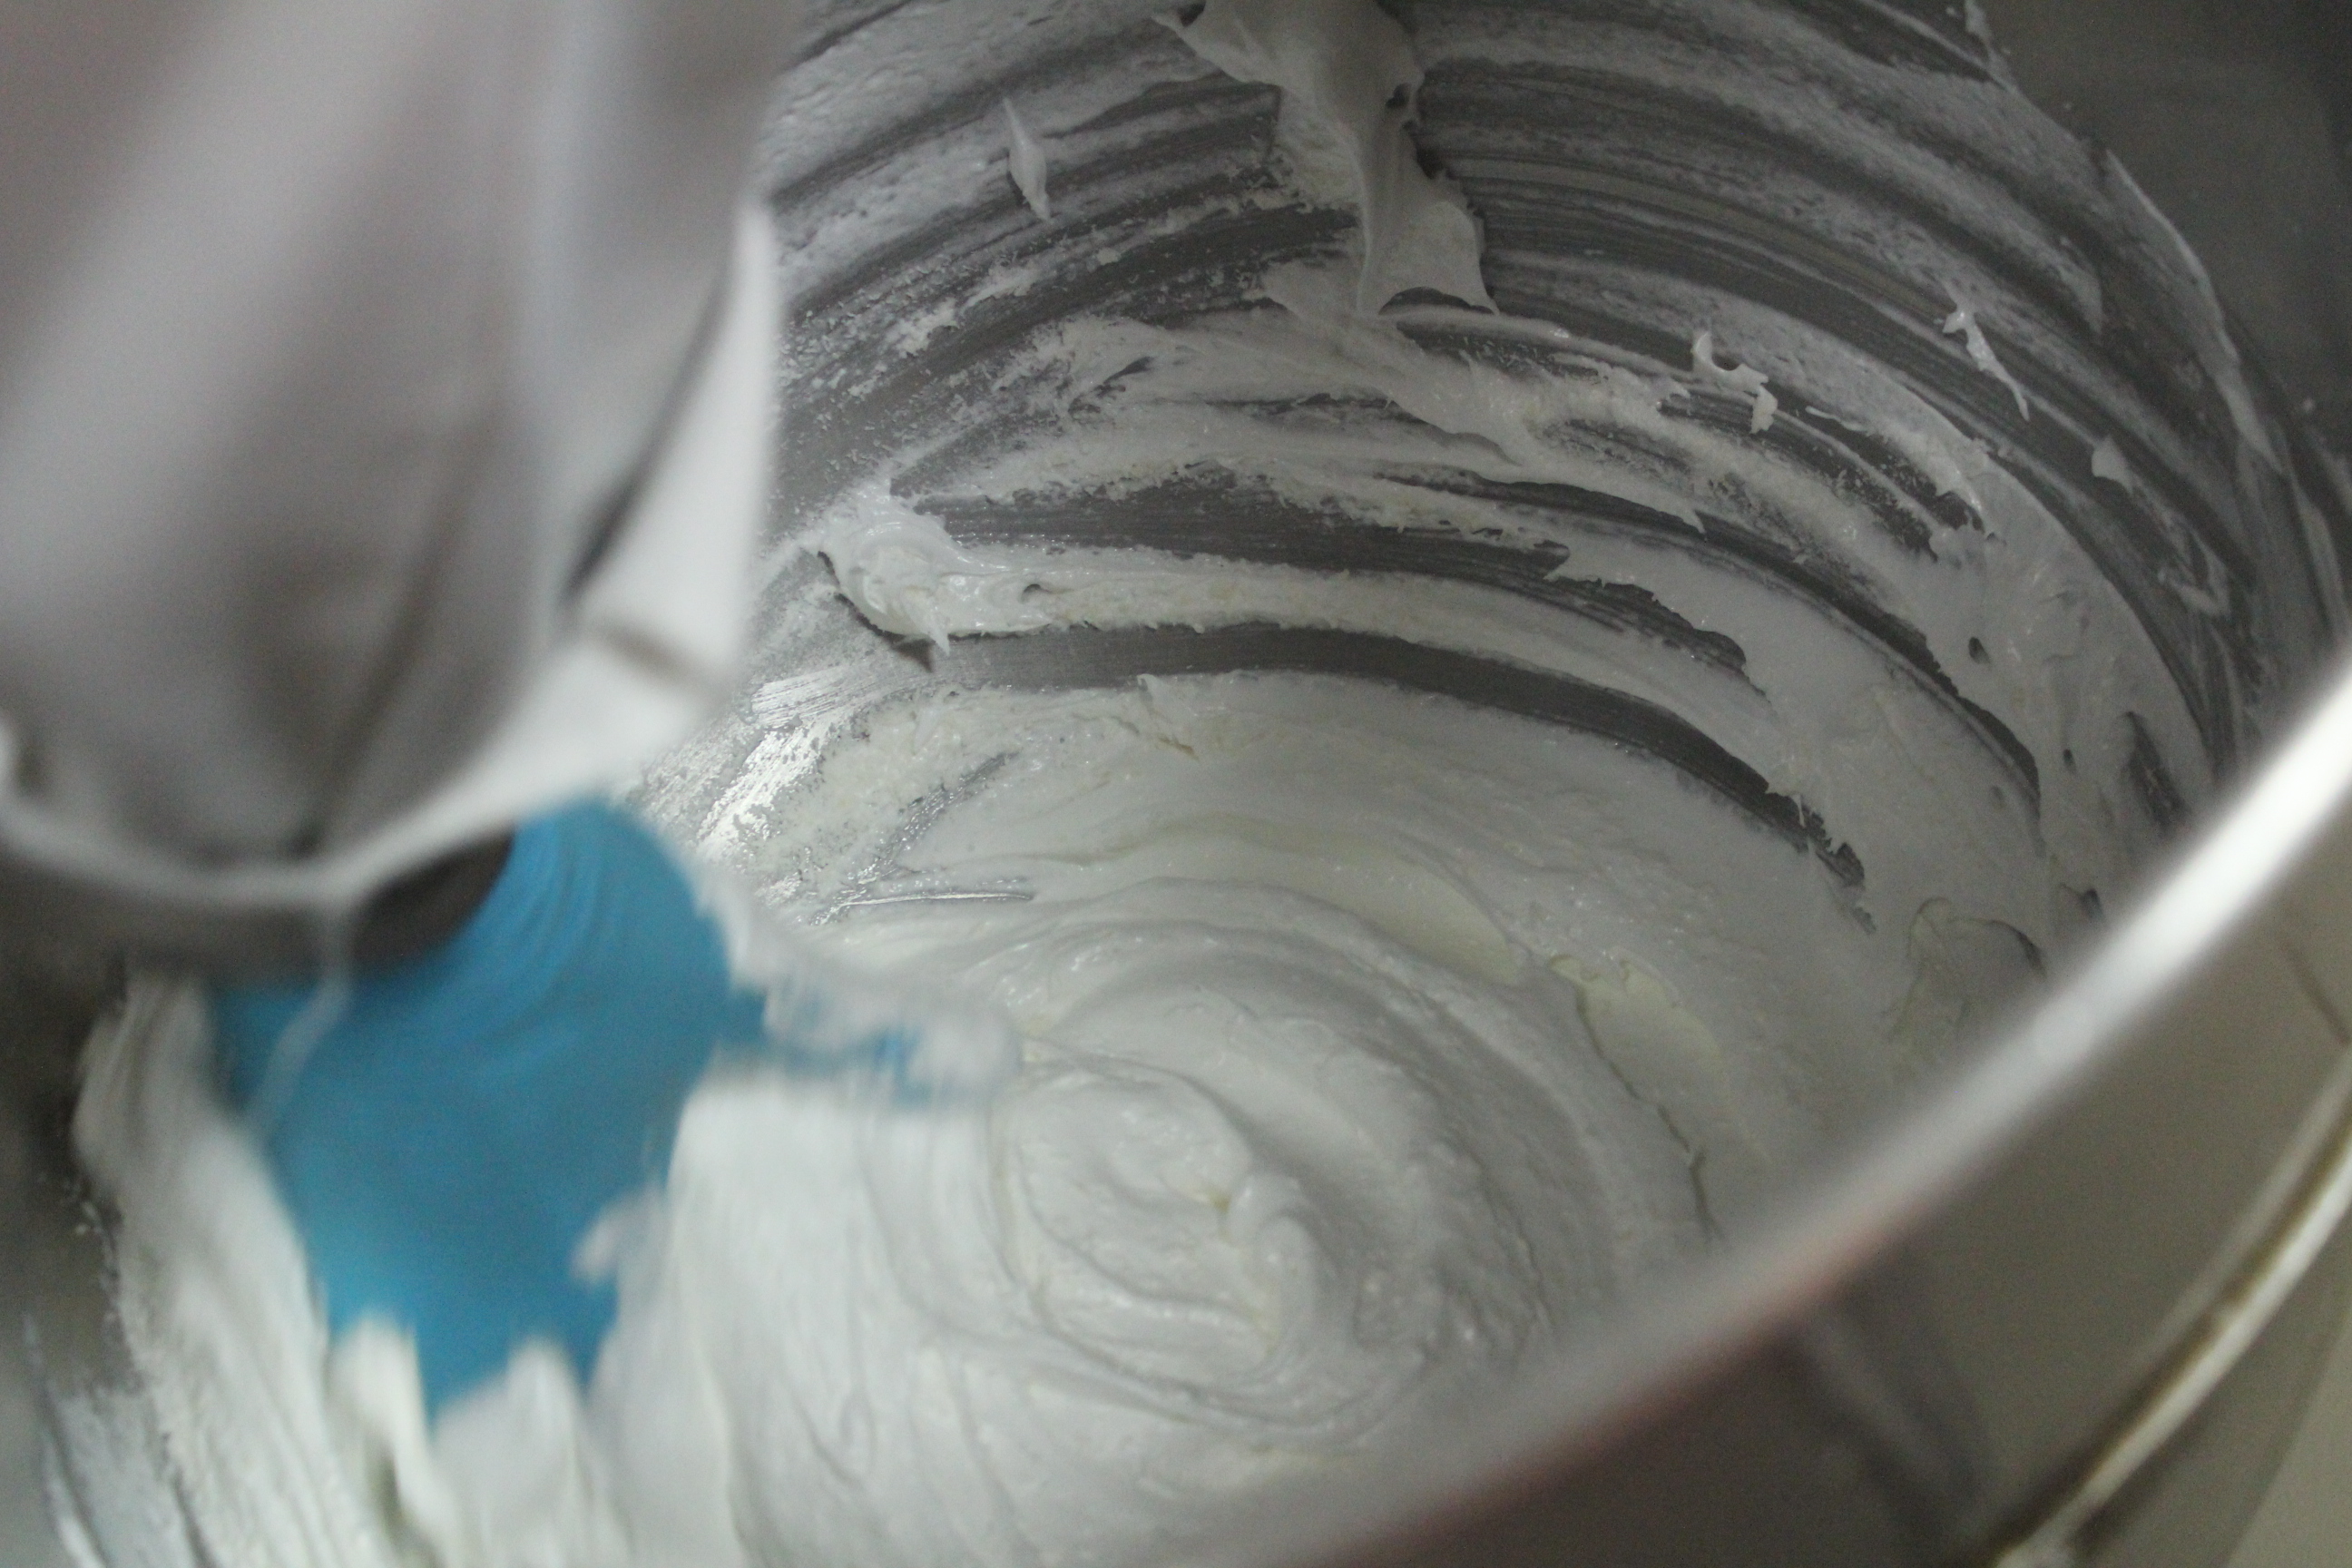
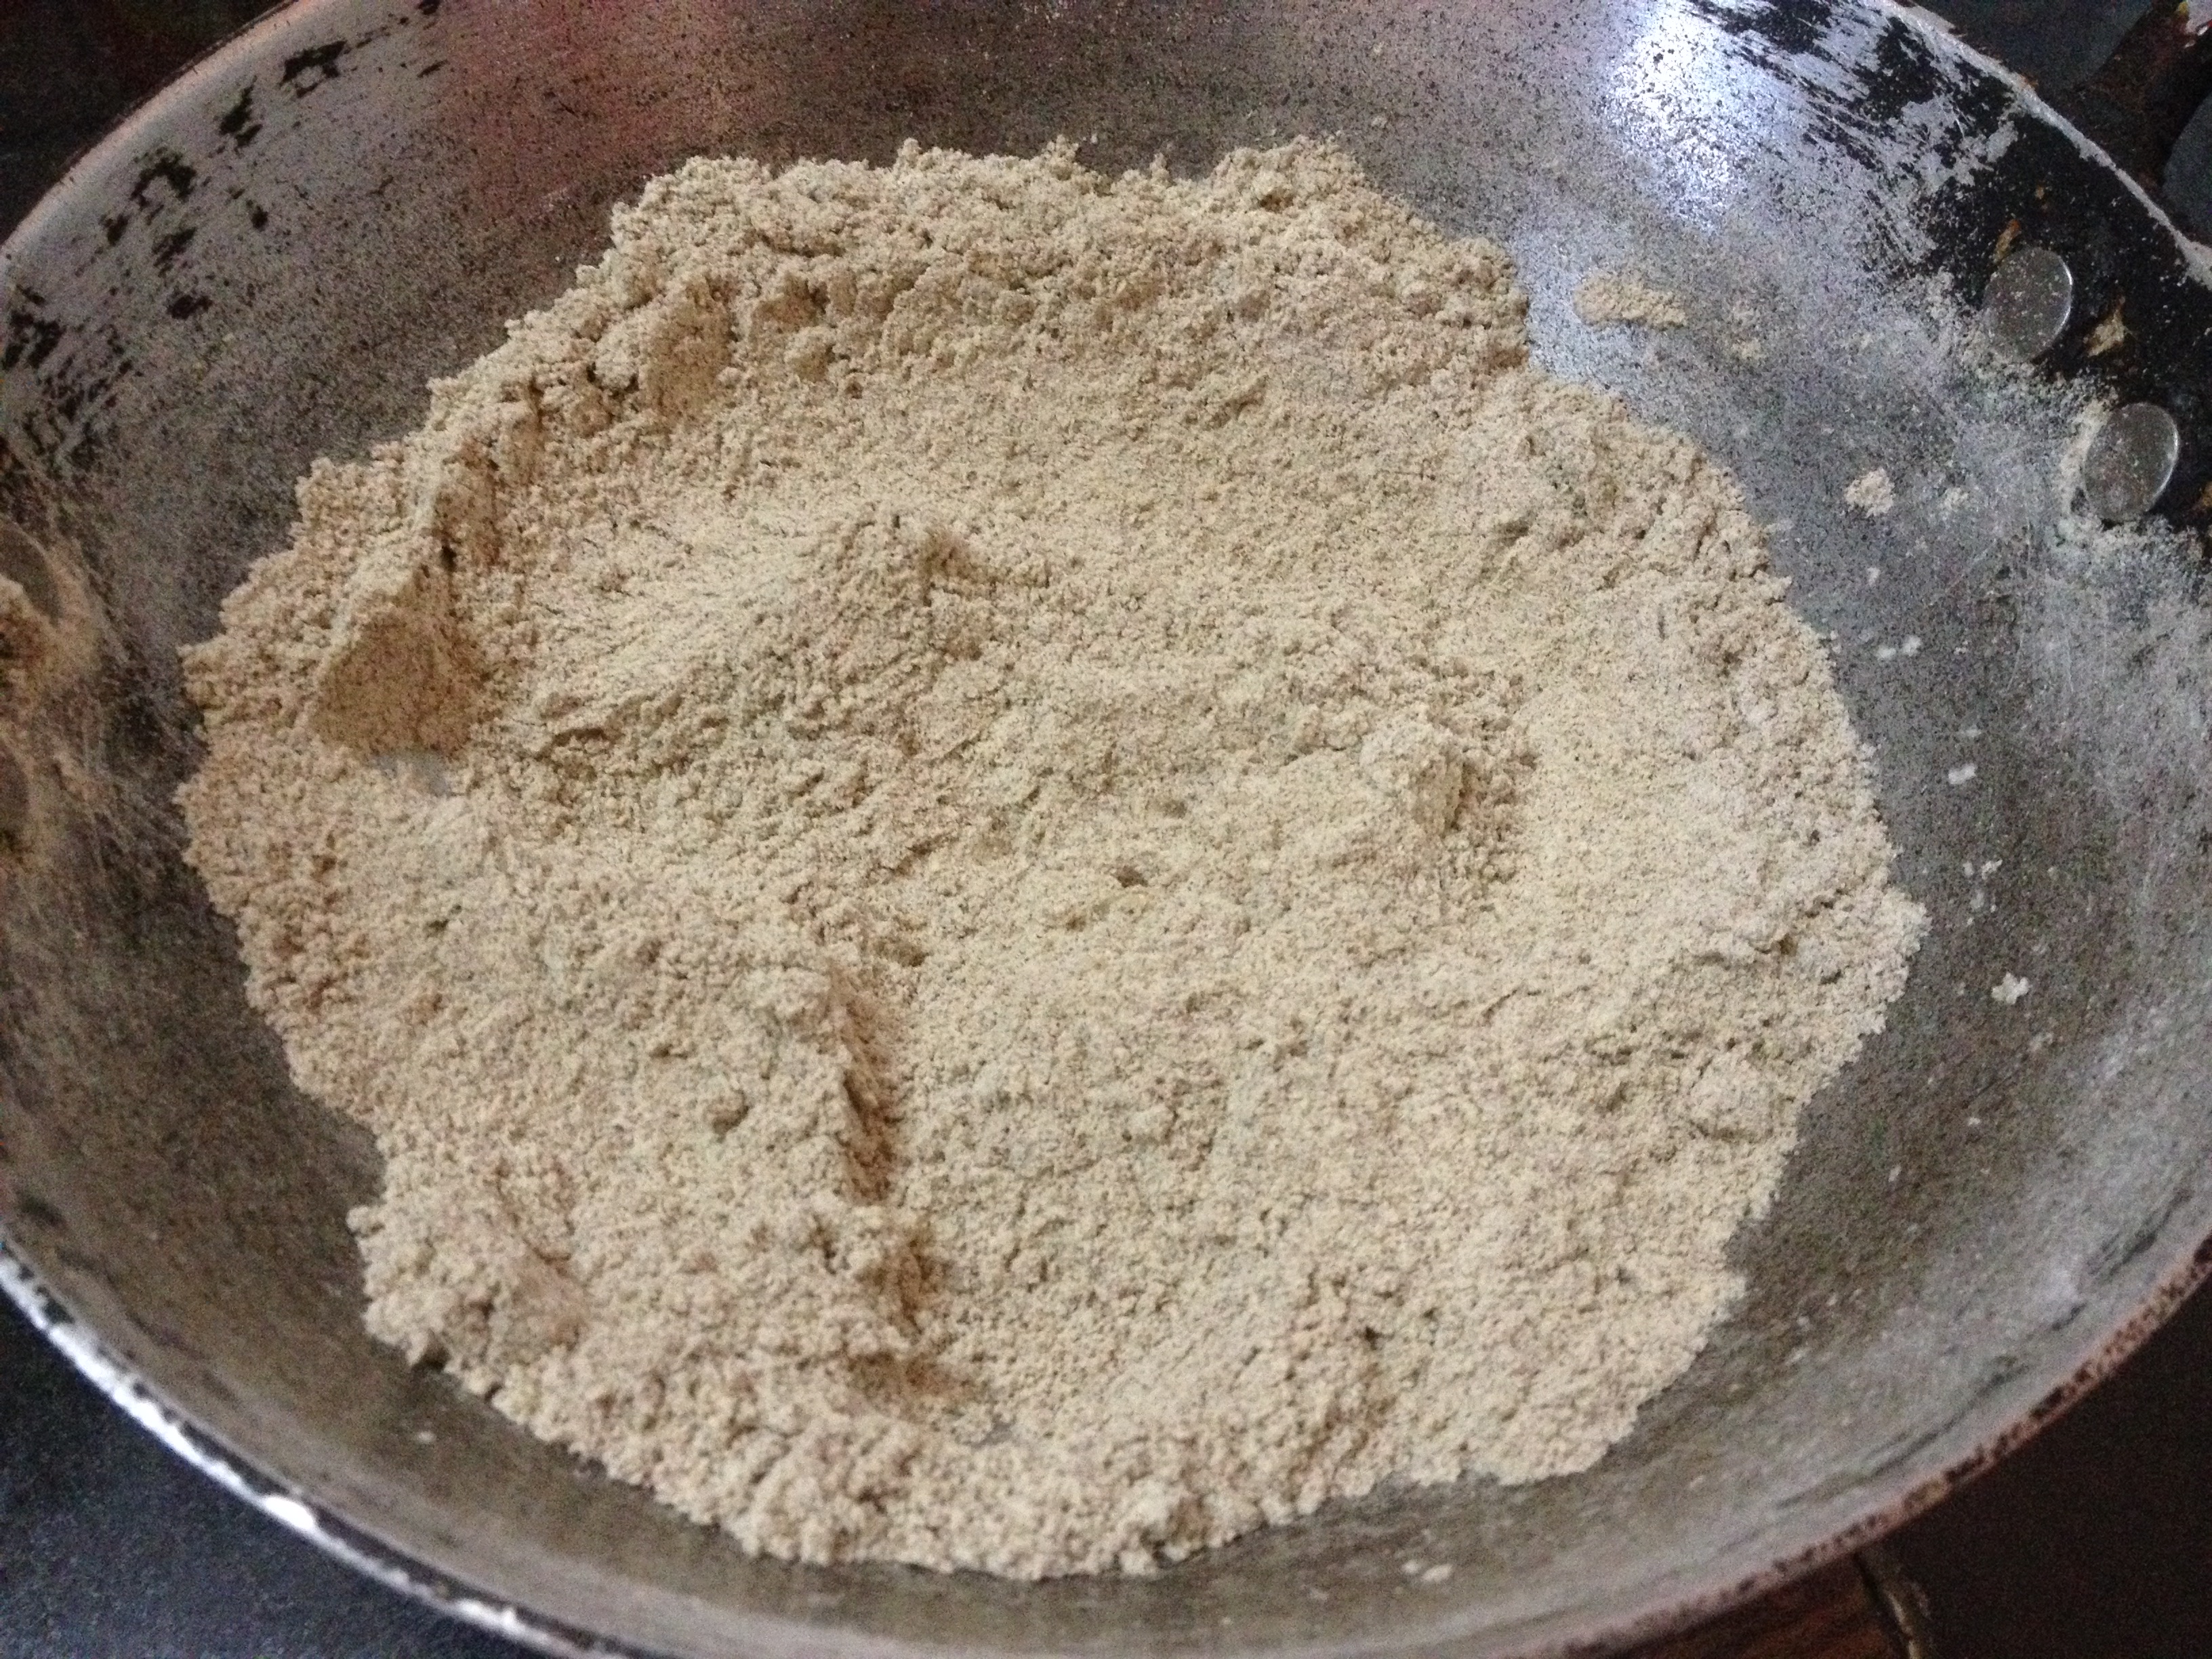
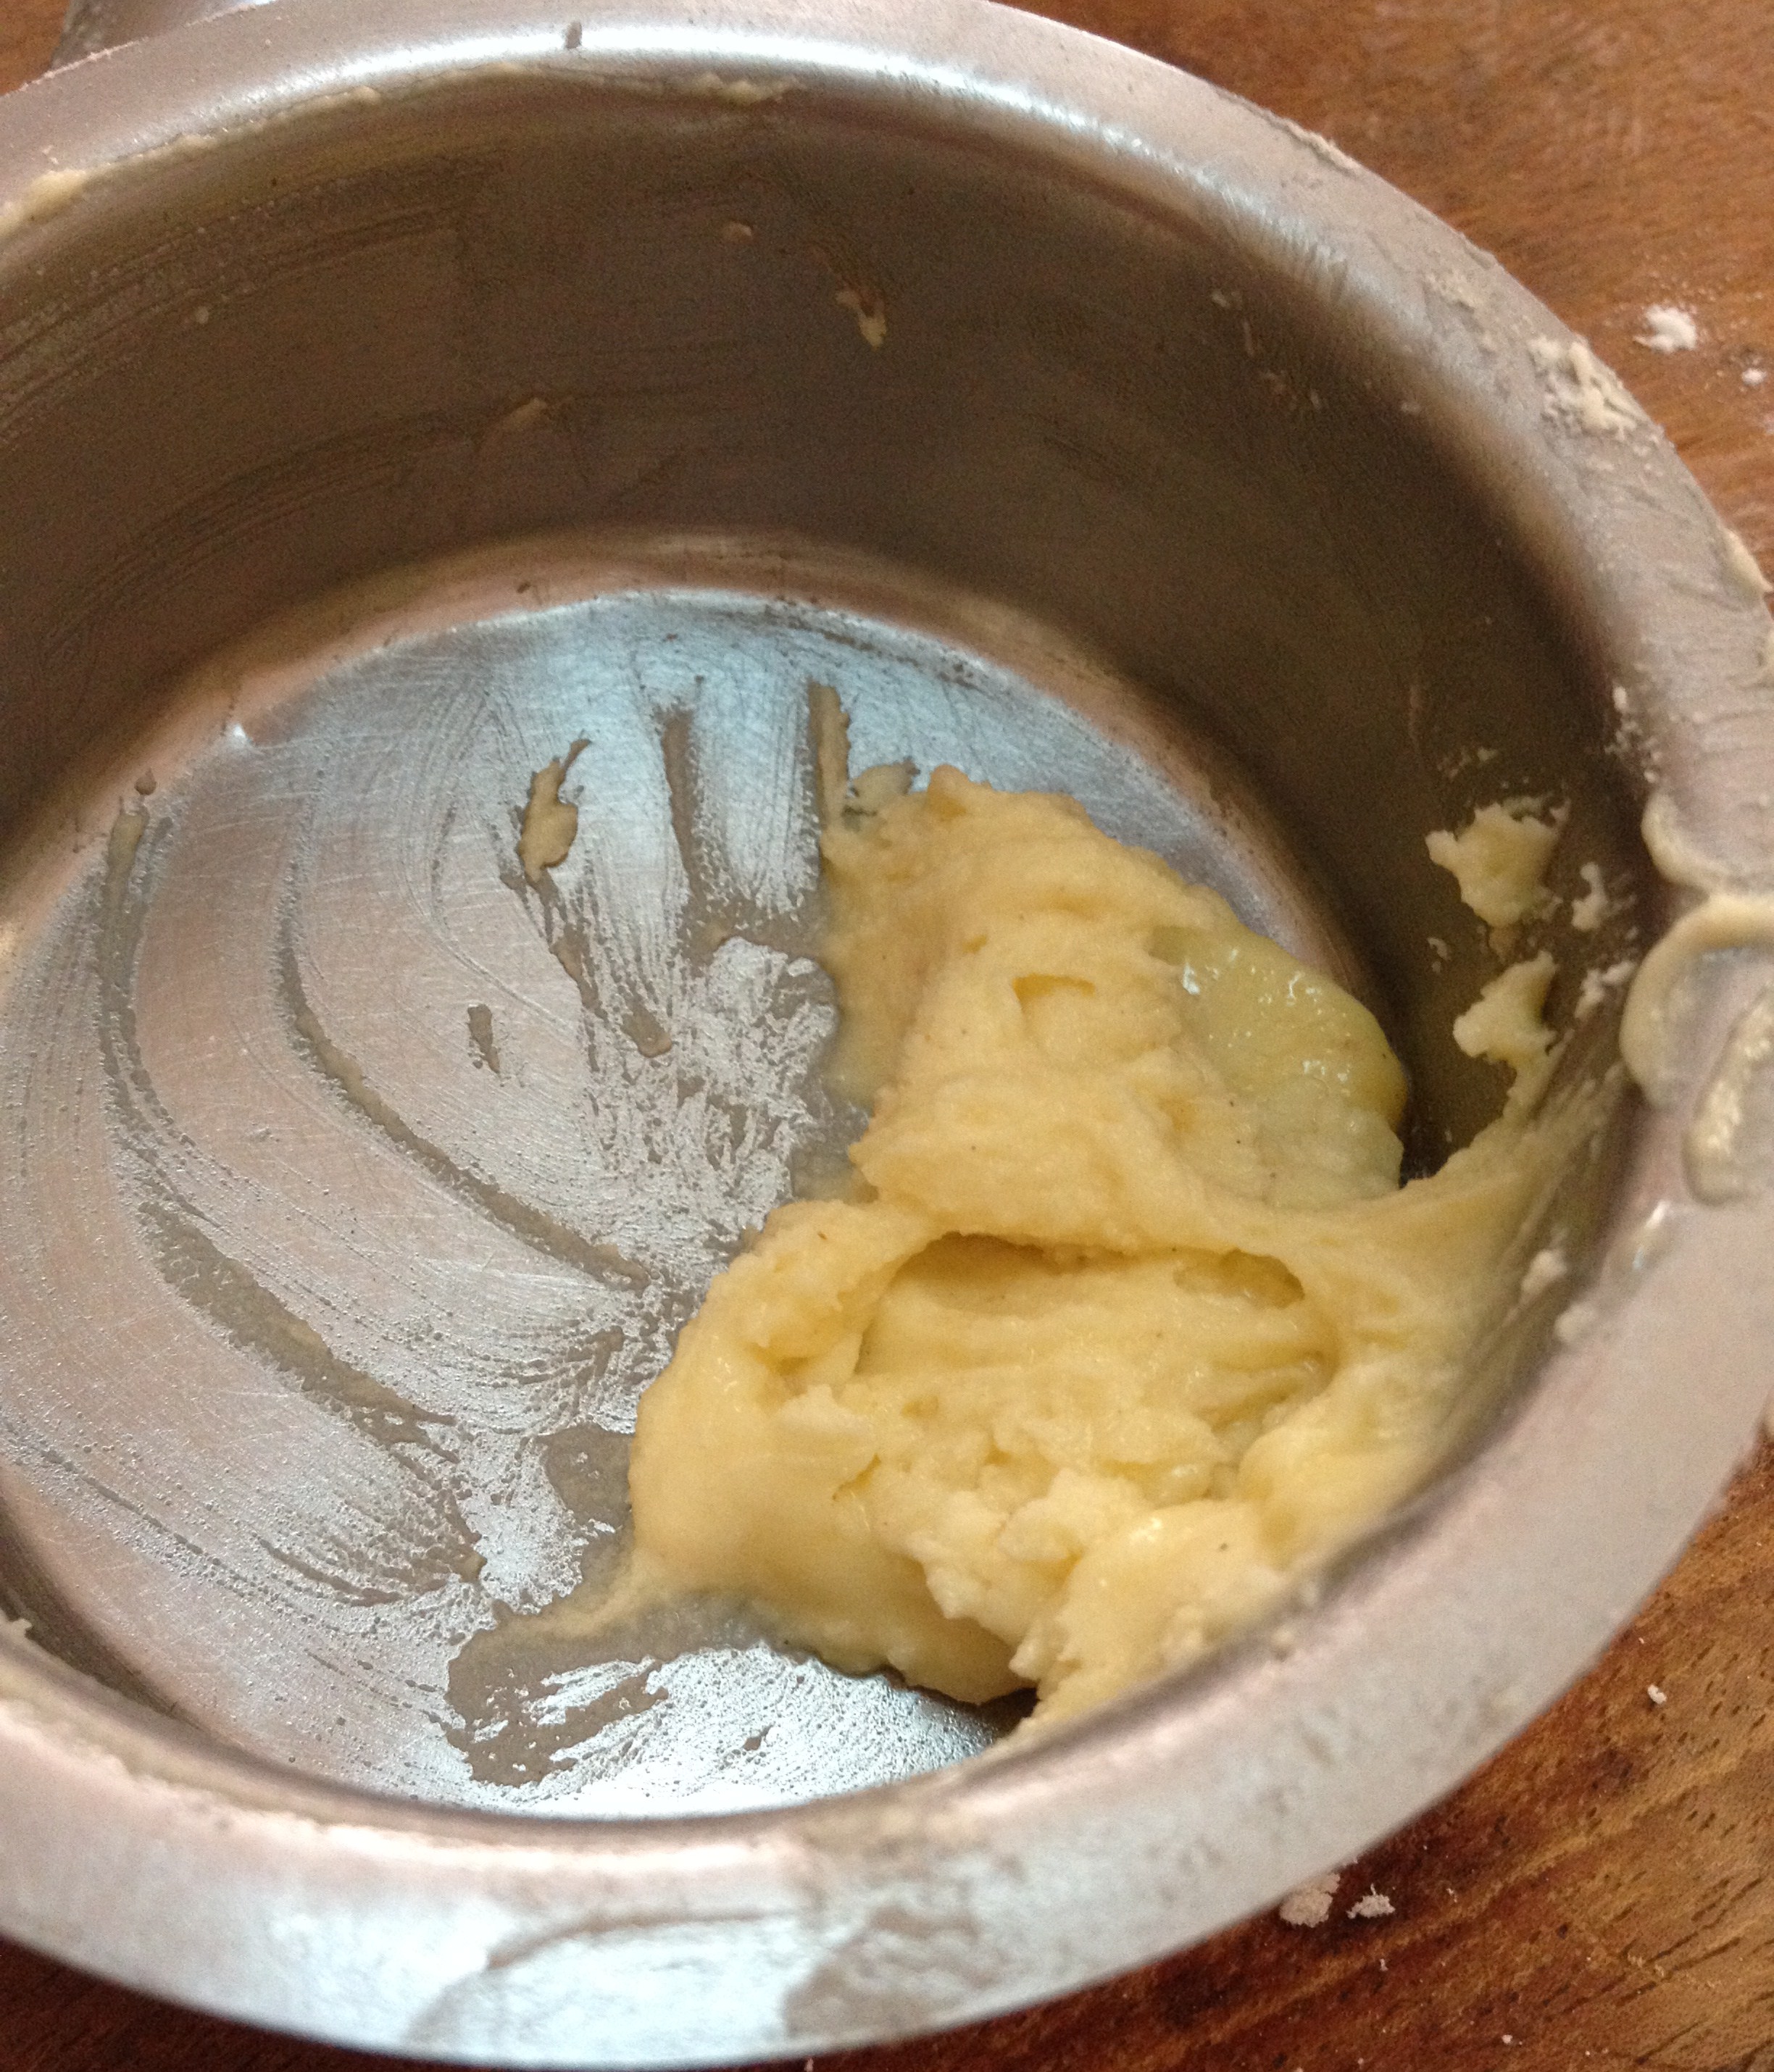
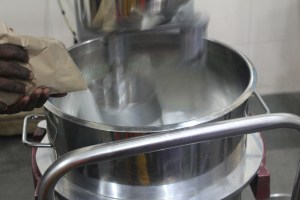
3. Then the quintessential cashew nut powder is added. No beater here and notice the color change of batter from white to ivory.

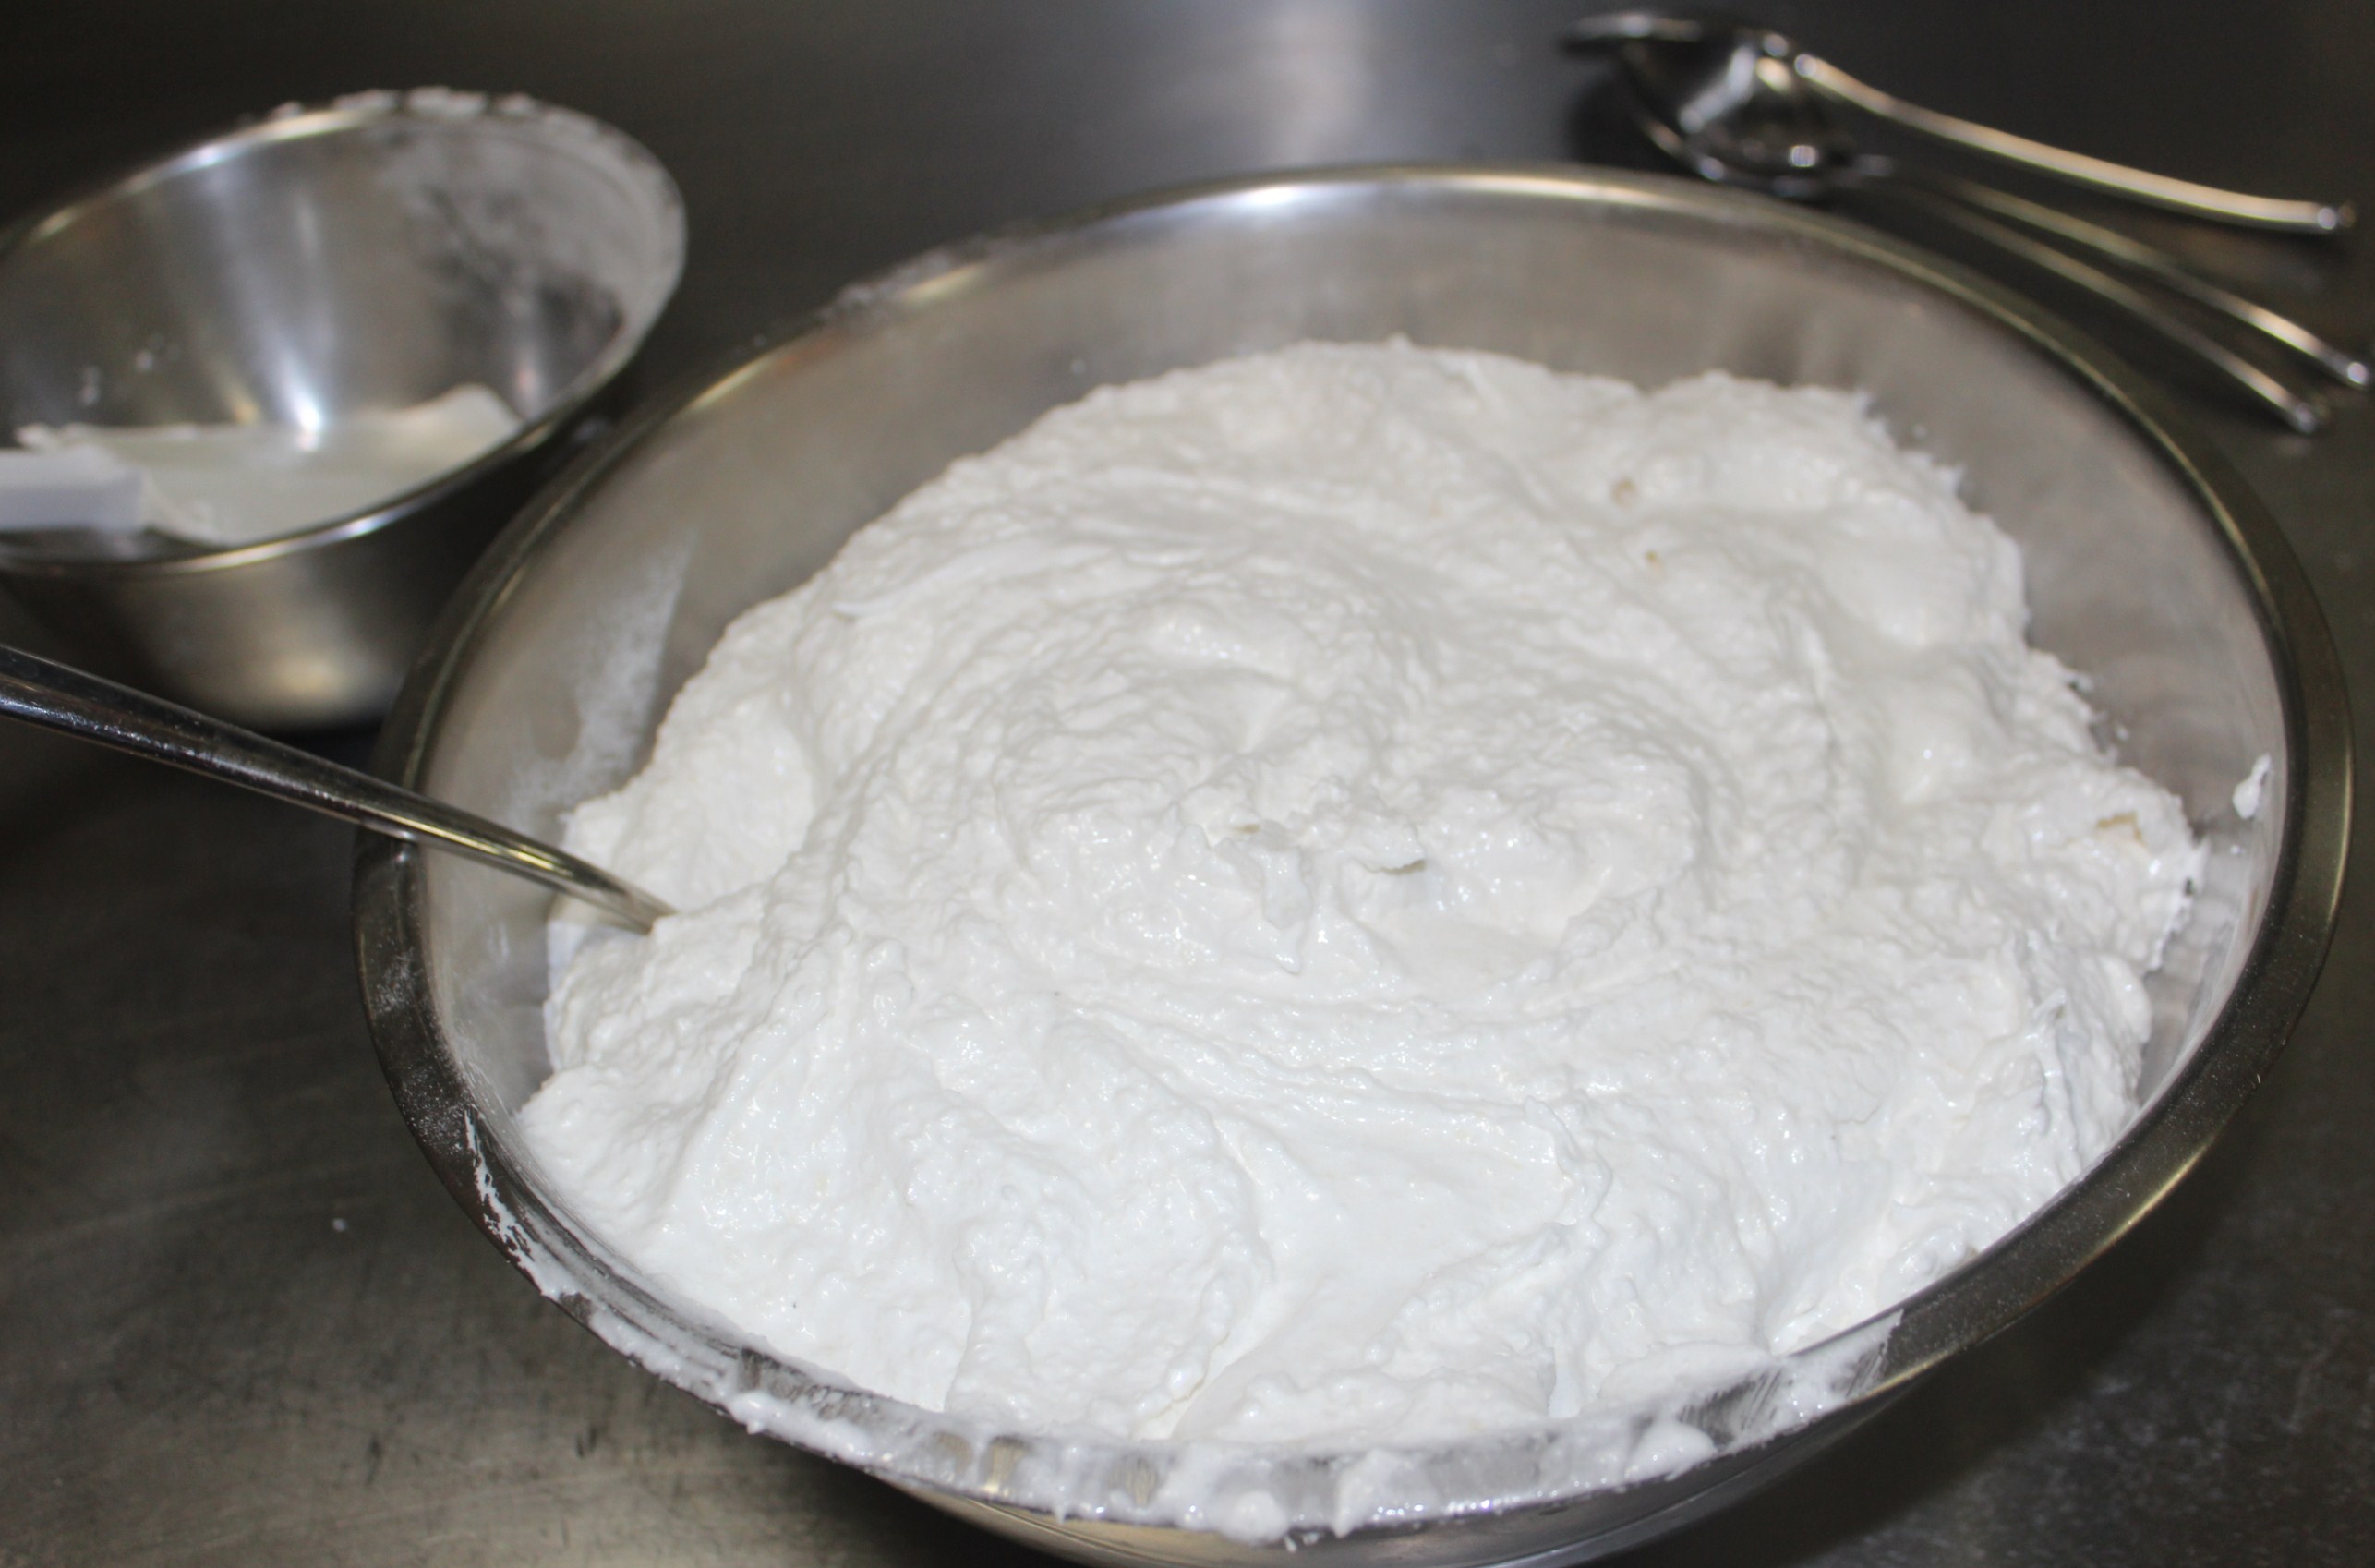
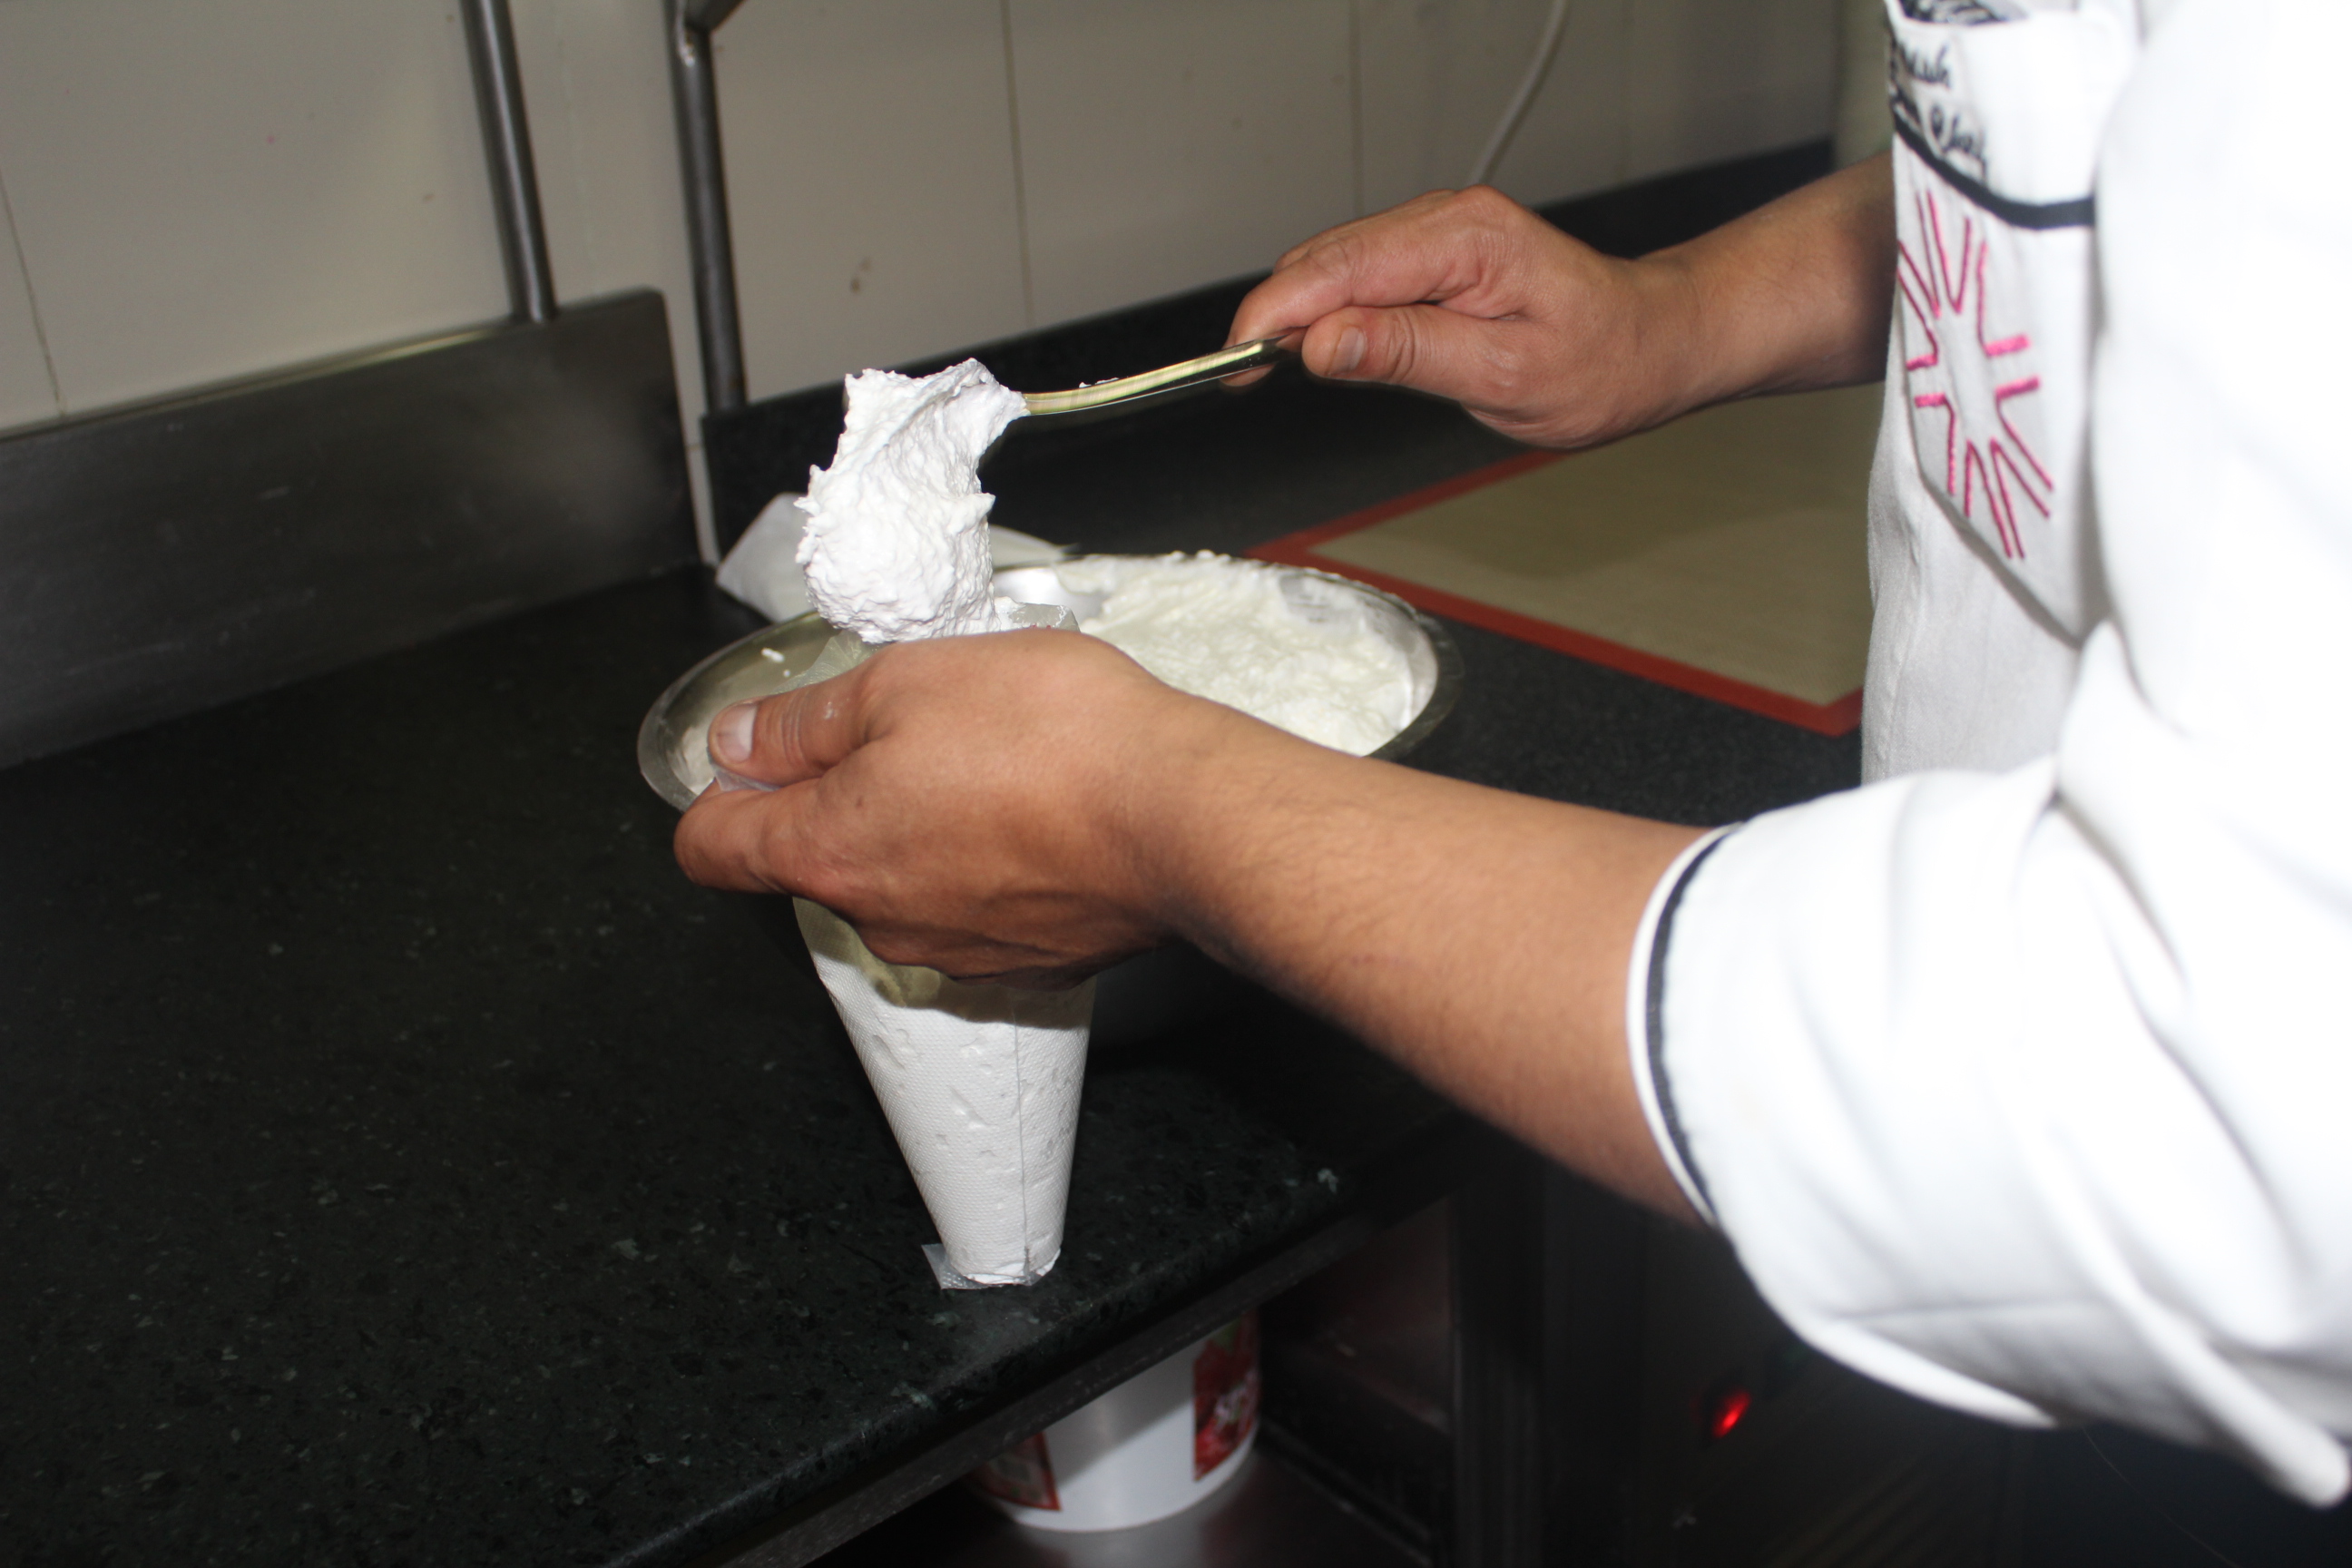
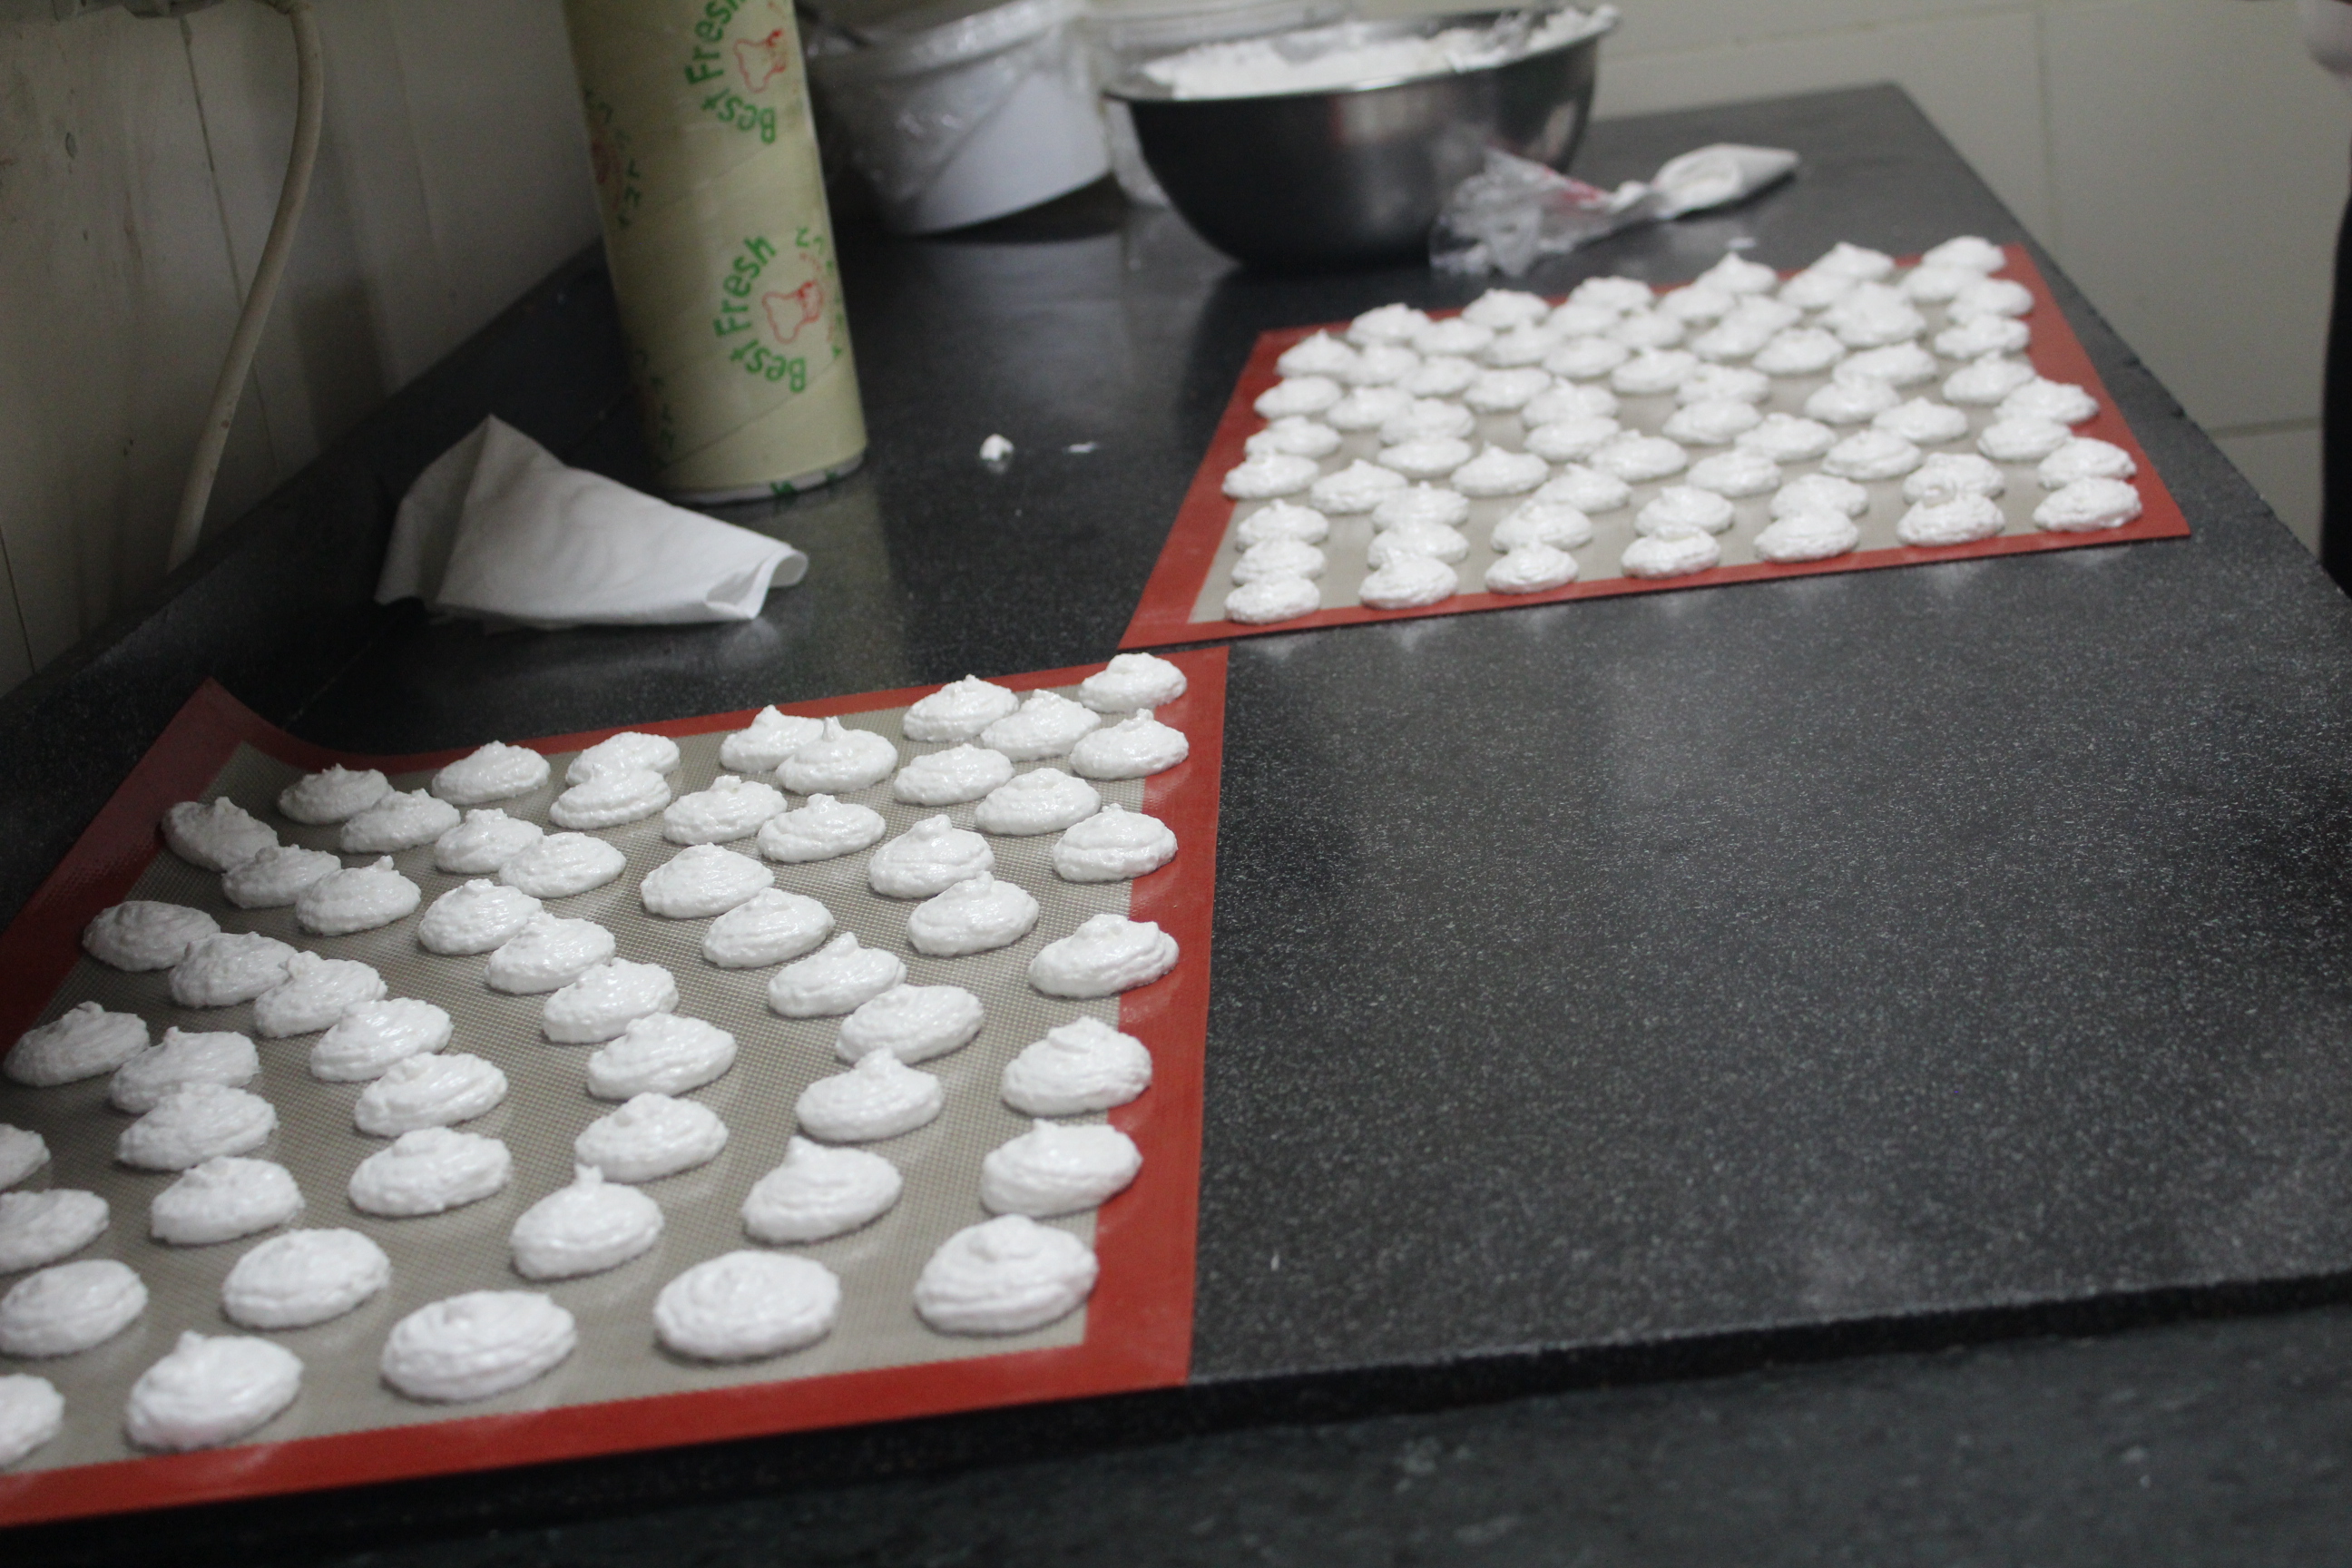
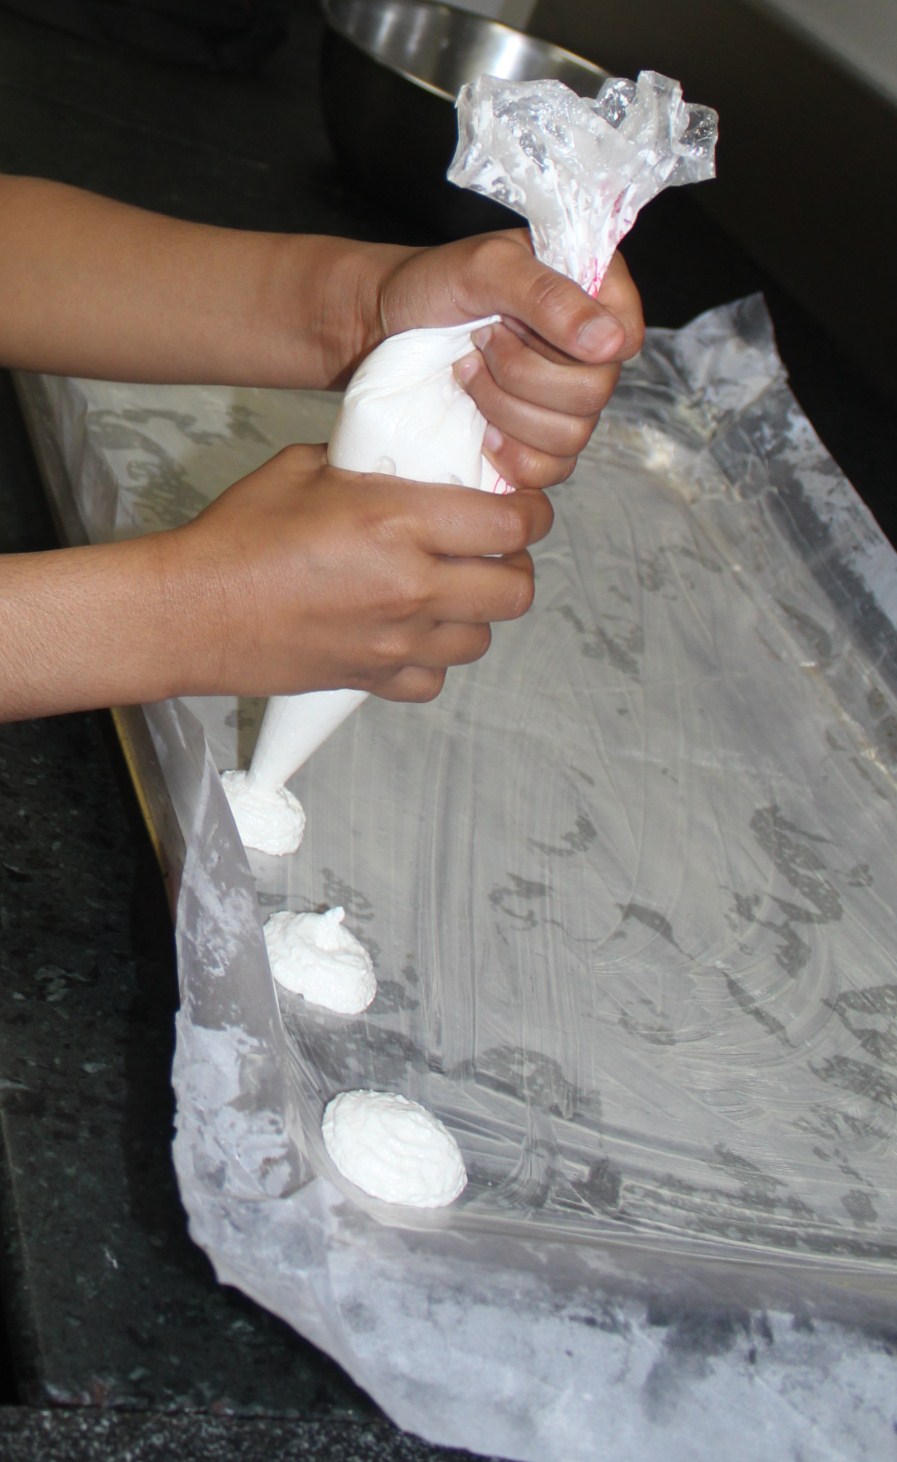
4. Batter is ready and is stuffed into piping cones-
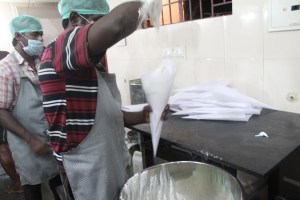
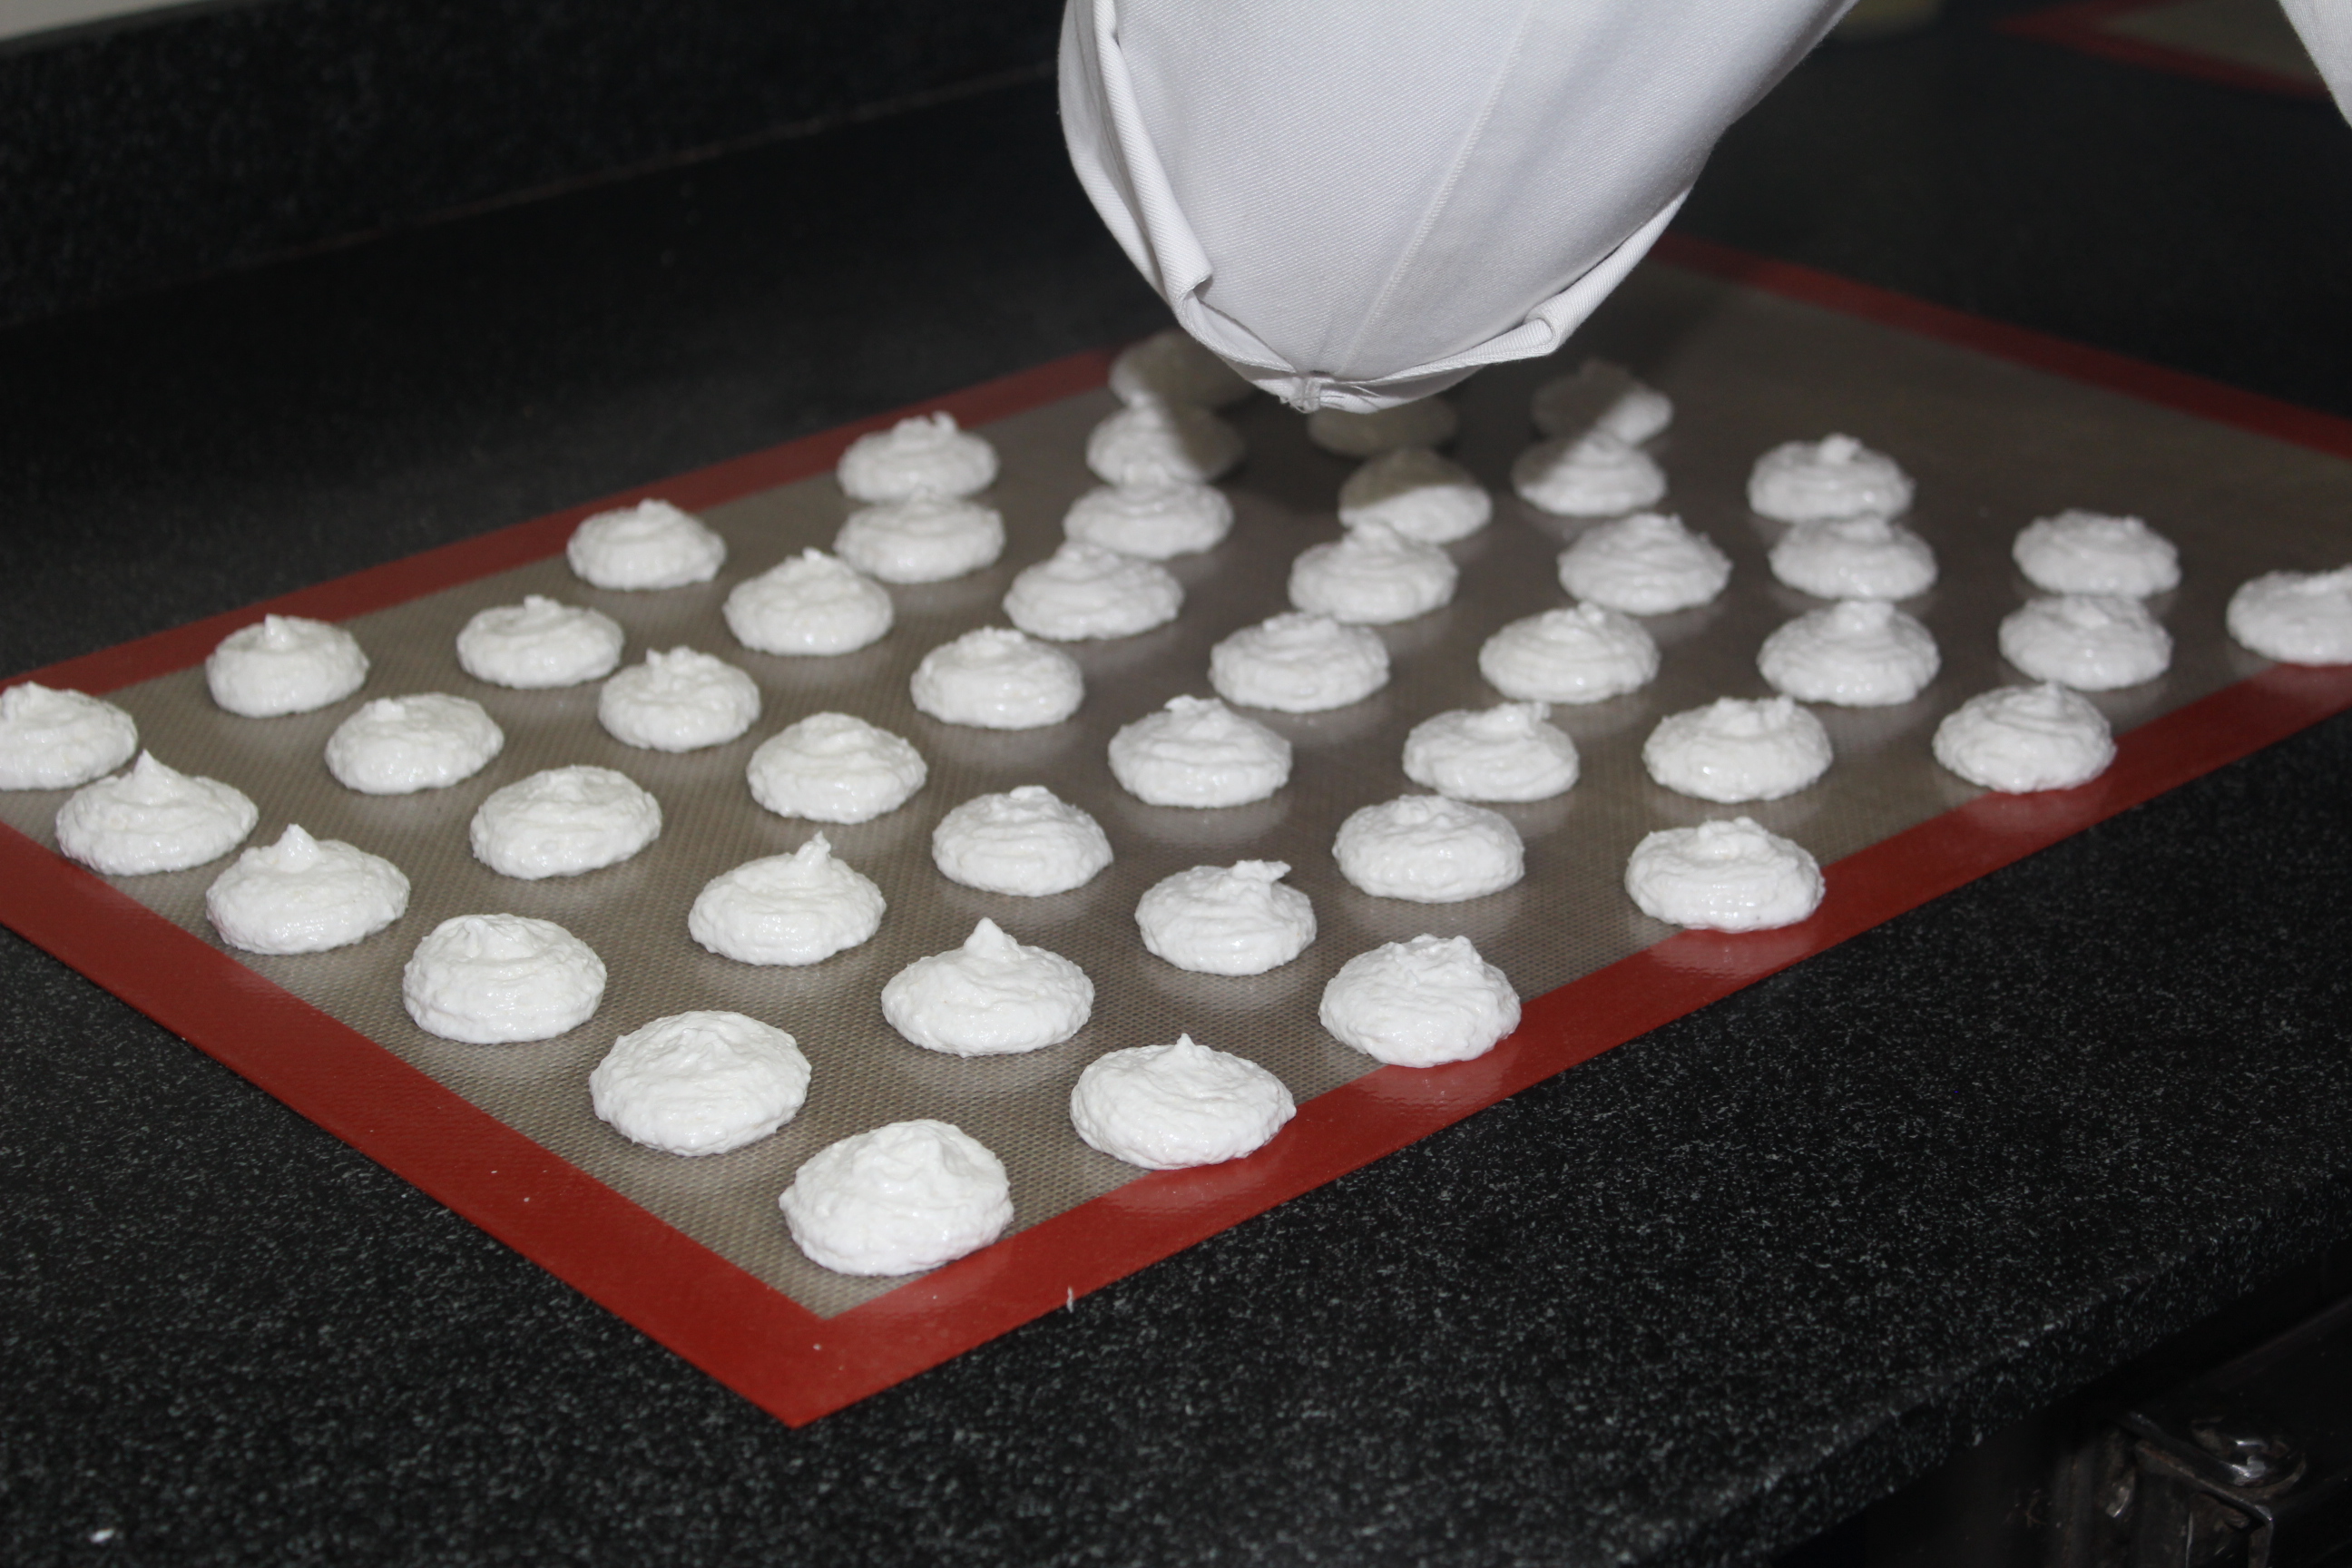
5. These are the strong hands that make the beautiful conical delicacy..
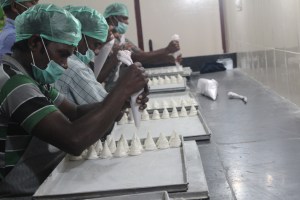
with great speed…

and greater accuracy and consistency….
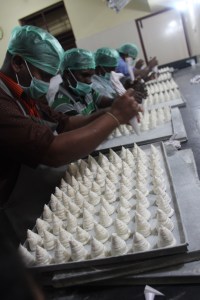
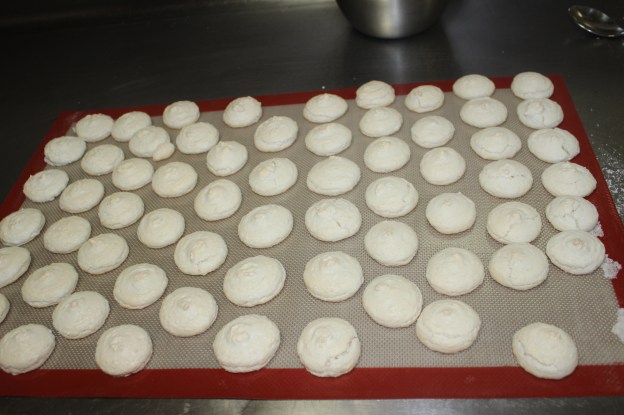
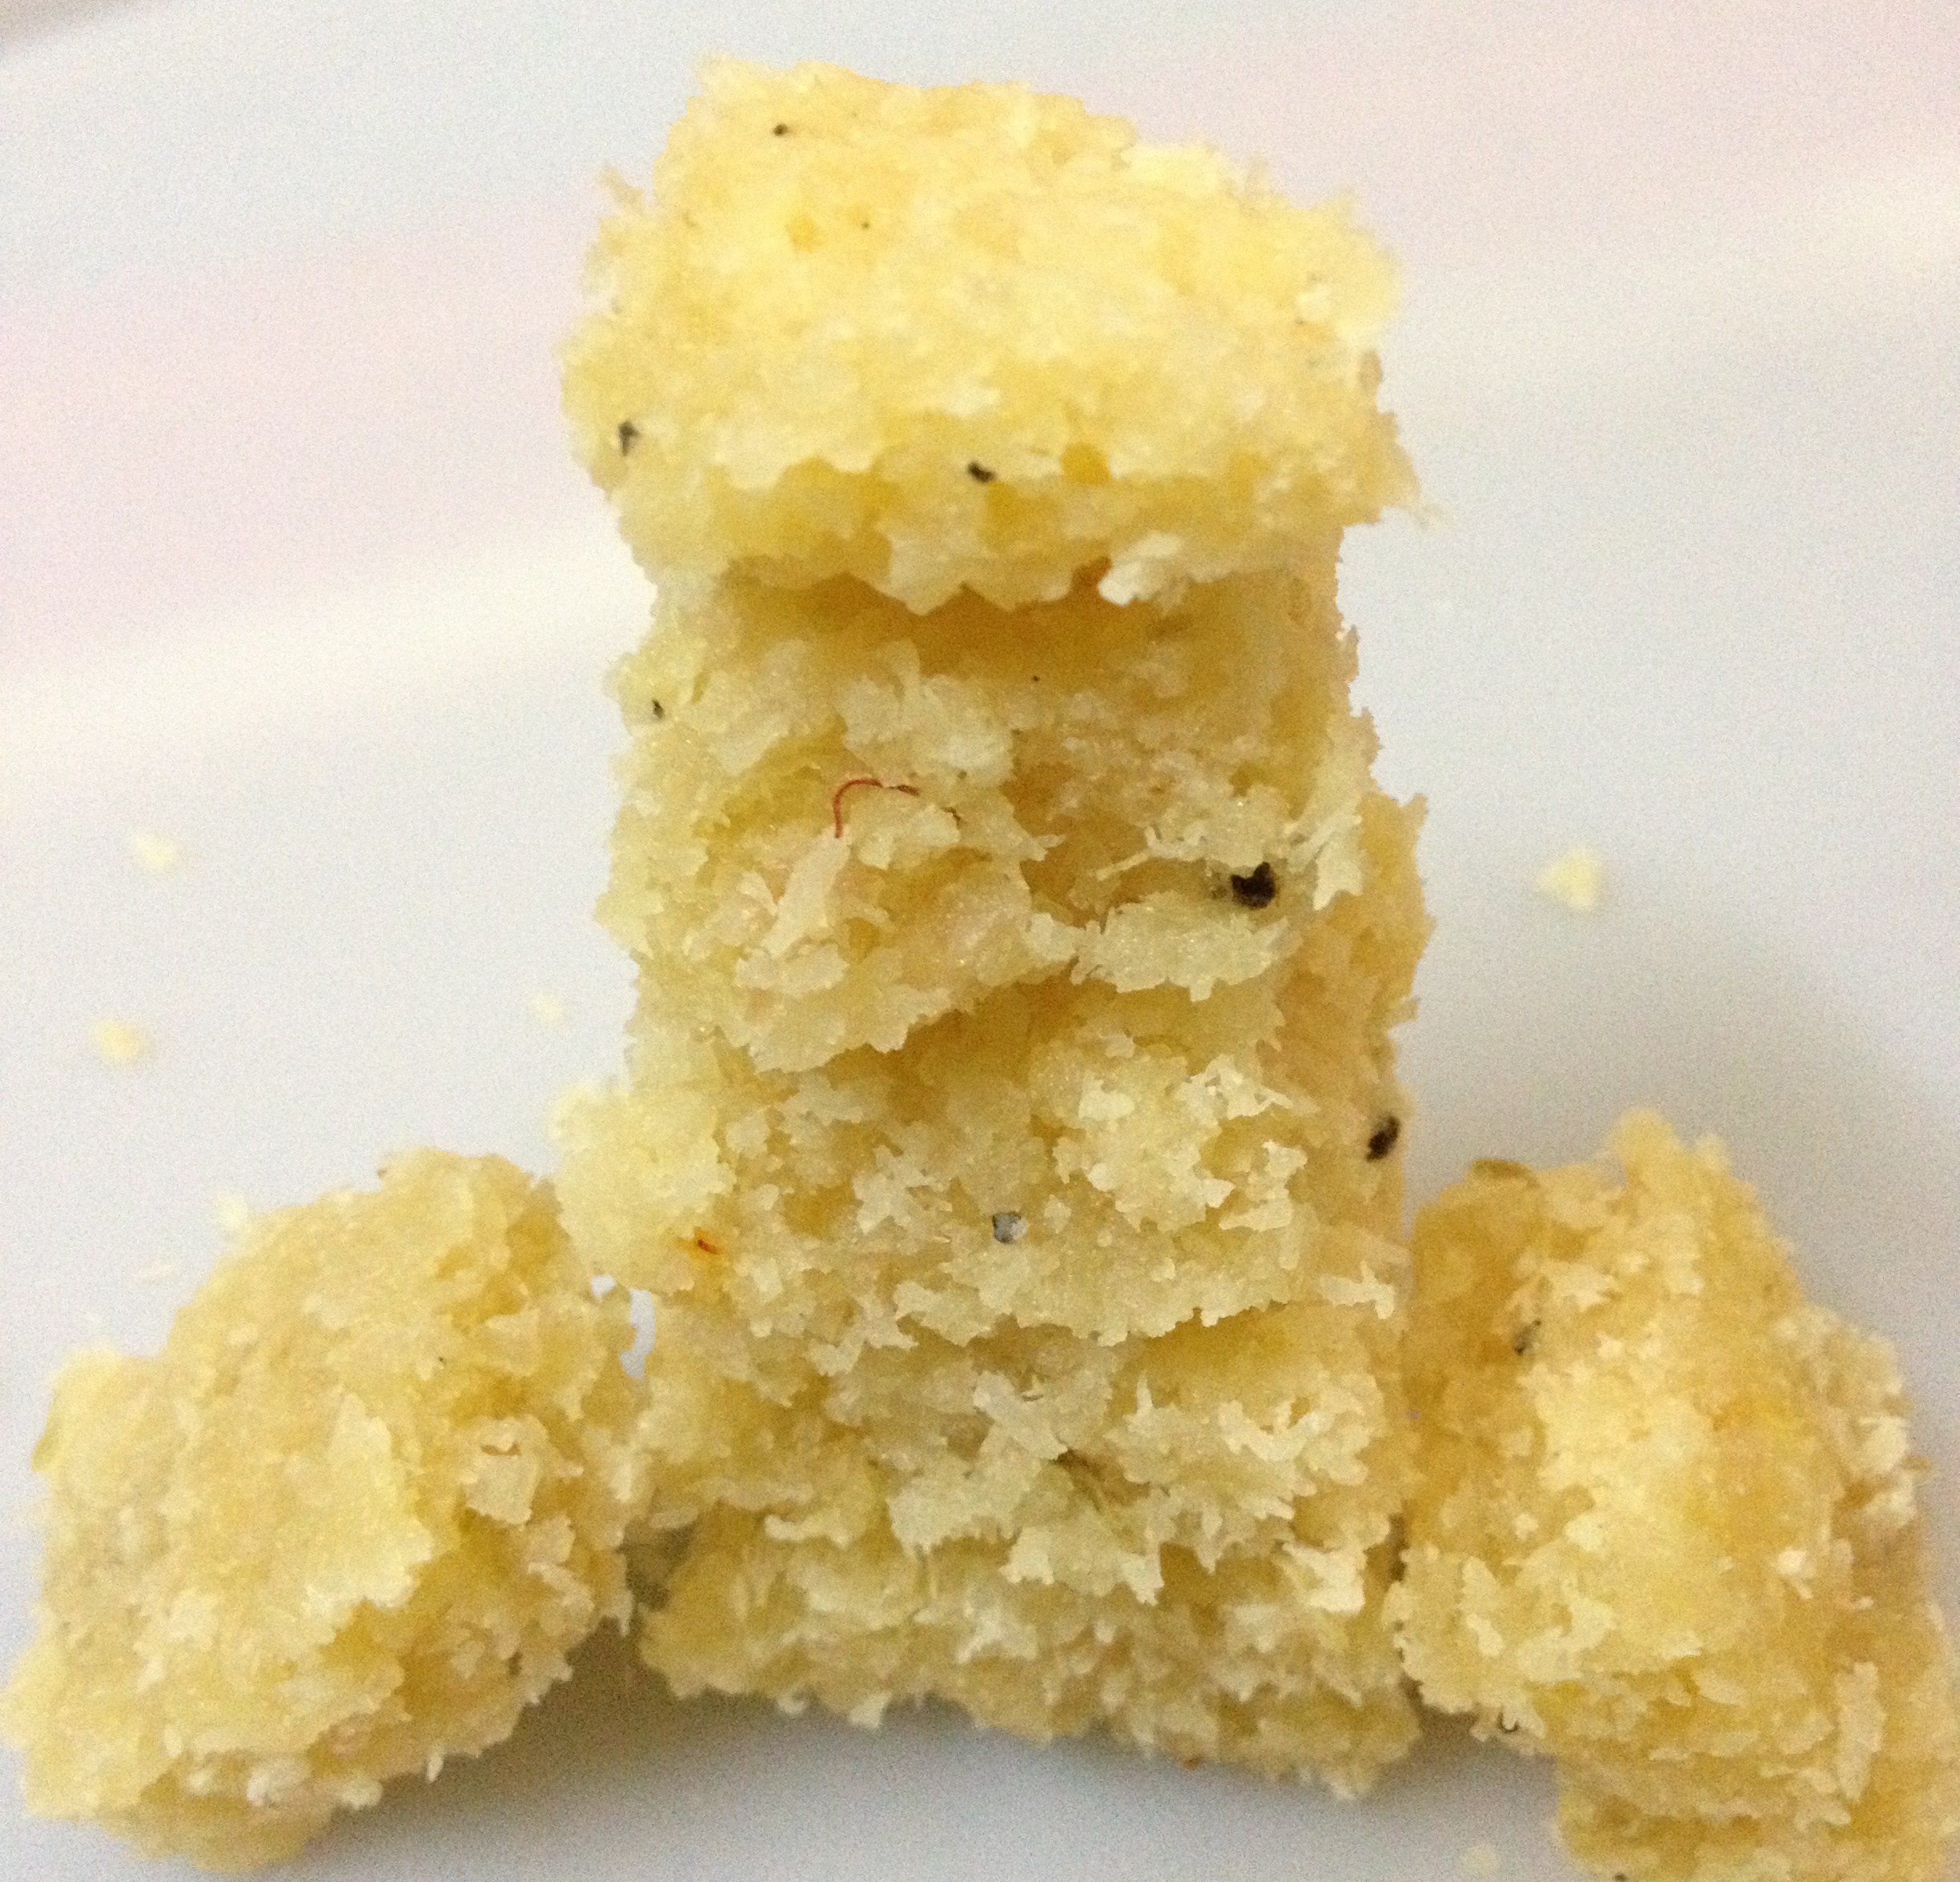
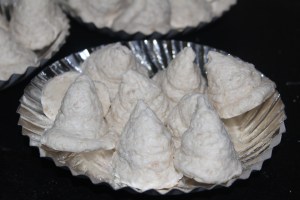
6. Macaroons are ready to be baked…
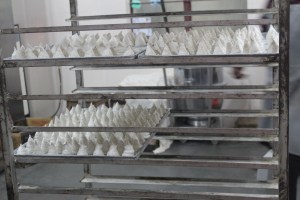
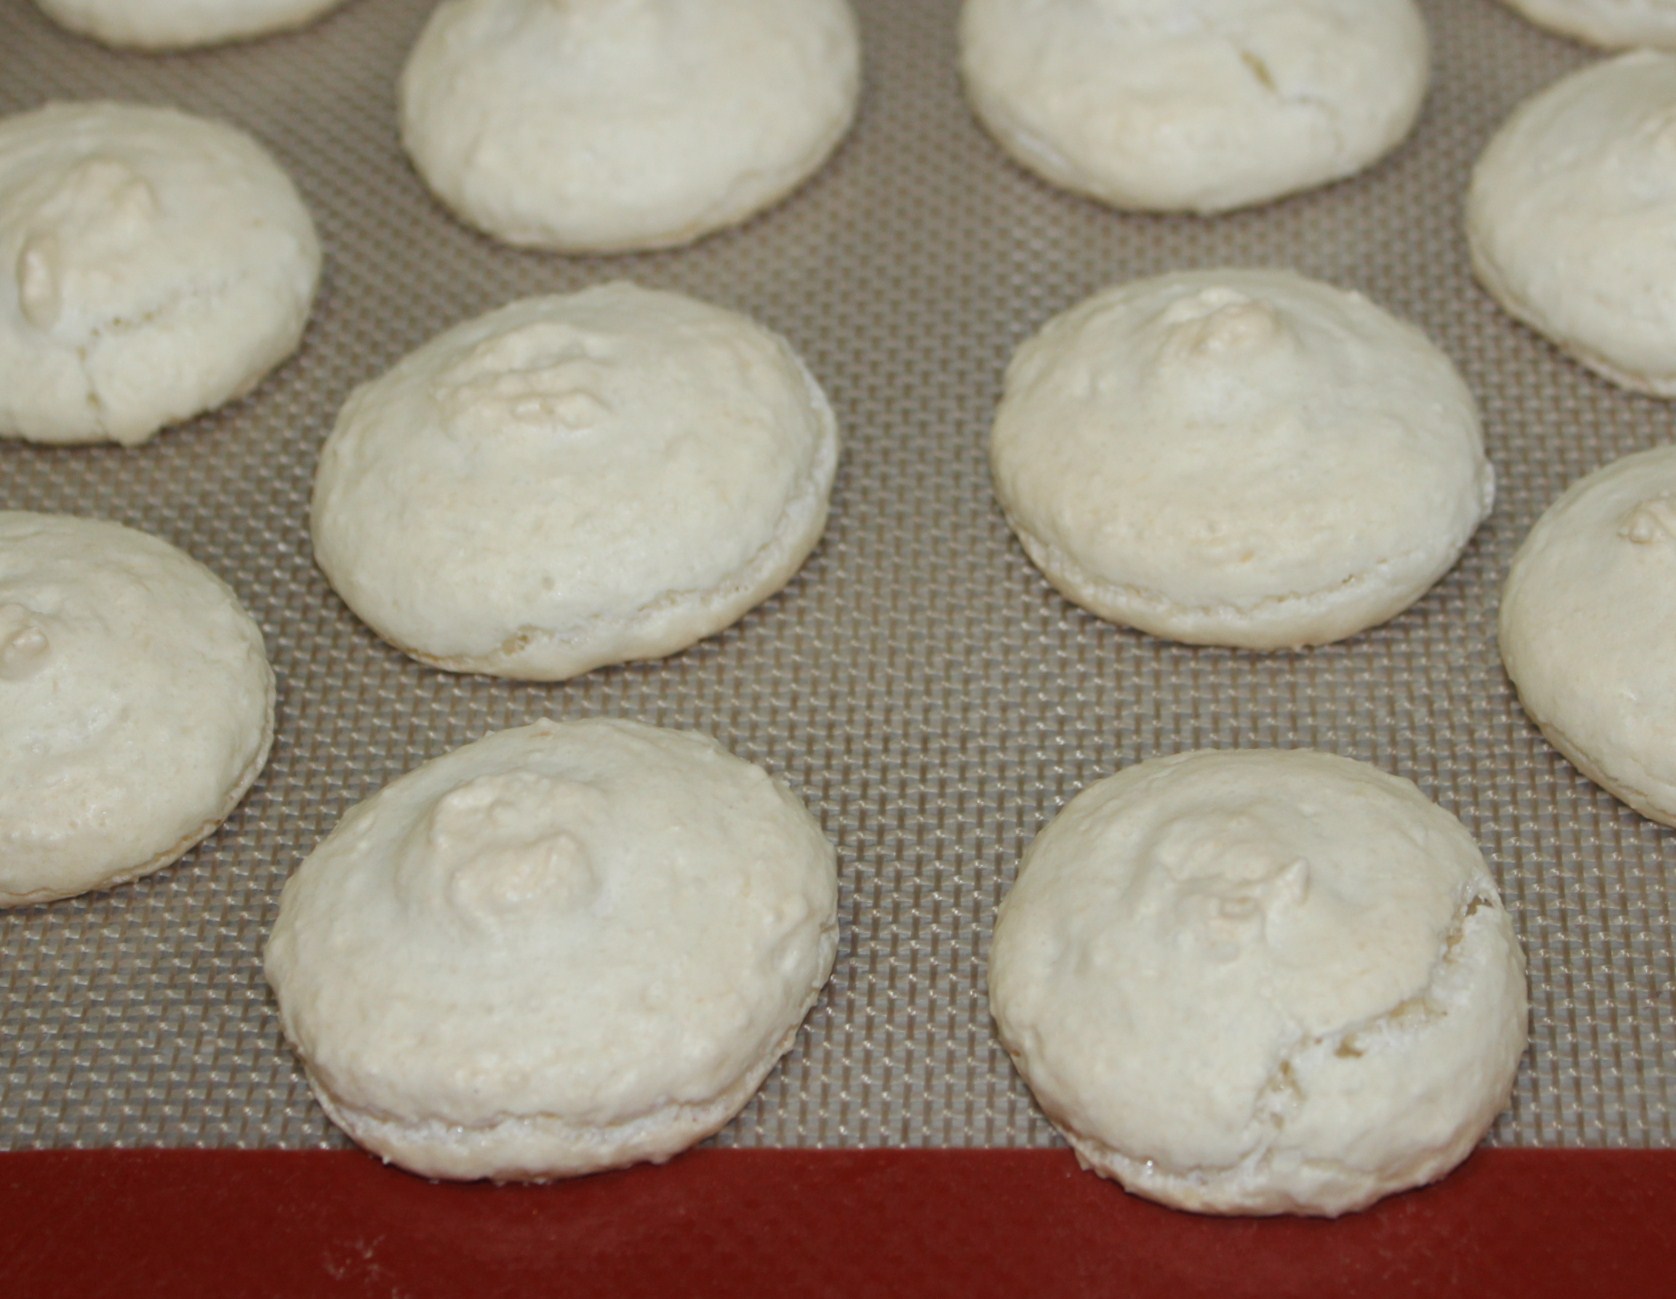
7. Finally baked right to be tasted.
The Colonial Remainder in Thotthukudi Macaroon Biscuit is a true delight for the sweet toothed. The beauty of the elegantly shaped Macaroon could easily be one of its kind in the Indian Baker’s Wish List. Not known to many in many other parts of the country, the legacy of the exclusive biscuits is carried forward only through its true connoisseurs. The original recipe still remains unchanged not only due to these connoisseurs but also due to those ignorant citizens who haven’t laid their hands in altering the taste.
I wouldn’t want my Thoothukudi Macaroons to have a twist of taste like the French Macarons, with added fillings and flavors. In this case, truly Ignorance is Bliss!