Category Archives: Non-Vegetarian

Aadu/Mutton Urundai Kuzhambu/Meat Balls (lamb) in Spicy Gravy


Mutton Kola urundai kuzhambu, Keema/Kaima urundai kuzhambu, Mutton urundai kuzhambu – all mean the same : a tasty, spicy Meat Ball Curry. I was introduced to this curry long back in a Tamil household, where native food at its best was the norm. Here, food at home was always strictly with the warmth of softest cloth idlies (idlies made in cloth) and the taste of grandmother’s stone ground curries. The efforts put in by the ‘Efficient Mother of the House’ was and is still truly impressive. So much emphasis on perfection for even the simplest of chutnies and precision in making curries used to be a fanfare while visiting their home.

One such amazing cooking experience that I could watch was that of Urundai Kuzhambu with Lamb. Urundai literally translates as ’round’ and is used for all round structures or believed to be round – including the world. Hence, Sweet Balls like Laddus are also known as Urundai and Meat Balls are also denoted by the term Urundai and more so, the Lentil Balls are Paruppu Urundai.

I rekindled the learning experience I got approximately 16 years ago and made Urundai Kuzhambu with Lamb. Whether the recipe is the same is yet to be referred.

I took these recipes as guidelines. Thanks a ton friends!

http://myerecipecorner.blogspot.in/2012/01/kola-urundai-kuzhambu.html
and
https://www.kannammacooks.com/mutton-kola-urundai-recipe/
  
Special thanks to Mrs. G for introducing me to this non-vegetarian extravaganza – due to its elaborate preparation,  especially making it in the traditional way possible (in today’s gadget world) with the stone grinder.

This is how I made it –
  

Aadu/Mutton Urundai Kuzhambu/Lamb Meat Balls in Spicy Gravy (serves 10-15 persons) – reduce according to family needs


Step I – Making the Meat Balls


Ingredients (makes appr. 35-45 urundai)


  • minced meat – 1/2 kg
  • grated coconut – 3/4 cup
  • cardamom – 4 no.s
  • cloves – 4 no.s
  • garlic – 10 cloves
  • ginger  – 2 inch piece
  • chopped onion – 1/4 cup
  • green chillies – 4 no.s
  • black pepper – 1 tsp
  • turmeric powder – 1/2 tsp
  • salt – as needed

  
Method of Preparation

  1. In a stone grinder, first grind the minced meat
  2. Next, add cardamom, cloves, ginger and garlic and let them mash well in the stone
  3. Add grated coconut and grind
  4. Then, add chopped onions and green chillies


5. Add salt and grind till smooth balls can be rolled out of the blended meat


6. Make small urundais and keep aside on plate.


Step II – Making the Kuzhambu/Curry


Ingredients
  
To saute –

  • oil – 2 tbsp
  • cinnamon stick – 1 inch
  • cardamom – 5 pods
  • cloves – 4 no.s
  • bay leaves – 2 -3 no.s
  • curry leaves – 15 leaves
  • chopped onions –  1 cup (2 big onions)
  • chopped tomato – 1/2 cup
  • slit green chillies – 2 no.s

  
Make a paste-


  • grated coconut – 1/2 cup
  • ginger – 2 inch piece
  • garlic – 8 cloves
  • fennel seeds – 2 tsp
  • black pepper – 1 tsp
  • red chilli powder – 2 tsp or more
  • coriander powder – 2 tsp
  • turmeric powder – 1/4 tsp

  
To cook-
  

  • tamarind juice – juice extracted from a lemon sized tamarind  – 1 cup


Making of Urundai Kuzhambu
  

  1. In a large, hard bottomed pan, add oil
  2. Saute bay leaves, cinnamon, cardamom, cloves and curry leaves
  3. Add chopped onions and slit green chillies and fry until golden


4. Add tomatoes and fry until soft

5. Next, add the ground paste of coconut and spices and fry well


6. Add tamarind juice to dilute the thick paste and salt to taste


7. Cook till the raw smell of spices and coconut is gone

8. Add more water if needed, as we need to let the meat balls cook and absorb more juices of the curry

9. When the curry is done and is there is enough liquid to soak the balls, gently drop the urundais one by one


10. Do not over crowd the curry – give enough breathing/cooking space


11. Close the lid, simmer the stove and let the meat balls cook in the gravy for at least half an hour

12. Check in between for enough liquid in the pan


13. Switch off once the meat balls are cooked well. Make this curry at least 4-5 hours ahead of meal time, for juicier urundais. Serve with Idli, Dosai or Rice.


Advertisement

Aattukkal Paya – Kuzhambu/ Leg of Lamb (Trotters) Curry


Aattukkal Paya or Mutton Paya has been a long awaited recipe to try. I was introduced to Aatukkal Paya when Appa was suffering from chronic pain of spondylitis. A vegetarian family where eggs were allowed once in a while in the name of health food, acclimatized itself to the smell of burnt goat’s leg – to be very blunt. A separate stove in the backyard, a separate pressure cooker and a few utensils for cooking and serving were all part of the new recipe to tackle the bone ailment of Appa. Every time ‘paya’ came home, it was a curious thing for me to see how it looked behind the goaty smell that it rendered. The burnt leg gave an additional intolerable smell while getting cooked….but all was tolerable in the name of spondylitis.

Our helper ‘N’ single handedly introduced all of us to the exclusive Paya. Awestruck, wide eyed and amused, me and Amma would watch her clean, wash and smash before dropping the stuff into the cooker. The done soup would enter the house through the back doors and then into appa’s tummy. But by the time appa would gulp it down, ‘N’ would clean the backyard with disinfectants and other necessary cleansers. Show over and the theatre would return next week.

The done Aatukkal Soup or Paya soup was a beautiful one. It was truly a surprise how the smelly bone turned out to be a glowing aromatic soup with just the simplest of ingredients like ginger, pepper and salt. Generally, vegetarian Tamilnadu foods don’t glow so much like their non-vegetarian counterparts. Poriyal (dry vegetable curries), kootu (vegetables cooked in lentils) or sambar .. the day to day curries are certainly less oily. The other kuzhambus like the Vatral Kuzhambu or Puli Kuzhambu (tamarind based curries) are made more flavourful, if needed, with hot gingelly oil (cold pressed sesame seed oil) poured on top. Hence this wide eyed surprise for a food product which delivered so much of glow. Less did I know then that animal protein has more fat to cook itself without addition of extra oil.

But Paya is a different and exclusive one that provides healthy fat that is loaded with nutrients and helps avoid degeneration of bones and cartilage.


Cartilage found in animal joint areas such as chicken feet, beef or lamb knuckles, trachea and ribs, hooves and skin, tend to yield the most nutritious broth. It contains cartilage (gelatine), bone marrow, amino acids and minerals. The end ingredient is a broth that contains all the valuable nutrients that are found in animal bones.

Bone broth promotes strength and nourishes, specially in times of sickness, injury, rehabilitation, and helps to prevent bone and connective tissue disorders.
Bone broth contains a high quantity of calcium, phosphorous, magnesium, sulfur, fluoride, sodium and potassium. These minerals can promote not only bone health but also support intestinal healing, help in calcium- or- magnesium-deficiency-related insomnia, irritability, fatigue and anxiety.
http://indianexpress.com/article/india/india-others/drink-bone-broth-to-rejuvinate-the-sick-heal-injuries/


When I knew nothing of cooking and was used to chatting with Amma and aachi while they were cooking, this was a great introduction to non-vegetarian stuff. But what remained well embarked in my mind was the fact that, that particular glowing soup was providing enough lubrication to the joints and was helping in easy recuperation of bone ailments.

Life is a great tutor. It shows you various things at various stages of your life….. that you may make use at perfect situations. It introduces you to very many things you might need to adapt at very many junctions… Now, adaptation is the key to a happy life. It’s true and I’ve experienced it.

Athai, my mom-in-law always remembers and narrates her childhood memories of Aattukkal Paya. In certain pockets of Tamilnadu, Dosai and Paya are quintessential Diwali breakfast foods. She tells me how Paya would be slow cooked on a wood-burning stove in her house in a big vessel..  Almost everyone contributes to the cooking process of Paya,  by stirring off and on, on the day before Diwali. After extensive cleaning, cutting and chopping of garlic, ginger and onion necessary for the curry, cooking begins by experienced elders of the household. With all siblings waiting to taste, Paya is ready to eat only the next morning. The aroma of Paya getting cooked in wooden based stove would fill the house, making the wait irresistible.

The Paya would be done by night and left on the stove, with firewood in sim throughout the night. The goats’ leg absorbs all the flavour of the spices and coconut milk while resting on the stove whole night. The next morning, when the world wakes up for sweets and celebrations of Diwali, soft Dosais are prepared. The wait is over and everyone gets the share of sumptuous Paya with Dosai.

This story from Athai that is always part of her childhood memories, and narrated several times to me, has acted as a catalyst in cultivating a special interest in Aatukkal Paya for a new comer to non-vegetarian cuisine, as a new daughter-in-law many years ago.

After the first Paya episode in childhood, almost 25 years ago, Paya holds a special place in my kitchen and in the freezer. I sit back with some statistics… Started Cooking non-vegetarian food 16 years ago, became non-vegetarian by chance and choice 10 years ago, started blogging 6 years ago, now I present Aattukkal Paya Curry (not soup that Appa (father) had but what Athai (mother-in-law had) that I think is truly a delicacy… Not because of my culinary skills, but because of the natural fatty agents stuffed inside the cartilage of the goat or sheep, and the exotic flavour of coconut milk in which the Paya is cooked. Truly, the combination is deadly.

To get a better idea of making Paya Curry or Lamb Trotter Curry, I got great tips and methods from these two bloggers:

Thanks so much guys. My work was made easy because of your posts.

Check out these posts and one gets a comprehensive idea of Paya, it’s usage, health benefits and above all two great curries.

http://www.kothiyavunu.com/2013/02/mutton-paya-aatukal-paya-goat-trotters.html

http://www.swapnaskitchen.com/2015/05/04/attukal-kulambu-paya/

I adapted the basic Paya making from these two curries and thought trotters initially cooked in thinner coconut milk would render better flavour as in my Tirunelveli Sodhi, where vegetables are cooked in the third or thinnest diluted coconut milk to render the coconut aroma throughout the dish. The double cooking of the trotters would somewhat compensate for the lack of slow cooking.
  

Recipe Aatukkal Paya Curry/Leg of Lamb (Trotter) Curry


Ingredients (serves 2-3)

  • Any cooking oil – 2 tsp
  • Aatukkal – 1/2 kg appr.
  • turmeric powder – 1/4 tsp
  • salt – to taste

  
Finely clean, burnt Lamb trotters with absolutely no hair. I always immerse the Paya in turmeric-salt water for at least 30 minutes to disinfect.

Dry whole spices


  • Cardamom – 5 no.s
  • Cloves – 5 no.s
  • Cinnamon stick – 2-3 pieces
  • Bay leaves- 2 no.s

  
Dry Grind together


  • red chilly-  5 no.s
  • cumin seeds – 2 tsp
  • coriander seeds- 2 tsp
  • fennel seeds-  1 tsp
  • black pepper- 1 tsp

  
To sauté


  • Ginger- 2 inch piece
  • Garlic- 10 cloves
  • Onions – 2 no.s finely chopped
  • Green chillies – 3 no.s slit
  • Curry leaves – a few
  • Tomato – 2 no.s finely chopped


Extract


Milk from 1 fresh coconut – divided into two parts:
a. Thick first milk reserved for second time cooking trotters
b. Thinner second milk used for the first stage cooking with spices
Or
Store bought coconut milk (500ml) – 1 can divided into two parts:
a. Half can thick milk reserved for second time cooking
b. Other half can mixed with water used for the first stage cooking with spices
  
Method of Preparation
 
Getting ready

  1. Clean the well-burnt trotters and immerse in turmeric-salt water for at least 30 minutes.
  2. If using fresh coconut, keep aside the thick milk taken from the first squeeze; and grind the coconut again with more water to get thinner milk. Strain both milks in a strainer with thin pores as we need clear milk. Keep them ready.
  3. Finely grind ginger and garlic.
  4. Finely chop onions and tomatoes and slit green chillies.
  5. Dry grind the above mentioned spices in a blender.


Cooking first time with thin milk


  1. In a pressure cooker, add oil and all dry whole spices and sauté.
  2. Add the slit green chillies, chopped onions and tomatoes one after another and fry. Need not wait for them to turn golden brown. Minimal sautéing is enough.
  3. Now, add the perfectly washed trotters and fry .
  4. Add the ginger-garlic paste and fry.
  5. Add the dry ground spices and mix well.
  6. Add turmeric powder and salt.
  7. Mix the thinner milk (appr. 2 cups); To avoid curry getting burnt- add more water if needed for the trotters to hold pressure in the cooker for at least half an hour, and pressure cook; After the first whistle, I reduced the burner and cooked for 20 minutes.


cooked once


Cooking second time with thicker milk


  1. Let the pressure release by itself, then open the cooker. The trotter curry would be almost done and would taste good if the Paya is cooked well. But we are not finished… The curry hasn’t reached its perfect consistency.
  2. Open the cooker, check salt and spices. This is the time one can add chillies or salt if needed. Add as per required.
  3. Heat the curry on hot stove again. Add the reserved thick milk and stir well. There shouldn’t be any need for water, unless the gravy is seriously thick.
  4. Close the lid and pressure cook again. I reduced flame to sim after the first whistle and cooked for 15 more minutes for the curry to absorb the flavour of coconut milk and spices.
  5. Once pressure releases fully, open and serve. Aattukkal Paya can be served with idli, dosai or appam.


Mutton Vathakkal/Spicy Stir fried Mutton

Let’s complete the Simple Sunday Meal of Mutton Biriyani (refer –  home-cook’s-pressure-cooker-mutton-biriyani ) with Mutton Fry. Having given balance to Biriyani with Salna (refer – kathirikkai-salna-brinjal-salna )– a veggie gravy/stew in the previous post, its time for Aadu Vadhakkal – spicy mutton stir fry.


img_6848


Mutton fry – That’s not the best of pictures, I know. Shall update it shortly. Yet, no compromise in taste.
img_6836
Aadu Vathakkal or Stir fried Mutton can be found in restaurant menus as mutton fry. It’s a spicy dry curry. And as a well known fact, the culinary secrets of Indian Cuisine differs with each family.  With the basic preparations intact, modify the fry as per your taste and spice preference. With the addition of tomatoes, this might become a gravy dish.

Since I decided to make Mutton Varuval, along with biriyani, I put in the mutton pieces for both biriyani and spicy fry in the pressure cooker for initial cooking. This reduces the time in cooking mutton separately. After a kilo of mutton is cooked in the first stage, separate boneless chunks (app. 250 gms) for Vathakkal. Keep the bigger portion for Biriyani.

Otherwise, to make a separate mutton fry, pressure cook mutton pieces with water, salt and ginger for 30-40 mins. or until done. Enjoy the broth as soup with crushed pepper. Take the pieces for the vadhakkal/fry. Easy isn’t it?


Ingredients

  • mutton – 250 gms
  • garlic – 12 cloves crushed coarsely
  • onions – 2 no.s sliced fine
  • salt – to taste
  • juice of ½ lemon
  • oil – 2 tbsp
  • red chilli powder – 1 tsp
  • coriander powder – ½ tsp
  • black/white pepper powder – 1 tsp
  • turmeric powder – ¼ tsp


Method of Preparation

  1. Cook mutton in water, with salt and ginger for 30-40 minutes or until cooked well.
  2. Strain the cooked broth and consume as soup.
  3. Use cooked mutton pieces for the fry.
  4. In a pan, heat oil and fry the crushed garlic.
  5. Add sliced onions and sauté till golden brown.
  6. Add turmeric, red chilli, coriander and white pepper/black pepper powders and mix well.
  7. Add ¼ cup cooked broth and a pinch of salt. Be cautious with salt, as salt has already been added while cooking mutton pieces.
  8. Cook closed in sim flame.
  9. After the raw smell of powders is gone, open lid, keep stove medium.
  10. When almost done, keep flame in full and let the water dry.
  11. Add the juice of lemon and transfer vathakkal to a serving dish.
  12. Spicy Vathakkal is ready.

Home Cook’s Pressure Cooker Mutton Biriyani with Thayir Pachadi/Raita

img_6848


That was a simple Sunday that started with the usual home made bread for breakfast.  Sundays can turn out to be one of the laziest days, yet the best is expected to come from the kitchen.  Thankfully for me, Cooking has always been a stress buster and an energy creator. This attitude can be termed as the height of optimism by those relaxing Sunday souls, who refuse to enter kitchen on holidays.

With the same positive energy, to make that lazy Sunday a flavorful one, I chose to try a Mutton Biriyani, a favorite delicacy throughout the world, with some good mathematics to post here. Mathematics with Biriyani…. certainly not written due to stress in brain activity. But, Biriyani needs meticulous measurements to bring out that ultimate aroma and taste.

I’ve tried to be accurate with the quantity of ingredients involved in the making of Mutton Biriyani. Additionally, reducing the effort involved in the making of good Biriyani, Pressure Cooker is used for quick cooking. This is no advertisement for Pressure Cookers, but believe me… it does reduce the stress of watching the Biriyani in a Pot or Handi cook to long grainy soft perfection.
A note on the history of Biriyani in India-


Though it may appear to be a dish indigenous to India, in reality the dish originated quite far away. Biryani is derived from the Persian word Birian, which means ‘fried before cooking’ and Birinj, the Persian word for rice. While there are multiple theories about how biryani made its way to India, it is generally accepted that it originated in West Asia.

There are records of a rice dish known as Oon Soru in Tamil literature as early as the year 2 A.D. Oon Soru was said to be made of rice, ghee, meat, turmeric, coriander, pepper, and bay leaf, and was used to feed military warriors.
http://www.thebetterindia.com/60553/history-biryani-india/


Just type – ‘oon soru’ and browse the internet. Your box would be filled with websites that talk about the same above said detail, verbatim. Which website posted the basic article is unknown. The above article gives a very fine and elaborate write up on different biriyanis in India.

An elaborate research would provide different insights into the culinary secret behind the speciality rice in Tamilnadu. I’ve heard people well versed in Tamil literature, talk about ‘Oon Soru’ and the practice of cooking rice with meat among the early Tamils.

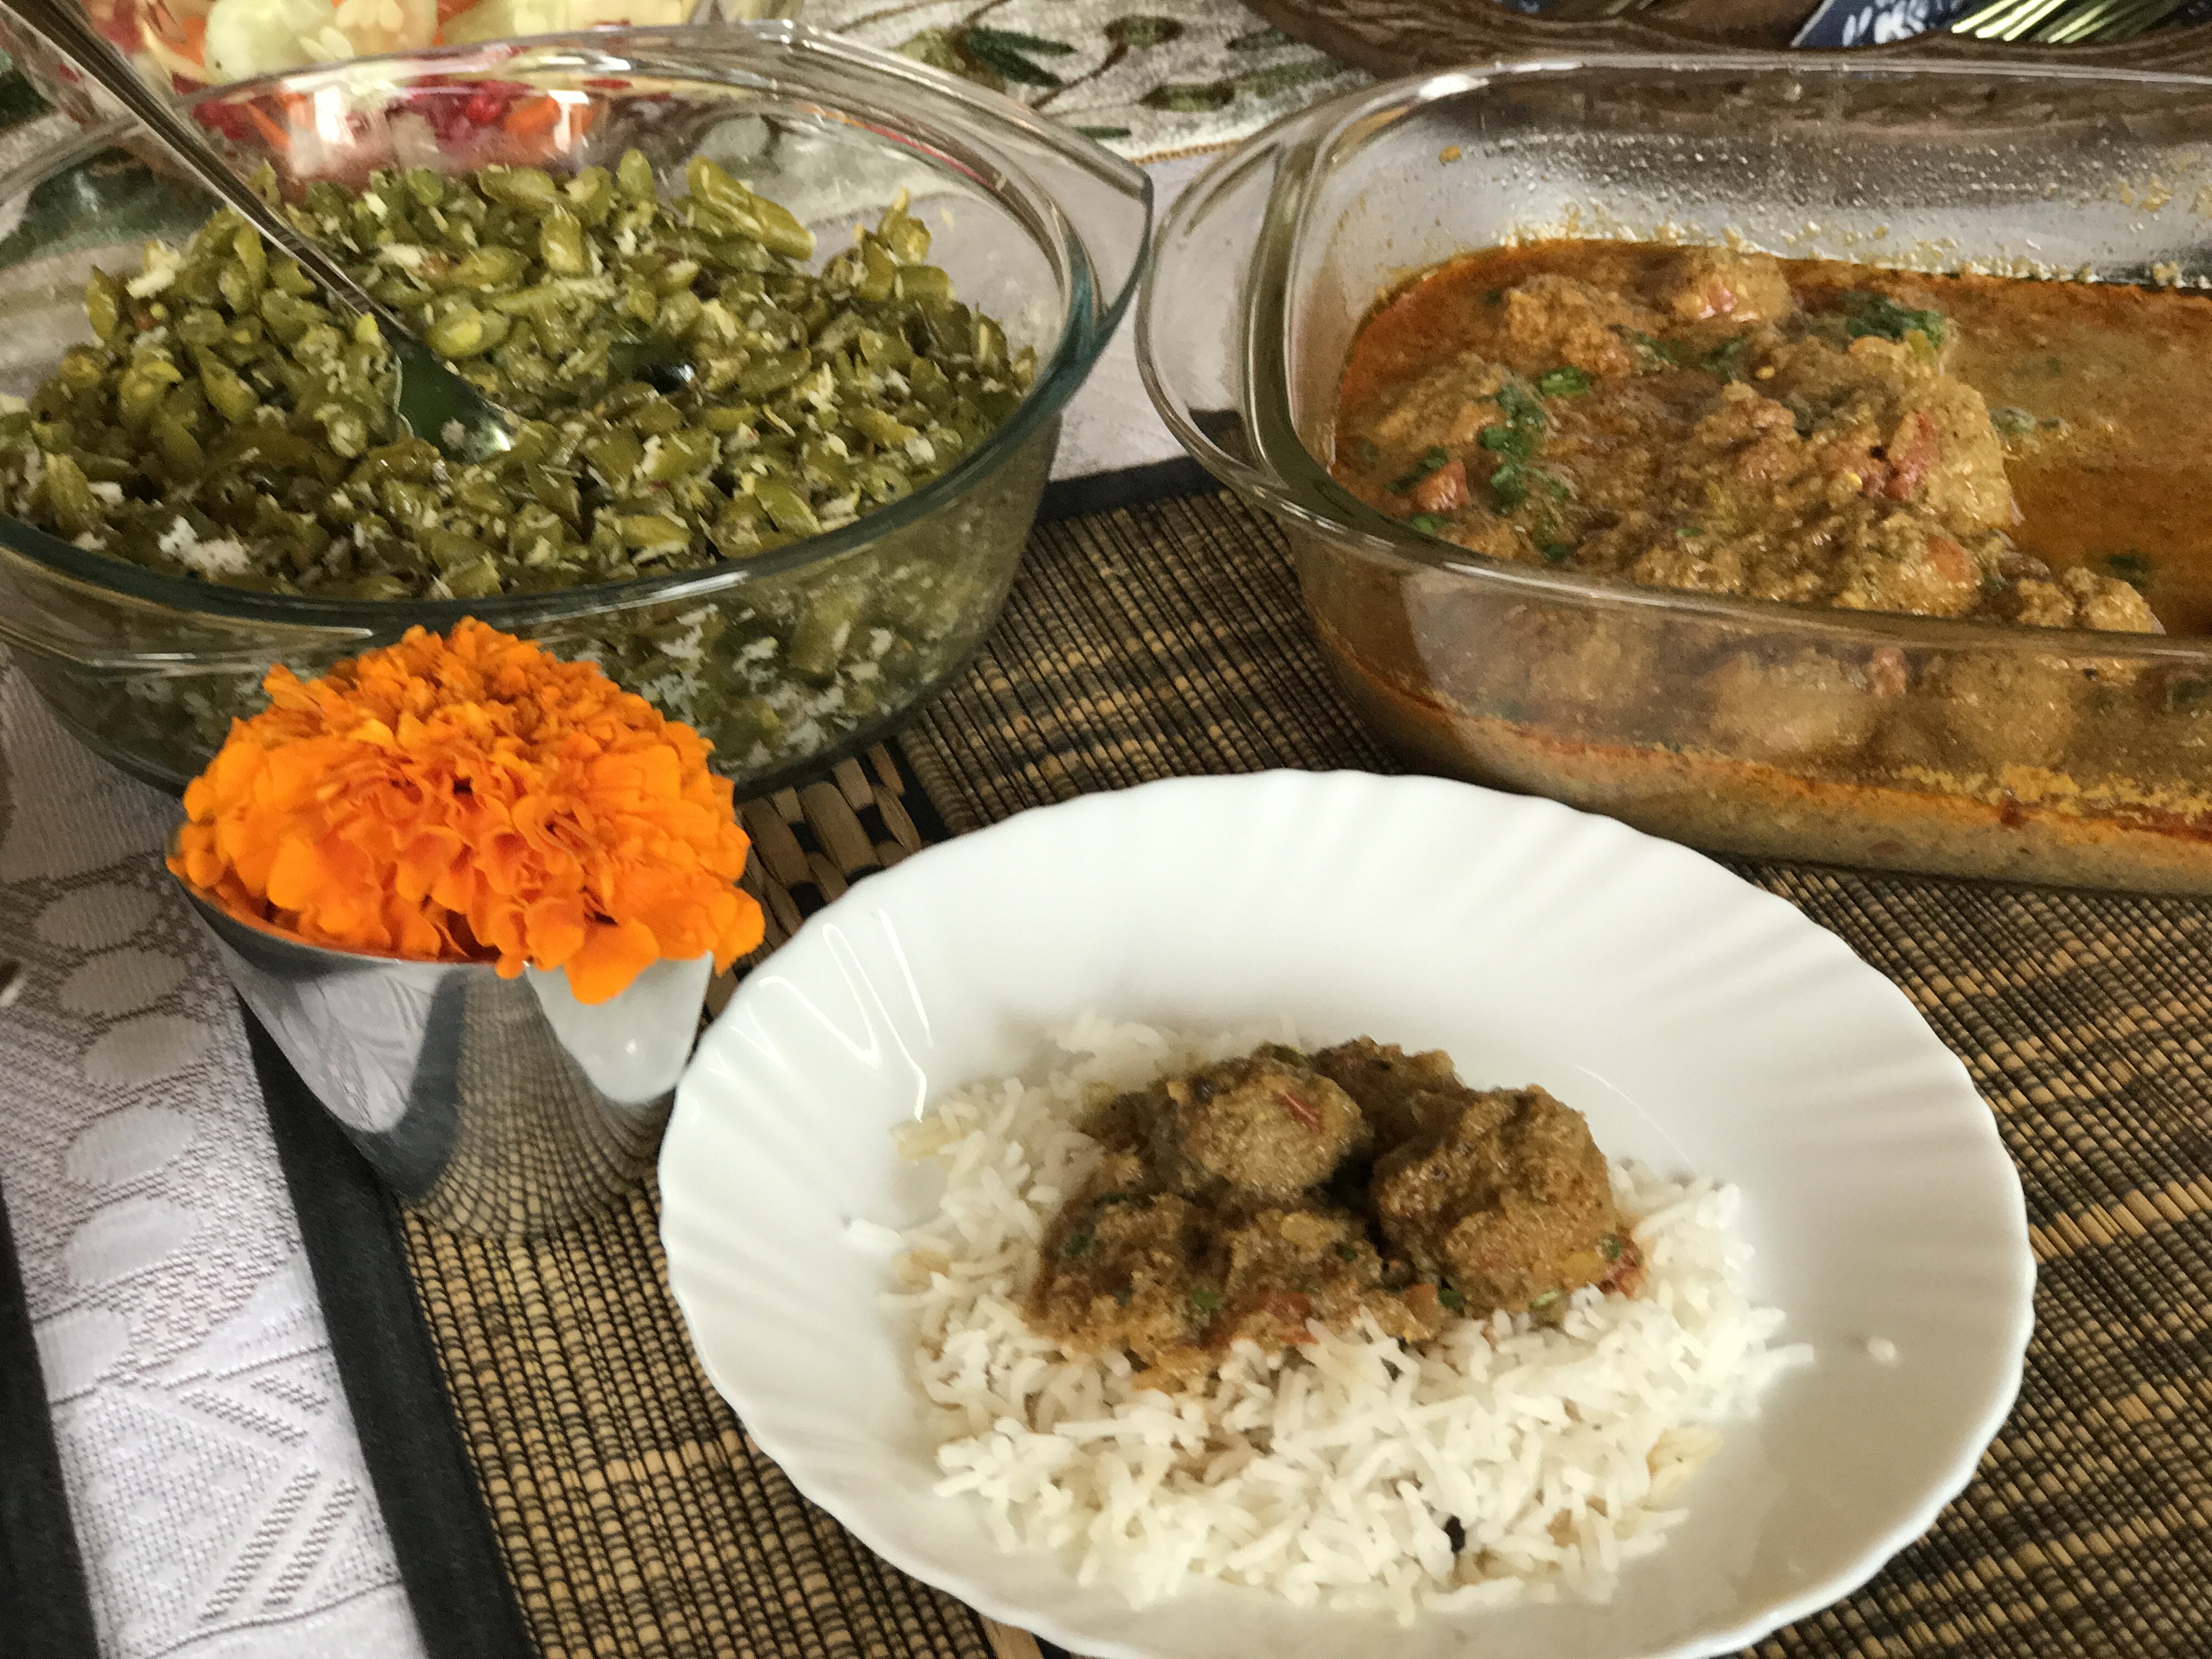
With various popular versions of Biriyanis-  Hyderabadi, Lucknowi or Old Delhi’s famous Mughal preparations, Tamilnadu has its own versions – Dindukkal Biriyani, Arcot Biriyani, Ambur Biriyani, Chettinad Biriyani and so on. There is one more variety that has no popular name, but the version is different from home to home – that’s the Home Made Biriyani, with the tasteful signature of the amateur home cook.

So, this Sunday I decided to make the Home Cook’s Mutton Biriyani – with step by step elaborate procedures for purpose of sharing here. This is a two-way process, where meat is pressure cooked initially with turmeric and salt, and then pressure cooked again together with spices and rice. This second part, makes the biriyani an easier version, where no ‘Dum’ (closed cooking in sim flame) is required and hence, is less time consuming, but no compromise in taste.
With the urge to cook Biriyani, came a list of other things that go well with the exotic Rice.

a. Thayir Pachadi – Onion and Yoghurt Raita

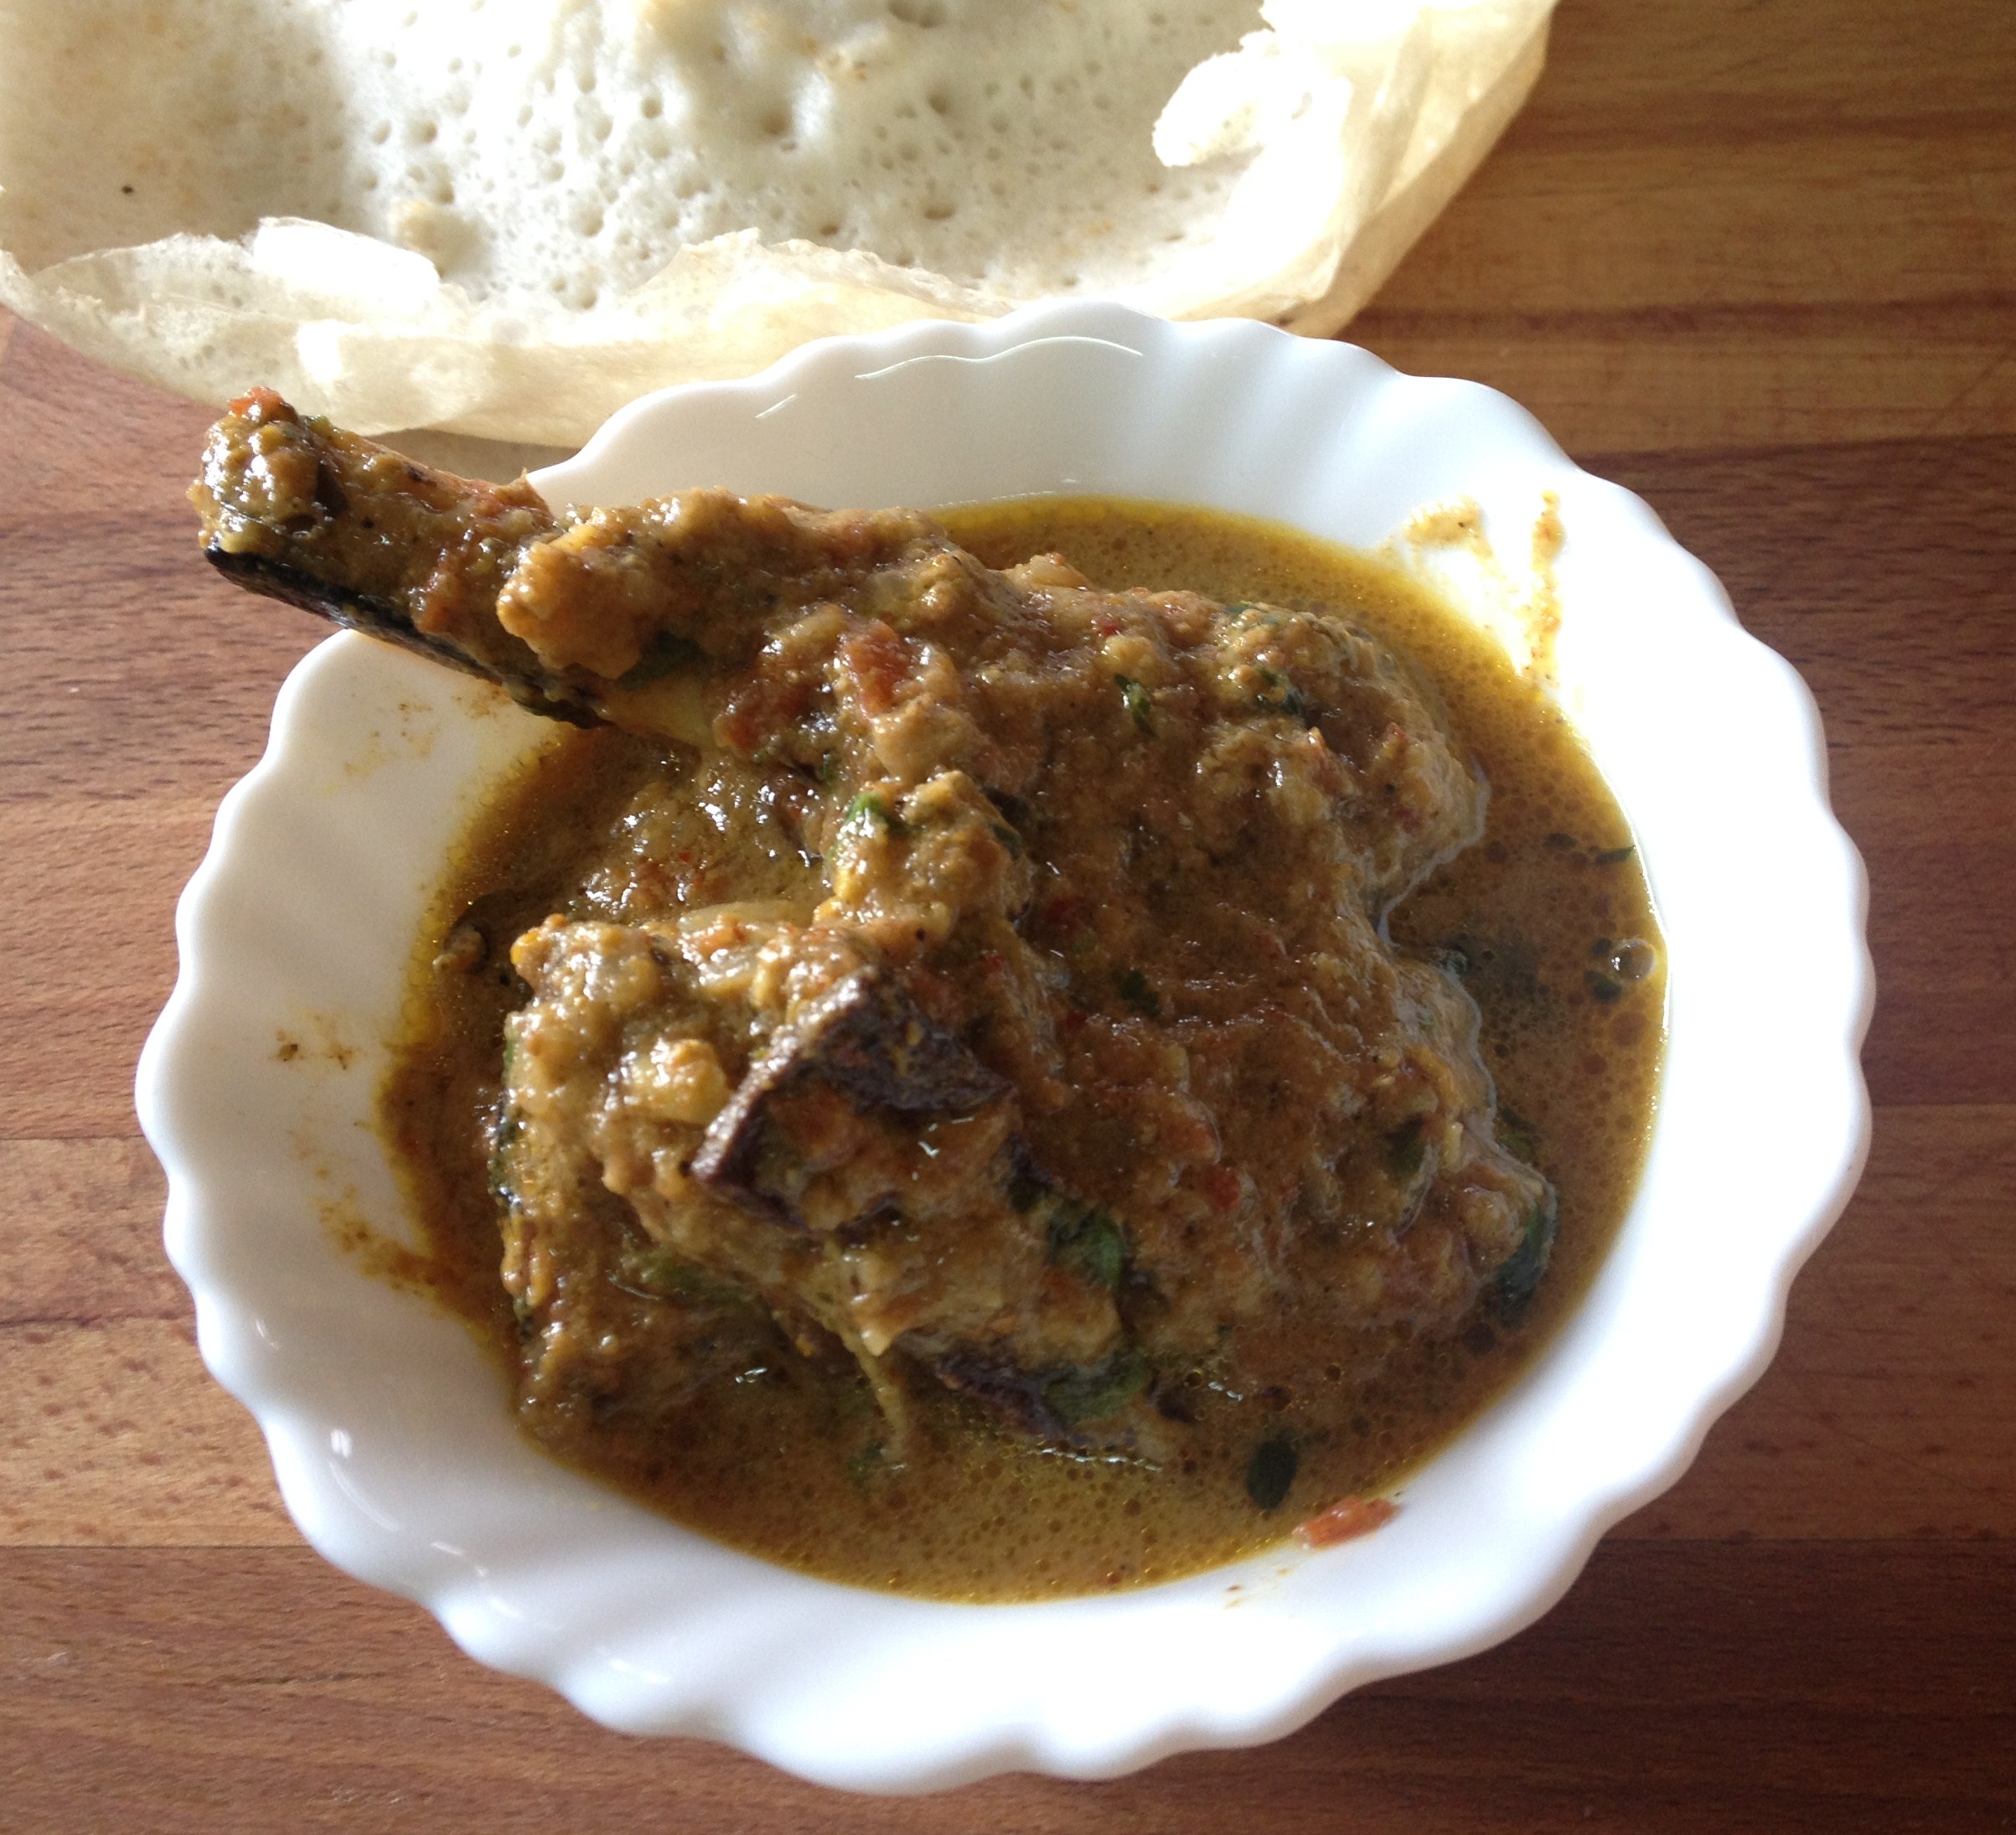
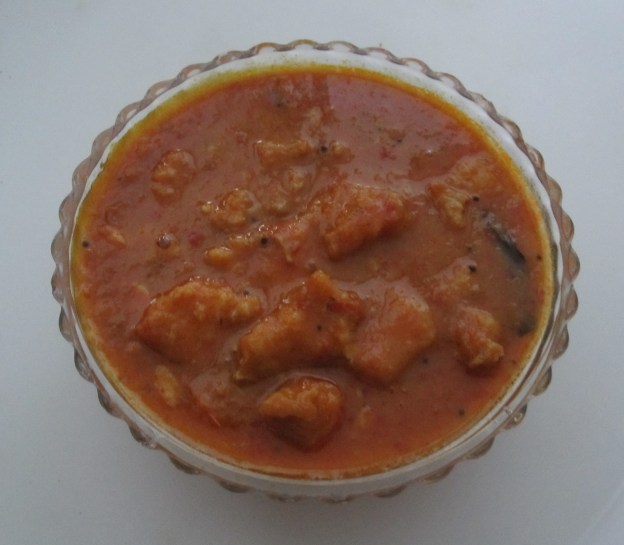
b. Kathirikkai Salna – Mildly spiced, tangy Gravy with brinjal/egg plant that is served alongside Biriyani

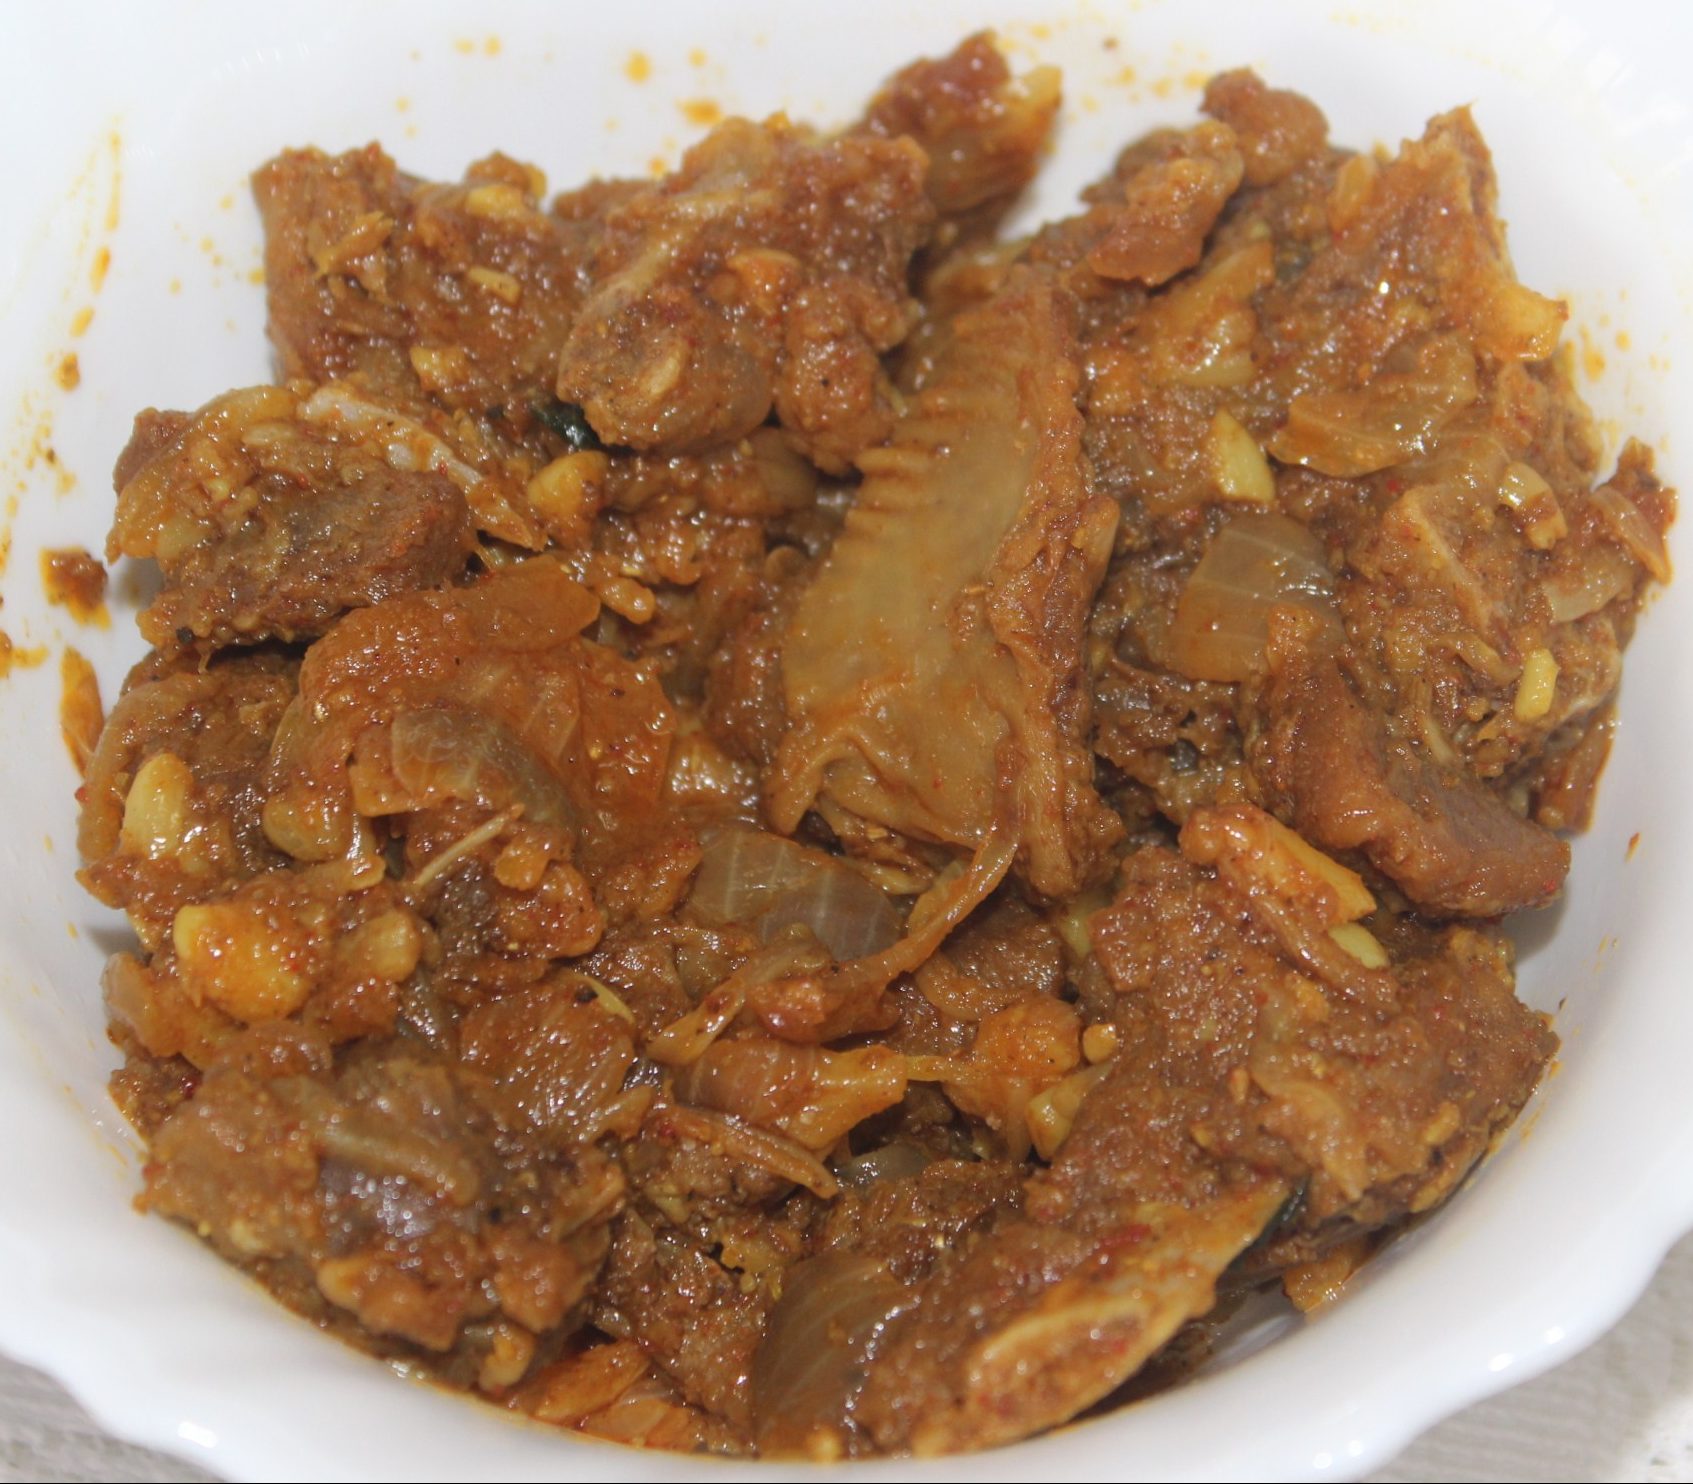
c. Mutton Vadhakkal – Spicy, Pan fried Mutton – the perfect munching companion for the succulent Biriyani

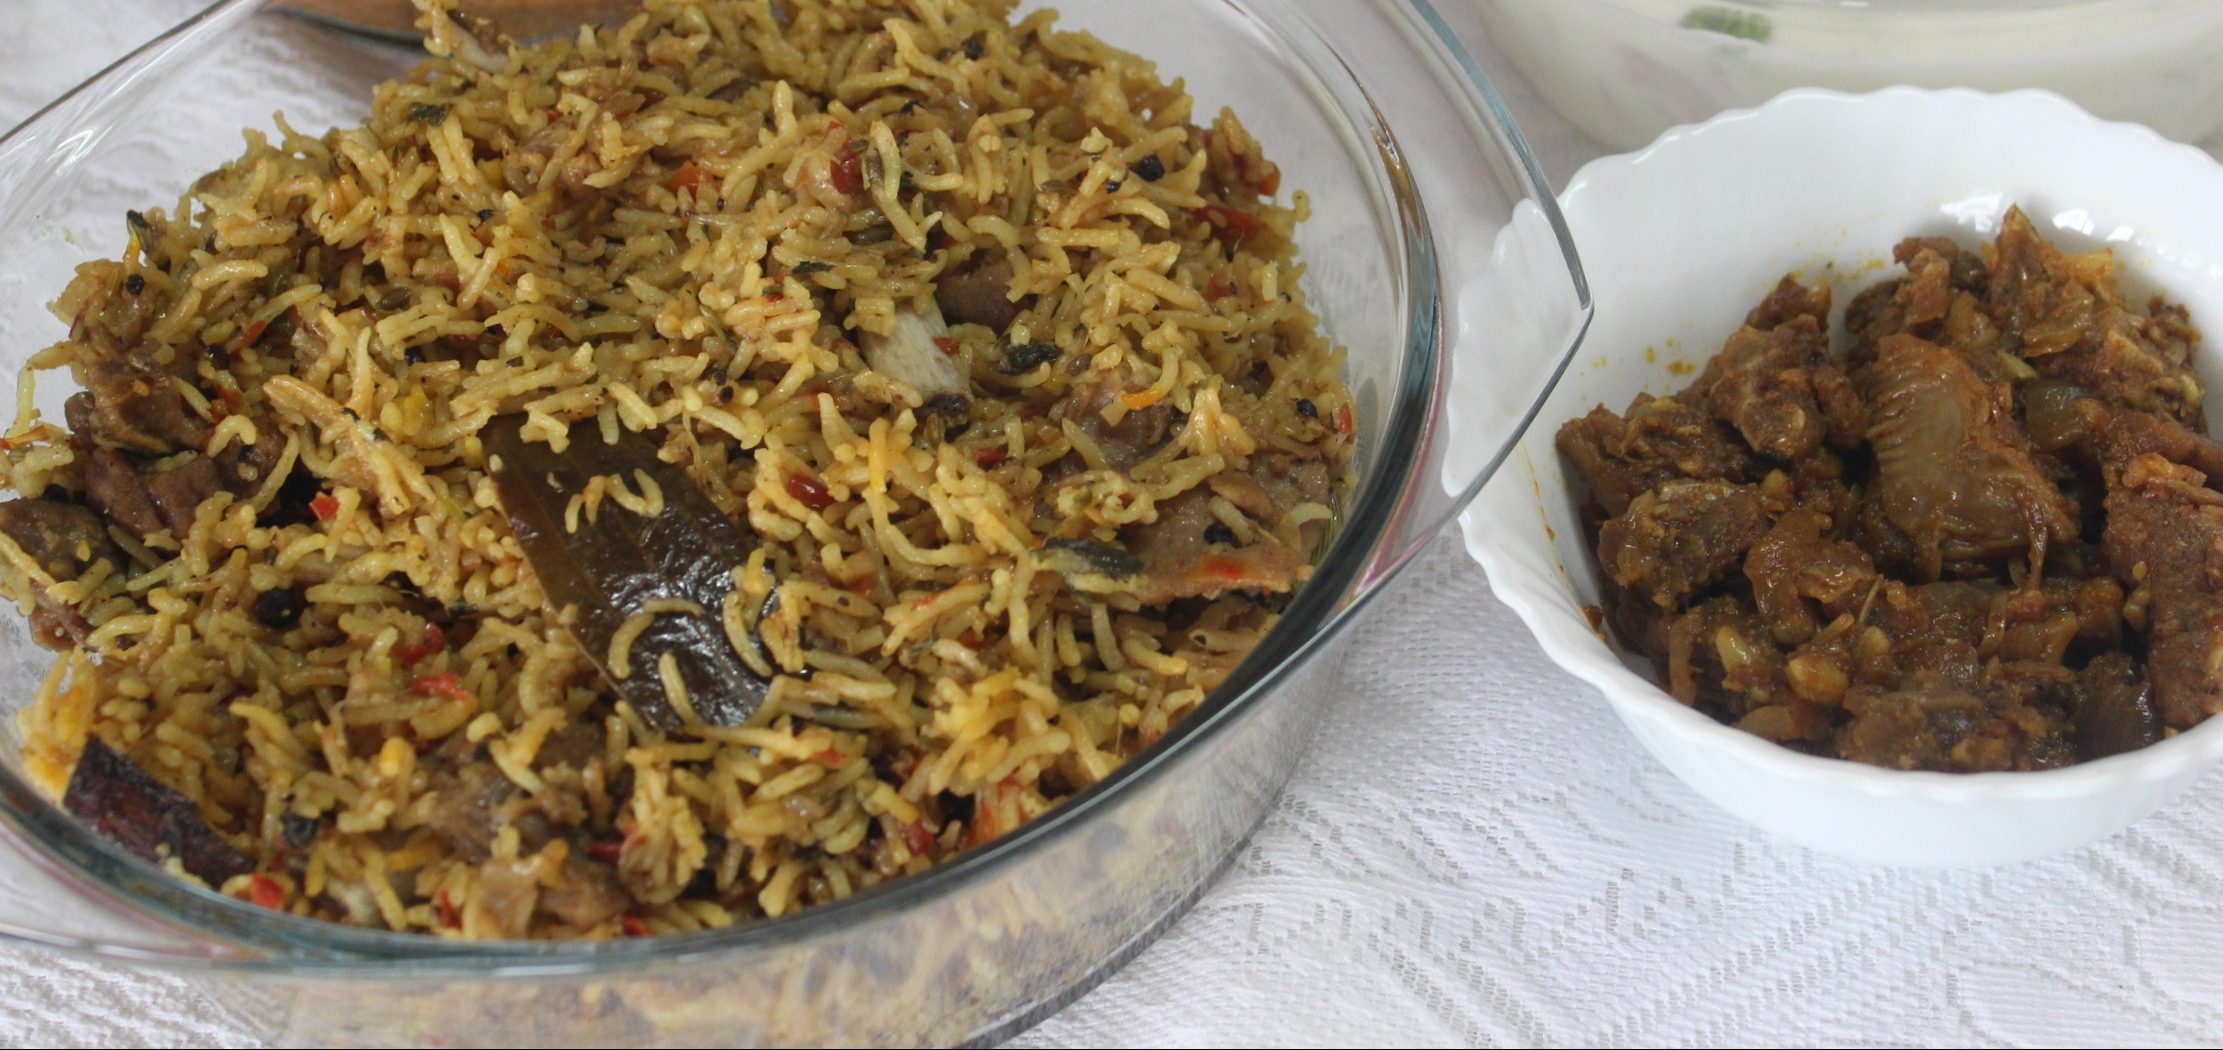
A successful Sunday with special delights calls for 2 connected posts on the lunch served. So, first – Biriyani and Pachadi, I call it the match made in kitchen, which is supposedly a cook’s heaven of culinary creations!
Home Cook’s Pressure Cooker Mutton Biriyani


img_6859


Ingredients (serves 3)


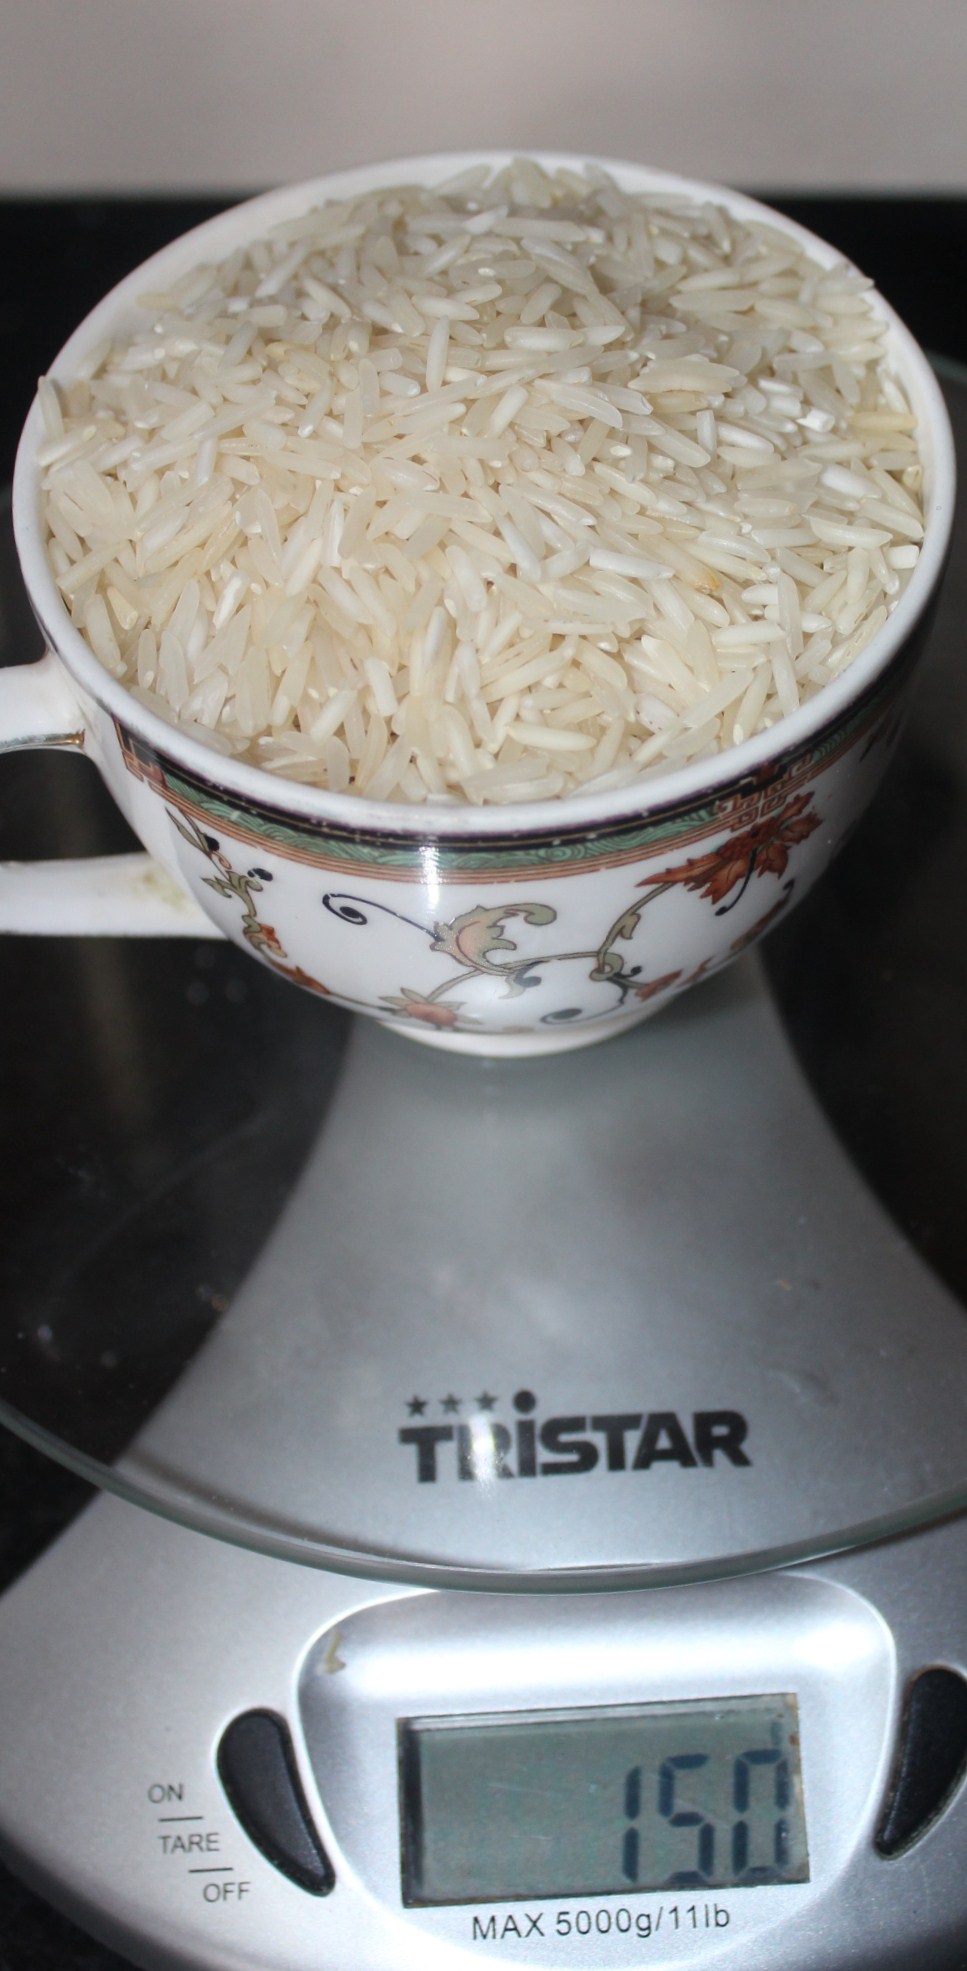
long grain basmati rice

img_6750


and meat

img_6746


  • basmati rice – 1 ½ cups – (app. 225 gms)
  • mutton – 500 gms
  • turmeric powder – ¼ tsp for cooking meat separately + ½ tsp while making biriyani
  • salt – to taste
  • oil – 3 tsp (for caramelising onions) + 3 tsp (for making biriyani)
  • clarified butter – 3 tsp
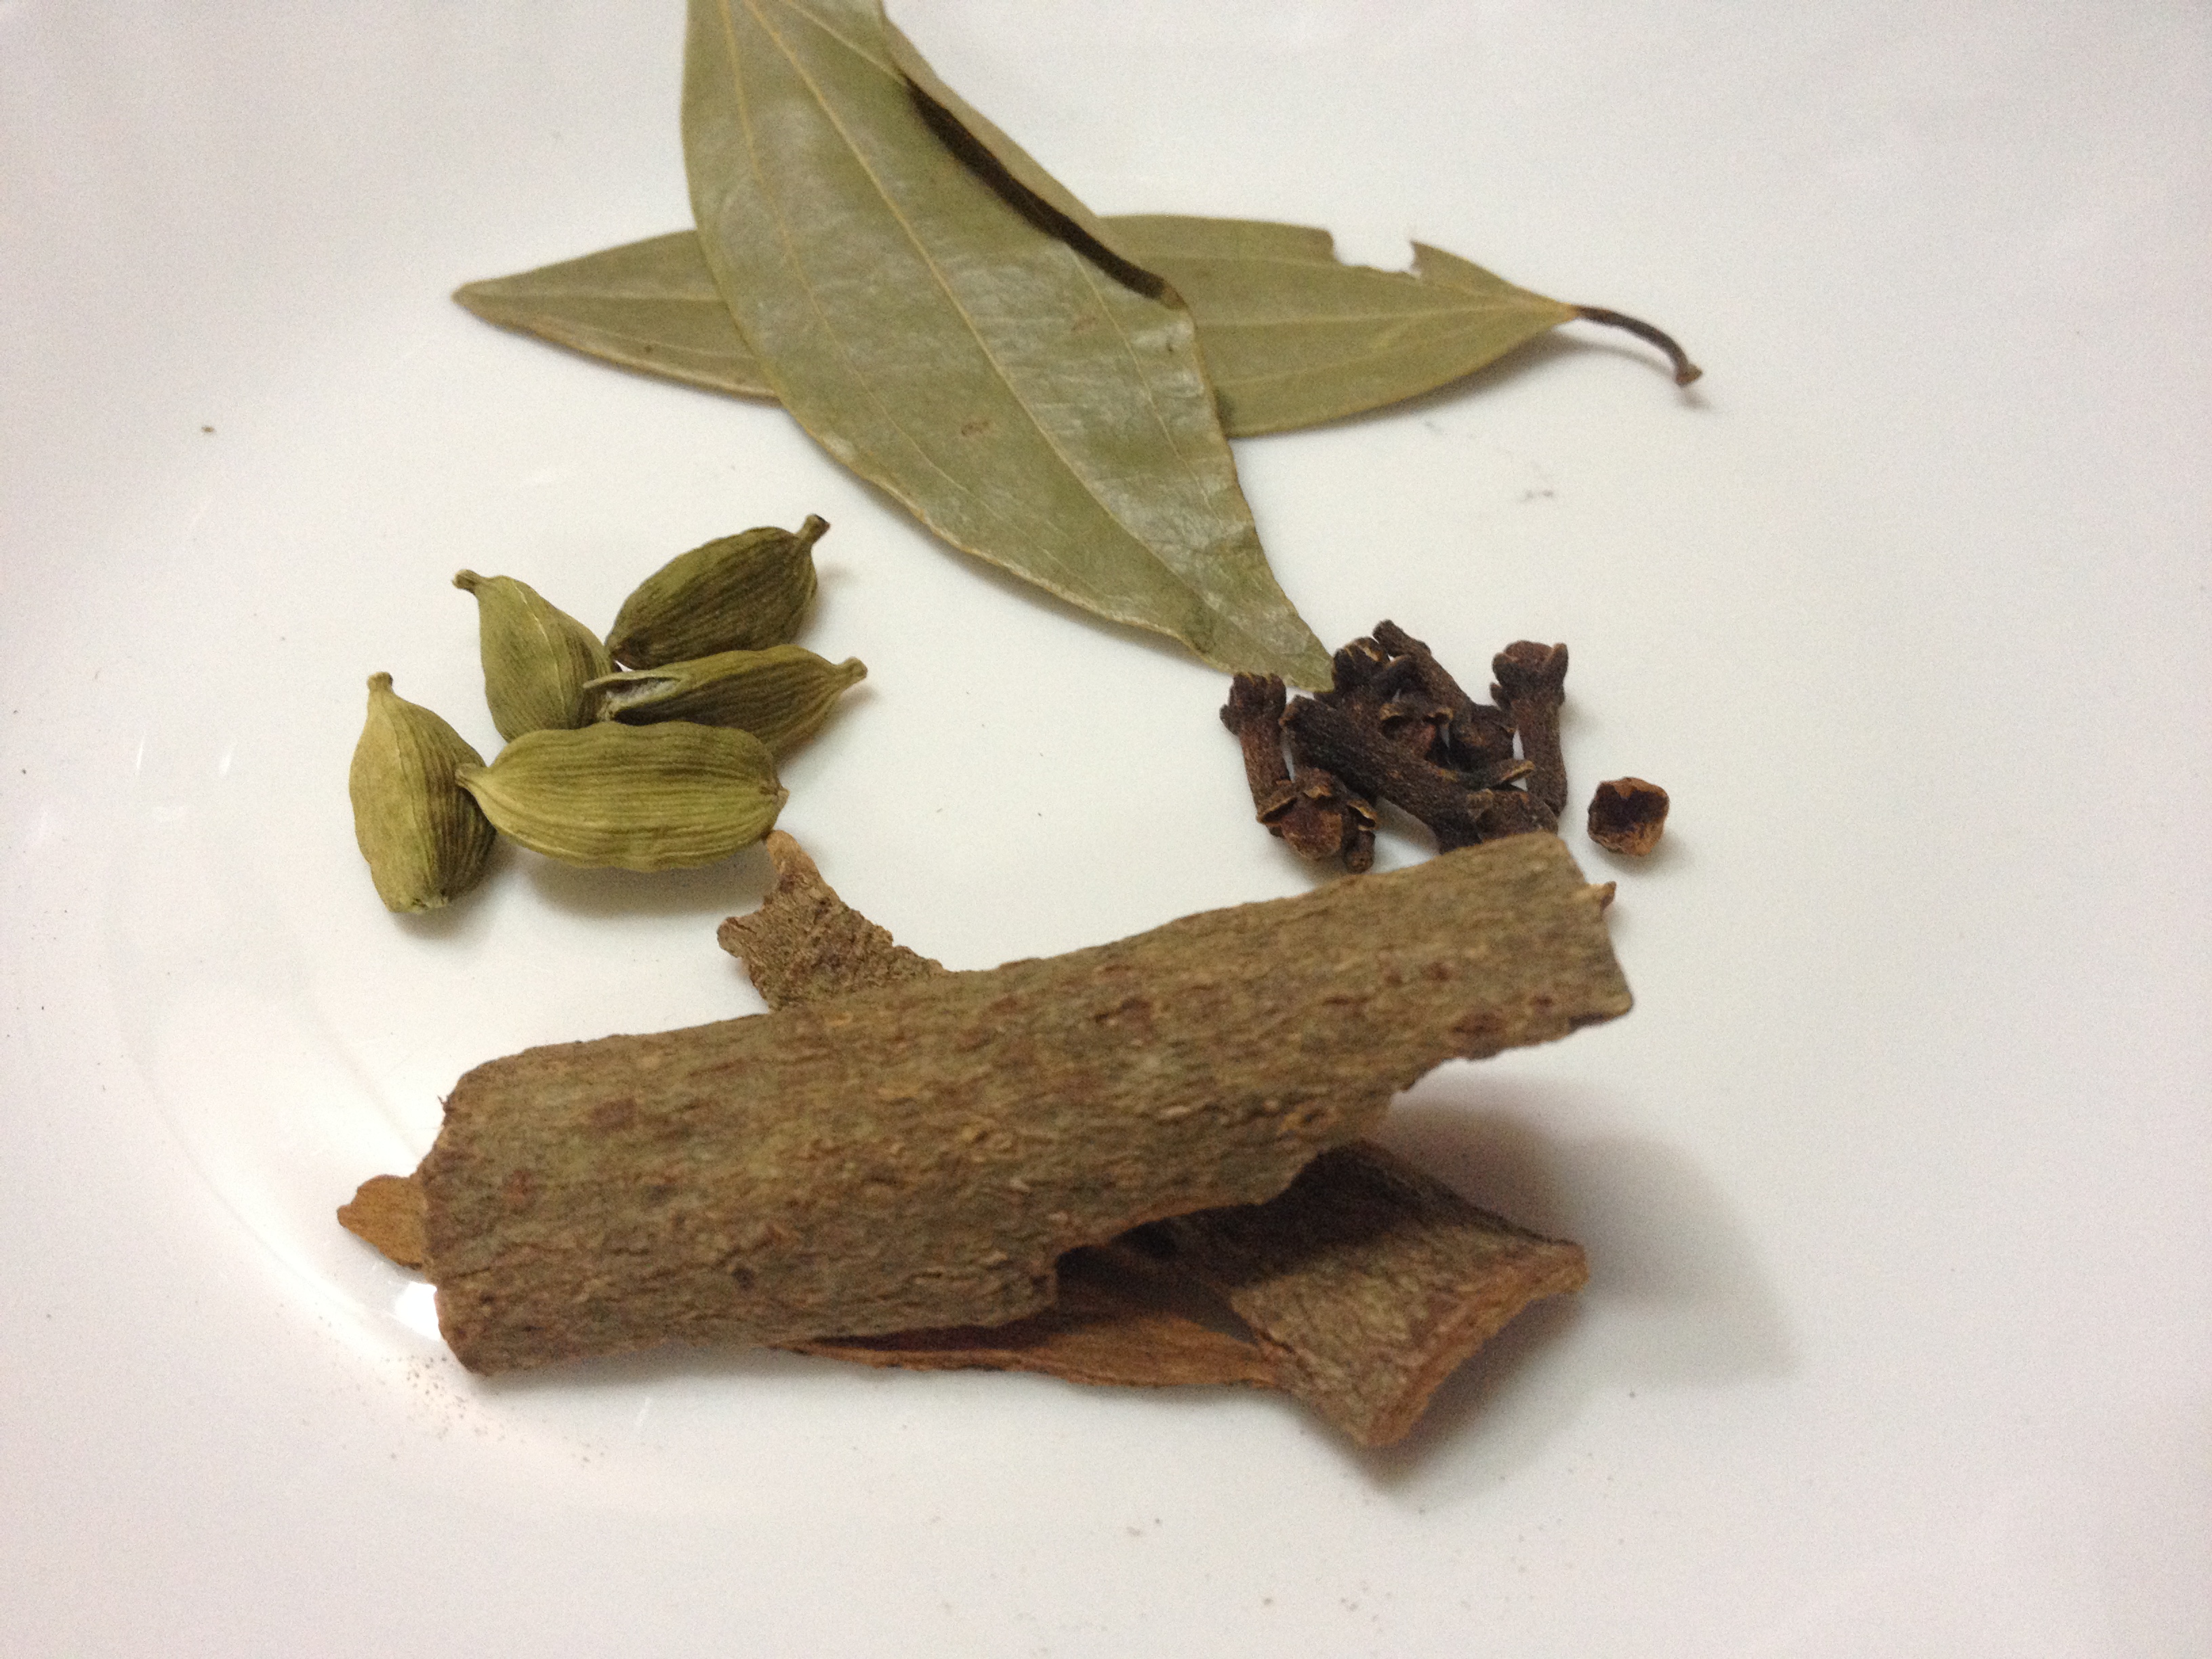
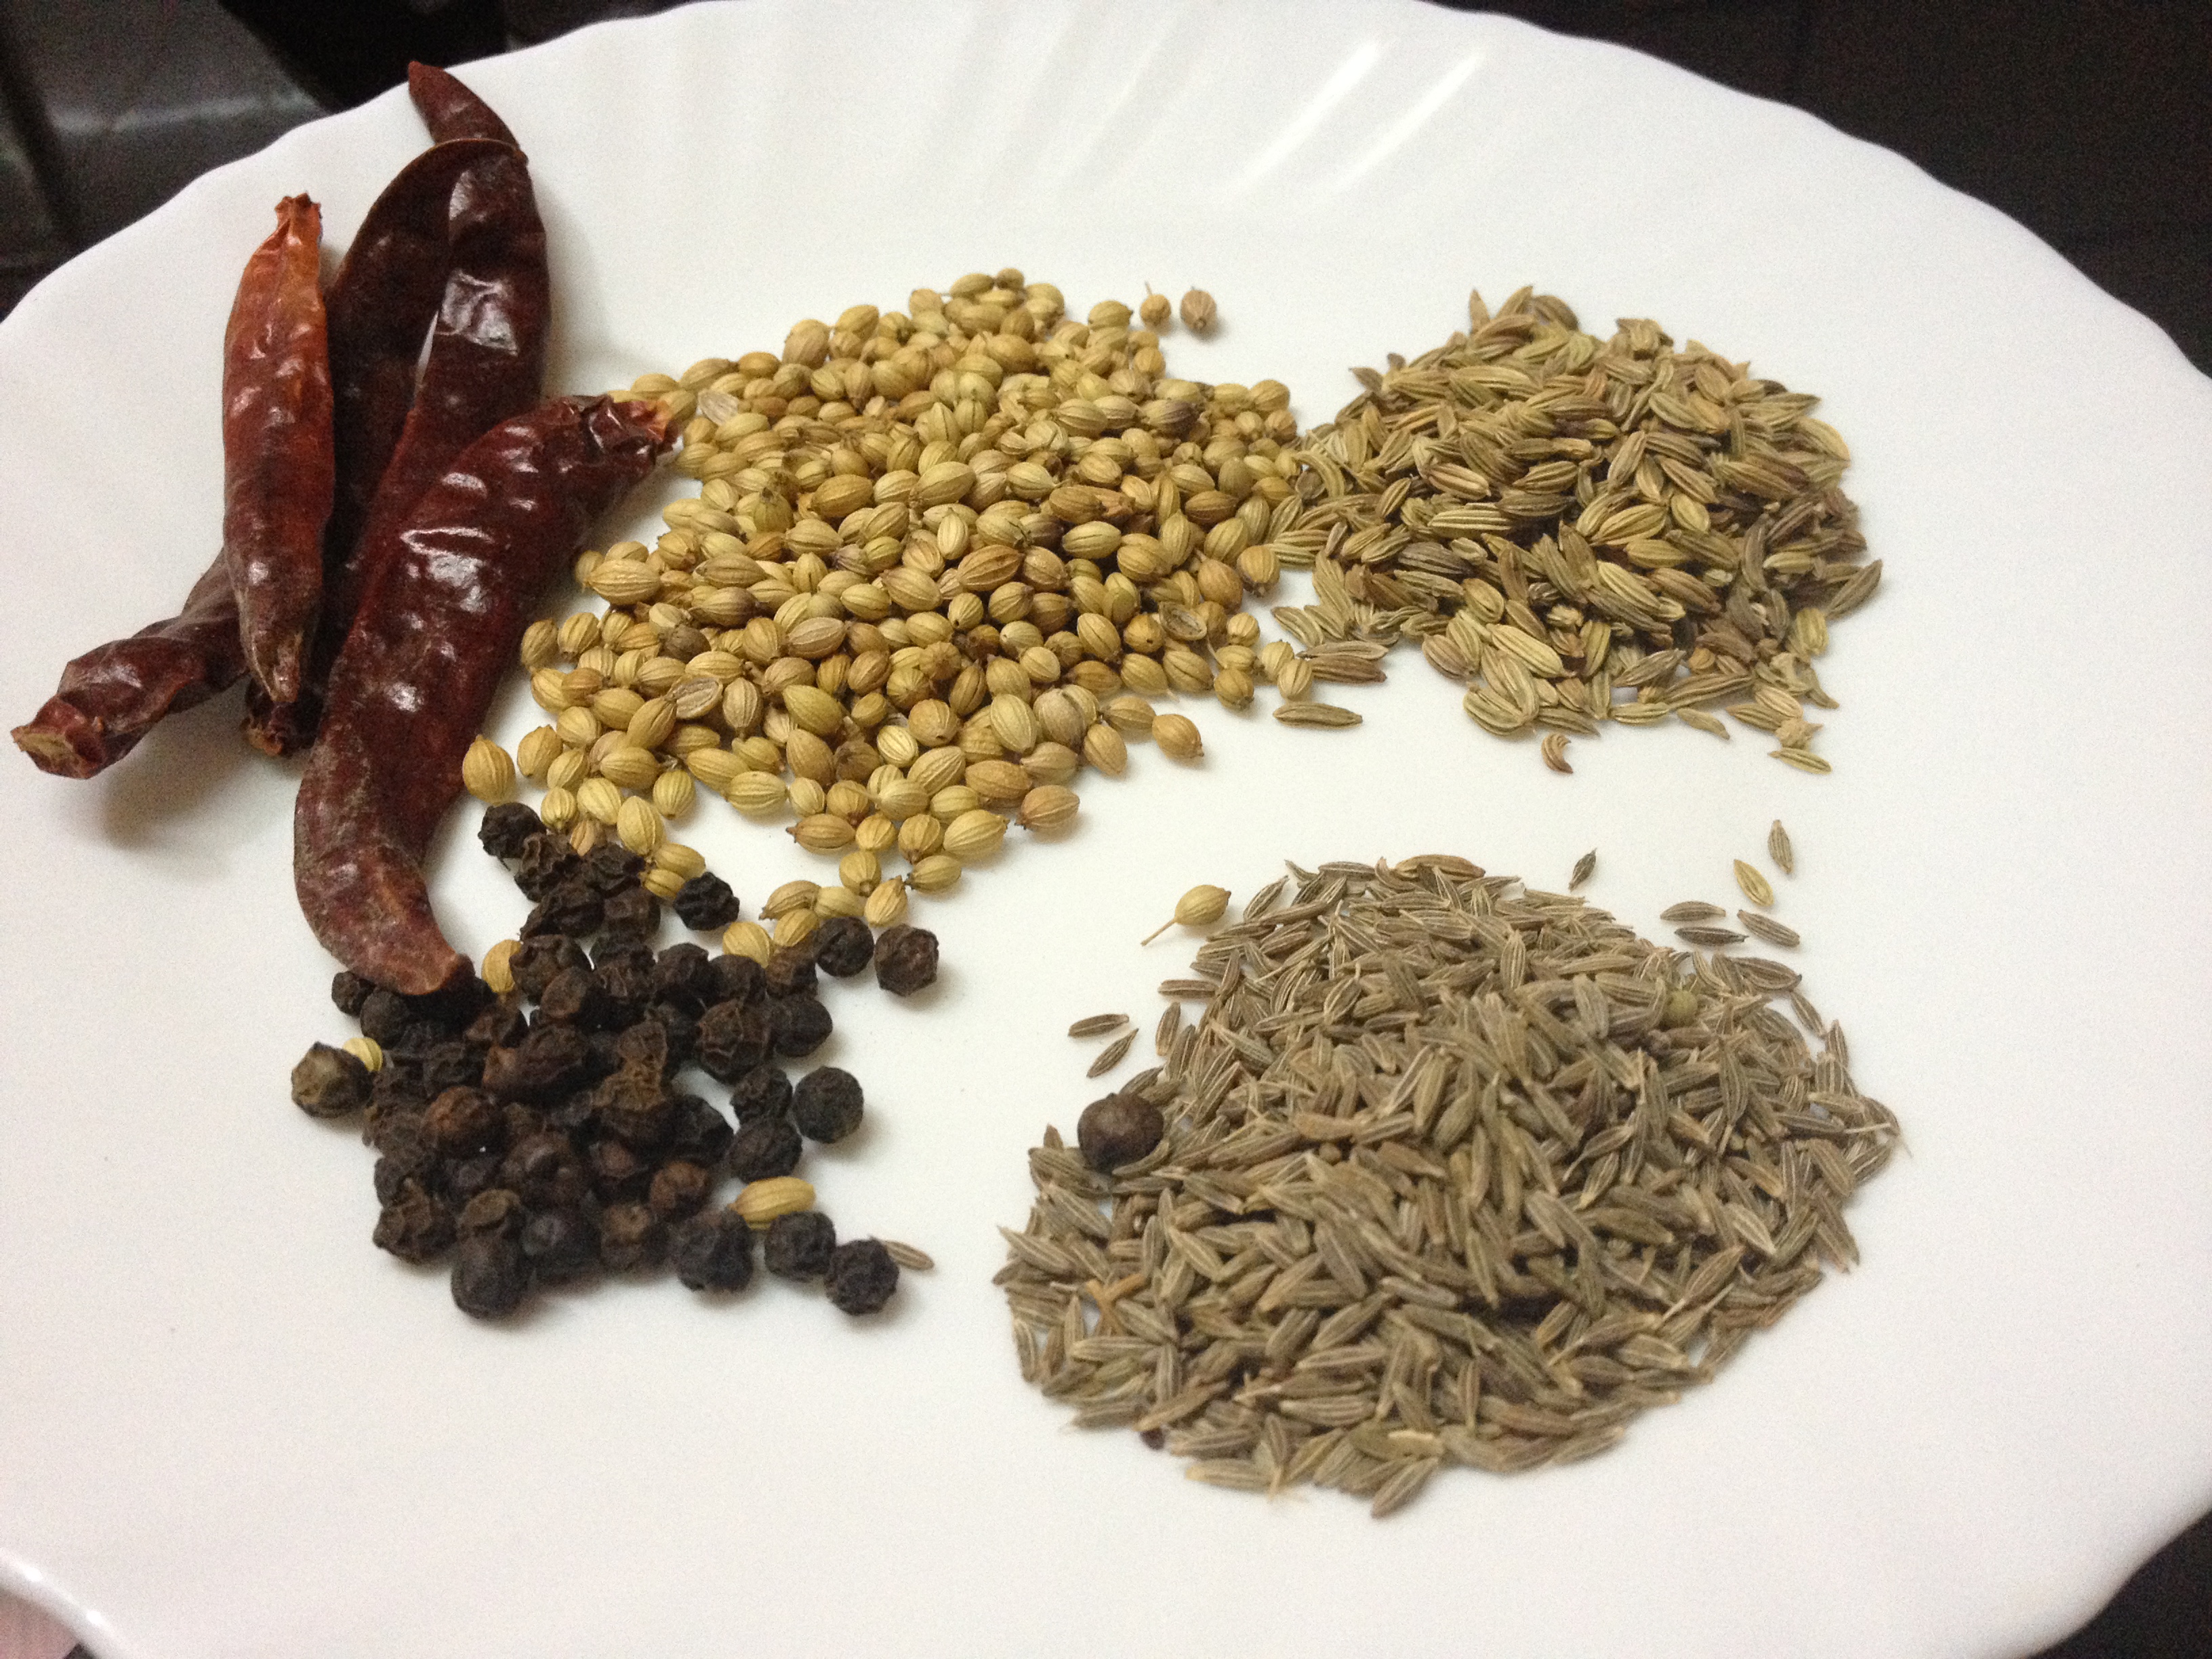
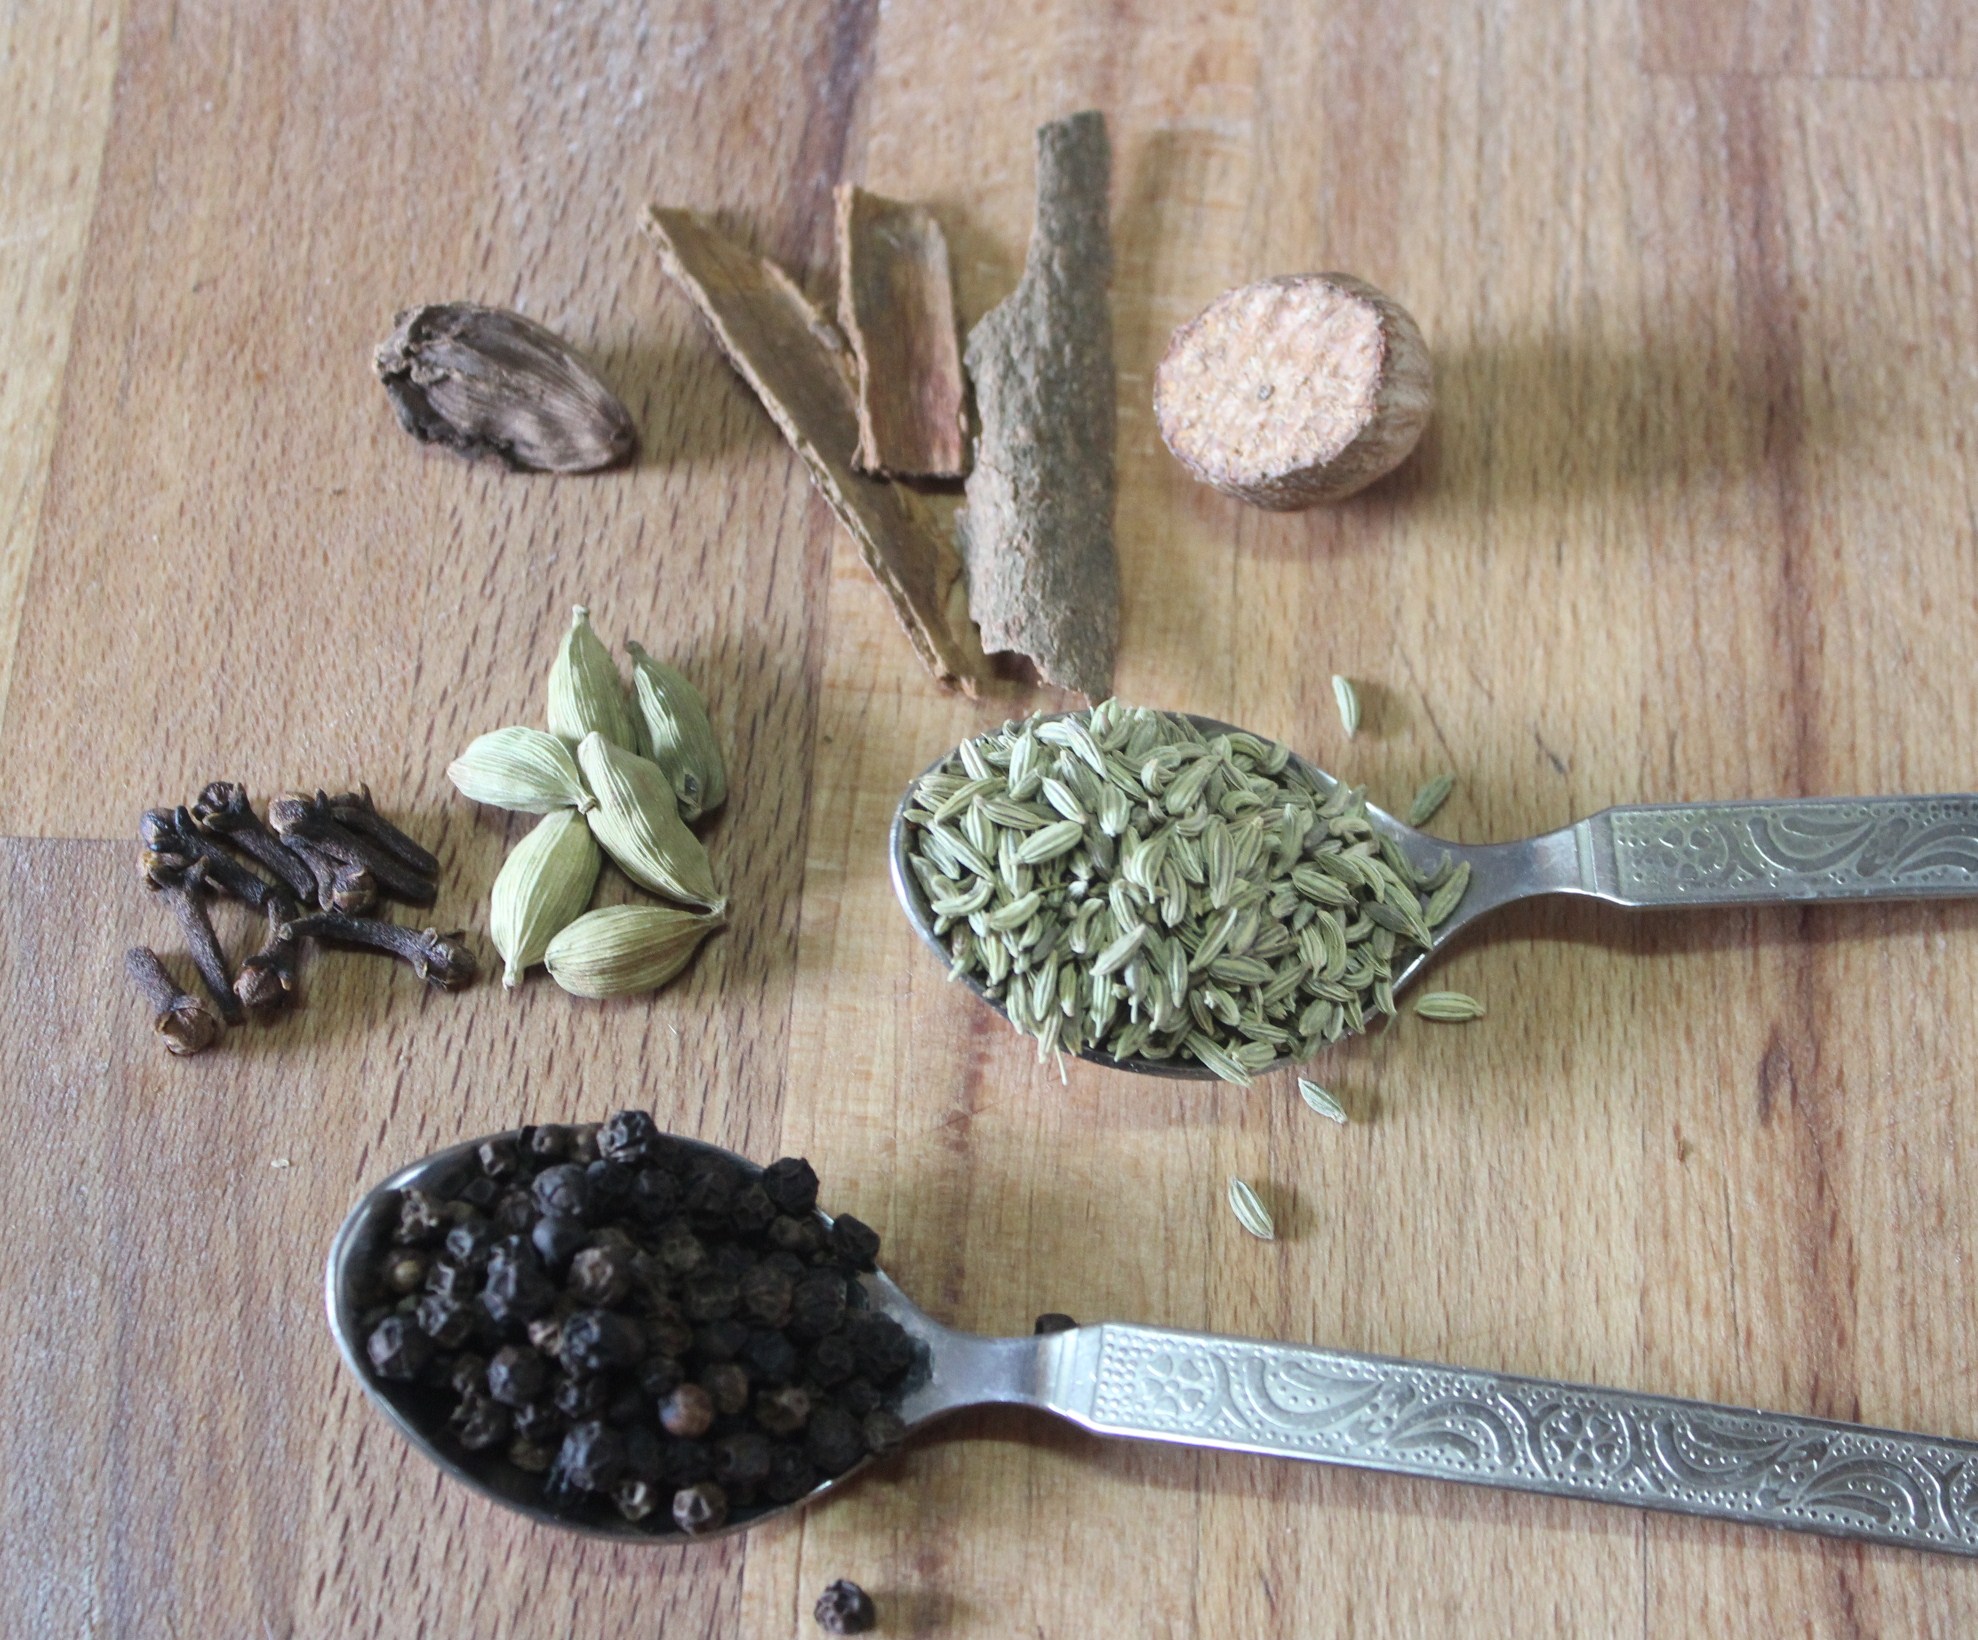
Dry Spices


img_6763


  • cardamom pods – 7 no.s
  • cloves – 7 no.s
  • cinnamon – 2-3 sticks
  • bay leaves – 2 no.s
  • big cardamom – 1 no.
  • fennel seeds – 1 ½ tsp
  • pepper corns – 1 tsp

To chop


img_6755


and green chillies

img_6765


  • ginger – 50 gms
  • garlic – 30 gms (app. 3 small pods)
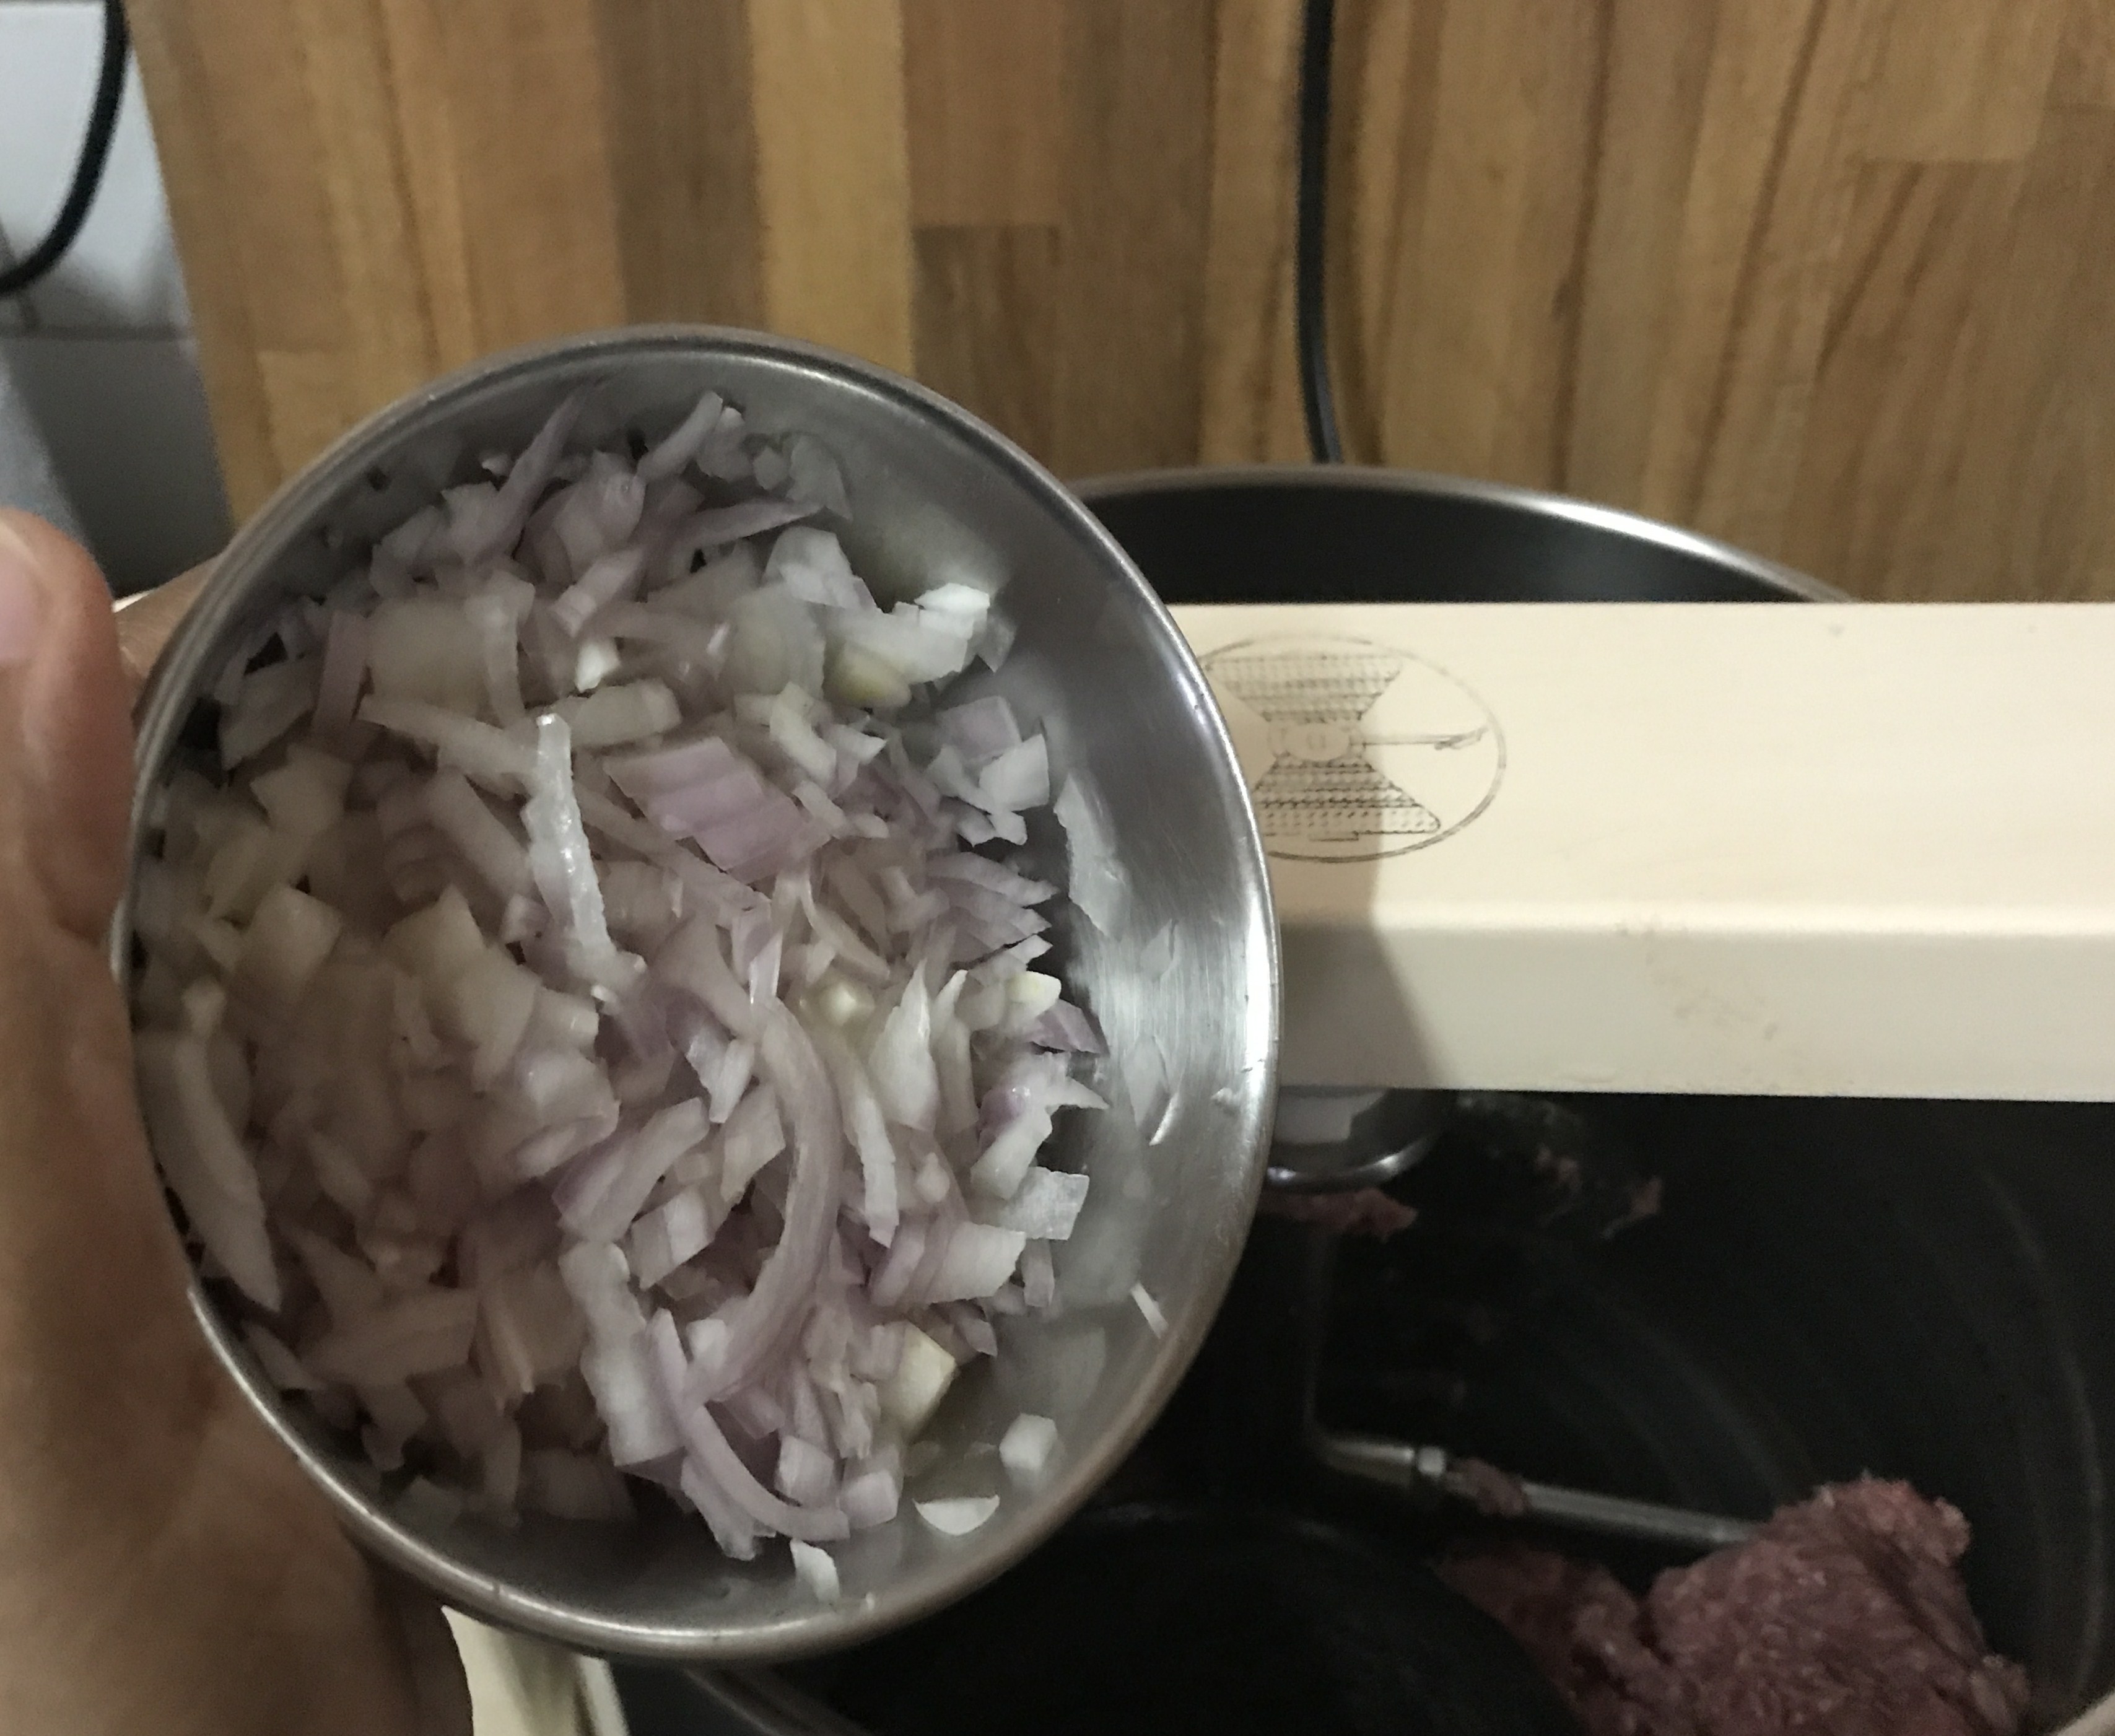
  • onion – 3 large – 165 gms
  • tomato – 2 large – 130 gms
  • green chillies – 5 -7 no.s (finely chopped)

For freshness

caramelised onions with mint and coriander

img_6771


  • mint leaves – 3 tsp
  • coriander leaves. – 3 tsp
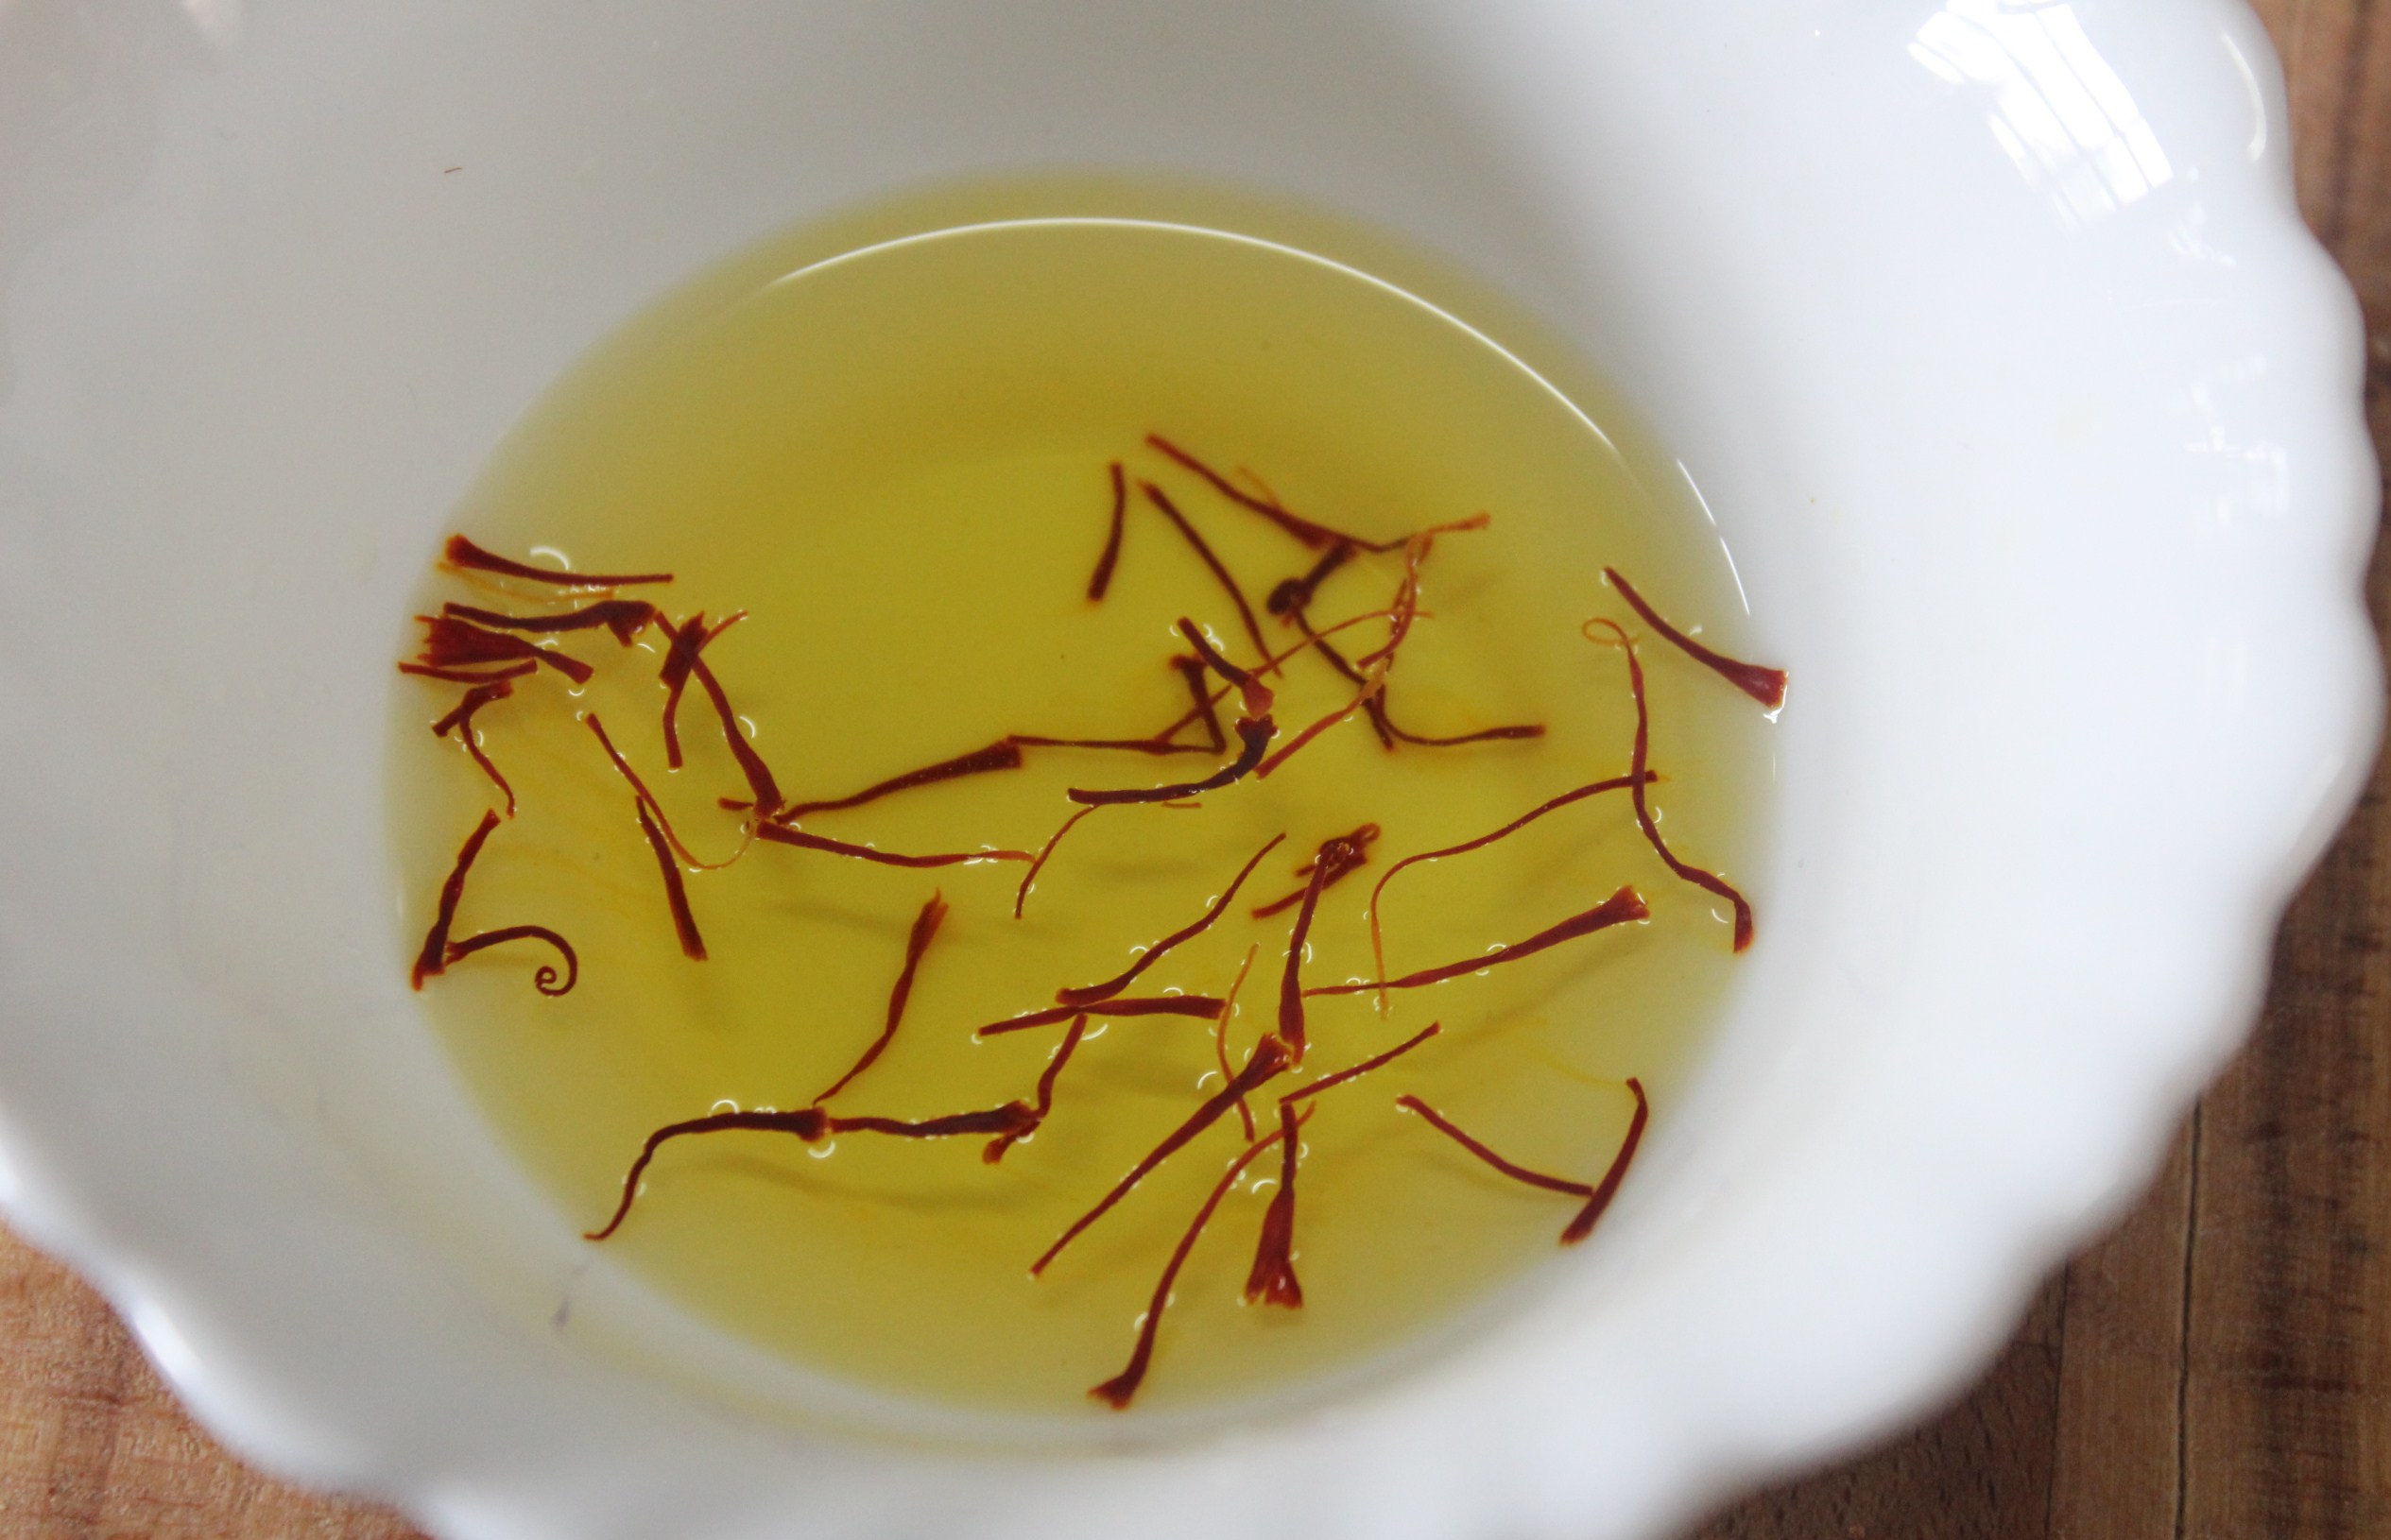
Exotic touch


saffron in water

img_6782


  • generous strands of saffron soaked in ¼ cup hot water tsp bring out that gorgeous colour
  • nutmeg – ½ tsp grated

Method of Preparation


img_6856
Part I

  1. Wash and soak basmati rice at least ½ an hour before pressure cooking meat
  2. Soak saffron in ¼ cup hot water


soaked rice

img_6789

Part II– Cook Mutton

  1. Remove fat as far possible from meat
  2. Mix turmeric and salt to meat and keep aside for 15 minutes
  3. Wash and clean well
  4. Squeeze out excess water from the washed meat
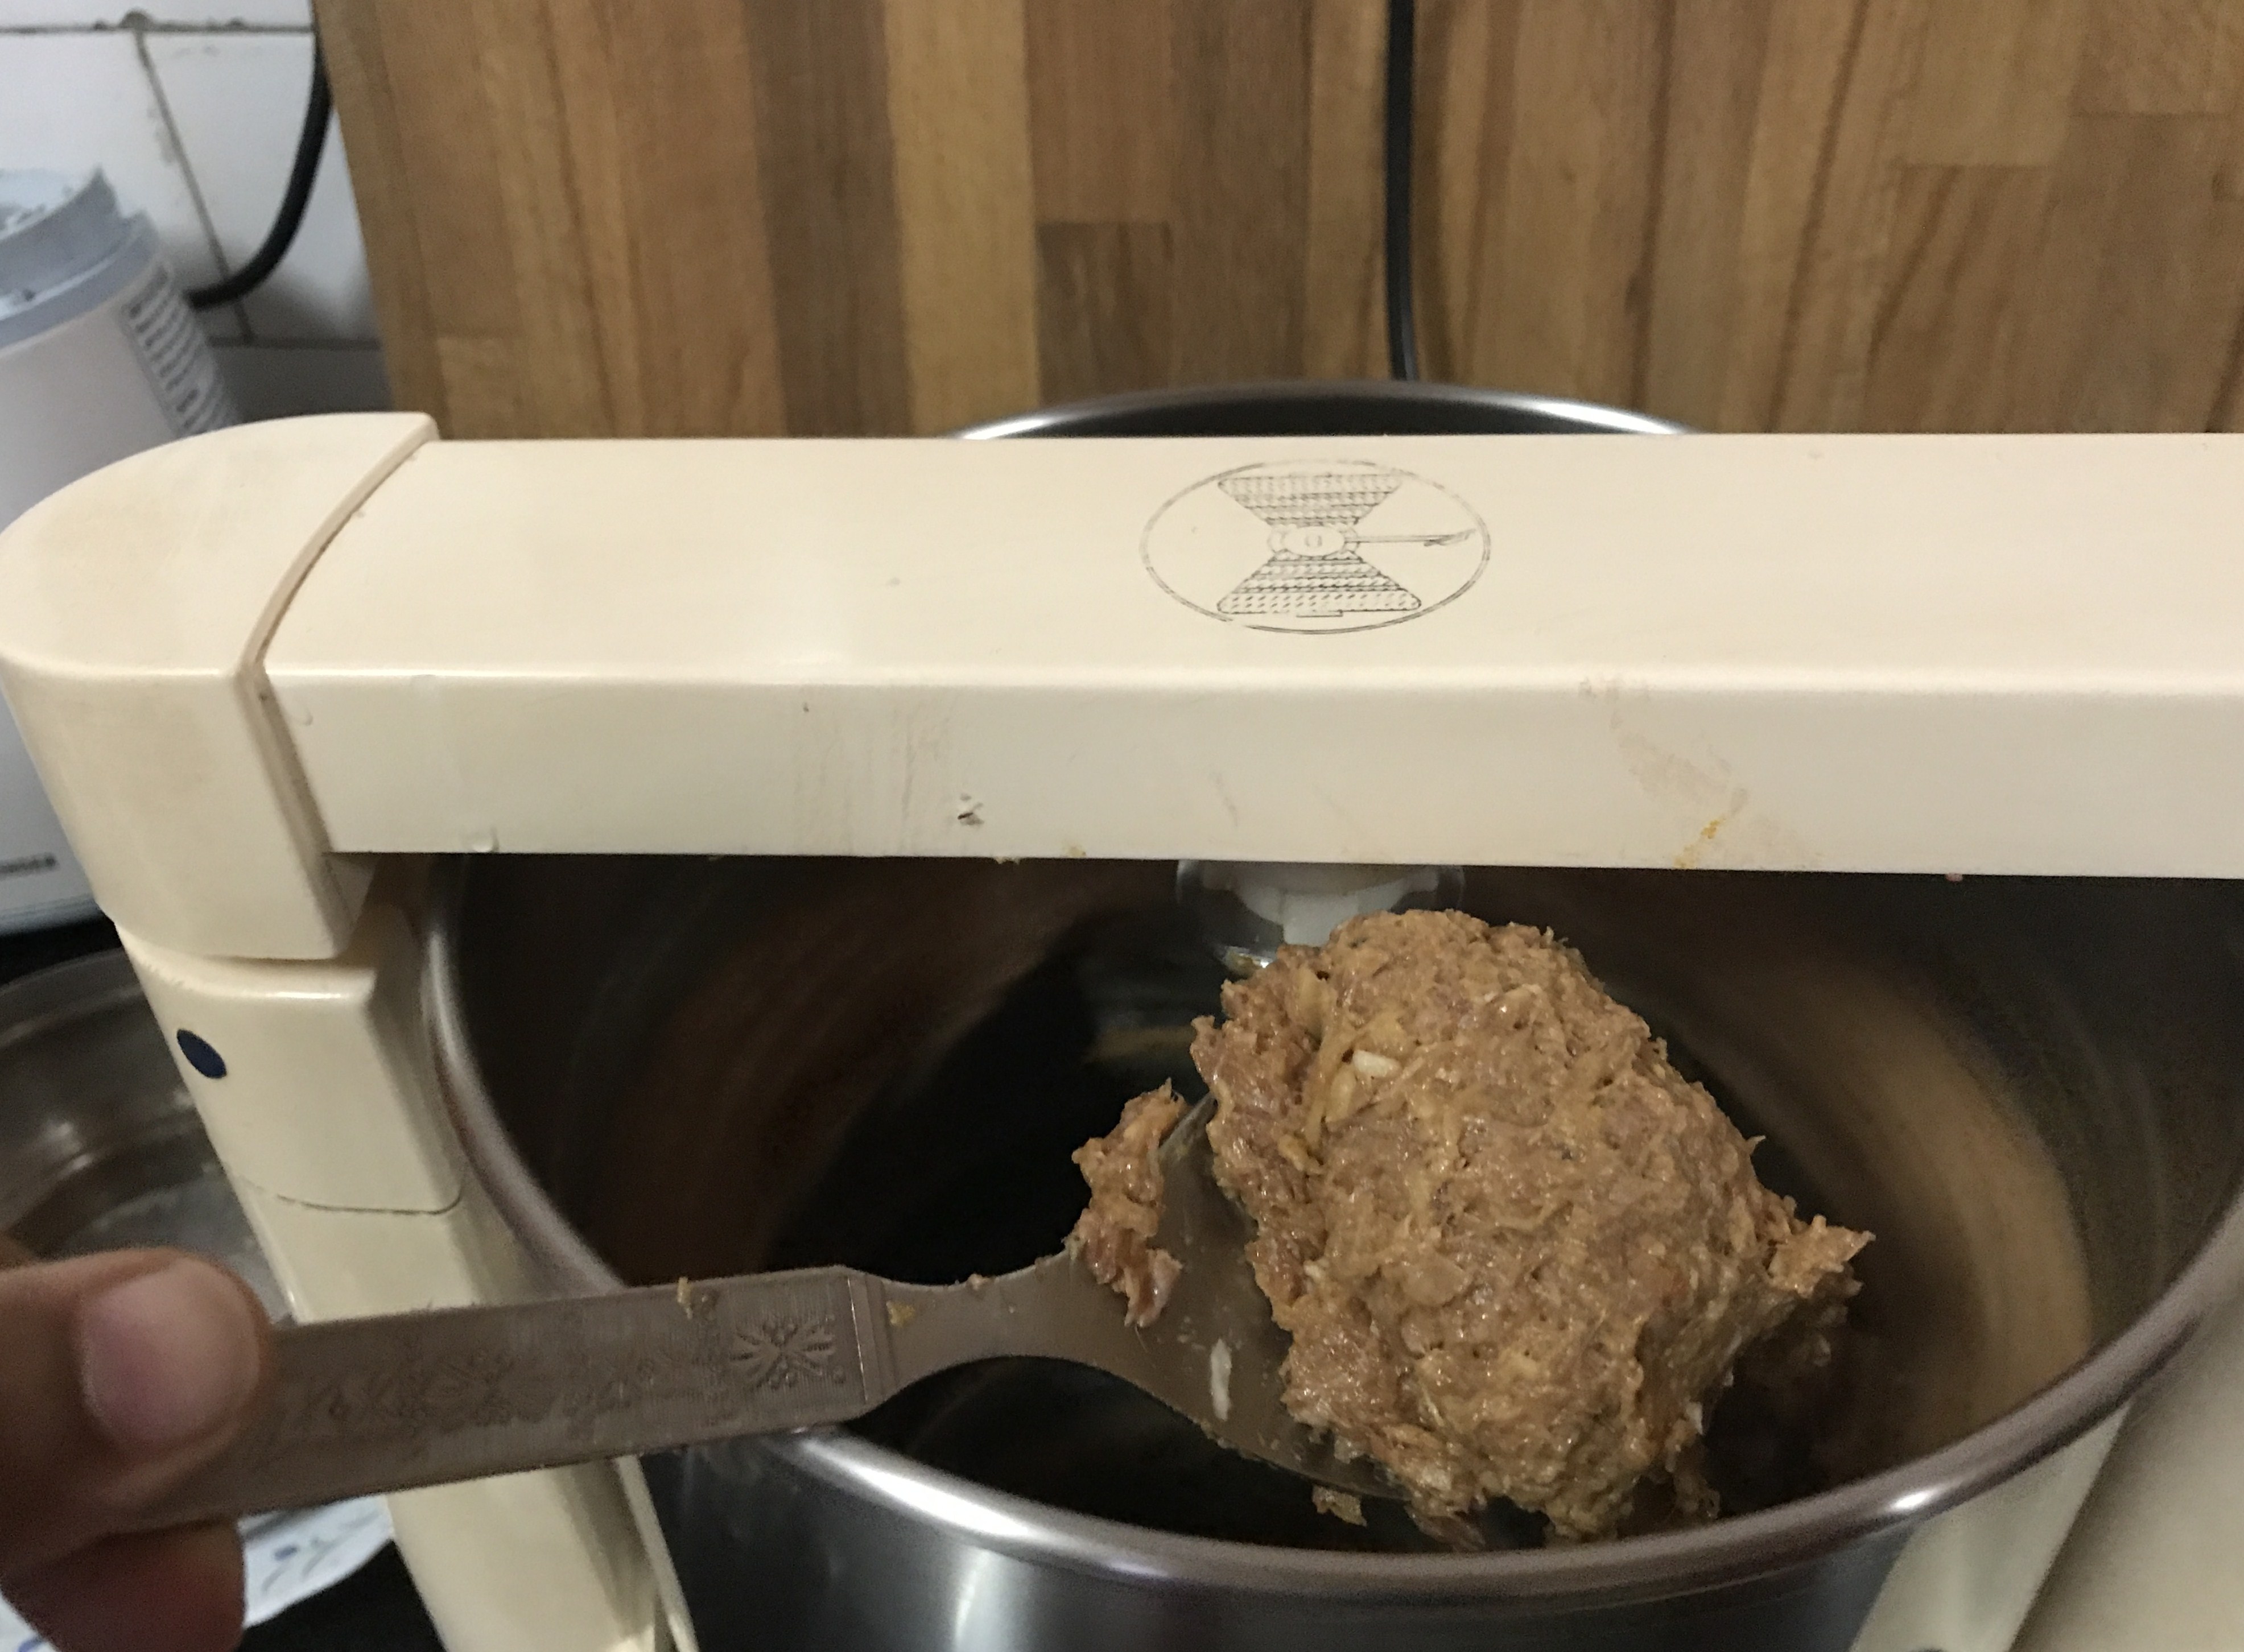
  5. In a pressure cooker, add meat, ¼ tsp turmeric and salt with water enough to cook for approximately 30 minutes
  6. Pressure cook meat till done (It takes 30-40 minutes to be cooked well)
  7. Do not forget to use the meat broth to cook the final Biriyani.

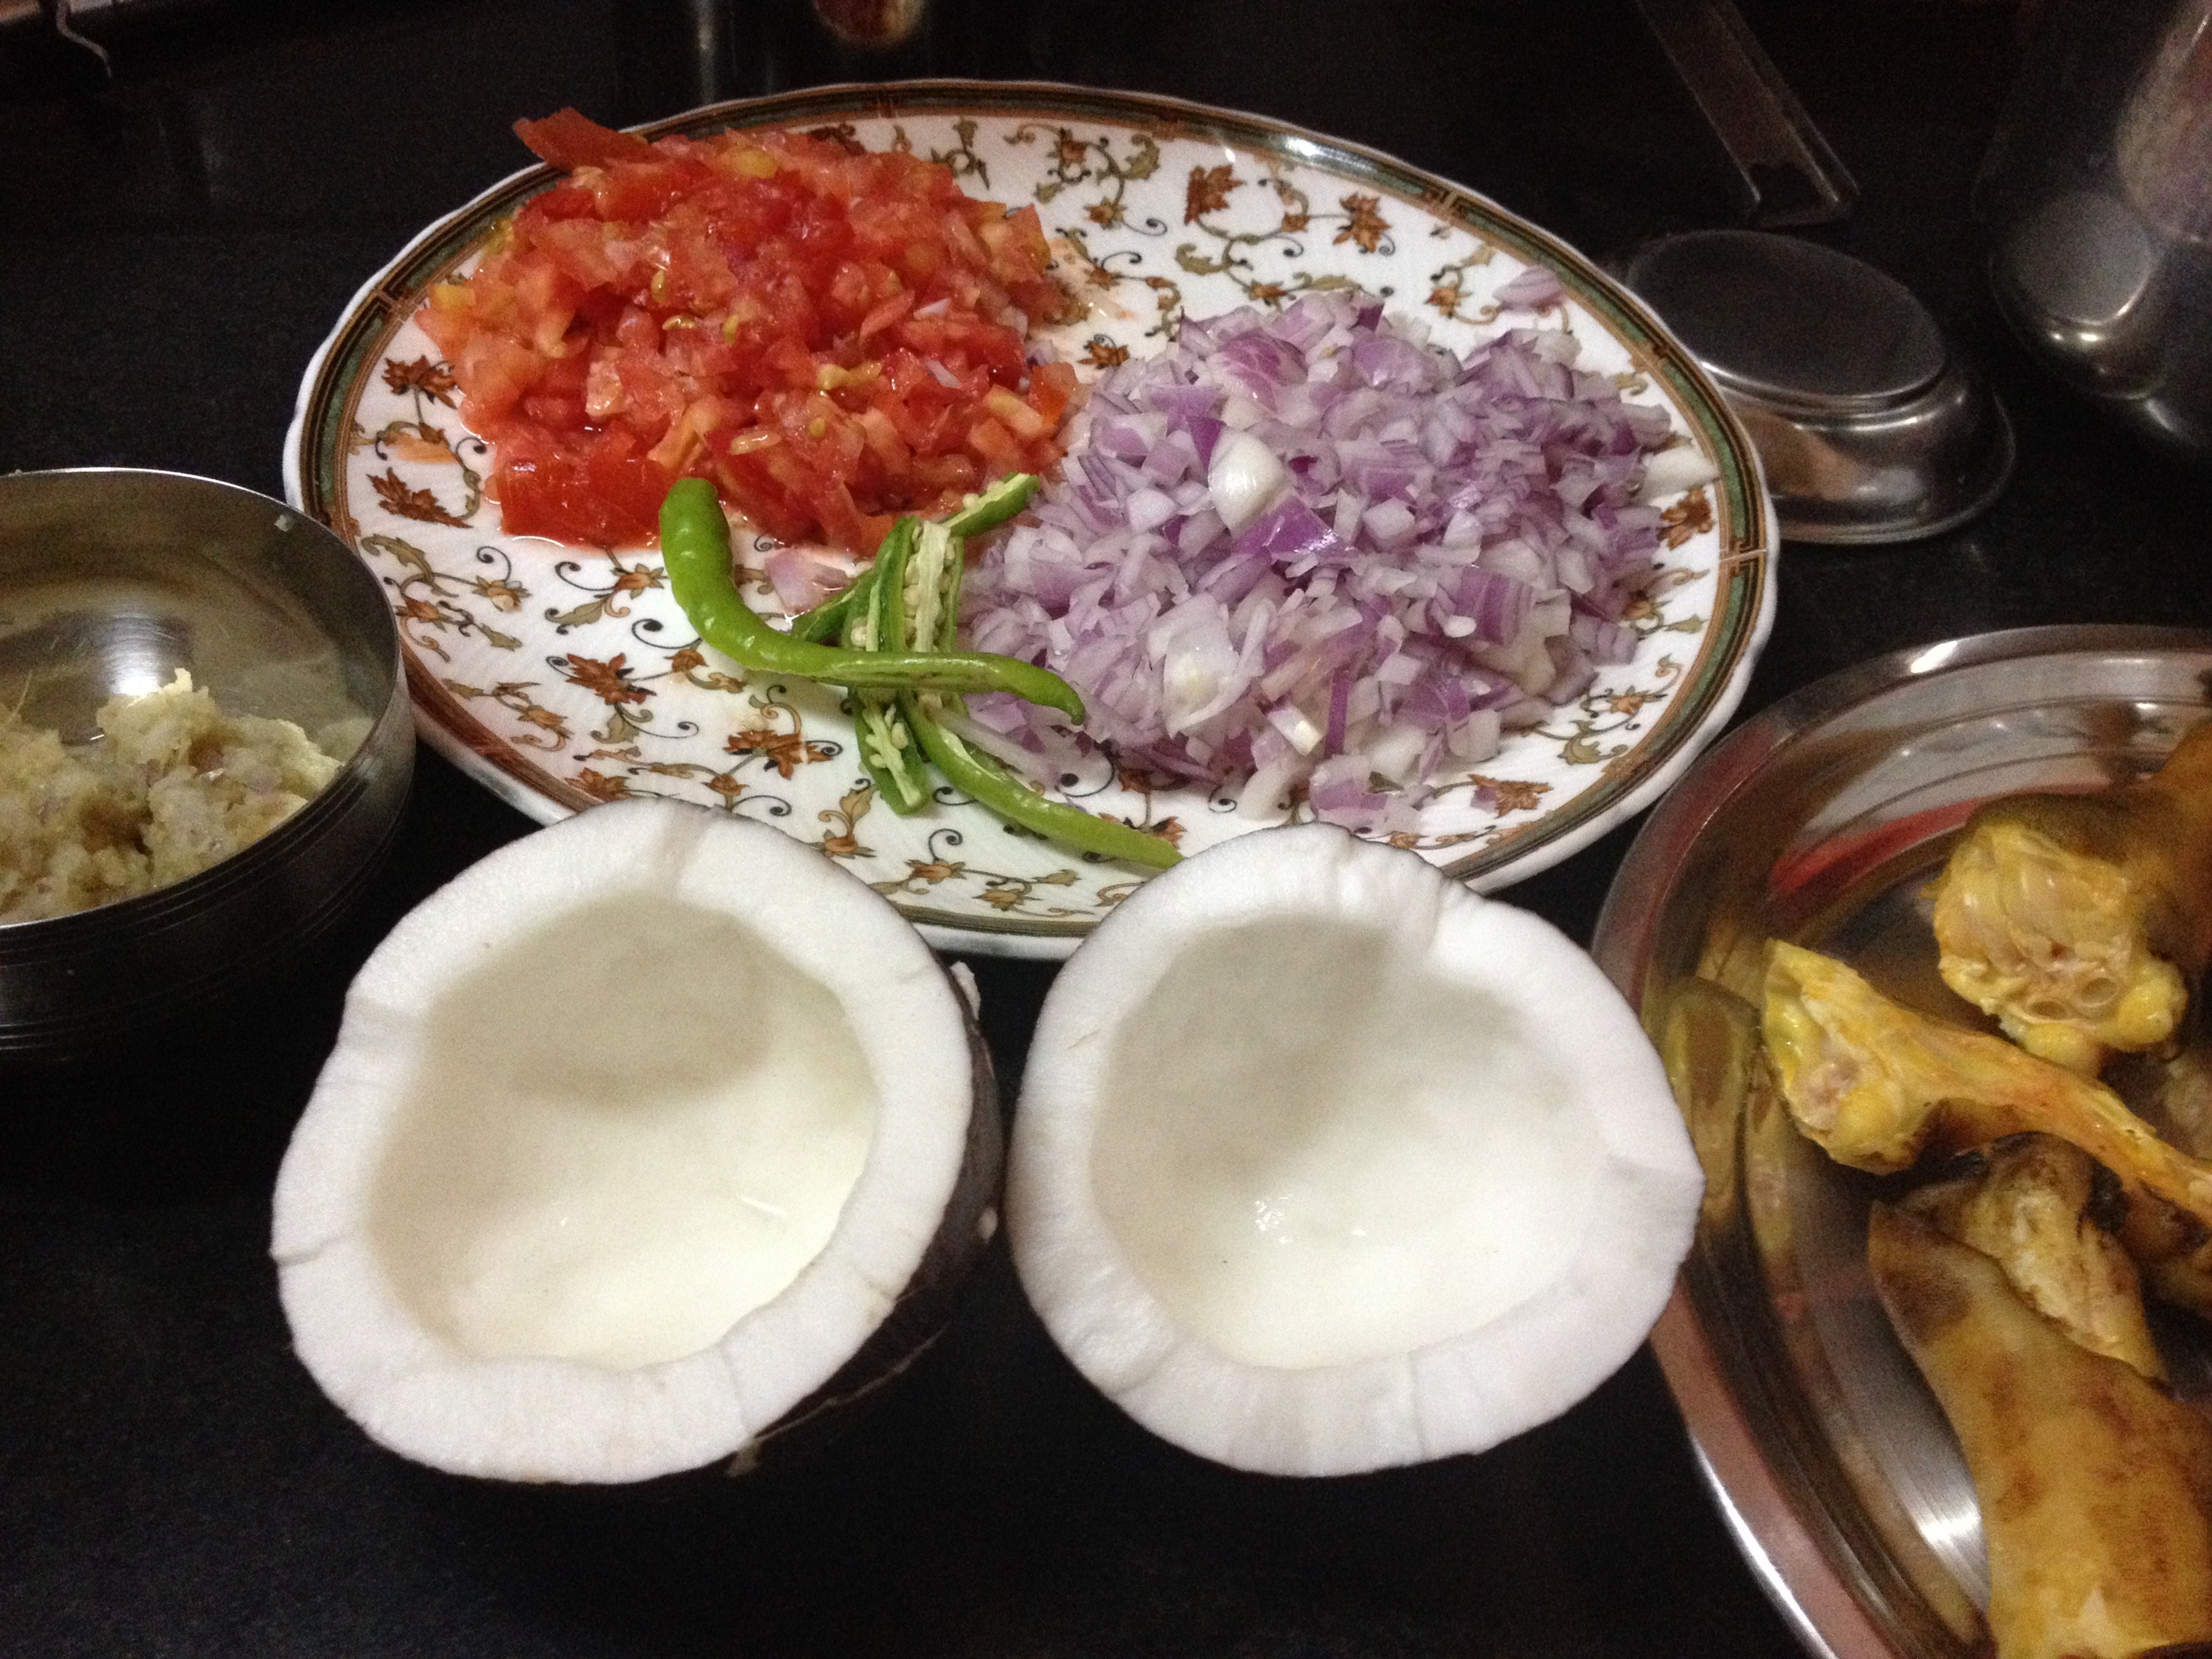
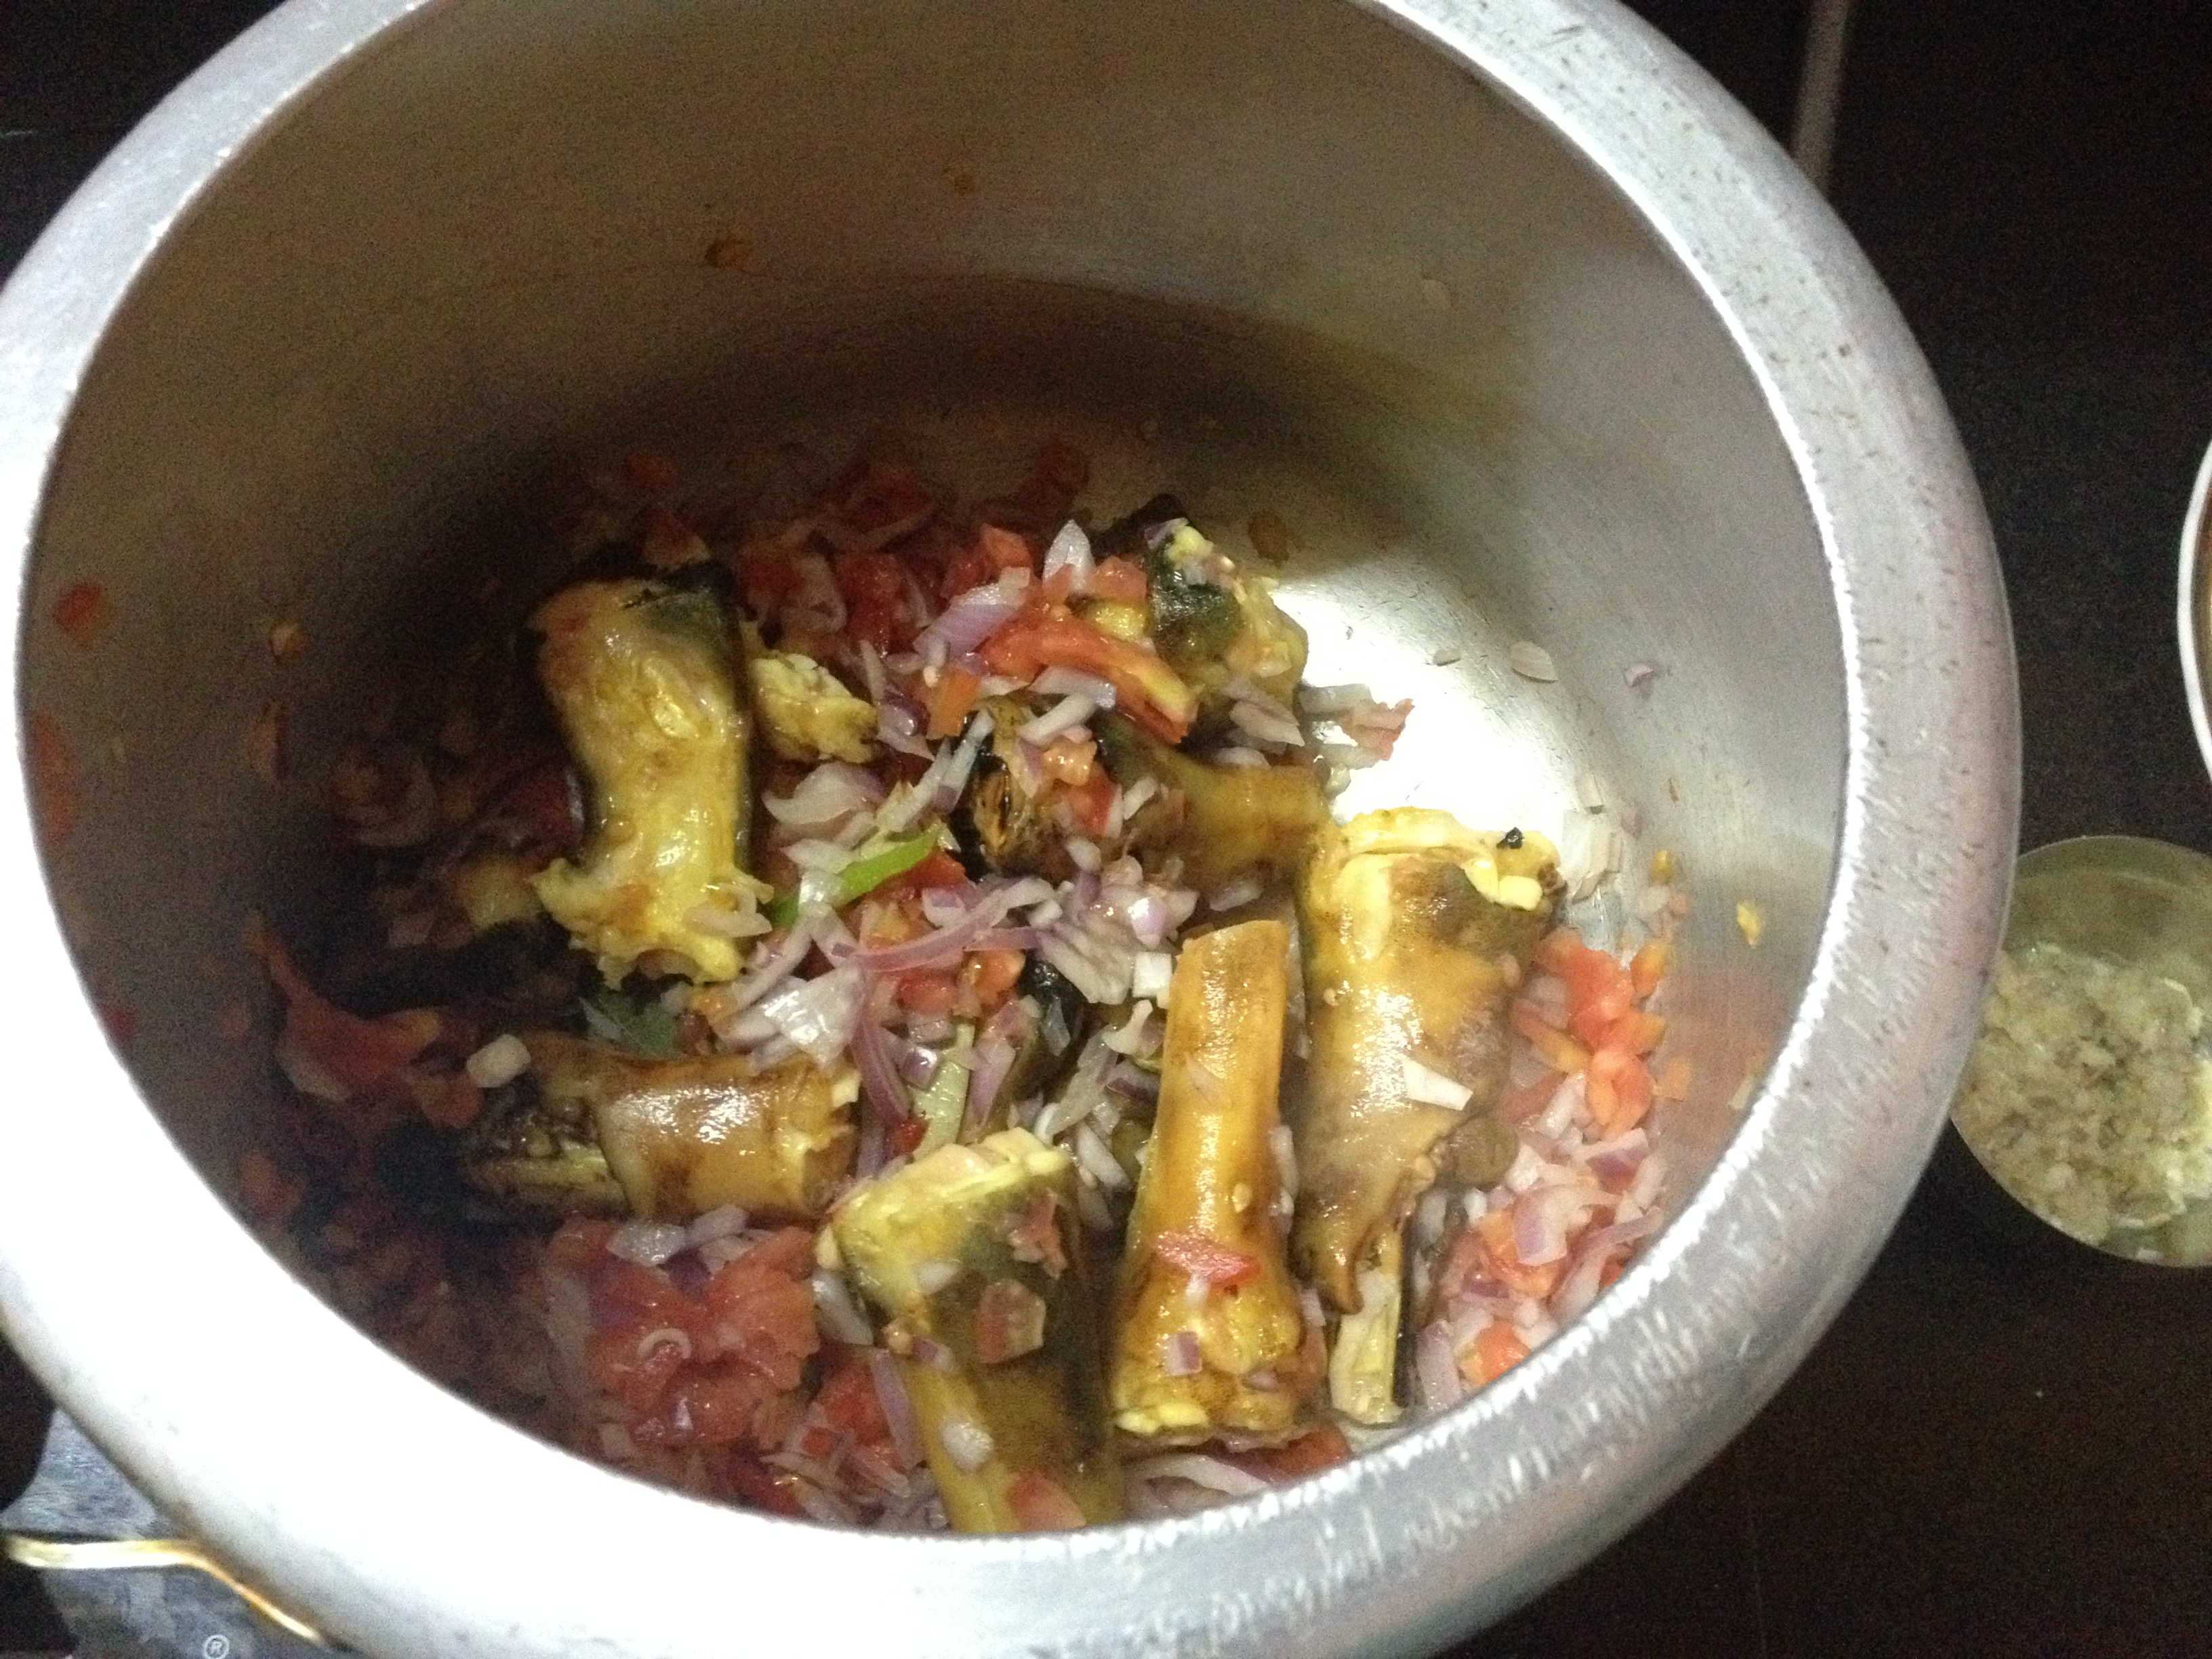
Part III– Getting things ready – grinding, slicing, chopping, caramelizing.


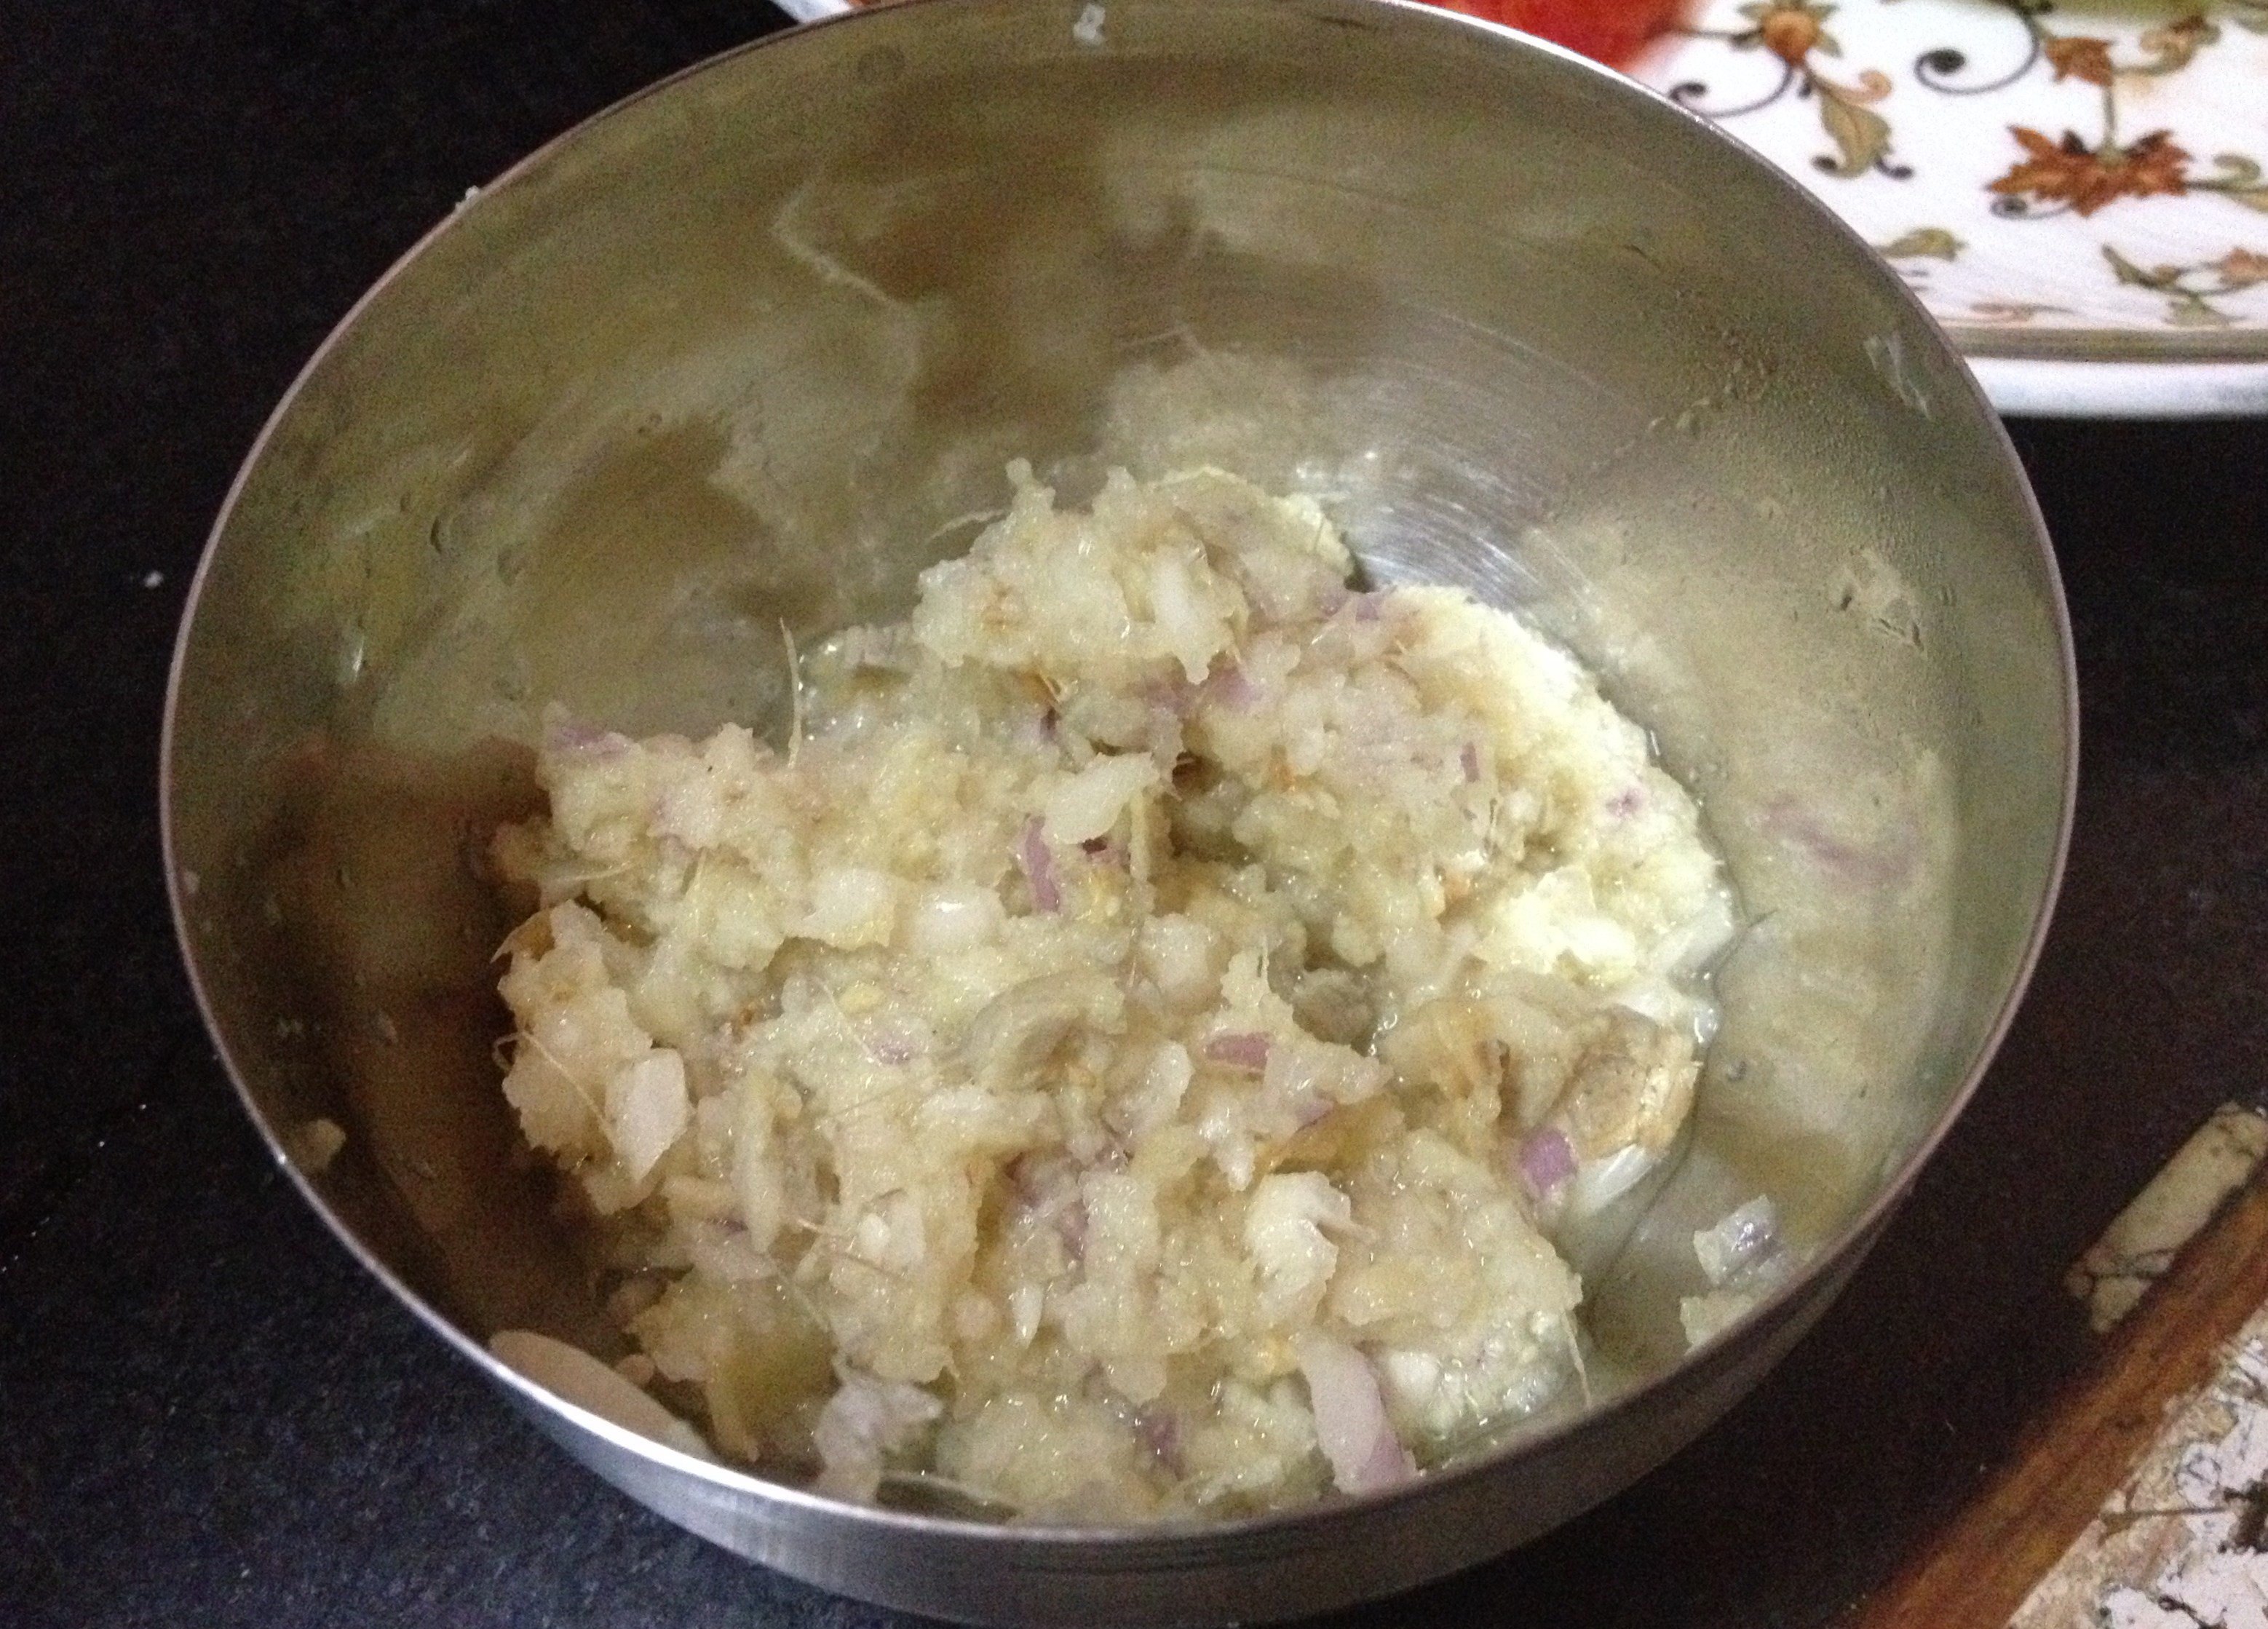
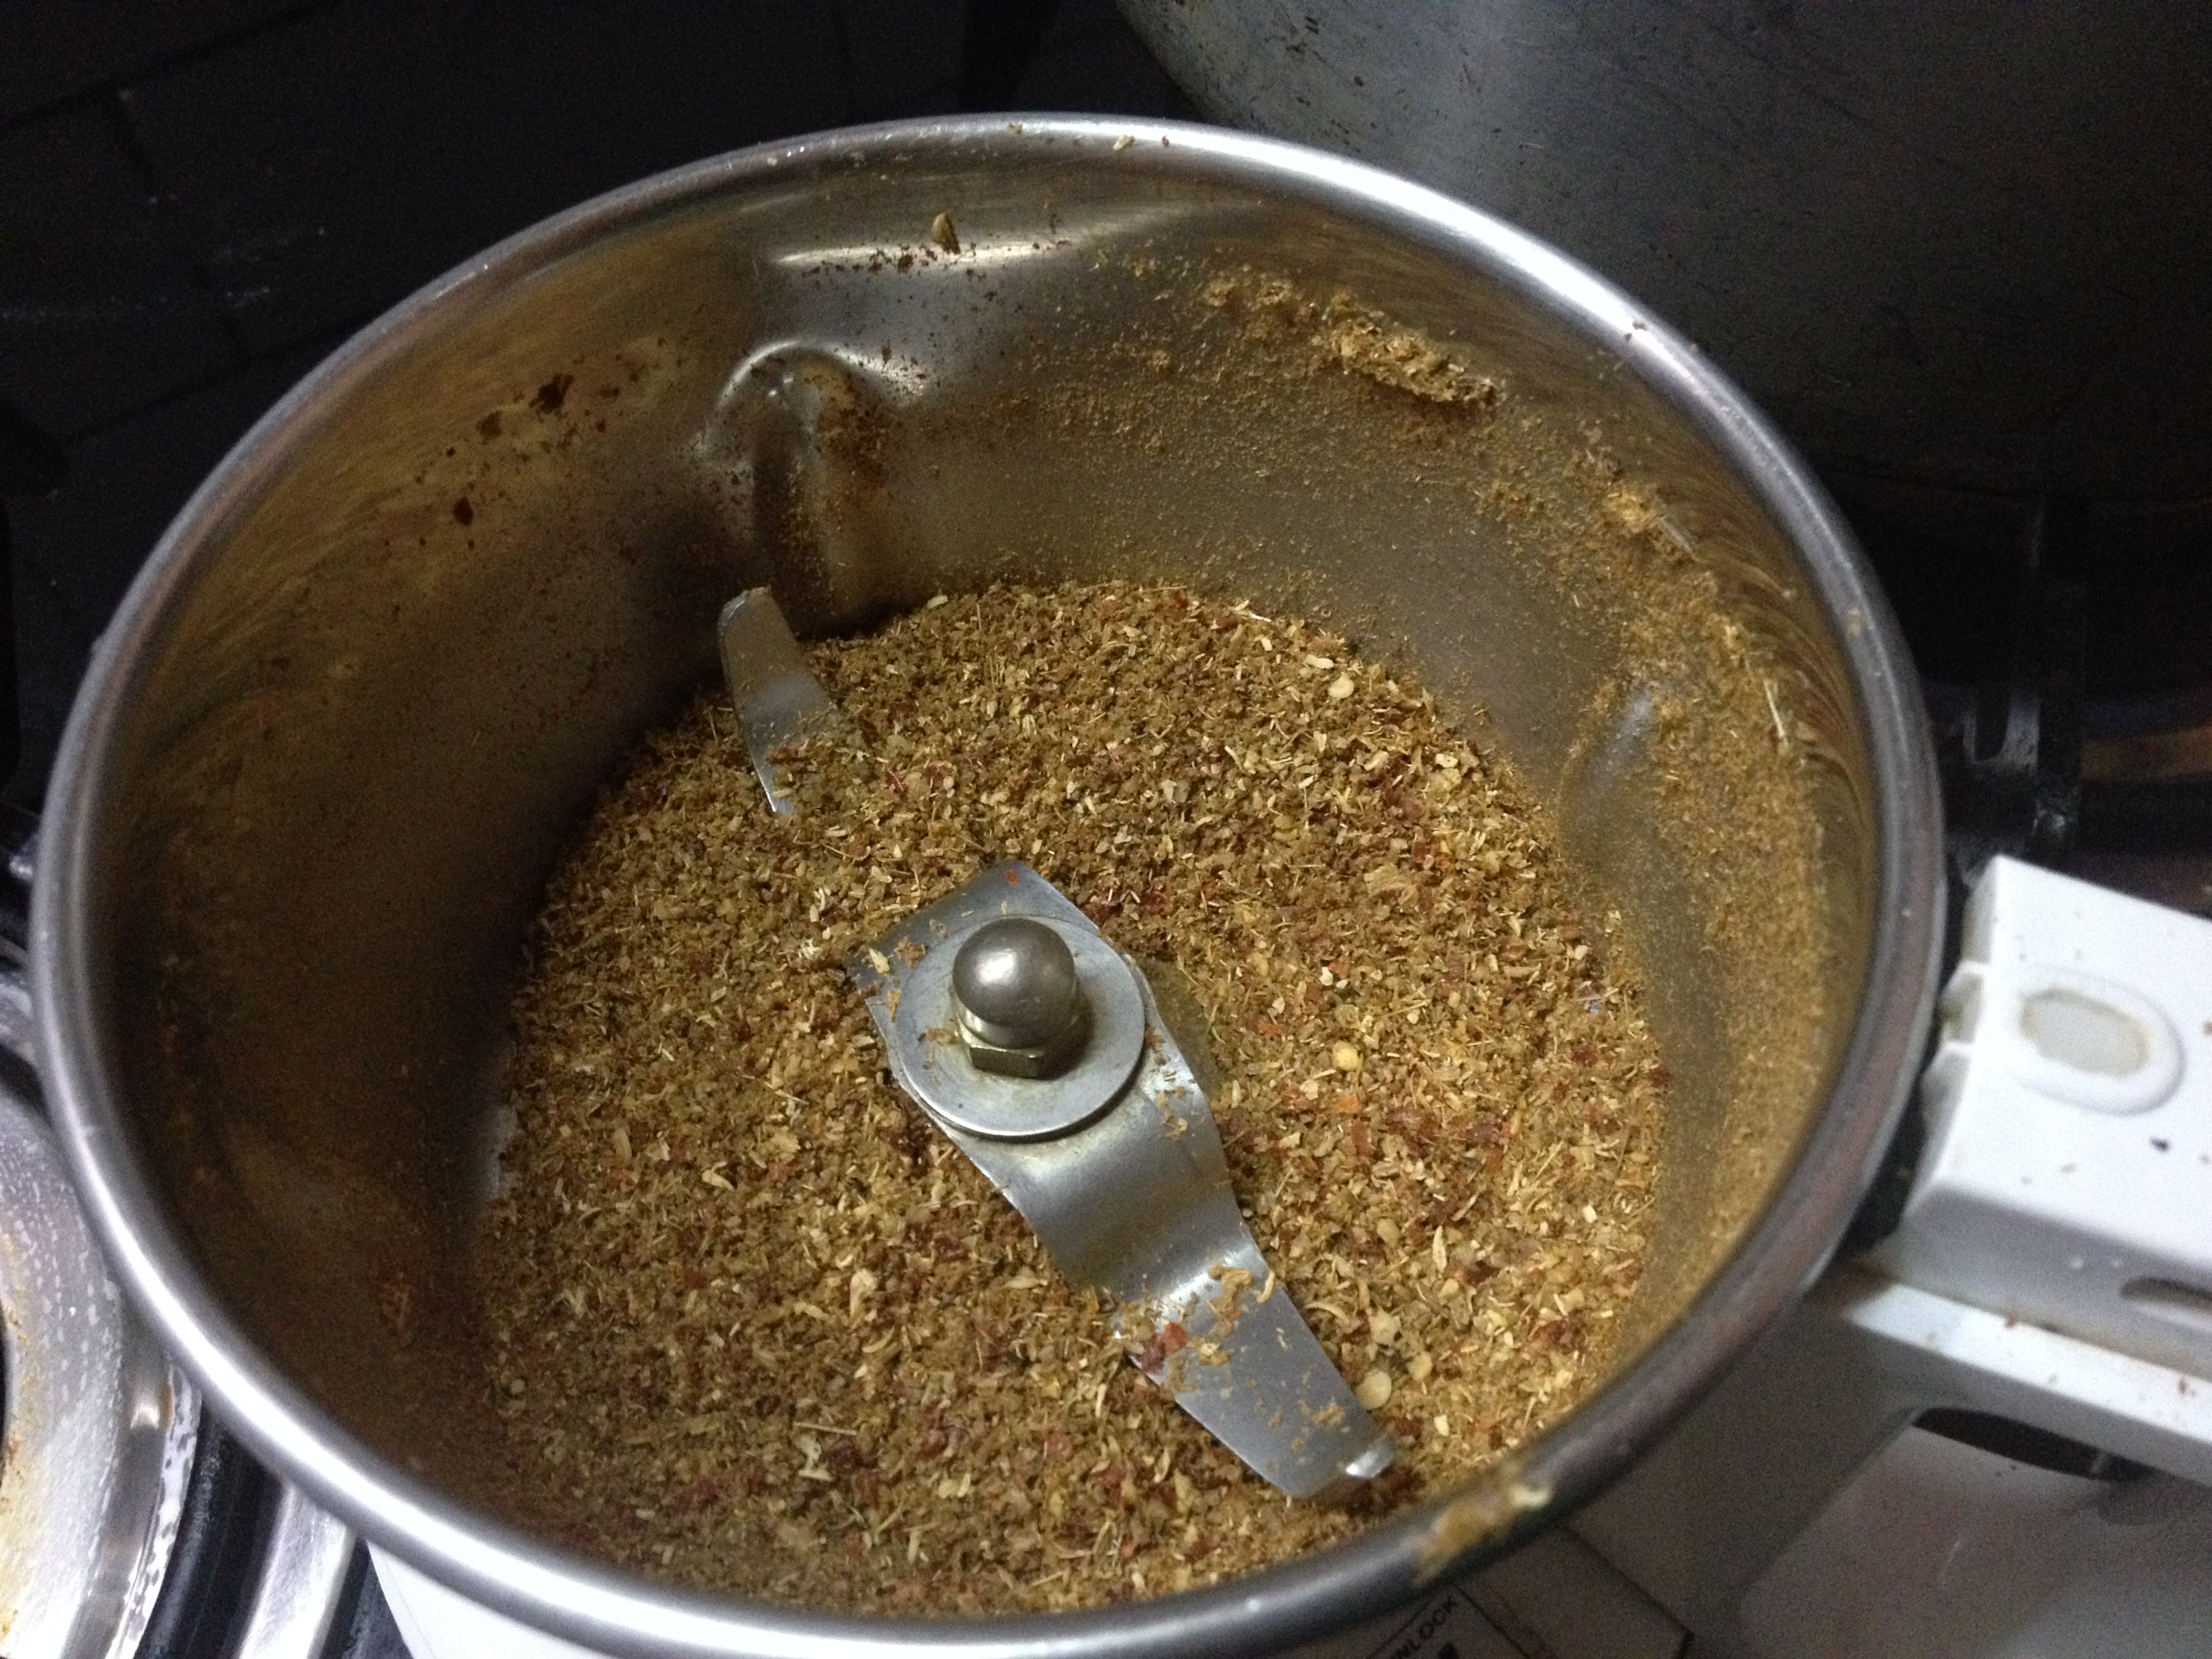
  1. Coarse grind ginger, garlic, fennel seeds and pepper corns together in a blender (without water). Though full pepper corns are fried with spices in Biriyani, I prefer to grind as there is no wastage on the plate. Additionally, ground pepper corn spices up the Biriyani with its unique flavor.
  2. Thinly slice onions. Caramelize sliced onions in 3 tsp oil.
  3. Finely chop green chilies and tomatoes separately. Keep aside.


img_6770
Part IV – Let’s do it – THE BIRIYANI

1. Heat pressure cooker and add oil and clarified butter.

2. Drop all the dry spices except pepper corns and fennel seeds (already blended with ginger-garlic)

img_6768

3. Next, add the ground ginger-garlic-pepper-fennel paste with green chillies and sauté.


img_6786

4. Add the chopped tomatoes and sauté till soft and mushy.

5. Then, add the caramelized onions and mix well.

6. Strain rice without water and add to the hot ingredients in the cooker and stir well.


img_6792

7. Add nutmeg, turmeric powder and salt.

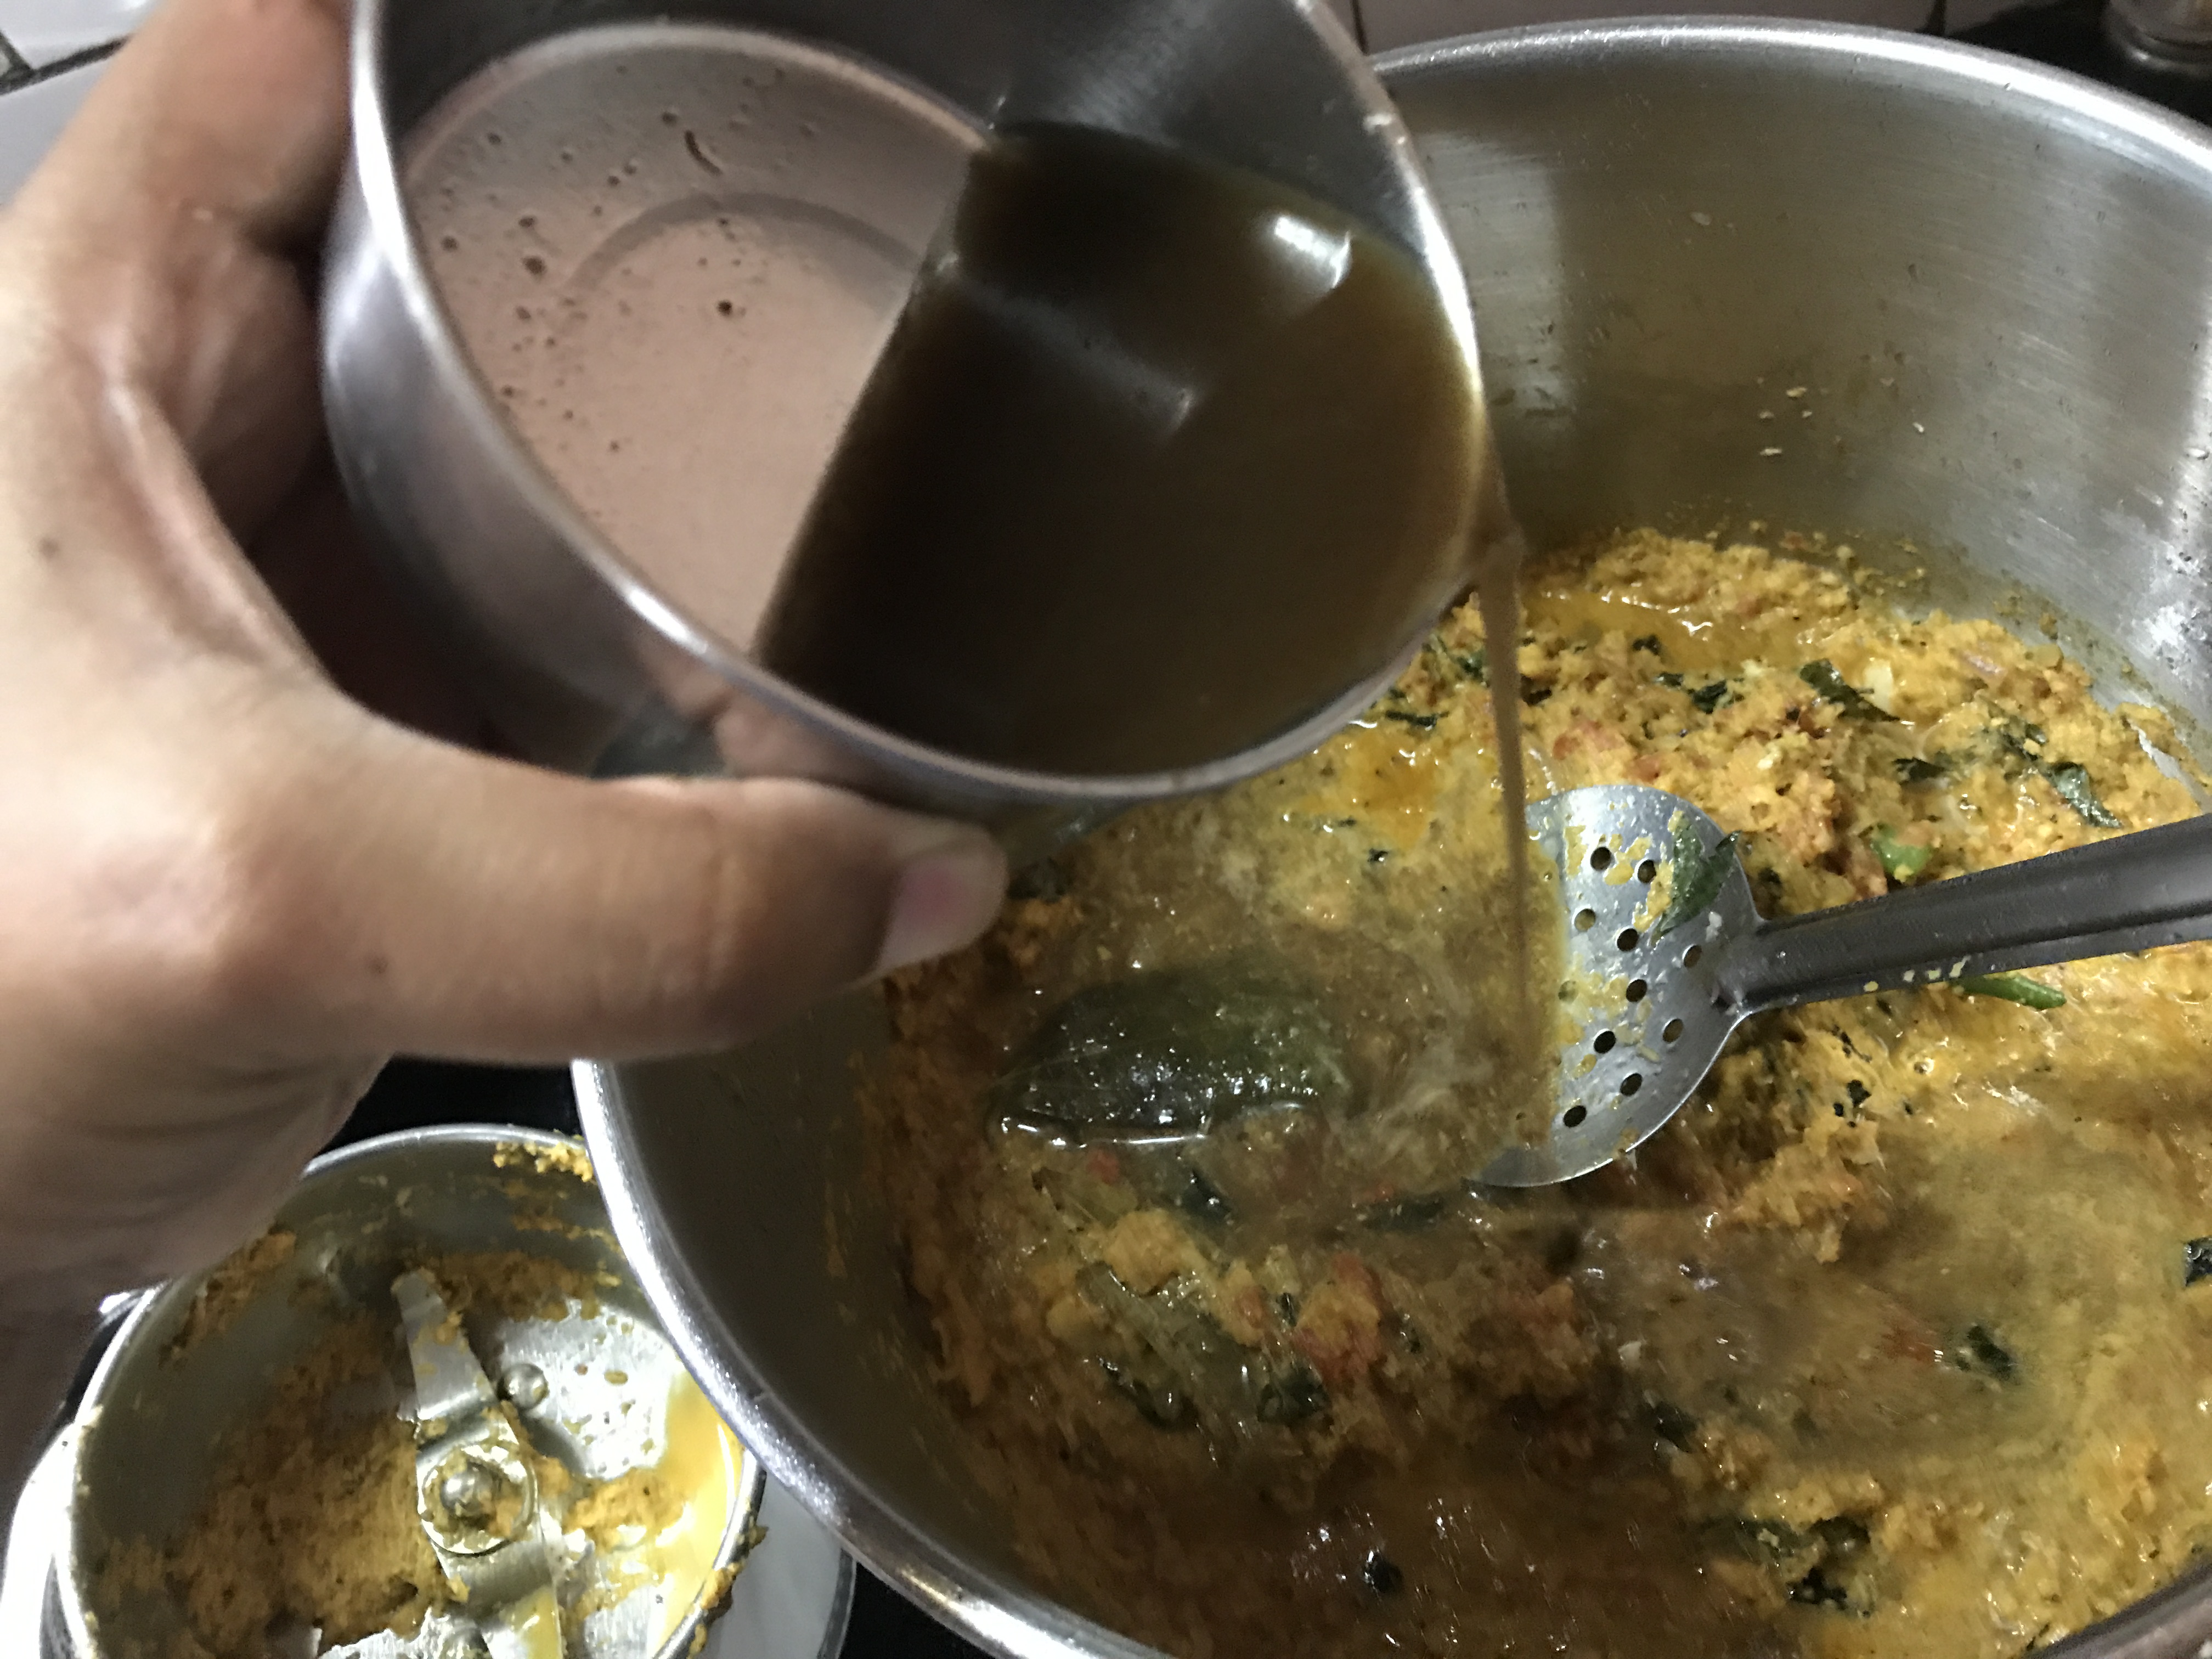
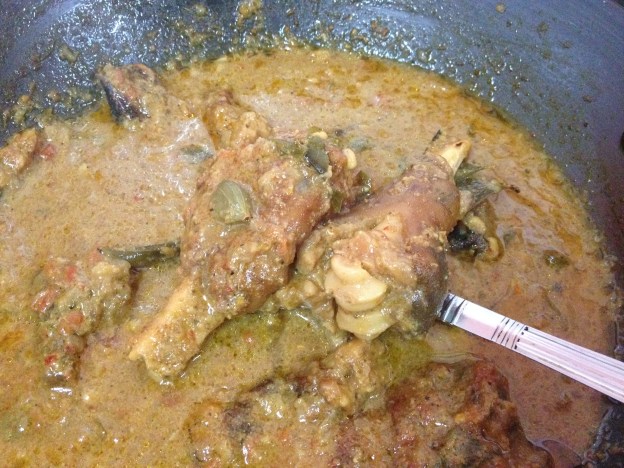
8. Strain mutton and save the cooked broth.

9. Add cooked mutton pieces and mix.
10.The most important ingredient- WATER

Now, it’s time to add water. I go by this ratio and it turns out good.

img_6799
For 1 cup of rice – 2 cups of water;
For 2 cups of rice – 4 cups water minus ½ cup = 3 ½ cups water
For 3 cups of rice – 6 cups of water minus ½ cup = 5 ½ cups water
For 4 cups of rice – 8 cups of water minus 1 cup = 7 cups water

So, for this biriyani, where 1 ½ cups rice is used, less than double or less than 3 cups, i.e. 2 ¾ cups of water is used.

  • Mutton cooked water – 1 cup
  • Saffron water – ¾ cup
  • Extra plain water – 1 cup

That works out to be 2 ¾ cups water for 1 ½ cups of rice.
Alter plain water according to the quantity of mutton cooked water you have. Add water, mix well.

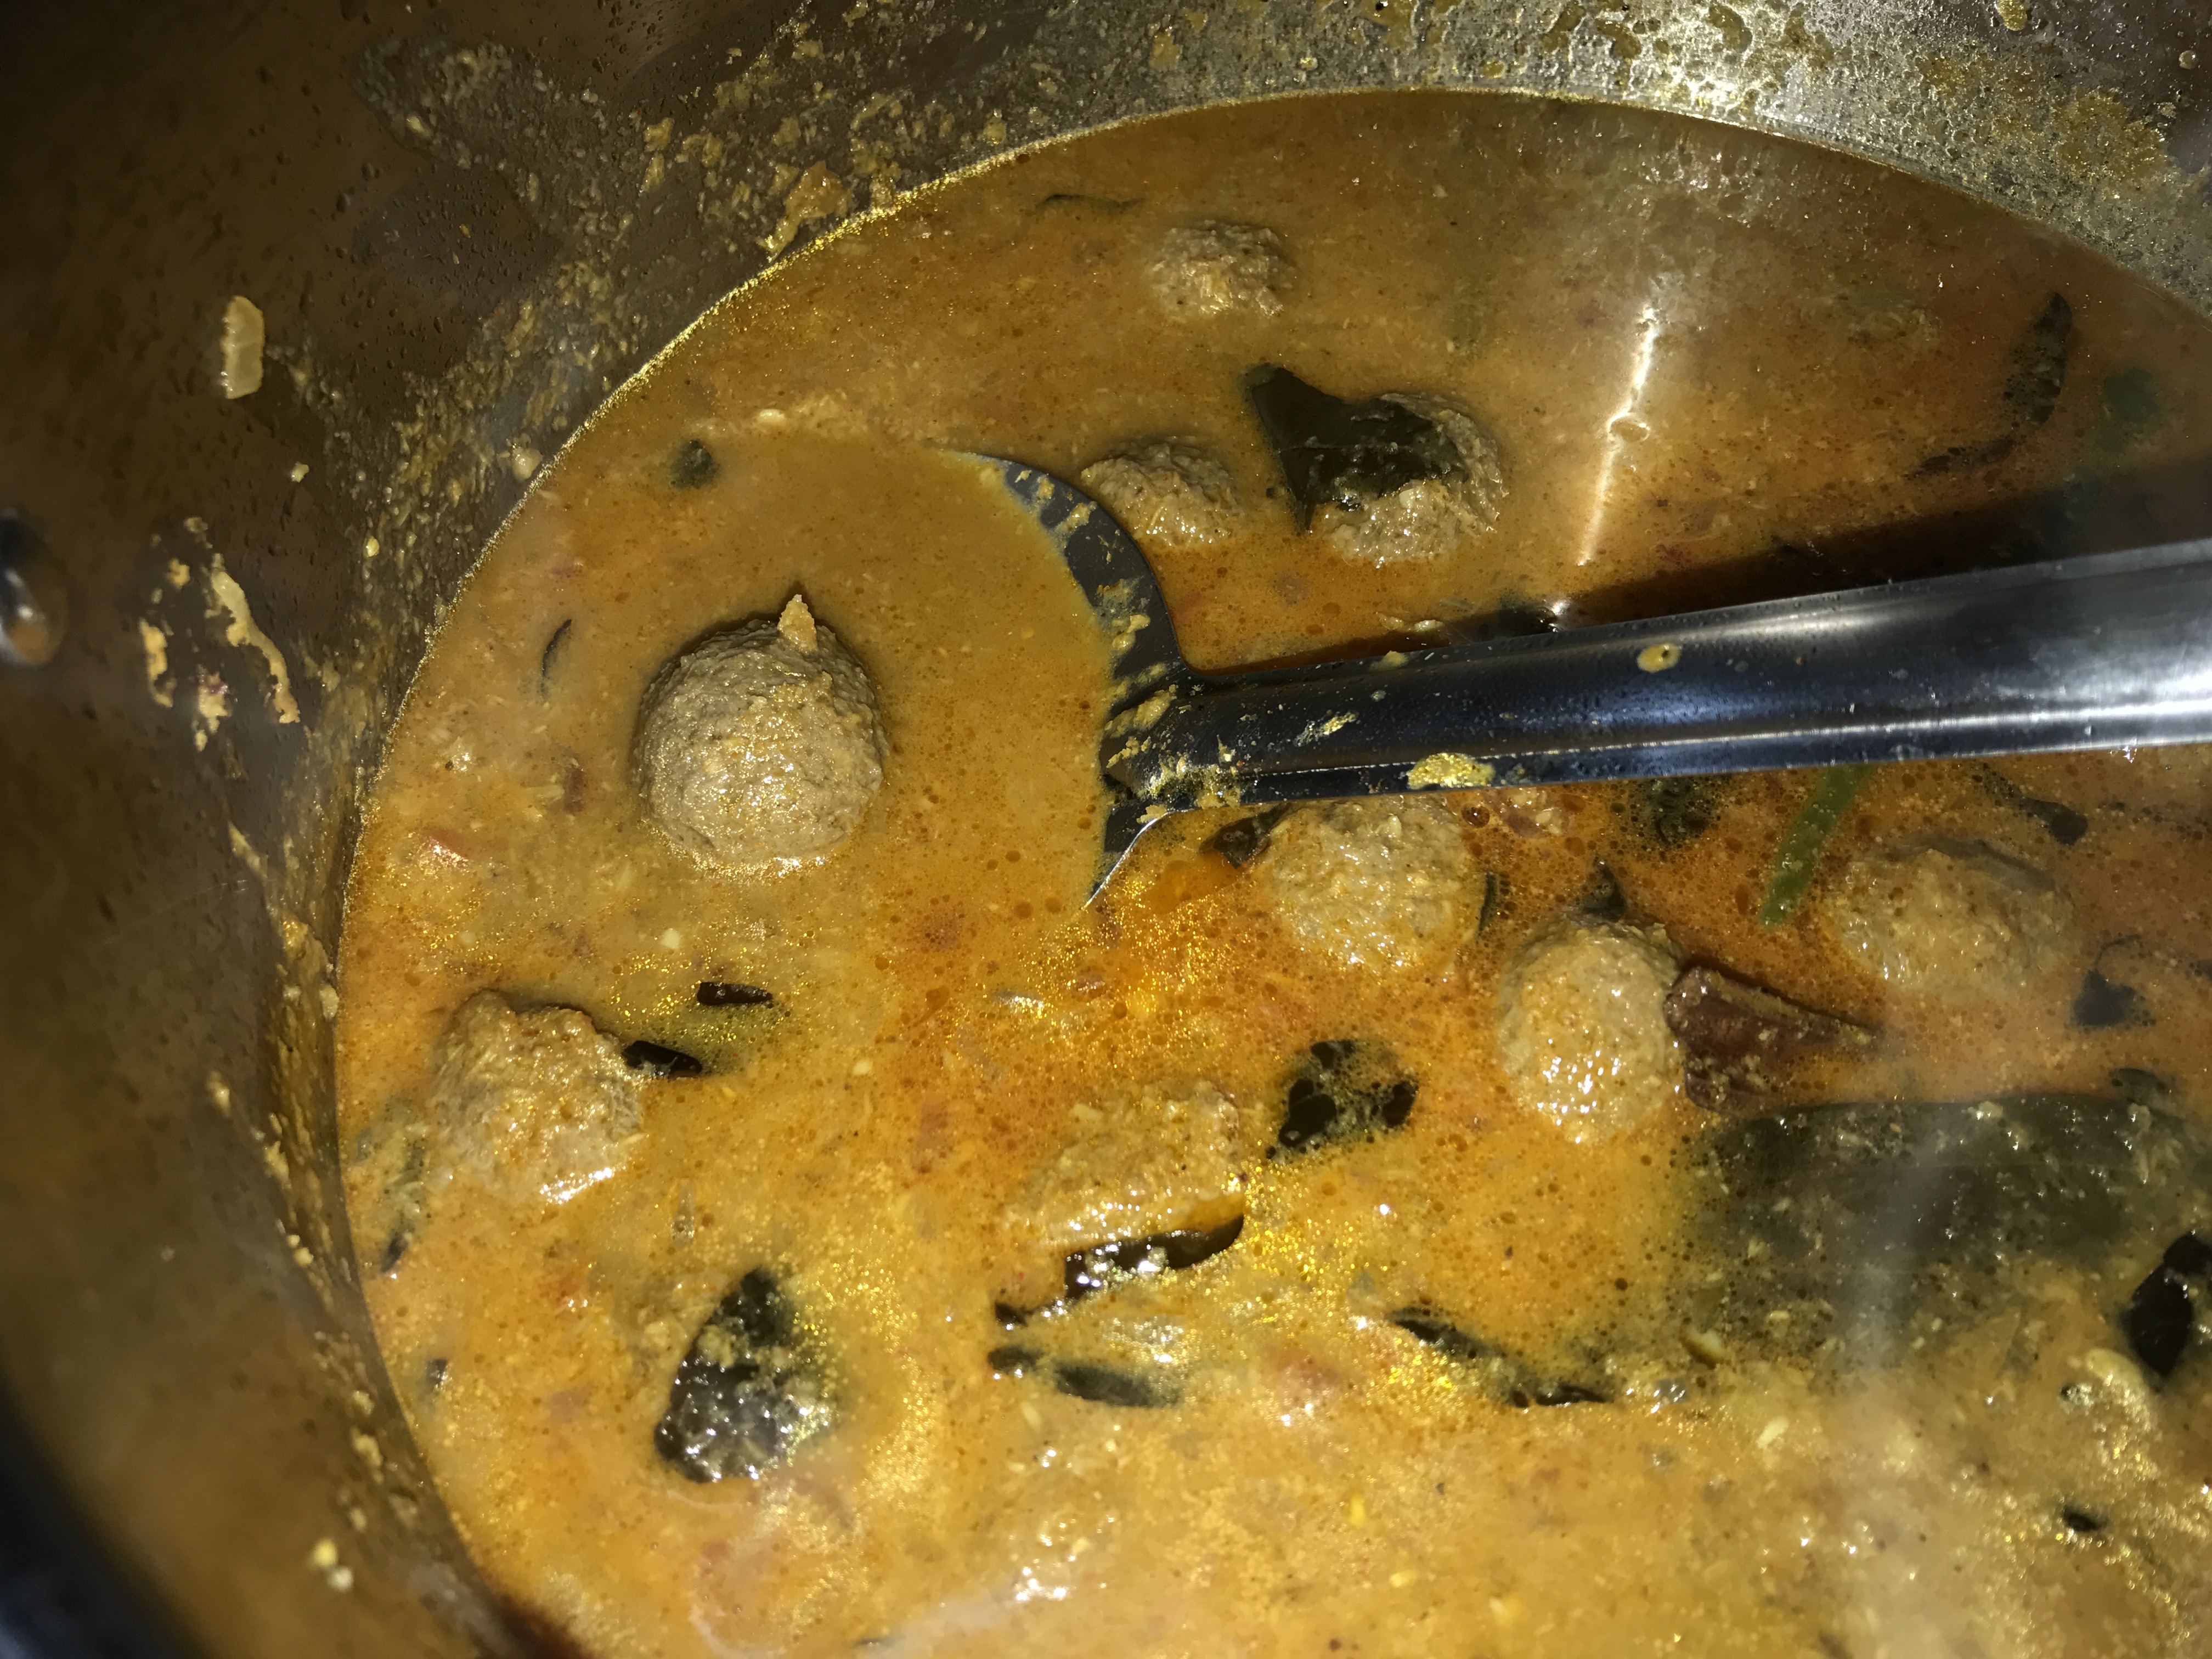
11. Check for salt. As mutton is already cooked, the water tasted does not consist raw meat. So, go ahead, taste and add salt if needed.

12. Close cooker with lid in full flame. Keep in full flame for 3 whistles. Switch off and wait for the pressure to release by itself.


img_6860

13.Open cooker and serve hot Biriyani.
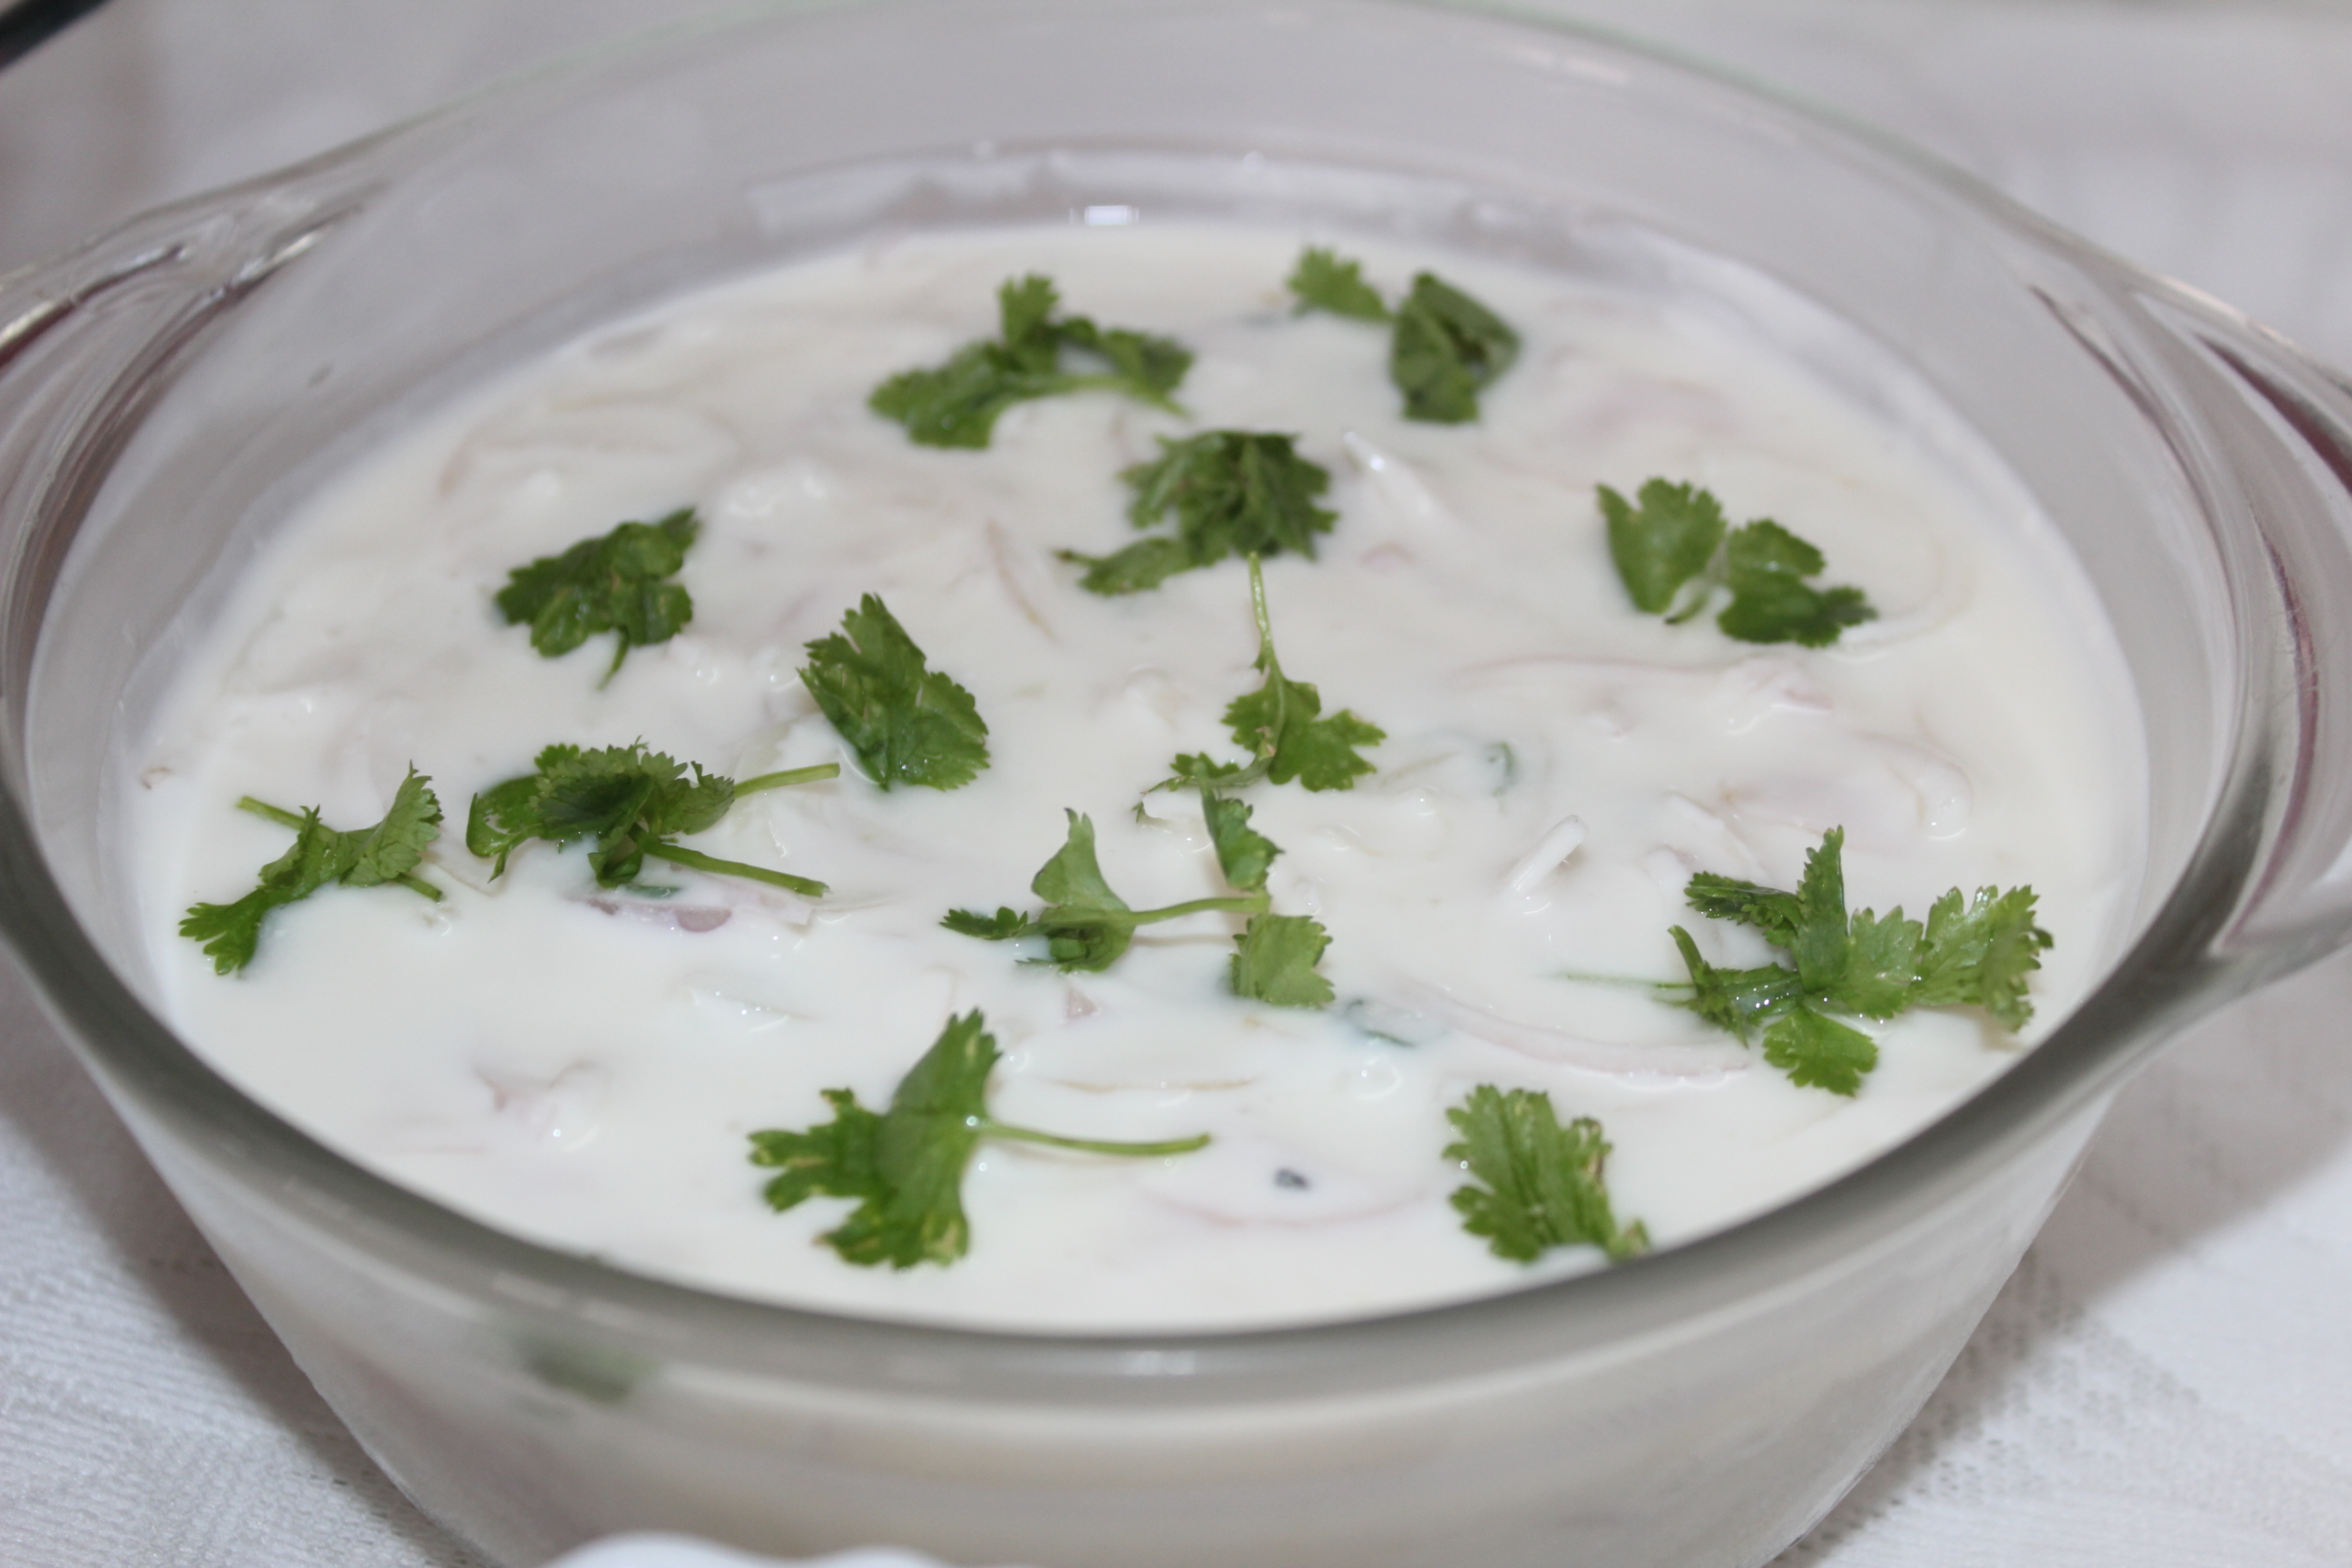
Biriyani- Thayir Pachadi / Biriyani- Onions in Yoghurt: Match made in heaven!

Thayir Pachadi – Onions in Yoghurt

img_6868


Biriyani needs a Thayir pachadi or Raita as in North Indian cuisine. Vegetable, chicken or mutton biriyani, is incomplete without the accompaniment of Pachadi.

Though, there can be many varieties of Pachadi/Raita. In Tamilnadu, a pachadi with just onions and little green chillies for spice is generally served with Biriyani.

  • thinly sliced onions – 3 no.s
  • thick yoghurt – to soak the sliced onions (approximately 3 cups)
  • chopped green chillies – as preferred
  • salt – to taste
  • coriander leaves (fresh) – for garnish


Mix all ingredients together and garnish with coriander leaves. In a restaurant that serves, vengaya pachadi or onion raita – yoghurt is less than mentioned above. But I prefer to have more yoghurt to the quantity Alter quantity of yoghurt as preferred.


img_6848

Rice with Meen Kuzhambu/Fish Curry

This can be a quick and easy sunday non-vegetarian meal – not to waste much of the precious weekend family time in the kitchen. One can also make this meen curry on a friday/saturday evening and store for the next day lunch/brunch! I don’t think this can be called an exact kuzhambu as generally kuzhambu is a thinner version. This can be fish in a thick gravy/thokku! Add more water and it can be converted to a simple kuzhambu.


The word ‘curry’

Curry has become a very popular and sort after word in the UK and many parts around the world…


The earliest apparent mention in print in the English language occurs in a translation (1598) of a Dutch traveller’s account of voyages in the E. and W. Indies. Referring to Indians, this text states that: ‘Most of their fish is eaten with rice, which they seeth in broth, which they put upon the rice, and is somewhat sour but it tasteth well and is called Carriel, which is their daily meat.’ http://www.huffingtonpost.com/encyclopedia/definition/curry/730/


The word comes from “Kari” which is from the Tamil language and was later anglicized into “curry”. Curry powder itself is not a single spice but a blend of different spices and can be mild or hot. This golden colored spice is one of the oldest spice mixes and is most often associated with Indian cuisine. http://www.indepthinfo.com/curry/history.shtml


There is also another view to the origin of the word curry in english –


200 cooks and several philosophers were summoned by King Richard II to produce the first English cookery book ‘The Forme of Cury’ in 1390. The book contained 196 recipes. None of these recipes have any thing in common with Indian curries. ‘Cury’ was the Old English word meaning cuisine based on French ‘cuire’ meaning: to cook, boil, or grill.. After the cookery book, Cury became a popular part of English vocabulary. The term Cury became associated with stew. http://www.indiacurry.com/faqhistory/hfaqcurry.htm


 ‘Kari’ means Meat

The word ‘curry’ is believed to be the anglicized version of the tamil word ‘kari’. But, in Tamil, the word kari/curry might denote meat..

Kozhi kari kuzhambu means Chicken Gravy – where kozhi means chicken, kari means meat and kuzhambu means gravy;

Aatu kari kuzhambu means Lamb Gravy – Aadu means Lamb, kari kuzhambu means meat gravy;

The same applies for Meen kari kuzhambu where Meen means Fish; and 

Kothu Kari means Minced Meat.


Most people in the world today know what a curry is – or at least think they do. In Britain the term ‘curry’ has come to mean almost any Indian dish, whilst most people from the sub-continent would say it is not a word they use, but if they did it would mean a meat, vegetable or fish dish with spicy sauce and rice or bread. http://www.menumagazine.co.uk/book/curryhistory.html


Now, the Meen Curry. 

Meen Curry

Ingredients (serves four)

  • meen/fish – 500 gms (any variety – with bones or fillet as preferred)
  • garlic – 6 cloves
  • onions – 2 medium
  • tomato – 2 medium
  • tamarind – marble sized ball
  • red chilli powder – 2 tsp
  • coriander powder – 3 tsp
  • pepper powder – 1/2 tsp
  • turmeric powder – 1/2 tsp
  • salt – as needed
  • oil – 4 tbsp
  • kadugu/mustard seeds – 1 tsp
  • vendhayam/fenugreek seeds – 1/2 tsp
  • curry leaves – a few


 Method of Preparation

  1. Clean the fish pieces; apply salt and turmeric powder and keep aside
  2. Finely chop garlic, onions and tomatoes separately
  3. Wash and soak tamarind in 1 cup hot water
  4. Heat oil in an iruppu chatti/Pan
  5. Add mustard seeds, when they splutter add fenugreek seeds and curry leaves
  6. Add chopped garlic, onions and tomatoes and fry for a while
  7. Add turmeric, chilli, pepper and coriander powders and salt and fry well
  8. Strain the tamarind and add the pulp
  9. Cook till the raw smell of spices and tamarind goes away
  10. Add the fish pieces and let the fish cook in the pan with closed lid in sim position
  11. The fish would be cooked in 5 -7 minutes or a little more
  12. Thicken the gravy if needed or add some water to make it thinner
  13. Serve hot with rice.


 Note:

  1. After the fish is washed, a paste of turmeric powder and salt is rubbed over the fish pieces and kept for at least 1/2 an hour
  2. Soak tamarind in hot water to easily get the pulp or paste
  3. Meen Kuzhambu tastes best when made in an earthen pot.

Thengai Pal Meen Kuzhambu/Fish Curry with Coconut Milk

After a few years of cooking not so good meen kuzhambu/fish curry or not as good as mother-in-law’s fish curry, this one came as a respite. This fish curry never flopped – might be because of the coconut milk added. Thengai Pal means Coconut Milk in tamil and thengai pal gives an exotic flavour to any curry or payasam, no doubt. 

Meen Kuzhambu holds a special place in Tamilnadu cuisine.  Fresh fish curry is not served immediately and is considered better in taste the next day. The fish is left to absorb the flavour of tamarind with spices till the next day -not in the refrigerator please! I have seen my mother-in-law cook fish kuzhambu specially in a man chatti – earthen pot and leave it till next day. Though I don’t wait till the next day, at least three to four hours of waiting time after the curry is done is advisable.

While traditional Meen Kuzhambu would follow in the near future, this kuzhambu is something for the buffet table I would say. Frozen fish fillet also suits this and in fact, I find fillet tastes best in this kuzhambu/gravy.  Ingredients needed to make this kuzhambu are also easily available in the market – especially not much of spice grinding involved for those ‘quick cooks’!

For those new entrants to the world of non-vegetarianism (quite recently like me) and those who find tasting, consuming and especially cooking fish a troublesome issue, this kuzhambu would be easy work. Might be useful for non-cook husbands too – to introduce their wives to the fish world! Now, let’s plunge into making thengai pal meen kuzhambu.

Here, Tilapia Fish is used as it tastes better. I also use Panga Fish fillet got from the fish store.  But, feel free to use any kind of fish you love.

Thengai Pal Meen Kuzhambu/Coconut Milk Fish Curry


Ingredients (serves 2)

  • Meen – Any fish/fish fillet – 250 gms
  • fenugreek seeds – 1 tsp
  • garlic – 5 cloves
  • chinna vengayam/shallots – 8 nos. or big onion – 1 no.
  • tomatoes – 2 no.s
  • tamarind – lemon sized ball
  • red chilli powder – 2 tsp
  • coriander powder – 1 tsp
  • salt – as needed
  • coconut milk – 1 cup (canned or freshly extracted)
  • any cooking oil – 2 tsp
  • For Tempering
  • nallennai/gingelly oil – 2 tsp 
  • mustard seeds – 1/2 tsp
  • curry leaves – a few


 chinna vengayam/shallots and poondu/garlic


Method of Preparation

  1. Soak tamarind in warm water for 15 minutes. Take the juice and keep aside
  2. Peel the skin of garlic, wash and keep aside
  3. Chinna vengayam or shallots always taste good in any fish curry – just peel the skin, wash and keep aside. If one uses big onion, peel, wash and cut to four pieces.
  4. Heat 1 tsp oil in an iruppu chatti/kadai
  5. Fry 1 tsp fenugreek seeds, garlic and onions in oil
  6. When they turn golden brown, add tomatoes and let them become soft
  7. Cool and blend well
  8. Heat remaining 1 tsp cooking oil in an iruppu chatti, and pour in the blended mixture
  9. Add tamarind juice, red chilli powder, coriander powder and salt and bring it to boil
  10. Let it boil to make a semi-thick gravy. Once fish is added, the gravy would become thinner/watery. Hence, it is advisable to make a thick gravy and then add fish to it
  11. Once the fish is cooked, pour in the coconut milk and cook in medium position for 5 minutes
  12. Tempering with gingelly oil enhances the taste of any south indian kuzhambu. Heat 2 tsp gingelly oil in a separate chatti; Add mustard seeds – when they splutter add curry leaves
  13. Pour this into the meen kuzhambu and serve hot
  14. Thengai Pal Meen Kuzhambu tastes best with Rice.


Note:

  1. Red chilli powder can be altered as per taste
  2. Tamarind pulp available in shops can also be used – add water and make a pourable consistency
  3. Meen Kuzhambu is cooked in nallennai or gingelly oil. If it is not available, one can use any cooking oil.

Kozhi Thokku/Chicken Thokku

This is my first non-vegetarian recipe. Born in a vegetarian family, married into a non-vegetarian family, a cook in true spirit, I am now a non-vegetarian – who likes to experiment on chicken, fish and lamb dishes but would prefer a vegetarian diet for myself. 

As a teenager, though I had tasted chicken secretly (inquisitive to know what it tasted like) with cousins (of course our parents know it all now), bringing meat home and cooking was not an acceptable thing initially.  When I was married I was a complete vegetarian – not even eggs were allowed!  Times have changed since then.

These are some of the reasons why I continue cooking non-vegetarian food –

1. When I started cooking non-veg. food, I found that chicken and lamb struck very well with any masala and gave remarkable results. So, not knowing anything about the intricacies of speciality non-veg. cooking of Tamilnadu, I used (and still use) the same methods of cooking vegetarian spicy dishes and was successful too.

2.  Initially when I started hosting – I could sense that the buffet table was kind of incomplete without the non-vegetarian dish. Even with a lavish spread of vegetarian items, one non-veg. dish did some unexplainable magic.

3. Especially when kids were invited, they were delighted or (if I sound too self-praising) – they were satisfied with rice and chicken  or rice and lamb curry. This made it easier for parents too.

4. This one I think should have topped the list. When my husband introduced me to his well wishers as his newly wed wife, while they welcomed me into the set-up, they expressed their concern about the taste buds of the man of the house and his survival without  chicken, lamb or fish at least once a week. Wherever I was invited, even people whom I met for the first time, took so much care to make me understand how difficult it was to live without chicken and fish, more difficult to live with a wife who wouldn’t cook all those humble curries and the most difficult – to ask (request?!) the newly wed wife to cook some chicken curry where the man knows nothing about cooking!

5. Of course reason no.4 did not make me cook chicken curry – but I must confess – the nature of my husband to forgo non-vegetarian food to make me comfortable made me try this in full swing and I remember I cooked a simple lamb curry and rice as a surprise lunch (taught by one of those friends).  How bad he felt to have put me in such a terrible situation cooking something alien and the big lecture I received on that are different episodes of the story!

It was first ‘cooking for friends but not tasting technique’;  Then came, ‘tasting the gravy to serve but not eating technique’; Then, there was enlightenment – cooking, tasting, eating and more cooking, tasting and eating! It is a stress free life now!

So, ‘forgoing non-veg. food for vegetarian wife technique’ did it all!! 

So, the first call I made was to my mother-in-law and told her I started cooking non-veg. at home.  A very caring mom-in-law that she still is, told me to stop. Though she was happy for her son, she didn’t want me to take the trouble as I grew in a vegetarian family – she didn’t want my parents to feel bad too. Like a true enlightened soul, I stuck to my new Principle. Since then, she has been my special tutor in non-vegetarian studies – especially in the art of cleaning and marinating meat and the special fish kuzhambu – which I have not perfected even after so many years.

So, now to some cooking –

Kozhi Thokku/Chicken Thokku

Thokku can be a thick  gravy or a thick paste. With medium or high level spice, this can go well with rice, chappatis or idli/dosas. Unlike chutneys which are ground to pastes and served immediately, thokkus are cooked for a long time to make it a pasty consistency – and are quite filling too. There can be vegetarian and non-vegetarian thokkus. They can also be stored for at least three days due to the thickening process involved. Certain pickles are made in the thokku form and can be stored for months.

This chicken thokku is an aromatic,  flavourful dish – simple and easy to cook too.

Ingredients (serves 2 persons)

  • kozhi/chicken – 400 gms
  • oil – 2 tbsp
  • chopped coriander leaves – to garnish

Finely chop –

  • ginger – small piece
  • garlic – 4 cloves
  • onions – medium size – 2 no.s
  • tomato – small – 2 nos./big – 1 no.

Dry powders –

  • turmeric powder – 1/2 tsp
  • red chili powder – 1 tsp (adjust according to spice need)
  • coriander powder – 1 tsp
  • pepper powder – 1/2 tsp
  • garam masala – 1 tsp
  • salt – to taste

Optional –

  • finely chopped green chillies – 1 no. to make it more spicy
  • lemon juice – 2 tsp


Method of Preparation

  1. Clean, wash and cut chicken to medium size pieces. Chicken can be boneless or with bones as per family preference
  2. Chop ginger, garlic, onions and tomatoes separately
  3. Usage of more tomatoes makes the colour reddish, consistency pulpy and reduces the taste of garam masala. What we need is a dark brownish colour with a thick paste consistency with the aromatic flavour of garam masala intact. Hence, if the tomato is big, take one and use two if small in size
  4. Heat oil in an Iruppu chatti/Kadai
  5. Fry chopped ginger and garlic till golden brown
  6. Add chopped onions and fry till golden brown
  7. Add chopped tomatoes and all the dry powders one after the other
  8. Mix well and sprinkle little water, not to allow chicken to burn at the bottom of the kadai
  9. Close the kadai and cook in sim position
  10. With the lid closed, chicken would release water and let it cook in the same released gravy
  11. Add very little water if chicken sticks to the kadai. Normally, no extra water would be required
  12. When chicken is done, open the lid and cook till gravy thickens
  13. When a semi thick gravy consistency arrives, it would start coating the chicken; When the coating becomes thicker and turns to dark brown in colour, thokku is done
  14. Garnish with chopped coriander leaves. Serve hot with rice, chappatis, idlis or dosais

Note:

  1. Chopped green chillies can be added along with dry powders to make thokku more spicy. This is purely optional.
  2. One might also add some lemon juice after the stove is turned off. This would give a tangy flavour to the spicy chicken thokku
  3. The quantity of chili powder can be altered according to the spice level of chillies and need of the family.