Tag Archives: deepavali savoury

Ribbon Pakoda/Gram flour Fritters (ribbon shaped)


IMG_3299

Ribbon Pakoda gets it name from its shape I suppose! The fritters look like ribbons – so when did the name come – after the Britishers came in, then what would have been its name before?

Ofcourse, there are a few tamil names to these fritters-
1. ‘Naadaa Thenkuzhal’ – fritters in the shape of string or rope
2. ‘Olai Pakoda’ – Olai is the name given to leaves of coconut and palm – especially dried leaves – Olai Chuvadi means Palm script written centuries ago. Ilai is the word for leaves in general – Maavilai – mango leaf; vaazhai ilai – banana leaf and so on…
Panai Olai for Palm leaf and Thennai Olai for coconut leaf – the dried version. The young leaves of these are called panang-kuruthu and thennang-kuruthu – so ‘kuruthu’ is fresh leaf here. Olai is the dried leaf. These fritters might look like the dried leaves too!!

There needs more exploration into the reasoning of names.

Now, to Diwali and the savouries stored for days, but the storage attempt always invariably fails – as they wouldn’t last a couple of days. All passers by in the family would open the ‘thooku chatti’ or the vessel in which the savouries are stored and then – not to worry – life moves on – to the next savoury or sweet.
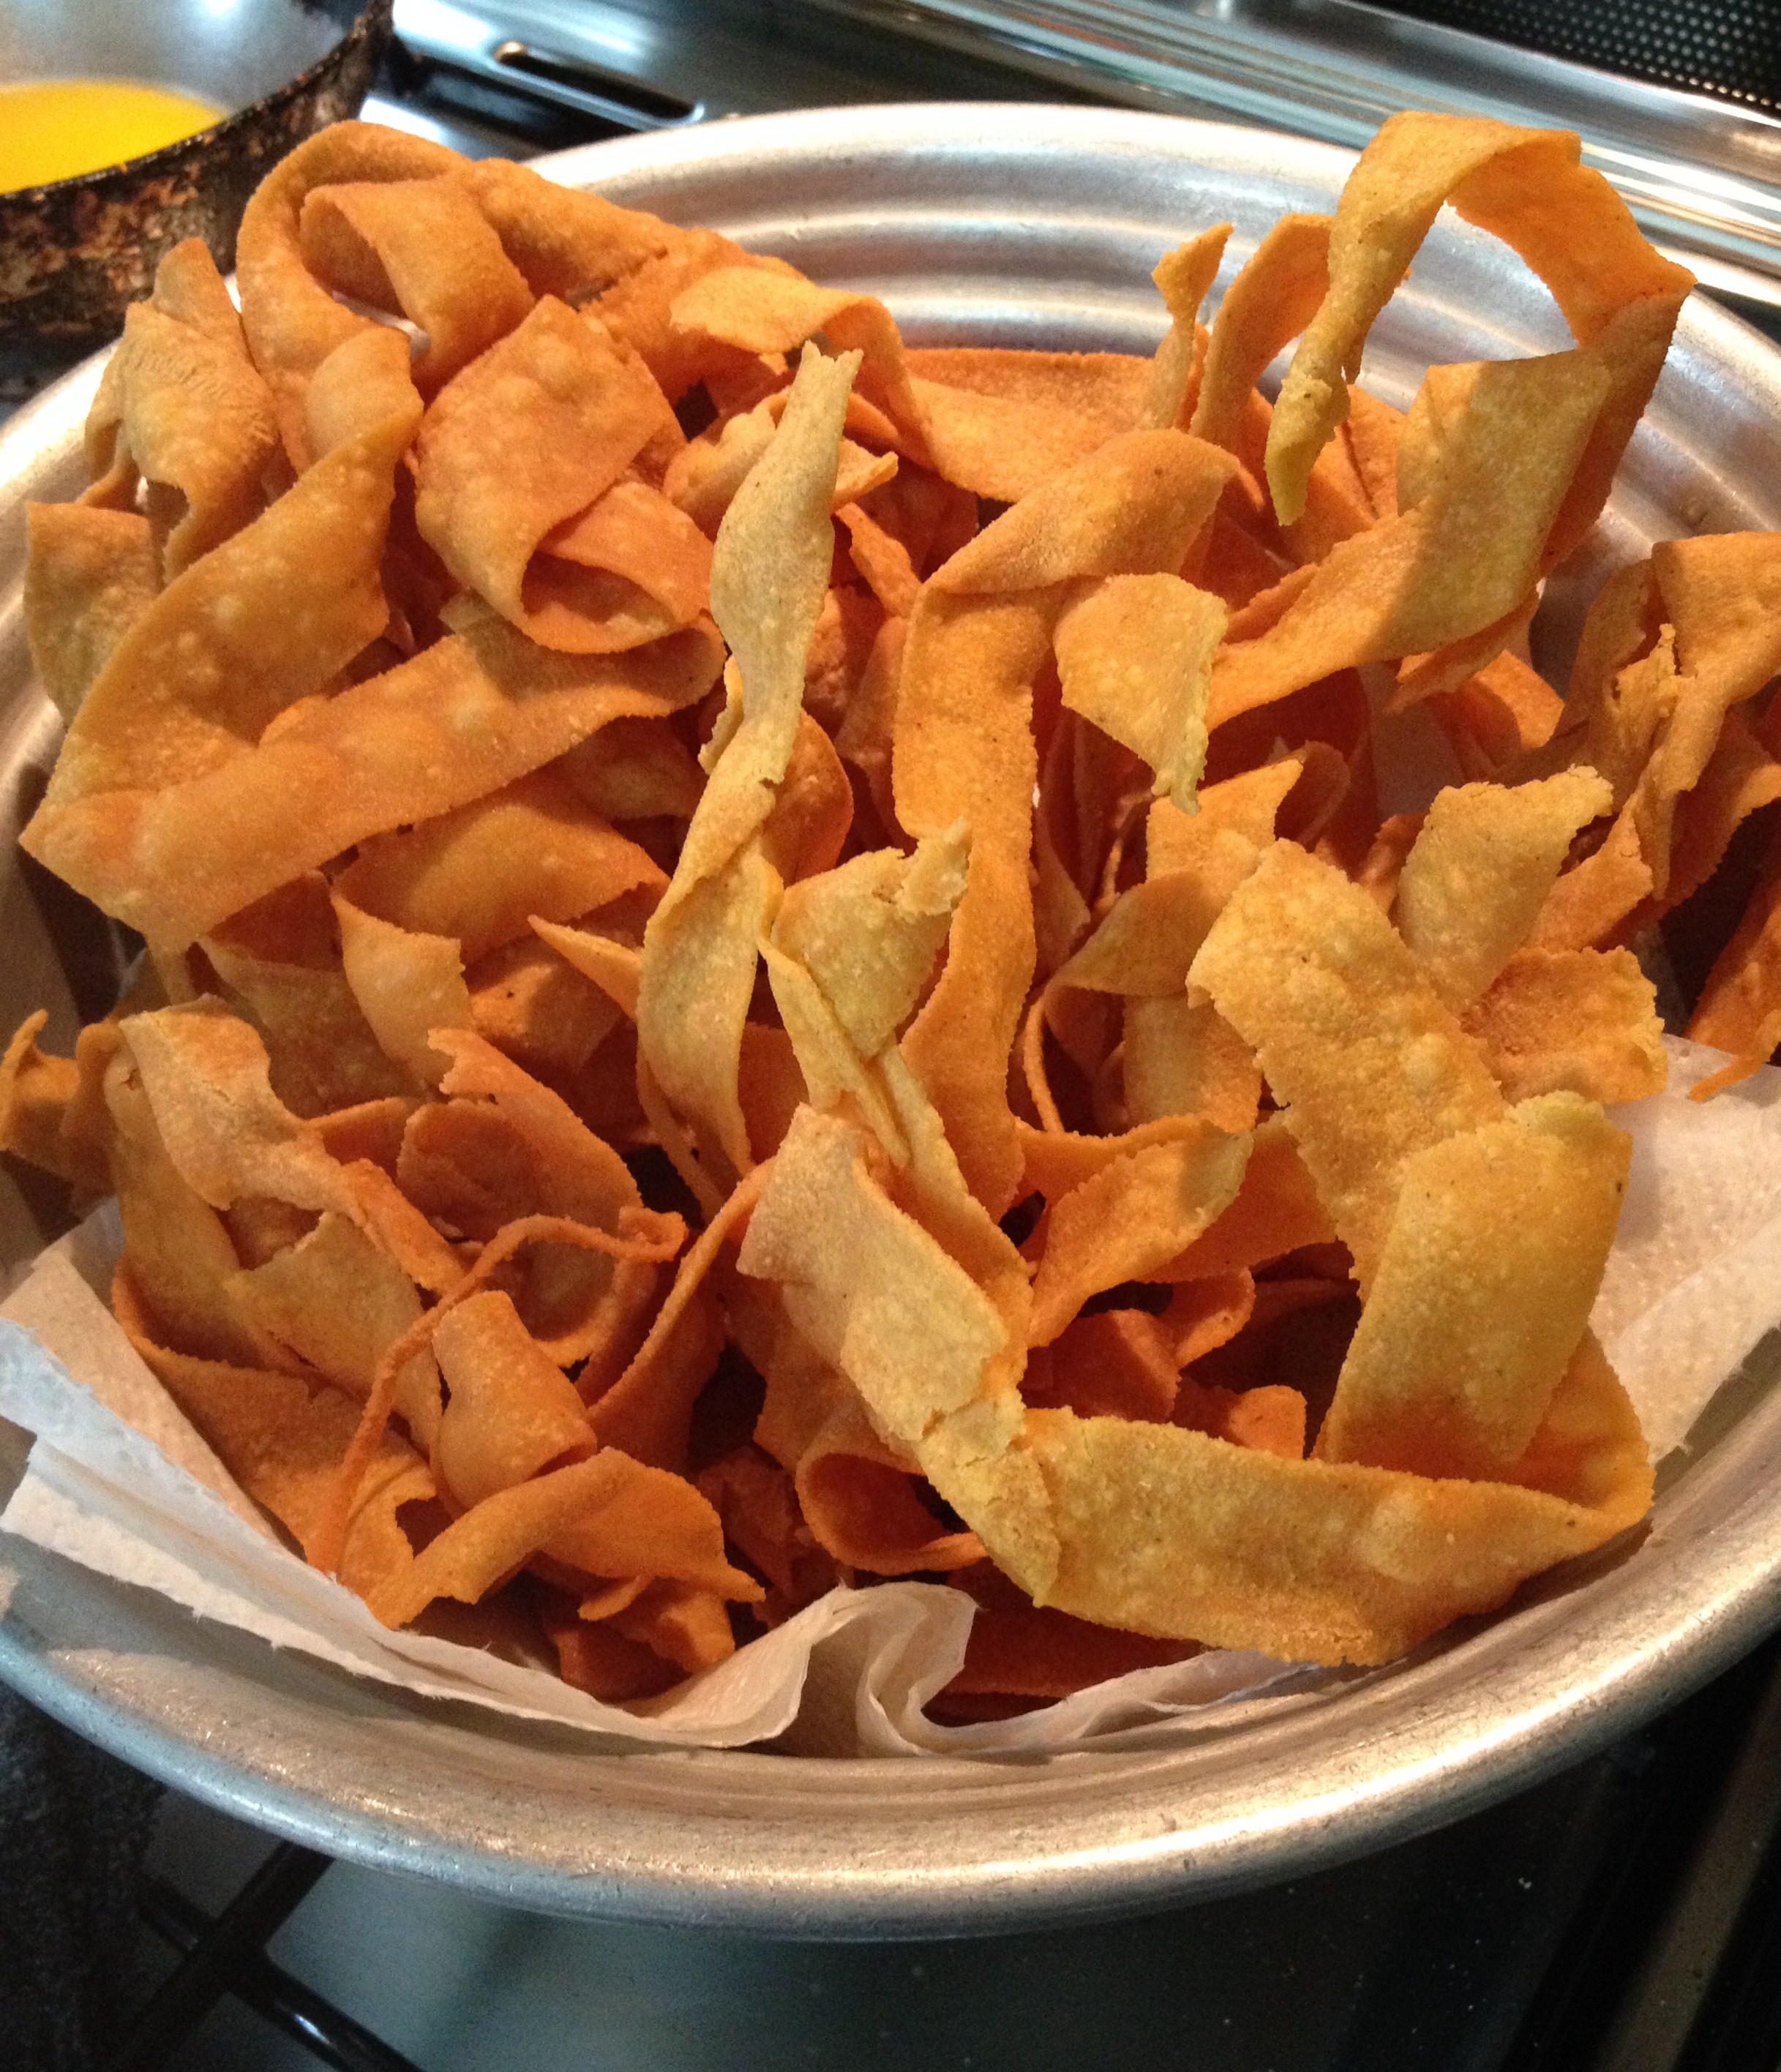
 

Ribbon Pakoda


IMG_3327


Ingredients

  • kadalai maavu/gram flour – 2 cups
  • arisi maavu/rice powder – 1 cup
  • milagai vatral podi/red chilli powder – 1/2 tsp – 1 tsp
  • salt – to taste
  • perungayam/asafoetida powder – 1/4 tsp
  • vennai/butter or nei/clarified butter – 3 tsp
  • yennai/oil – to deep fry
  • thanneer/water – as needed

optional additions

  • poondu/garlic – 4 cloves (make a paste)
  • seeragam/cumin seeds – 1 tsp
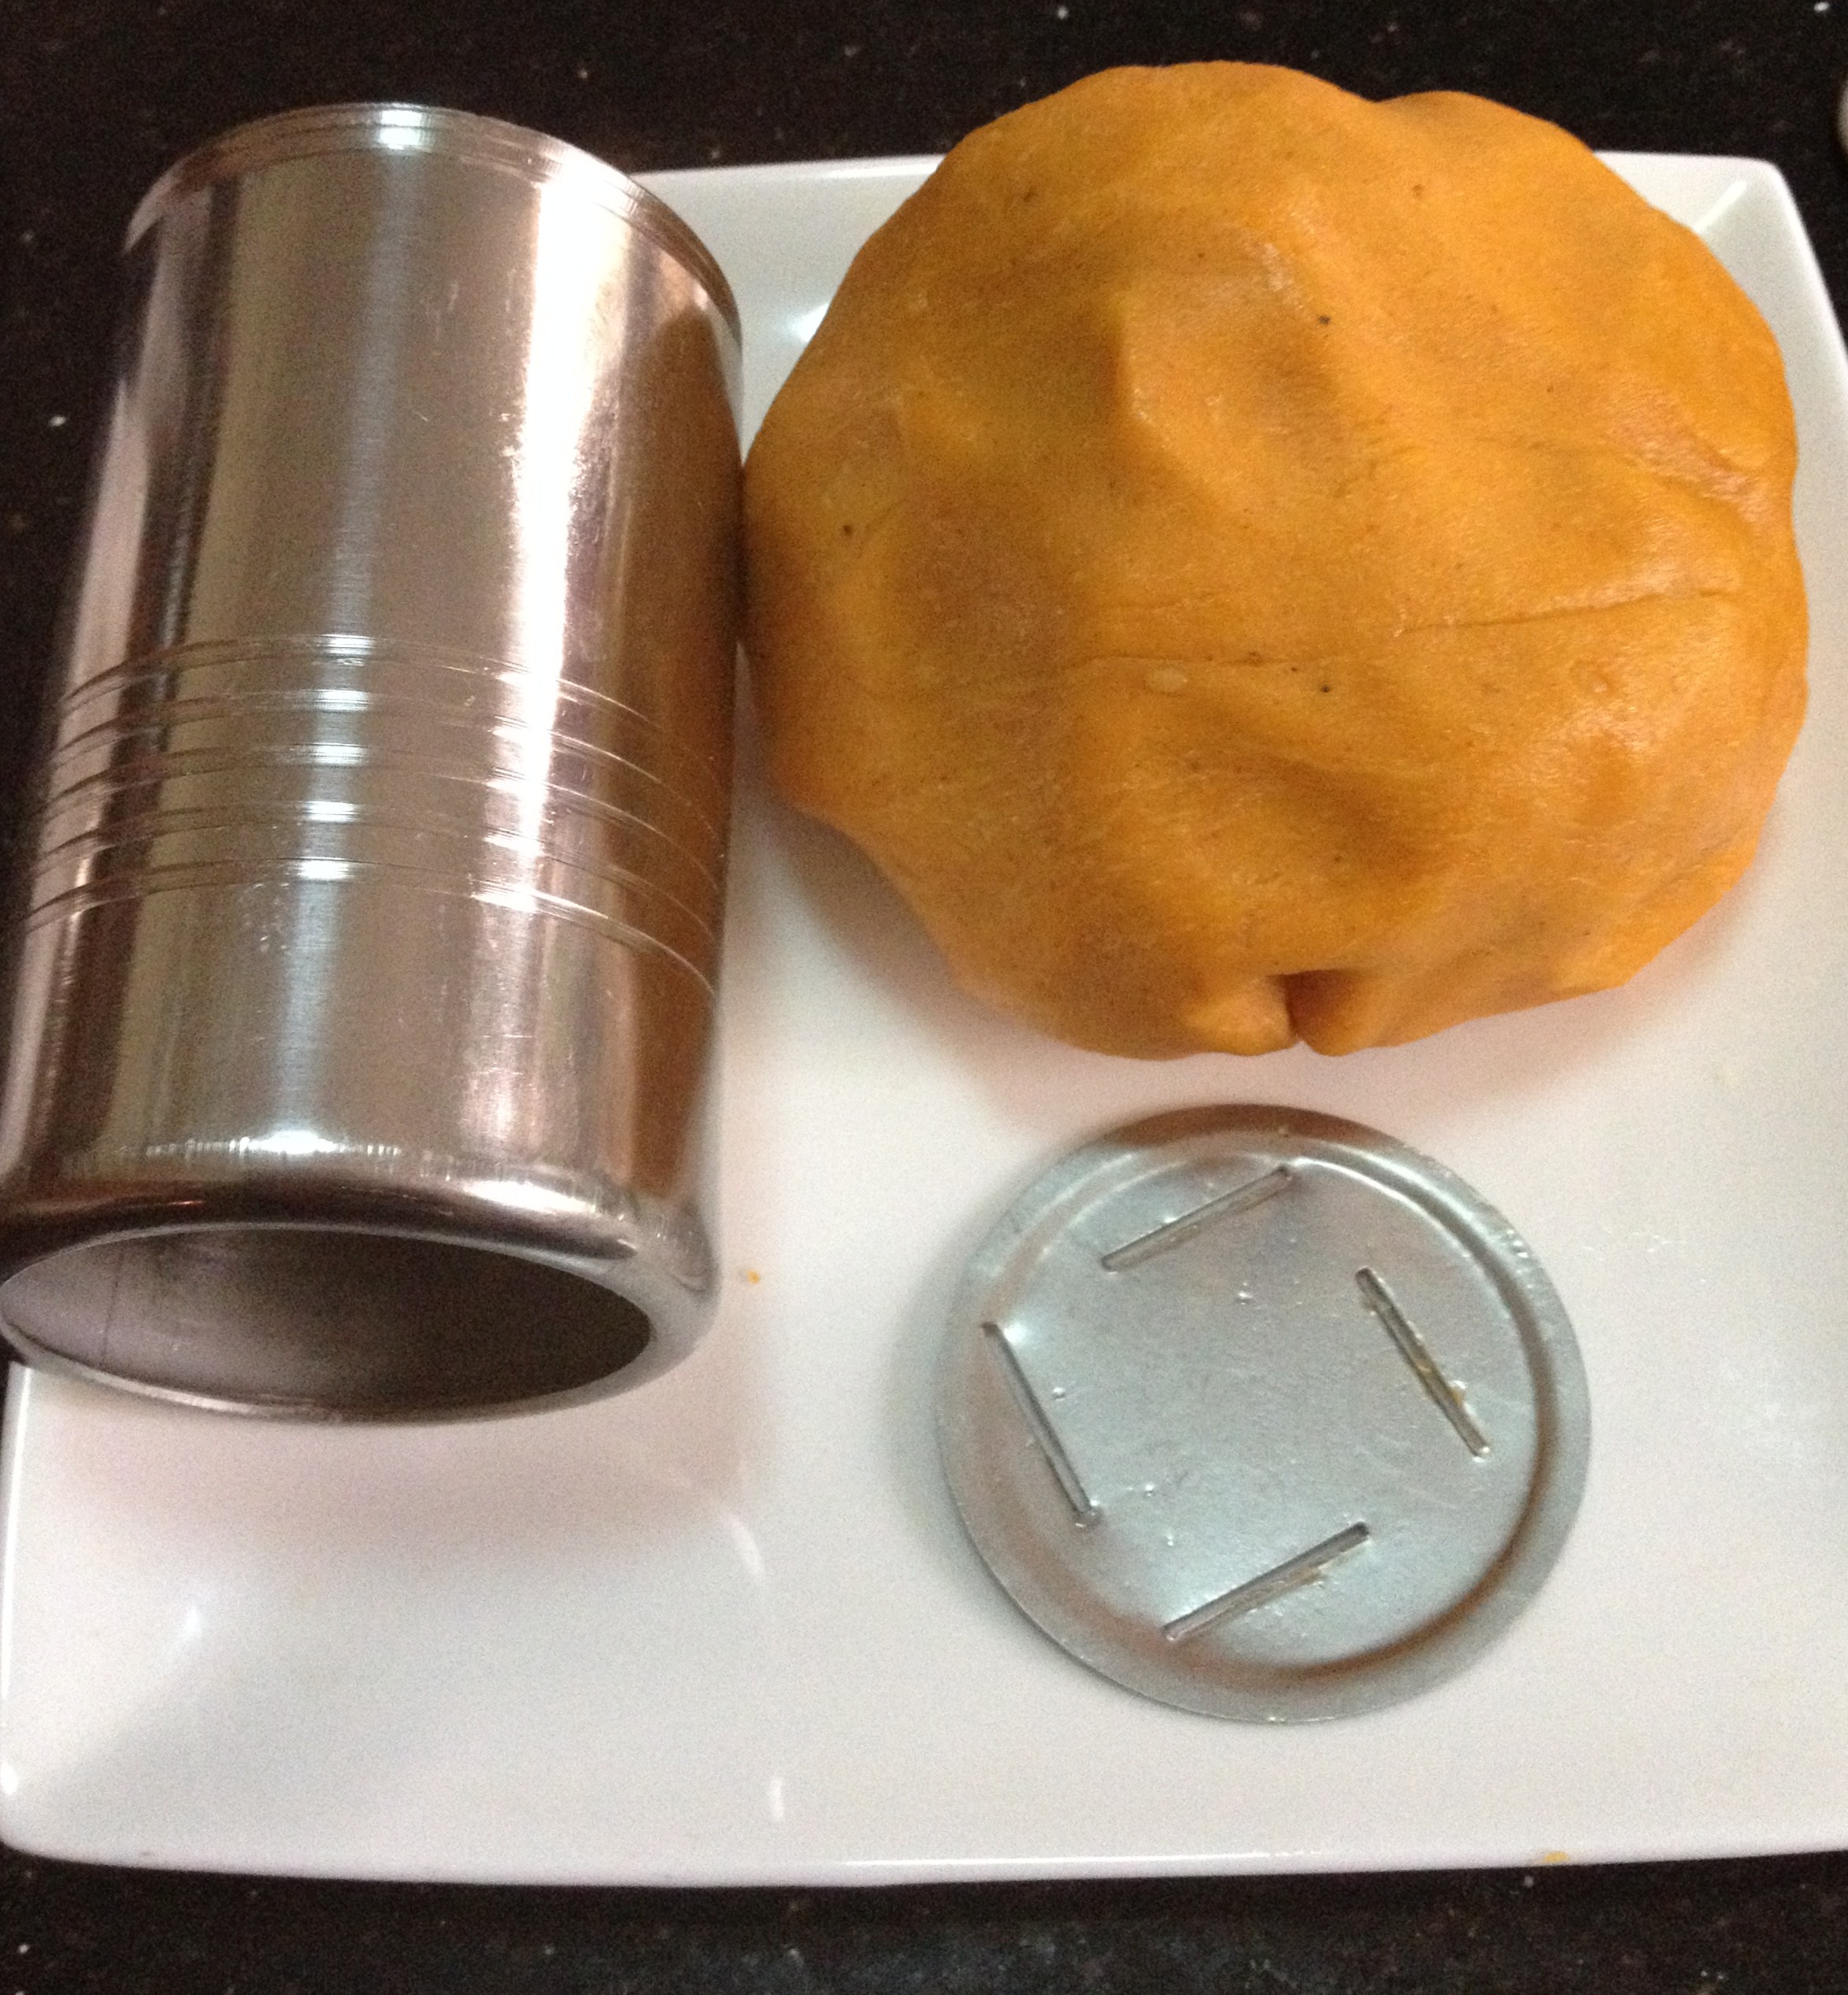
 

dough and the mould

IMG_3618

Method of Preparation

  1. Sieve both the powders together
  2. Mix chilli powder, salt, asafoetida powder and butter/clarified butter to the dry powders
  3. Add enough water to make a stiff dough
  4. Heat oil in a pan for deep frying
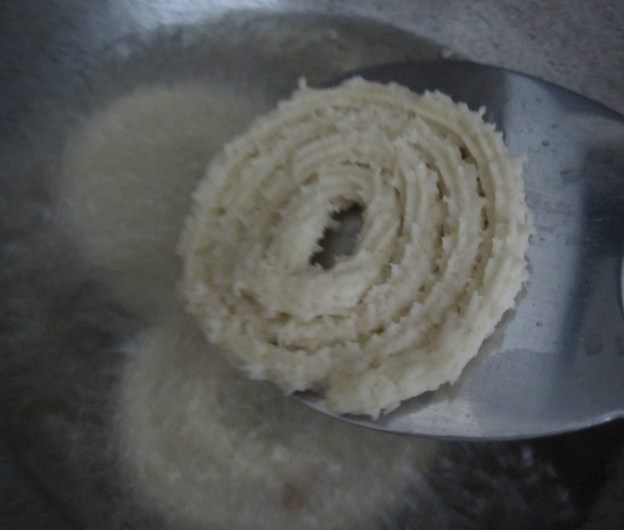
  5. Grease the inner cylinder of the murukku kuzhal/maker and place a part of the dough and close with ribbon pakoda disc
  6. When the oil is hot, turn down the stove to medium and press the dough into the oil into circular basket like fritters
  7. Fry till golden brown and crisp
  8. Remove in absorbant tissue and store after cooled. Break the fritters for easy storage (also to avoid over-eating).


IMG_3627

Note:

  1. This is a quick and easy version with red chilli powder. A ground paste of red chillies and garlic tastes better. Garlic aids in digestion.
  2. Cumin seeds are sprinkled for digestion as well as better looks of the fritters.
  3. Butter helps in the softly crisp texture of the fritters. Hot oil can also be poured into the powder with butter.
  4. Do not fry in very high oil temperature. The pakodas would turn dark very quickly. Keep in medium and adjust the heat accordingly for the perfect colour and crispness.
  5. For those who are searching for asafoetida in ingredient picture, sorry the box got over and I threw it away. The other new one would arrive tomorrow from the Indian shop.
    If you do not have the disc – that’s something to worry at the moment… please buy one now!


IMG_3630

Advertisement

The All time Favourite Murukku!

Murukku in tamil and chakli in kannada and marathi and chakri in gujarati is very popular for its different shapes and crisp fried taste. It is also handy due to its storable convenience. Nowadays, even in india, families prefer to get them from savoury shops to distribute for deepavali and even to send abroad to their children.

Murukku – as a verb in tamil means ‘to twist’. The dough made of rice flour and urad dal flour(dehusked black gram) is twisted and swirled to be made into round shapes, and hence the name! There are also different kinds of murukkus –

  • thenkuzhal – plain murukku
  • magizhambu or mullu murukku – murukku with a thorny sharp texture
  • kai murukku – hand twisted murukku
  • vennai murukku – butter murukku

and many more with a little variation like ribbon pakoda, kara sev and so on.

Murukkus can be magical for first timers – especially first time makers. Be it the ones made by the murukku maker, or the hand-made kai-murukkus, making murukku is an art by itself. Tasting, without knowing when to stop can be another art worth mentioning! Not getting into any gender bias, boys seem to fare better in this art! Sitting with aachi and amma to see the murukkus being made by hand on plastic sheets or the murukku maker ones directly into oil with elegant expertise, I have experienced the joy of viewing, tasting and once in a while trying to make some too.

They are quite easy to make – with the murukku maker and some patience – you can surprise your family and yourself too with these excellent crispies.  The rice flour used to be prepared by a long process of soaking raw rice, then drying them in a clean white cloth in a shady place at home, and later milled. With easily available rice flour in the indian markets abroad, this has become easier, though nothing to match the home-made rice flour. Of course, the urad flour is not available so easily in the markets – that has to be done at home. I have always used the flours sent by amma, this time I thought I would try making urad flour at home but had the milled rice flour from chennai!  Making urad flour was not at all a tedious one!

Deepavali snacks are incomplete without these different kinds of murukkus.


Making Murukku


Ingredients (makes approximately 15 murukkus)

  • rice flour – 2 cups
  • urad flour – 1/2 cup
  • white/black sesame seeds – 1 tsp (cumin seeds can be used instead of sesame seeds)
  • salt – as needed
  • oil – for frying

Method of Preparation

Making Urad flour

  1. Heat a hard bottomed vessel or kadai
  2. Dry roast ulundham paruppu/urad dal – dehusked black gram till golden brown
  3. Grind to a fine powder in a blender
  4. Sieve it and keep aside.

Note: 100 gms urad dal gives 100 gms urad flour

Making dough

  1. Sieve rice flour and urad flour
  2. Soak salt in very little and let it dissolve. This helps in even distribution of salt
  3. Add dissolved salt, sesame or cumin seeds and enough water to flour mixture and make a smooth dough
  4. The dough should neither be too tight nor too loose. 

Making murkku

1. Take one portion of dough and fill it inside the cylindrical container of the murukku maker

2. Close it with the single holed disc


3. Press into medium size murukkus on an aluminium foil sheet or any oiled plate


4. I used a greased plate and used a dosai thiruppi – ladle used to turn the dosais, to take it out and drop in the oil


5. Take care to drop the murukkus gently in the oil

6. Fry till golden brown

7. Remove in kitchen tissues to absorb excess oil

8. Let them cool and store in an air-tight container.


Omapodi/Ajwain Sev

Now, to one of Deepavali savouries – Omapodi or Sev in hindi. Before coming to omapodi, about the savoury maker – achu kuzhal. The traditional achu kuzhal or the mould for making different kinds of deep-fried snacks used to be a wooden one or a metal one. I am yet to find mine as I kept it safely in the shaft but couldn’t locate the safe place. It has thin round plates/discs with different shapes and holes to make different kinds of savouries. In the picture is a modern murukku/sev maker – but the different discs and tubular press do the same as the traditional achu kuzhal. The tight dough of the savoury is put in the tubular container and the lid is fit with the required disc and closed. Then the dough is pressed out into hot oil and fried.

the murukku maker with discs


tubular container with small-holed disc


Omapodi or Sev

Omam is tamil means Carom seeds or ajwain in hindi. This sev is made with ajwain or carom seeds which helps in digestion and also relieves cold and chest congestion. Among the moulds, the thinnest is used to make omapodi. If preferred the next size mould can also be used. Rice flour is added to gram flour to make this savoury crispy.

Ingredients

  • kadalai maavu/gram flour – 3 cups
  • arisi maavu/rice flour – 1/4 cup
  • omam/carom seeds – 3 tsp
  • salt – 2 tsp
  • hot oil/ghee – 2 tsp
  • oil – for frying

Method of Preparation

Making dough

  1. Sieve kadalai maavu and arisi maavu (both flours)
  2. Soak omam in water for 2 hours and grind to a smooth paste with salt
  3. Strain the omam paste and add this syrup to the sieved flour
  4. Add hot oil or ghee too to the sieved flour
  5. Make a stiff dough by sprinkling water little by little

ready to store omapodi 


Making Omapodi

  1. Heat oil in a kadai
  2. Apply oil inside the tubular container so that the dough does not stick to it
  3. Keep one portion of dough and close the lid with the very small holed disc
  4. Squeeze omapodi/sev into hot oil
  5. Turn it gently and cook
  6. When the spluttering ends, omapodi is ready
  7. Remove and place on tissue to absorb excess oil
  8. After it cools, crumble and store in an air-tight container.

Note: (I read from Mrs. Mallika Badrinath’s cook book)

  1. Red chillies can be added to omam while grinding for extra flavour.
  2. After adding omam syrup, the coarse flour can be divided into three portions. Sprinkle water to each portion just before frying.
  3. This keeps the total dough fresh from becoming dry and each portion of dough is freshly made for more perfect omapodi.