Tag Archives: jaggery

Thiruvathirai – the festival of Adavallan/Nataraja – the Dancing Shiva

Thiruvathirai, is an auspicious day for Hindus, especially Shaivites. January 10, 2020 was the Day of Thiruvathirai. It is the day to celebrate Lord Shiva, in the form of Adavallan – the Cosmic Dancer. It is celebrated on the full moon night of the Tamil month of Margazhi, which falls between mid December and mid January of the Gregorian Calendar. What I know, is Tiruvathirai is celebrated in Tamilnadu and Kerala, the southern states of India.

Society has always found new philosophies and concepts to make Religion, an indispensable part of an individual’s life. Stories and Narratives of different eras, that are documented in various forms of literature and also those which are not documented, yet transferred through word of mouth, may form the basis of value based religious education.

To me, language and culture are synonymous to one’s roots, but religion is not. Not getting too much into this, I stay put here, as a Food Blogger alone.

That is why, we will not discuss about the religious aspects of Thiruvathirai, but the literary and culinary aspects of the special day.

Tamil Bhakti Literature consists of thousands of hymns, composed by several Saiva Saints, in praise of Lord Shiva, between 6th century ACE and 12th century ACE. Thirunavukkarasar, the Saint who lived in the 6th and 7th centuries ACE and Thirugnanasambandar, who lived in the 7th century ACE, have sung about the auspicious day of Thiruvathirai.

“ஊர்திரை வேலை யுலாவும் உயர்மலைக் 
கூர்தரு வேல்வல்லார் கோற்றங் கோள் சேரிதனில் 
கார்தரு சோலைக் கபாலீச்சரம் அமர்ந்தான் 
ஆதிரைநாள் காணாதே போதியார் பூம்பாவாய்”

‘Athirai naal kaanathe….’ says the last verse by Sambandar.

“முத்து விதான மணிப்பொற் கவரி முறையாலே 
பக்தர்க ளோடு பாவையர் சூழப் பலிப்பின்னே 
வித்தகக் கோல வெண்டலை மாலை விரதிகள் 
அத்தனாரூ ராதிரை நாளா லதுவண்ணம்”

‘Athan Aarur Athirai naal…’ says the last verse above, by Thirunavukkarasar

These are literary evidences, that mention about the special day of Thiruvathirai, in praise of Lord Shiva, that go back almost 1500 years from today.

As a food blogger, who wishes to transfer the culinary legacies to the next generation, what is important to me, is the Gastronomy involved in the celebration of festivals. Celebrating cultural legacies and honouring heritage through these legacies, are key aspects in passing on the essence of one’s roots to our offsprings.

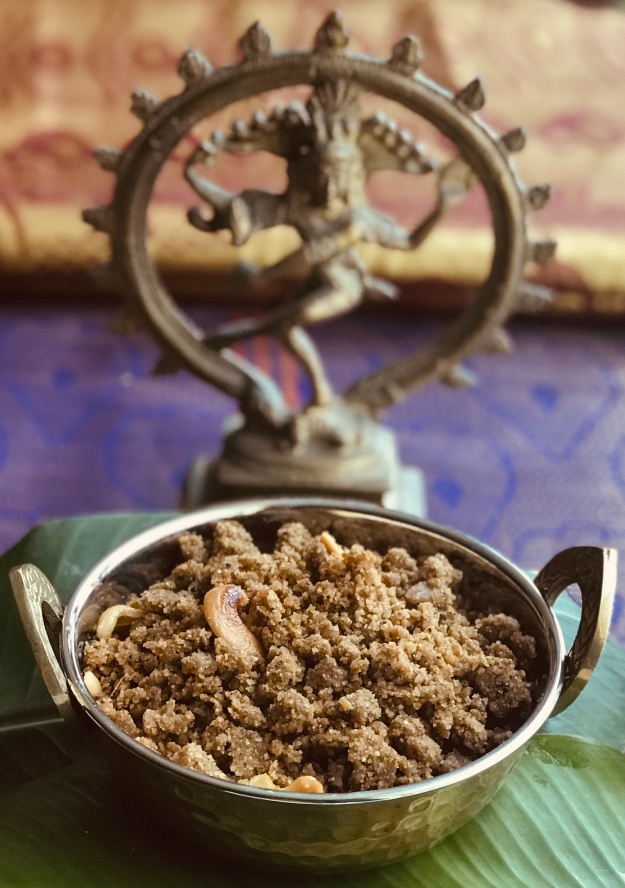
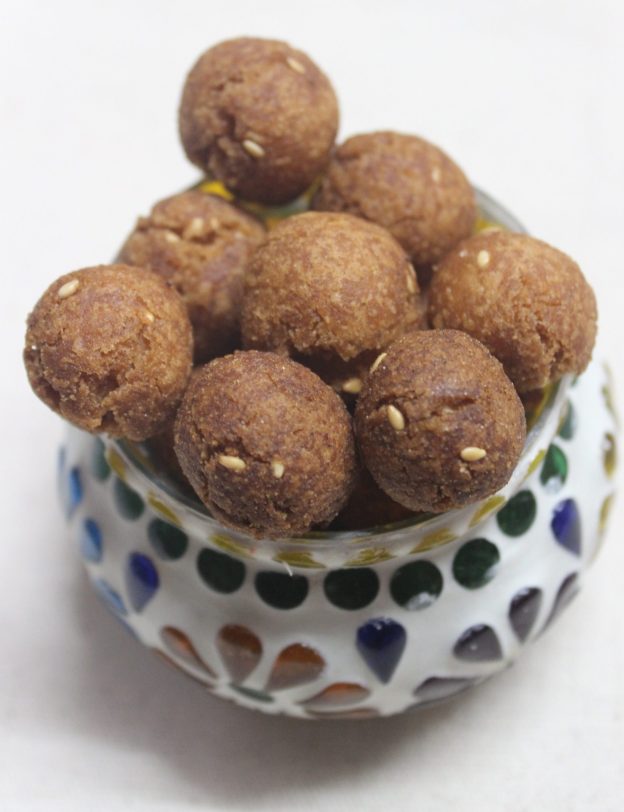
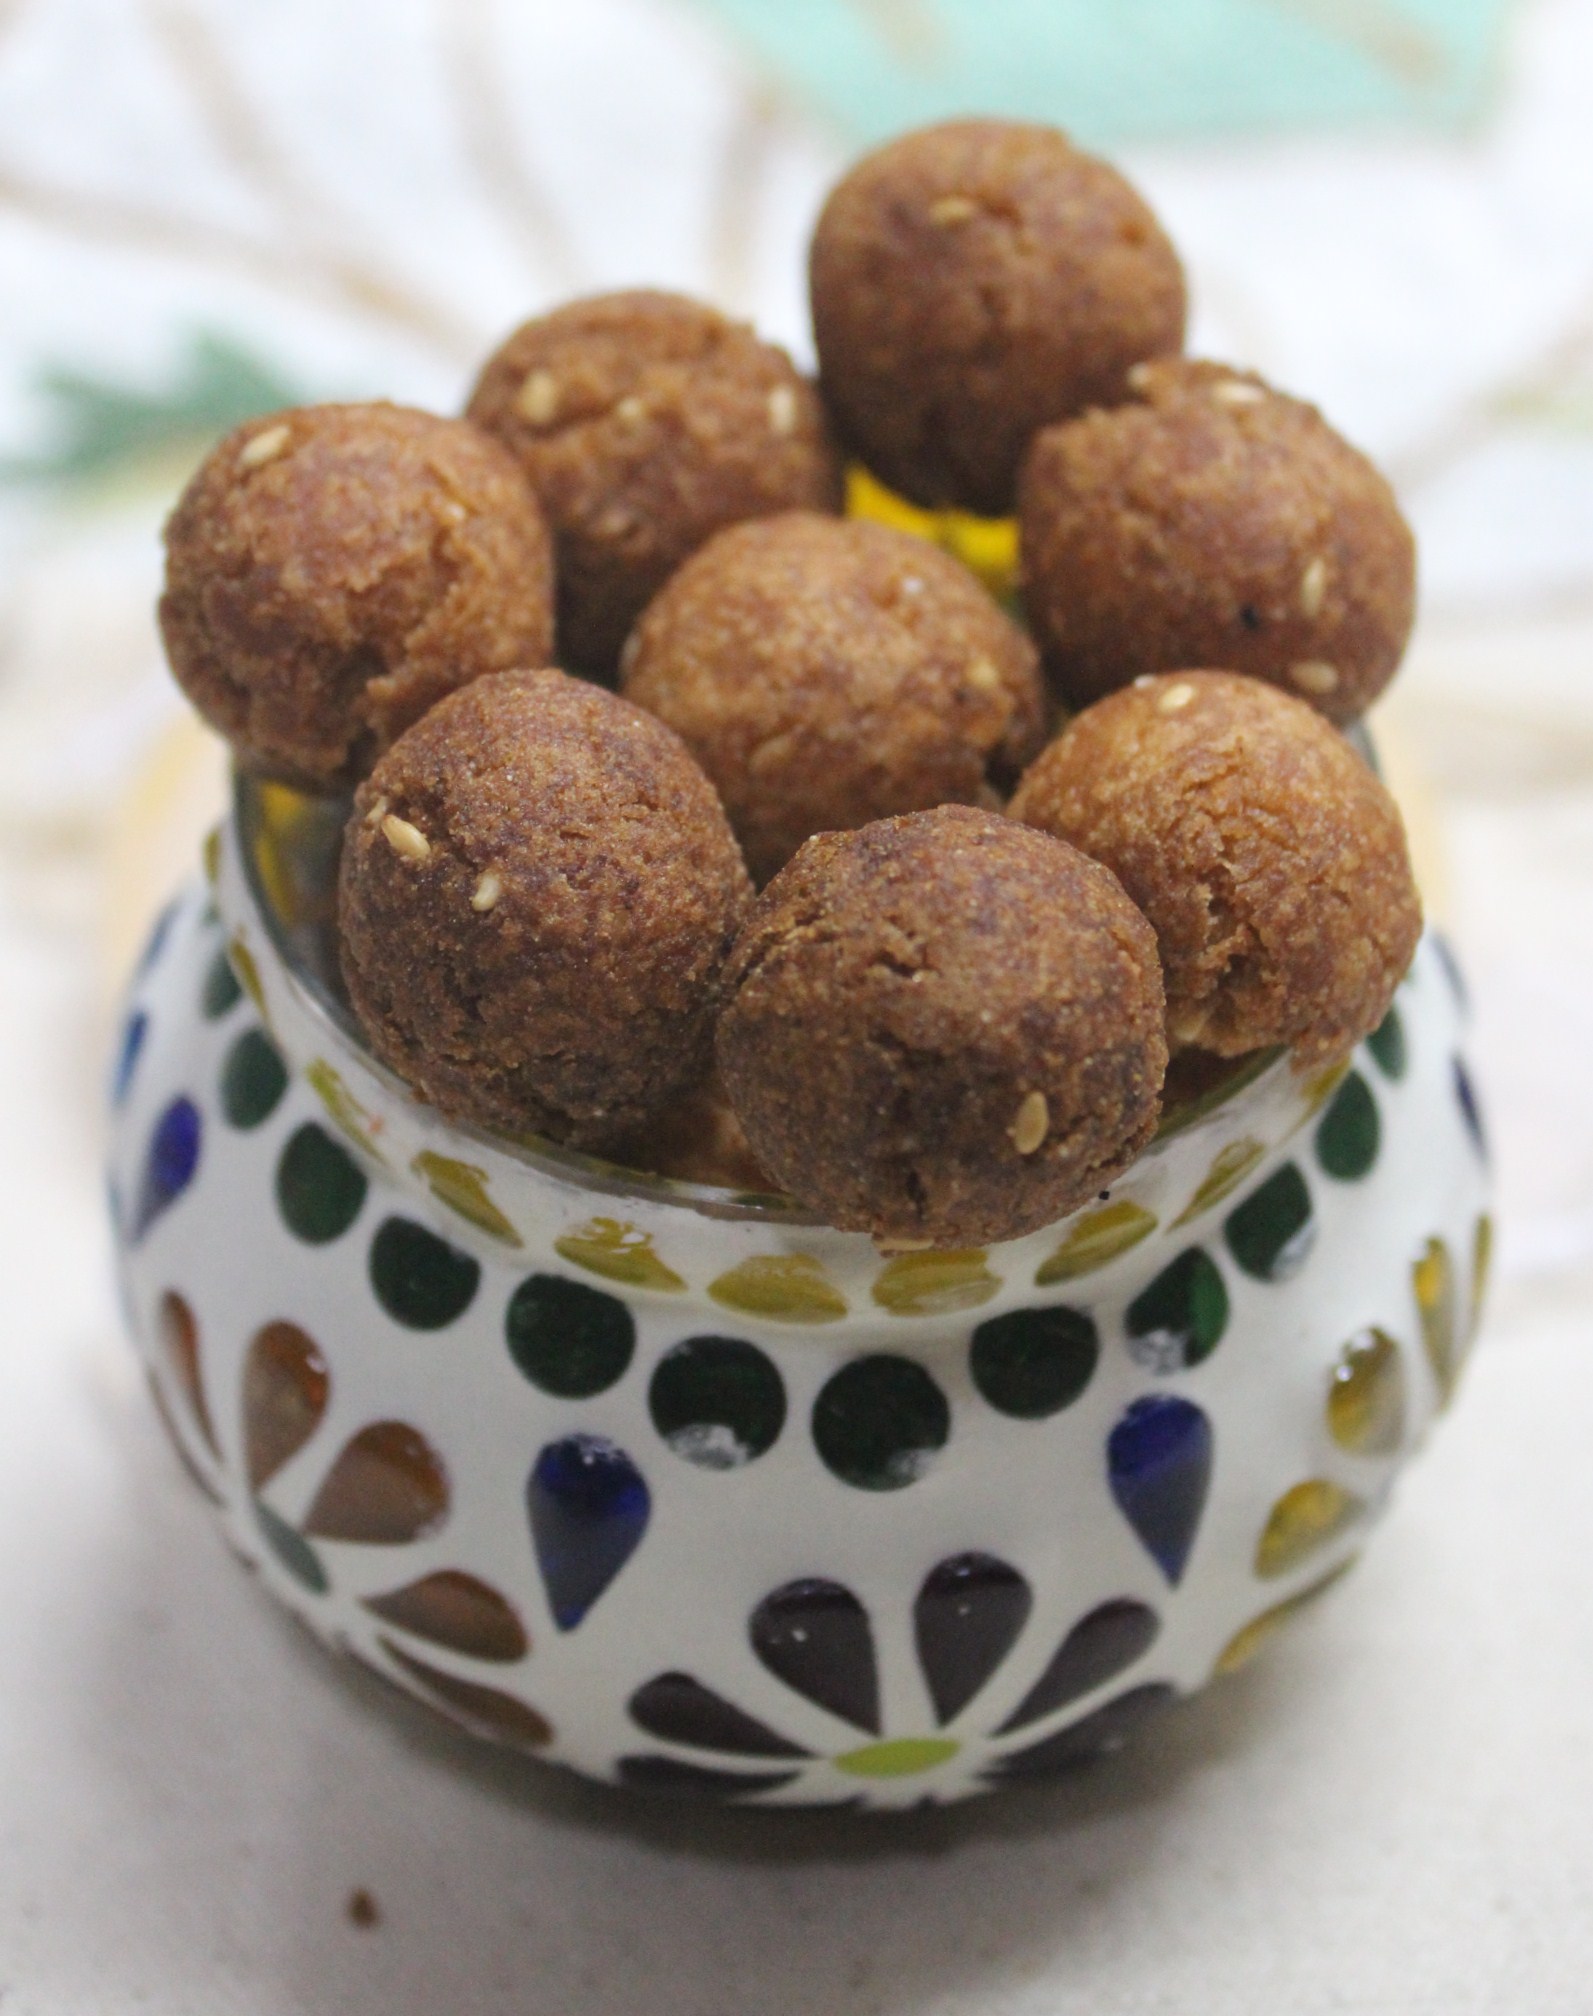
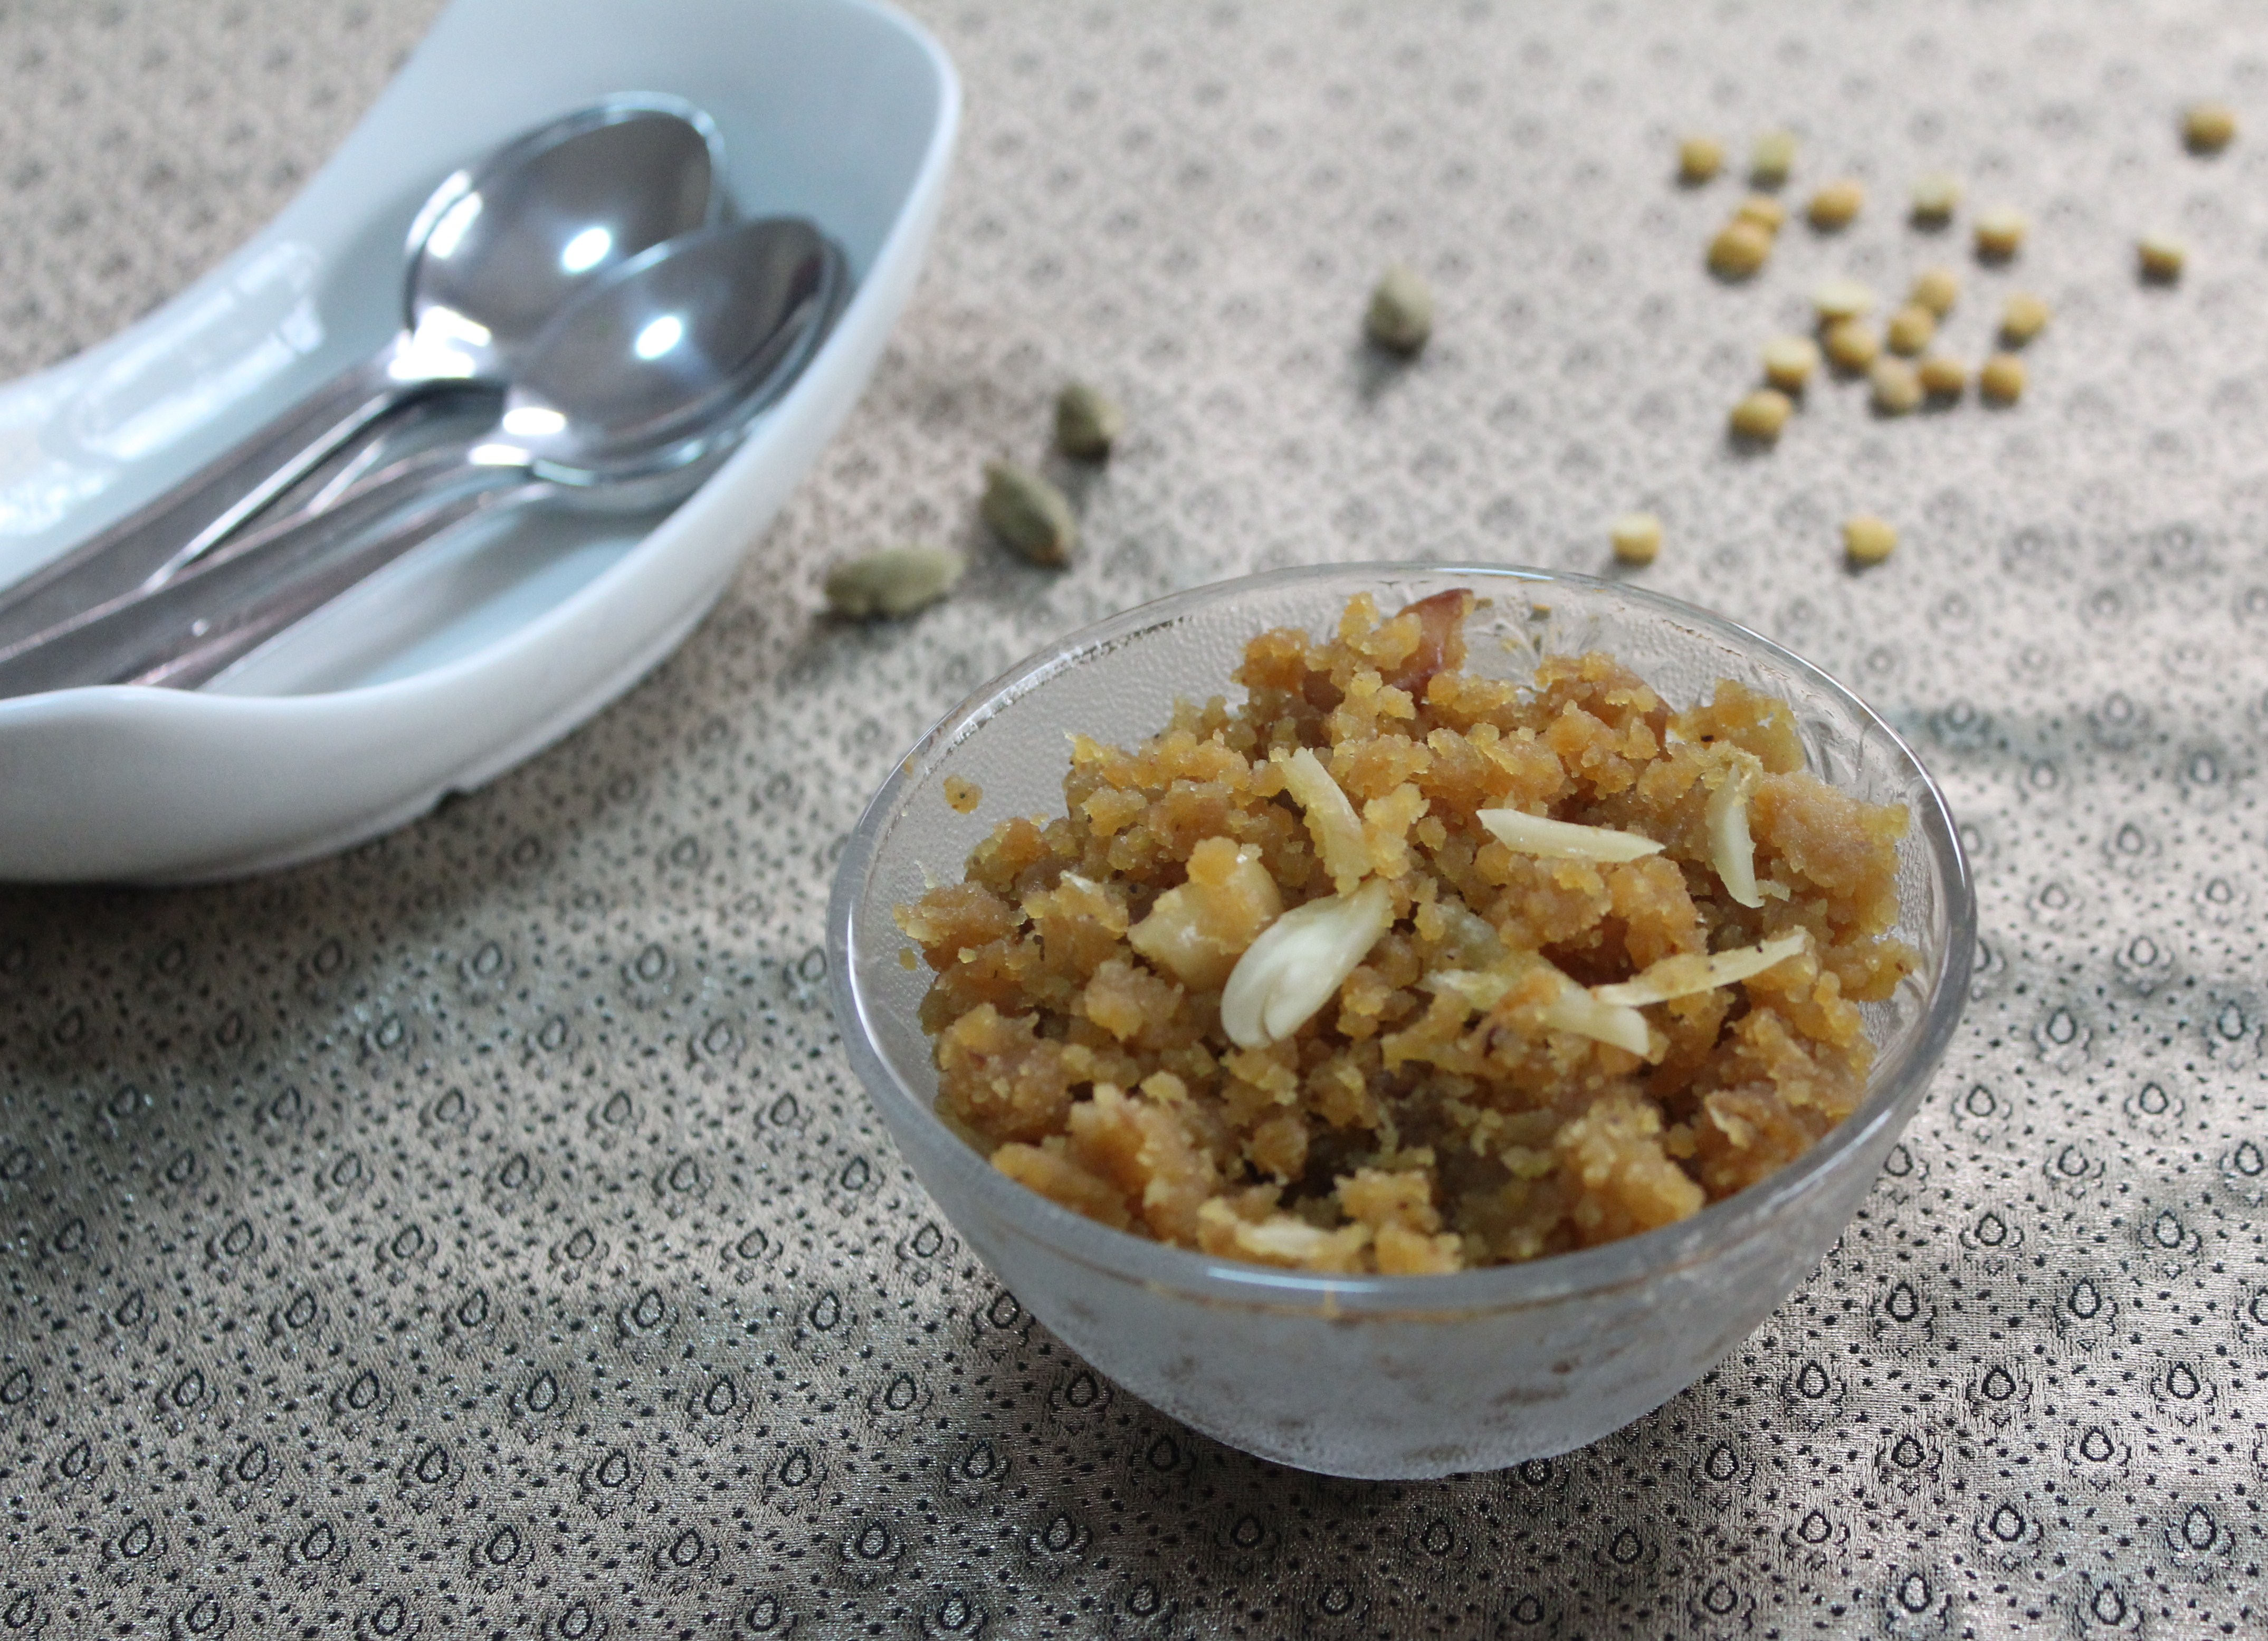
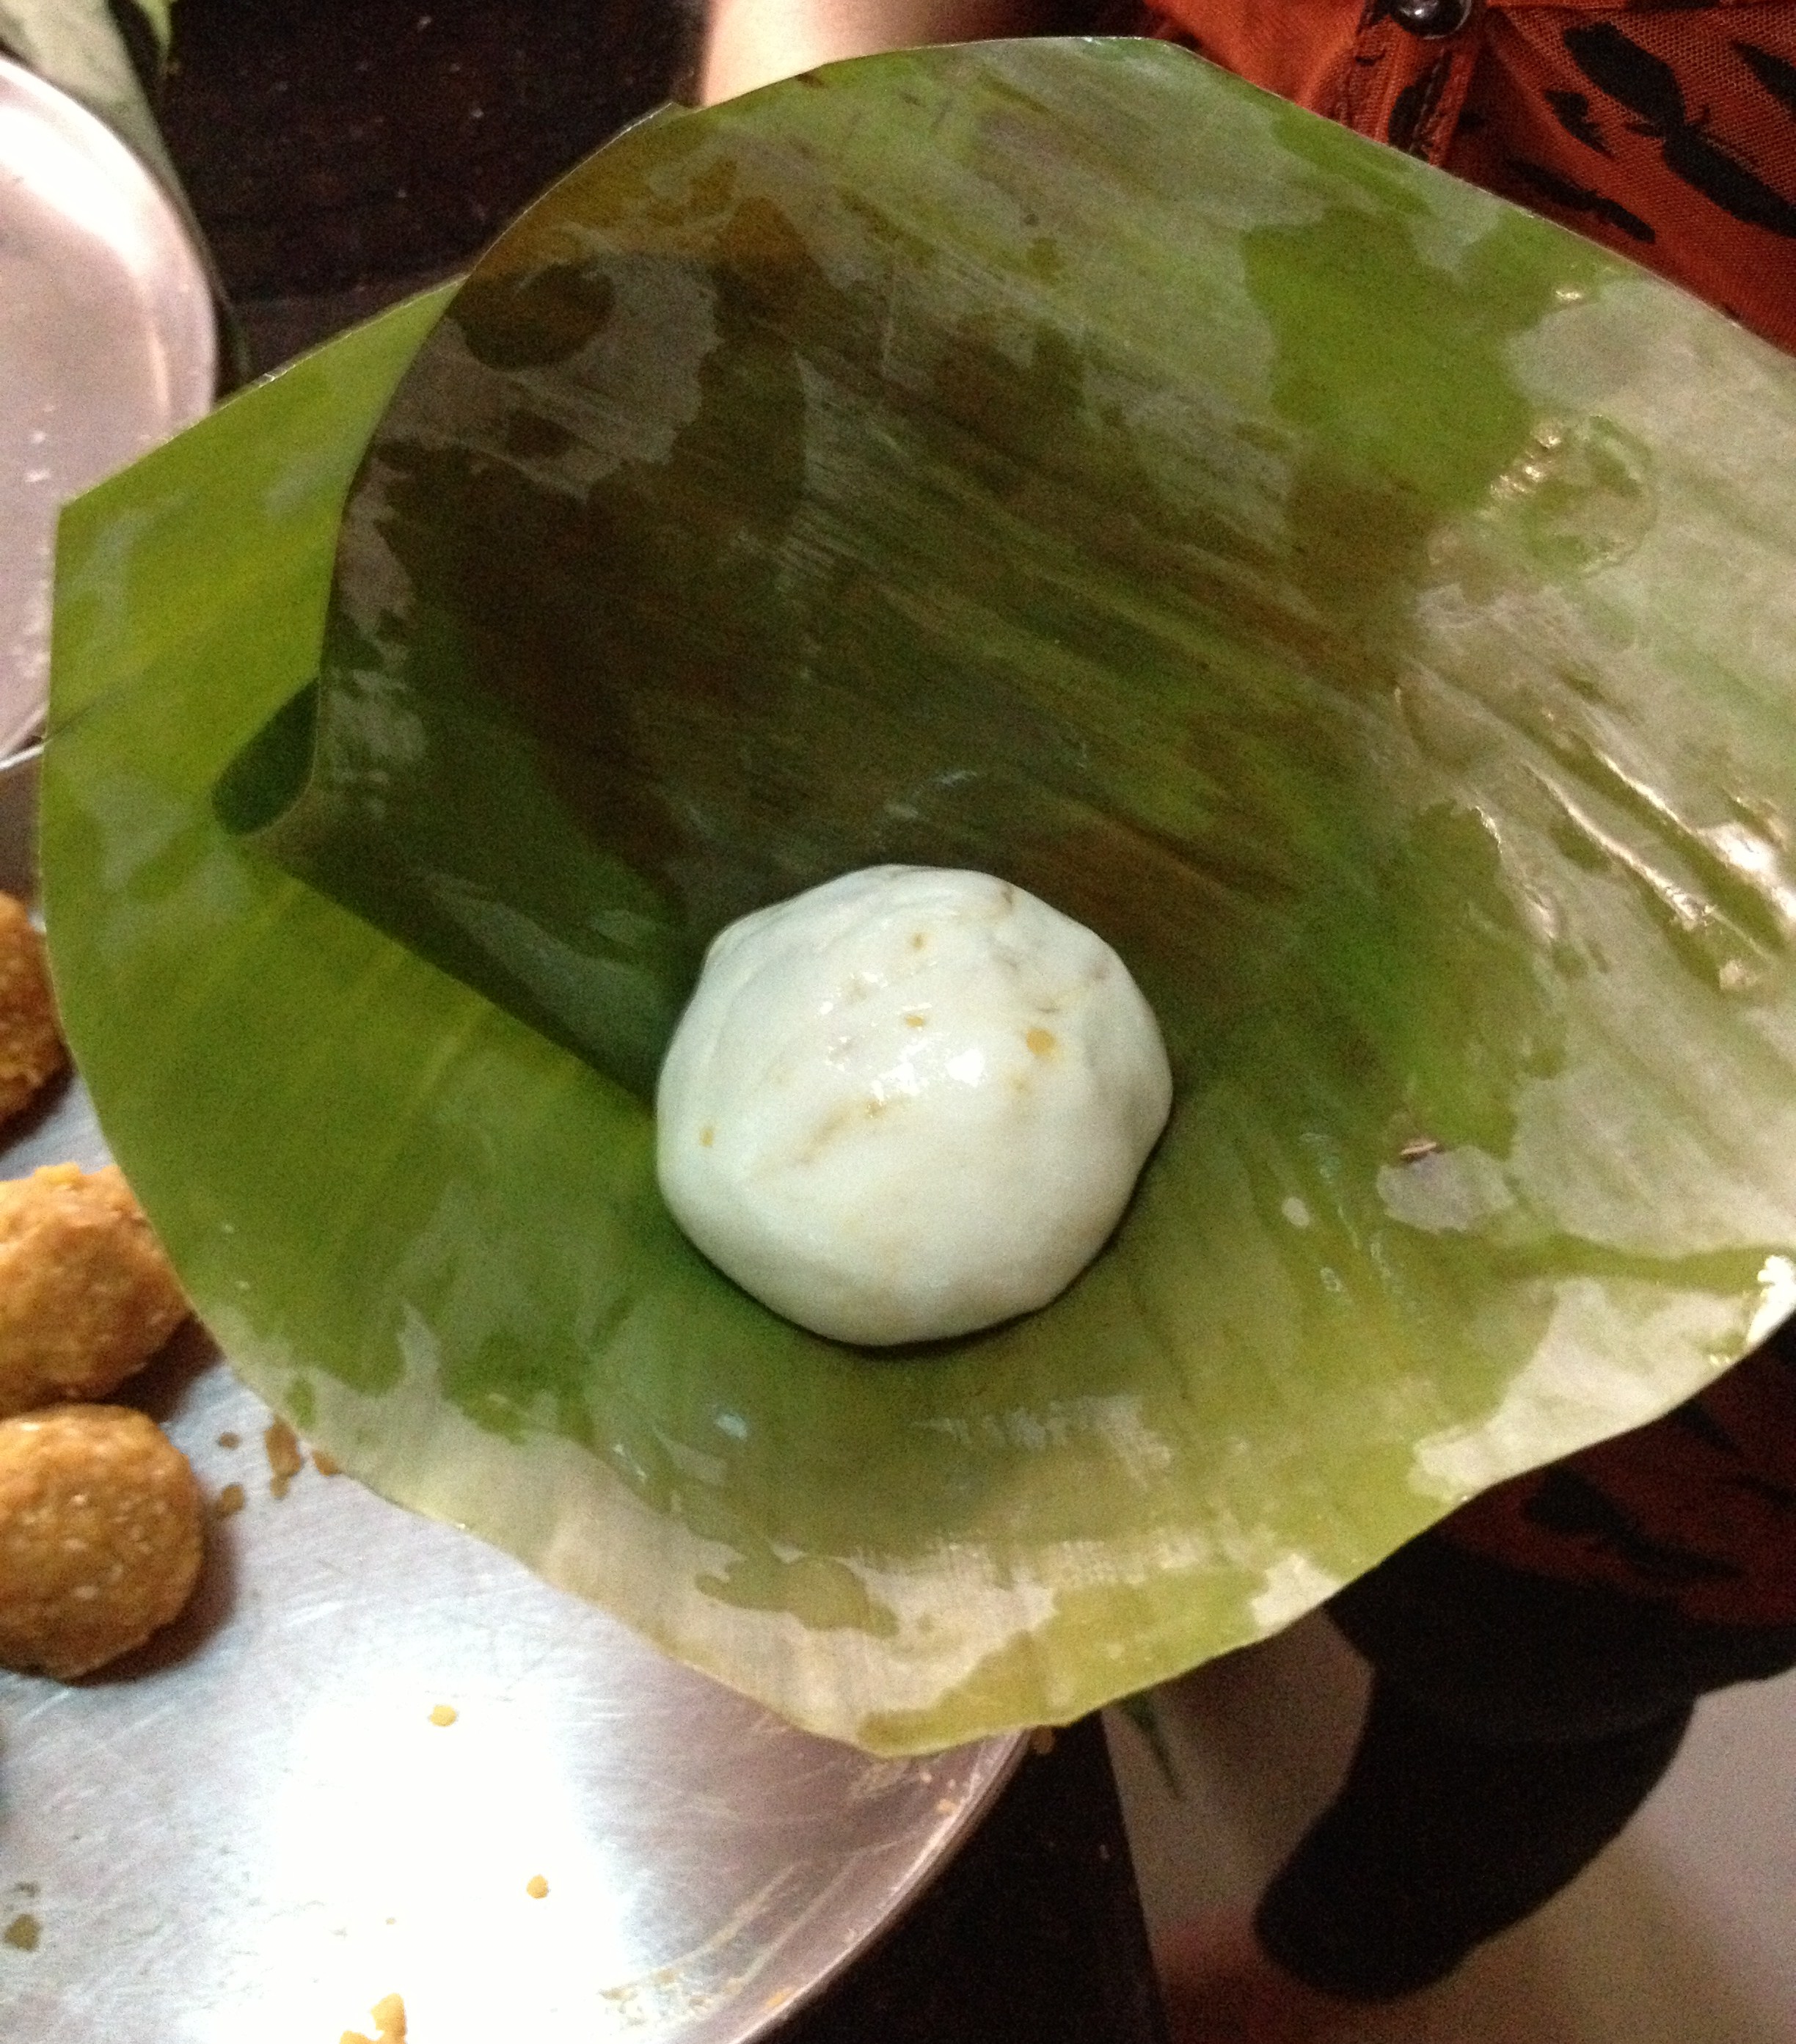
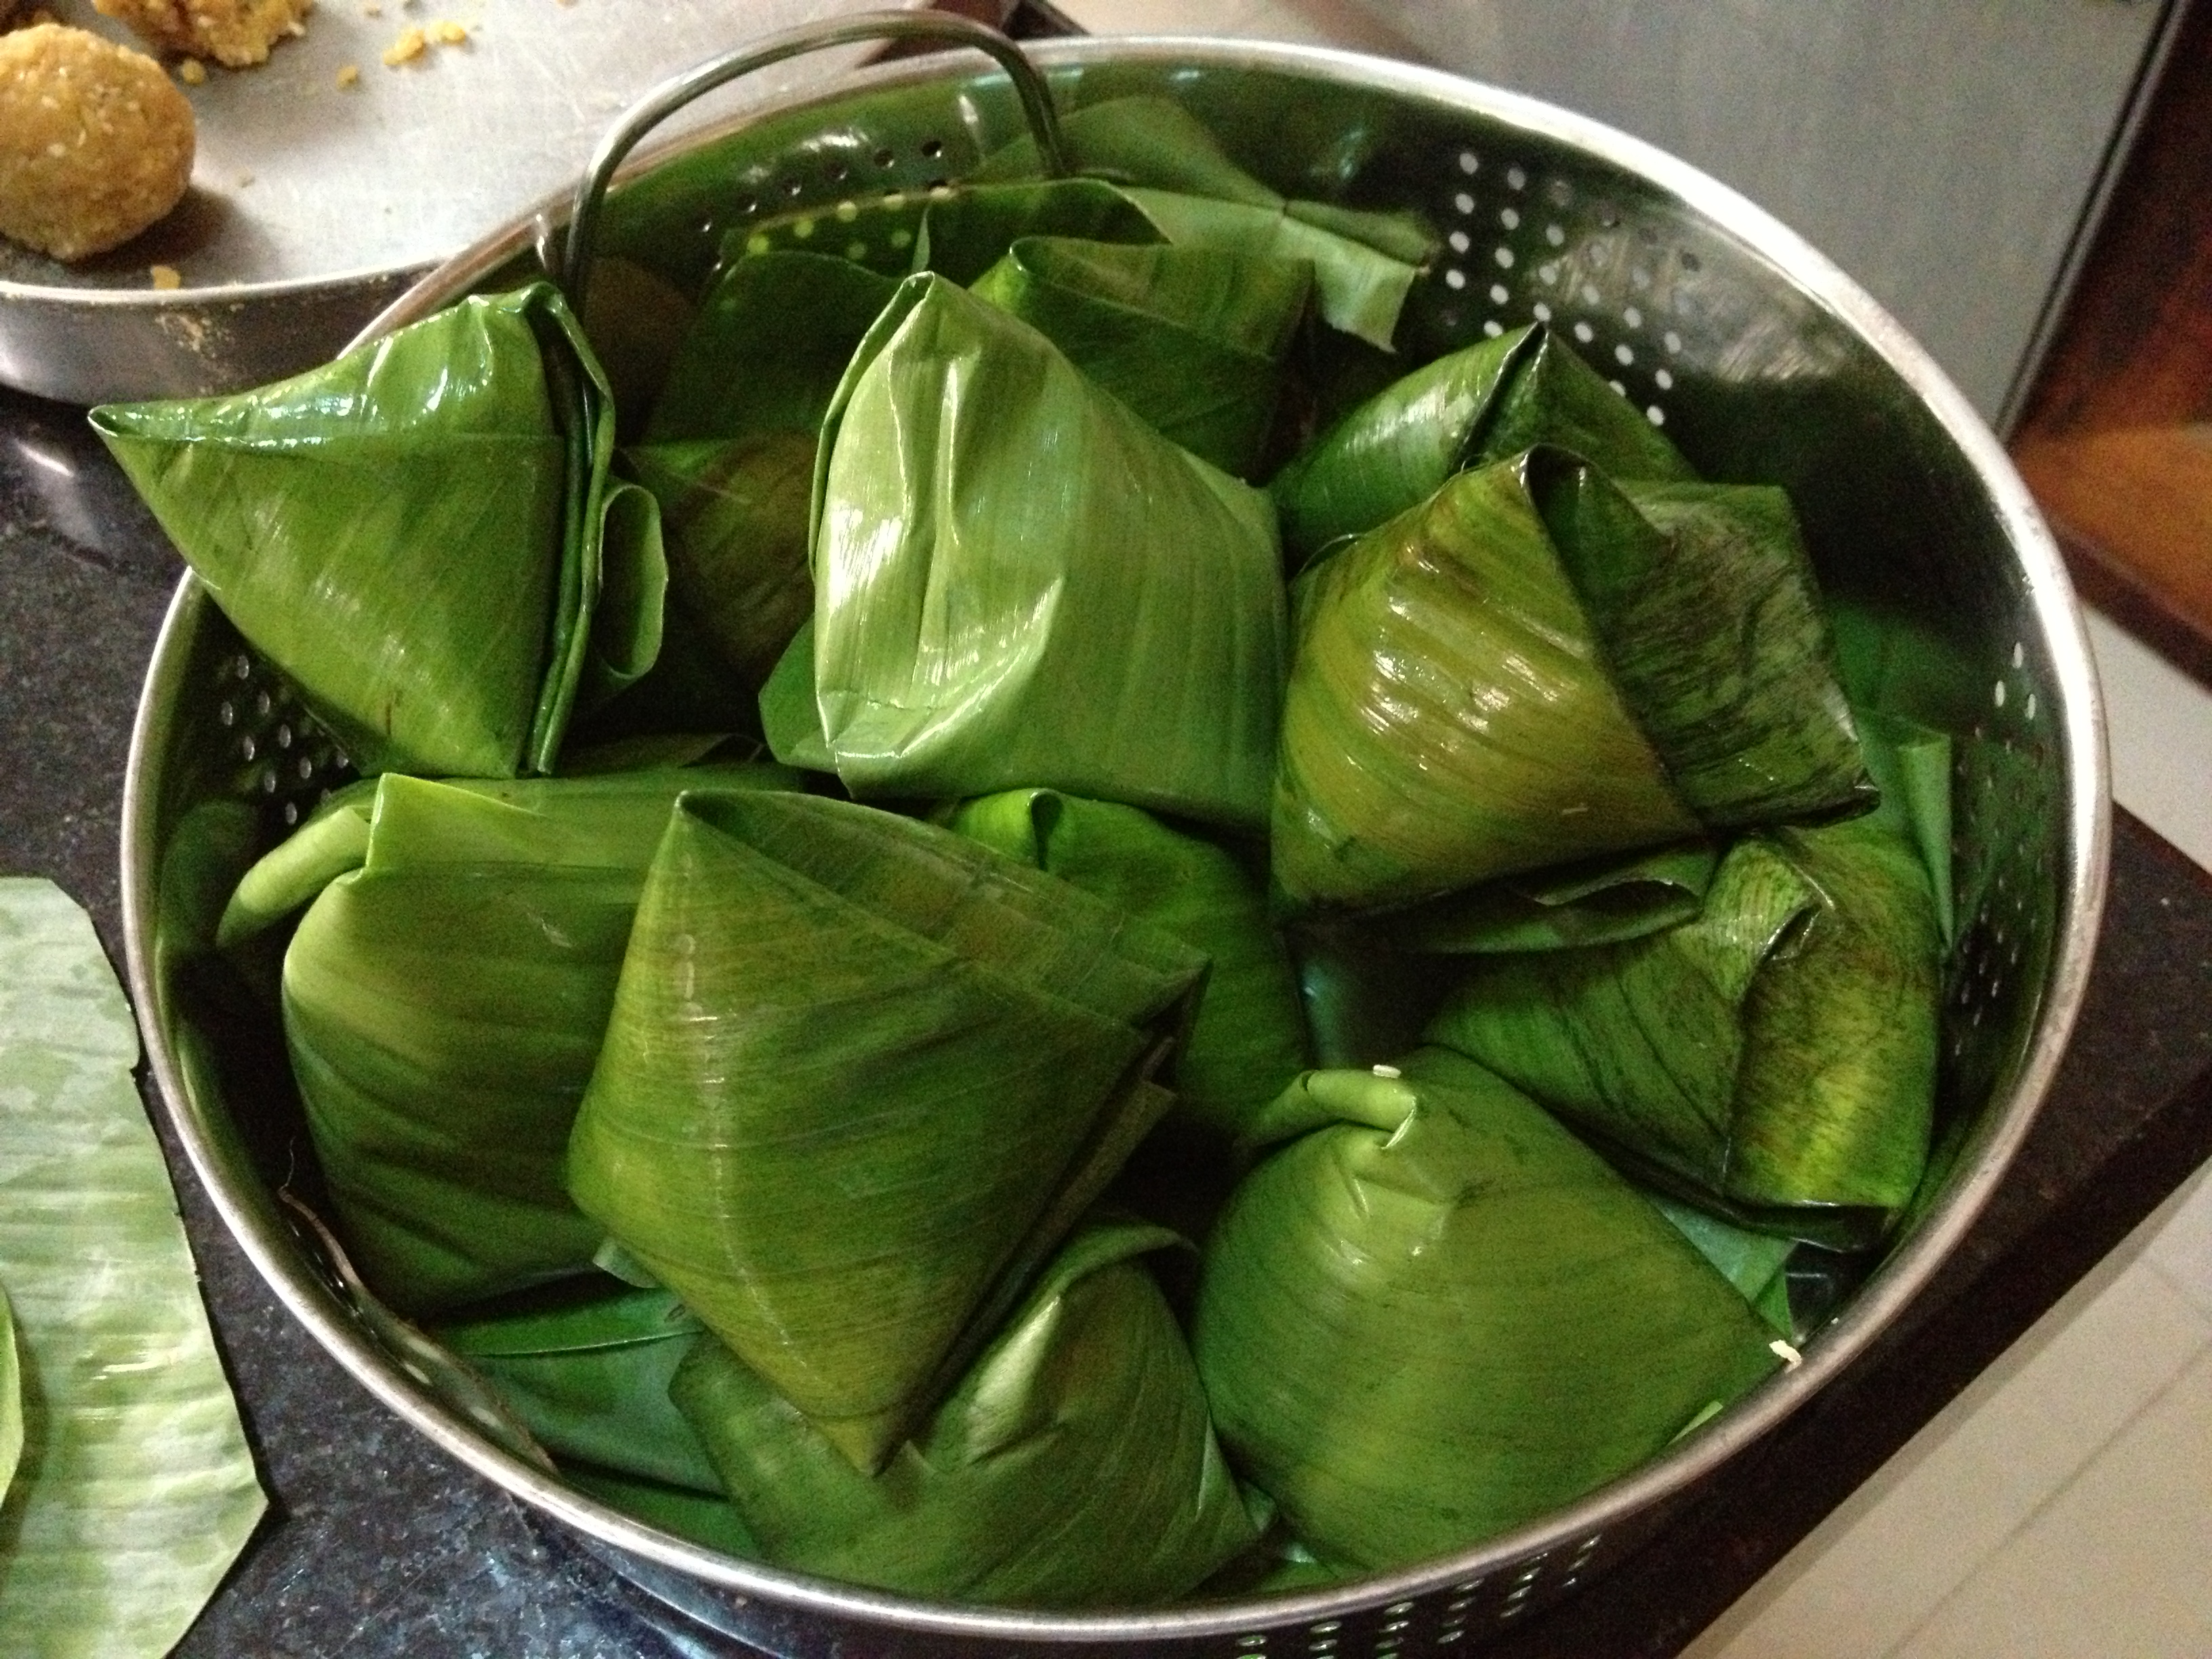
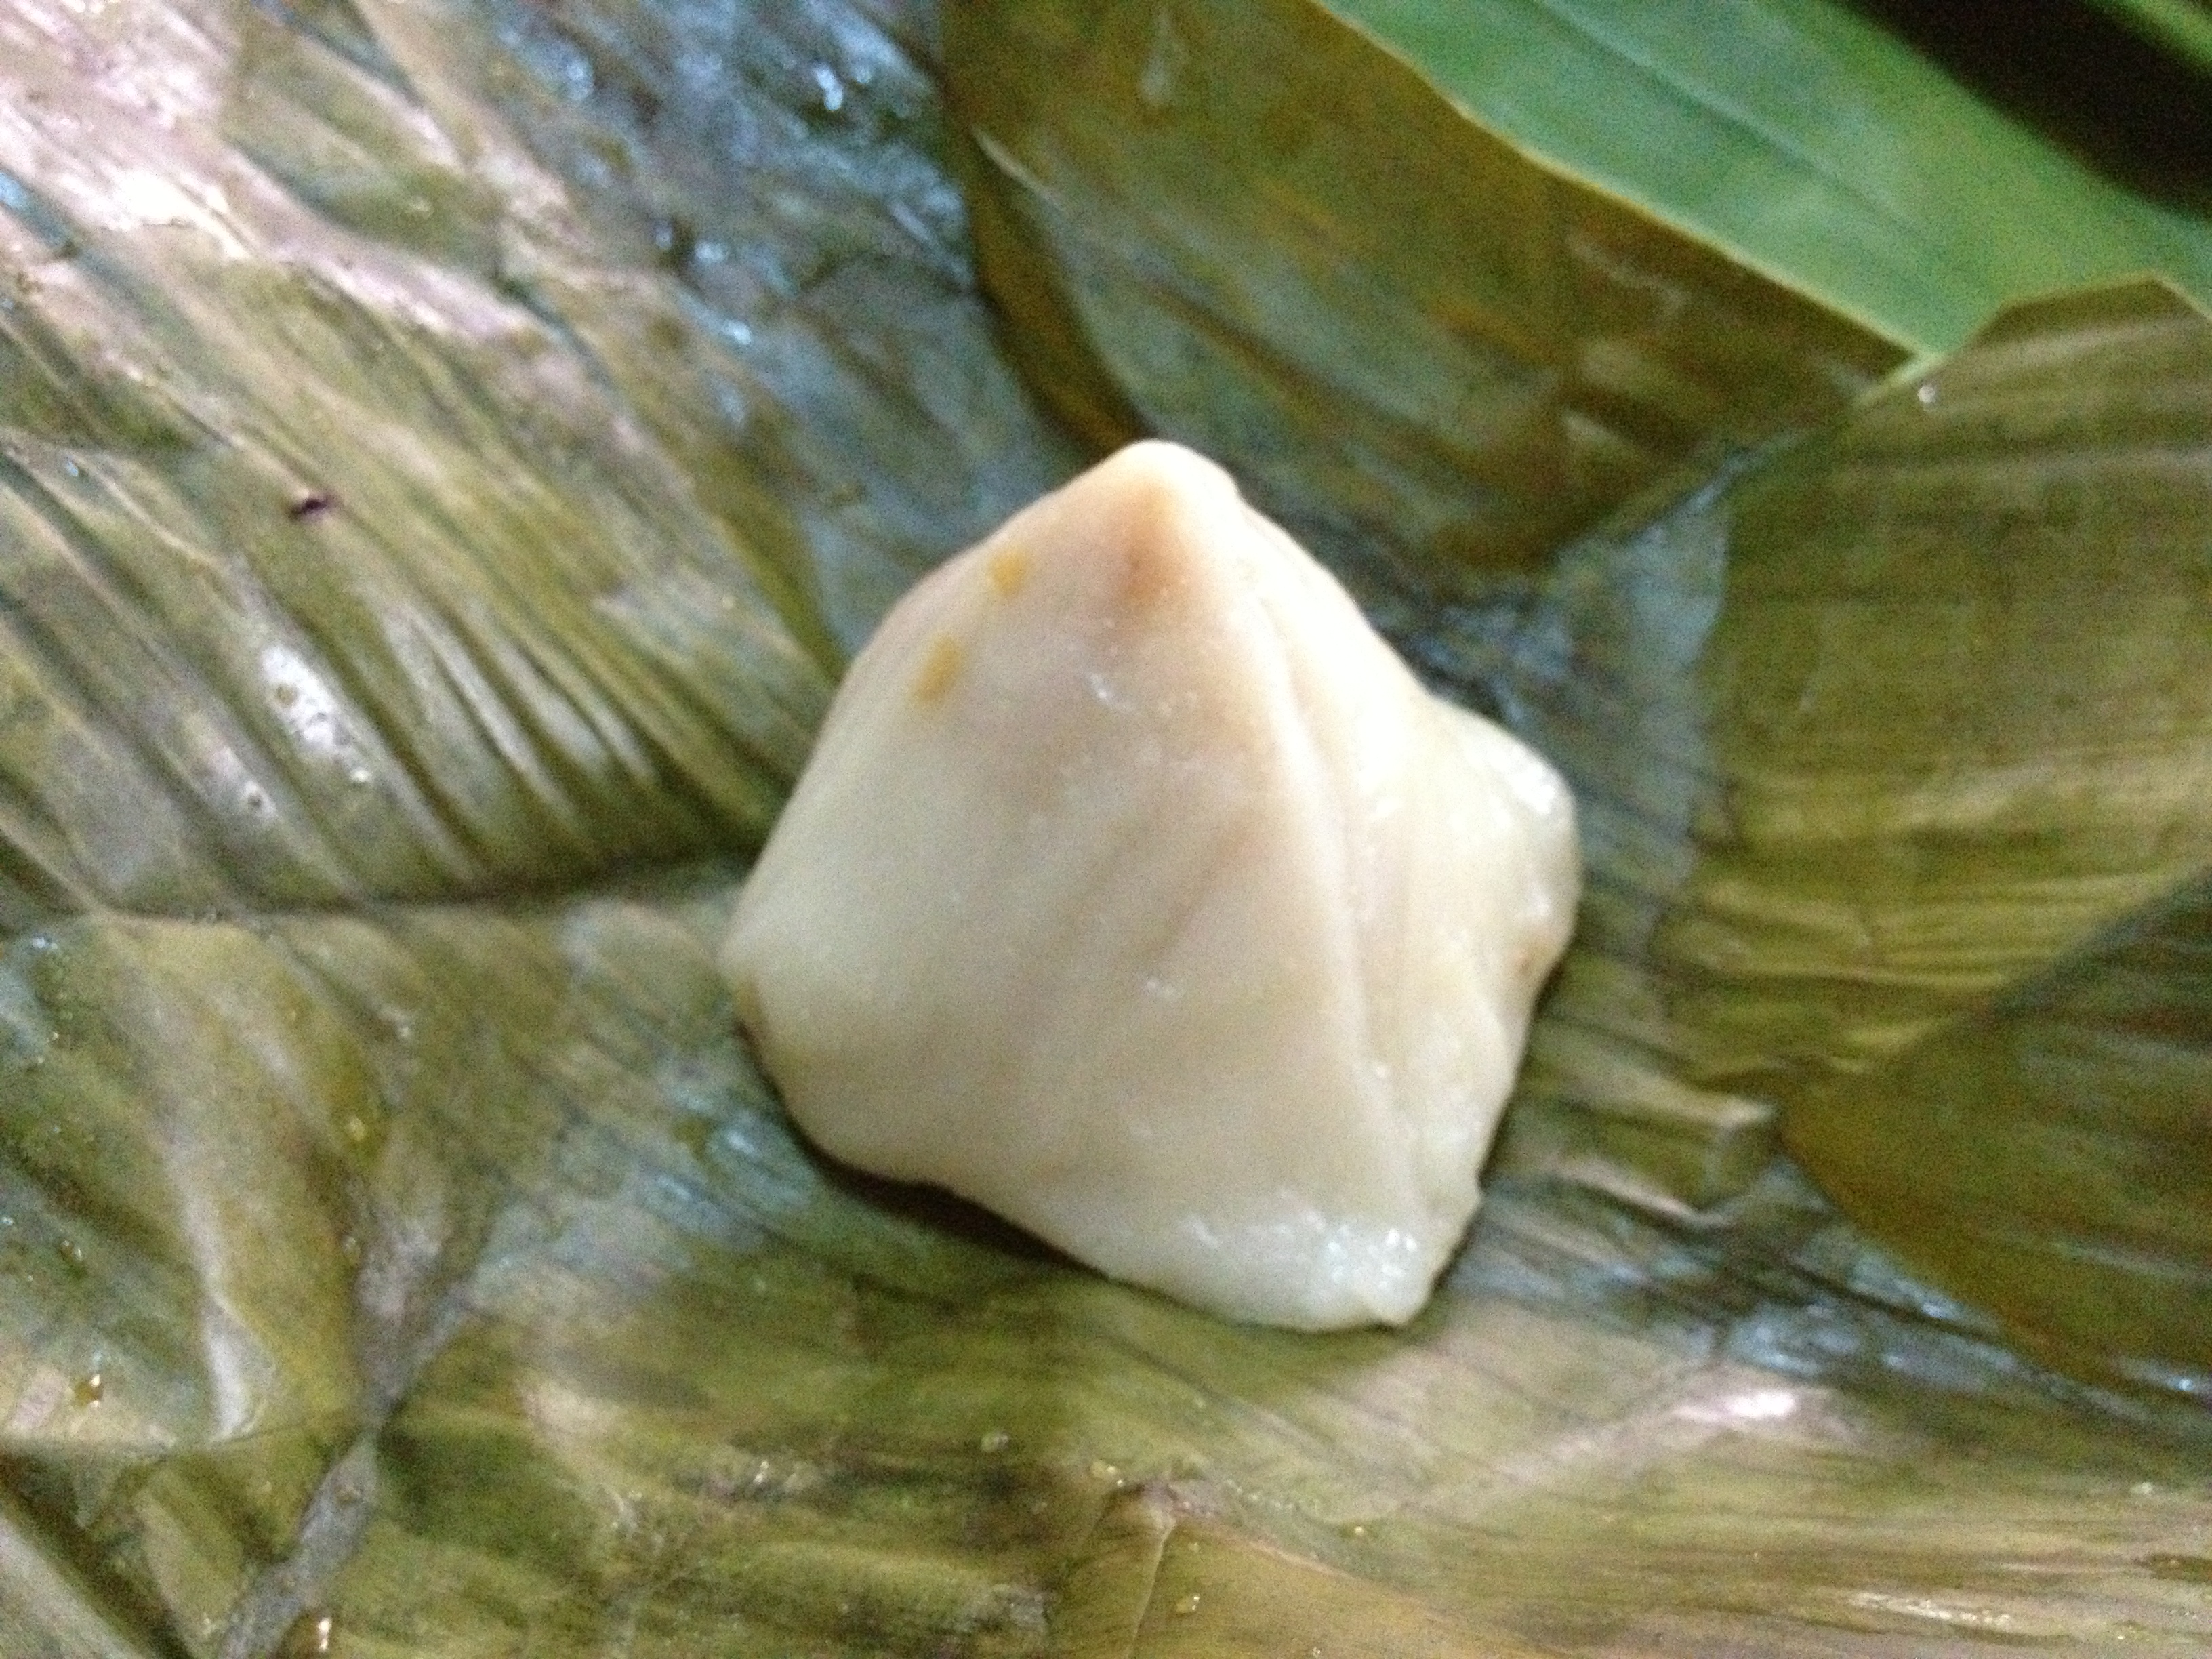
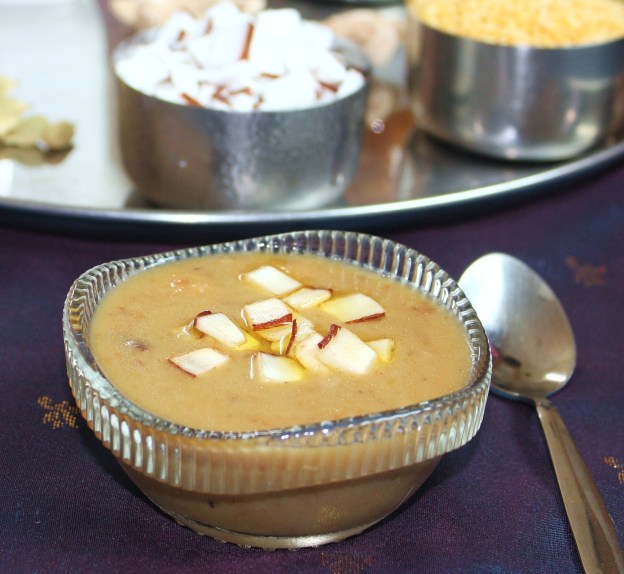
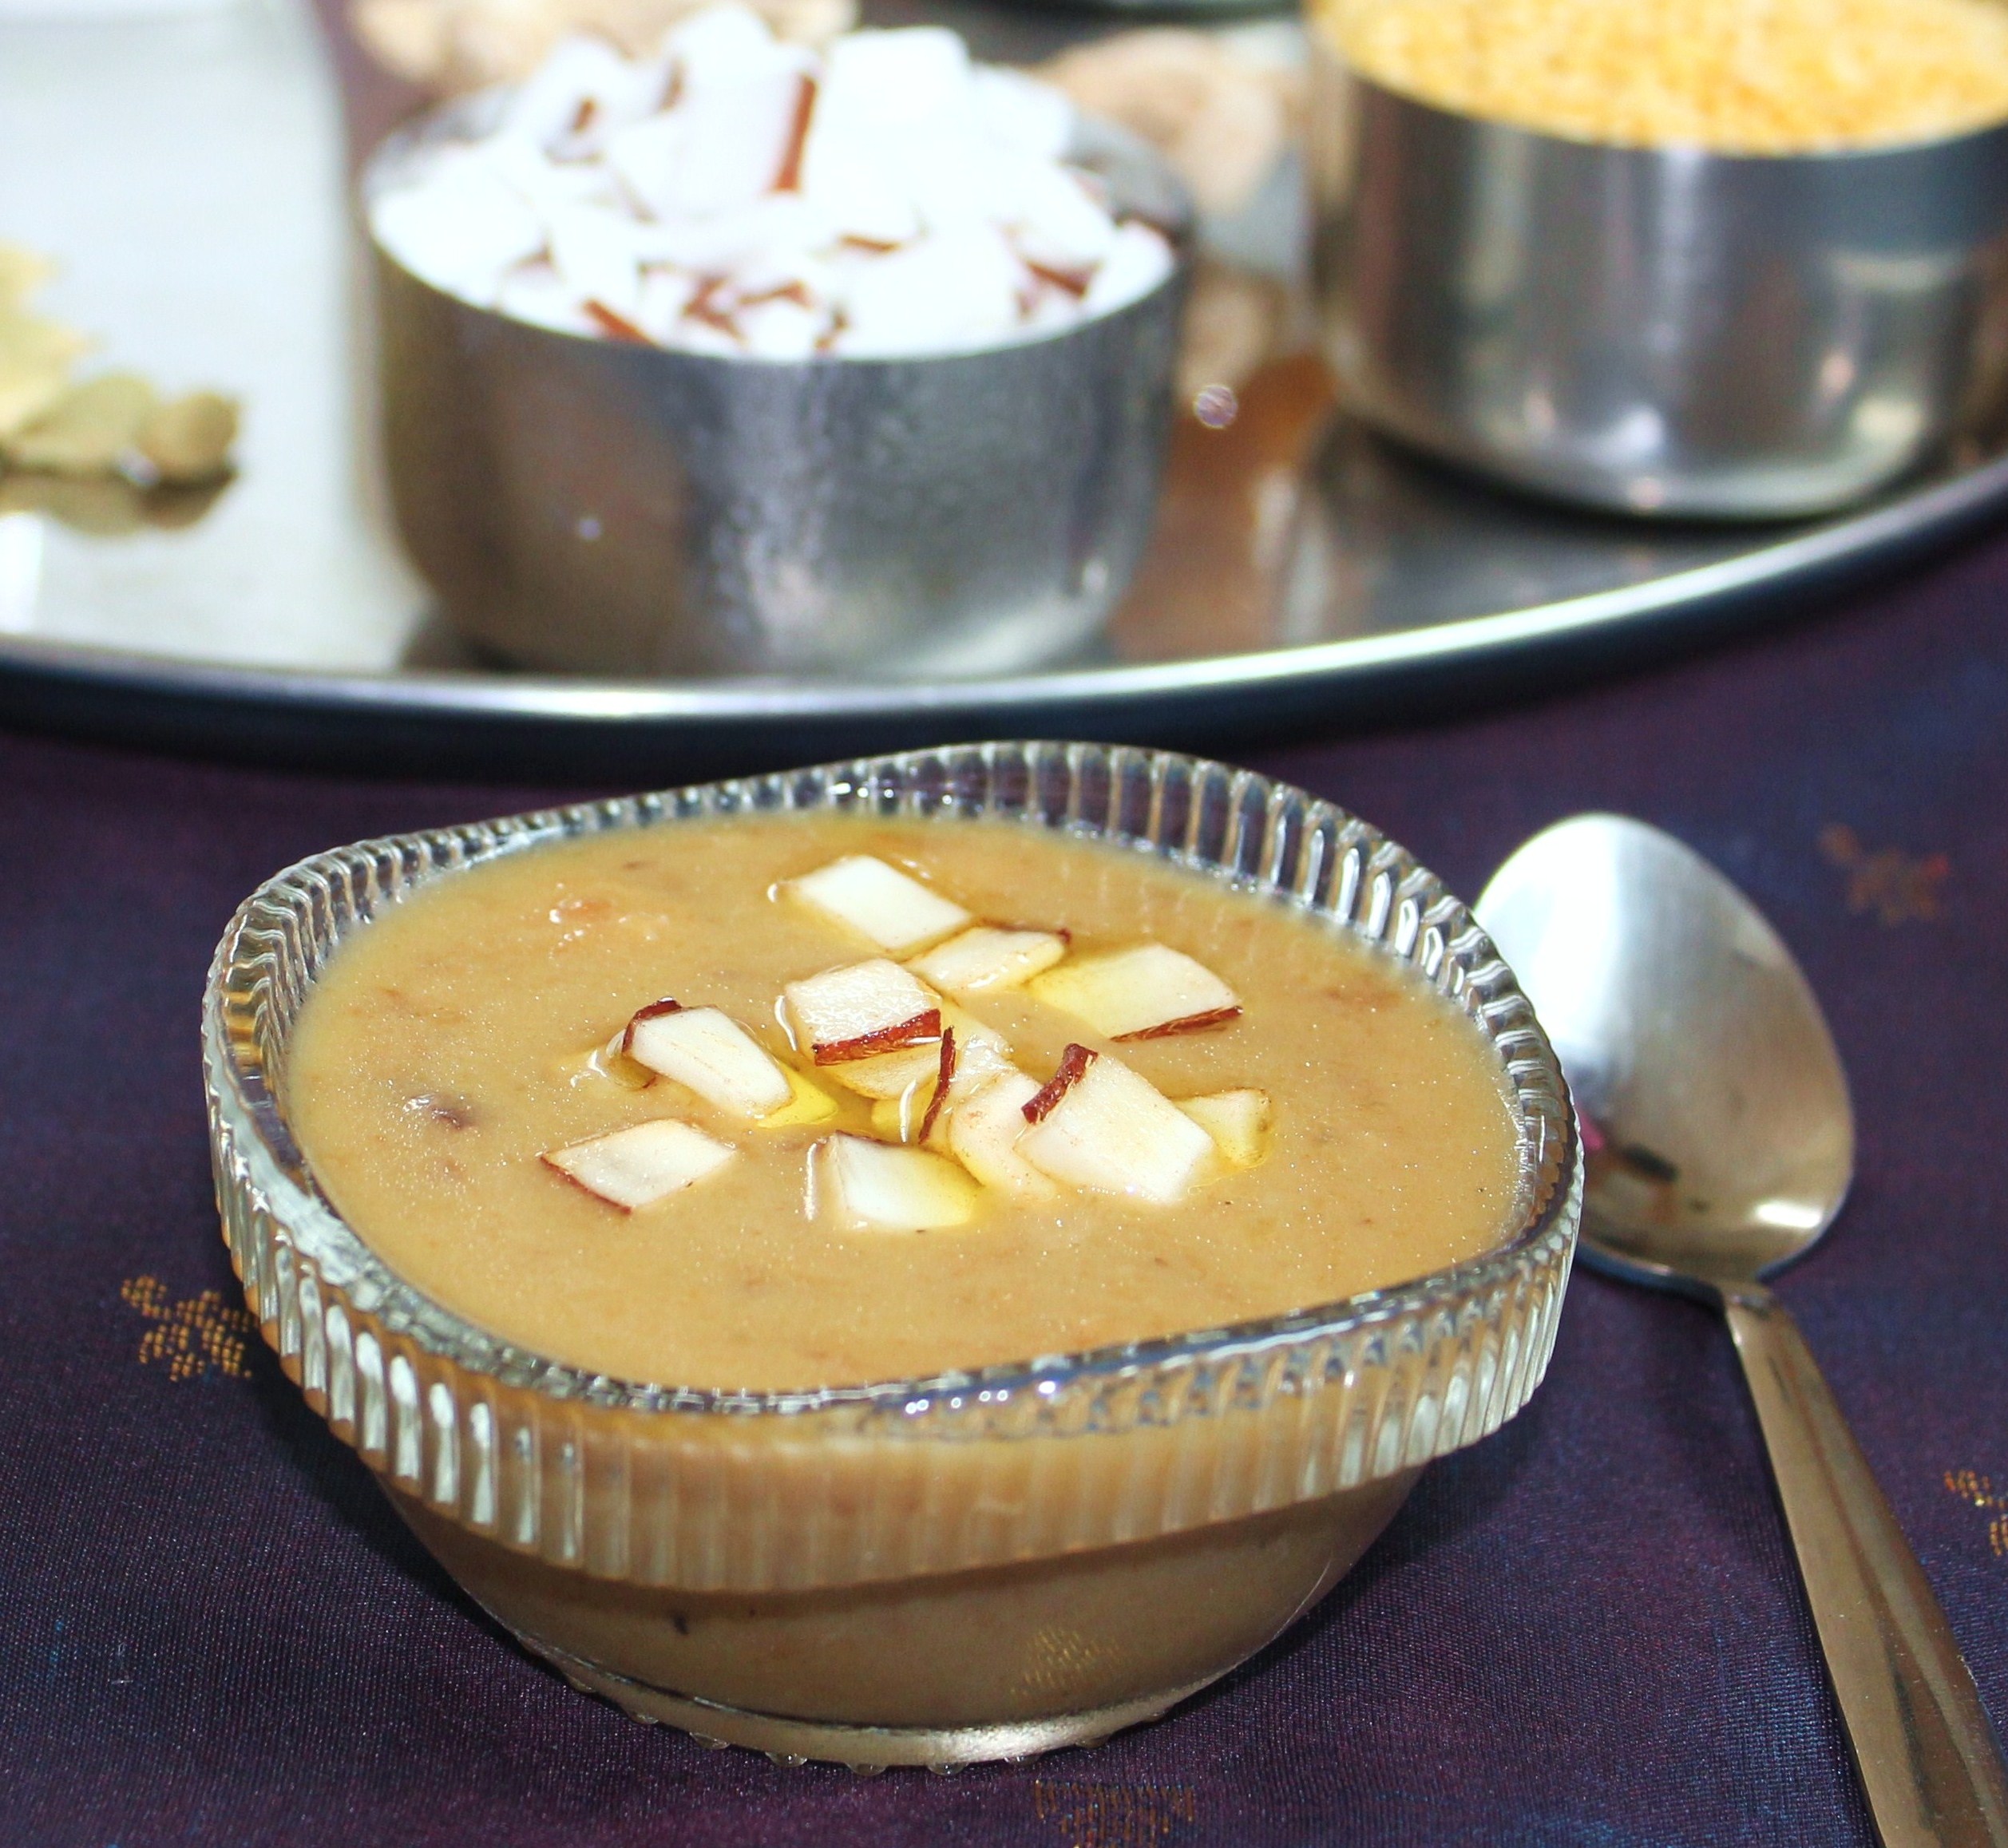
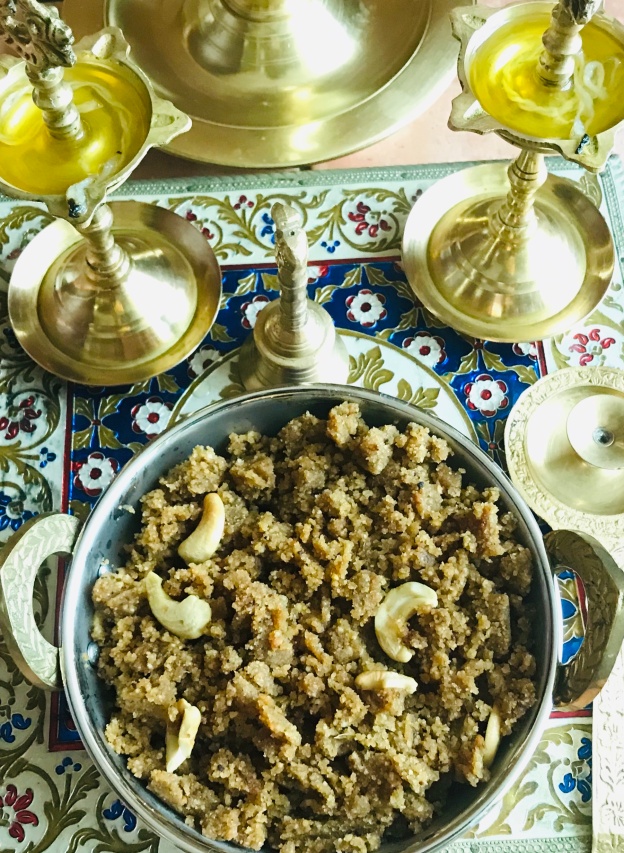
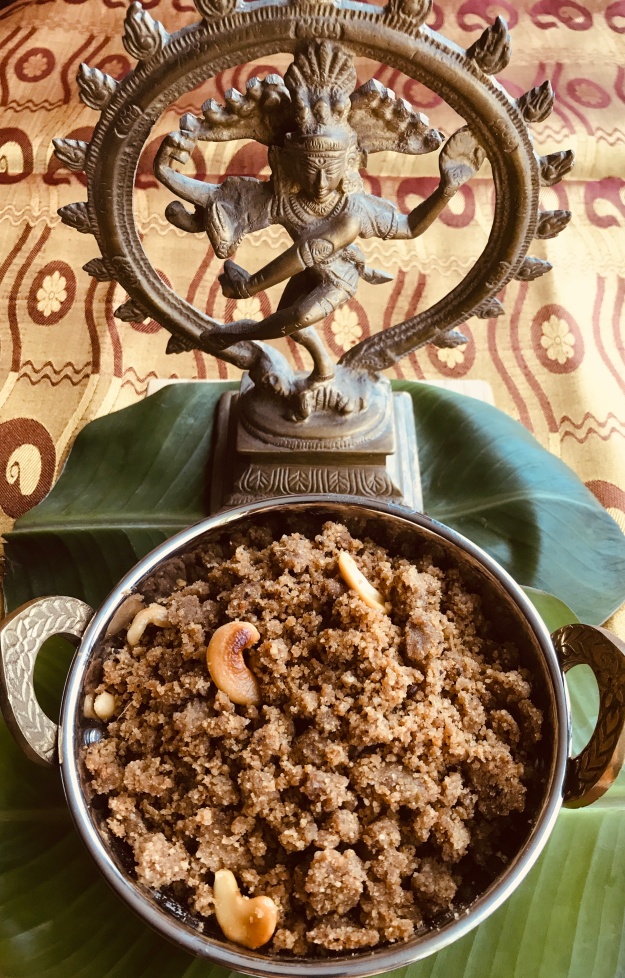
The festival of Thiruvathirai, is celebrated with Thiruvathirai Kali– a delicacy made with rice, split green gram and jaggery- that is cooked to a Pudding/Halwa like consistency. Kali might be Tamil word for Halwa… (I have already posted another Kali – Ulundhankali – which is made with black gram and palm jaggery).

This is how I made it, the day before yesterday.

Thiruvathirai Kali

Ingredients

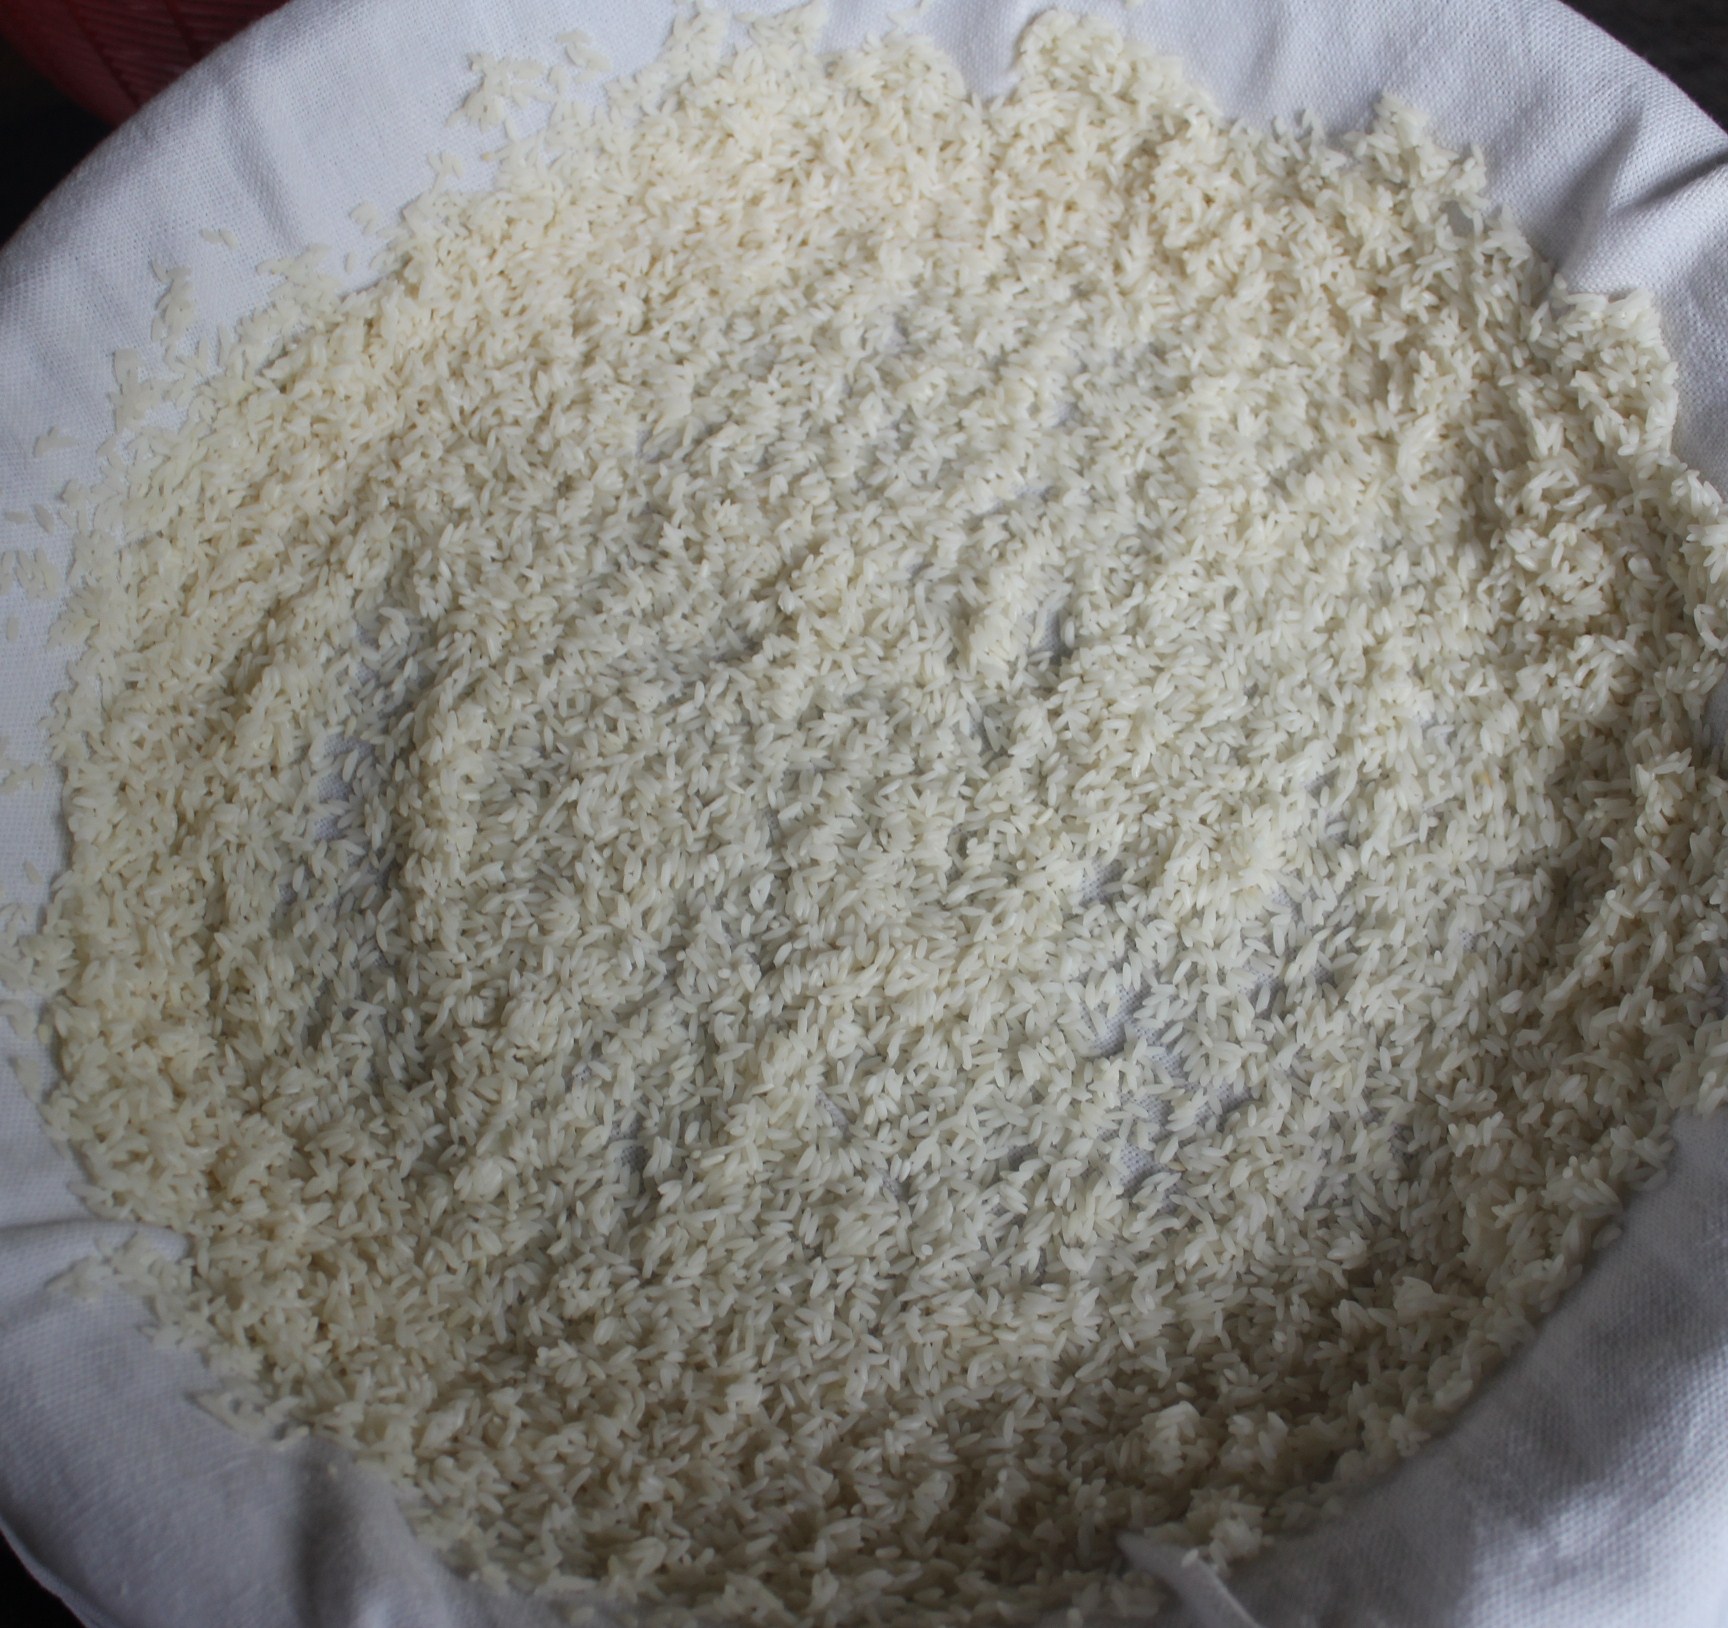
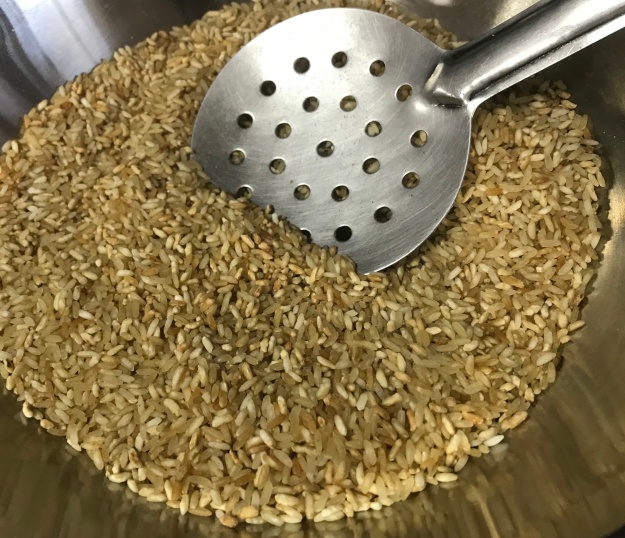
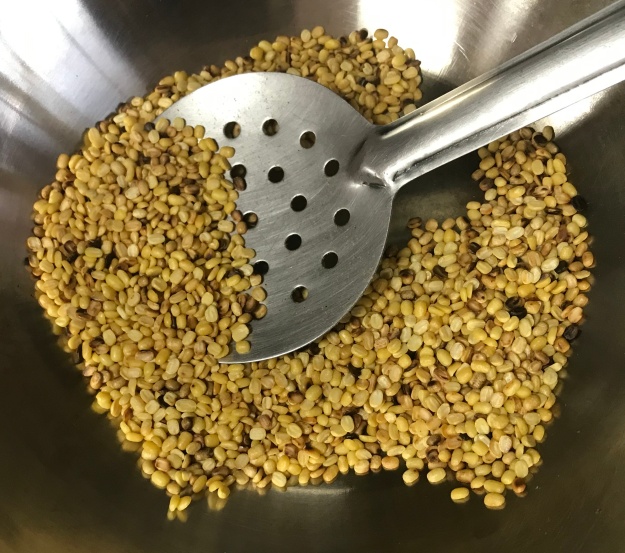
  • pacharisi/raw rice – 1 cup
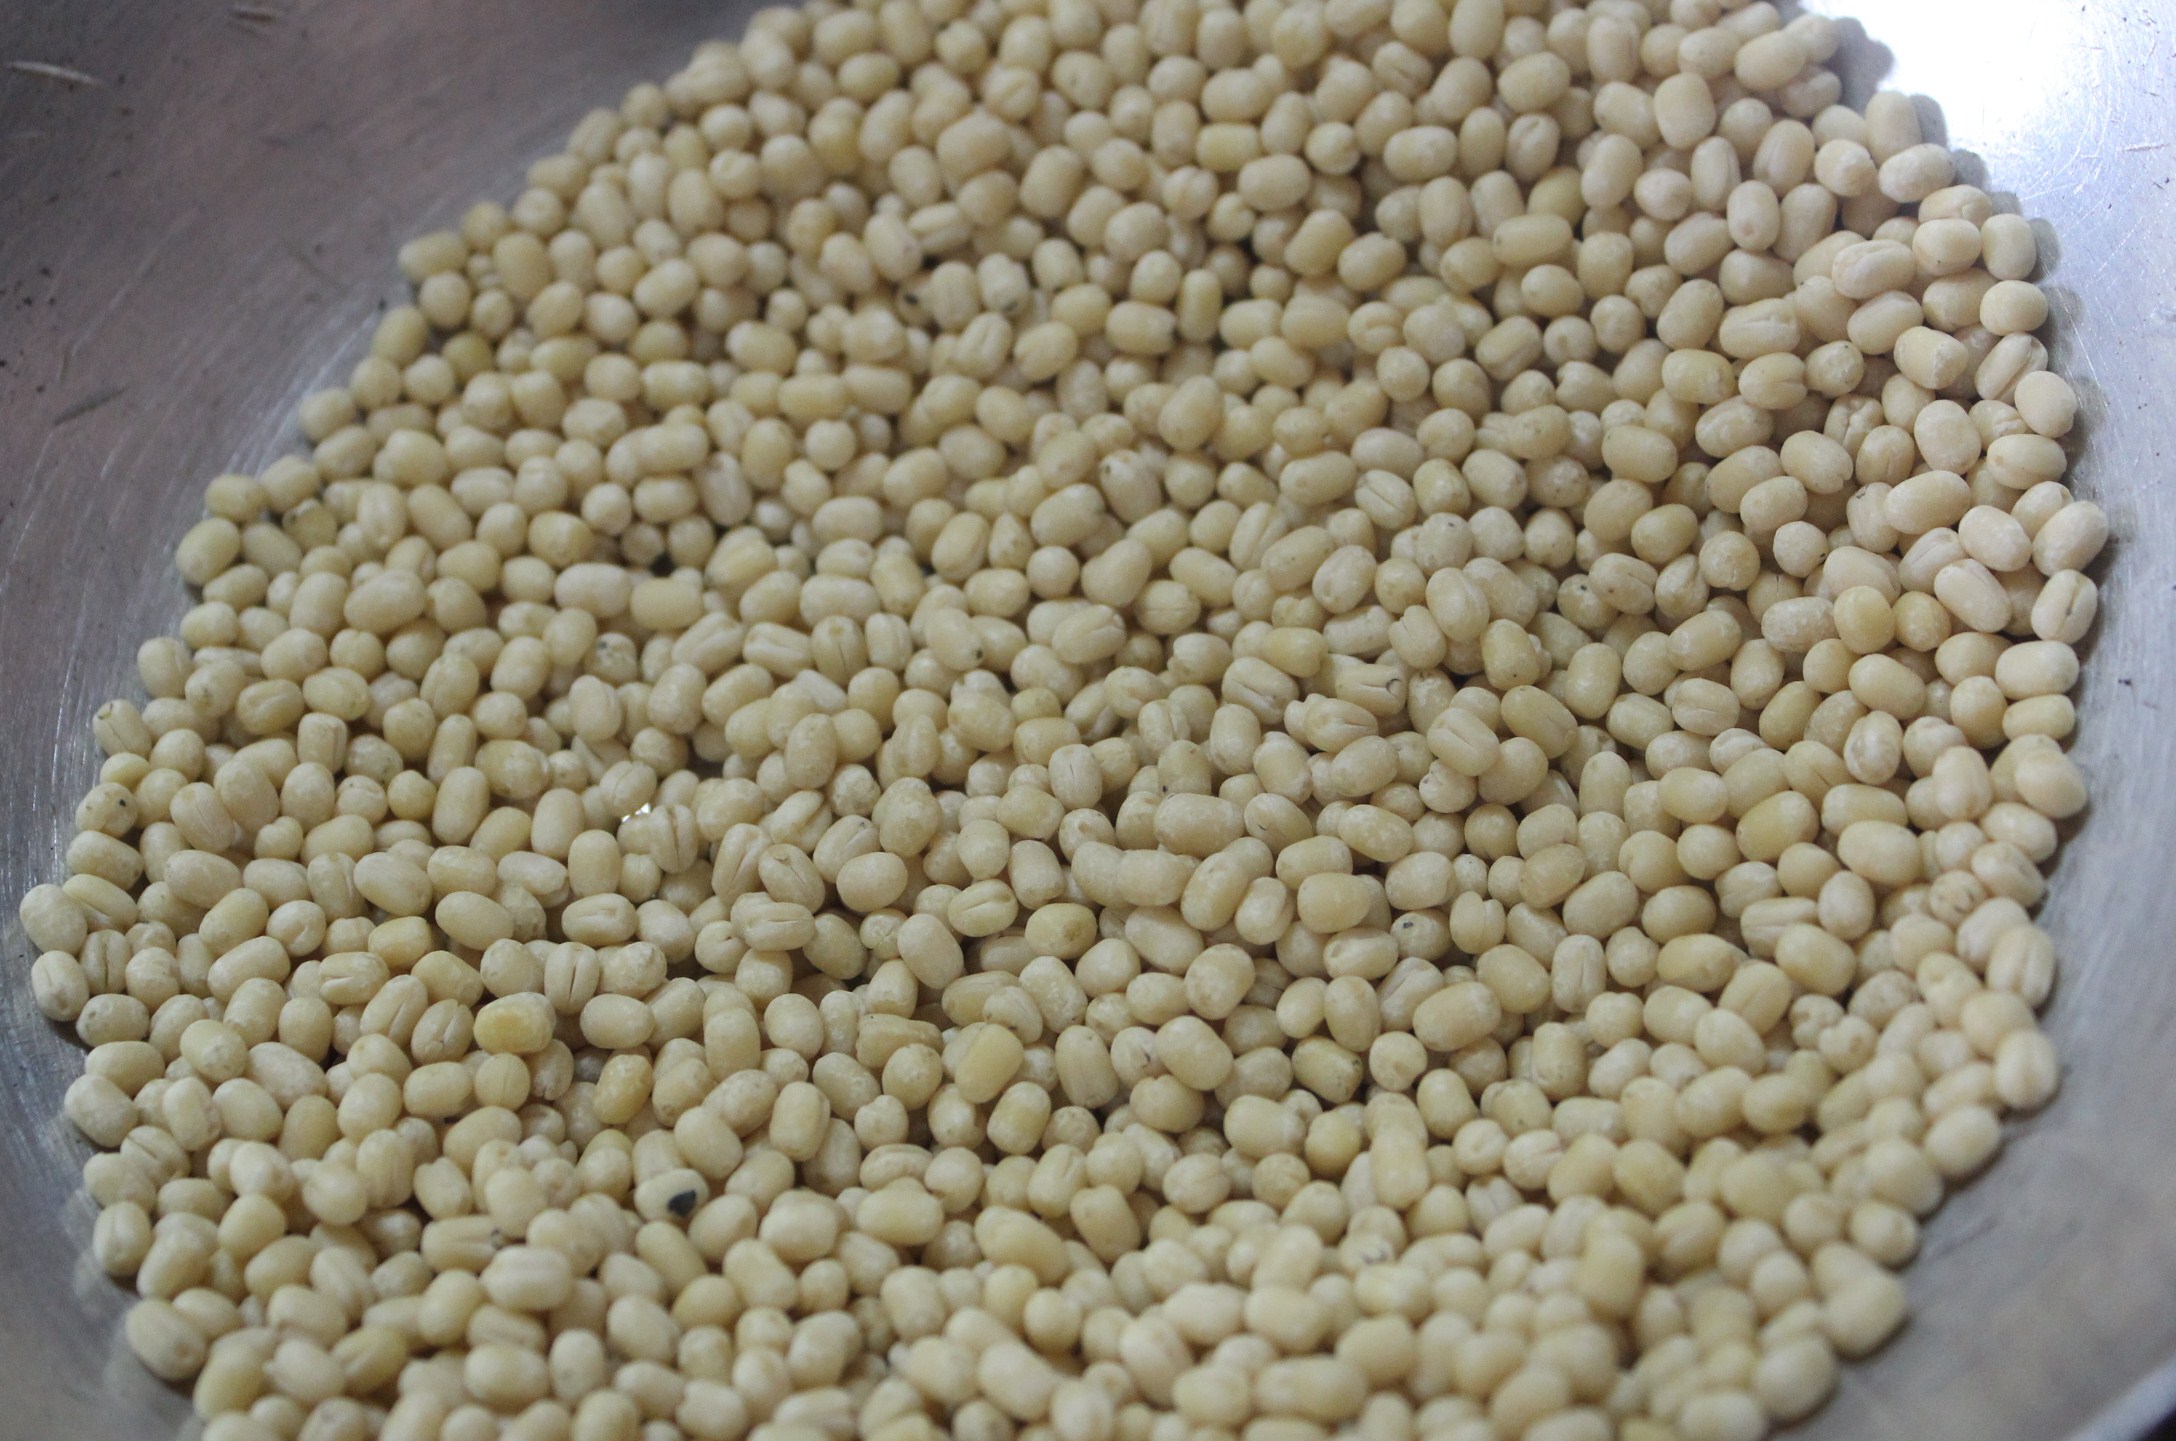
  • paasi paruppu/skinned, split green gram – 1/4 cup
  • vellam/jaggery – 1 1/4 cup (can use 1 cup if less sweet preferred)
  • water (to cook the kali) – 2 cups
  • elakkai podi/cardamom powder – 1 tsp
  • chukku podi/dry ginger powder – 1 tsp
  • nei/clarified butter – 2 tbsp
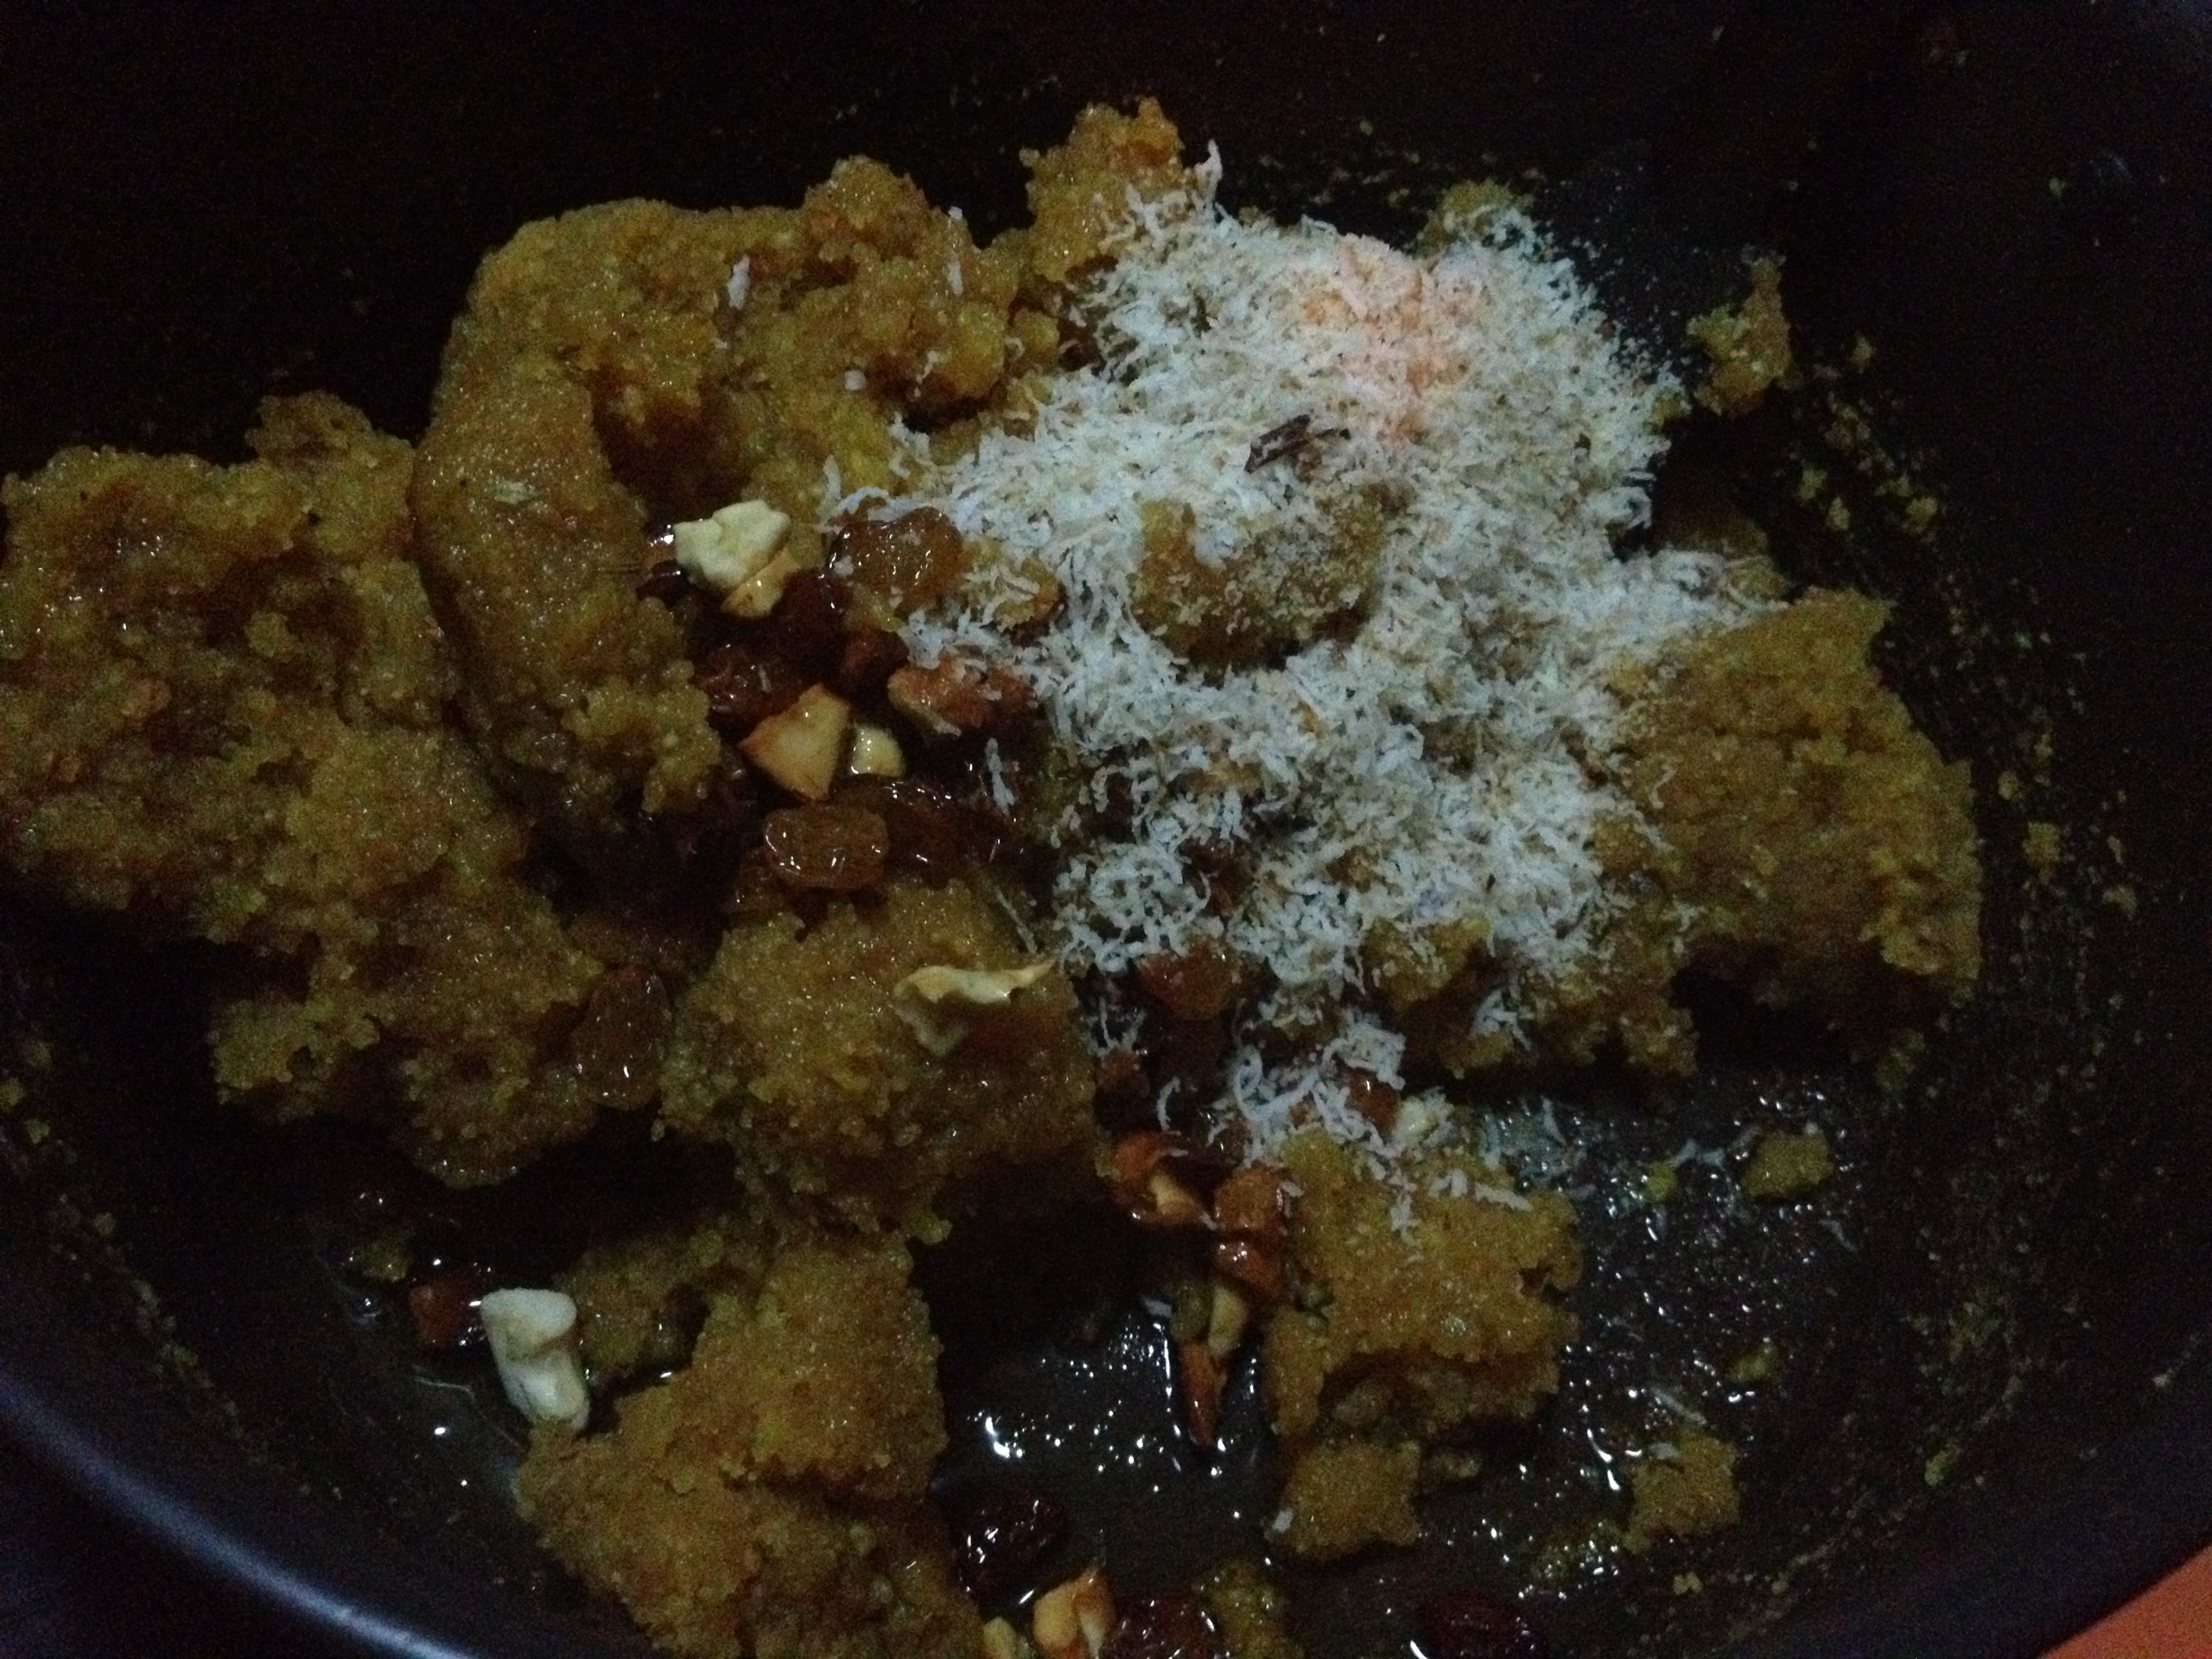
  • cashew nuts – 10 no.s, halved
  • grated coconut – 1/2 cup (optional- I didn’t add this)

Method of Preparation

  1. Dry roast rice and lentils separately, till they turn golden

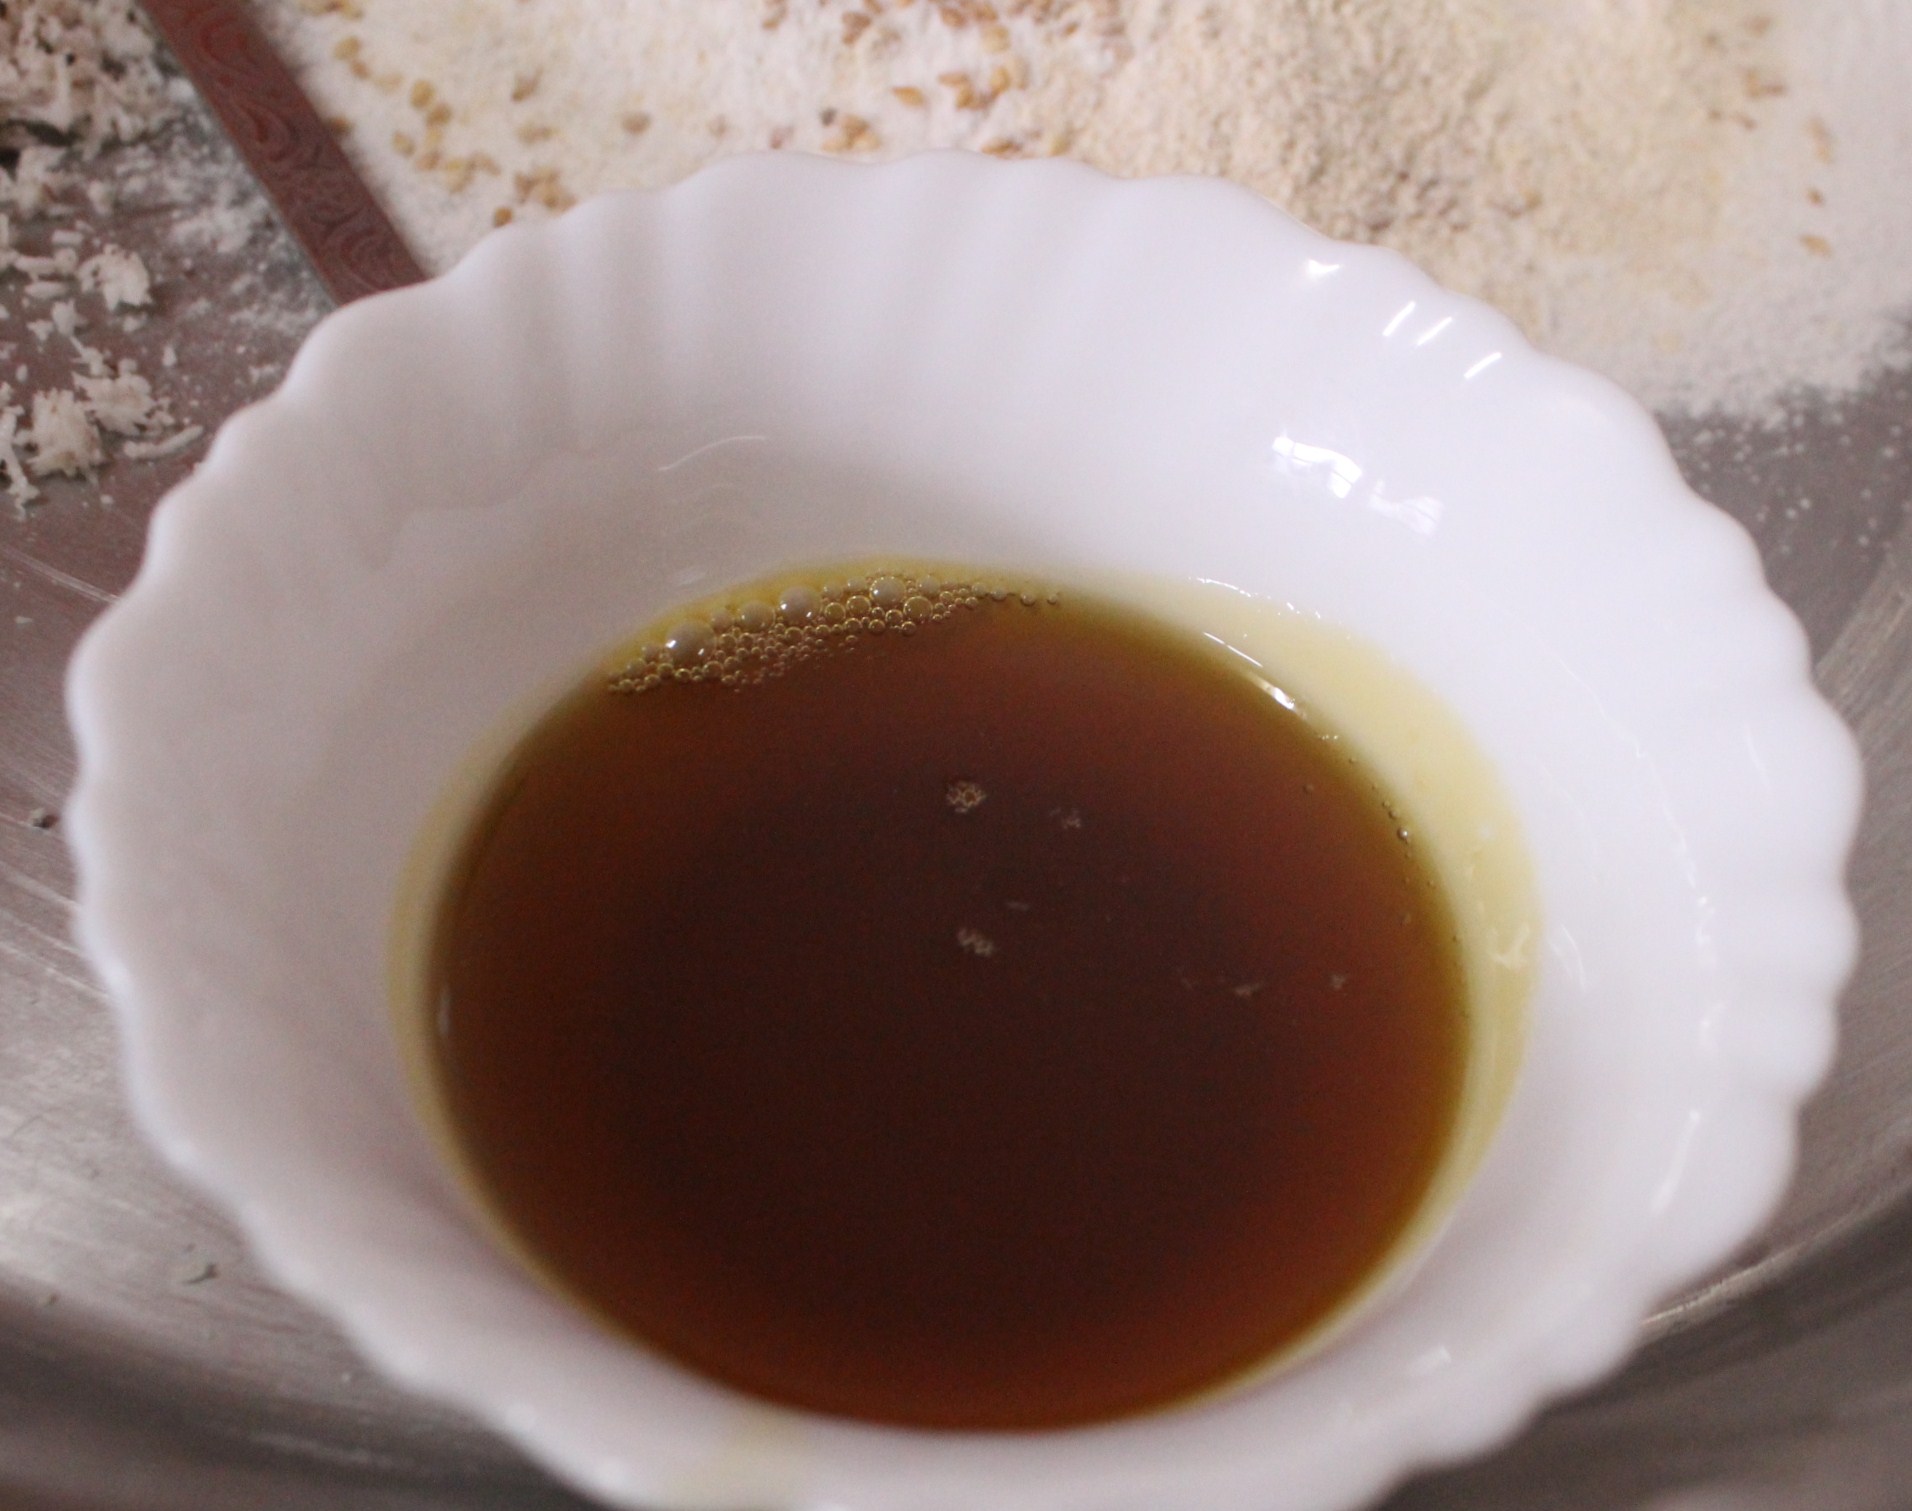
2. Grate 1 1/4 cups of jaggery and add 2 cups water and let the jaggery dissolve

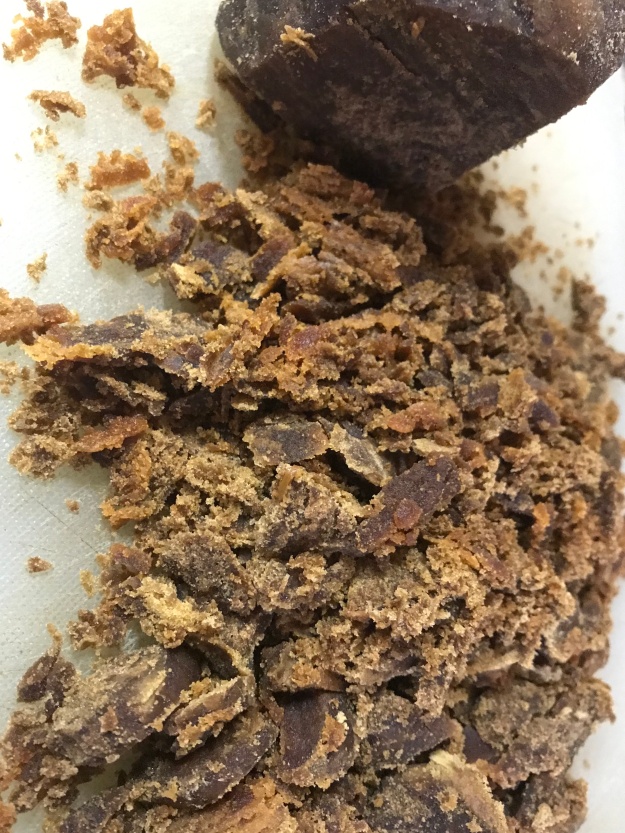
3. Once dissolved, strain for impurities and place in a hard bottomed vessel. This is the pan, in which kali would be stirred.

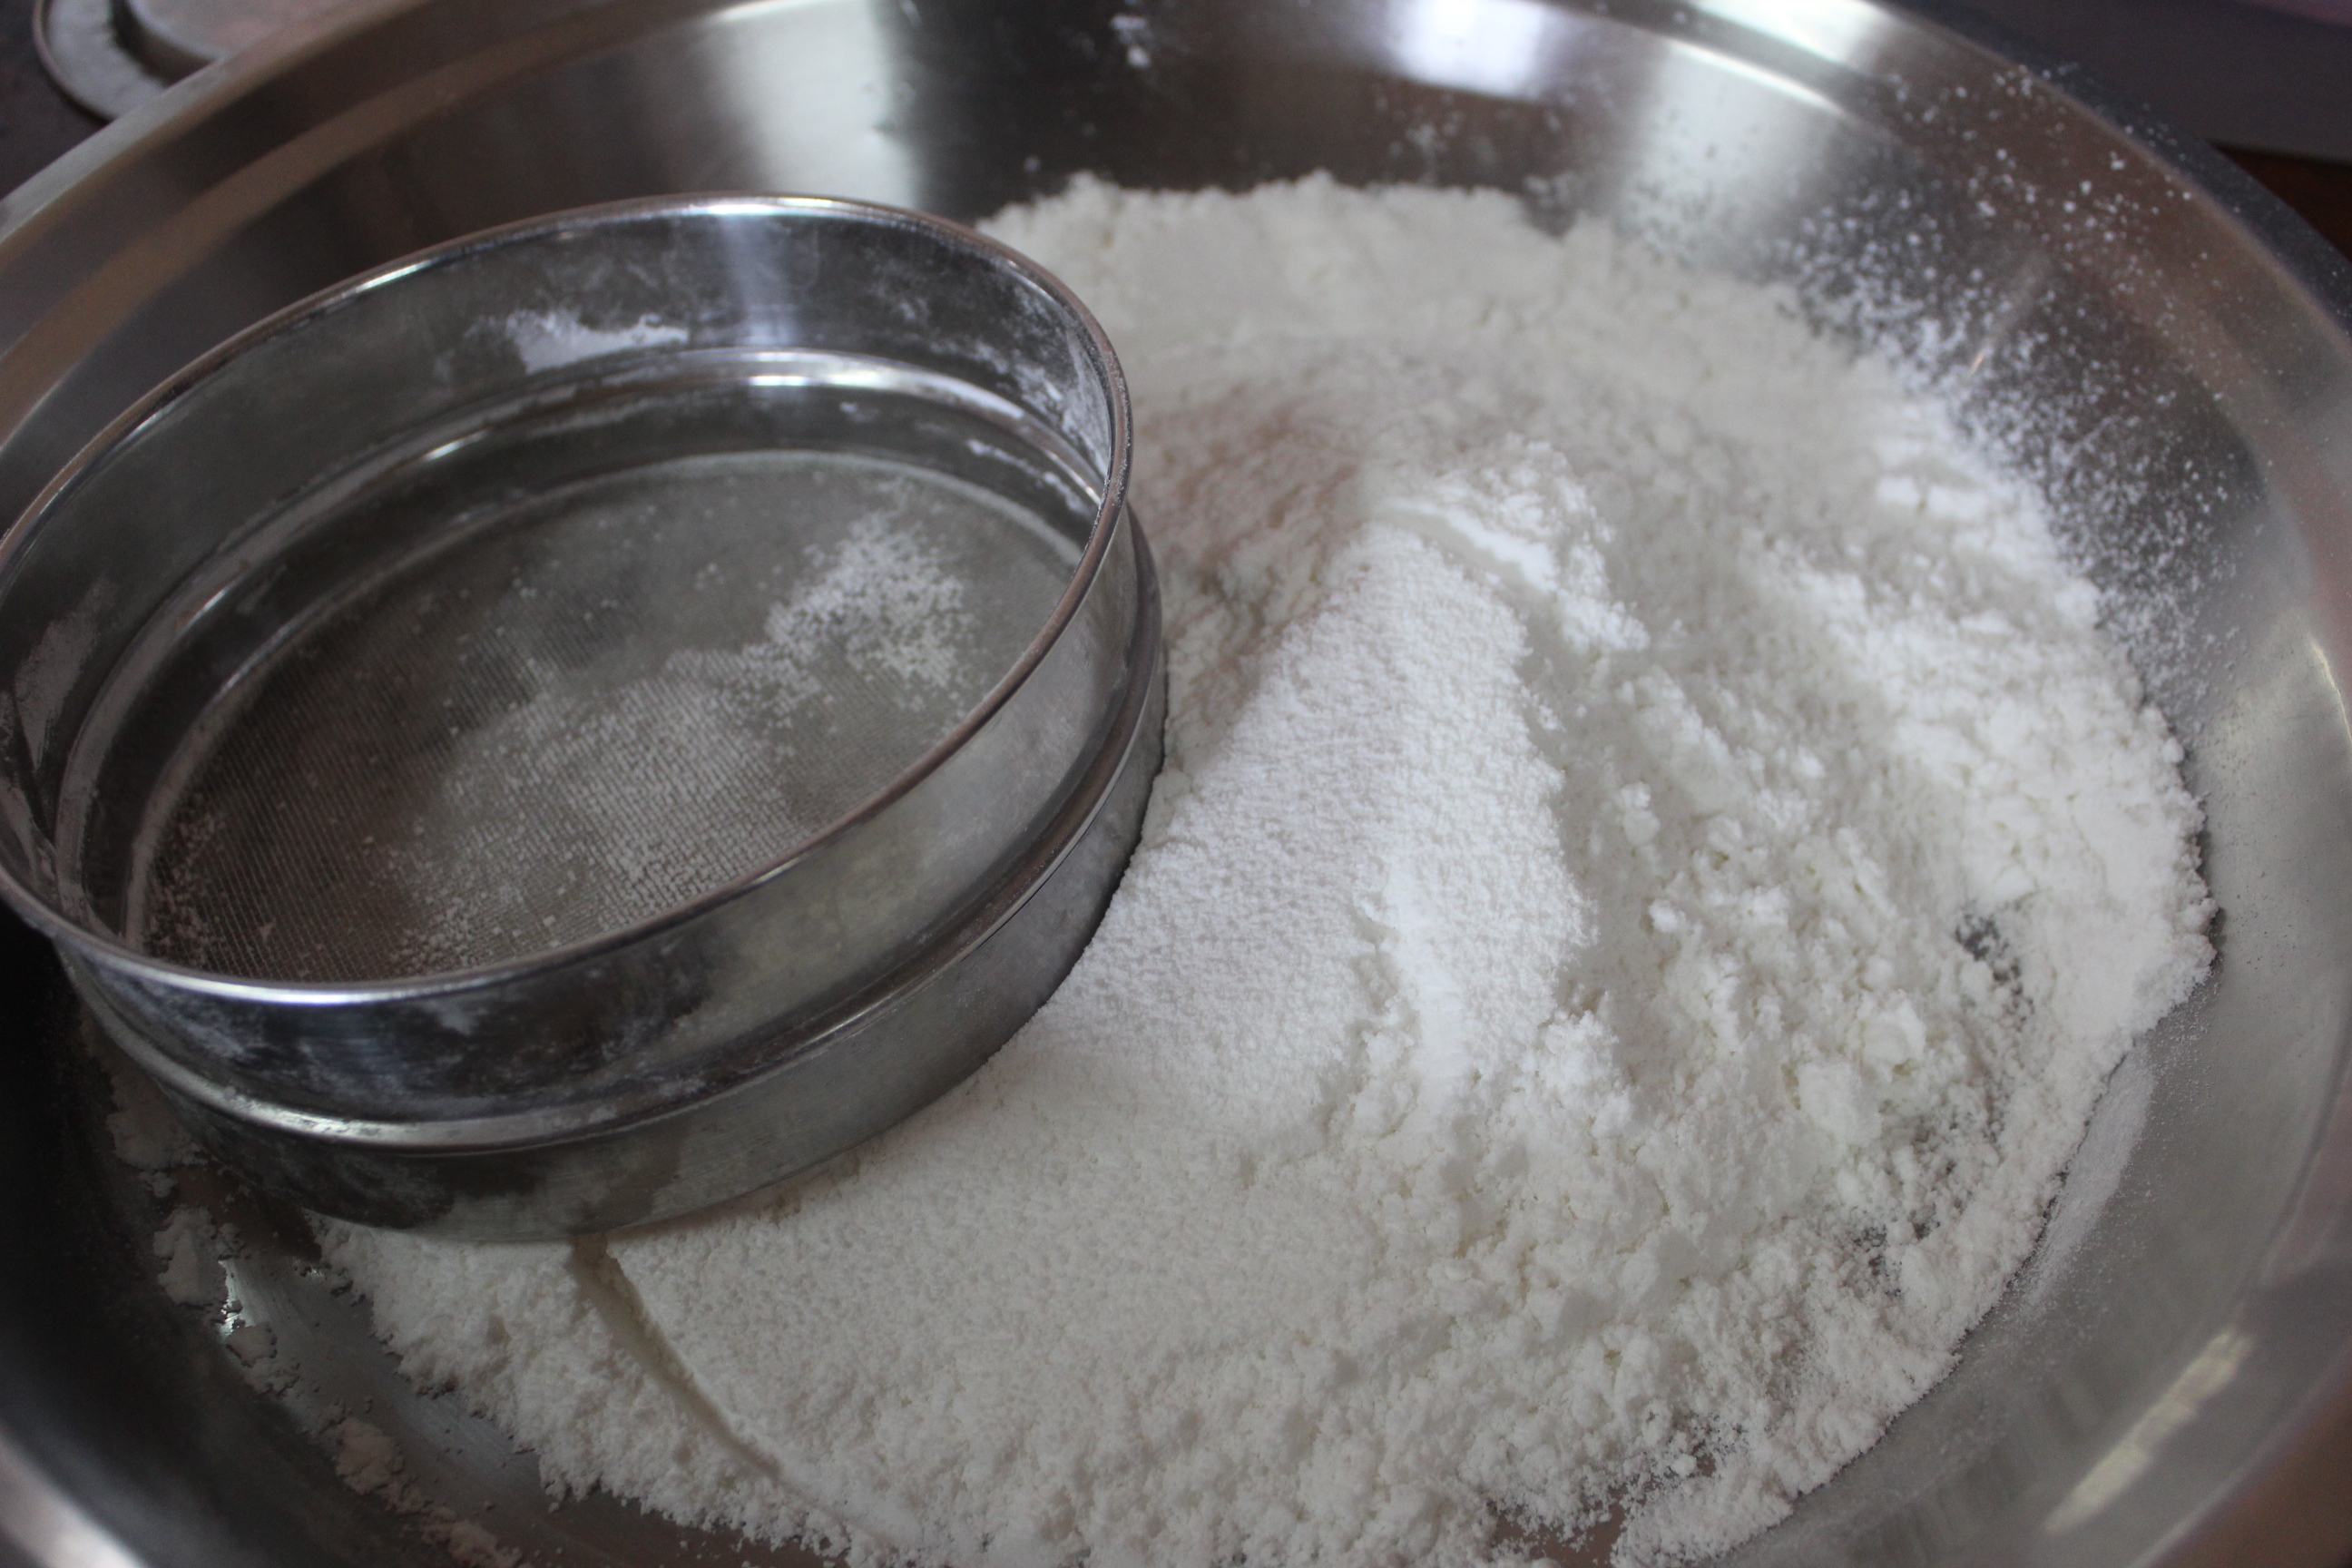
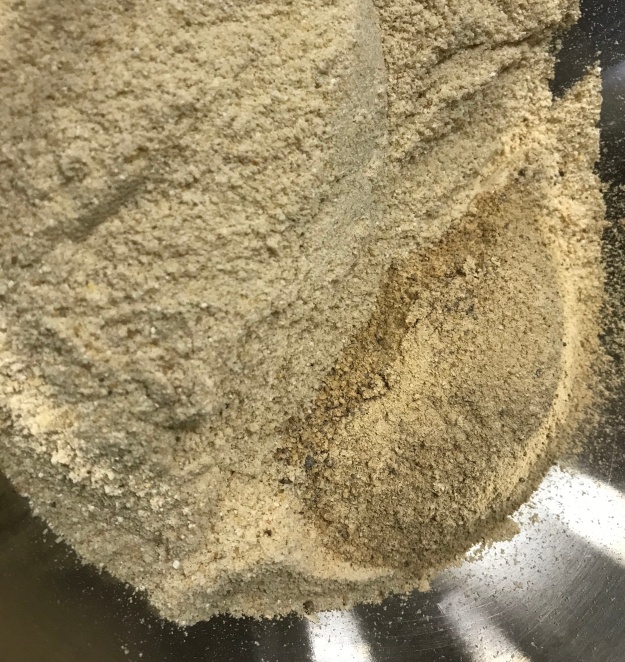
4. Dry grind the roasted rice and lentil. Keep on a plate or bowl.

5. Place the hard bottomed pan with Jaggery water on stove. Add cardamom and dry ginger powder. Bring to boil.

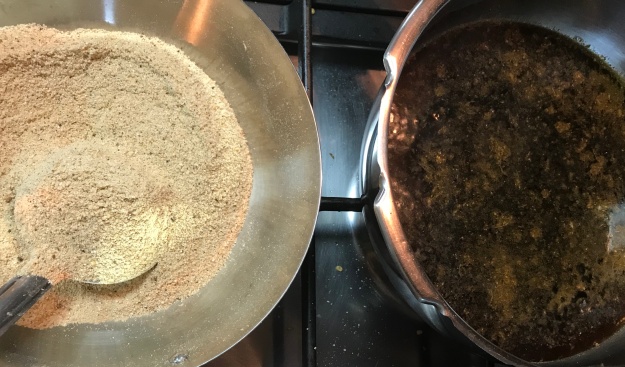
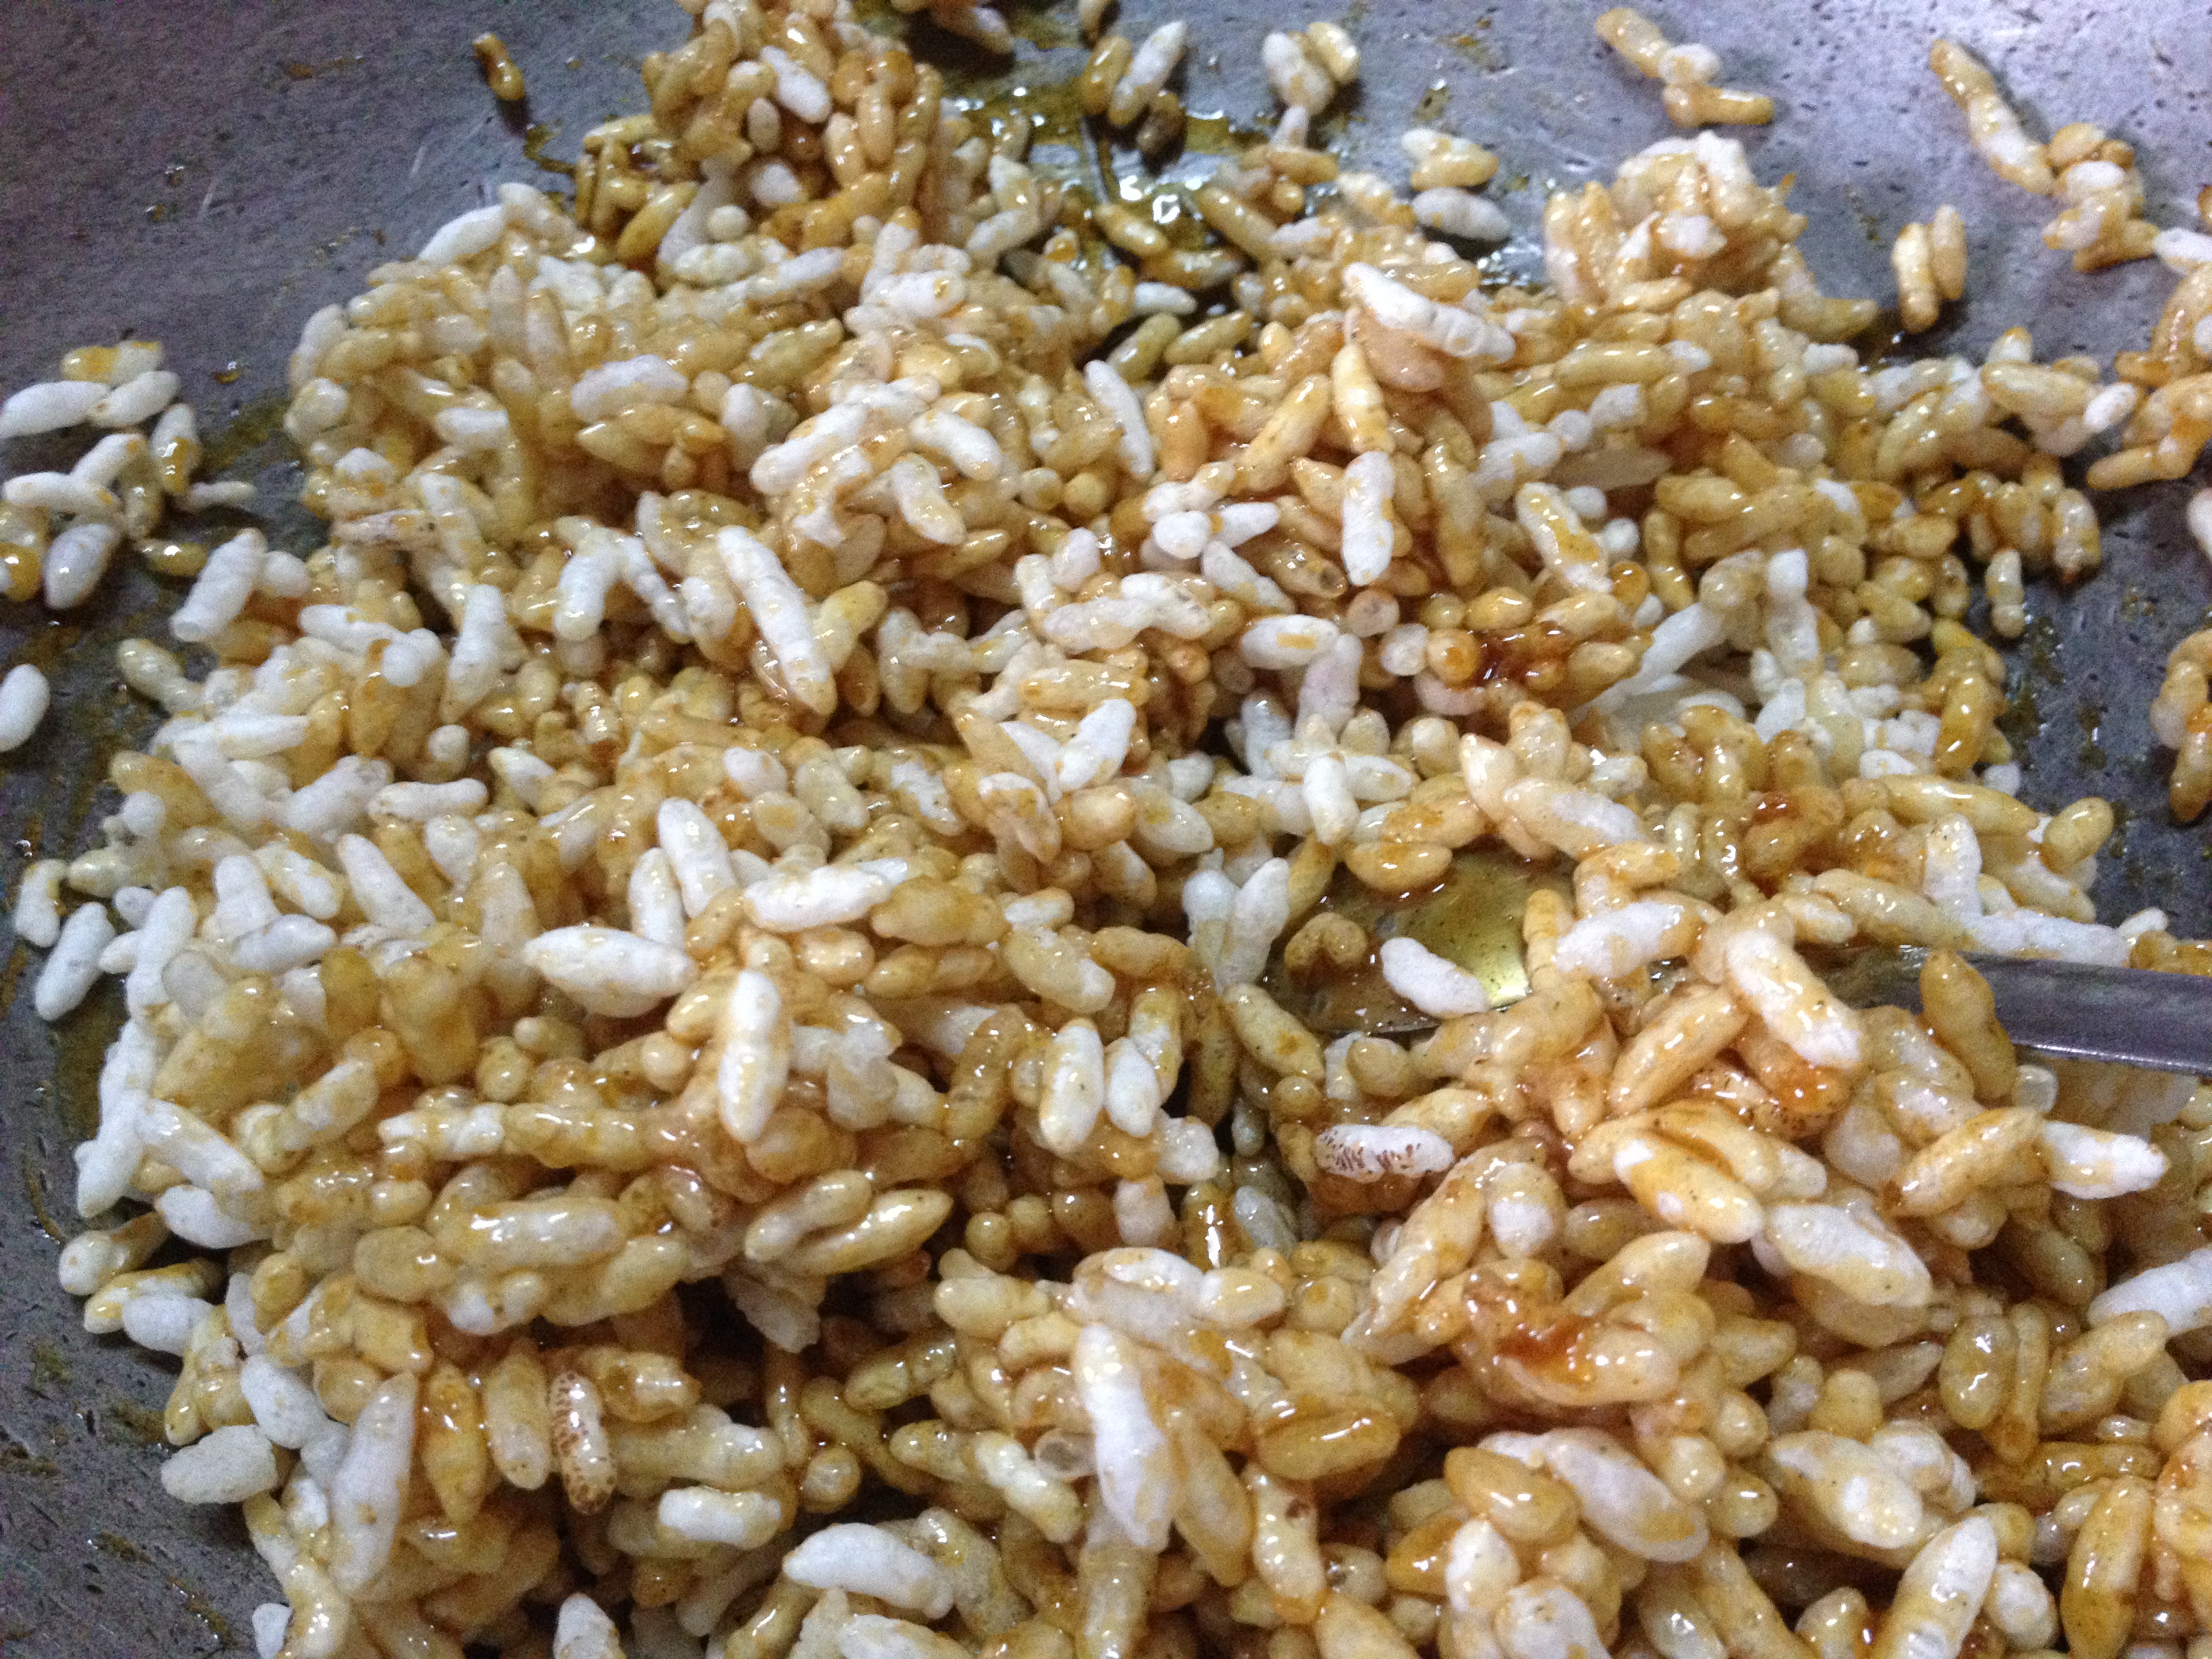
6. Once the jaggery water starts to boil, add the rice-lentil powder slowly. Keep stirring before lumps form.

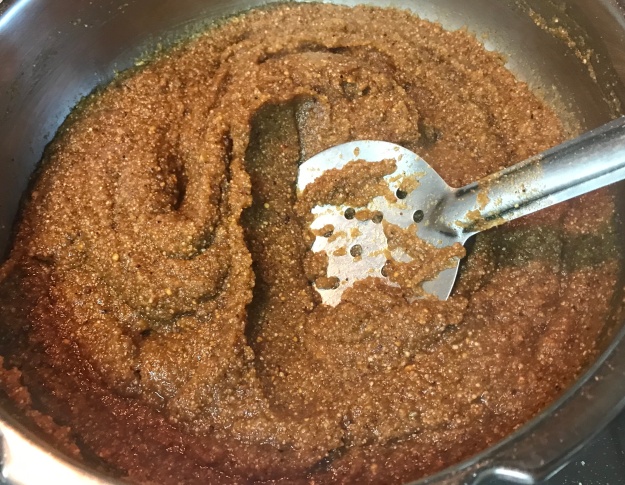
7. Very quickly, the flour will start to thicken – almost like Upma.

8. Since the rice is roast and ground, it will thicken fast; An additional informative tip from Amma, unroasted raw rice powder will be sticky, but this roasted flour will have a coarse and dry consistency.. and is easier and quicker to get cooked.

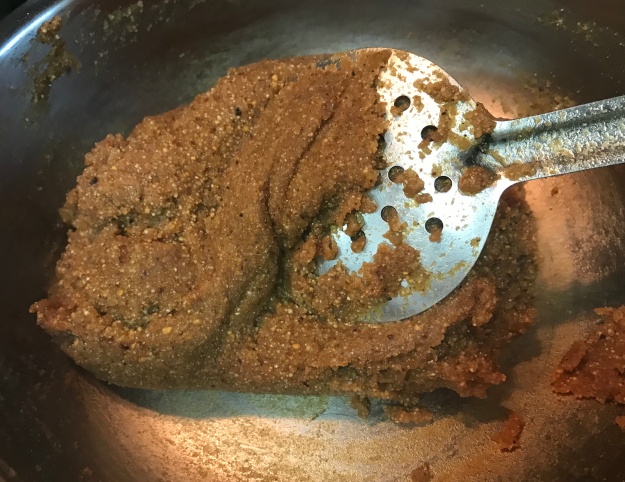
9. Now, the Kali is almost done; keep stove in sim or if you fear it might burn a bit, switch off stove.

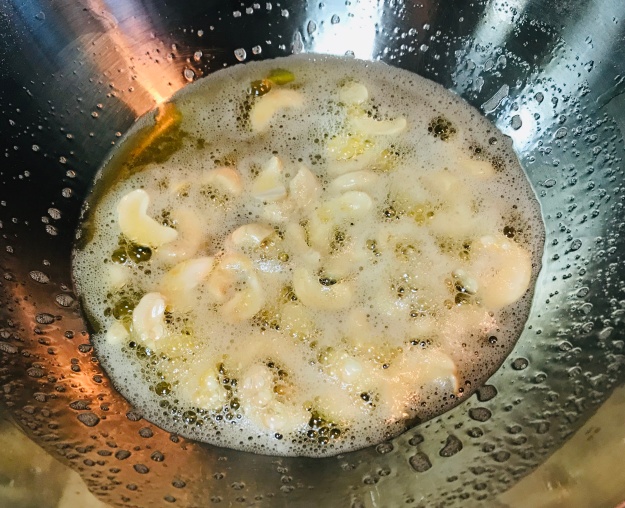
10. In another pan, deep fry cashew nuts in clarified butter till golden.

11. Add the clarified butter and cashew nuts into the Kali and mix well.

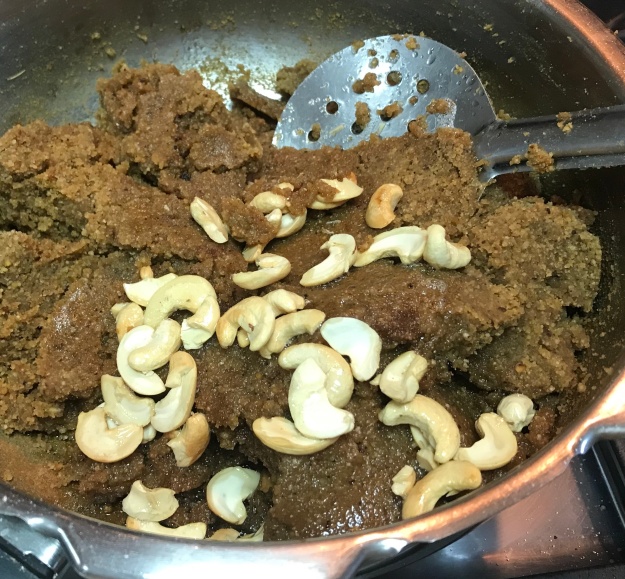
12. Switch on stove. Let the flame be in sim position, and keep stirring with the ladle. When the Kali doesn’t stick to the pan, remove and serve.

13. Feel free to add more nei/clarified butter. it only enhances the flavour.

14. If using freshly grated coconut, add before switching off the stove. Mix well and serve hot.

My love for nutty jaggery Brittles – 2. Kadalai Mittai/Peanut Brittles 3. Dry Fruit Brittles


Smitten by the brittle bug, I continue my jaggery journey with peanuts and dry fruits. If anyone tells you – Kadalai Mittai and Ellu Mittai are one of his or her favourite snacks, waste no time in guessing their age. They must surely be in their late thirties or beyond…. Rarely early thirties…. More certainly, they grew up in a traditional environment with no space for the likes of popular fast food Giants.

Before our children look at us as bizarre creatures from an alien world – who say no to burgers or croissants for snacks, it’s high time we train them to accept the goodness of healthy traditional stuff. If you are already an alien, waste no time. Start immediately. Make them feel comfortable with their snack boxes with no junk. Now, before defining what is junk to our children, I think WE should understand JUNK.

One can’t actually make out what is junk and what is not. Correct me if am wrong…….

Junk can just be that which is craft fully made, temptingly displayed, yet made with UNHEALTHY ingredients.

A good snack or food can be equally craft fully made, temptingly displayed, yet not accepted as it is what your mother served you at home.

This acceptance of home made or even store bought traditional foods, would develop only if we change as a community of parents. Peer pressure seems to be the most common and simple reason for falling into certain traps… especially into the trap laid by fast food Giants . Peer pressure contributes to what children prefer packing to school for snacks and lunch.

With no more thoughts to elaborate, let us start making Kadalai Mittai (peanut brittles) and dry fruit brittle… Anytime healthier than snacks that constitute white flour, white sugar white butter. Brittles are called Chikkies in the northern part of India.

I didn’t want to do separate posts for both brittles… The method being the same and just alteration of nuts, this is a post with dual recipes.

Kadalai Mittai (Peanut Brittles)

This image has an empty alt attribute; its file name is img_8150.jpg

Ingredients

  • kadalai/peanuts – 2 cups
  • vellam/jaggery – 1 1/2 cups
  • water – 1/2 cup
  • chukku podi/dry ginger powder – 2 tsp
  • elakkai podi/cardamom powder- 2 tsp

Dry fruit Mittai (Dry fruit brittles)

This image has an empty alt attribute; its file name is dosaikal-dry-fruit-mittai-2017-09-23-029.jpg

Ingredients

  • combination of almonds, walnuts, cashewnuts, peanuts (one may also include pecan nuts, hazelnuts) – coarsely chopped – 2 cups
  • vellam/jaggery – 1 1/2 cups
  • water – 1/2 cup
  • chukku podi/dry ginger powder – 2 tsp
  • elakkai podi/cardamom powder- 2 tsp

Method of Preparation

  1. Dry roast peanuts and keep aside / Coarsely chop mixed nuts, dry roast them and keep aside.
  2. The procedure is the same for any brittle…
  3. Grease a flat tray
  4. Heat up jaggery and water until jaggery dissolves
  5. Strain the liquid
  6. Boil the jaggery water along with cardamom and dry ginger powder until it reaches hard ball consistency – place a bowl with water and drop the syrup into it. If the syrup doesn’t melt and turns to a harder ball, that’s right for making brittles
  7. Switch off stove, mix the roasted peanuts and spread on greased tray.
  8. Make slices while hot with a greased sharp knife
  9. Break the pieces when cold.
  10. Store in air tight containers.

This image has an empty alt attribute; its file name is dosaikal-dry-fruit-mittai-2017-09-23-001-2.jpg

Note:

  1. If one is unable to cut perfect bars, just break the brittles into random pieces… The crispy bars are what you want.
  2. If one hasn’t got the right consistency, if the brittles are chewy…no worries they are equally good while sticky
  3. If they turned out harder…. they taste like toffees, first suck the jaggery juice and then eat the peanuts.

Come along, Life is all about positivity.

My love for nutty jaggery brittles- 1. Ellu Mittai/Sesame Seed Brittles

Brittle is a type of confection consisting of flat broken pieces of hard sugar candy embedded with nuts such as pecans, almonds, or peanuts.  https://en.wikipedia.org/wiki/Brittle_(food)

 As per the above definition, normal brittles are made with sugar and water, mostly white sugar. 

Traditional indian brittles are made with jaggery. Hence, are a combination of health and taste. Kadalai urundai (peanut jaggery balls)/ ellu urundai (sesame jaggery balls)/ pori urundai (puffed rice balls)/ pottukadalai urundai (roasted bengalgram balls) are common combinations made with  jaggery syrup brought down to hard ball consistency.

Urundais are sweet balls, but the less time consuming version is the Mittai – Brittles. Kadalai Mittai and Ellu Mittai are squared brittles. When was the word ‘Mittai’ included in Tamil vocabulary is a matter for research.  Before the concept of urundais or sweet balls came into making, the kitchen guardians must have powdered the nut and jaggery in the ural -mortar and enjoyed the marriage of sweet-nutty flavour.

Making sweet balls or bars involve perfect string consistency of jaggery syrup. After continuous efforts, off-late my nut brittles are almost good. Before I got the right consistency to harden the syrup to be perfectly crispy , we used to munch chewy candies. The sticky  chewy candies were equally a joyous endeavour in the mouth…. reluctant to leave the teeth. 

I shall be ever grateful to my daughter and husband, who never hesitated to pull the chewy candy from teeth to tongue. It is because of their patience, that I have reached this stage, making crispy brittles.

For the recipe, as usual, chukku podi/dry ginger powder for easy digestion and elakkai podi/cardamom powder for flavour have been added.

These are a few brittles that I’ve tried …

  • Ellu Mittai/Sesame Brittle
  • Kadalai Mittai/Peanut Brittle
  • Dry fruit Mittai/Brittle

Let’s handle them one by one.

Ellu Mittai/Sesame Seed Brittle

Ingredients

  • ellu/sesame Seeds – 1 cup
  • vellam/jaggery – 3/4 cup
  • thanneer/water – 1/4 cup
  • chukku podi/dry ginger powder – 1 tsp
  • elakkai podi/cardamom powder – 1 tsp

Method of Preparation

  1. I used white sesame seeds. Dry roast sesame seeds until golden brown and crispy
  2. Grease a plate for spreading the done mixture later
  3. Heat a pan, and let jaggery melt in water
  4. Strain the jaggery water in a clean hard bottomed pan.
  5. Add dry ginger powder and cardamom powder. Let it boil
  6. When the syrup reaches hard ball consistency – when you drop a little syrup in cold water, it should form a hard ball – switch off stove and add the roasted sesame seeds
  7. Mix well and immediately spread on the greased plate
  8. Level the presently sticky mixture and cut into squares with a sharp knife. 
  9. Remove pieces once it is cooled.
  10. Store in air tight container and relish the goodness of ths healthy brittle.

Say ‘NO’ to refined – white sugar! – Candied Walnuts with Jaggery


Caramel seems to be omnipresent…. be it chocolates, ice creams, milk shakes, macchiatos, puddings, cappuccinos, cakes, frostings and the list is endless. If not a weight watcher, I am certainly a health watcher. When craving (especially to indulge in sweets) takes a huge leap, I try to substitute with my favourite unrefined forms of sugar. My immediate choice is palm or sugarcane jaggery which involves dissolving and filtering from scratch. The next in line to make Urundai/Sweet Balls, I prefer raw unrefined palm or cane sugar for direct usage.

When we went to dine in this beautiful restaurant, the dessert served was vanilla ice cream with caramelized/candied walnuts. The hot, gooey, a touch of bittery sweetness in the caramel that coated crispy walnuts was truly awesome. After a while when the caramel coat hardened a bit, it was a wonderful crispy cracker. Though I relished the taste of it, the guilt of having something with white sugar hit me hard, as usual.

Hence came this recipe. I substituted jaggery with sugar. The kadalai mittai- peanut crackers, ellu mittai- sesame crackers, pori urundai- puffed rice crackers…. all native sweets of Tamilnadu, made with jaggery syrup caramelized to perfection – for the crunchy bite came to my mind. When we could make caramel popcorn with jaggery syrup, why not caramel walnuts? Yes we can. There is no butter or clarified butter to add extra calories.


Candied Walnuts (with jaggery syrup)
 

coated well


Ingredients

  • walnuts – 2 cups
  • vellam/jaggery – 1 cup grated
  • water – 1/2 cup
  • elakkai podi/cardamom powder – 1 tsp
  • chukka podi/dry ginger powder – 1 tsp

  
Method of Preparation


  1. Dry roast walnuts until crisp –
  • Preheat oven at 350°F. Place walnuts on butter paper/cookie sheet.
  • Bake for appr. 10 minutes- couple of minutes more or less . Do keep checking frequently.


2. to caramelize jaggery

  • On a stove, dissolve 1 cup jaggery in 1/2 cup water
  • After jaggery has dissolved completely, strain for impurities
  • Take a hard bottomed chatti/pan, pour the filtered jaggery water
  • Add cardamom powder and dry ginger powder- cardamom for flavour and dry ginger for quick digestion
  • Let it boil until syrup consistency is reached
  • Once the liquid becomes syrupy, simmer the stove and wait for the required three string consistency or hard ball stage.


3. Hard Ball stage in syrup

(courtesy: http://www.sanjeevkapoor.com)
  

4. Next step is a quick and swift one – otherwise the syrup consistency would turn disastrous.

5. When the syrup is perfect hard ball consistency, drop quickly the roasted walnuts and mix well until every walnut is coated perfectly.

6. Spread on a greased plate.

7. When the walnuts are cool, they would be crisp. Store in an air tight container. They taste awesome when hot too.
  

bird’s nest with caramelized jaggery


Vella Seedai/Jaggery Rice Ball Crispies


IMG_6400


Vella seedai, as the name suggests is made of vellam or cane jaggery. The sweetness of the festive delicacy comes from the traditional jaggery and the right consistency of the dough results in a crunchy melting snack.

As mentioned in the Uppu Seedai recipe in the previous post, the dough stands the risk of melting while frying, the culprit being the temperature of jaggery, we need room temperature jaggery water. Hot jaggery water might lead to a break-up of seedai in hot oil. The sweet deep fried balls lose their shape and end up in a powdery chunk if the jaggery water is hot. So, one needs to be cautious on that.

Otherwise, this sweet is an easier affair in comparison to Uppu seedai, which can be revolutionary and exploding.

The step by step procedure of making of the basic rice flour has already been posted in https://dosaikal.com/2016/08/29/uppu-seedaisalted-rice-ball-crispies/

But, to reduce web-browsing time, I repeat the procedures below.
Vella Seedai/Jaggery Rice Ball Crispies

Before making seedai, we need home made, fine powdered rice flour, the core ingredient for both the salt and sweet version of seedai.
Rice Flour


  • Wash well and soak 3 cups pacharisi/raw rice in enough water for 2 hours. Drain the water and spread in a clean cloth, preferably cotton towel which would absorb the excess water and dry the rice inside the room.


IMG_6333


  • Never use paper, especially newspapers to dry rice or any kitchen purposes, as they contain highly dangerous ink which can cause illnesses.
  • The rice shouldn’t be dried too much. With a bit of moisture still in the rice, dry grind in a blender to a fine powder.
  • Sieve well and keep aside


IMG_6338


Dehusked Black Gram Flour
Also needed is black gram flour, which is dry roasted and powdered.

dry roasted…


IMG_6346


and powdered…


IMG_6351


  • Grind again the granules left over from the first sieve
  • Combine only very fine powder which is very important in the making of seedai.

Ingredients (makes 75-80 balls)


  • pacharisi maavu /rice flour – 2 cups
  • ulundhu maavu/dehusked black gram flour – 2 tbsp
  • varutha ellu/roasted sesame seeds – 2 tsp
  • nei/clarified butter – 2 tbsp
  • uppu/salt – a pinch
  • vellam/cane jaggery – grated – 1/2 cup
  • thanneer/water – to dissolve jaggery
  • thuruviya thengai/grated coconut – 2 tbsp
  • yennai/oil – for frying

Method of Preparation
Part I


  1. Dry roast rice flour till aroma comes out, but be careful not to over roast as it will change the colour of flour.
  2. Take jaggery in enough water and heat slightly till it dissolves. We do not want a syrup here. So, be cautious.
  3. Strain and keep aside.


IMG_6372


Part II

IMG_6371


  1. Mix all the dry ingredients – rice flour, black gram flour, sesame seeds, salt and grated coconut with clarified butter.
  2. Make a stiff dough with just enough jaggery water.
  3. Always have extra flour (both rice and black gram) in hand. This might come handy when the dough becomes soft.


IMG_6373


Part III


  1. Heat oil for deep frying in a pan to start frying seedai. Keep in medium flame.
  2. Make small balls of equal size.
  3. Fry in medium hot oil till done – end product would be dark brownish in colour.
  4. Drain excess oil in kitchen tissue and store in an air-tight container.


IMG_6393

Thirukkaarthigai and Pori Urundai/Festival of Lights and Puffed Rice Sweet Balls

IMG_4479


Thirukkarthigai was celebrated yesterday – 25.11.15. This is one of the ancient festivals of Tamilnadu and originally the Festival of Lights. It calls for decorating the house with lamps. A detail post on thirukkarthigai was written in 2011. Refer – dosaikal.com/thirukkaarthigai
There are various sweets prepared for different festive occasions- it can be a mix and match affair as far as the sweets are concerned. But there are certain specific delicacies for specific festivals. ‘Pori’ or Puffed Rice forms a basic part of Thirukkaarthigai. It takes the name of the festival and is called ‘Kaarthigai Pori’.


IMG_2873
In the previous post on Thirukkaaarthigai or Kaarthigai Deepam, I had tried Pori Urundai or Puffed Rice Jaggery Balls but had not been successful. Hence, it was converted into uthiri pori or sweetened puffed rice.

This time I was successful and could make Pori Urundais because of the right consistency of jaggery syrup.Graduating from a learner to a better learner, this time ‘Maavilakku’ or the lamp made with rice flour also came out better shaped, certified ‘good’ by my daughter. What else one needs as good marks from your child!

To the recipe-

Pori Urundai


IMG_2881

Ingredients (makes approximately 30 balls)

  • pori/puffed rice – 5 cups
  • vellam/jaggery – 1 cup
  • thanneer/water – 1/2 cup
  • elakkai podi/cardamom powder – 1 tsp
  • chukku podi/dry ginger powder – 1 tsp
  • nei/ghee – to grease hands


IMG_2882


Method of Preparation

  1. Keep puffed rice in a wide bottomed bowl, enough to mix jaggery syrup
  2. Take Jaggery in a pan with water and heat till jaggery dissolves
  3. Strain jaggery to remove mud which is generally present
  4. Keep the strained jaggery water on stove and add cardamom powder and dry ginger powder
  5. Boil till it becomes a thick syrup and reaches a consistency where it forms a ball when dropped in water – this is called uruttu padham in tamil


6. When the syrup reaches proper consistency, pour into puffed rice bowl and mix well with a ladle

IMG_2873IMG_2878

7. Adjust the quantity of puffed rice according to the syrup

8. Grease both hands with little clarified butter/ghee and make medium sized balls

9. Pori Urundai is ready.

Note:

  1. The puffed rice can be moulded into balls only if the consistency of jaggery syrup is right.
  2. If the rice mixture turns hard after a while, keep on stove and reheat till it melts a bit and continue making again.
  3. If the pori has become crispy with syrup and is unable to be moulded, the syrup has crossed the required consistency. In such case, enjoy uthiri pori or fried sweet puffed rice.
  4. Adjust the quantity of pori as per need while mixing the syrup. I needed to mix at least 1/2 cup more to bring it to right ratio.
  5. Pori Urundai cannot be made with sugar; Jaggery is the only sweetener. Or one can try palm sugar.
  6. Dry ginger powder aids in easy digestion and helps especially in case of over-eating.
  7. If the puffed rice is not crispy and is a bit soft, dry roast before making urundais/sweet balls.


IMG_4489

Mundhiri Kothu – the traditional and exceptional sweet!


IMG_8823


I have always been fascinated by the name of this sweet. Whoever named it Mundhiri Kothu – which translates as ‘Bunch of Cashews’- has been a keen observer of the making of this sweet. This deep fried snack/sweet comes out like a bunch when taken out of oil.

Mundhiri Kothu is a popular sweet from the Kanyakumari region of Tamilnadu.It can be called the healthier cousin of Susiyam which is also known by the names Soyyam/Sugiyan. For recipe refer- (https://dosaikal.com/2011/10/18/susiyam-deep-fried-lentil-jaggery-sweet-balls/).

Susiyam is made with kadalai paruppu/bengal gram; and the outer dip is prepared with maida/all purpose flour. Whereas, Mundhiri Kothu is made with paasi payaru/green gram and the outer dip is with rice flour. This is a sweet with the best choice of ingredients, except that it is a deep fried snack. The pleasing aroma of roasted green gram combined with other ingredients would surely make one’s kitchen a favorite place to work more!

Mundhiri Kothu is a popular sweet in the Yaazhpanam or Jaffna Area of Srilanka too. With slight variations, people call this as ‘Payatham Paniyaram’. Source: http://en.wikipedia.org/wiki/Munthiri_Kothu
Now to the making of Mundhiri Kothu –

Mundhiri Kothu


IMG_8831


Ingredients (makes approx. 30 mundhiri kothu)

  • paasi payaru/whole green gram – 1 cup/150 gms
  • grated coconut – 1 cup – 75-80gms
  • ellu/sesame seeds (i used white) – 3 tblsp
  • elakkai/cardamom pods – 20
  • chukku/dry ginger – 3 gms
  • vellam/jaggery – 250 gms
  • rice flour – 2 cups
  • salt – 1/4 tsp
  • water – to mix rice flour and to dissolve jaggery
  • oil – for frying


Method of Preparation

1. In a pan, dry roast whole green gram till nice aroma comes out of the grain, along with cardomom pods


IMG_8778


2. Dry grind green gram and cardamom, with dry ginger into a coarse powder (not too coarse)

3. Dry roast grated coconut and sesame seeds

4. Mix green gram powder, roasted coconut and sesame seeds


IMG_8800
5. In a separate pan, dissolve jaggery in water and strain well

6. Boil jaggery in water to make a syrup – little sticky consistency, to make a tight ball with the powdered ingredients; Be careful not to make it stringy consistency


IMG_8802
7. Mix jaggery to the powdered ingredients and make marble sized urundai/ball


IMG_8803

8. Make a not too thin-not too thick batter with rice flour, salt and water; The batter should be thick enough to coat the jaggery balls before deep frying

IMG_8809


9. Dip each urundai/ball in rice batter and deep fry till well cooked

10. As the cooked mundhiri kothu would be in a bunch, separate each ball after it cools a bit.


Note:

  1. Cardamom is added for flavor and I have added dry ginger for easier digestion; for me – addition of dry ginger makes any jaggery based sweet taste divine.
  2. The above can be omitted too.
  3. The quantity of grated coconut and sesame seeds can be altered/reduced according to taste preferences.

Few Other Variations of Mundhiri Kothu

  1. Traditionally, the batter is made by soaking raw rice and grinding it wet into a dosai consistency; But, I have used rice powder.
  2. In the above mentioned, soak and grind method, dehusked black gram is also soaked and ground together with rice (50 gms ulundham paruppu/dehusked black gram for 200 gms pachia arisi/raw rice).
  3. Turmeric powder is mixed to the batter and hence mundhiri kothu looks yellow.


Happy Diwali!


IMG_8823


Ukkarai/Okkarai – Lentil Halwa for Diwali


IMG_2921


The festival of lights is back again! No need for long paragraphs saying Diwali brings in joy and happiness and teaches the traditional values to the younger generation….. Whatever said and done, not said and not done – Diwali or Deepavali in Tamil, brings in loads of sweets and tonnes of savouries – to relish and eat and ofcourse over eat!

So, let’s plunge into some special sweets and savouries one after the other in the coming week. Today it is Okkarai or Ukkarai – a Halwa with two/three lentils and jaggery.

Some make it with all the three basic lentils of an Indian kitchen – red lentil, dehusked green gram and bengal gram or a combination of two of these or just bengal gram. Though amma does not make okkarai, I was re-introduced to this exquisite sweet by my friend Lakshmi in Chennai. When my daughter was very small and we lived in the same locality as theirs, we used to be treated with Okkarai very often and it became one of my daughter’s favourites. The beautiful brown colour, the aroma of clarified butter with the fried nuts added and the flavour of lentils mixed jaggery is just exotic with no words to explain.

Lakshmi, I never knew the effort that was involved in Okkarai until I made it now. So, it is a rekindled, more respectful thanks for the strain you put yourself to!
Recipe adopted from-

In Rajasthani cuisine, Moong Dhal Halwa occupies a special place. To me, it is one of best desserts of Indian Cuisine. I should confess, anyone can swap their home made moong dhal halwa/dehusked green gram halwa – rajasthani style – with the best of my pattu/silk sarees (or my husband’s favourite suits)!!
Okkarai/Ukkarai – Lentil Halwa


IMG_3051

Ingredients (serves 4)

  • kadalai paruppu/bengal gram – 1/2 cup
  • paasi paruppu/dehusked green gram – 1/2 cup
  • thuruviya thengai/grated coconut – 1/2 cup
  • vellam/jaggery – 3/4 cup
  • elakkai podi/cardamom powder – 1/2 tsp
  • nei/clarified butter – 1/2 cup
  • mundhiri paruppu/cashew nuts – 4tsp
  • ular thiratchai/raisins – 4tsp


Method of Preparation

  1. Dry roast kadalai paruppu and paasi paruppu till golden brown
  2. Wash and soak for two hours
  3. Grind into a coarse paste with no water – the same as dry grinding but the lentils are wet as they were soaked – but no water please
  4. Make small balls and flat discs and steam in a greased tray/mould for about 15 minutes
  5. Dry grind the balls again for an even end product of halwa without lumps
  6. Keep aside the lentil powder
  7. Grate the coconut and keep aside
  8. Heat a little clarified butter in a pan and fry the cut cashewnuts and raisins and keep aside
  9. In a pan slightly heat jaggery in little water until jaggery dissolves completely
  10. Strain it well and place in low heat for a thick syrup  – Even if the syrup is not too sticky like a single string consistence, do not bother. There is enough time while the jaggery gets mixed with lentil powder- but just be careful not to get it burnt
  11. In the same pan, when the jaggery is ready, add the lentil powder to it and start stirring well
  12. Heat the clarified butter into a pourable consistency and add to the jaggery, lentil mixture while getting cooked. This helps the mixture from sticking to the bottom of the pan
  13. Add the fried cashews and raisins
  14. Stir well till jaggery is completely absorbed by the lentils and a smooth halwa consistency is arrived
  15. In the end add the grated coconut and mix well till the raw smell and juiciness of coconut is gone
  16. Tastes best when served hot.


roast the lentils together

IMG_3209


after soaking, grind and steam the mixture

IMG_3211


then, dry blend to avoid lumps

IMG_3214


mix well with fried nuts and grated coconut

IMG_3234


Notes:

  1. Quantity of jaggery depends on each family
  2. As mentioned above, addition of red lentils is another option
  3. I used banana leaves to steam the lentil mixture for some extra aroma
  4. Add the lentil powder to syrup jaggery or pour in the jaggery syrup into the pan of lentil powder – either way the halwa would come out the same
  5. Quantity of nei/clarified butter can be altered. I love nei in my sweets – hence this quantity. If one prefers lesser clarified butter  -feel free to reduce it. The texture of ukkarai would be slightly powdery – like Puttu (steamed rice cylinders) and hence, okkarai is also called ‘Paruppu Puttu’, I learnt it now.


IMG_2941

Num Kom-Sticky Rice Cakes with coconut filling/Khmer Kozhukkattai!

Modhakam (http://modhakam-pillayar-chaturthi-special), Kara Kozhukkattai (http://pidi-kozhukkattai-karamsalted-rice-dumplings) and Inippu Kozhukkattai (http://inippuvella-k-kozhukkattaijaggery-rice-dumplings) for Pillayar Chaturthi have been made in the recent posts. So why not make this Pillayar Chaturthi a fusion festival – with a Tamil-Khmer festive sweet… that which also somewhat resembles our Poorana Kozhukkattai (Dumplings with filling) in preparation and filling!
Here is Num Kom – The Cambodian Sticky Rice Cake!

IMG_2543

Cambodia with the staple food rice has many varieties of food made with Rice, especially the Glutinous Rice or the Sticky Rice.

Glutinous rice (Oryza sativa var. glutinosa; also called sticky rice, sweet rice or waxy rice) is a type of rice grown mainly in Southeast and East Asia, which has opaque grains, very low amylose content, and is especially sticky when cooked. It is called glutinous (< Latin glūtinōsus)[1] in the sense of being glue-like or sticky, and not in the sense of containing gluten. While often called “sticky rice”, it differs from non-glutinous strains of japonica rice which also become sticky to some degree when cooked. http://en.wikipedia.org/wiki/Sticky_rice


IMG_2668 (2)
Some of the main delicacies made for special occasions with the Sticky Rice are the different kinds of Rice Cakes. Special occasions can be Weddings, Khmer New Year or Pchum Ben (Festival devoted to worship of ancestors).

The Rice Cake varieties can be Num Kom,  Num Ansom Chrouk and Nom Ansom Chek. Num means Cake in general. Nom Kom is the Rice Cake with coconut and palm sugar filling. Ansom Chrouk has a filling mainly of pork fat and green bean and can be a main course.  Ansom Chek has a filling of banana and it is served as a dessert.

During Pchum Ben – where the ancestors of every family are worshipped – women of the household, young and old sit together and prepare Num Kom.  The Rice Cakes require a lot of time wrapping them in banana leaf – folded in a particular pattern.  While Num Kom – the coconut filled rice cake needs less time comparitively,  there are other fillings to the rice cake – like pork meat – cooking time of which is longer. So, they say the womenfolk sit chatting in the night making hundreds of rice cakes, while the different kinds of cakes get cooked for the next day ceremony.

Thanks to http://blog.aseankorea.org/archives/16079 – from which I could collect some interesting information about these Rice Cakes.

Special thanks to my friend and one of the pioneer bloggers of Cambodia at a very young age – Keonila of blueladyblog.com for helping me out in the search of more authentic information. Also patiently answering my doubts on the fillings of Nom Kom. She is one of the top 5 bloggers of Cambodia and a social media advocate. Thankyou Nila!

And all those other friends who may be reading this – do correct me when I am wrong on information – and please do not hesitate to share your thoughts. This would help me get a better insight into the traditions and culture behind the cuisine of Cambodia!

This Rice Cake could not have been prepared without the guidance and helping hands  of friend ‘D’, who played teacher in letting me learn this cake – with the taste and twist (literally) of banana leaves. Thank you ‘D’.
Num Kom


IMG_2548

Num Kom is a Rice Cake made with the outer shell of Sticky Rice with a filling of coconut and palm sugar, wrapped in banana leaf and steamed.

Originally palm sugar is used as sweetener. Since I did not have it, I substituted with the home made jaggery syrup which was available. Incidentally, when I made modhakam/poorana kozhukkattai on pillayar chathurthi, there was no jaggery at home as well in the Indian shop I get it from. I could only palm sugar instead. It was meant to be this way I suppose – Indian Kozhukkattai (Rice Dumplings) substituted with palm sugar and Khmer Kozhukkattai (Rice Cakes) with jaggery.


Ingredients (makes 7-8 num koms)


for the filling
IMG_2672 (2)


  • glutinous rice/sticky rice – 175 grams (1 cup – a little more or less)
  • grated coconut – 1 cup
  • sesame seeds – 3 tsp
  • jaggery syrup – little less than 1/2 cup
  • salt – a pinch
  • banana leaves to wrap

Method of Preparation


I. Preparation of Outer Shell/Rice Covering


IMG_2507

We decided to go for the traditional method of soaking rice and making a paste. The paste is strained in a netted cloth and the water content remaining in the paste would go. Then, hot water is added to somewhat dry dough to make it easy to wrap the filling inside.


IMG_2488

This was a flop with the cloth I had was thick and could not strain the water away.. Emergency!!!  Got some glutinous rice powder and mixed it with the rice paste and converted it into the required right consistency to make Num Kom

Keep aside.


II. Preparation of filling
IMG_2687 (2)


  1. In a wide pan, dry roast sesame seeds till slightly brown. Preferably black sesame – but I had white.
  2. Switch off the stove and add grated coconut and jaggery syrup
  3. If one uses palm sugar, it mixes well very fast and easily
  4. Frying more or making the filling thick and sticky as in south indian dumplings is not needed here
  5. Mix well and keep aside.


III. Preparation of Rice Cake


IMG_2527


  1. Make small balls of rice dough
  2. Flatten each to keep the filling inside
  3. Fill with coconut-sesame-jaggery filling
  4. Close and make a ball

IV. Folding the Rice Cake in Banana Leaf

1. Cut the banana leaves in 8 by 7 inches  (khmer food cooking tutorial: num kom’s (steam rice cake with coconut)

2. Wash the leaves well and wipe them clean with cloth

3. Fold each leaf vertically and give it a slightly cross cut

IMG_2493

4. The cut leaves look like this

IMG_2510
5. Fold it vertically – one fold

IMG_2494

6. Next fold – make it a ‘V’

IMG_2496

7. There would be two pockets – open the wider pocket

IMG_2498

8. Grease the leaf and place the Rice Cake inside

IMG_2520

9. Do not close it the same side where the leaf looks ‘V’ – but, fold the leaf to close the cake in the middle portion where there is a double slit – now, this is a tricky part I forgot to capture. I was learning to close it and was quite successful too. But no photos please. Shall try again for sure!

10. Done and the cakes are ready to be steamed.

IMG_2523


V. Steaming Num Kom

place the rice cakes randomly in the vessel
IMG_2535


  1. Boil water in a steamer
  2. In the container, place banana leaves as base. This prevents the num koms from sticking to the bottom of the vessel and also gives more banana leaf fragrance and flavour to the steamed cakes
  3. Arrange the prepared rice cakes. Be careful not to damage the shape
  4. Place more banana leaves on top and close the steamer with lid
  5. Steam for about 15 minutes
  6. Num Kom is ready


IMG_2538

Sounds so similar, feels so familiar – yet so different! This holds good to the cuisine connections of Cambodia and South India! Shall explore more…

IMG_2546


Entering Year 3! Paasi Paruppu Payasam/Dehusked Green Gram Pudding/Kheer


paasi paruppu payasam

IMG_1297


The second year of blogging has not been a continuous writing affair… though there was no end to cooking affair! Too much into packing, shifting places, entering new places and faces, unpacking and settling has been quite tedious. When I look back, the previous year has been a slow-paced one… sometimes out of sight for a couple of months too. But I feel overwhelmed by the support I have received in spite of those long intervals.

NANRI – Thanks a ton – for understanding my absence for short periods!

During this period of settling down, the new subscribers that joined hands with me and my old friends who have been continuously keeping pace with my posts, have made me feel more guilty of not having settled sooner and not having posted more. I shall surely try to compensate on that this year.

As usual, let’s enter another year with a sweet dish. This is one of my favourite payasams, of course next to Adai Pradhaman (https://dosaikal.com/adai-pradhaman-ada-pradhaman).J aggery and coconut milk make a sweet dish heavenly! This is one such payasam/pudding/kheer, with dehusked green gram. Generally, in payasams or any sweet dish, nuts are roasted or fried in nei/ghee to add richness and flavour. Here, traditionally, thinly cubed coconut pieces are fried in nei/clarified butter and added to the completed payasam. The coconut pieces can be added with fried cashewnuts. But, they can taste good all alone without the nuts too! Here, I have avoided the nuts and added fried coconut pieces alone.

I have seen aachi and amma always use chukku podi – dry ginger powder when jaggery is used in sweets. Adding dry ginger to jaggery helps in avoiding acidity and gastric problems. When the dish has coconut milk to make it a heavy intake, chukku podi/dry ginger powder would aid in easy digestion too!
 

Paasi Paruppu Payasam


IMG_1316
 

Ingredients (serves 4-6)

  • paasi paruppu/dehusked green gram – 3/4  cup
  • vellam/jaggery – 1/2 cup
  • water – 1/4 cup to dissolve jaggery
  • thengai pal/coconut milk – 1 and 1/2 cup
  • chukku podi/dry ginger powder – 1/2 tsp
  • elakkai podi/cardamom powder – 1//2 tsp
  • thinly cubed coconut pieces – 3 tblsp or lesser as per preference
  • nei/clarified butter – 2 tblsp


Method of Preparation

  1. In a pan, roast dehusked green gram till golden brown, no oil or butter needed
  2. In the same pan, fry coconut pieces in clarified butter till golden brown
  3. Cook the gram in pressure cooker with enough water till done; do not overcook
  4. While the green gram is getting cooked in the pressure cooker, dissolve jaggery in just enough water (1/4 cup). Strain it to avoid impurities
  5. Now on, the preparation is really easy and simple – Strain jaggery into the pressure cooker with cooked lentil
  6. Add dry ginger powder and cardamom powder and bring the mixture to a slightly thick consistency; if the cooked lentil is already thick and with very less water and the addition of jaggery has made it thicker, not to worry – add very little water if needed. This might help blending jaggery well with the lentil
  7. When jaggery is well blended with cooked lentil, add coconut milk. I used canned coconut milk
  8. If the payasam is too thick in consistency, add 1/2 cup water to dilute it.  If one likes the thicker version, can avoid adding more water
  9. After coconut milk is added, too much cooking and boiling might make coconut milk curdle due to the presence of jaggery
  10. Bring to a single boil and switch off the stove
  11. Transfer to a serving bowl and mix the fried coconut pieces with nei/clarified butter
  12. Serve hot.


Note:

  1. Do not roast the lentil too dark as the payasam would lose perfect colour.
  2. Coconut pieces should be really thin.
  3. Keep track of the amount of water in cooking the lentil and soaking jaggery… too much water would result in too much cooking time in reducing the lentil-jaggery mixture before adding coconut milk.
  4. The quantity of jaggery here is for a mildly sweetened payasam. Those who prefer more sweetness in their payasam can add a little more jaggery
  5. The most important thing is the coconut milk. Adequate care should be taken not to curdle the milk.
  6. REHEATING: Do not reheat the payasam directly on stove as it may curdle or the lentil would get burnt at the bottom. Heat slightly in microwave or Boil water in a vessel and place a steel bowl of payasam to heat up.


IMG_1297
 

Wait..Wait…

This is not as complicated as the points mentioned above! But actually, just take care of the coconut milk alone.

If one notices, I have emphasised a bit too much on water. It is just to say that one need not panic if lentil has less water or more water. Add more water wherever needed and incase of excess water, boil it to bring to required consistency. Just one thing to remember, all alterations of boiling should be before coconut milk is added.

If lentil is overcooked, not to worry. This payasam tastes good with overcooked lentil too! Personally to me, doesn’t make big difference. The taste of coconut milk with jaggery takes care of everything.

One last thing….
Forgot to reduce water before adding coconut milk…… not to worry again!  Instead of a bowl, serve in a tumbler/glass as we do at home in Tamilnadu!!