Tag Archives: tamilnadu sweets

Deepawali 2019 – The Laddu Saga

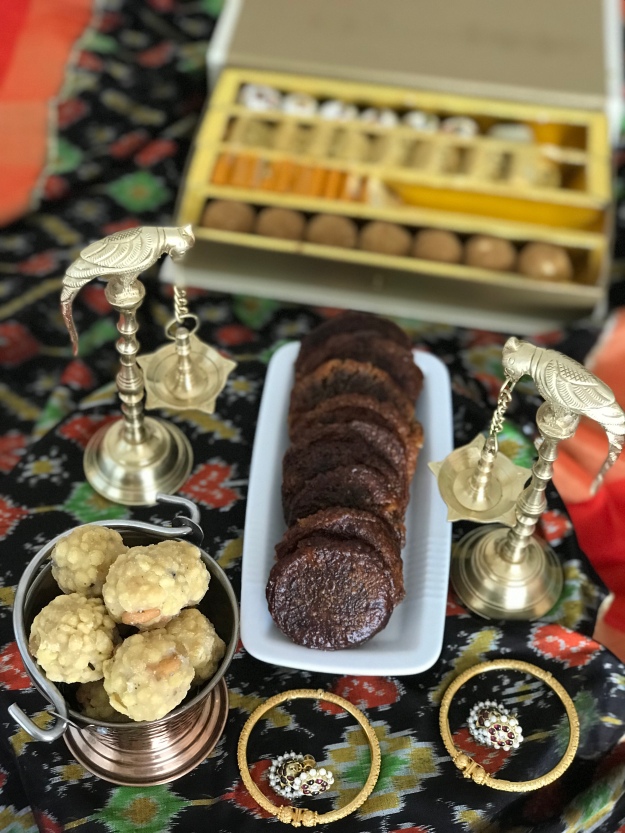
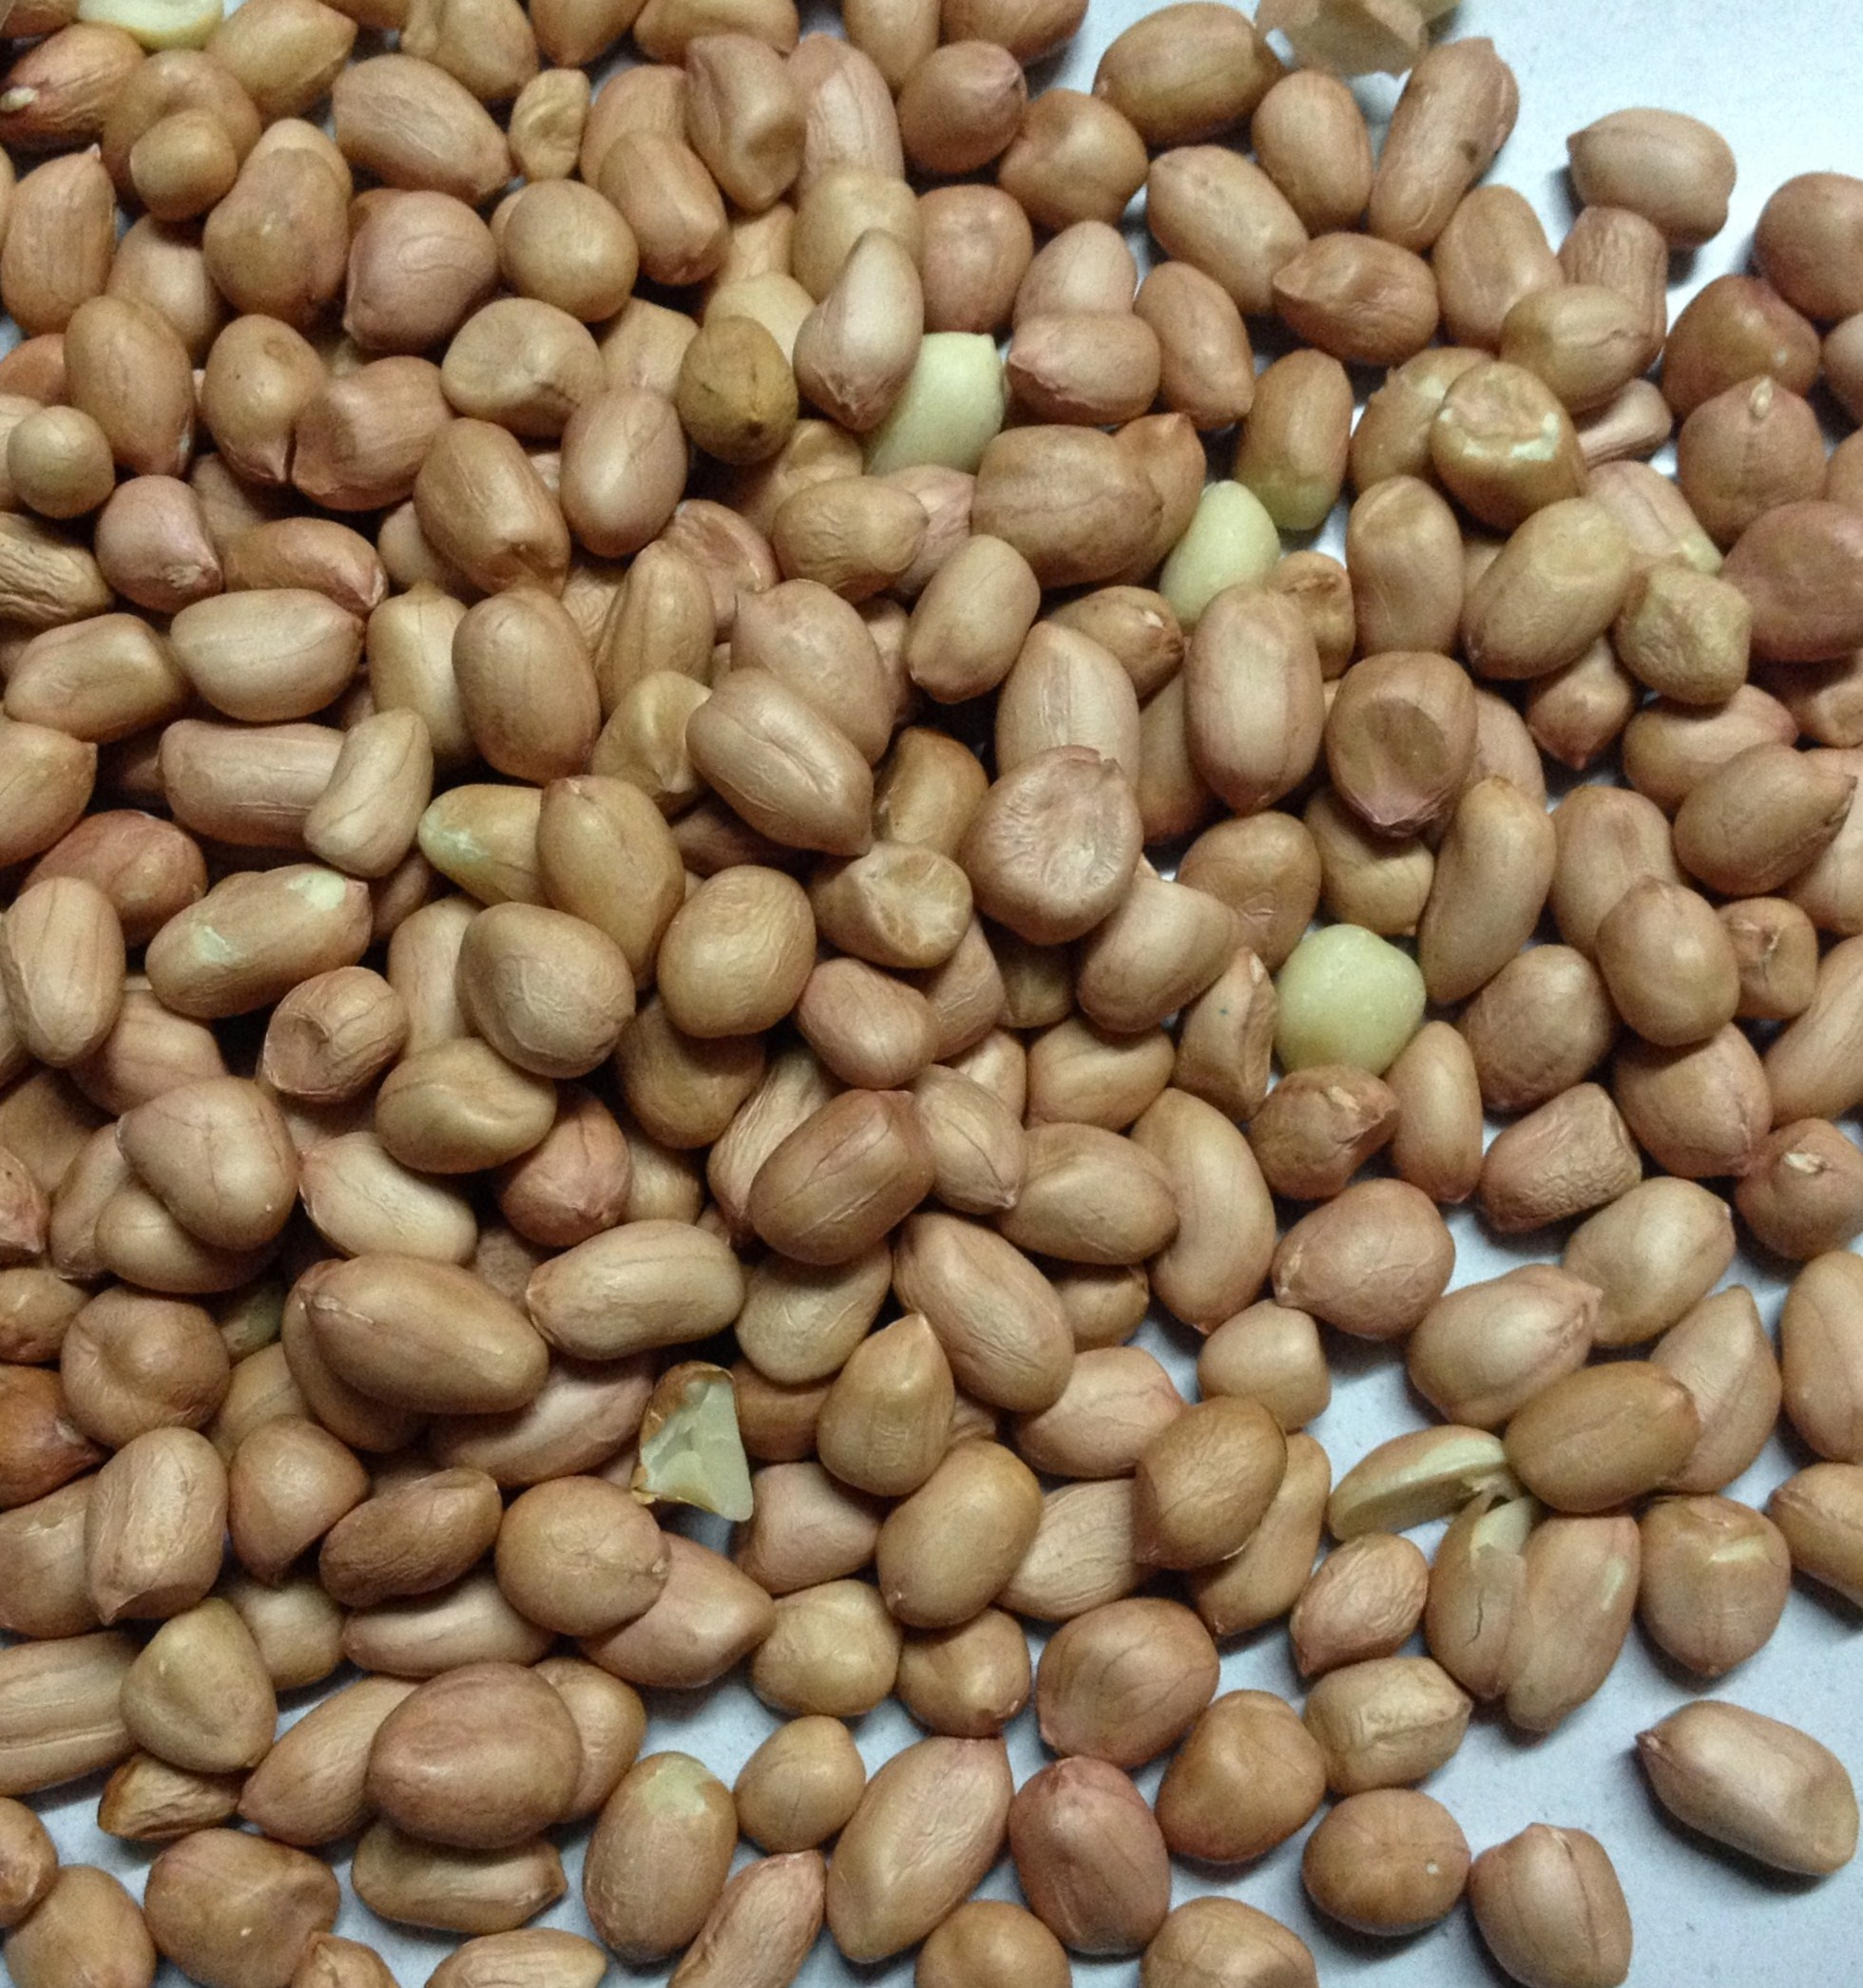
Laddu might be a favourite sweet for many. Any type of Laddu, called ‘Urundai’ in Tamil, denotes, sweet balls made with different ingredients… like neiurundai/split green gram laddu, kadalai maavu urundai/bengal gram laddu or the unavoidable thengai urundai/coconut laddu.

These traditional urundais are healthy with the roasted lentils, in comparison to the white flour based creamy sweets. With new age food therapies from bloggers like me, there are other healthier versions – flax seed urundai, ragi urundai, and other millet based sweet balls.

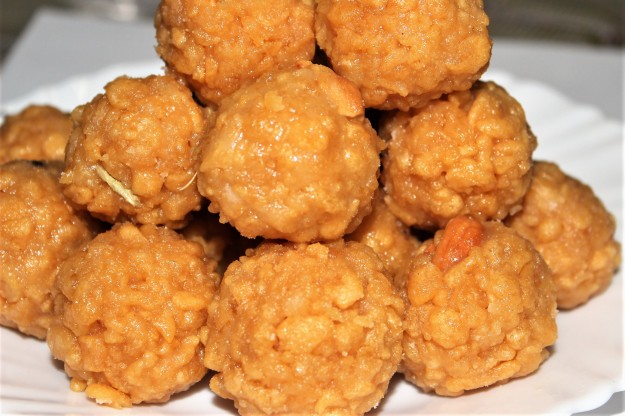
But, no one can beat the Boondi Laddu. The King/Queen of Laddus in the south is the boondi laddu and, in the north of India, it is the ‘Moti choor Laddu’. The Moti choor of north India, is named due to its miniature pearls. The boondi, must have been named after the Hindi word- ‘Boond’ which means ‘droplet’.

One version of the South Indian Laddu, is the most popular Laddu of the Temple of Thiruppathi. The Thiruppathi laddu must be the most sort after, next to the presiding deity in the temple. The Boondi Laddu of the south, is made with slightly bigger pearls, than its northern counterpart. In colour too, the north prefers orange and the south prefers yellow. The Thiruppathi laddu though is brownish, as the pearls are deep fried and, taken out after they reach a darker colour. This might be for longer shelf life.

So, Laddu has been on my bucket list for many years. Before starting to make the Laddu, I wanted to do my homework well. I had my cousin in Chennai, who was and is still an expert in making Laddus. I approached her during one of my holidays, and that was my ‘Laddu Workshop’, in its best and simplified form. After that fruitful lesson, I thought Laddu was not as hard as I used to believe.

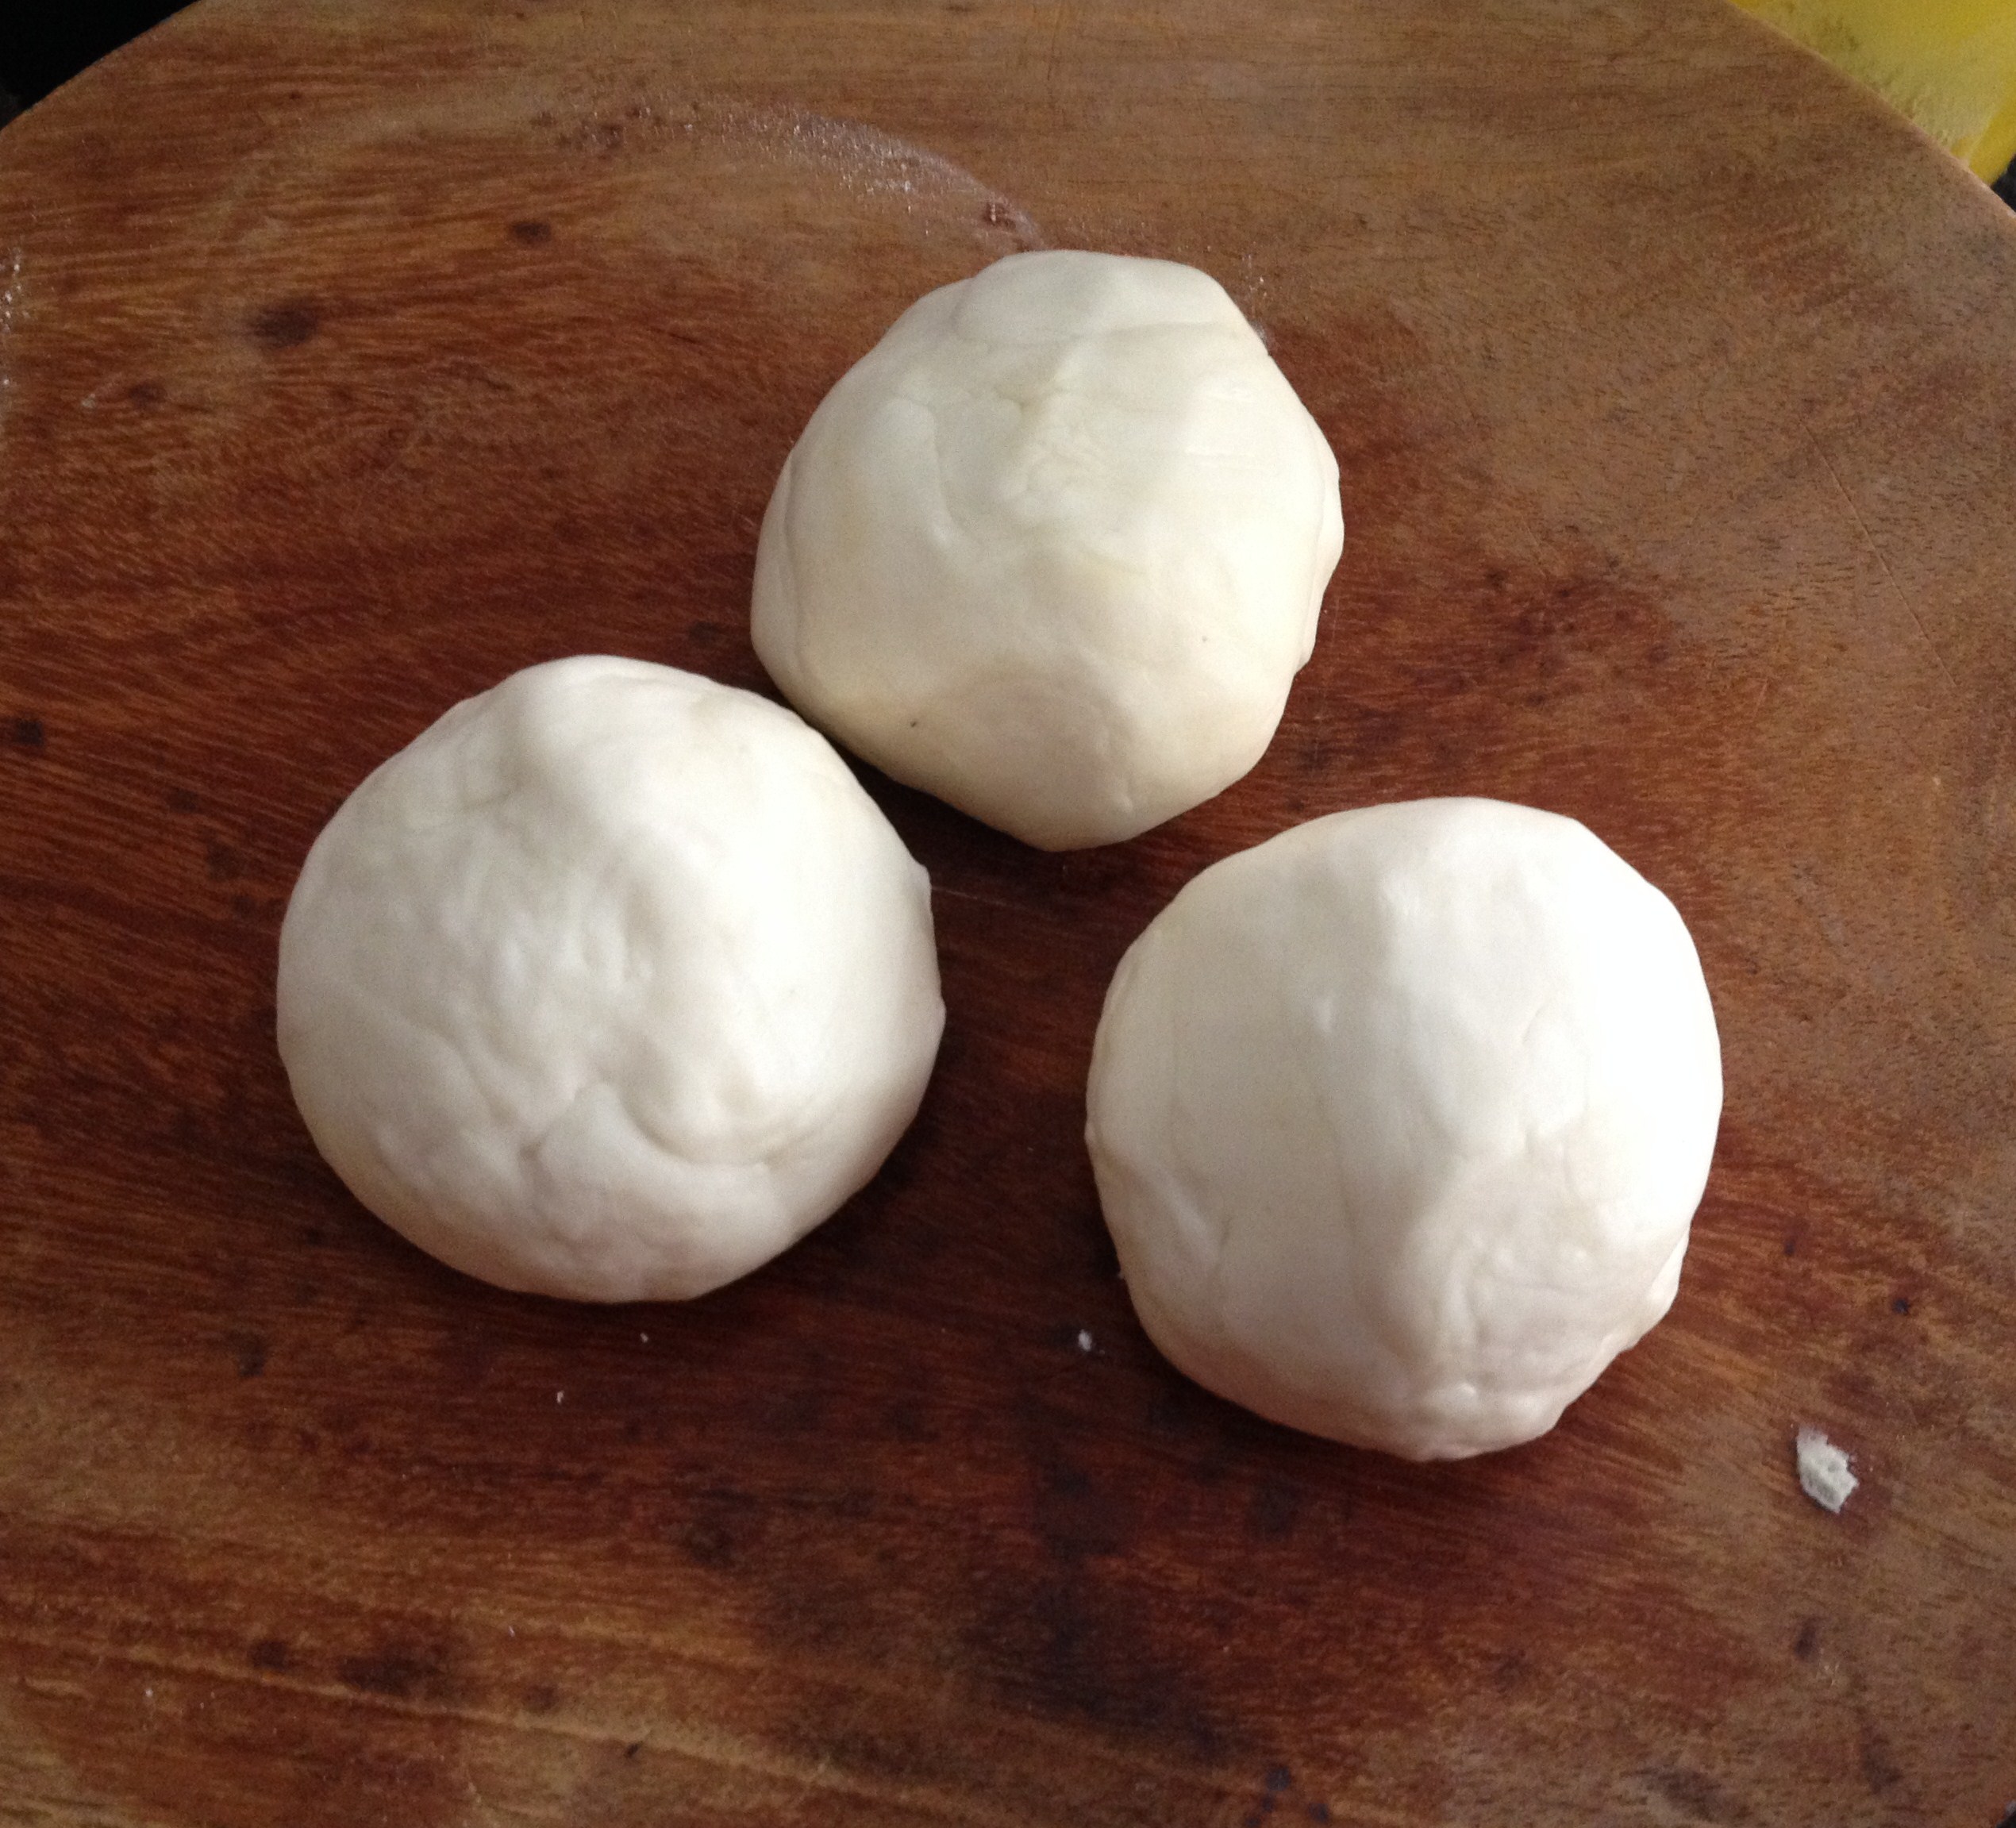
The hands that gave me a live demo and a true workshop on Laddu..

Thanks Sweety for that excellent demonstration!! These are the beautiful laddus we made.

So, inspired by the skillful workshop on Laddus by Sweety, I was confident, my laddus were going to be perfect.

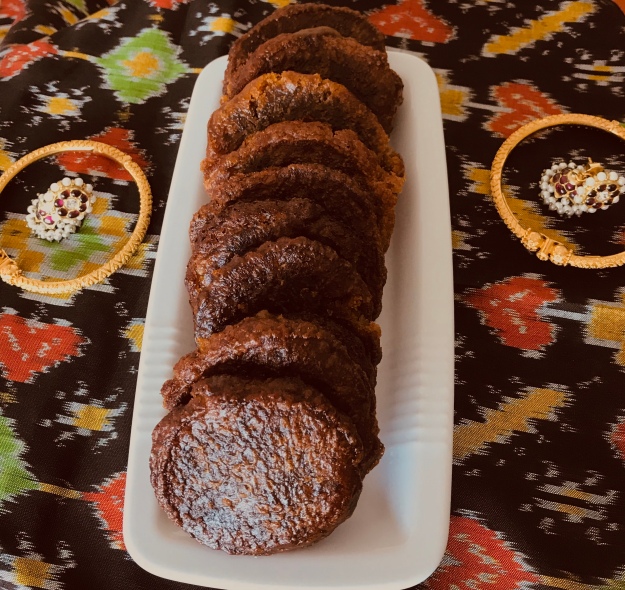
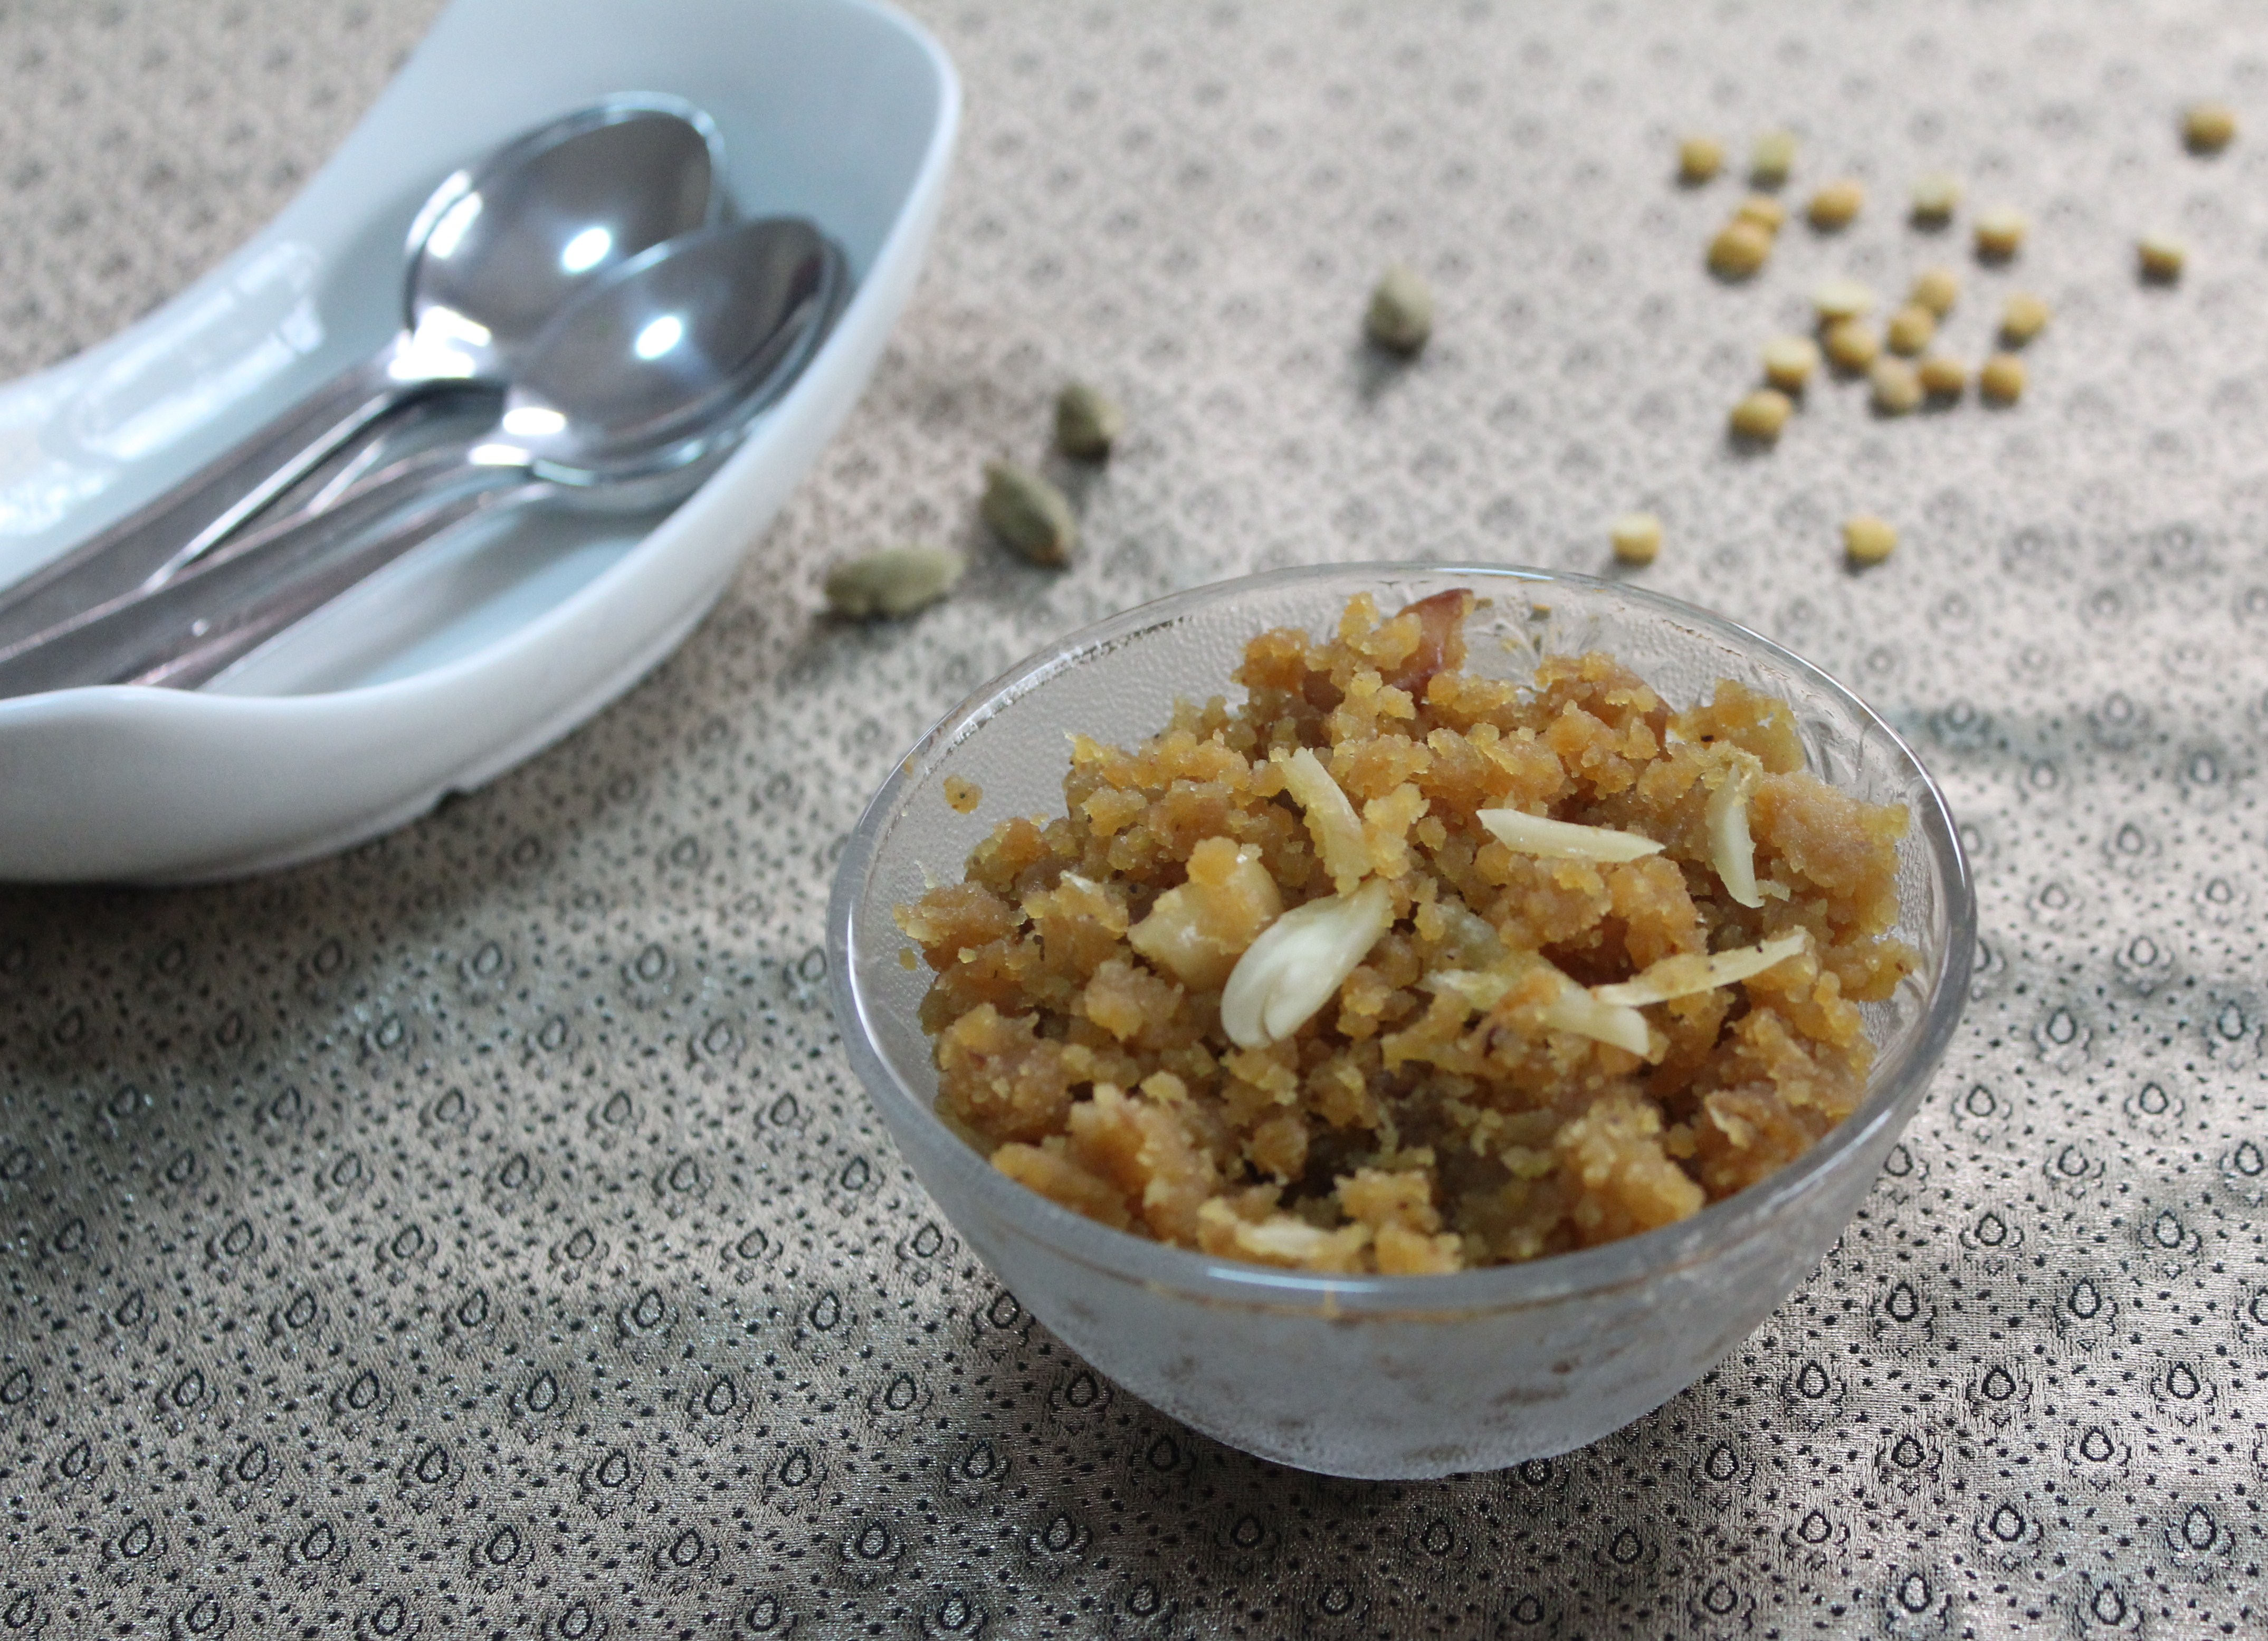
Last Deepawali, I decided to make Boondi Laddu, along with Flax seed/black sesame Laddu – (https://dosaikal.com/2018/11/24/the-good-fat-black-ball/). But, I messed up with the Paagu or the sugar syrup. The sugar syrup got a bit thicker and couldn’t bind the laddus together. instead, we had them as dry sweet boondi. It was not a waste, that had to be thrown away, or altered to settle down in other variations, like the athirasam. But my mission remained unaccomplished.

I felt like the same maths student in my previous article (https://dosaikal.com/2019/11/07/deepawali-the-victory-story/), whose procedures were right, yet answer went wrong.

I researched into the shots, that I had taken at my cousin’s. Then I went through this youtube -demonstration- Laddoo by Revathy Shanmugam

After setting myself into a Yogic meditator’s mode, I went into the kitchen, at 9 in the night. I told the chatting and helping enthusiasts at home, husband and daughter, not to come near the kitchen, till further instructions.

Two alterations I did to the original recipe –

  1. No food colour or turmeric powder was used.
  2. Since I didn’t want to use white sugar, I used unrefined cane sugar.
  3. Also, Mrs. Revathy Shanmugam’s recipe suggested 1 1/2 cups sugar for 1 cup of bengal gram flour. I took equal quantity of both, as my family needs less sugar.

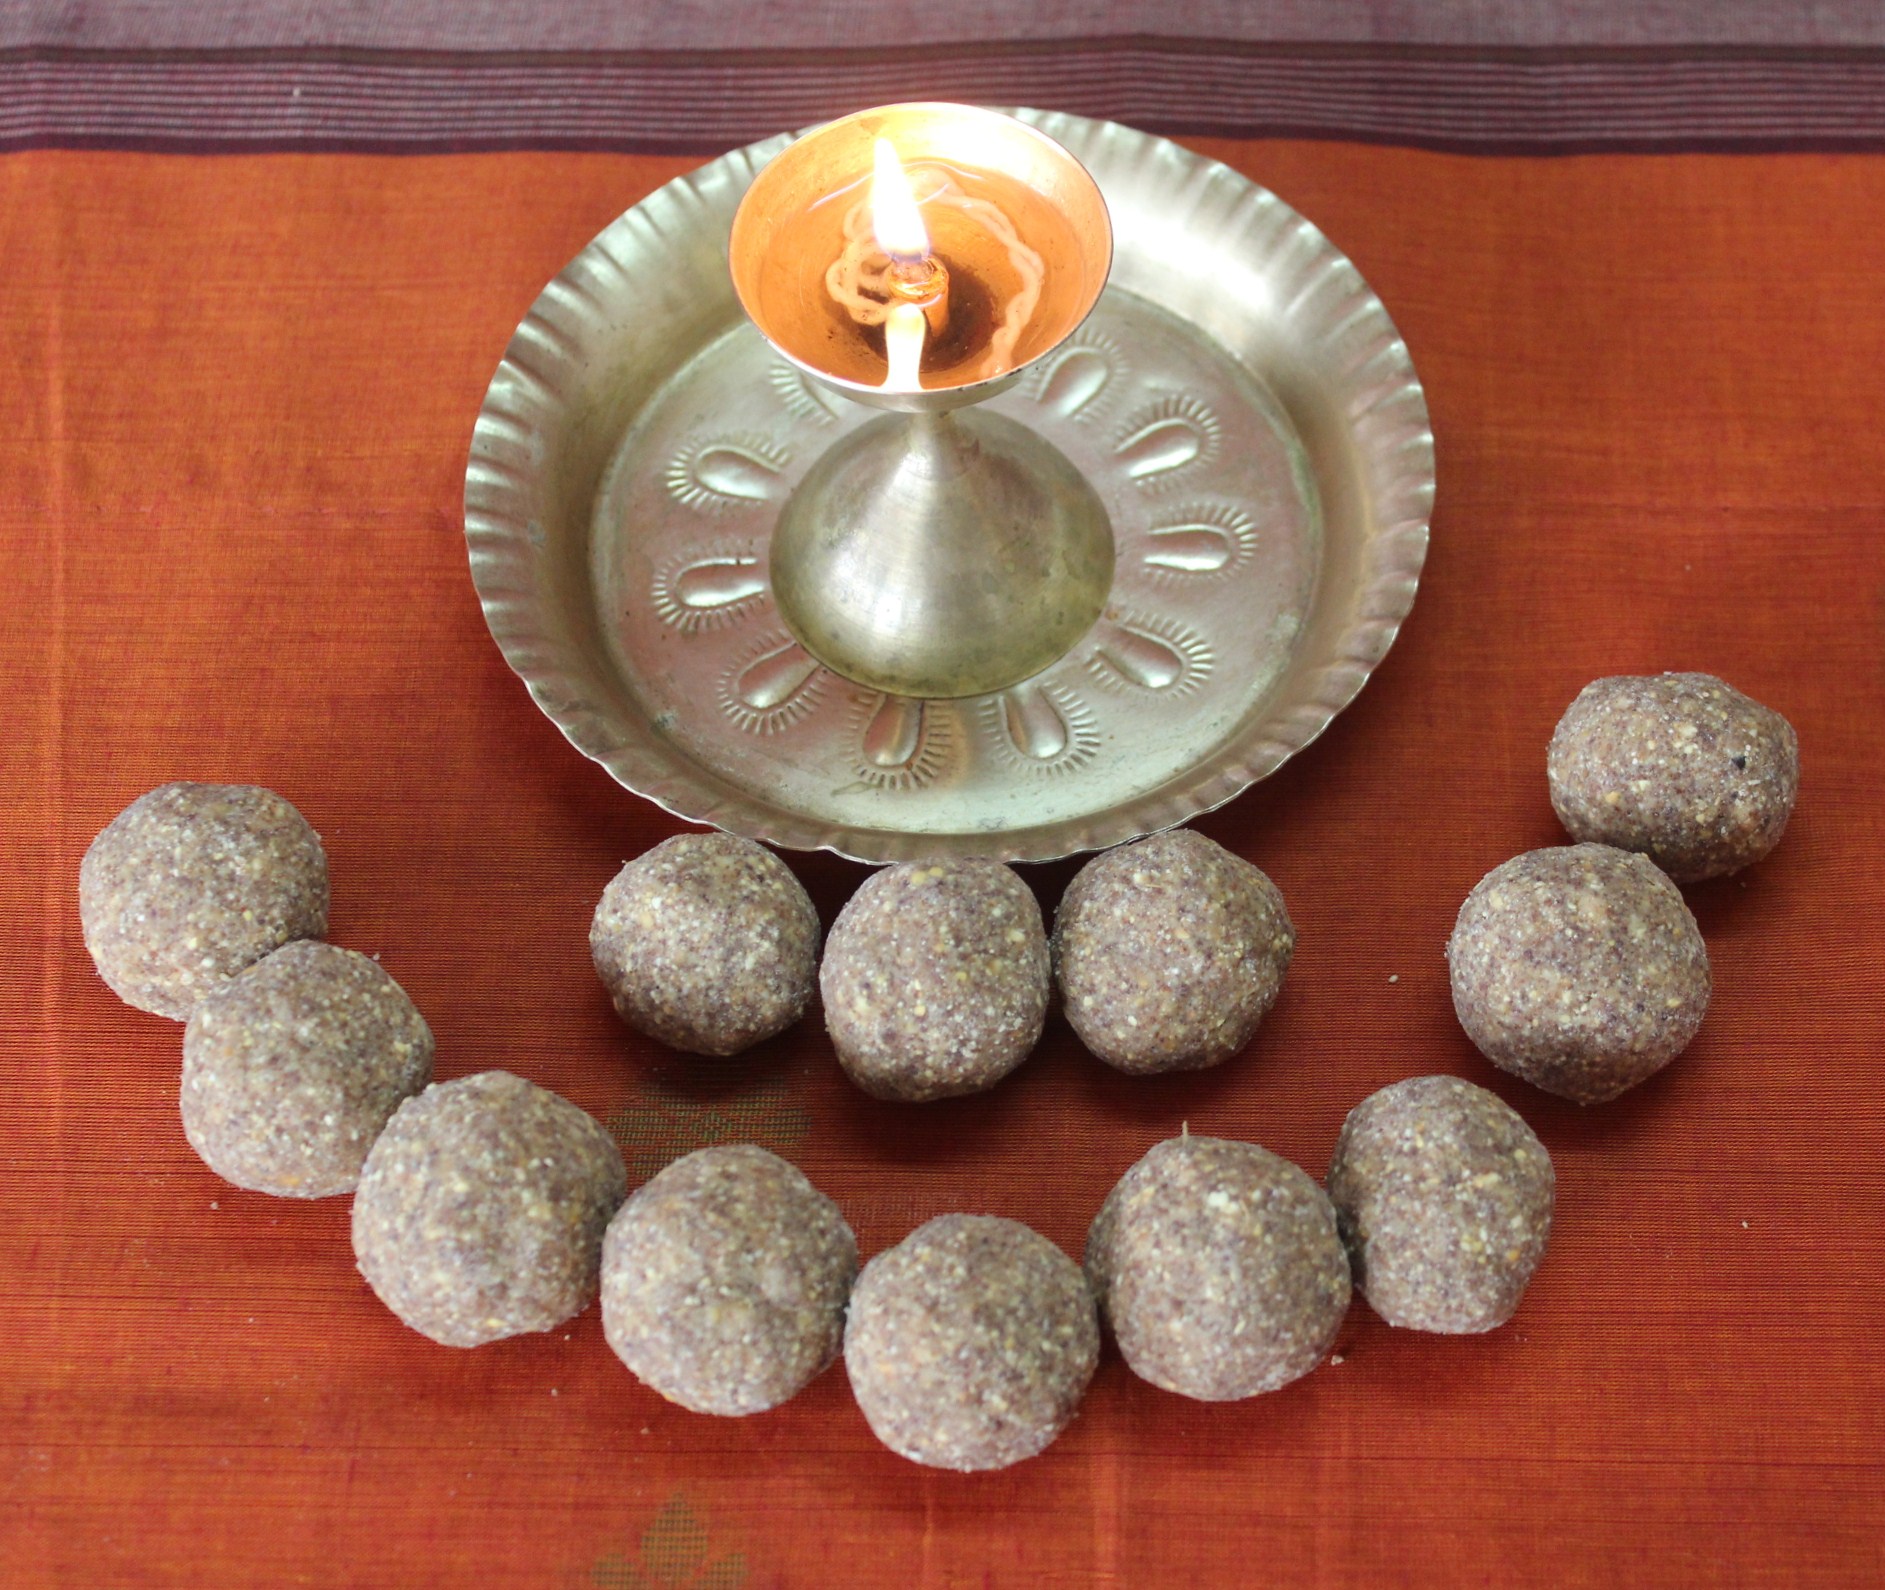
Even then, we found the Laddus to be too sweet for us.

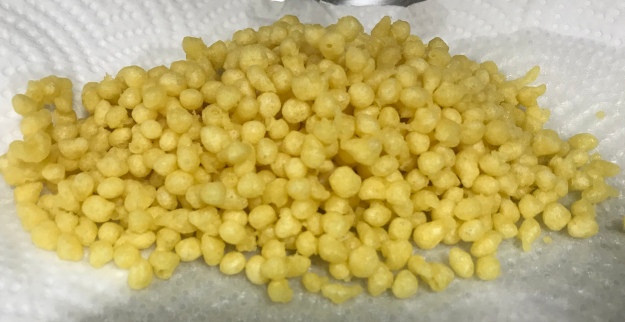
Hence, with no food colour and brown sugar, the colour of Laddu was not as yellowish as it is available normally, still the taste was unaltered.

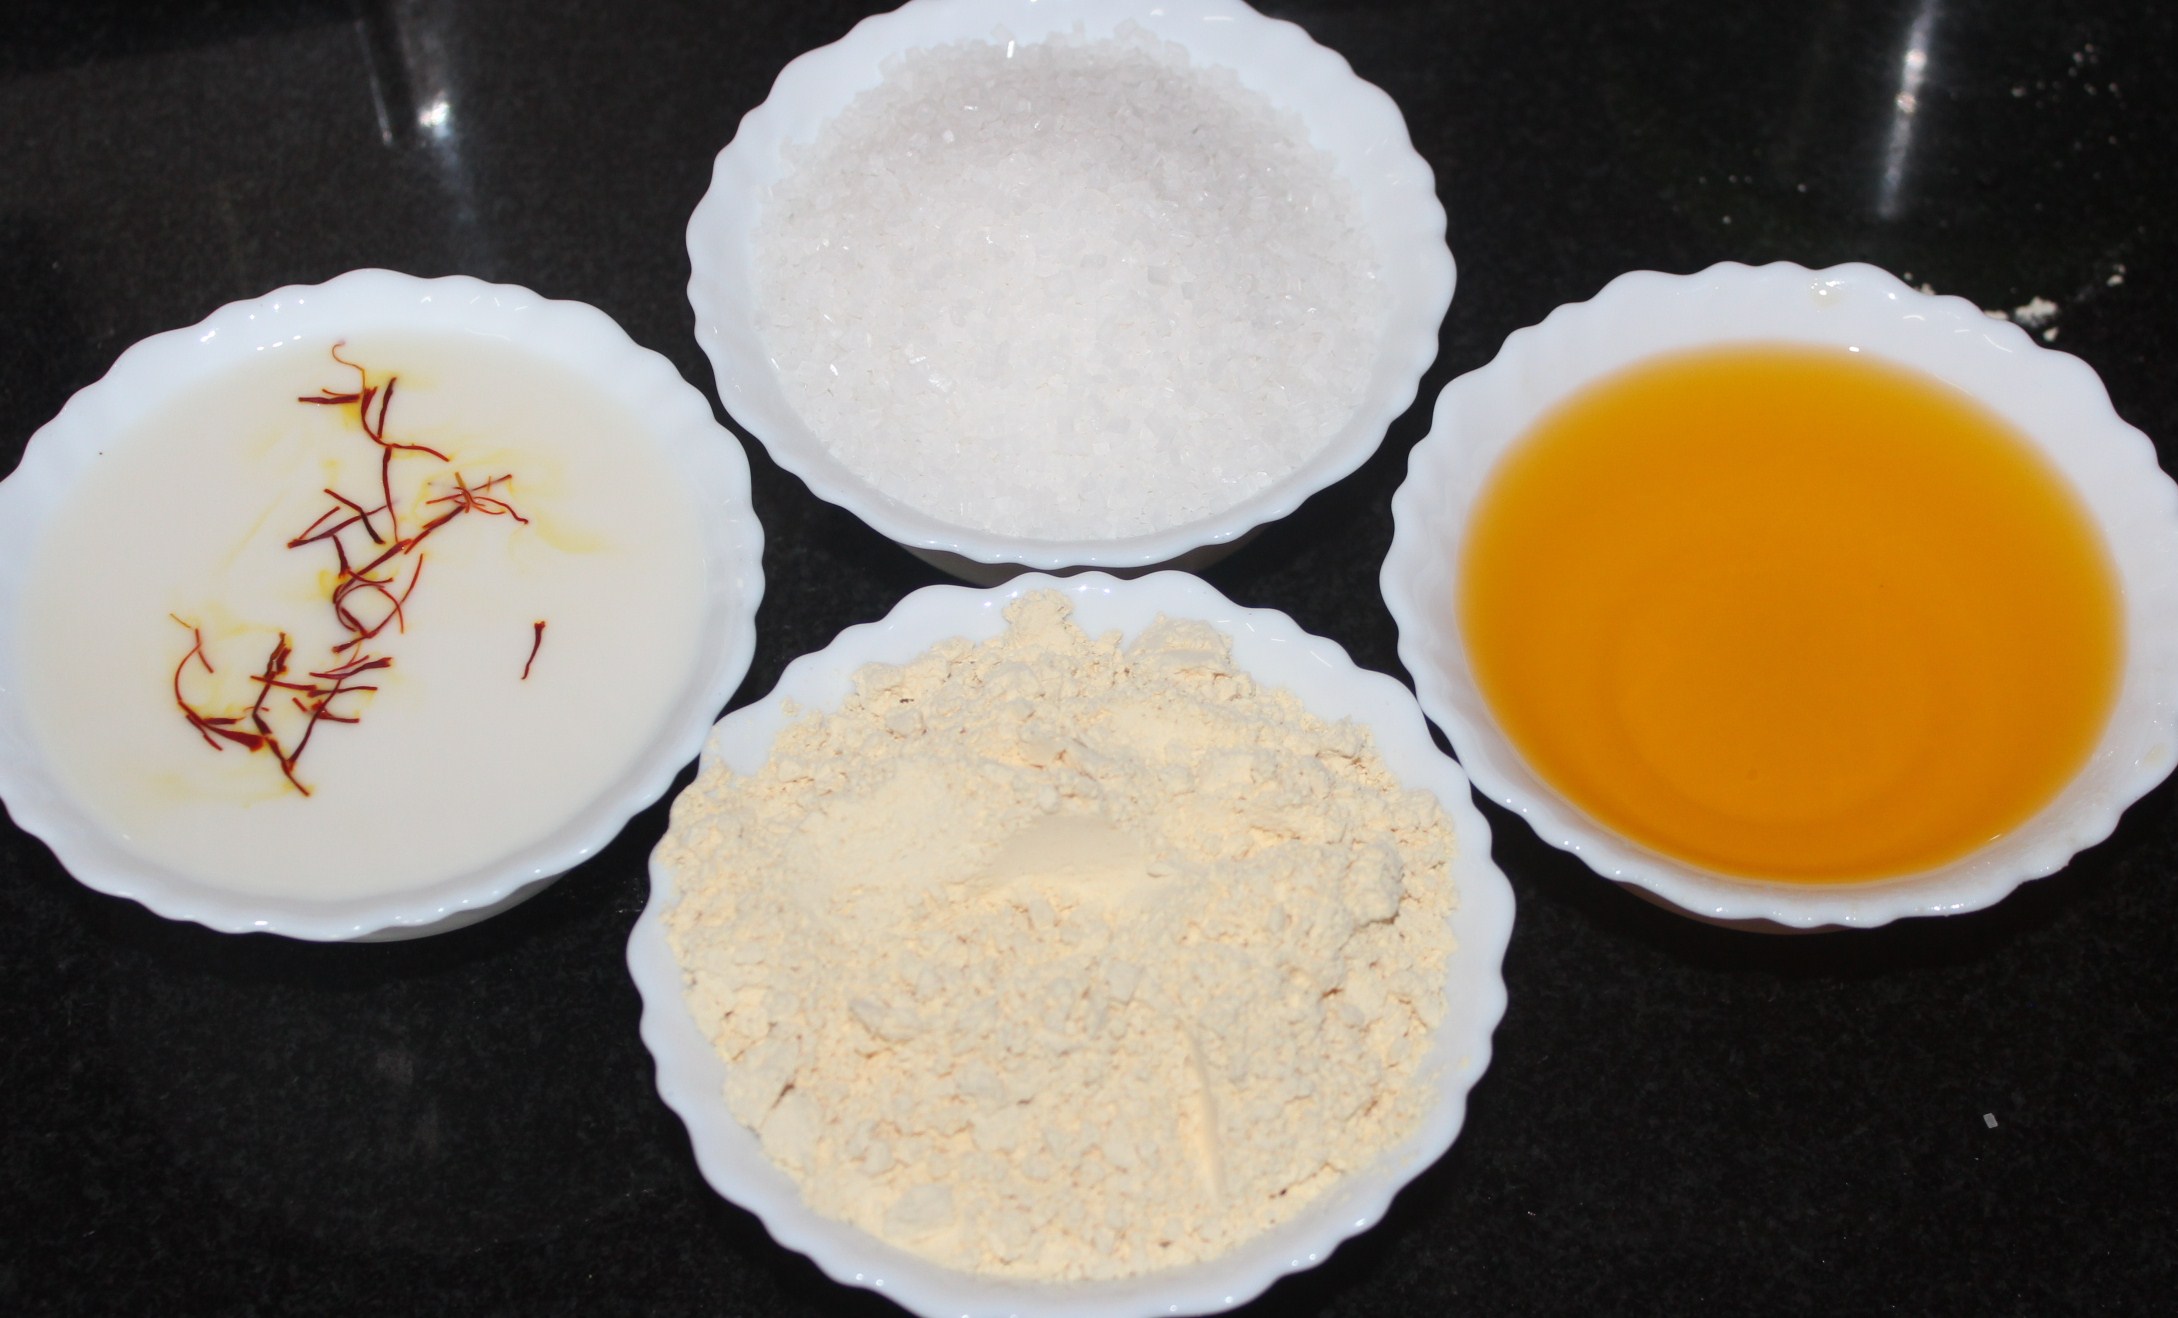
Ingredients (makes approximately 25 laddus)

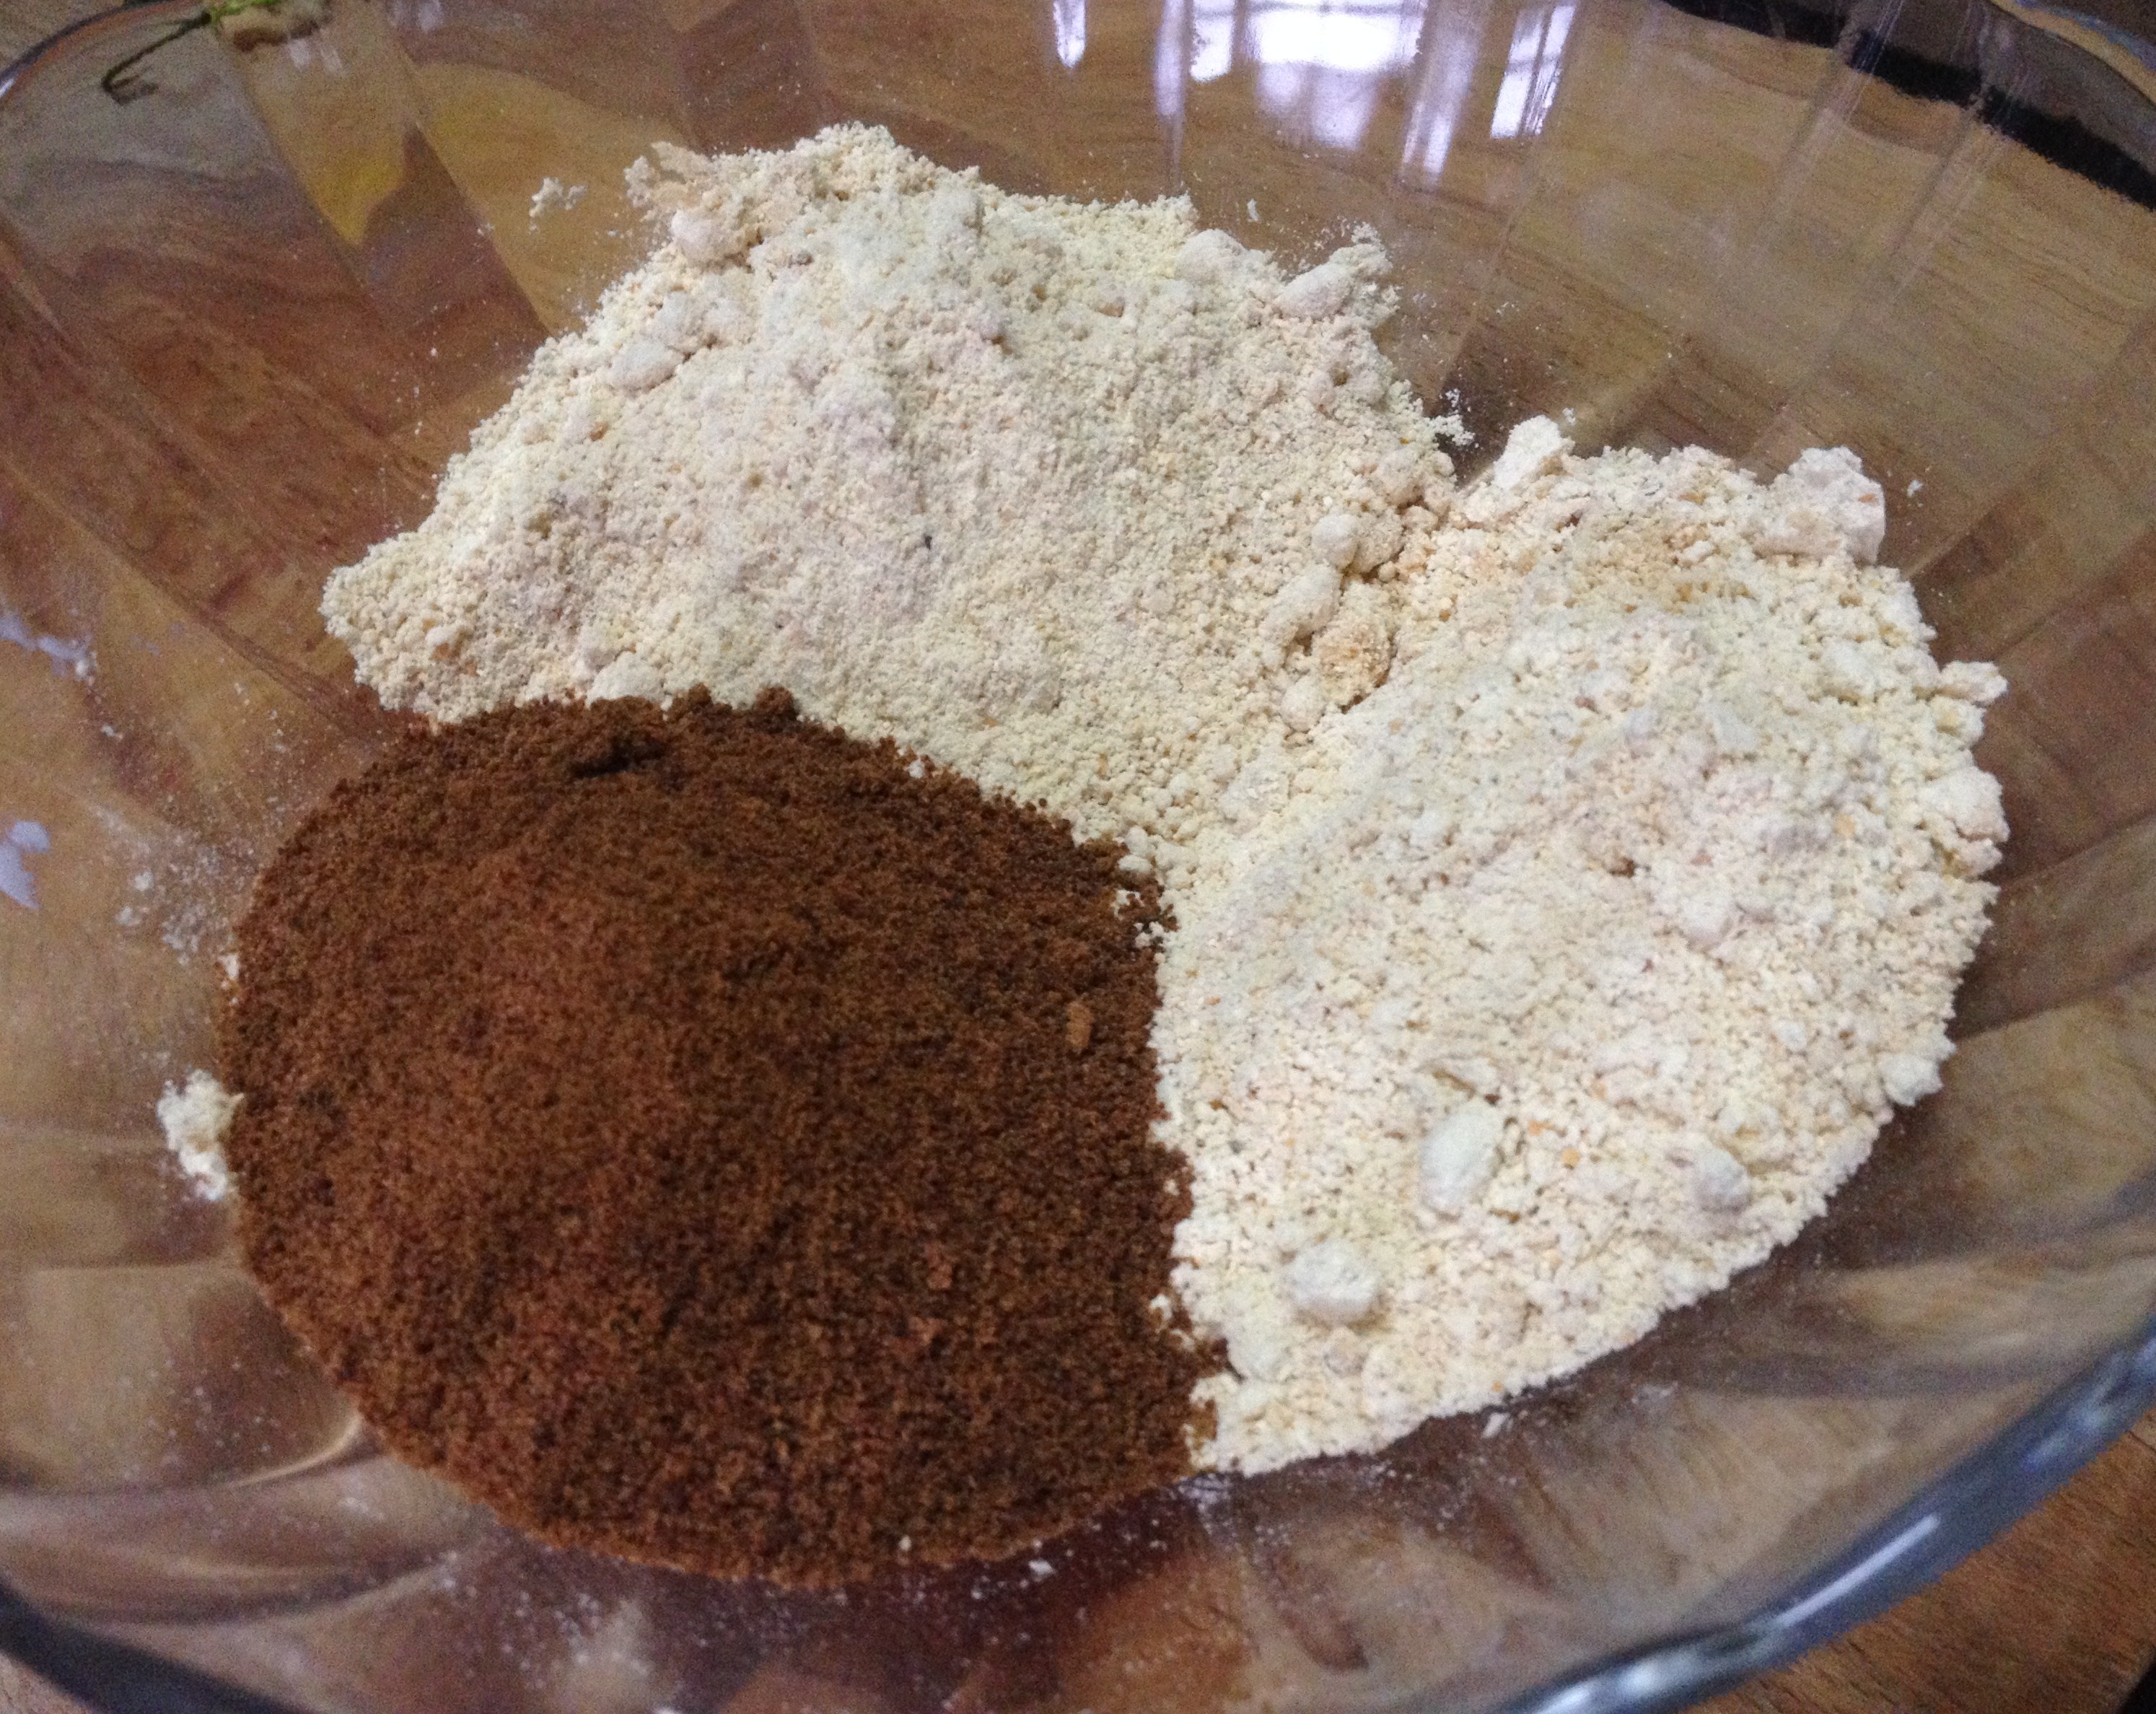
  • Kadalai Maavu/bengal gram flour (store bought) – 1 1/2 cups
  • baking soda – a pinch
  • water – to make batter
  • unrefined cane sugar – 1 1/2 cups
  • cashew nuts – 10-15 halved
  • raisins – 10-15
  • cardamom powder – 1 tsp

Method of Preparation

Before we start making boondi for laddu, it is advicable to make the sugar syrup. As Mrs. Revathy Shanmugam mentions, mixing boondi in hot syrup doesn’t yield the best of laddus. Let the syrup cool a bit, then the boondi or bengalgram pearls can be mixed.

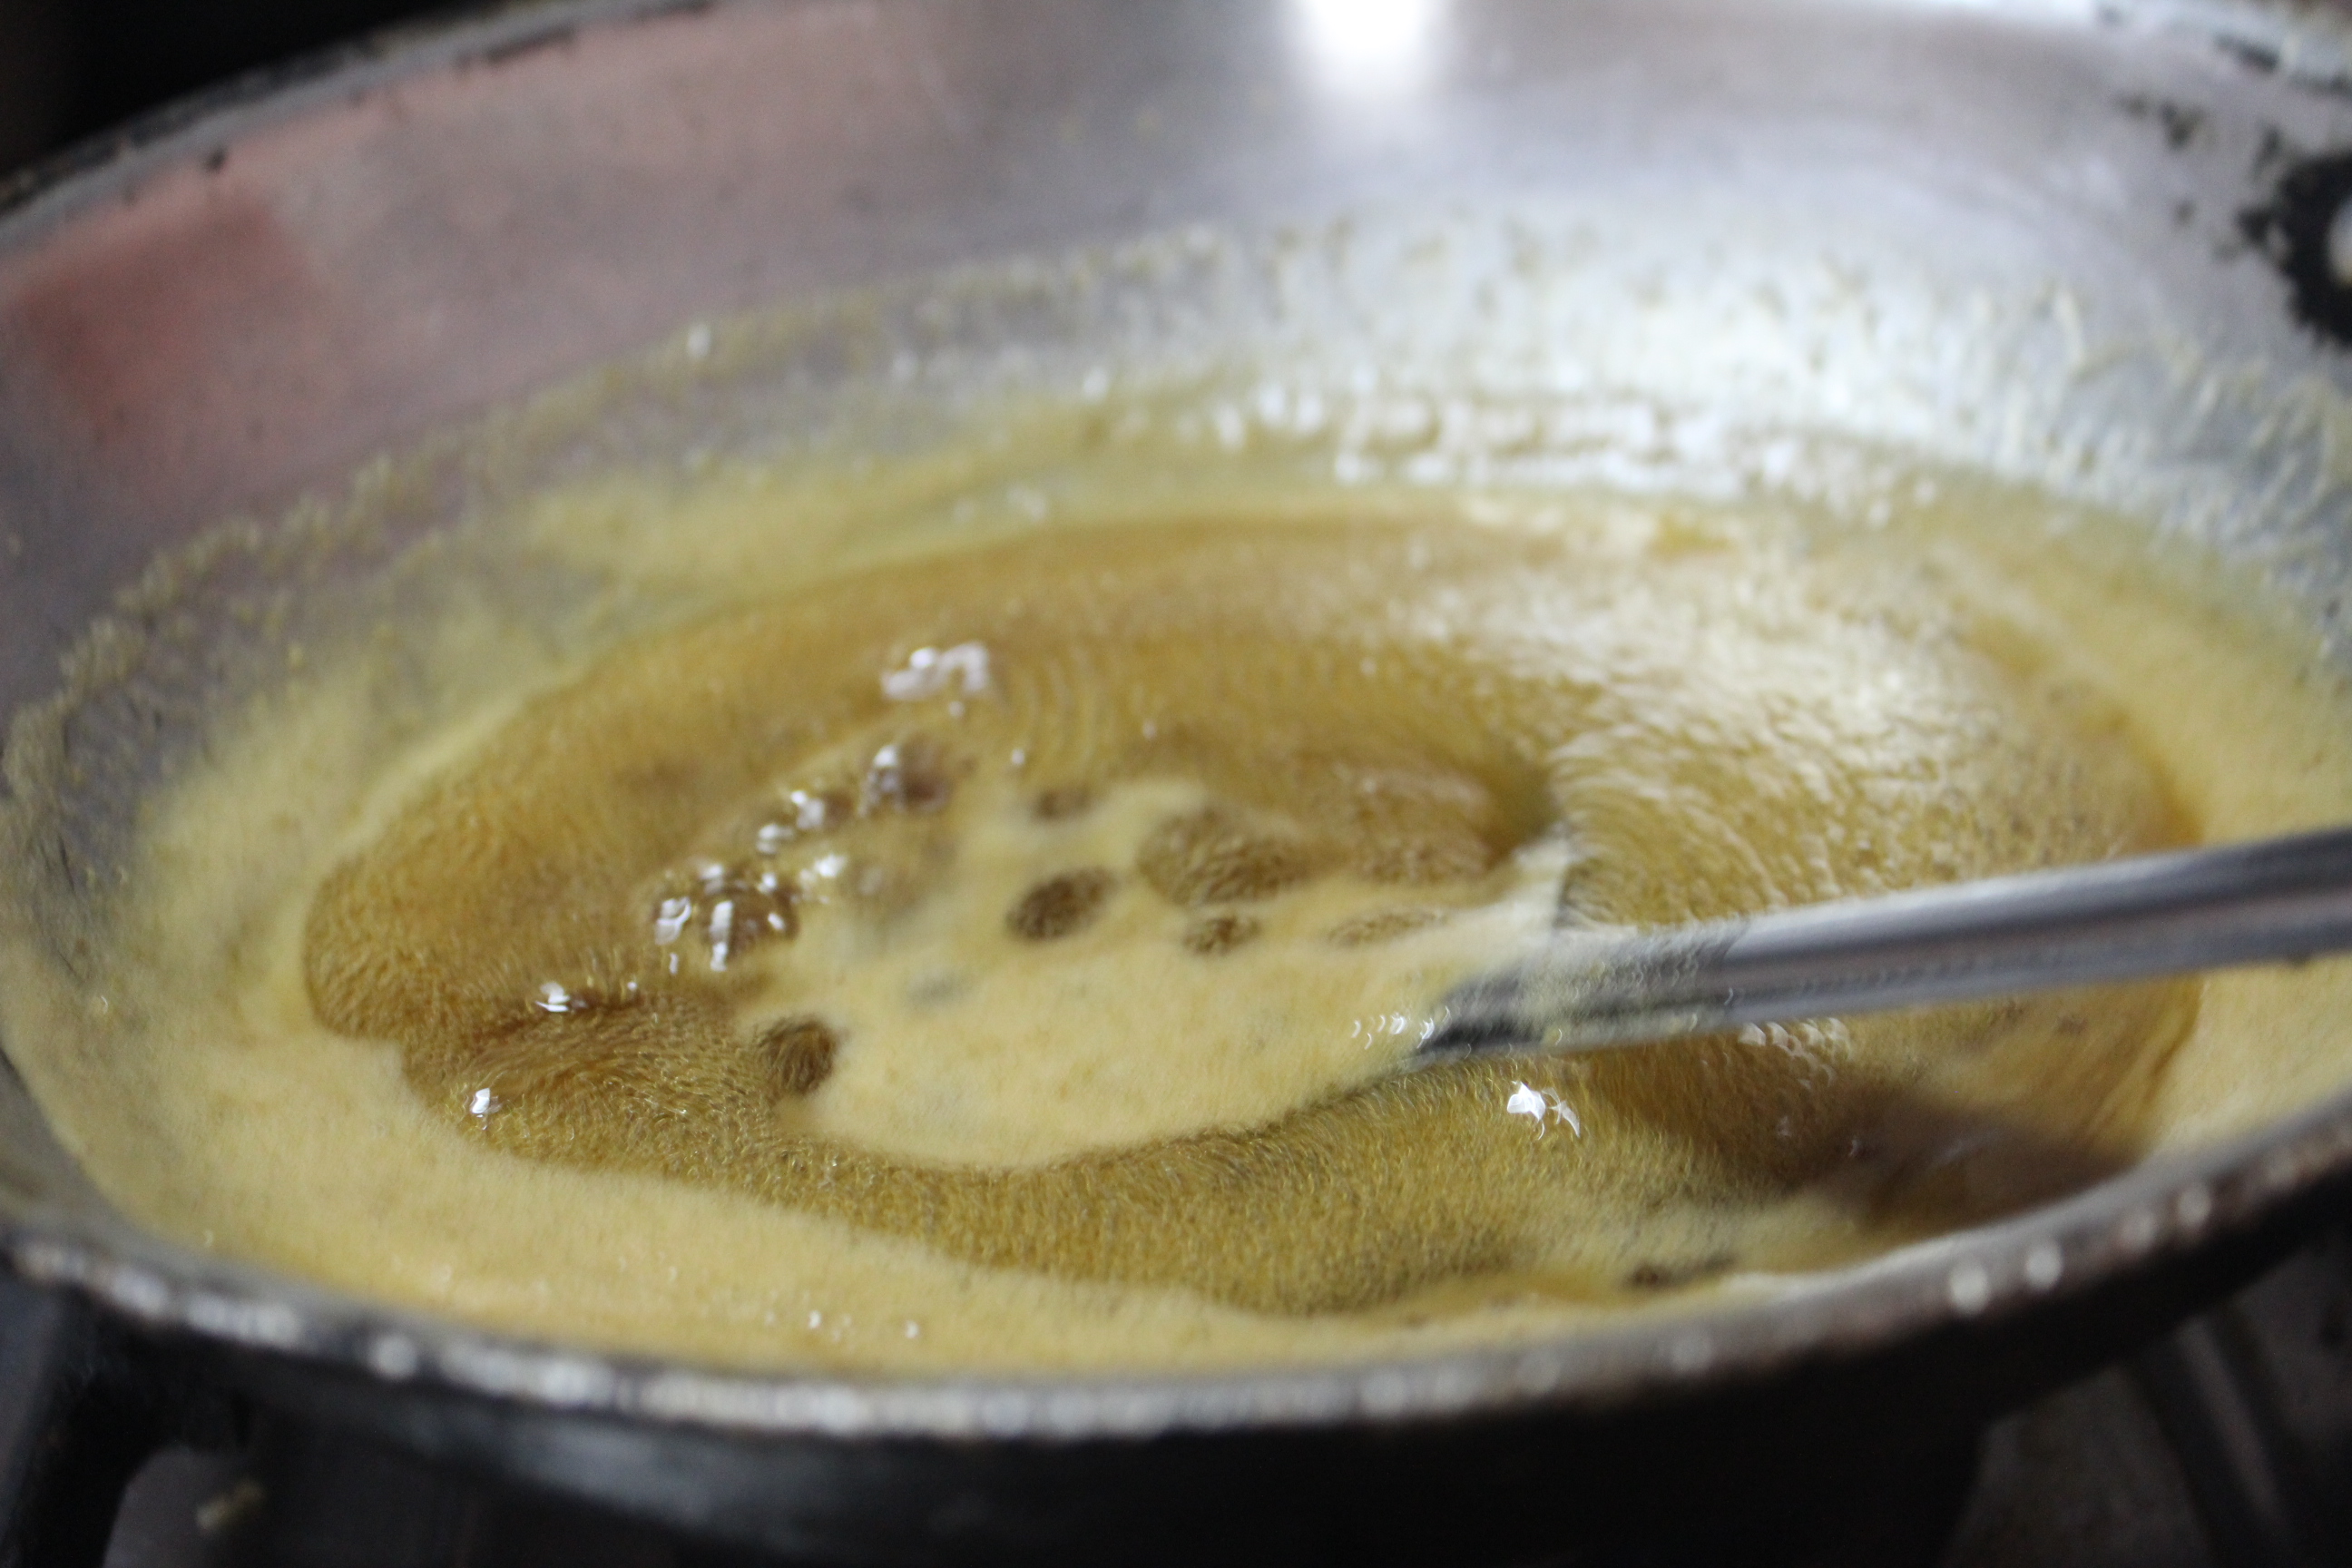
First – Soft Ball/Single String consistency – How to make the quintessential syrup?

the syrup – a bit brownish because of the cane sugar
  • In a wide pan, take 1 1/2 cups sugar and 1/2 cup water
  • Bring it to boil and then keep the stove in sim position
  • Check for Soft ball consistency.When the sugar syrup is boiling well in the vessel – keep a bowl of water and add a few drops of the syrup. The drops should settle in water and one should be able to make a soft ball out of the droplets. 
  • Soft ball consistency is same as single string. Take very little syrup in between thumb and index finger (be cautious… the syrup is too hot), now, single string should be formed. This is the right consistency of syrup.

Now that the syrup is ready, leave it aside to cool.

Start making Boondi.

the first batch came out really perfect
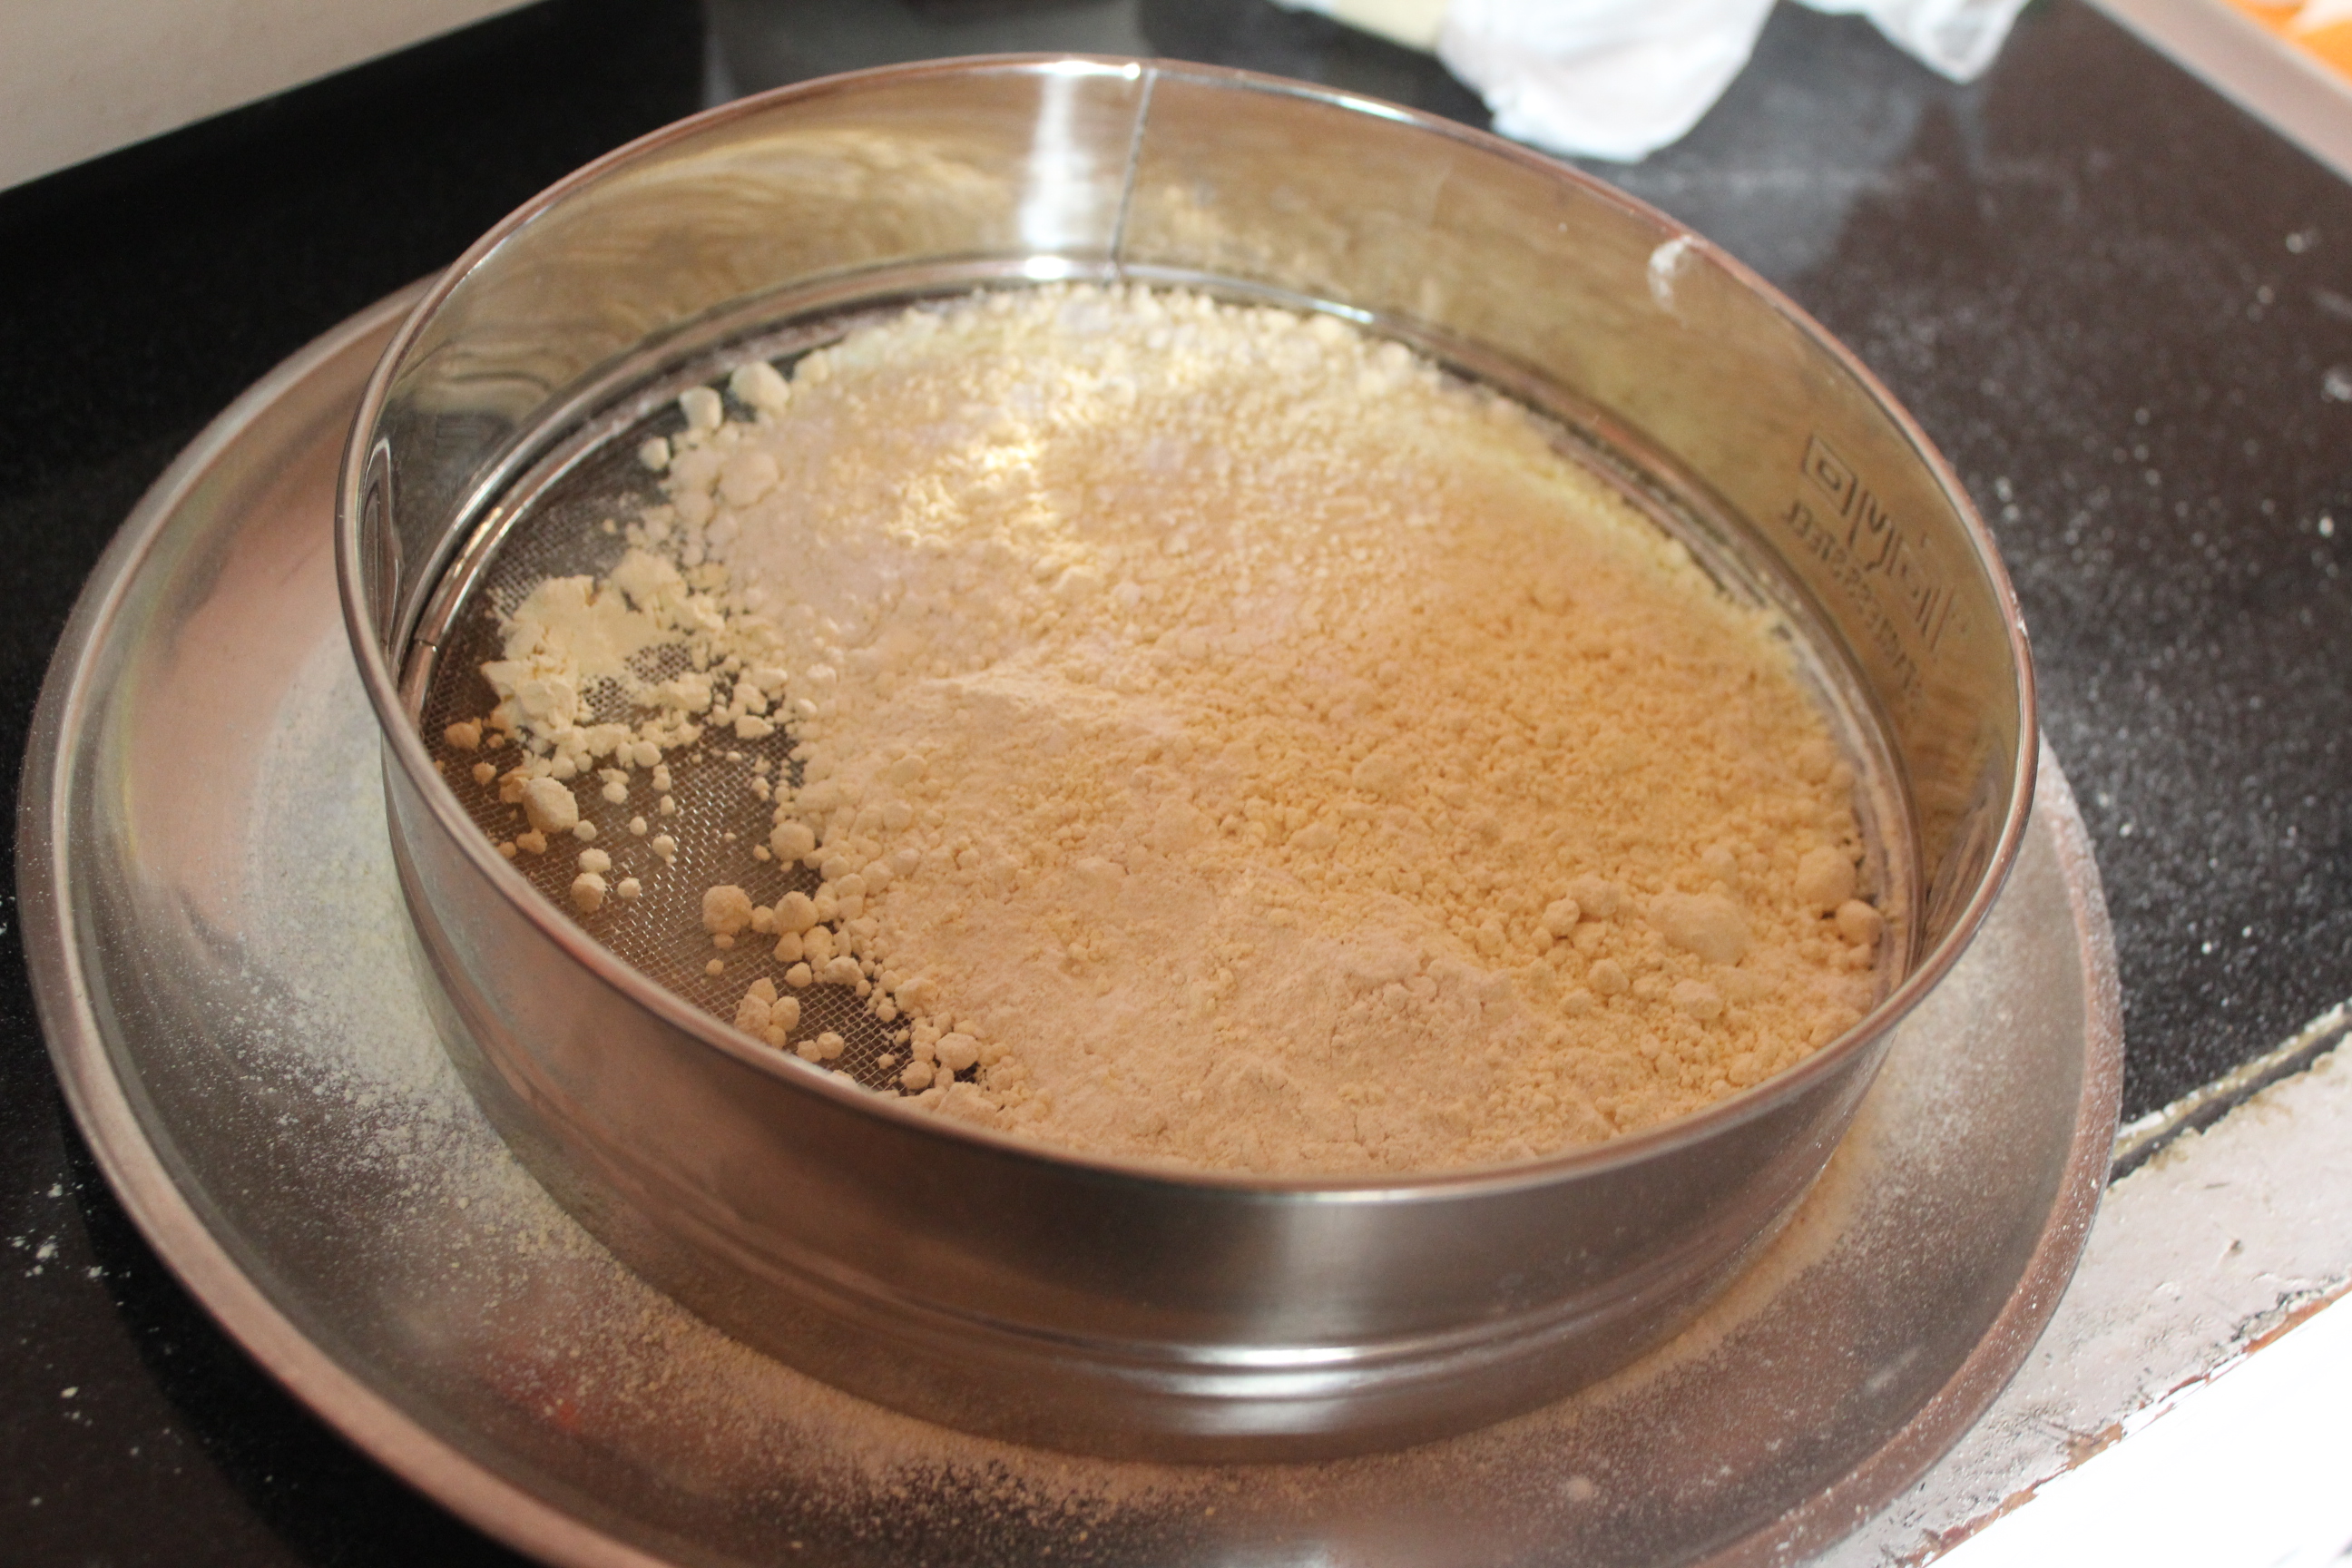
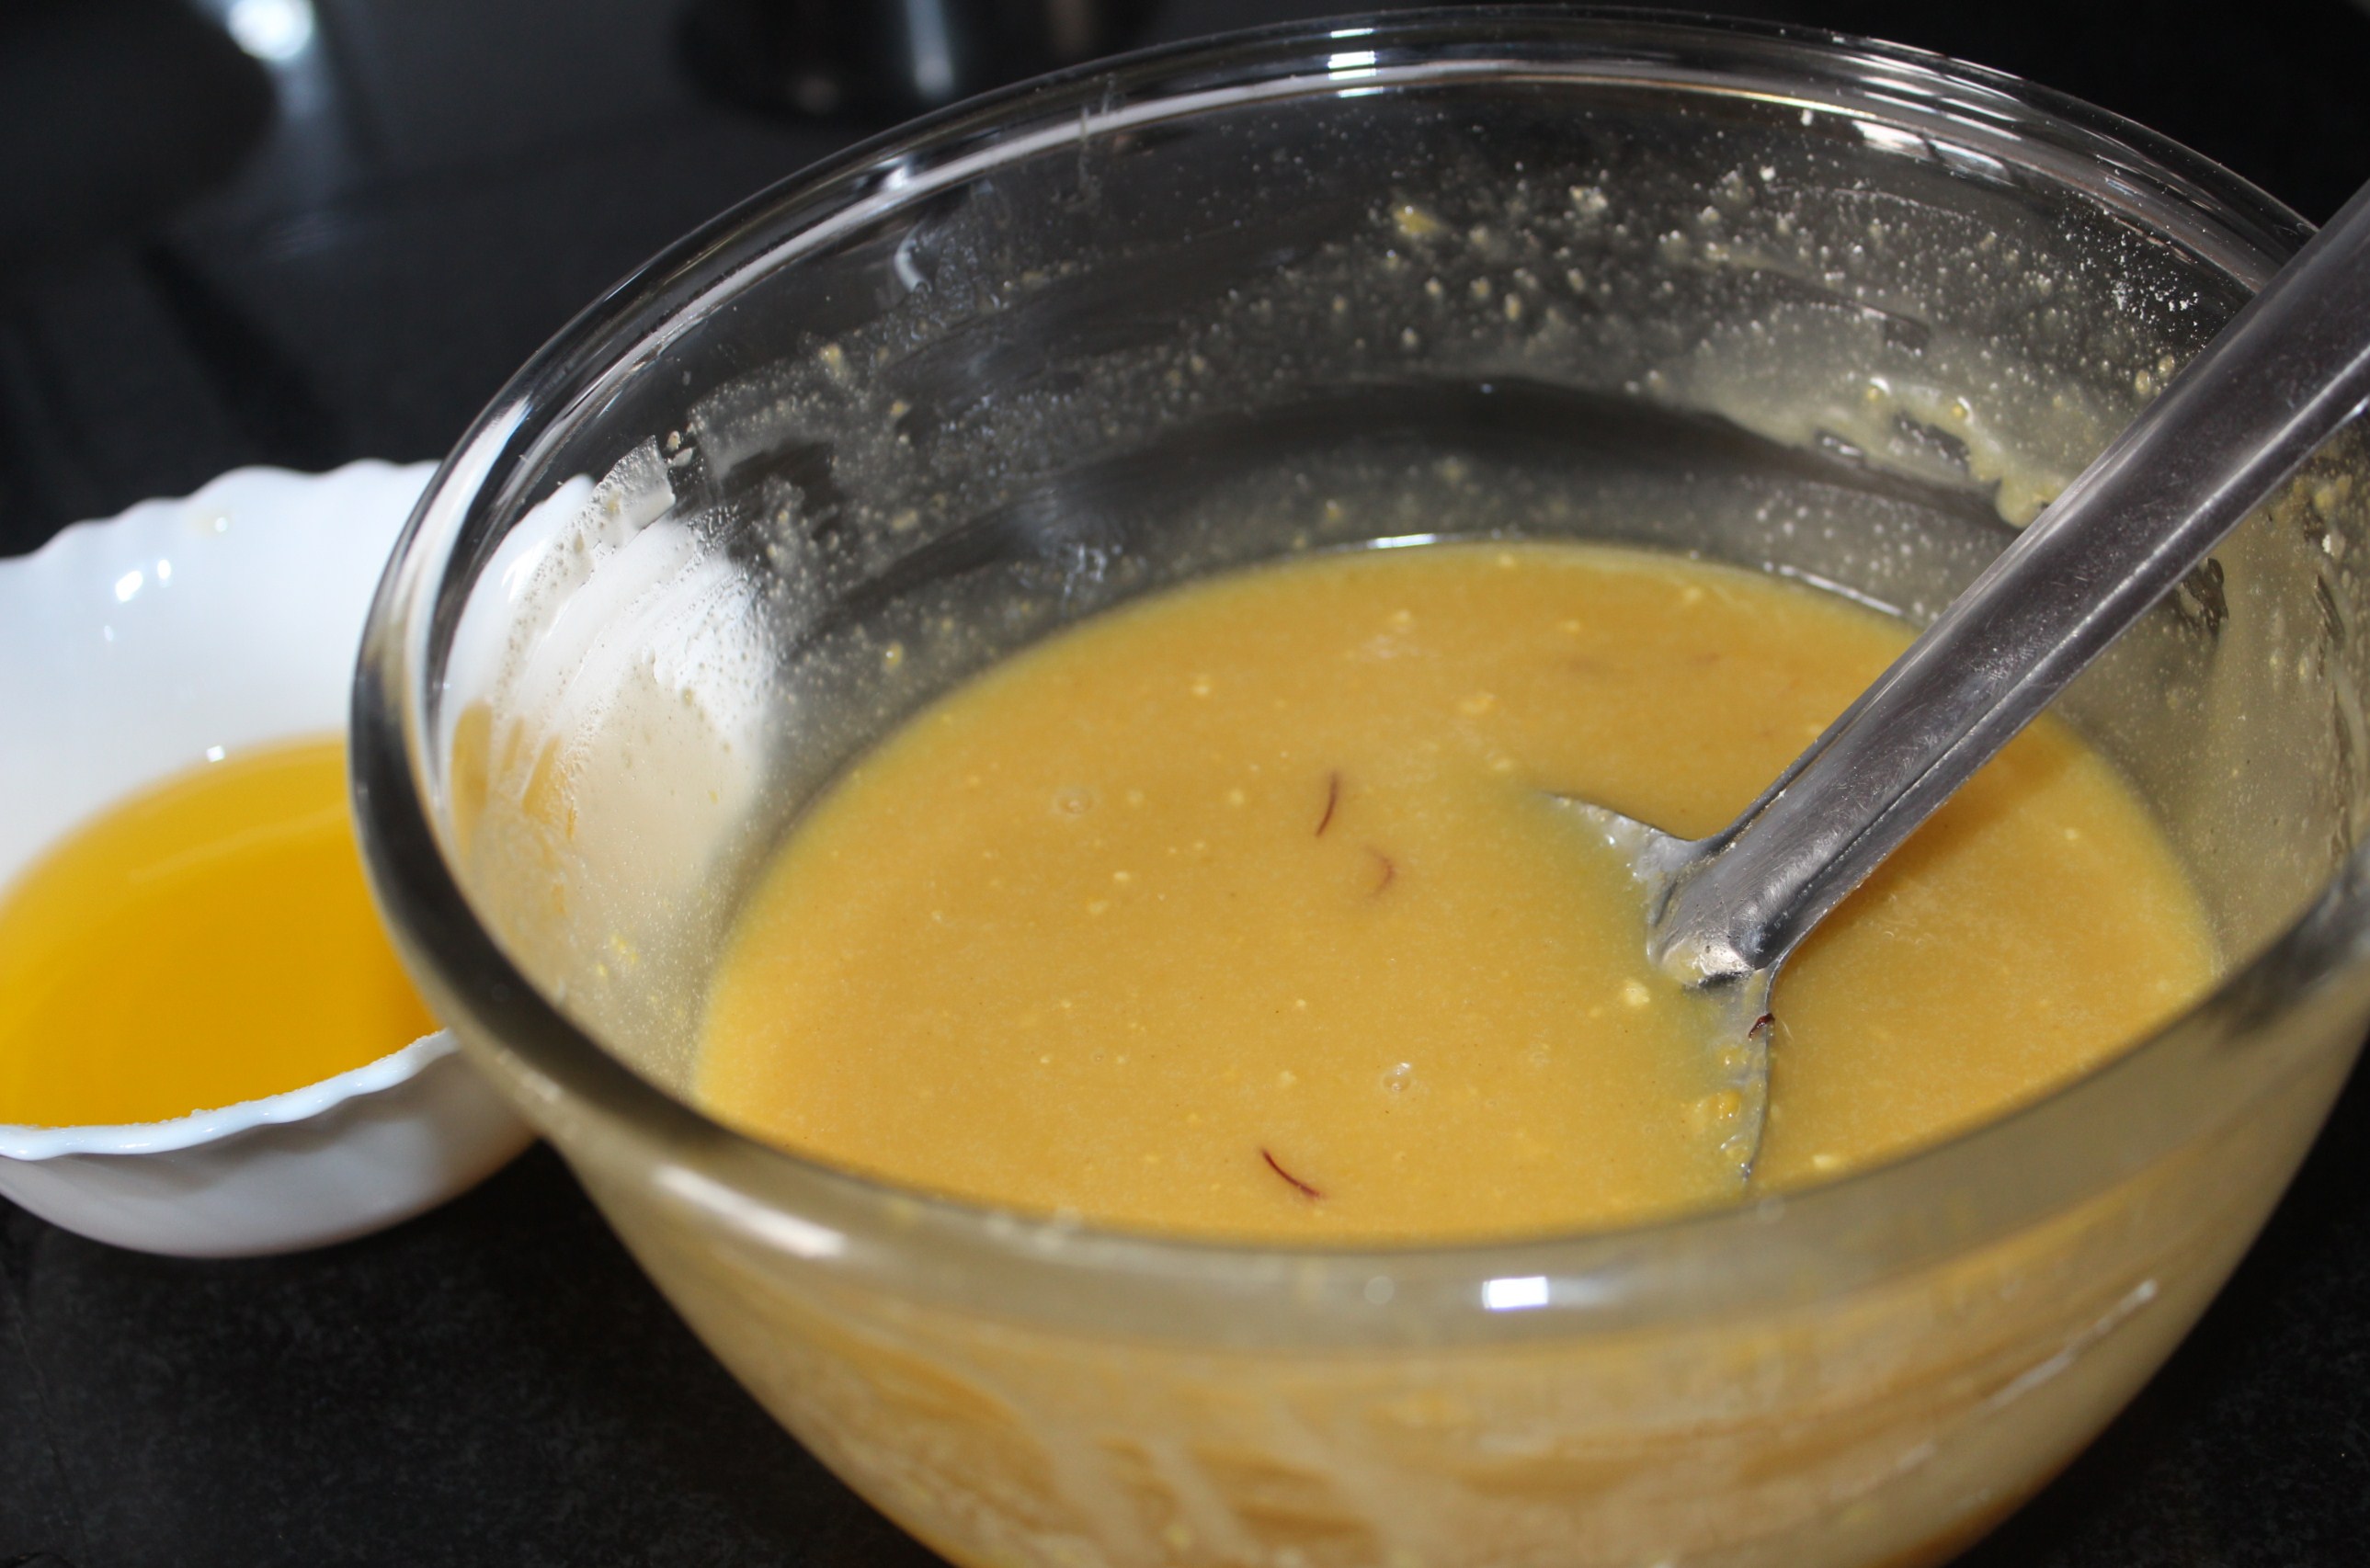
  1. Sieve kadalai maavu; Add baking soda
  2. Add water little by little and mix into a batter, almost suitable for dosa or pancake
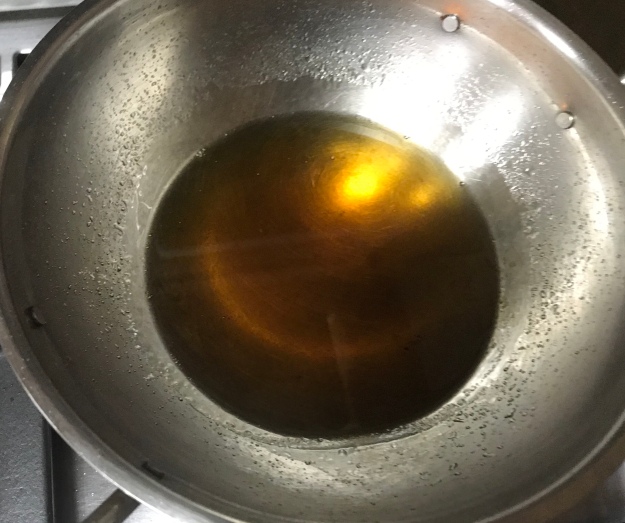
  3. Heat oil in a pan. The oil shouldn’t be too hot – then the boondi would turn brown immediately, without being properly cooked. The same way, oil shouldn’t be low in heat too. Boondi would turn out soggy.
  4. Like the porridge of the baby bear, in Goldilocks Story, the oil should be – ‘not too hot not too cold’- just right.
  5. Keep the boondi ladle over the oil and pour enough batter
  6. Tap the ladle so that beautiful pearls drop in harmony
  7. Do not make too many pearls in one ladle, as they would reduce the heat of oil, in turn, the boondis would become soggy
  8. When they are done, that is, when they reach a beautiful yellow colour, take them out on kitchen tissue
  9. Finish the whole batter
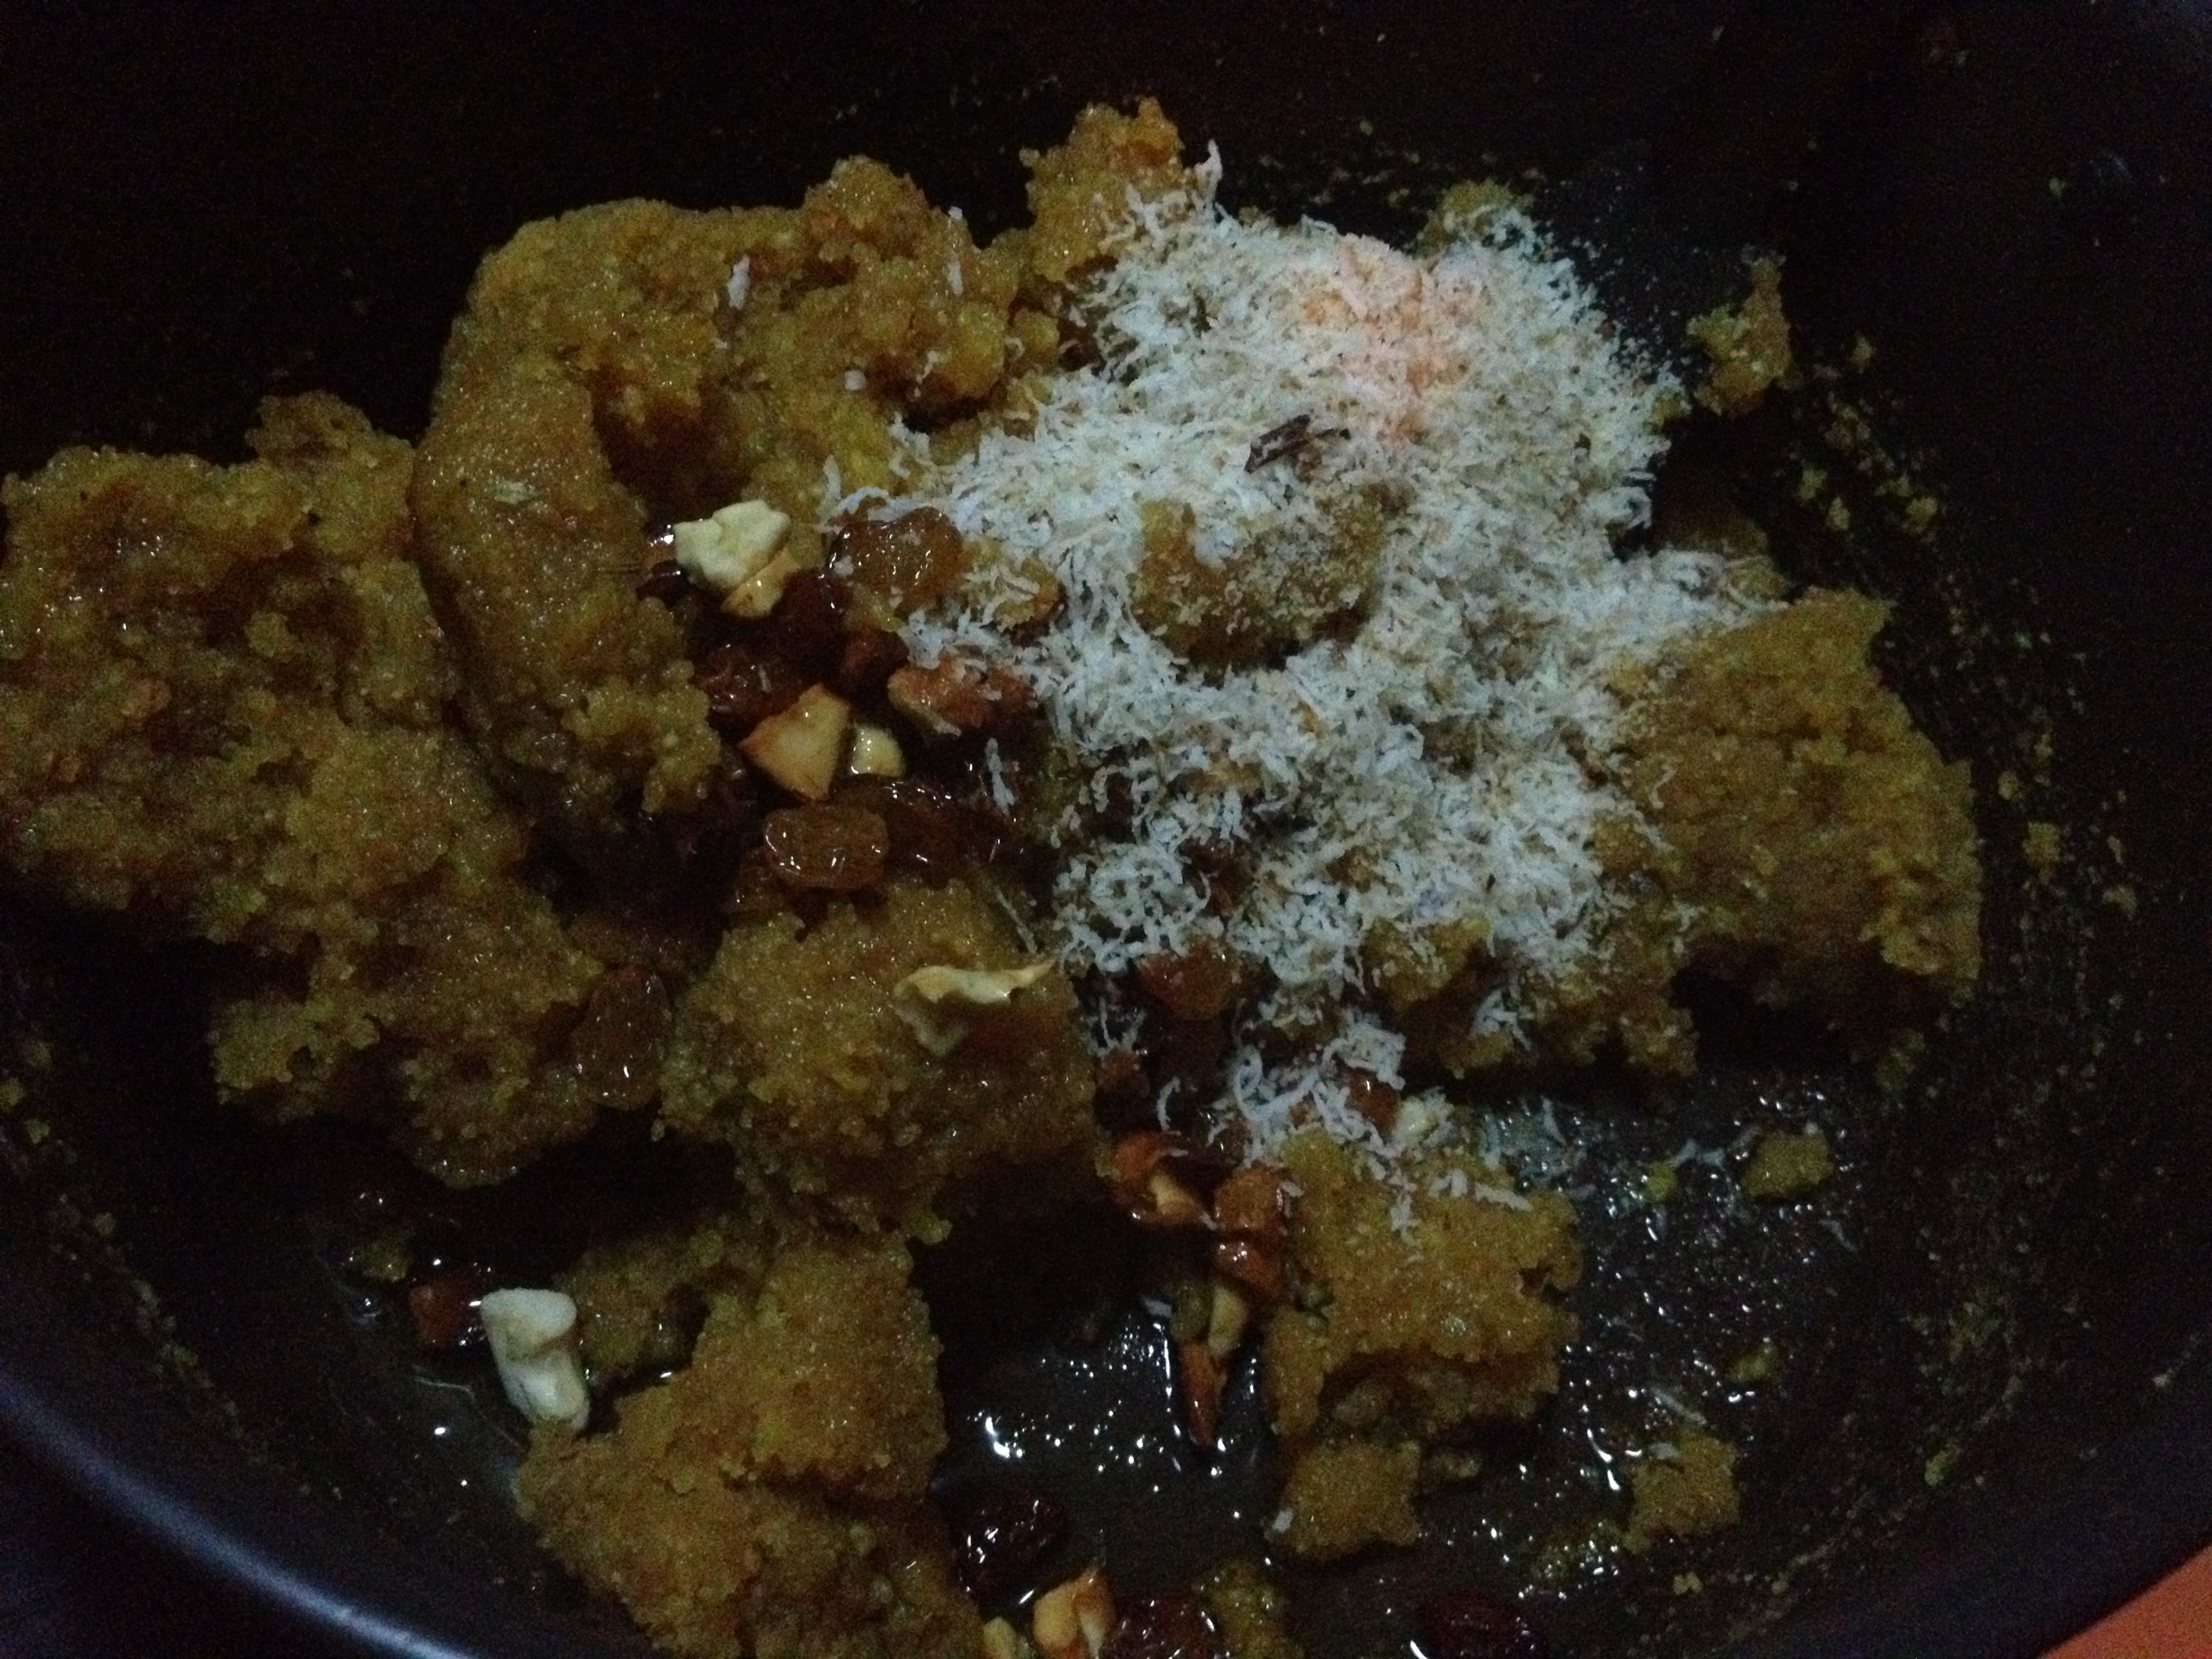
  10. When the batter is done, in the same oil, fry the cashewnuts and raisins and mix with the boondi.
  11. Add powdered cardamom powder too.
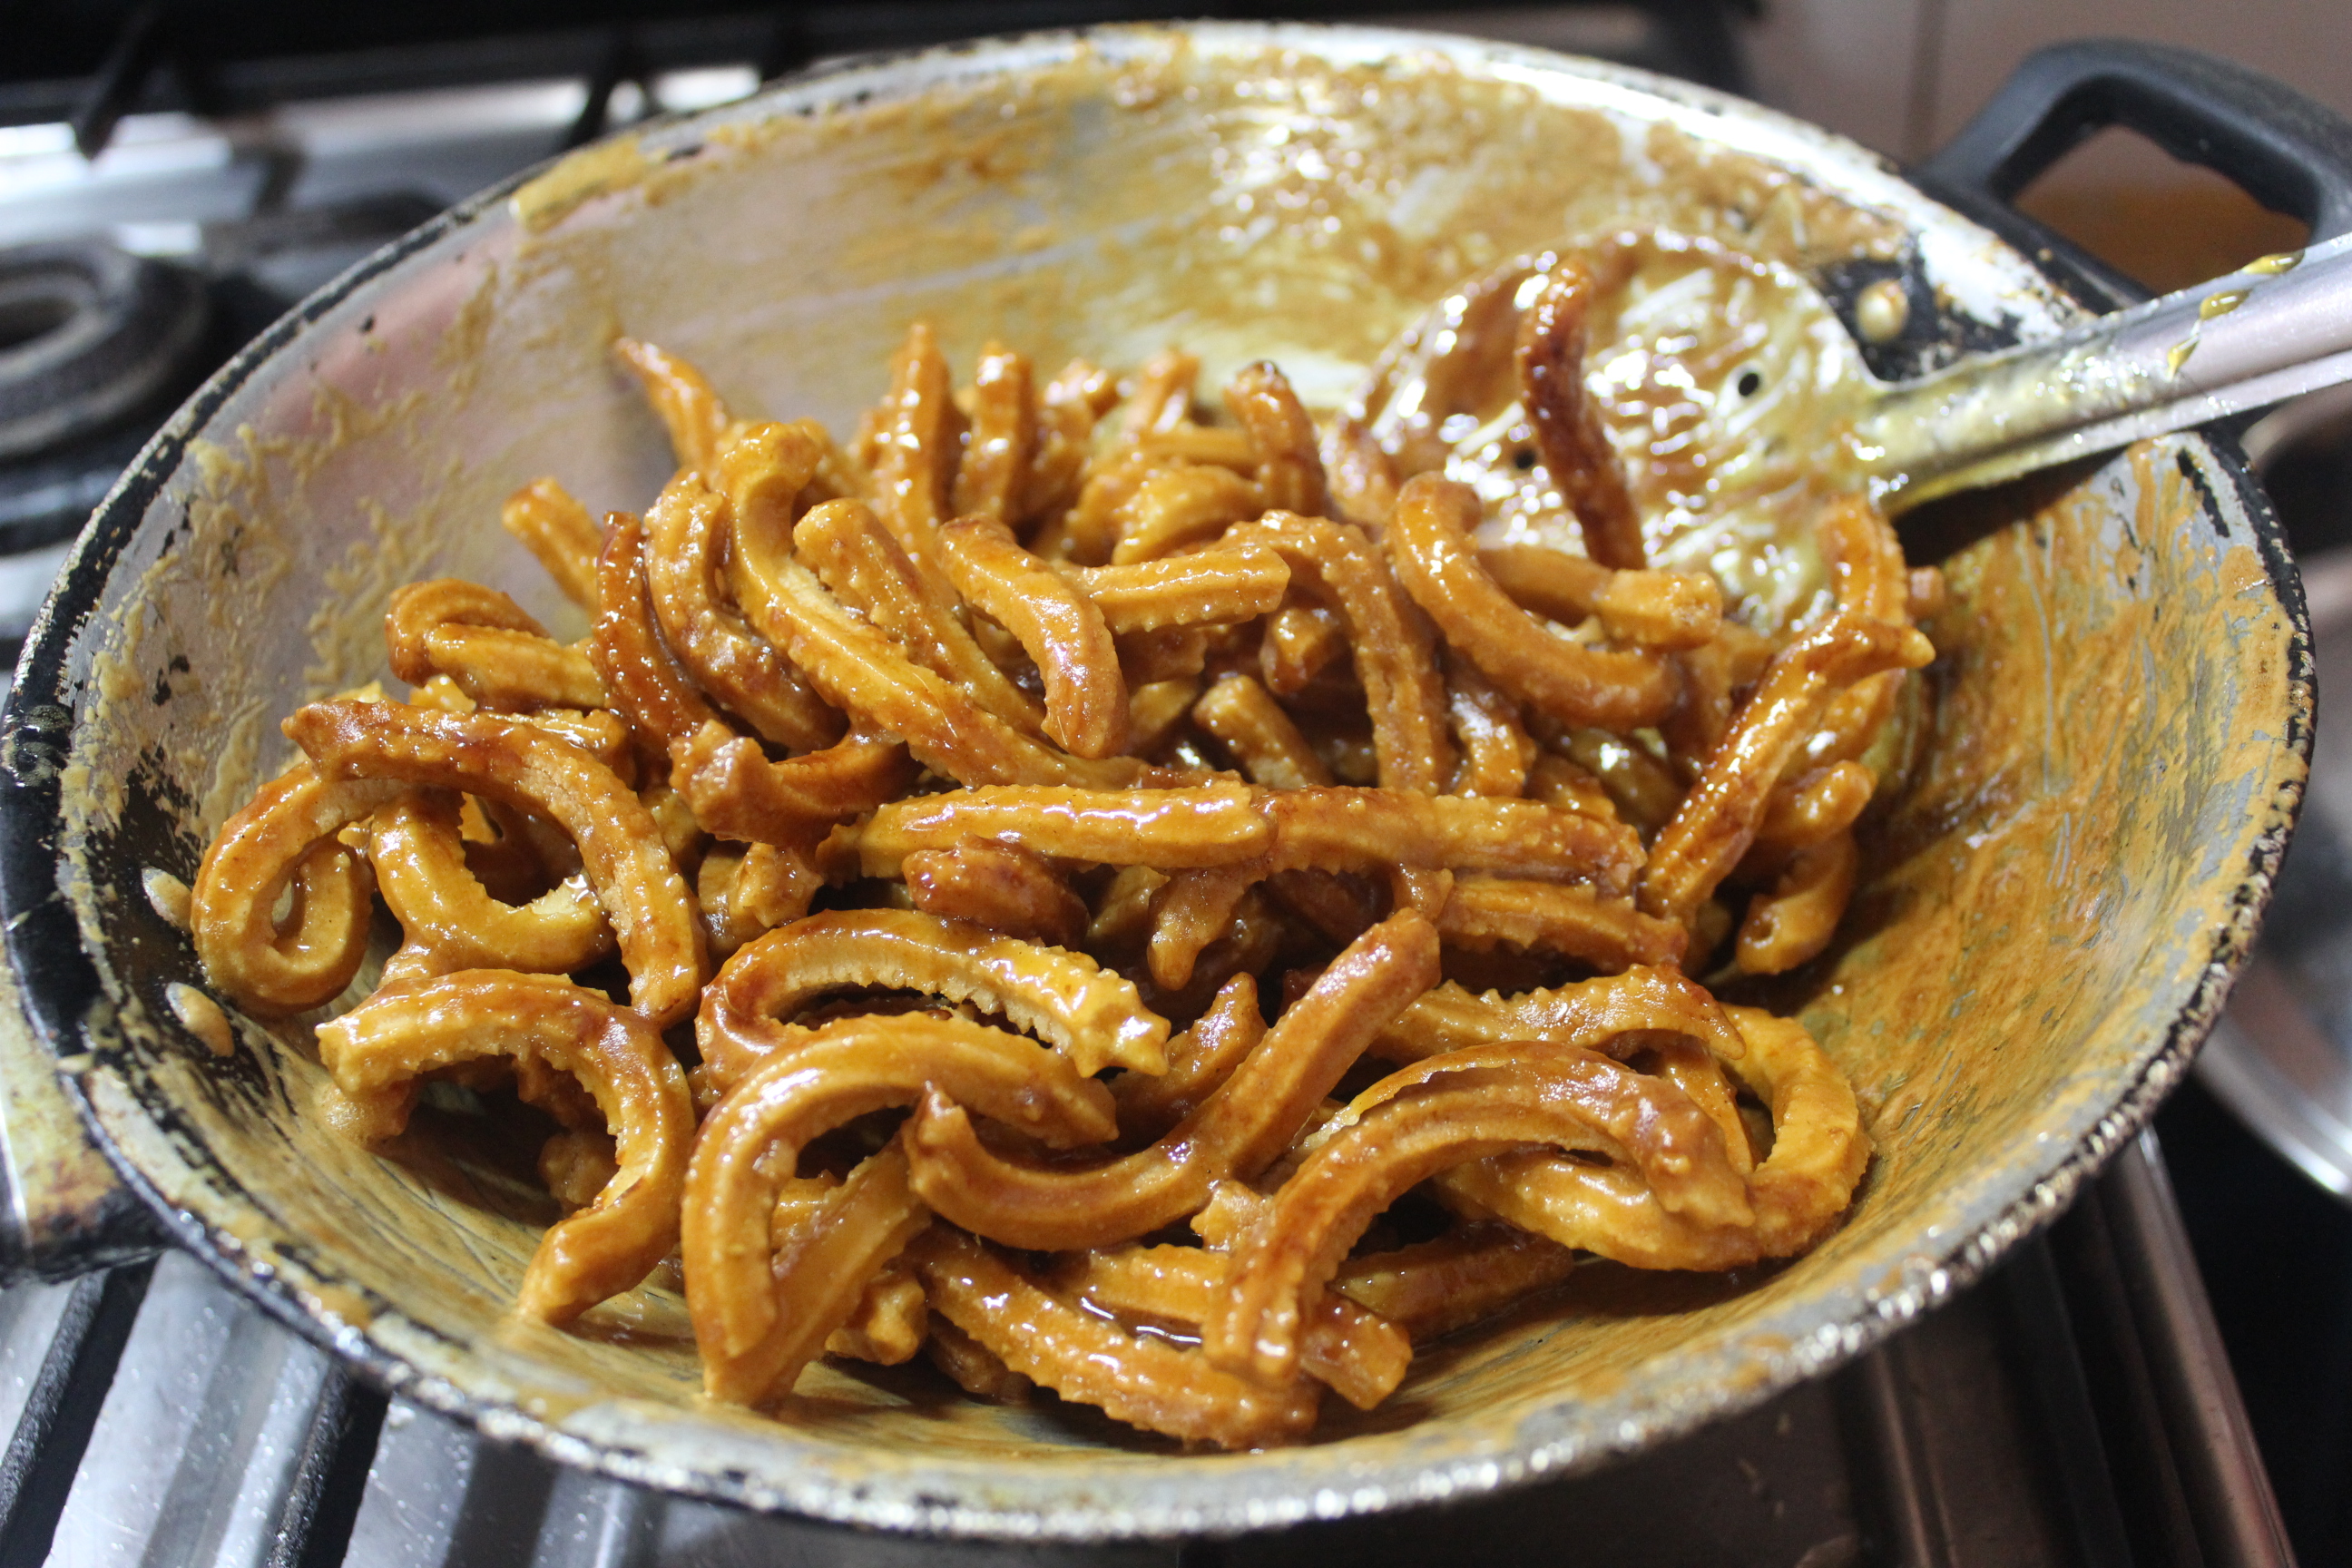
Making Laddu

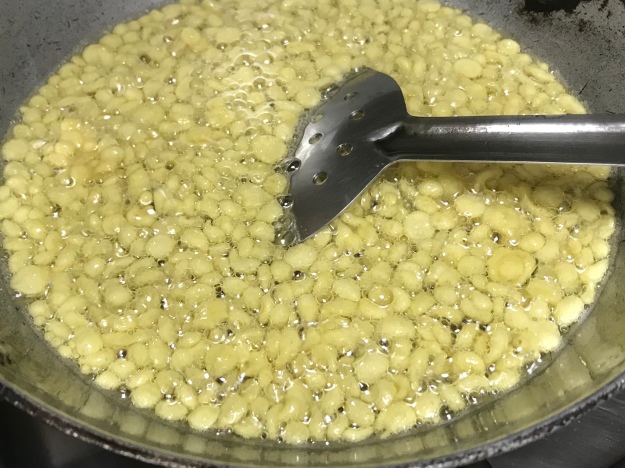
  1. By now, the syrup must have cooled.
  2. Mix the boondi to the syrup and stir well. Leave it aside for at least a couple of hours or even overnight. This helps the boondis to soak in the sugar syrup well.
  3. I couldn’t wait beyond a couple of hours… so, I started making Laddus by middle of the night.
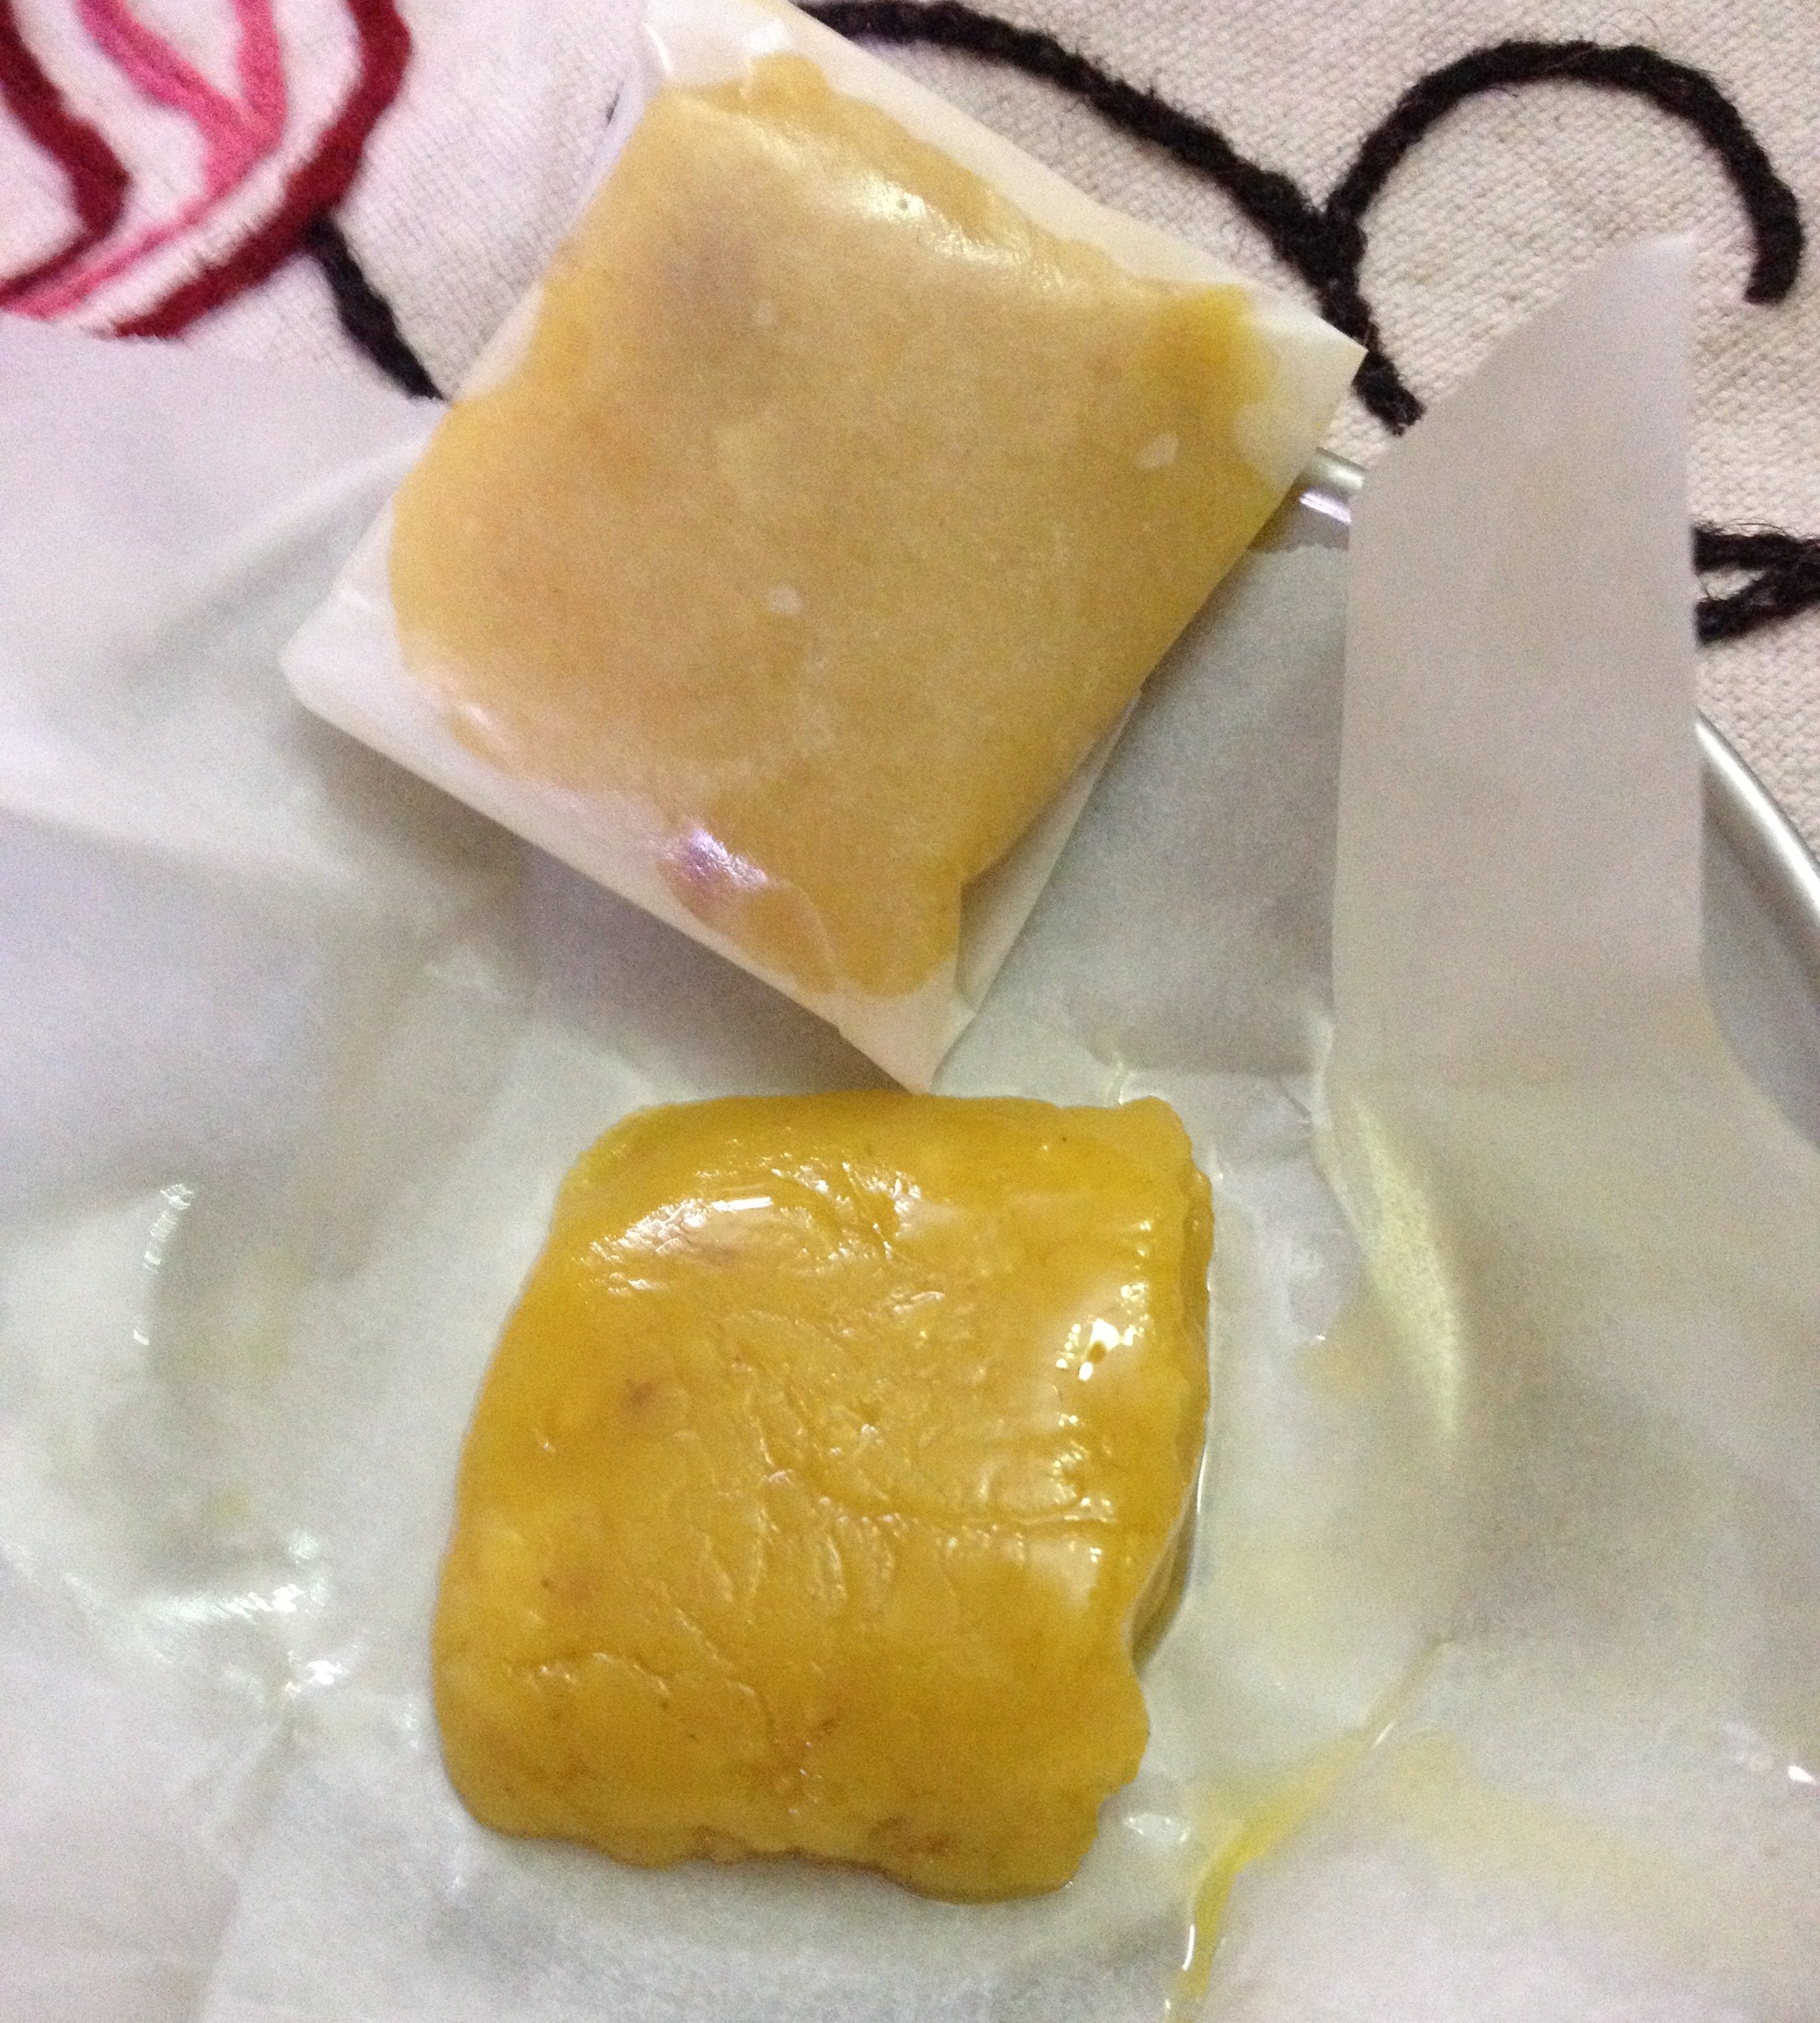
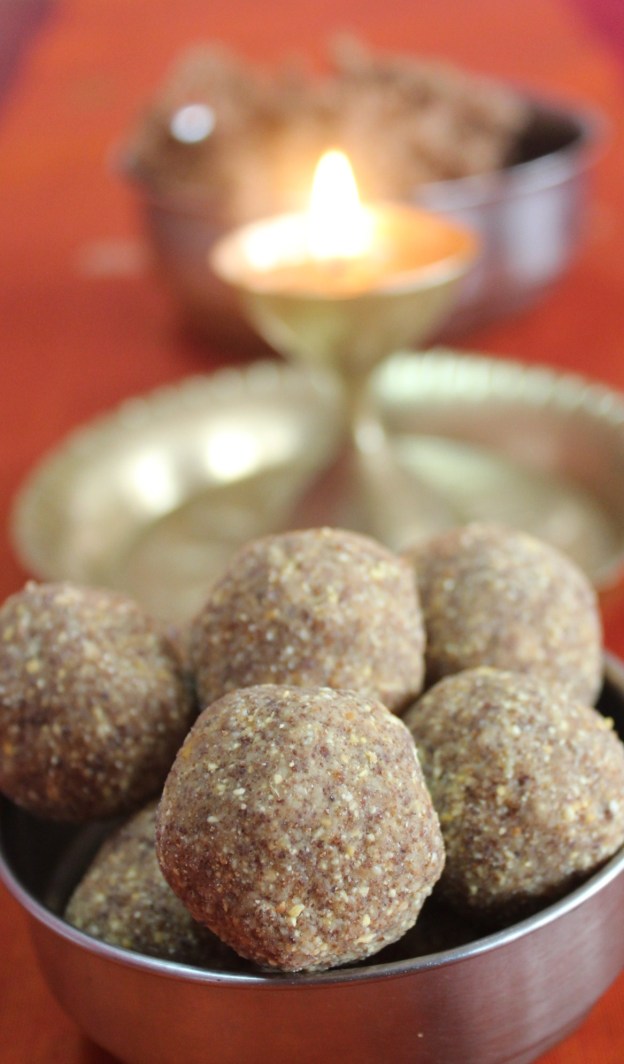
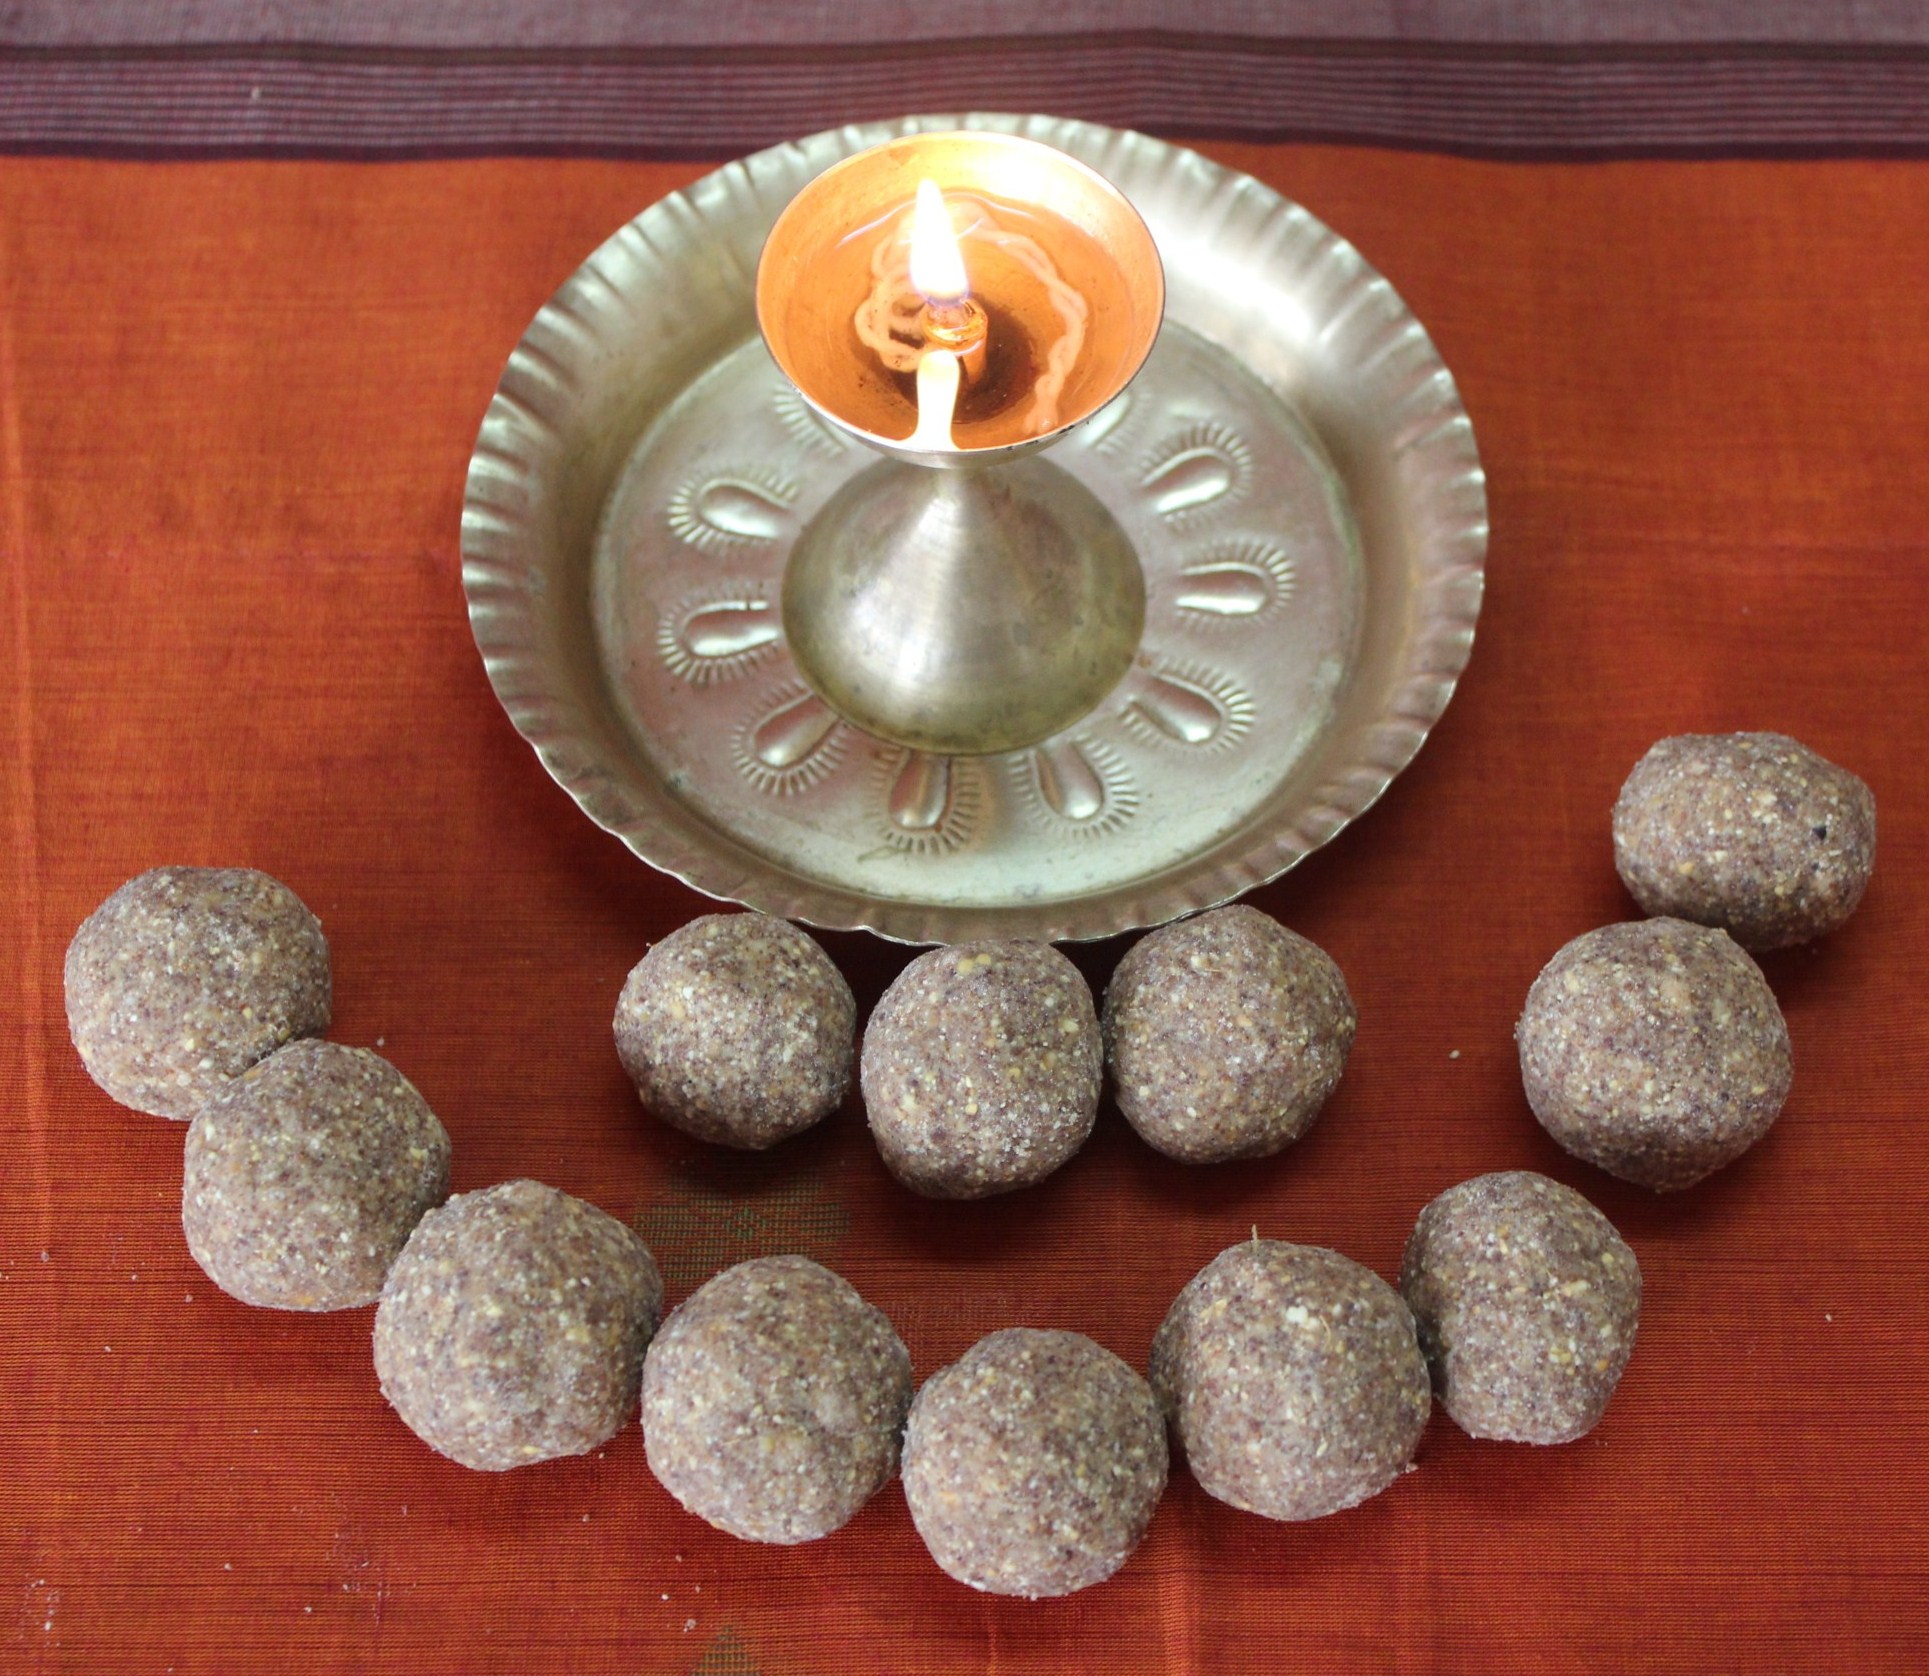
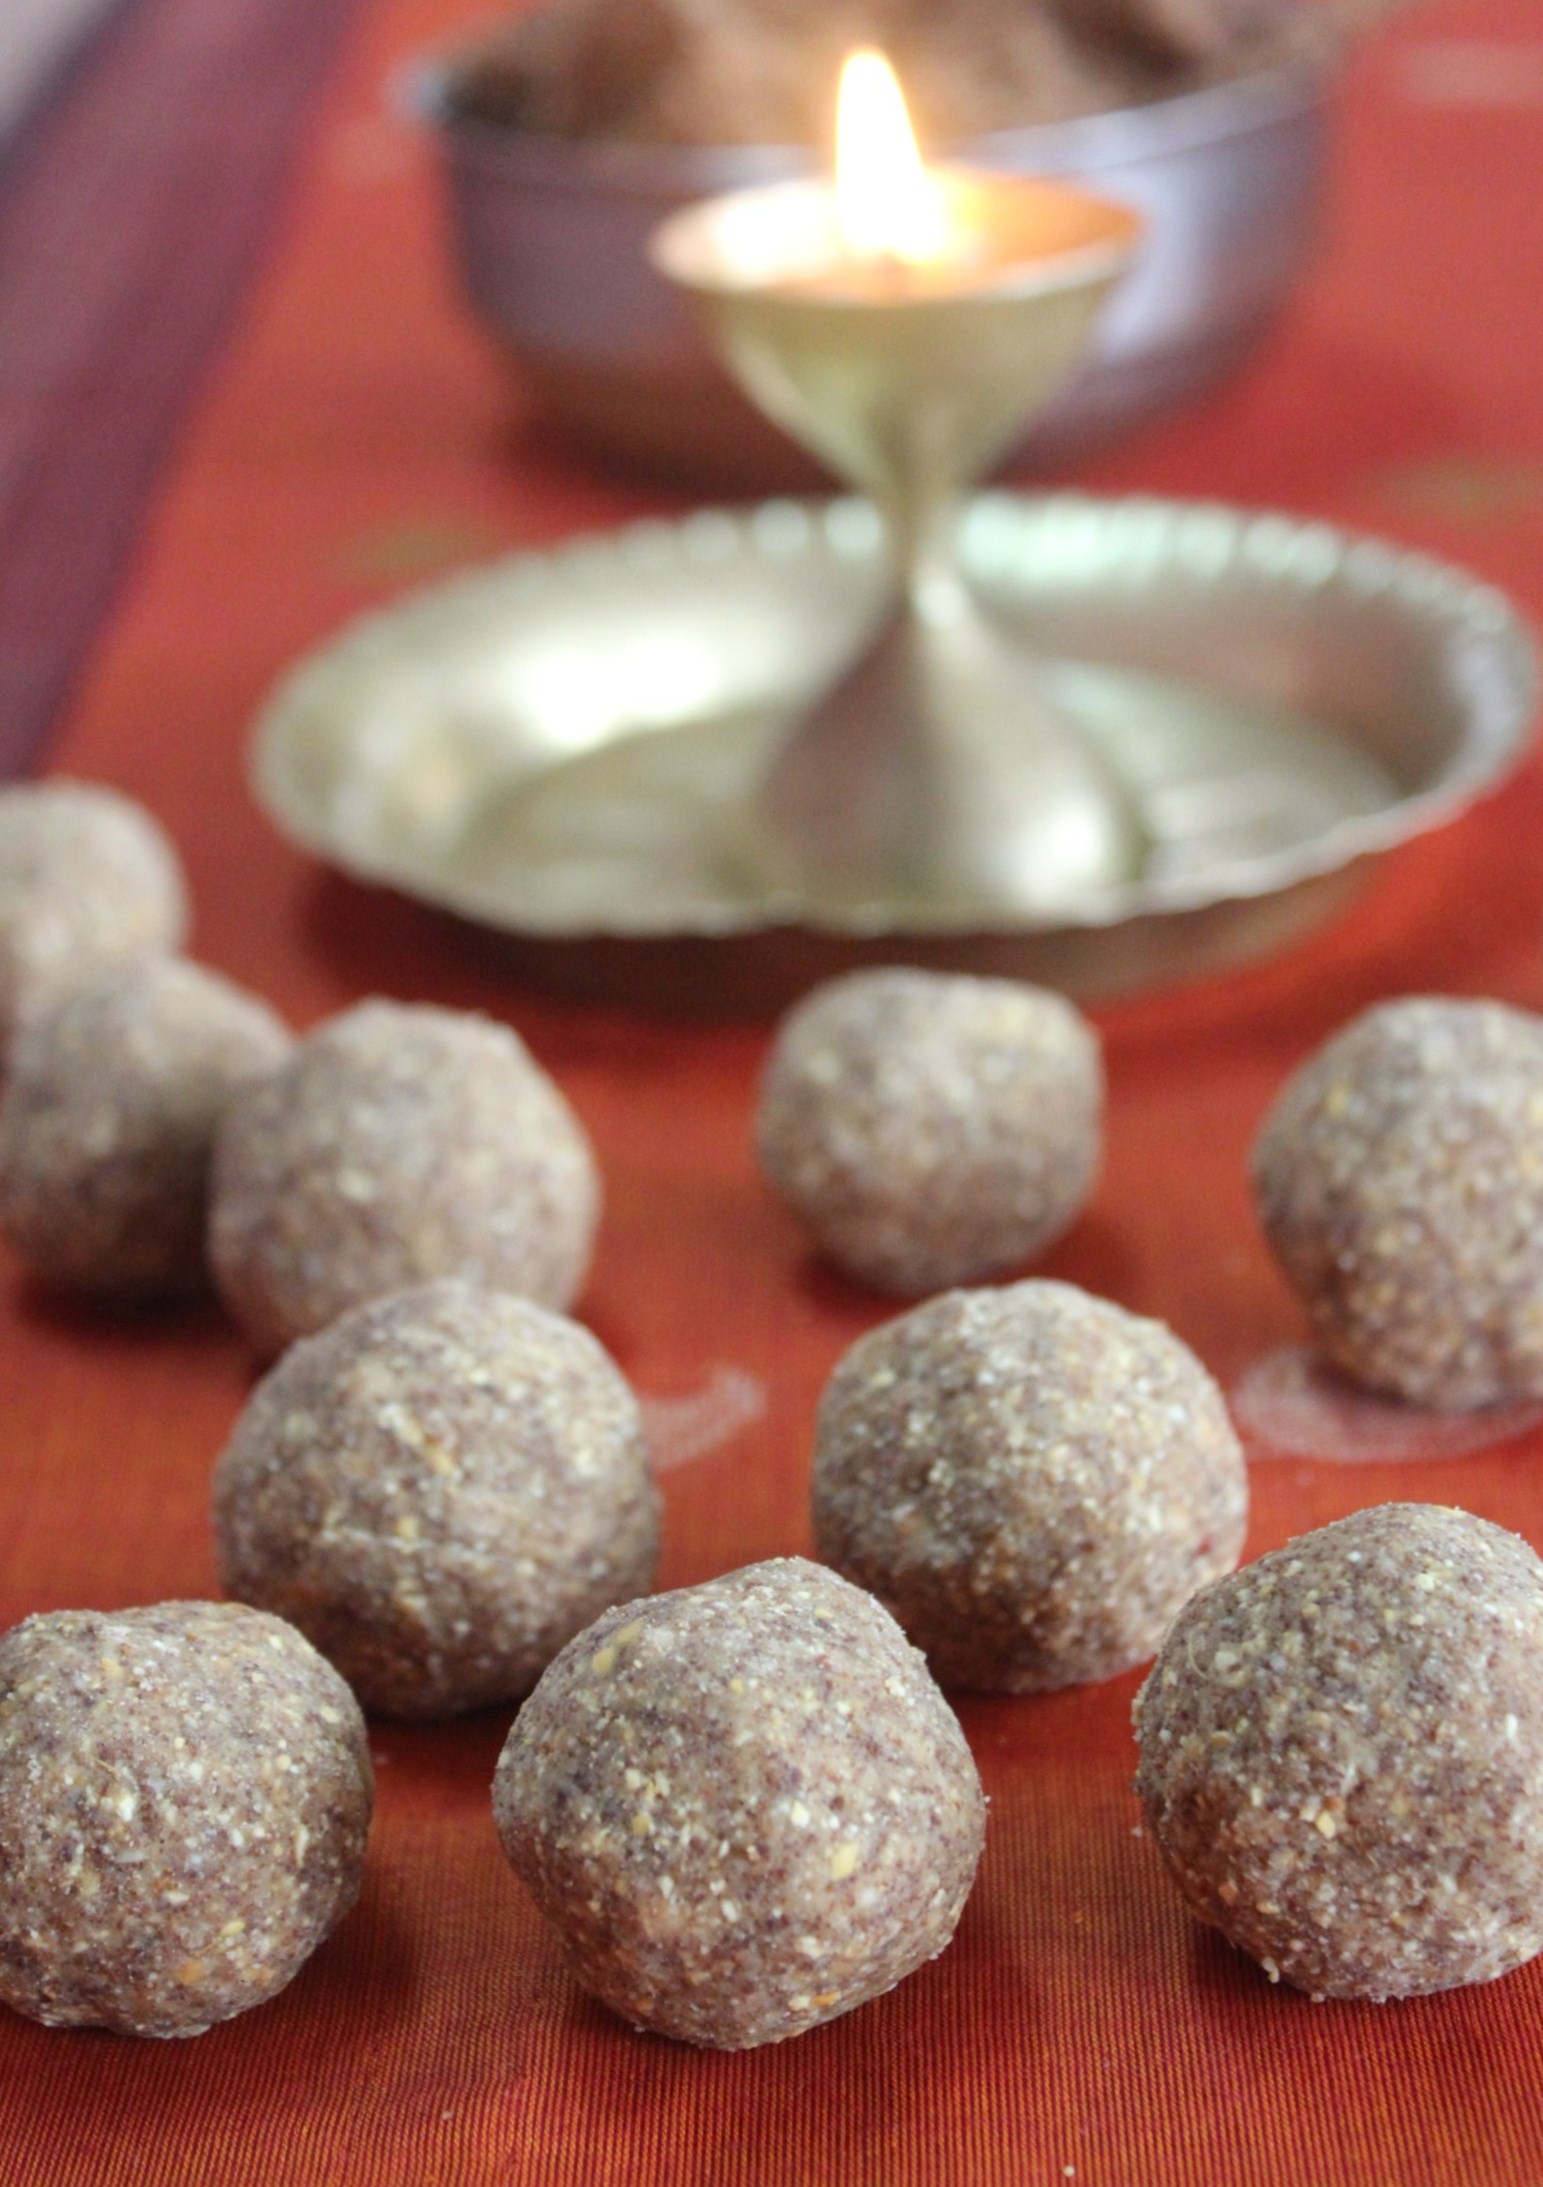
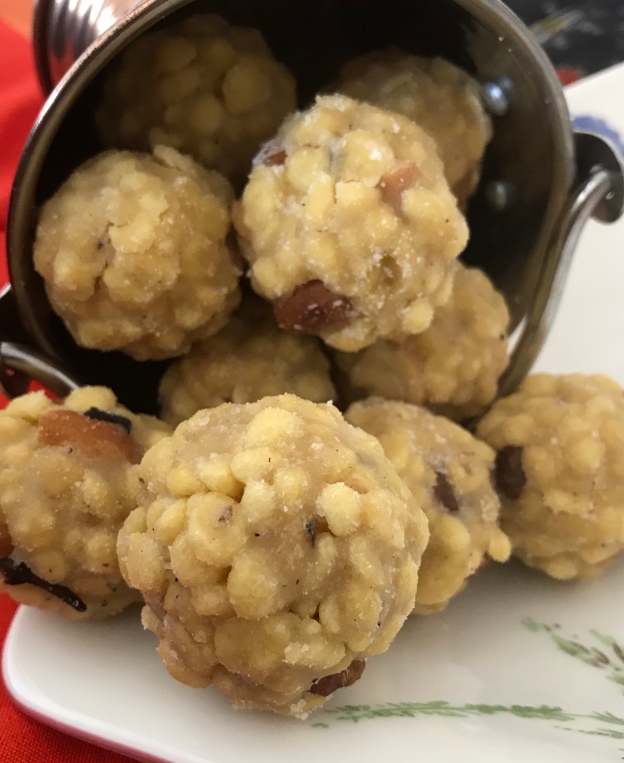
  4. The well soaked and cooled boondi in syrup, binded beautifully to make perfect Laddus.

Truly, a happy ending to a fruitful Saga!

Advertisement

Deepawali – The Victory Story

Deepawali in the south of India or Diwali in the north, the festival signifies victory of good over evil. In the north, it is Lord Rama’s homecoming, after his victory over Ravana; In the south, it is the day of Lord Krishna’s victory over demon Narakasura.

Now, my victory story, doesn’t involve any such philosophy. It is the victory of perseverance, victory of persistence, diligence, commitment and the list is endless. Why have I suddenly drenched myself in a sea of boastfulness? Let me elaborate. Exactly on the victorious day of Deepawali – I was a changed person. I suddenly felt my soul reached an unexplainable ecstatic state – with my victory over two things.

One – victory over the tricky Athirasam and Two – victory over the complicated Boondi Laddu! Doesn’t that sound awesome??

Athirasam

Athirasam has always been a tricky affair, since my first article on Athirasam in November 2011. It seems to have been a long journey, but this time, I am a contended soul.

I prayed very hard to all Gods, not for me, not for Athirasam, and also not for the Gods to whom I devoutly offered…. but extensively for my family. They are super appreciative of my efforts in the kitchen. A few times, I succeeded making replica of flattened pumice stone with the athirasam batter. Though it was capable of breaking any tooth, as strong as diamond, they appreciated the polished texture of the thing I made.

A few other times, the batter disintegrated in oil, they sweetly commented, it looked like blooming flowers in a lake. I was smart enough to stop with the first batch. I converted the batter into Appam with Banana or sweet Paniyaram. I even got hugs and kisses for being so very innovative.

Though, my heart brims with pride, having made them proud, on such countless occasions, I could somehow feel they were worried souls, on the eve of Diwali. They were in fact getting panic attacks, when I was preparing the Athirasam batter. With a true feeling of helping them out of this stressful situation, this time I prayed to all Gods, with utmost Devotion.

Thankfully, the Gods didn’t drop – good looking, perfect athirasams from Heaven. That’s when, I started to think, and hence, got so much stories to share with you guys.

So what made the difference? There were a few things I thought I should re-analyse. All numeric ratios were checked and they seemed just right. The measurements were perfect; the ingredients were exact; the procedure was flawless. I felt like a school going kid, with my math problem gone wrong. All formulas right, done in the exact step by step procedure, rechecked several times….. but the answer went wrong. All my teachers stood in front of me, and seemed to be telling me – Maths is all about Practice. Not only Mathematics, anything in life comes with a price – and the most important of all might be…. Time – Devoted Time to practice and practice again.

I realised, making Athirasam was more than a tough mathematical calculation. Practice was not enough. But, learning new nuances from continuous practice helped. What I learnt from continuous Practice is listed below-

  1. Rice flour used for Athirasam needs to be moist and not too dry. That’s why, raw rice is soaked, dried at home for an hour or so, and powdered in the mixer while slightly wet.
  2. Jaggery used should be the darker variety and also one which is right for syrups – we call it the ‘Paagu Vellam’ in Tamil.
  3. Though the ratio is provided, always keep additional rice flour. Because, some varieties of jaggery might take in more flour. If there isn’t enough flour, the mixture would be watery, a consistency not suitable to make athirasam.
  4. Also, always mix rice flour to syrup and, do not pour the syrup into rice flour. This helps in binding the mixture well, and gives room to add more rice flour if needed. But, while pouring syrup into the flour- one might end up having a very thick batter. And, if there isn’t more syrup in hand, it would be difficult to alter the consistency of batter.
  5. The most important of all – THE SYRUP…. that makes the difference. What we need, is a single-string consistency or soft ball consistency syrup.

Soft Ball consistency – How to make the quintessential syrup?

  • Heat jaggery with 1/4 cup water in a vessel to dissolve
  • Filter when jaggery is dissolved and make a syrup.
  • Check for Soft ball consistency? When the jaggery is boiling well in the vessel – keep a bowl of water and add a few drops of the syrup. The drops should settle in water and one should be able to make a soft ball out of the droplets.
  • Soft ball consistency is same as single string. Take very little syrup in between thumb and index finger (be cautious… the syrup is too hot), now, single string should be formed. This is the right consistency of syrup.

Now, after getting the consistency of syrup right, add the rice flour to the syrup and let the batter ferment overnight.

For recipe and ingredients of Athirasam, and my initial stories on how I learnt athirasam from our family kitchen, visit – https://dosaikal.com/2011/10/25/the-tricky-athirasam/

RICE FLOUR

The next important aspect of this year’s Athirasam making was the rice flour. I had store-bought rice flour, that was Idiyappam maavu. While I was wondering, how to use this flour, as an easy option .. this website came to my rescue. https://www.sailajakitchen.org/2018/10/adhirasam-recipe-using-ready-made-rice.html

It had an answer to keep the store bought dry rice powder in moist condition. The author asked to sprinkle water little by little on the rice flour, and after mixing, powder the bread-crumb-like flour with dry ginger and cardamom in a mixer. The moist rice powder for Athirasam is ready.

Isn’t this super smart! I adapted this method, with a slight correction in the syrup consistency- accurately soft ball.

Thank You Sailaja! you made my Day!!

After allowing the batter to ferment overnight, I made athirasam on the day of Deepawali. Gods had answered the prayers of my family. My Athirasams were just perfect.

I had mixed feelings… Had I scored full marks in mathematics? Or was I an athlete, who has just reached the finish line, faster than ever? I touched my head…. do I feel a chef’s cap? I suddenly realised, my feet didn’t touch the ground, then, I pressed myself down.

It might sound like an exaggerated triumph, but, this is no mean feat either. My mother agrees with me. Since Deepawali until today, she has been the lone soul, to have listened each word of my triumphant story of Athirasam, in complete silence on the other side of the telephone. And just said, ‘I’m proud of you’ with tears in her eyes, that I could visualise through my BOTIM call.

‘Manoharam’ – Gram Flour Fritters (Churros) dipped in jaggery syrup

426


Manoharam is a traditional Tirunelveli sweet. The gram flour fritters soaked in gorgoeus golden-caramelly cane/palm jaggery syrup is a delight in every crispy bite.  With healthy Bengal gram flour and no white flour as the base and Unrefined Jaggery and no white sugar caramel for the coating, this is a no nonsense fritter as well as a childhood comfort snack.

When asked about the recipe, Amma fondly remembered both me and my little brother, having plates filled with these crispy fritters as an after school snack, giving more emphasis to the filled plates. Those were the days of no botheration of putting on weight, leave alone childhood obesity. We could burn the nutritious extra calories earned from healthy millet flours and cane and palm sugars, with the crazy amounts of time we spent playing in the streets. No store bought chips or cakes, buns or pastries loaded with white flour, white sugar and salt.

Manoharam and Spanish Churros – great observation by my Little Chef

Since I didn’t have the thenkuzhal/plain murukku – fritter disc, I used the magizhampoo disc – which is a sharp edged or star shaped fritter disc. Once the fritters were done, the little chef at home exclaimed that they resembled Spanish Churros, thanks to so many cookery shows in countless channels. That observation was quite a surprise to me indeed. When I put my eyes through her thought, the traditional Manoharam did look like Churros. While Churros are made with all purpose flour and coated with cinnamon sugar, Manoharam is made with gram flour, rice flour and a pinch of salt. And instead of the chocolate sauce to dip, we coat them in jaggery syrup. Both the tastes are completely different, created with local ingredients available – yet, there seems to be a slight similarity in the concept of making and looks.

If you don’t feel so, that’s ok.. let’s move on to recipe.

For a detail look at churros, I referred http://www.justataste.com/easy-homemade-churros-chocolate-sauce-recipe/

Manoharam

for fritters

  • kadalai maavu/bengal gram flour/besan – 1 cup
  • arisi maavu/rice flour – 1/2 cup
  • ulundha maavu/dehusked black gram flour/urad – 2 tsp
  • nei/clarified butter – 1 tbsp
  • uppu/salt – a pinch
  • thanneer/water – as needed


for syrup

  • vellam/cane jaggery – 1 cup
  • thanneer/water = 1/2 cup
  • yelakkai podi/cardamom powder – 1/2 tsp
  • chukku podi/dry ginger powder – 1/2 tsp

Method of Preparation
Bengal gram flour and rice flour may be easily available in stores. Black gram flour should be made at home.

I. Making Black gram/Urad flour

  1. Heat a hard bottomed vessel or kadai
  2. Dry roast ulundham paruppu/urad dal – dehusked black gram till golden brown
  3. Grind to a fine powder in a blender
  4. Sieve it and keep aside
  5. Cool and Store in air tight container, and use when needed.


II. Making Fritters

  1. Sieve all three flours without lumps

358

2. Add salt (just a pinch), clarified butter and just enough water to make a stiff dough
364


3. Heat oil in a pan for deep frying
4. Use any single holed disc of a Murukku Maker to make the fritter (for details of murukku maker and single holed disc, refer – https://dosaikal.com/the-all-time-favourite-murukku/
5. Take a portion of the dough and place inside the cylindrical container of the murukku maker and press into big circles,  directly inside hot oil
6. Fry both sides till golden brown


365
7. Remove in kitchen tissue to absorb excess oil

8. Break them into finger sized pieces
370


9. Keep them aside till we make the jaggery coating.


III. Making Jaggery Syrup and Coating the Fritters

  1. Let jaggery dissolve in water
  2. Filter the liquid to remove impurities
  3. Take a pan and pour the jaggery water
  4. Add cardamom powder and dry ginger powder
  5. Let the liquid come to a single string consistency or thick enough to roll the fritters through
  6. Keep the stove in sim position to judge the right syrup consistency

375

7. Once the liquid has become a syrup, drop all the fritters and gently mix well in the syrup

8. Let the stove be on and the thick hot syrup would coat the fritters well and reach the required crisp texture


381
9. When the syrup is thick and coated completely in the fritters, switch off stove

390

10. Jaggery coated glowing Manoharam is ready.


427


Happy Deepavali 2016 with Thiripagam – an easy variant of Badam Halwa


452


pre-diwali and diwali delicacies

295423
Deepavali falls on the 29th of October, 2016 in Tamilnadu. If Deepavali means lots of happiness and loads of sweets and snacks- the festivity arrived a week earlier at home.

In the earlier decades of joint families or extended families close by, or at least a few siblings to share and pick up the last bits of sweets and snacks from the thooku chatti, festivals meant making of sweets and savories literally in several kilograms if not tonnes.

Presently, with nuclear families, especially with single children or children in different destinations, the sweet and savories story isn’t a kilogram affair, but has become a ‘grammy’ indulgence. Additionally, there is no aachi-amma duo to occupy the kitchen for consecutive hours, patiently filling the big chattis with goodies. Making so many delicacies in a couple of days fit for consumption for diwali and a few days beyond has become too strenuous now, atleast for me.

But, when the most important ingredient of a good festival – the energy to make and share traditional sweets and savories was still bright and shining as the lights of Diwali, there arose a patient plan. The patience behind making several goodies gave rise to a Pre-Diwali weekend.Instead of slogging in kitchen with so many things in mind, I started off with a few last weekend. Festivity started a week earlier, yes- for the sheer temptation of making more and introducing more traditional sweets and snacks.

Cooking is a bliss when you have people around to gobble it in a jiffy. Now, I really miss the ever hungry tummy of my little brother, who let amma and aachi feel delighted to make more and more ‘norukku theeni’ aka nibblers with the same enthusiasm for years together.

Yet, I have a little nibble hunter, who is as enthusiastic to taste new palagaram/snacks as to cook a few.

These are a few of my little one’s contributions for this Diwali…


magizhampoo murukku by her

312

And also, a few kiliyanchatti/diyas hand painted for several occasions

painted lamps in gorgeous colors

458

and this one’s already lit with imagination

493


For the Pre-Diwali weekend, I made

  1. Gulab Jamun
  2. murukku in two different shapes

and  3. dragonny jilebis (those first attempt jilebis which turned out off-shape)

Mid way in the week, started off with the true notion of cooking traditional sweets from the place I hail from – Tirunelveli.
Thiripagam, Manoharam and Kara Sevu passed to the top of the list. If the first two resemble names of mythical characters beyond seas, that’s merely co-incidental. Not to worry, they are sweets and the third one is a popular spicy savory, available throughout South India.


444


First, to the most uncommon among the three – Thiripagam.
When Amma had already started with Thiripagam – a long forgotten sweet, I just grabbed the opportunity of introducing the same here. Thanks to her, took step by step instructions to make.

I was introduced to this elegantly presented sweet in my uncle’s marriage. The feast had this different sweet, but with a very familiar taste. Was it Mysore Pak or Badam Halwa ? The former is the ghee oozing/melting in the mouth sweet with bengal gram flour and the latter is the wonder pudding with the goodness of almonds. Now, Thiripagam is somewhere between both. Kadalai Maavu or Bengal Gram Flour is the base ingredient with equal proportion of nei/clarified butter. Add the sugar and it would very well become mysore pak. This sweet has an additional inclusion of milk to the gram flour, that acts as an alternate to the almond milky flavor. These might be reasons for the resemblance of Badam Halwa and familiarity of Mysore Pak.

The pudding is shaped in rectangles or squares and wrapped in cookie sheet/butter paper. This is what aids in its elegant presentation with the distinct taste.

If made in a micro wave, this is certainly a 10 minute sweet to prepare. But since I don’t prefer micro wave cooking, I’ve done in the pan, which took about 30 minutes of stirring to reach the adequate kali/halwa consistency.

Thiripagam


471
Thiripagam, – which means three parts, where the name must have come from the three core ingredients – bengal gram flour, clarified butter and milk.


img_5177
Ingredients (makes 16 pieces)


330


  • kadalai maavu/bengal gram flour (besan) – 1 cup
  • nei/clarified butter (ghee) – 1 cup
  • paal/milk – 1 cup
  • cheeni/sugar – 3/4 cup
  • kungumapoo/saffron – generous strands


Though Amma mentioned the quantity of sugar could vary between 1 1/4 to 1 1/2 cups, I added only 3/4th of a cup. One can alter as per their sweet preference. Another alteration I made was the deduction of pachai karpooram/edible camphor. The flavor of the sweet comes from edible camphor, but I thought saffron could be a flavorful component to this exceptional sweet.


Method of Preparation

  1. Sieve kadalai maavu/bengal gram flour and keep ready
  2. Warm milk and mix the saffron strands
  3. In a bowl, mix the sieved flour, sugar, 1/2 cup clarified butter and milk with saffron – without lumps


341


4. Having the batter without lumps is very important – I used a fork to press the few lumps that was left over in the batter

345

5. Keep the other 1/2 cup clarified butter to add in the end when pudding is almost done

6. Mix well till all sugar is dissolved

7. Heat the batter in a non-stick pan and let it boil

8. Keep stirring and when it starts boiling, simmer the burner


347

9. The batter would reach a thicker consistency in about 30 minutes time in sim position


351
10. At this stage, pour the reserved 1/2 cup clarified butter and stir well


354

11. When the kali/halwa has become thick enough to be spread in a plate, switch off stove

12. Spread the halwa in a greased plate and cut into rectangular/square piece when warm

13. Take cookie sheets and cut into squares enough to fold the thiripagam pieces

14. Place the piece inside the cookie sheet and fold into beautiful squares


img_5177

15. Thiripagam is ready in its perfect presentation.


Pottukkadalai-Nilakkadalai Urundai/Roasted Channa-Groundnut Laddu

IMG_4377


Happy Diwali!

Any happy festival is made happier when it is made healthy too. With varied sweets and snacks to eat and greet, it is also important to include a few healthy sweets and snacks to reduce the damage already created by fatty intake of delicacies. After all the goodies have been stuffed and the digestive system has had over loaded duty to perform,  there is always the kashayam/poshion for stomach cleaning (dosaikal.com/deepavali kashayam), which is given as a damage control mechanism.

Yet, this is my contribution to a healthy sweet for the festival of lights, especially suitable for kids and due to the Clarified Butter/Ghee content- in limitations for adults too.

Pottukkadalai/Nilakkadalai Urundai/Roasted Channa-Groundnut Laddu (Sweet Ball)


IMG_4362

These Urundais/sweet balls are made in combination with roasted channa, peanuts and palm sugar all in powder form.  It is an easy to make sweet as well as high in nutritional value due to the protein rich chick pea and peanuts. White refined sugar has been avoided as they have only empty calories. Palm sugar which is rich in iron and other minerals is an added source of nutrition in the recipe. If powdered palm sugar is not available, cane jaggery syrup, palm jaggery syrup or unrefined cane sugar which is ‘Naattu Sarkkarai’ in Tamil can be used.

Pottukkadalai/Roasted Channa


dosaikal 12 061
Pottukkadalai is Roasted Channa, also called Chutney Dhal in the northern part of India. It gets this name as it is directly used to make chutneys/dips without the burden of frying/roasting the lentil at home. It is had as a simple teatime nibbler too in Tamilnadu. Combined with pieces of coconut and jaggery it can be a healthy munch suitable to curb hunger between meals.


  1. They are naturally fat-free, saturated fat-free, and sodium-free. Roasted chana helps lower your risk of heart disease and may reduce your risk of colon cancer.
  2. They help to keep blood sugar low as the carbohydrate present in them takes longer time to digest and hence it has a low GI which makes them a suitable snack for diabetics.
  3. Use them to add a protein boost to meals without introducing meat or unnecessary fat to the dish.
  4. Roasted chana contain 6 grams of dietary fiber, or 22 percent of the recommended daily requirement of 28 grams. Dietary fiber encourages regular bowel movements, prevents constipation and lessens the risk of heart disease.
  5. They are also a good source of calcium, potassium and magnesium.http://www.tarladalal.com/glossary-roasted-chana-1800i


Nilakkadalai/Peanuts


IMG_2774

Here are a few nutritional facts of groundnuts or peanuts-

  1. They are actually legumes but carry almost all the qualities of other popular edible kernels such as pistachio, almonds, etc.
  2. They compose sufficient levels of mono-unsaturated fatty acids (MUFA), especially oleic acid. MUFA helps lower LDL or “bad cholesterol” and increases HDL or “good cholesterol” level in the blood
  3. The kernels are an excellent source of vitamin E (a-tocopherol);
  4. The nuts are packed with many important B-complex groups of vitamins such as riboflavin, niacin, thiamin, pantothenic acid, vitamin B-6, and folates. 100 g of peanuts provide about 85% of RDI of niacin, which contribute to brain health and blood flow to brain.
  5. The nuts are rich source of minerals like copper, manganese, potassium, calcium, iron, magnesium, zinc, and selenium.
  6. Just a handful of peanuts per day provides enough recommended levels of phenolic anti-oxidants, minerals, vitamins, and protein.
    http://www.nutrition-and-you.com/peanuts.html


Pottukkadalai-Nilakkadalai Urundai/Roasted Channa-Peanut Laddu/Sweet Balls


IMG_4352


Ingredients (makes appr. 20-22 urundais)


IMG_2768


  • pottukkadalai/roasted channa – 1 1/2 cup
  • nilakkadalai/peanut – 1 1/2 cup
  • palm sugar (powder) – 1 1/2 cup
  • elakkai/cardamom powder – 1 tsp
  • chukku podi/dry ginger powder – 1 tsp
  • nei/clarified butter – appr. 1/4 cup


Method of Preparation

  1. Dry roast- roasted channa and powder it in a blender
  2. Dry roast peanuts, remove skin and powder it in a blender
  3. Take a wide bowl and place all the dry powders – channa powder, peanut powder, palm sugar powder, cardamom powder and dry ginger powder and mix well
  4. Heat clarified butter in a small pan and pour on top of the powder mix.
  5. Make lemon sized balls and they are ready to enjoy.


IMG_4379

Note:

  1. Be mindful of the roasted channa. Normal raw bengal gram is not the one to be used here. Go for the roasted gram available in south-indian groceries.
  2. Palm sugar can be substituted with ‘Naatu Sarkkarai’ which is unrefined cane sugar, easily available in local stores in tamilnadu.
  3. Another substitute can be jaggery syrup or palm jaggery syrup. In that case, usage of clarified butter can be reduced as the syrups act as binding agents themselves. A little touch of ghee should be enough.


Pathirpeni/Sugary Snow White Crisps


IMG_3397

Pathirpeni is a very special sweet to me and to my brother! It was and is still a speciality signature sweet of Aachi  my paternal grandmother. I do not remember having pathirpeni in any other house in the big clan that we belong to. The sole supplier to all near and dear ones was Aachi – helped meticulously by Amma – my mother.

I had my miniature ‘Puri kattai’ or the spherical puri maker in wood to specially make pathirpeni and also puris. This was handed over to my daughter who used to help me make rotis, but feels she is a grown up and uses my bigger puri kattai. She painted my dear little puri kattai though the newer roller is intact.


IMG_3744

Pathirpeni is for those with that extra sweet tooth – which might be god sent genetically or amma fed affectionately… We siblings have both – hence not one but two extras to successfully acquire that ‘happier the healthier’ plump look!

These are deep-fried crisps dipped/rubbed immediately in powdered sugar to get the snowy white finish. It is a simple sweet with minimal ingredients but one should be ready for some interesting variety of work. The sugar that melts in the mouth first is followed by the crispy crunch of the deep-fried discs.

These also involve an efficient team work. Since the count was always in hundreds, amma or aachi would knead the dough; they would take turns in pressing the spheres and frying in oil – the last quintessential part of rubbing the powdered sugar would be ours – mine and my brother… I think I did the rubbing and he contributed more into something which can also be decently termed as tasting!

So I did the rolling and frying and my 6-year-old did the sugar-coating! She wanted to make her own pathirpeni and then I was a proud mother!!


she started off like this….

IMG_3725


and then graduated with flying colours!! – special seven that the little hands made!

IMG_3722

These can be stored in air tight containers after cooled for a week – that’s not a concern as its life ends too quickly! Yet the tastiest crisps are those which directly come out of the oil and are delicately transferred for one’s taste buds to relish, sprinkled/rubbed very quickly with powdered sugar.

One cup of flour (about 150 gms), would yield 20-25 crisps. After a no maida/all-purpose flour and no white sugar life for many years now, this one has been an exception. Might be I try next time with whole wheat flour and brown sugar – but have to sacrifice on the colour as wheat flour would result in brown crisps and then we might call it brownie crisps!

Now to the recipe –
Pathirpeni/Sugary Snow White Crisps


IMG_3385

Ingredients (makes 30-35)


IMG_3426


  • maida maavu/all-purpose flour – 1 1/4 cup (200 gms)
  • cheeni/sugar – 1 1/4 cup (200 gms)
  • thanneer/water – as needed
  • uppu/salt – a pinch
  • nei/clarified butter – 1 tsp
  • arisi maavu/rice powder – 1 tsp
  • yennai/oil – for deep frying

Method of Preparation
1. Sieve all-purpose flour, add a pinch of salt and mix enough water to make a tight dough


IMG_3670

2. Finely powder the sugar and keep in a wide bowl or plate; the deep fried crisps would directly land inside this bowl to have a sugar bath
3. Heat oil in a pan, keep in sim position
4. In a small bowl, mix clarified butter and rice powder
IMG_3673
5. Make three even balls of the dough


IMG_3681

6. Spread into flat breads – chappatis/indian roti size – not too thin, not too thick


IMG_3683

7. Do not place rotis one on top of the other before spreading the mixture as they would stick to each other and one would have to make the three flat breads again. Make one and place on a plate; spread the butter rice powder mixture, make the second one and place on top of the first; spread the mixture and make the third; now place the third on top of the second. It had become messy as I had placed before spreading – I had to do it all over again. So be cautious on this


IMG_3684

8. Roll this triple layered roti . Now it is time to pull the rolled roti as long as possible without spoiling or breaking the texture


IMG_3685


pulled long

IMG_3687

9. Then cut into very small bits, size enough to make small circular crisps

these are little big, i had to make them smaller

IMG_3694

10. Roll into thin crisps – while rolling, see the side which was cut by knife – make thin puris/crisps pressing the knife cut edge into a circle. This helps the butter mixture to stay intact. Otherwise it would ooze out from the puris.


IMG_3688

11. When the oil is ready, roll one by one and fry till crisp. We do not want a fluffy soft puri – make really thin and flat ones that come out crisp
12. Immediately drop it inside the sugar bed and apply well; the powdered sugar must have coated evenly


IMG_3692

13. Tap the crisps slightly to reduce the excess sugar
14. Taste one to enjoy the true taste of pathirpeni – this is the most important step in my opinion; having identified the flaws (making thinner or thicker; right shape; less sugar coating; more sugar coating and so on), proceed with the next
15. Make all the crisps and let them cool
16. Store in an air tight container and enjoy.
17. Do not hesitate to help yourself with more – you won’t get those hot crisps after they are cooled – cannot be microwaved or reheated by any means!
Note:

  1. This is a simple one – yet, some caution on important steps would make it easier
  2. Try one and feel the crispness of it and accordingly try to make corrections on the thinness and crispness of the pathirpeni
  3. Each time, tap a little to take away the sugar if one doesn’t prefer so much sugar
  4. Adding cardamom powder to the powdered sugar might add some aroma and flavor though it is not added normally.


IMG_3367


Ukkarai/Okkarai – Lentil Halwa for Diwali


IMG_2921


The festival of lights is back again! No need for long paragraphs saying Diwali brings in joy and happiness and teaches the traditional values to the younger generation….. Whatever said and done, not said and not done – Diwali or Deepavali in Tamil, brings in loads of sweets and tonnes of savouries – to relish and eat and ofcourse over eat!

So, let’s plunge into some special sweets and savouries one after the other in the coming week. Today it is Okkarai or Ukkarai – a Halwa with two/three lentils and jaggery.

Some make it with all the three basic lentils of an Indian kitchen – red lentil, dehusked green gram and bengal gram or a combination of two of these or just bengal gram. Though amma does not make okkarai, I was re-introduced to this exquisite sweet by my friend Lakshmi in Chennai. When my daughter was very small and we lived in the same locality as theirs, we used to be treated with Okkarai very often and it became one of my daughter’s favourites. The beautiful brown colour, the aroma of clarified butter with the fried nuts added and the flavour of lentils mixed jaggery is just exotic with no words to explain.

Lakshmi, I never knew the effort that was involved in Okkarai until I made it now. So, it is a rekindled, more respectful thanks for the strain you put yourself to!
Recipe adopted from-

In Rajasthani cuisine, Moong Dhal Halwa occupies a special place. To me, it is one of best desserts of Indian Cuisine. I should confess, anyone can swap their home made moong dhal halwa/dehusked green gram halwa – rajasthani style – with the best of my pattu/silk sarees (or my husband’s favourite suits)!!
Okkarai/Ukkarai – Lentil Halwa


IMG_3051

Ingredients (serves 4)

  • kadalai paruppu/bengal gram – 1/2 cup
  • paasi paruppu/dehusked green gram – 1/2 cup
  • thuruviya thengai/grated coconut – 1/2 cup
  • vellam/jaggery – 3/4 cup
  • elakkai podi/cardamom powder – 1/2 tsp
  • nei/clarified butter – 1/2 cup
  • mundhiri paruppu/cashew nuts – 4tsp
  • ular thiratchai/raisins – 4tsp


Method of Preparation

  1. Dry roast kadalai paruppu and paasi paruppu till golden brown
  2. Wash and soak for two hours
  3. Grind into a coarse paste with no water – the same as dry grinding but the lentils are wet as they were soaked – but no water please
  4. Make small balls and flat discs and steam in a greased tray/mould for about 15 minutes
  5. Dry grind the balls again for an even end product of halwa without lumps
  6. Keep aside the lentil powder
  7. Grate the coconut and keep aside
  8. Heat a little clarified butter in a pan and fry the cut cashewnuts and raisins and keep aside
  9. In a pan slightly heat jaggery in little water until jaggery dissolves completely
  10. Strain it well and place in low heat for a thick syrup  – Even if the syrup is not too sticky like a single string consistence, do not bother. There is enough time while the jaggery gets mixed with lentil powder- but just be careful not to get it burnt
  11. In the same pan, when the jaggery is ready, add the lentil powder to it and start stirring well
  12. Heat the clarified butter into a pourable consistency and add to the jaggery, lentil mixture while getting cooked. This helps the mixture from sticking to the bottom of the pan
  13. Add the fried cashews and raisins
  14. Stir well till jaggery is completely absorbed by the lentils and a smooth halwa consistency is arrived
  15. In the end add the grated coconut and mix well till the raw smell and juiciness of coconut is gone
  16. Tastes best when served hot.


roast the lentils together

IMG_3209


after soaking, grind and steam the mixture

IMG_3211


then, dry blend to avoid lumps

IMG_3214


mix well with fried nuts and grated coconut

IMG_3234


Notes:

  1. Quantity of jaggery depends on each family
  2. As mentioned above, addition of red lentils is another option
  3. I used banana leaves to steam the lentil mixture for some extra aroma
  4. Add the lentil powder to syrup jaggery or pour in the jaggery syrup into the pan of lentil powder – either way the halwa would come out the same
  5. Quantity of nei/clarified butter can be altered. I love nei in my sweets – hence this quantity. If one prefers lesser clarified butter  -feel free to reduce it. The texture of ukkarai would be slightly powdery – like Puttu (steamed rice cylinders) and hence, okkarai is also called ‘Paruppu Puttu’, I learnt it now.


IMG_2941