Tag Archives: biriyani

‘SIGNATURE’ by Sanjeev Kapoor – The Biriyani Workshop

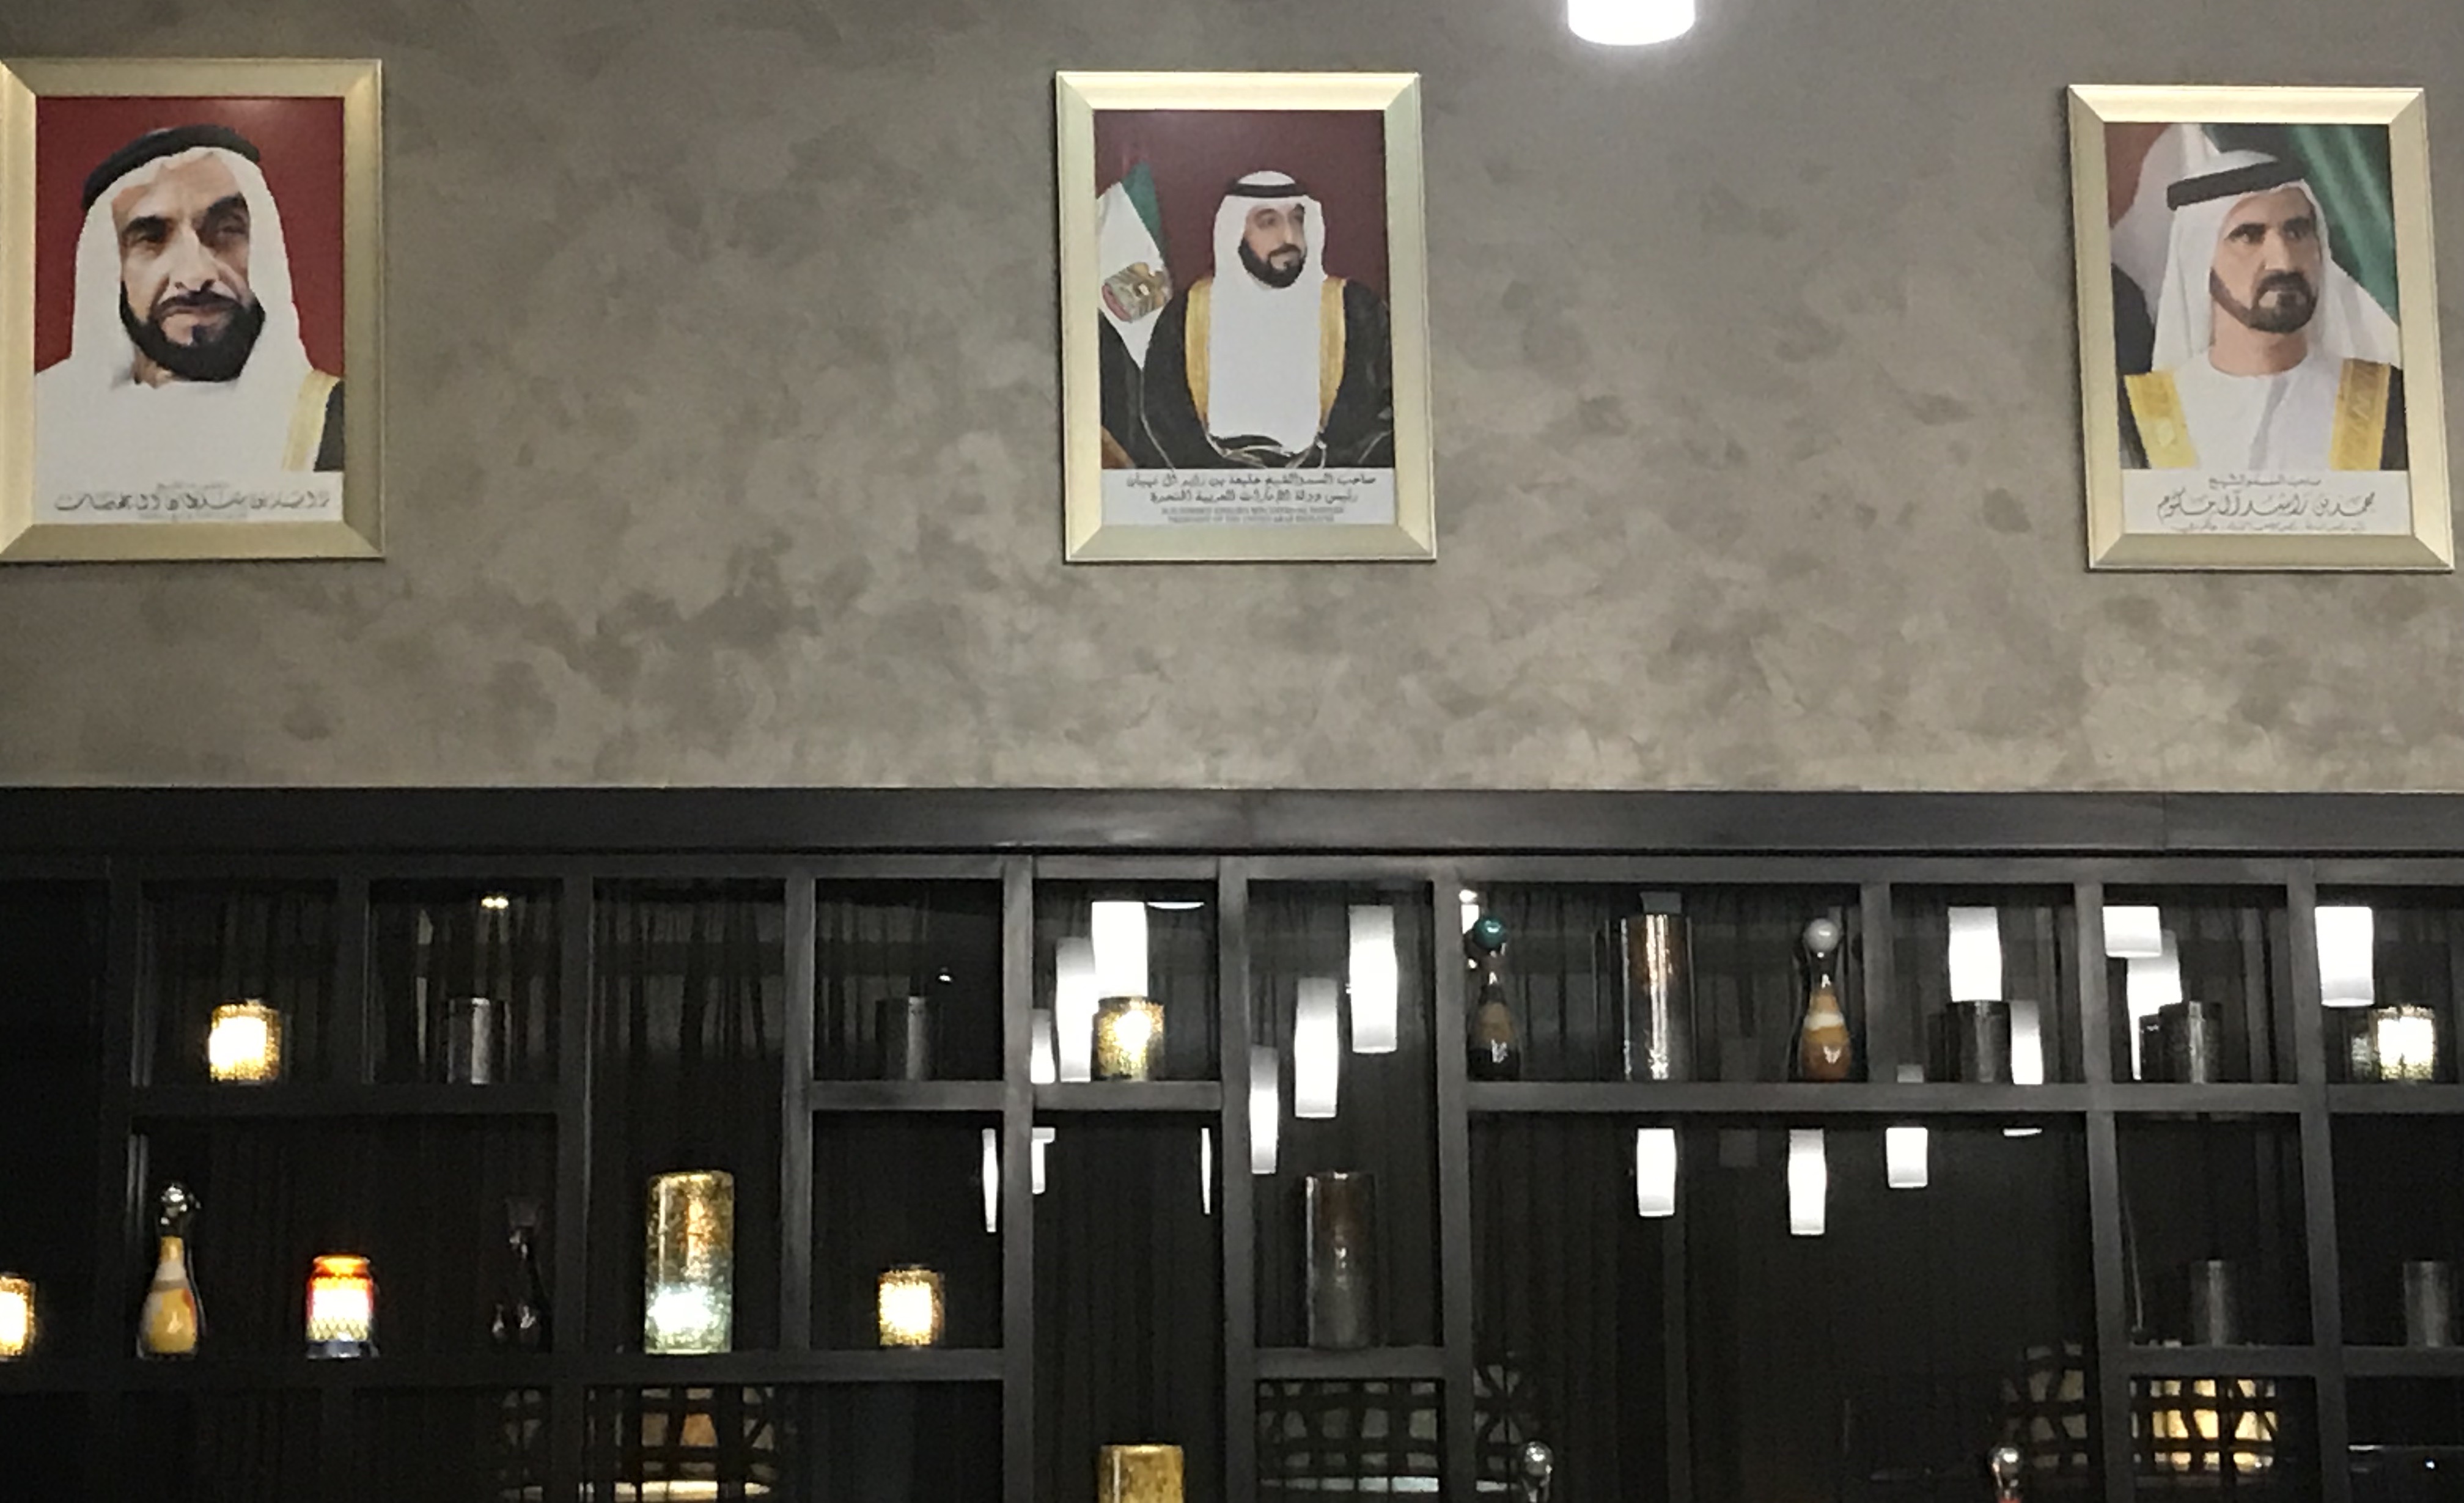
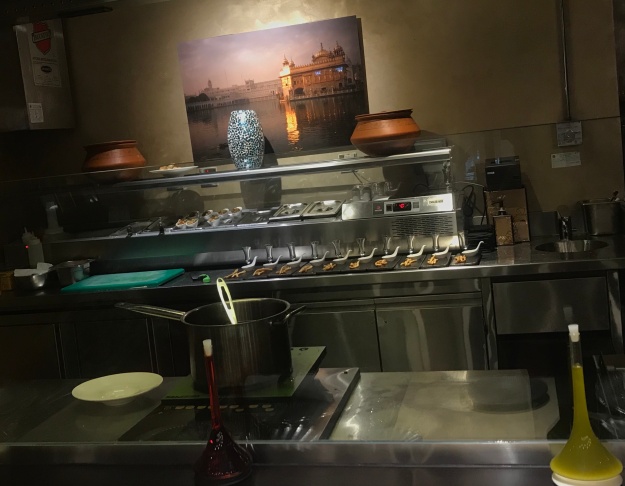
Recently, I had this wonderful opportunity, to visit the Kitchen of the fine dining restaurant – ‘Signature by Sanjeev Kapoor’ in Abu Dhabi. A very big Thanks to friends, who made this happen.

The restaurant stands in a prime location, in Nation Towers, overlooking the Corniche. The restaurant prominently showcases modern and contemporary interiors. Yet, the elegance of Indian cultural elements are not to be missed. The menu here, boasts of traditional dishes served with a twist.

Disclaimer: This post is not a review on the restaurant. I was not invited to write about the cuisine or the restaurant.

It is my own personal interest, to learn new things, from speciality chefs that has led to this post. It is hard to find restauranteurs, who are open-minded to share their recipes and kitchen. Especially, allowing a blogger like me, who doesn’t even have an account in any social networking arena, certainly isn’t a normal trend in either today’s restaurant business or blogging field . That is why, I need to extend my warmest gratitude to the owners of the restaurant, to have given me the opportunity to learn the dishes and also share them with my readers.

Signature By Sanjeev Kapoor, is a well known chain of restaurants in Abu Dhabi, Dubai and Doha. The restaurant serves signature dishes of Mr. Sanjeev Kapoor, well acclaimed Celebrity Chef of the Indian Subcontinent. He can easily be hailed as, one of the first very few Chefs in India, to have popularised the Job of a Culinary Artist, if I can say so, to the most respectful status it enjoys today. Due to such devoted as well as media friendly/articulate Chefs like Mr. Kapoor, the profession has acquired a Cult Status today. This in turn, has motivated a big chunk of the younger generation, to join the crew of Chefs, in a dream to become Sanjeev Kapoors of their Restaurants. And millions of home cooks like me, also feel the aura of a Chef’s Cap, when a dish is cooked to perfection.

All said and done, the struggle of a chef to reach the desired heights is enormous. Especially, to reach the Pinnacle of one’s career, is not a mean feat. And Mr. Sanjeev Kapoor, continues to be the Super Speciality Chef, even after years of attaining the Apex status of the most popular Chef of Modern India.

One of the few first cookery books, I bought to keep on the coffee table at home, were three books of Mr. Sanjeev Kapoor. While we live away from our homeland, I feel authentic culinary experts like Mr. Kapoor are the Best Brand Ambassadors, who represent Indian Cuisine abroad.

I thoroughly made use of the opportunity, to learn two of everyone’s favourite dishes, Biriyani and Kabab. The recipe of these two, among many more, makes me feel truly inquisitive about the several processes of preparation.

Among the Biriyanis, the Chef demonstrated –

  1. Chicken Biriyani
  2. Easy Mutton Biriyani, with left over Mutton curry

The Executive Chef at ‘Signature By Sanjeev Kapoor’, was very patient, to explain the step by step processes of the making of Biriyani . After his demonstration, the recipe now looks very simple. A very big Thanks to him.

First to grab on, is the Chicken Biriyani.

Now, to the recipe-

Chicken Biriyani (serves 3-4)

Since it was a demonstration, the right quantities of chicken and rice are only given. Other quantities are approximate values. As told by Chef, It is a usual norm to use 1/2 kg chicken for 1/2 kg of rice.

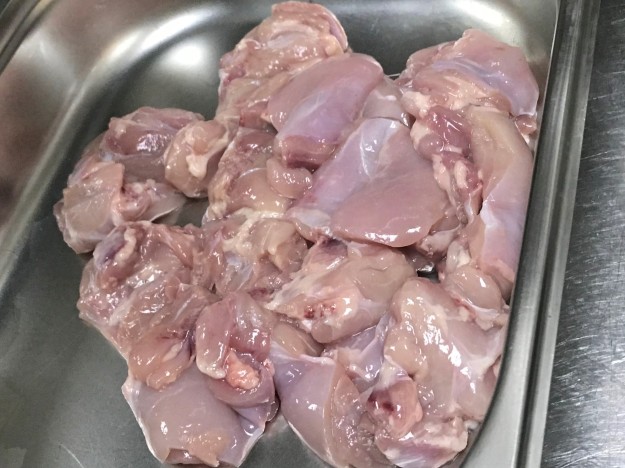
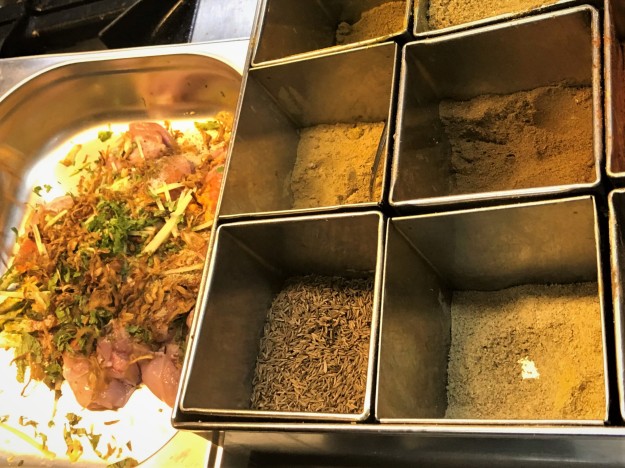
Marinating the Chicken

  1. Half a kilo of cleaned chicken pieces

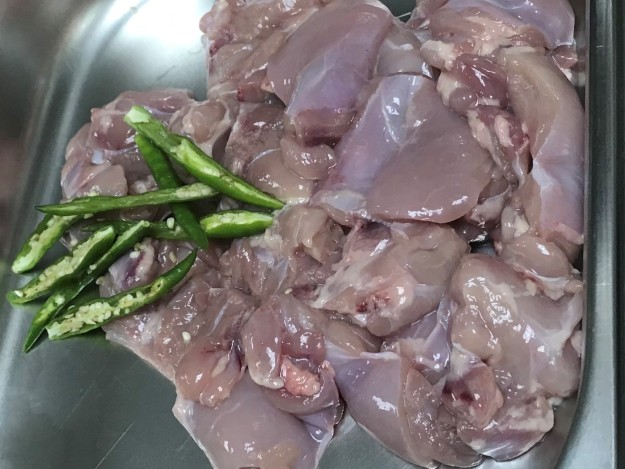
2. Add 4 slit green chillies and 3 tsp ginger garlic paste

3. Add turmeric, chilli, cardamom, pepper powders and salt to the chicken

powders

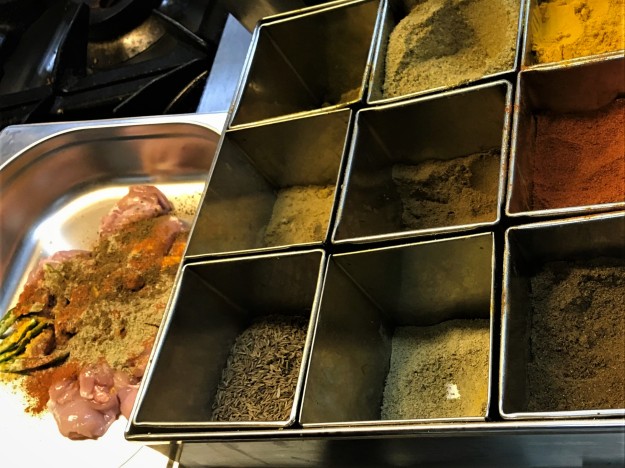
4. Add ginger juliennes, ghee, crispy fried (browned) onions and coriander leaves

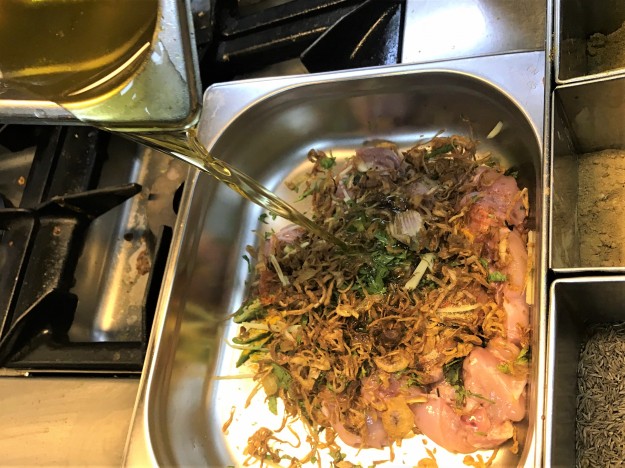
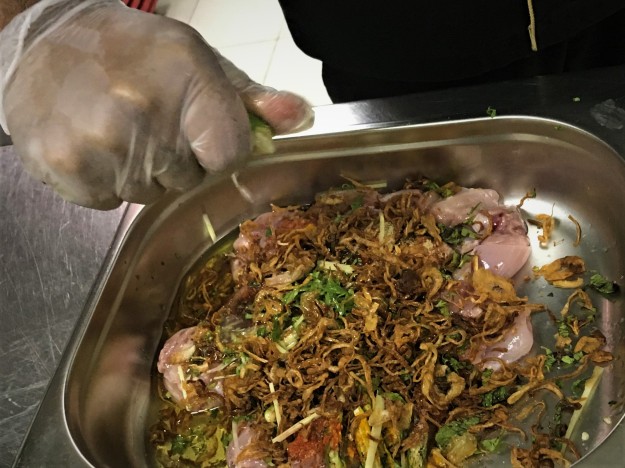
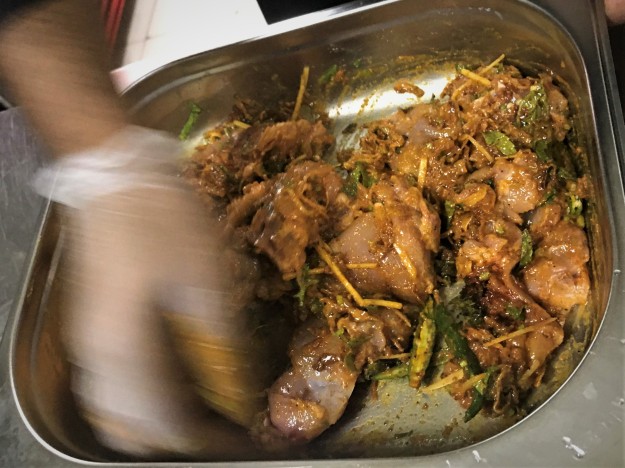
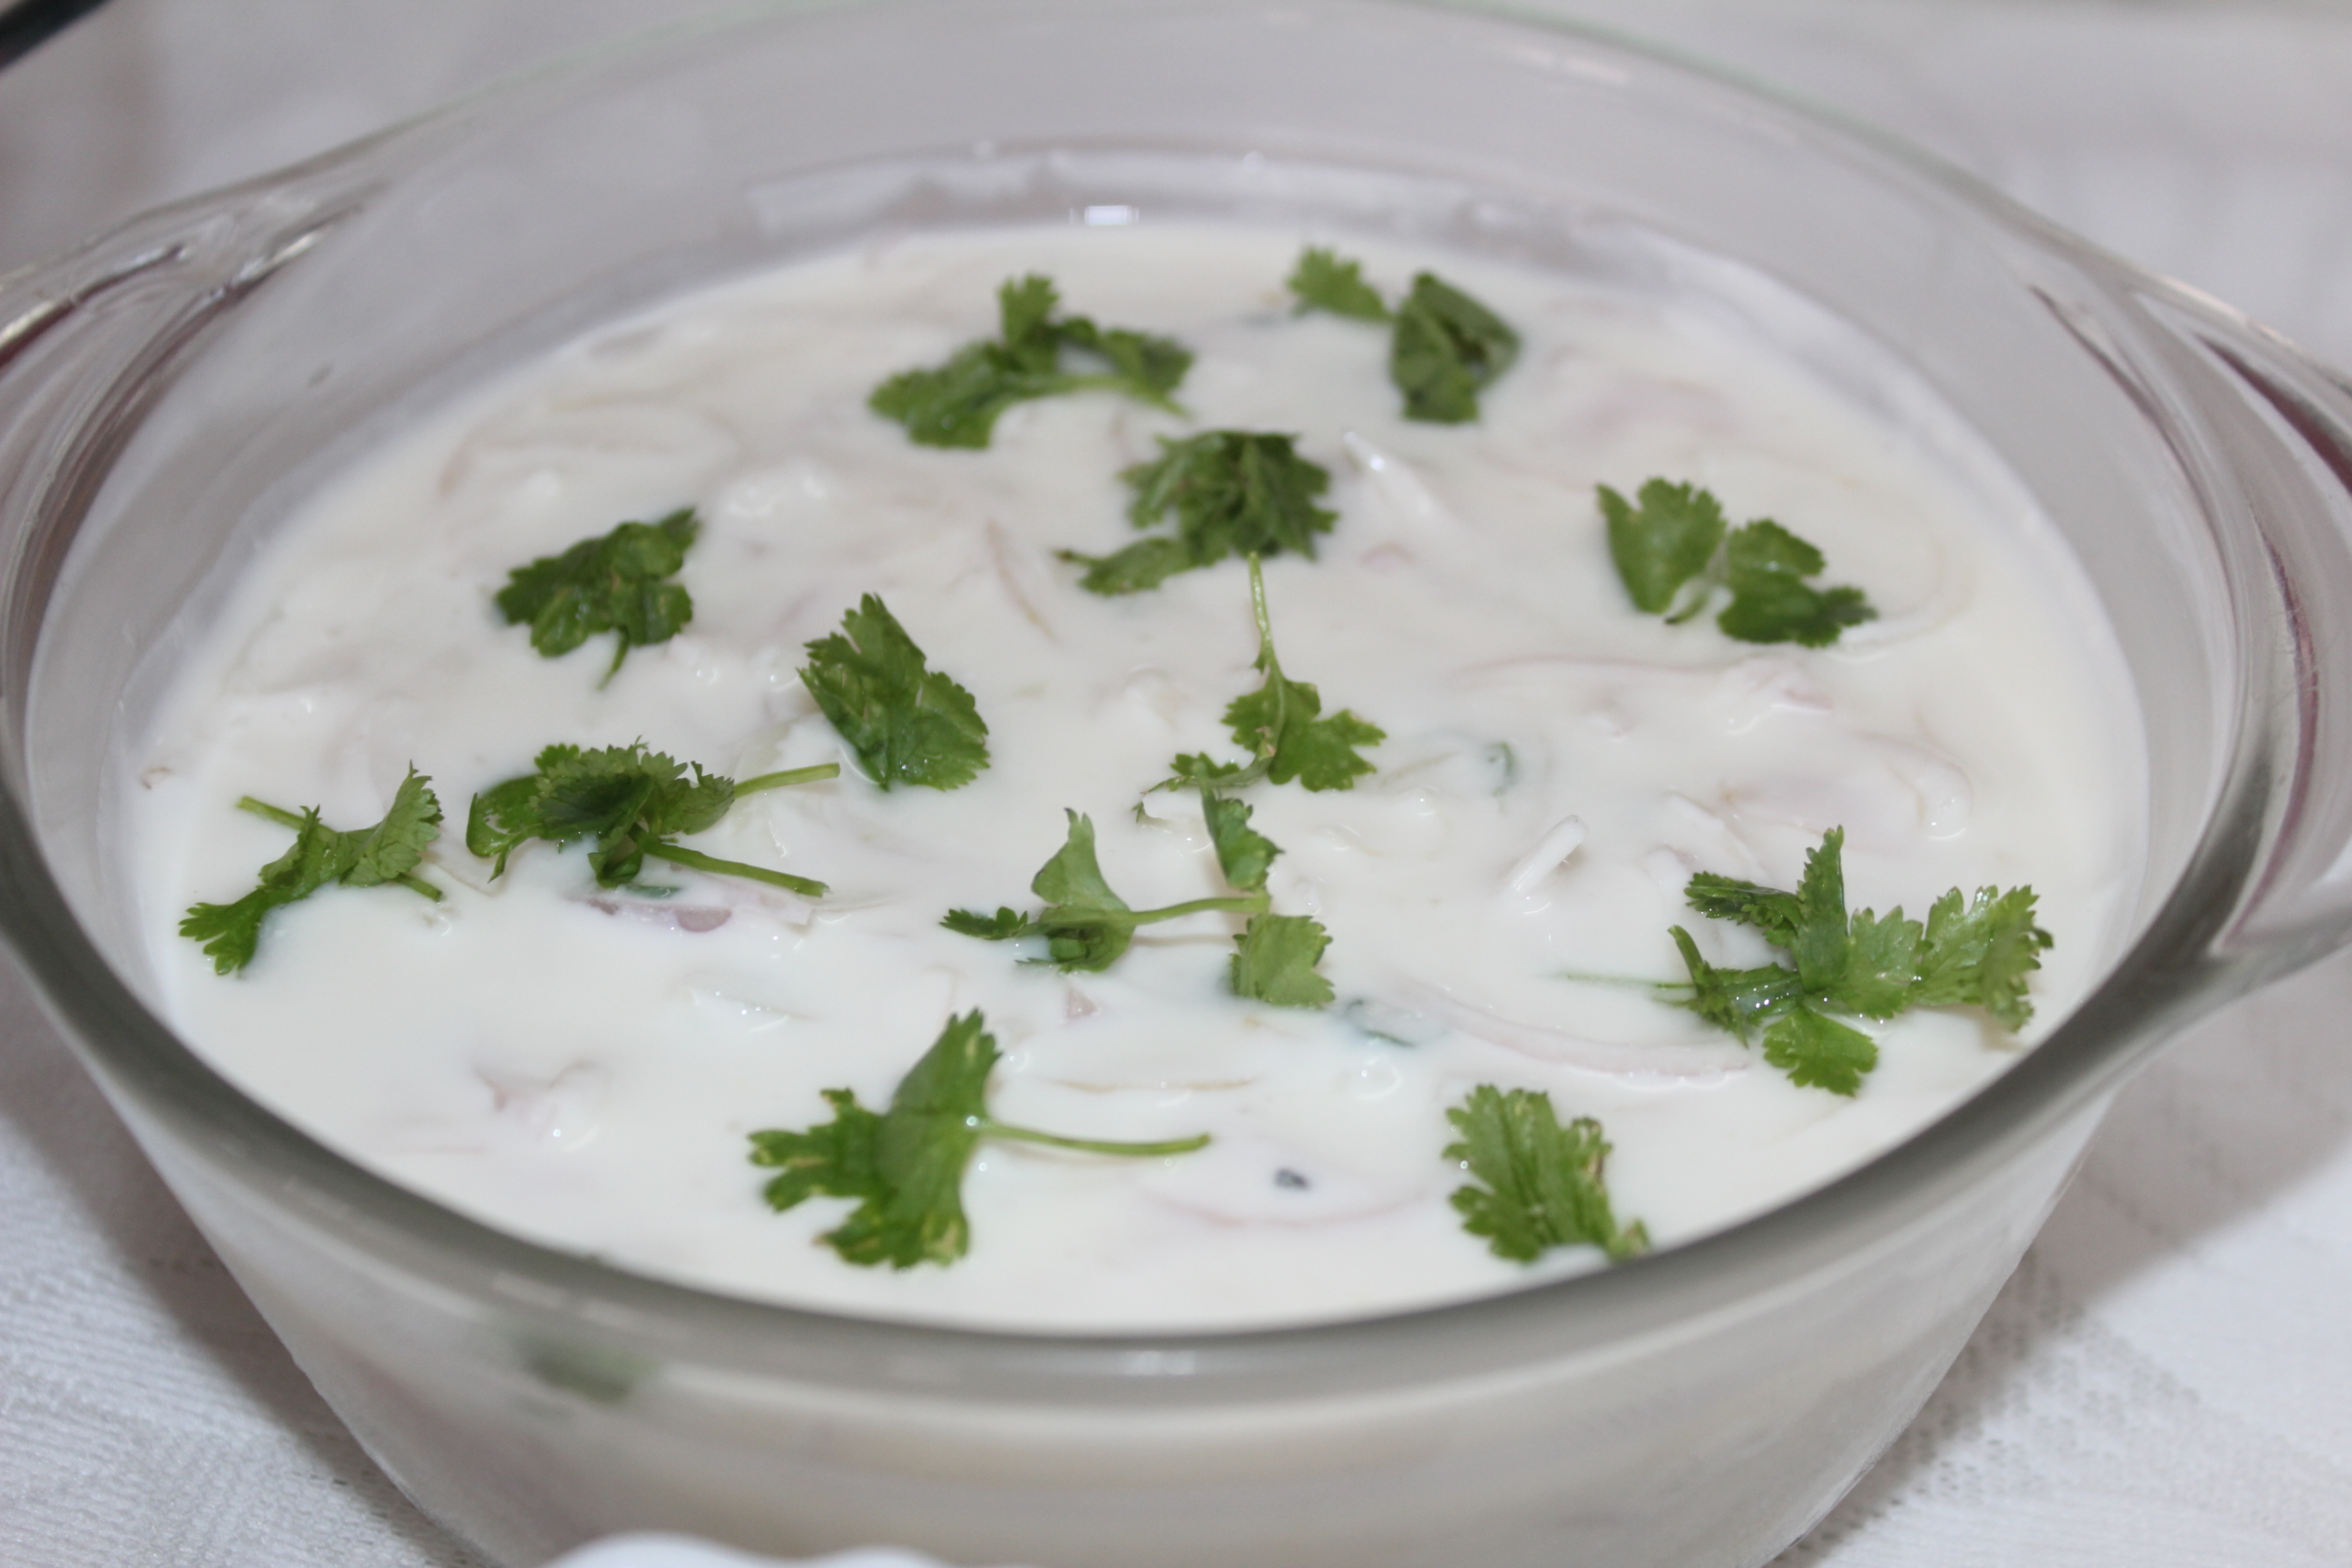
5. Add yoghurt and mix well

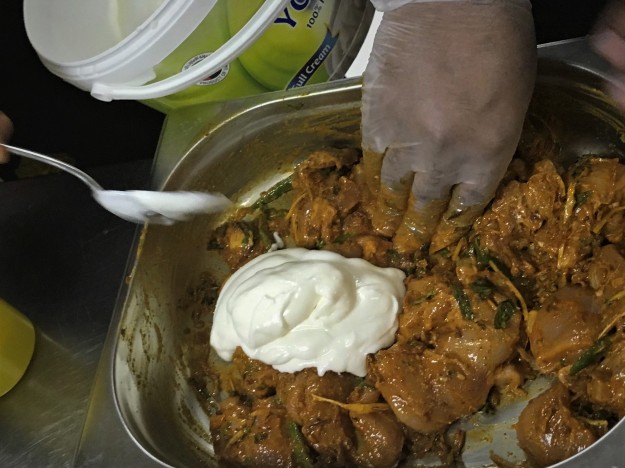
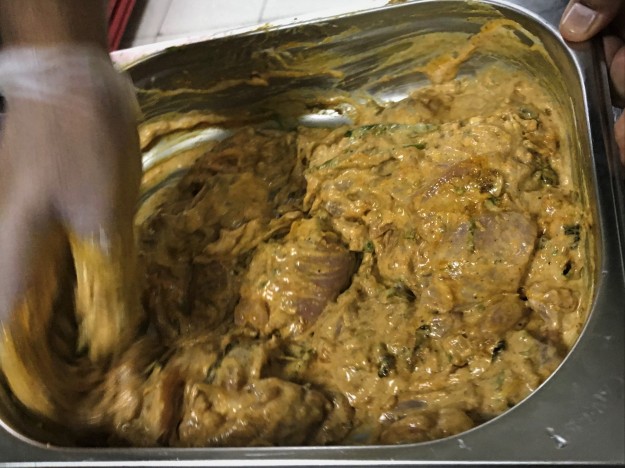
6. Let this chicken and added ingredients marinate overnight in the refrigerator.

Making Biriyani

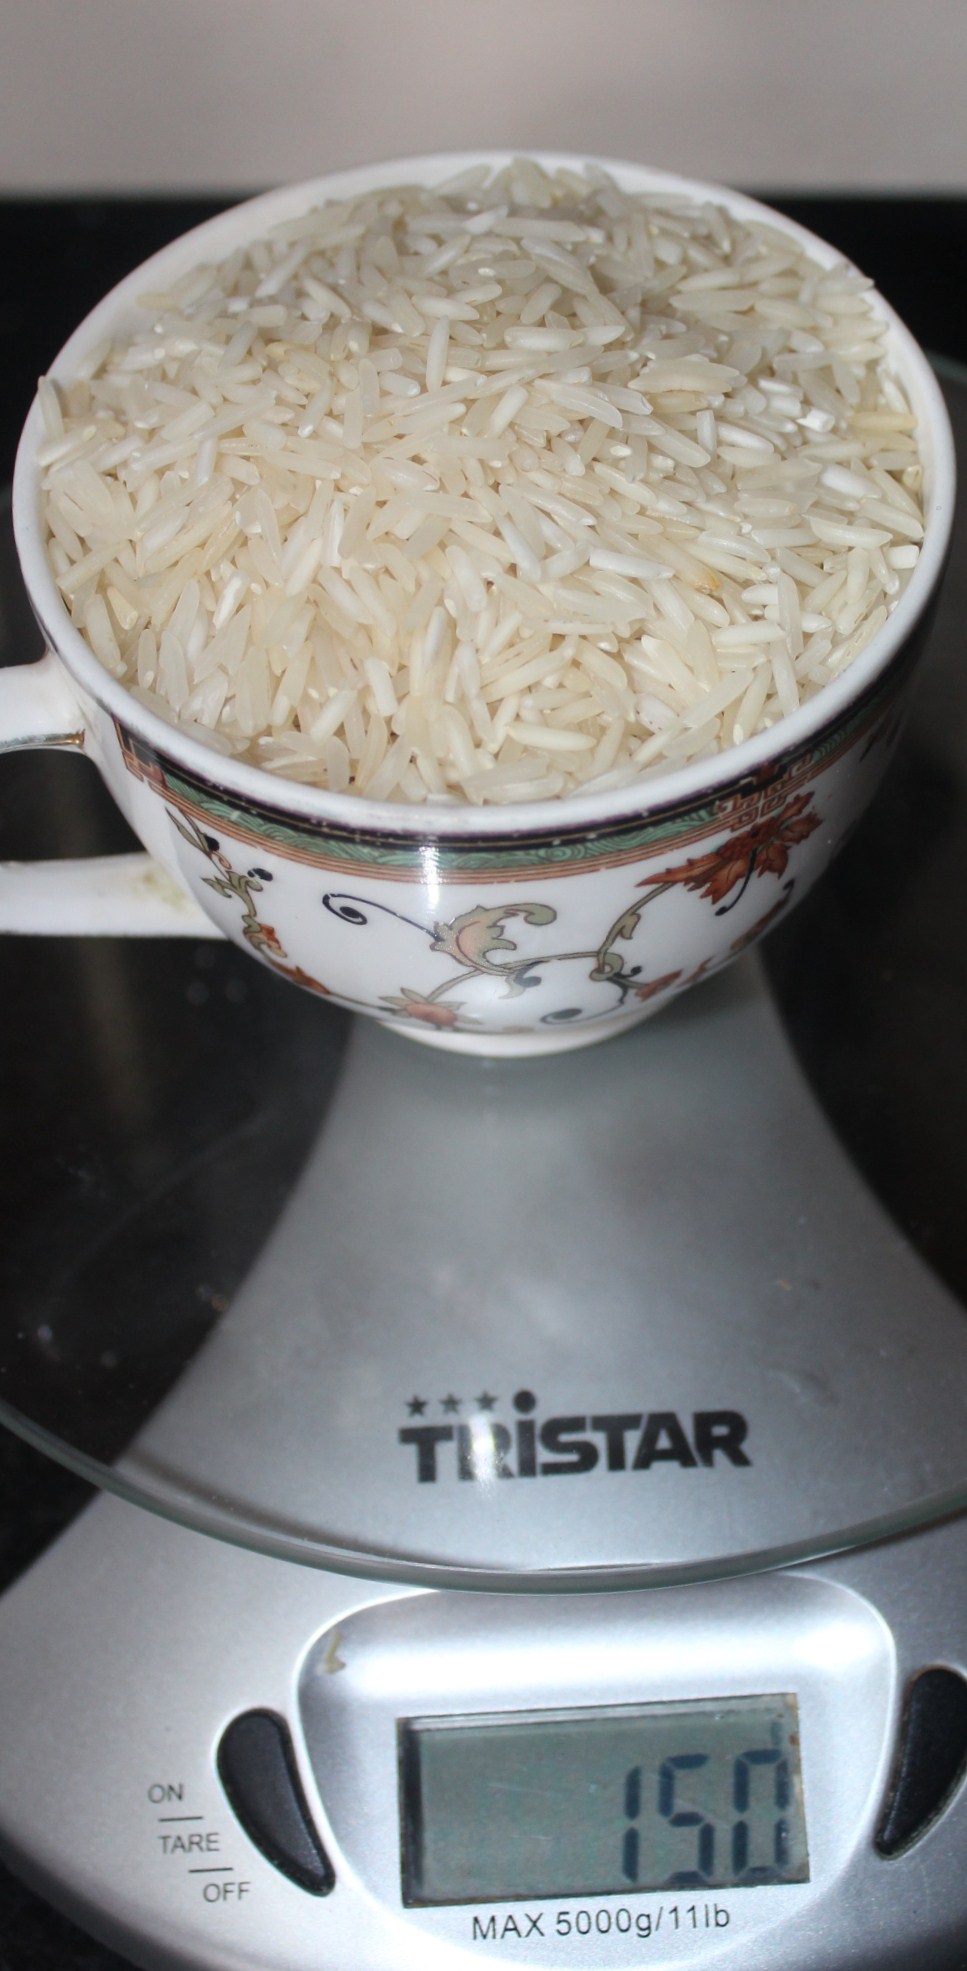
  1. Wash and soak rice in water, atleast half an hour prior to boiling water.

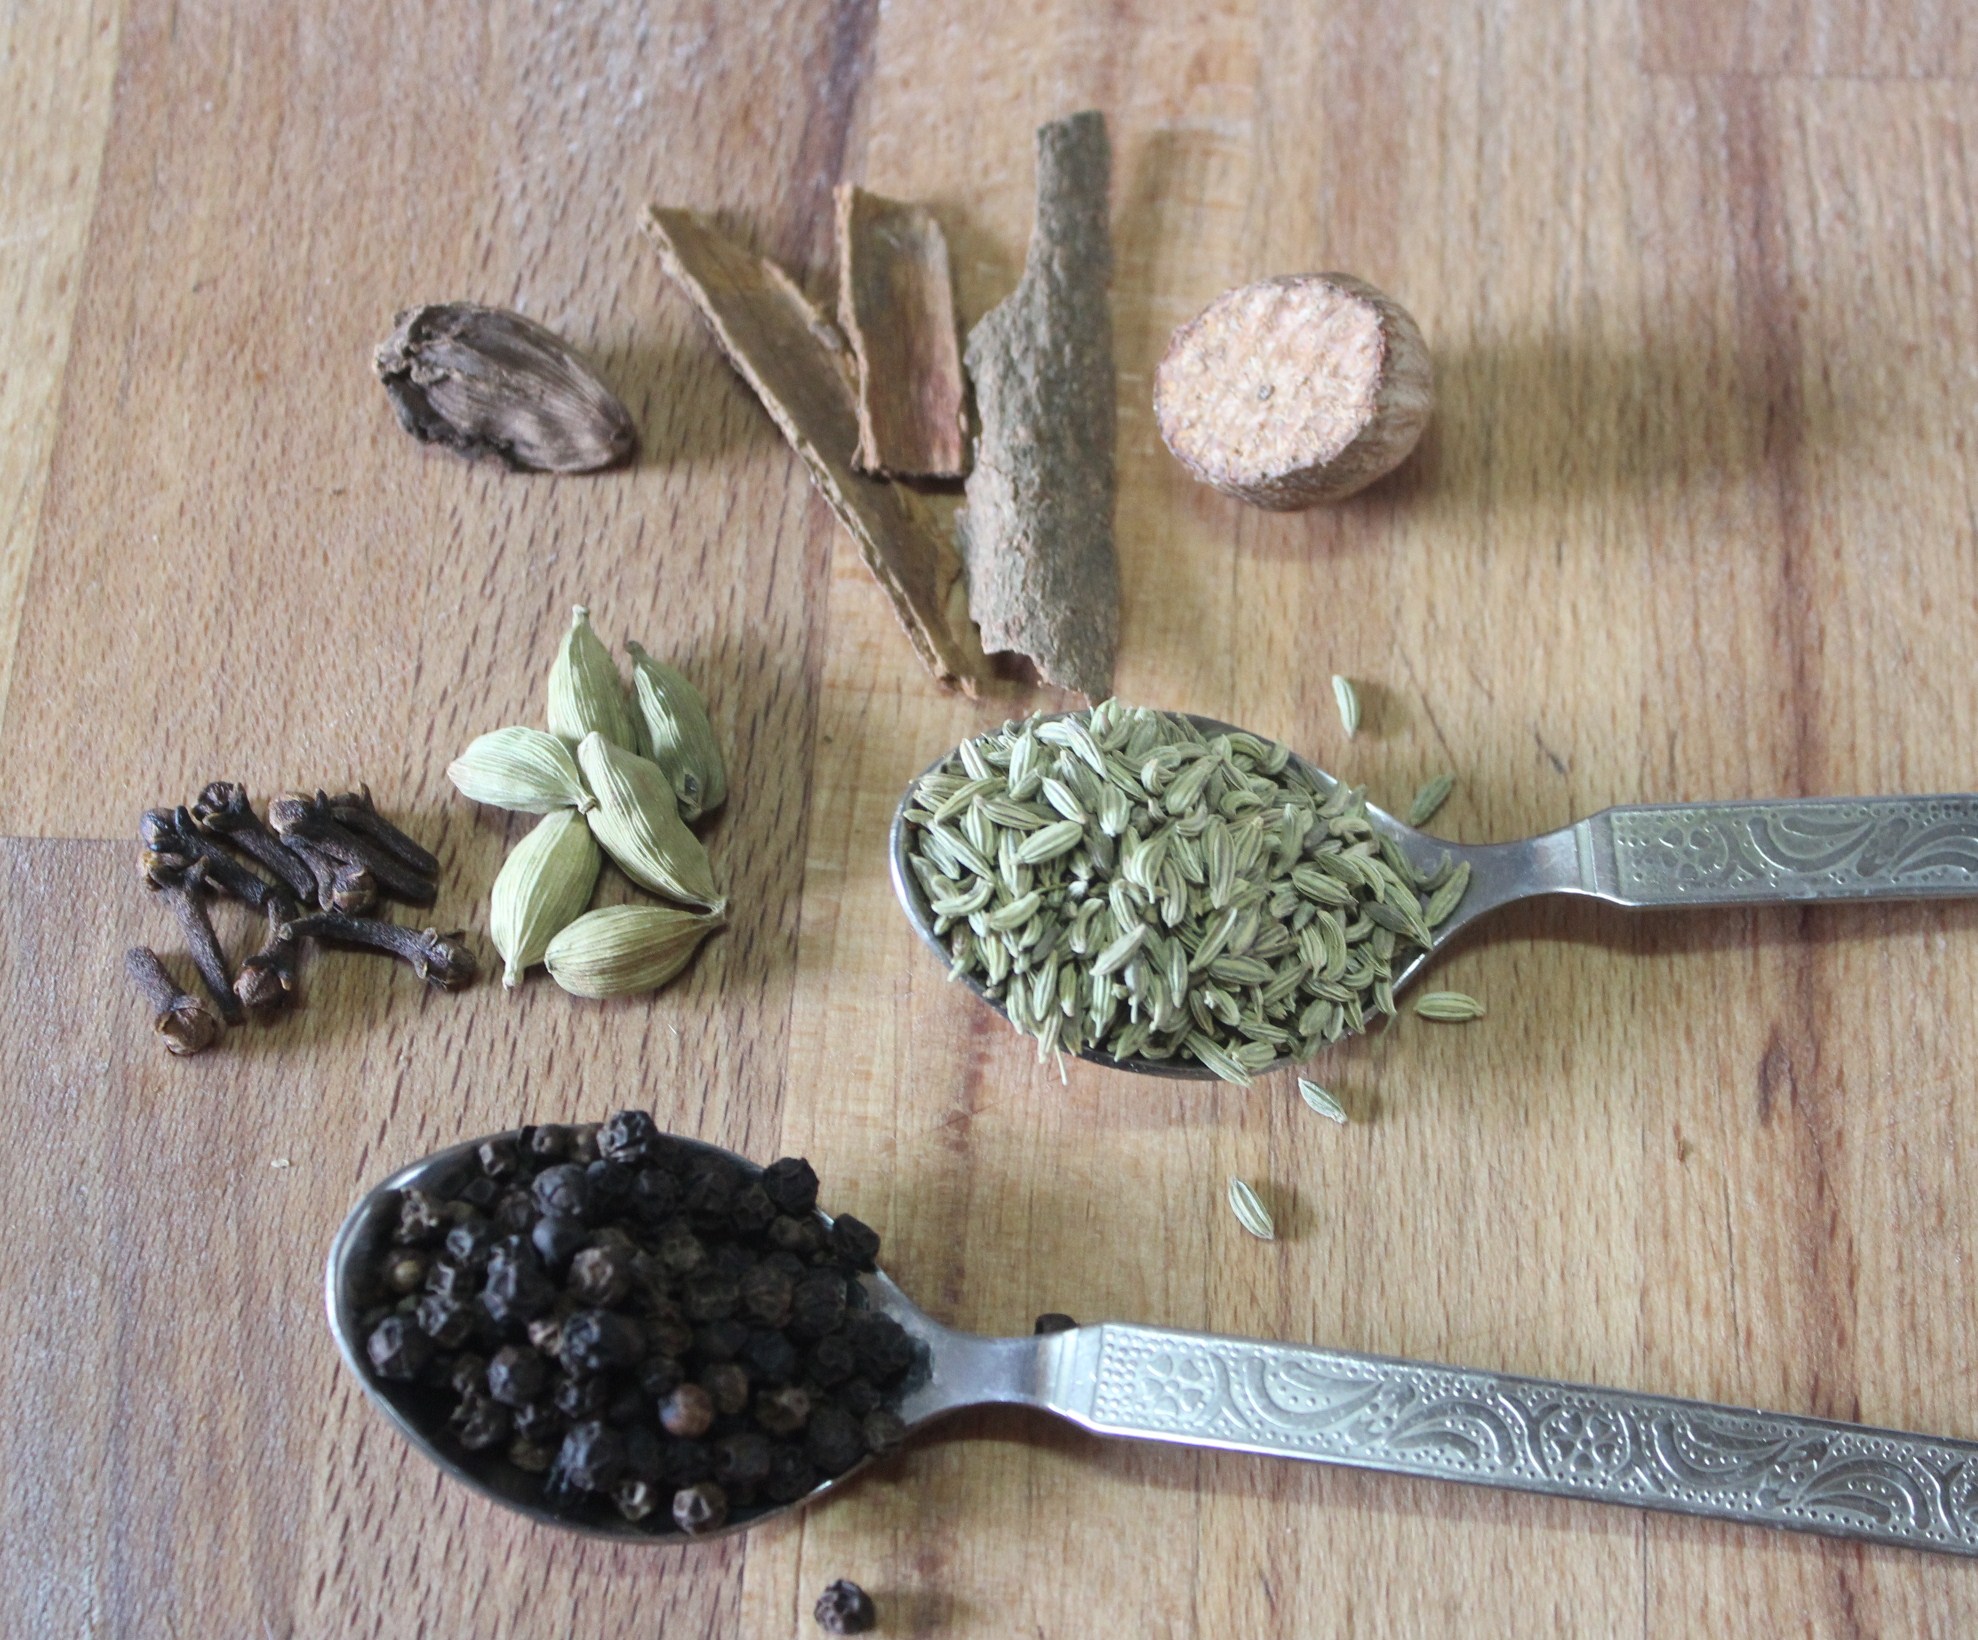
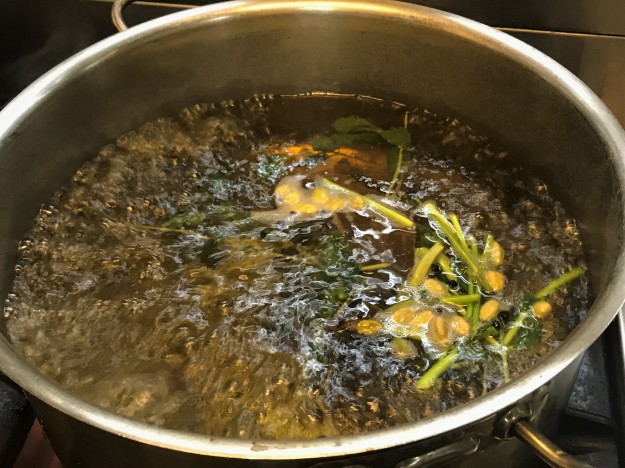
2. Boil water in a wide pot or pan, that is big enough to cook rice and throw away excess water. Add dry spices and other ingredients listed below. Let the water boil with the spices for about 8-10 minutes.

  1. cardamom
  2. cinnamon
  3. bay leaves
  4. cloves
  5. black pepper
  6. fennel seeds
  7. ginger julienne
  8. mint leaves
  9. coriander leaves
  10. green chillies
  11. oil
  12. salt

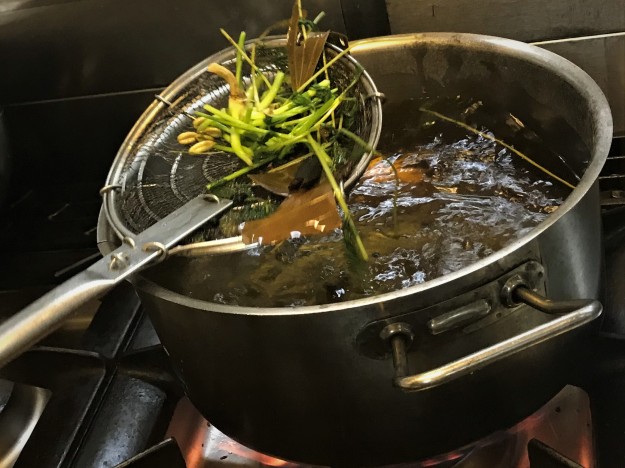
3. Remove the spices from water.

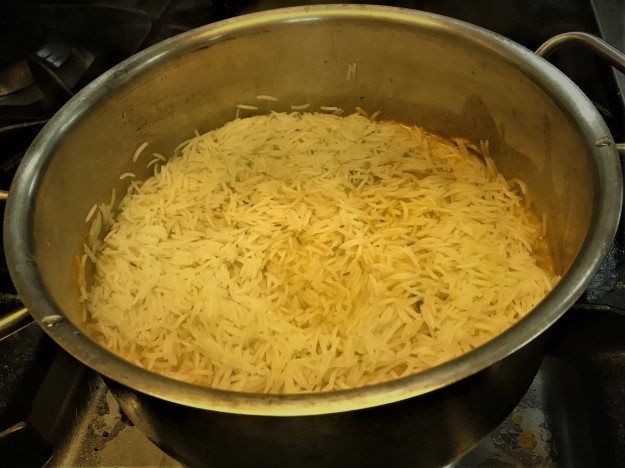
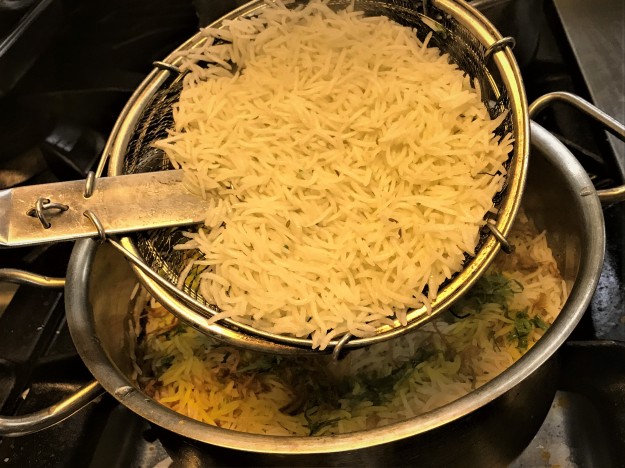
4. Drop the soaked rice in the boiling water and let it cook.

5. Choose a good hard bottomed pan. The quality of the pan would facilitate in making a successful final product, which doesn’t stick to the bottom of the vessel.

6. Add the marinated chicken to the pan.

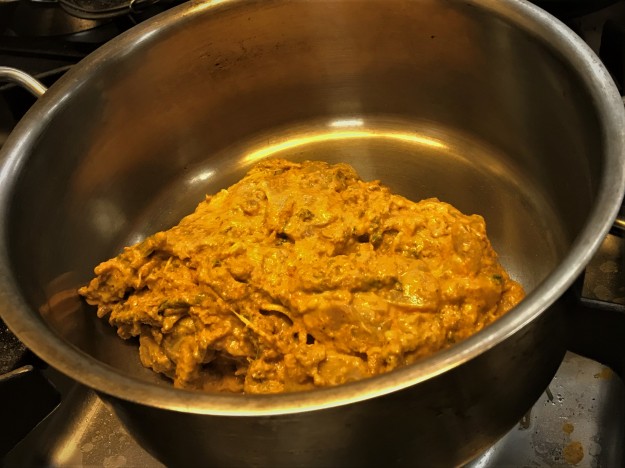
7. Two pans, one with rice and the other with marinated chicken, are kept alongside each other, both getting cooked simultaneously .

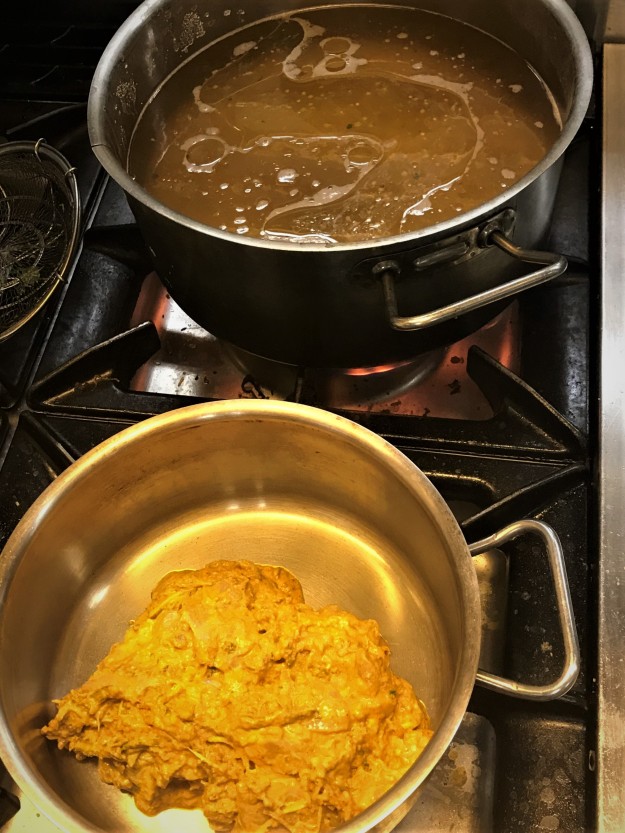
8. After a while, they look like this…

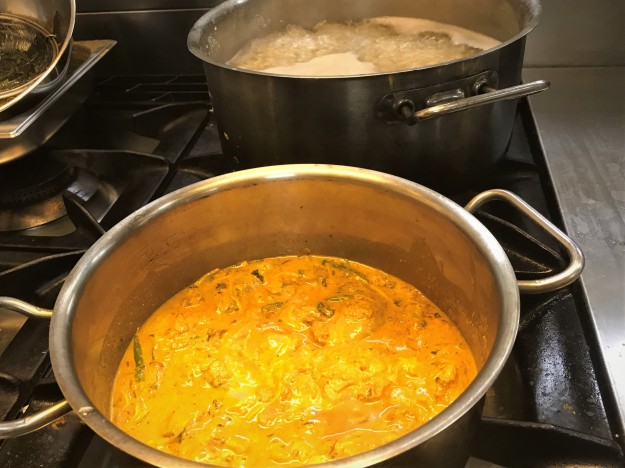
9. The chicken now, is half cooked. And the rice is also half cooked. It is time to give the first layer to the chicken curry. The stove is always kept in medium to sim position. Once we start keeping the layers, the flame should be in sim position only.

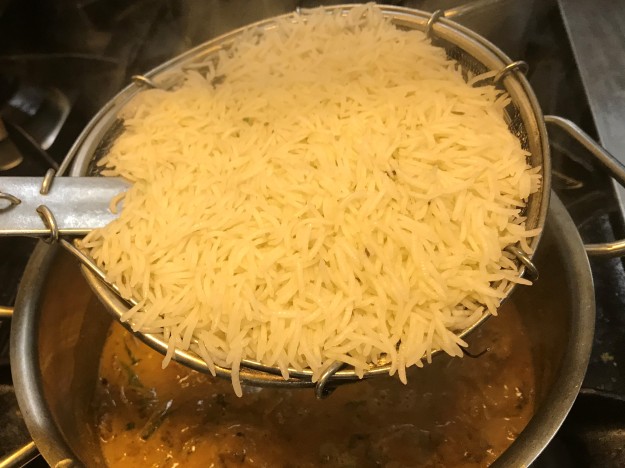
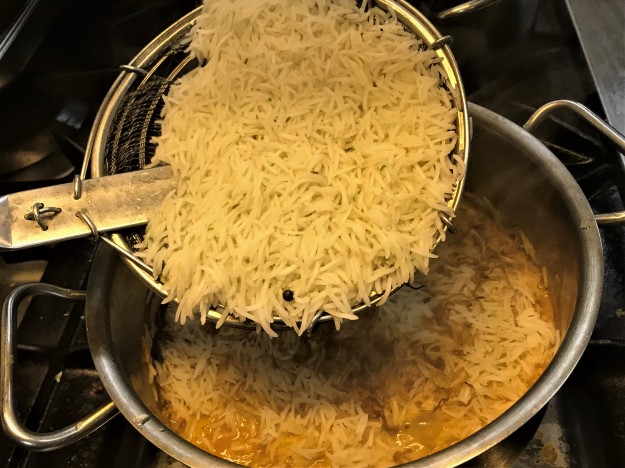
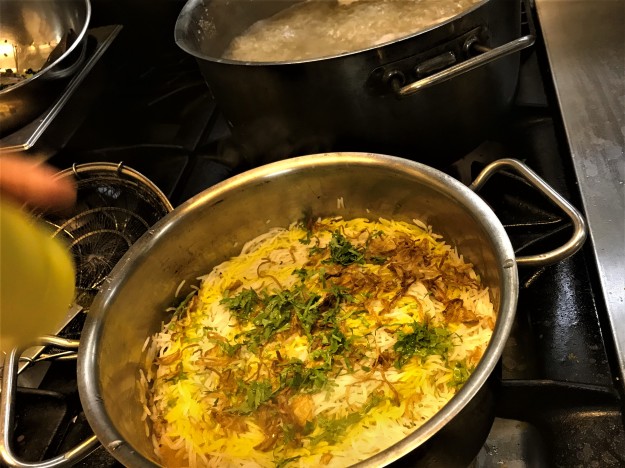
10. With half cooked chicken at the bottom, first layer of rice on top- add crispy fried golden brown onions.

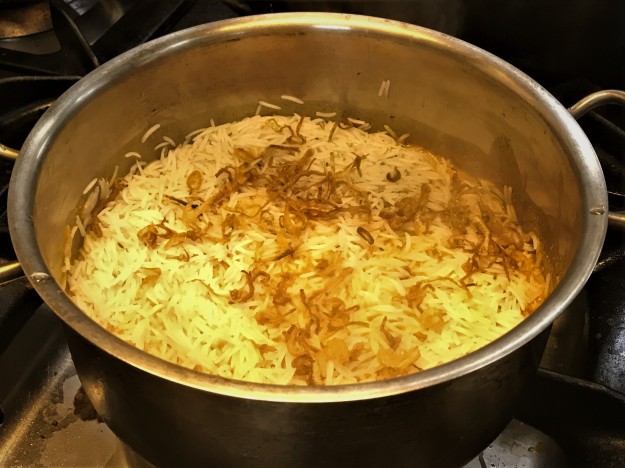
11. Now, the second layer of rice; then golden brown onions and coriander leaves.

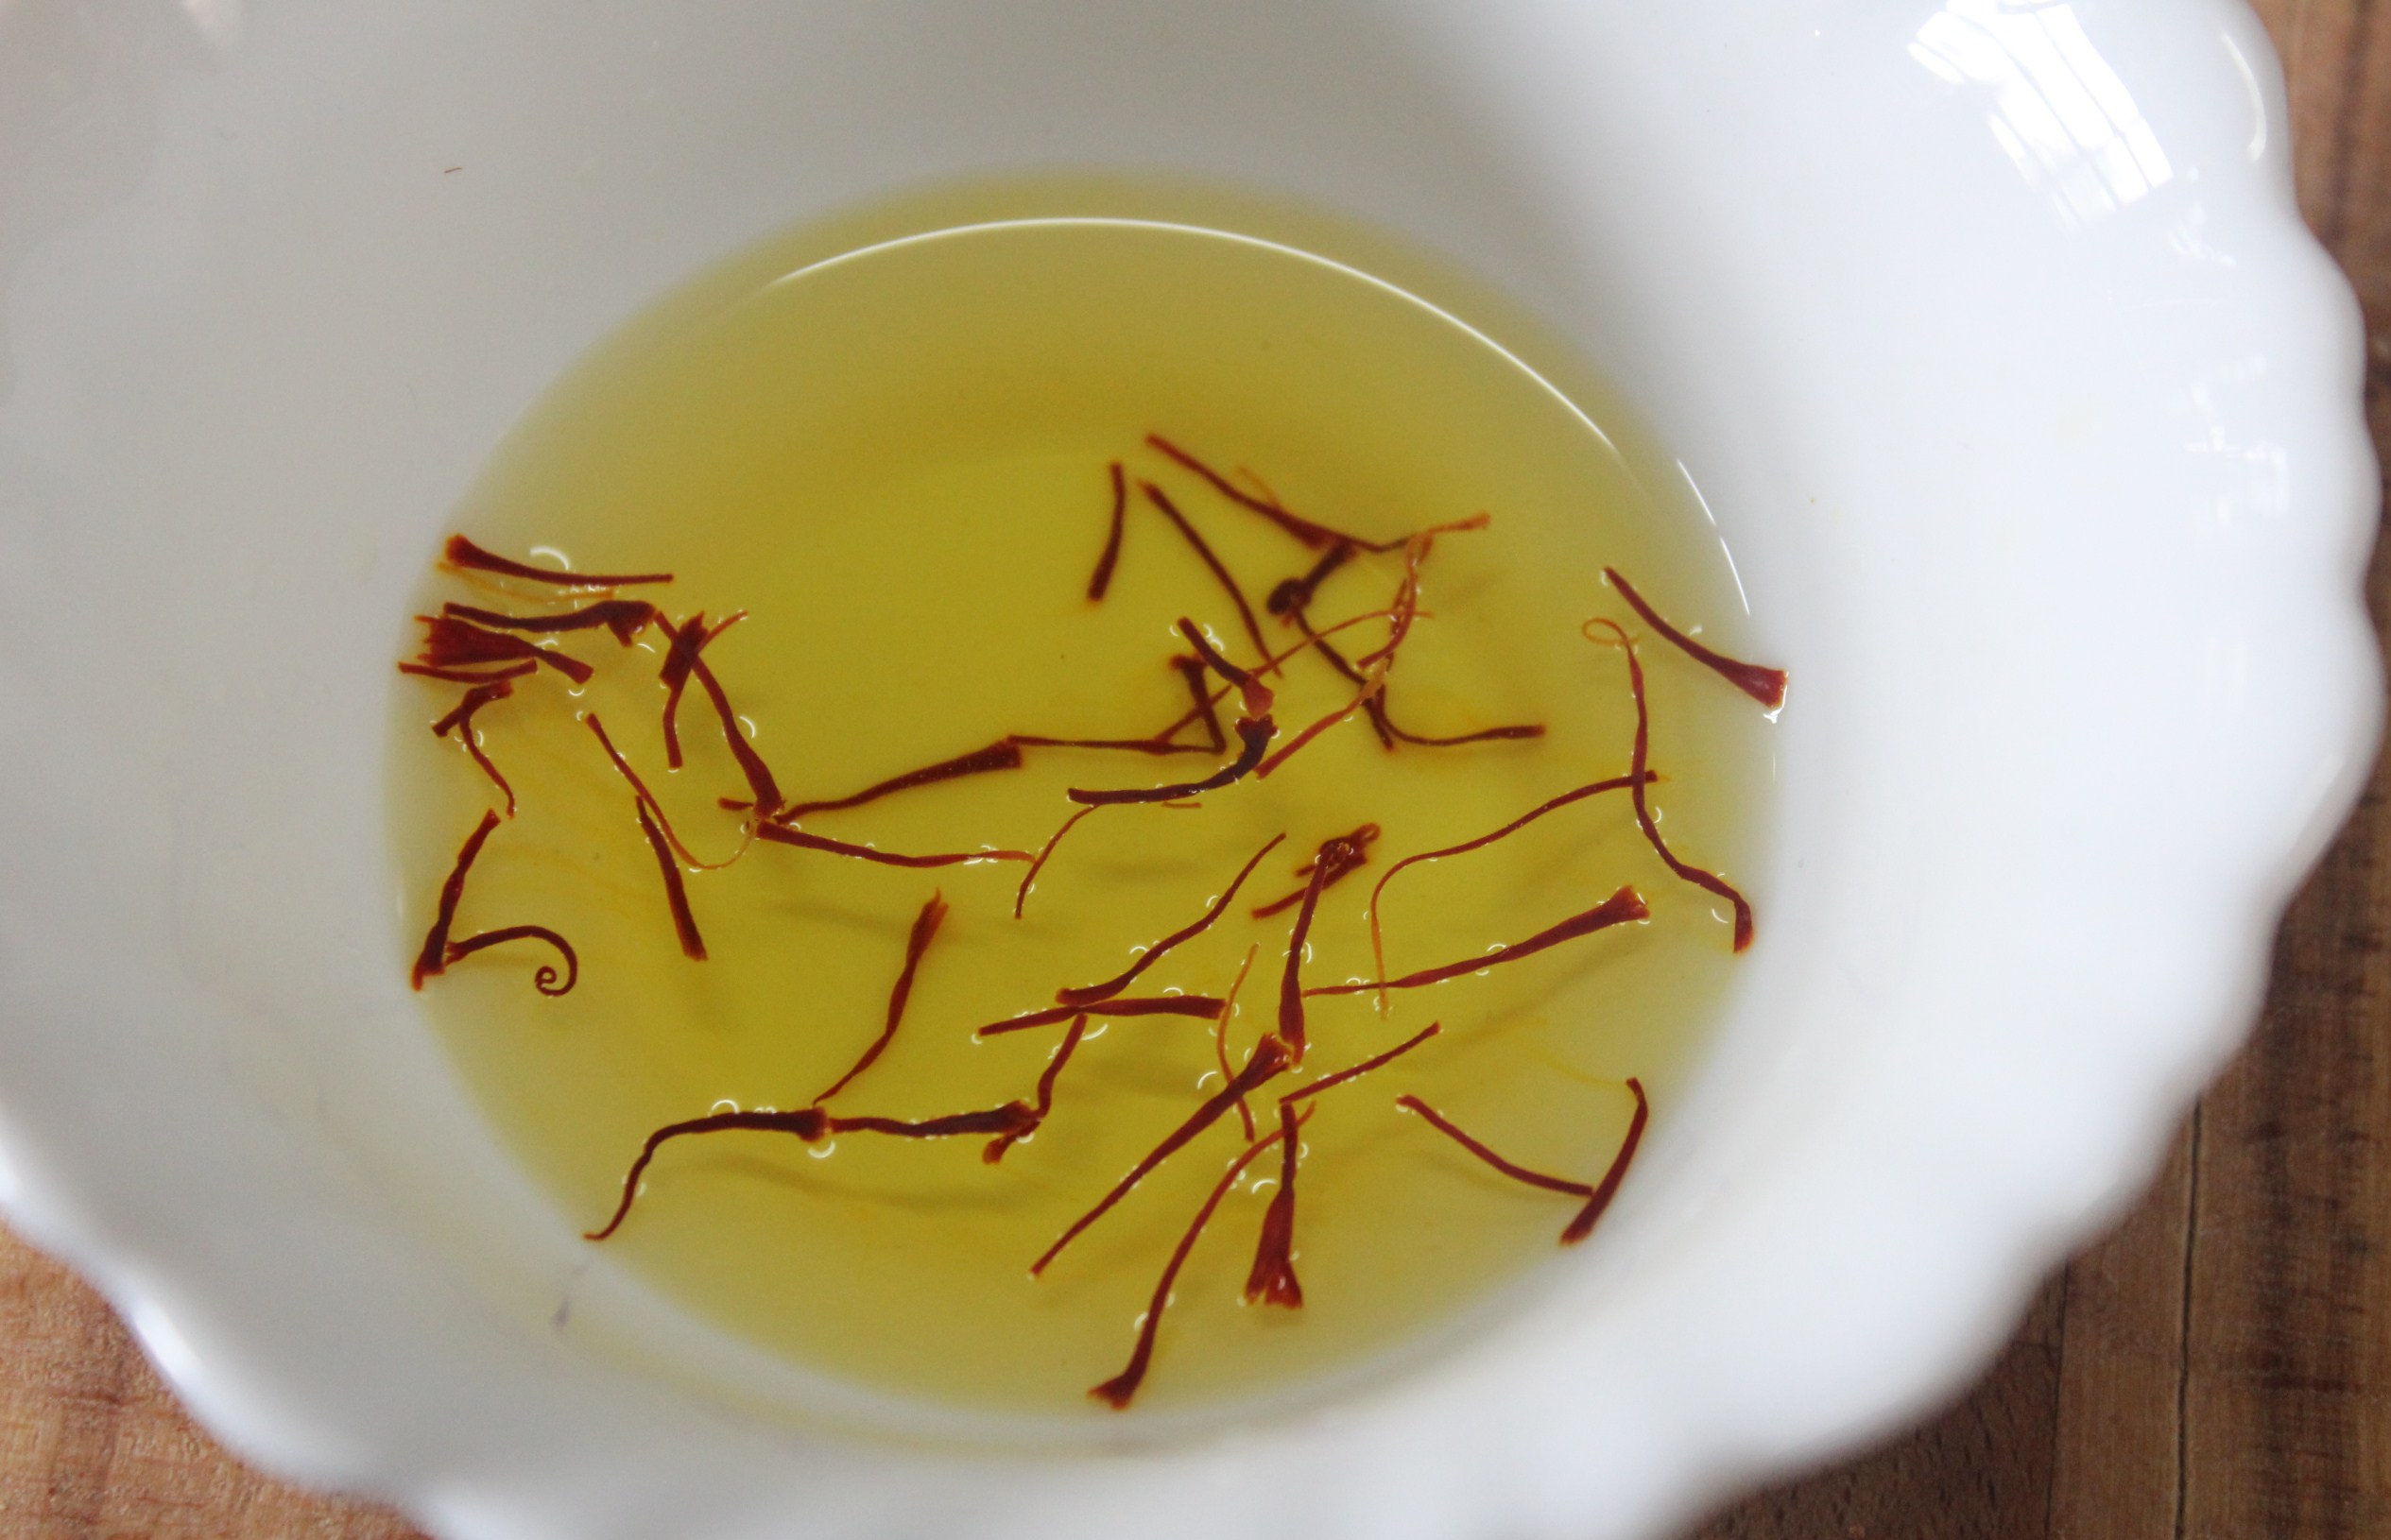
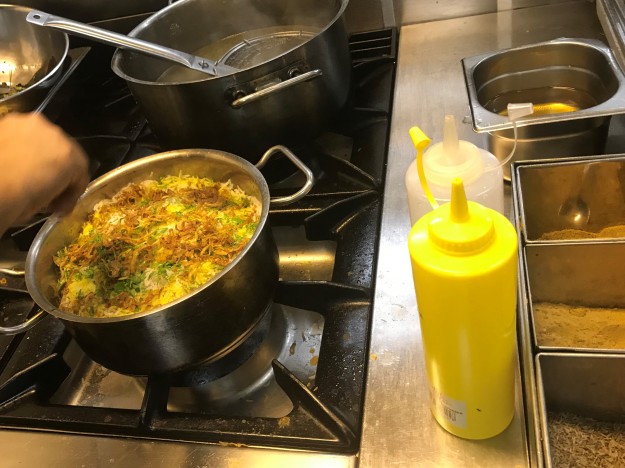
12. Add saffron water and khewra water (extract from distilled pandanus flowers)

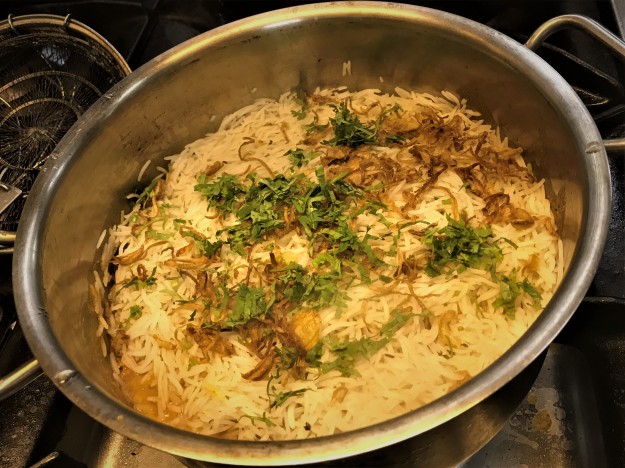
13. Moving on to the third and the last layer…rice, golden brown onions, coriander leaves, saffron water and khewra water. This time, add ginger juliennes and garam masala on top

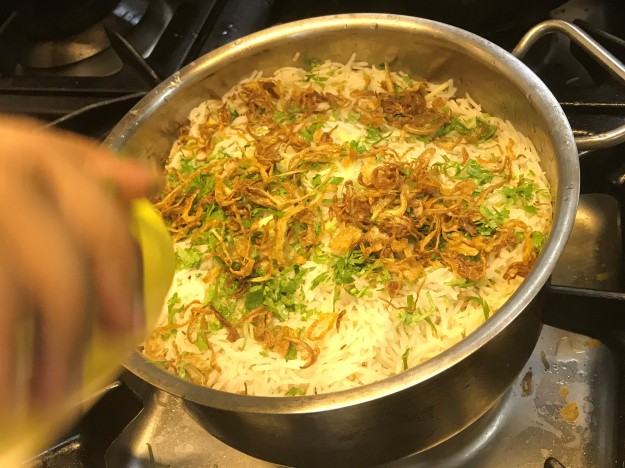
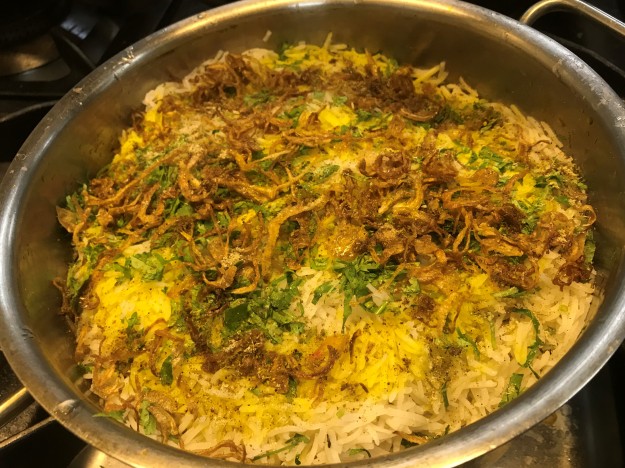
14. Remember, all this while, the stove is kept in sim position.

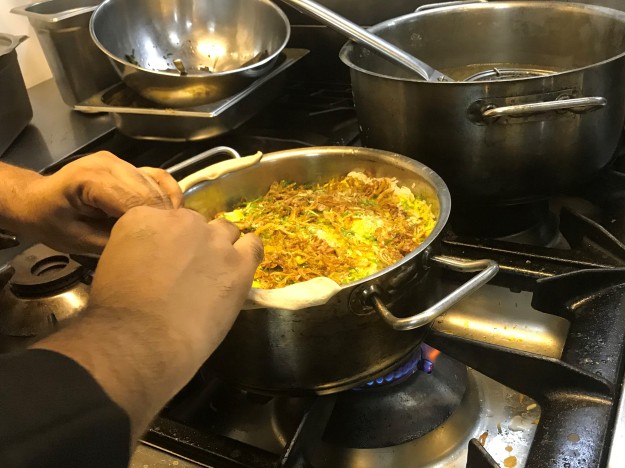
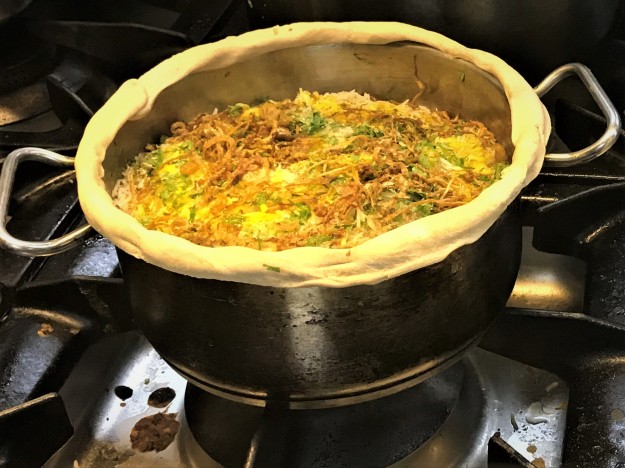
15. The next step, is to seal the vessel and allow the chicken and rice to blend well with the spices added. Take kneaded wheat flour and press it on the edges of the pan.

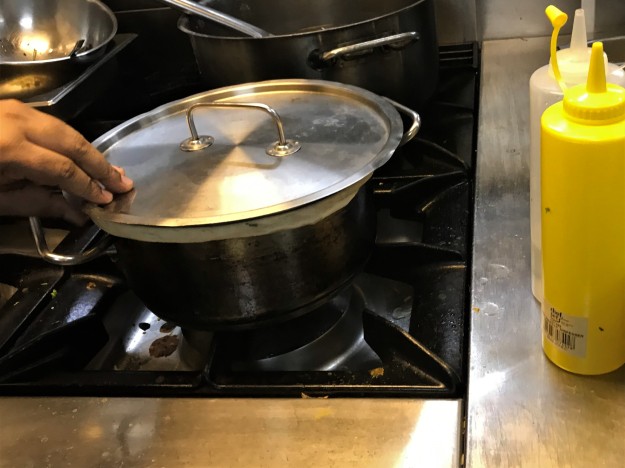
16. Close tightly with a lid, and let the combination of multiple ingredients bring out the best of each other. This might take approximately 20 minutes. Keep the flame in full for the first 2-3 minutes and then simmer and cook for another 18 minutes.

in full flame for the first 2-3 minutes

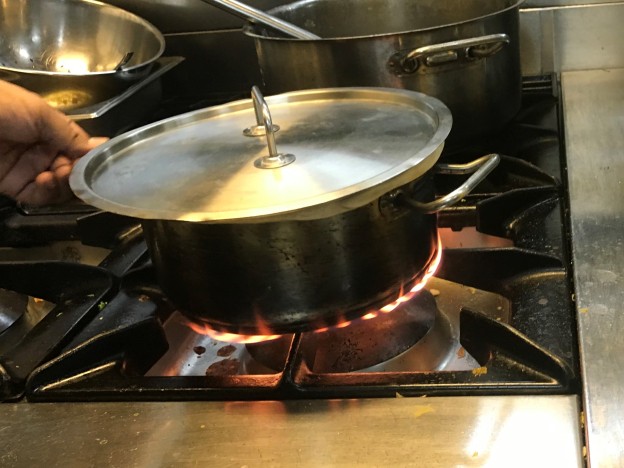
17. A better way to cook 100% unburnt Dum Biriyani, is to place the pan on a hot cast iron pan, which is kept on medium flame. This way, direct heat doesn’t affect the bottom layer of the biriyani, that is the chicken.

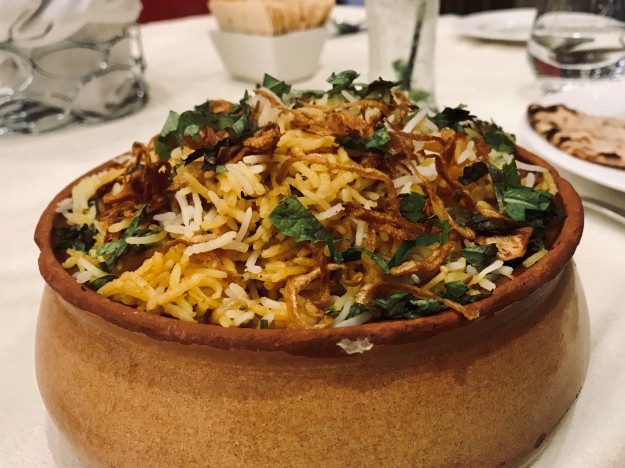
18. We are almost done. Hold your breath tight and open the pan to see the beautifully cooked delicacy. Enjoy the wonderful aroma of the slow cooked Dum Biriyani.

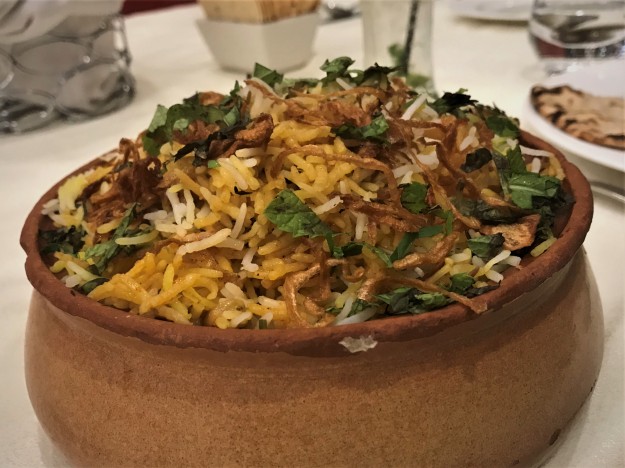
A truly inspiring and delightful experience over all.

Advertisement

Kathirikkai Salna/Brinjal Salna

Let’s continue the Mutton Biriyani recipe of the previous post, with a balance of Salna – veggie gravy/stew and complete it in the next post with Aadu Vadhakkal – spicy mutton stir fry.
img_6865


First SALNA..

‘Salna’ – a unique delicacy that is served along with Biriyani, is a simple gravy to tackle any spicy variety rice.  The tanginess of the Salna strikes a balance with the aromatic Biriyani. This is a  tamarind curry, thickened with peanut-fennel powder. Peanut stands as a natural variant to the usual coconut based gravies of the south. Tried for the first time and voila.. turned out to be good. No separate pans, time consuming closed cooking here. Yes, the best part is, this dish is quite simple, as everything goes into the cooker and is cooked in no time.
I concentrated so much on the making of Biriyani, that didn’t click better pictures of salna or mutton fry. Shall update with better pictures..at the earliest.

Kathirikkai Salna/Brinjal Salna


img_6810

Ingredients

  • brinjal – 6 no.s. – slit in the middle
  • ginger- garlic paste – 2 tsp each
  • onion – 2 no.s – coarsely ground in blender
  • tomato – 2 no.s finely chopped
  • tamarind – extract of a gooseberry sized piece
  • jaggery syrup – 1 tsp
  • water – 1 cup
  • oil – 3 tsp

powders

  • sambar powder – 1 ½ tsp
  • coriander powder – 1 tsp
  • turmeric powder – ¼ tsp
  • salt – to taste

dry roast and powder

  • peanuts – 2 tsp
  • fennel seeds – 1 tsp

Method of Preparation

  1. Wash and slit brinjal on top.
  2. In a cooker, fry brinjal in oil. Remove and keep aside.
  3. In the same oil, fry ginger garlic paste.
  4. Add coarsely ground onion and fry till golden in color.
  5. Add the chopped tomatoes and fry well.
  6. Add tamarind pulp and powders and mix well.
  7. Add 1 cup of water.
  8. Then add peanut – fennel seed powder and stir well.
  9. Add the jaggery syrup.
  10. Close cooker and cook in full flame for 2 whistles.
  11. Open the cooker once pressure is released by itself.
  12. Kathirikkai (Brinjal) Salna is ready to be served.

img_6867

Home Cook’s Pressure Cooker Mutton Biriyani with Thayir Pachadi/Raita

img_6848


That was a simple Sunday that started with the usual home made bread for breakfast.  Sundays can turn out to be one of the laziest days, yet the best is expected to come from the kitchen.  Thankfully for me, Cooking has always been a stress buster and an energy creator. This attitude can be termed as the height of optimism by those relaxing Sunday souls, who refuse to enter kitchen on holidays.

With the same positive energy, to make that lazy Sunday a flavorful one, I chose to try a Mutton Biriyani, a favorite delicacy throughout the world, with some good mathematics to post here. Mathematics with Biriyani…. certainly not written due to stress in brain activity. But, Biriyani needs meticulous measurements to bring out that ultimate aroma and taste.

I’ve tried to be accurate with the quantity of ingredients involved in the making of Mutton Biriyani. Additionally, reducing the effort involved in the making of good Biriyani, Pressure Cooker is used for quick cooking. This is no advertisement for Pressure Cookers, but believe me… it does reduce the stress of watching the Biriyani in a Pot or Handi cook to long grainy soft perfection.
A note on the history of Biriyani in India-


Though it may appear to be a dish indigenous to India, in reality the dish originated quite far away. Biryani is derived from the Persian word Birian, which means ‘fried before cooking’ and Birinj, the Persian word for rice. While there are multiple theories about how biryani made its way to India, it is generally accepted that it originated in West Asia.

There are records of a rice dish known as Oon Soru in Tamil literature as early as the year 2 A.D. Oon Soru was said to be made of rice, ghee, meat, turmeric, coriander, pepper, and bay leaf, and was used to feed military warriors.
http://www.thebetterindia.com/60553/history-biryani-india/


Just type – ‘oon soru’ and browse the internet. Your box would be filled with websites that talk about the same above said detail, verbatim. Which website posted the basic article is unknown. The above article gives a very fine and elaborate write up on different biriyanis in India.

An elaborate research would provide different insights into the culinary secret behind the speciality rice in Tamilnadu. I’ve heard people well versed in Tamil literature, talk about ‘Oon Soru’ and the practice of cooking rice with meat among the early Tamils.

With various popular versions of Biriyanis-  Hyderabadi, Lucknowi or Old Delhi’s famous Mughal preparations, Tamilnadu has its own versions – Dindukkal Biriyani, Arcot Biriyani, Ambur Biriyani, Chettinad Biriyani and so on. There is one more variety that has no popular name, but the version is different from home to home – that’s the Home Made Biriyani, with the tasteful signature of the amateur home cook.

So, this Sunday I decided to make the Home Cook’s Mutton Biriyani – with step by step elaborate procedures for purpose of sharing here. This is a two-way process, where meat is pressure cooked initially with turmeric and salt, and then pressure cooked again together with spices and rice. This second part, makes the biriyani an easier version, where no ‘Dum’ (closed cooking in sim flame) is required and hence, is less time consuming, but no compromise in taste.
With the urge to cook Biriyani, came a list of other things that go well with the exotic Rice.

a. Thayir Pachadi – Onion and Yoghurt Raita

b. Kathirikkai Salna – Mildly spiced, tangy Gravy with brinjal/egg plant that is served alongside Biriyani

c. Mutton Vadhakkal – Spicy, Pan fried Mutton – the perfect munching companion for the succulent Biriyani

A successful Sunday with special delights calls for 2 connected posts on the lunch served. So, first – Biriyani and Pachadi, I call it the match made in kitchen, which is supposedly a cook’s heaven of culinary creations!
Home Cook’s Pressure Cooker Mutton Biriyani


img_6859


Ingredients (serves 3)


long grain basmati rice

img_6750


and meat

img_6746


  • basmati rice – 1 ½ cups – (app. 225 gms)
  • mutton – 500 gms
  • turmeric powder – ¼ tsp for cooking meat separately + ½ tsp while making biriyani
  • salt – to taste
  • oil – 3 tsp (for caramelising onions) + 3 tsp (for making biriyani)
  • clarified butter – 3 tsp

Dry Spices


img_6763


  • cardamom pods – 7 no.s
  • cloves – 7 no.s
  • cinnamon – 2-3 sticks
  • bay leaves – 2 no.s
  • big cardamom – 1 no.
  • fennel seeds – 1 ½ tsp
  • pepper corns – 1 tsp

To chop


img_6755


and green chillies

img_6765


  • ginger – 50 gms
  • garlic – 30 gms (app. 3 small pods)
  • onion – 3 large – 165 gms
  • tomato – 2 large – 130 gms
  • green chillies – 5 -7 no.s (finely chopped)

For freshness

caramelised onions with mint and coriander

img_6771


  • mint leaves – 3 tsp
  • coriander leaves. – 3 tsp

Exotic touch


saffron in water

img_6782


  • generous strands of saffron soaked in ¼ cup hot water tsp bring out that gorgeous colour
  • nutmeg – ½ tsp grated

Method of Preparation


img_6856
Part I

  1. Wash and soak basmati rice at least ½ an hour before pressure cooking meat
  2. Soak saffron in ¼ cup hot water


soaked rice

img_6789

Part II– Cook Mutton

  1. Remove fat as far possible from meat
  2. Mix turmeric and salt to meat and keep aside for 15 minutes
  3. Wash and clean well
  4. Squeeze out excess water from the washed meat
  5. In a pressure cooker, add meat, ¼ tsp turmeric and salt with water enough to cook for approximately 30 minutes
  6. Pressure cook meat till done (It takes 30-40 minutes to be cooked well)
  7. Do not forget to use the meat broth to cook the final Biriyani.

Part III– Getting things ready – grinding, slicing, chopping, caramelizing.


  1. Coarse grind ginger, garlic, fennel seeds and pepper corns together in a blender (without water). Though full pepper corns are fried with spices in Biriyani, I prefer to grind as there is no wastage on the plate. Additionally, ground pepper corn spices up the Biriyani with its unique flavor.
  2. Thinly slice onions. Caramelize sliced onions in 3 tsp oil.
  3. Finely chop green chilies and tomatoes separately. Keep aside.


img_6770
Part IV – Let’s do it – THE BIRIYANI

1. Heat pressure cooker and add oil and clarified butter.

2. Drop all the dry spices except pepper corns and fennel seeds (already blended with ginger-garlic)

img_6768

3. Next, add the ground ginger-garlic-pepper-fennel paste with green chillies and sauté.


img_6786

4. Add the chopped tomatoes and sauté till soft and mushy.

5. Then, add the caramelized onions and mix well.

6. Strain rice without water and add to the hot ingredients in the cooker and stir well.


img_6792

7. Add nutmeg, turmeric powder and salt.

8. Strain mutton and save the cooked broth.

9. Add cooked mutton pieces and mix.
10.The most important ingredient- WATER

Now, it’s time to add water. I go by this ratio and it turns out good.

img_6799
For 1 cup of rice – 2 cups of water;
For 2 cups of rice – 4 cups water minus ½ cup = 3 ½ cups water
For 3 cups of rice – 6 cups of water minus ½ cup = 5 ½ cups water
For 4 cups of rice – 8 cups of water minus 1 cup = 7 cups water

So, for this biriyani, where 1 ½ cups rice is used, less than double or less than 3 cups, i.e. 2 ¾ cups of water is used.

  • Mutton cooked water – 1 cup
  • Saffron water – ¾ cup
  • Extra plain water – 1 cup

That works out to be 2 ¾ cups water for 1 ½ cups of rice.
Alter plain water according to the quantity of mutton cooked water you have. Add water, mix well.

11. Check for salt. As mutton is already cooked, the water tasted does not consist raw meat. So, go ahead, taste and add salt if needed.

12. Close cooker with lid in full flame. Keep in full flame for 3 whistles. Switch off and wait for the pressure to release by itself.


img_6860

13.Open cooker and serve hot Biriyani.
Biriyani- Thayir Pachadi / Biriyani- Onions in Yoghurt: Match made in heaven!

Thayir Pachadi – Onions in Yoghurt

img_6868


Biriyani needs a Thayir pachadi or Raita as in North Indian cuisine. Vegetable, chicken or mutton biriyani, is incomplete without the accompaniment of Pachadi.

Though, there can be many varieties of Pachadi/Raita. In Tamilnadu, a pachadi with just onions and little green chillies for spice is generally served with Biriyani.

  • thinly sliced onions – 3 no.s
  • thick yoghurt – to soak the sliced onions (approximately 3 cups)
  • chopped green chillies – as preferred
  • salt – to taste
  • coriander leaves (fresh) – for garnish


Mix all ingredients together and garnish with coriander leaves. In a restaurant that serves, vengaya pachadi or onion raita – yoghurt is less than mentioned above. But I prefer to have more yoghurt to the quantity Alter quantity of yoghurt as preferred.


img_6848