Category Archives: Cakes and more

Vegan Chocolate Fudge

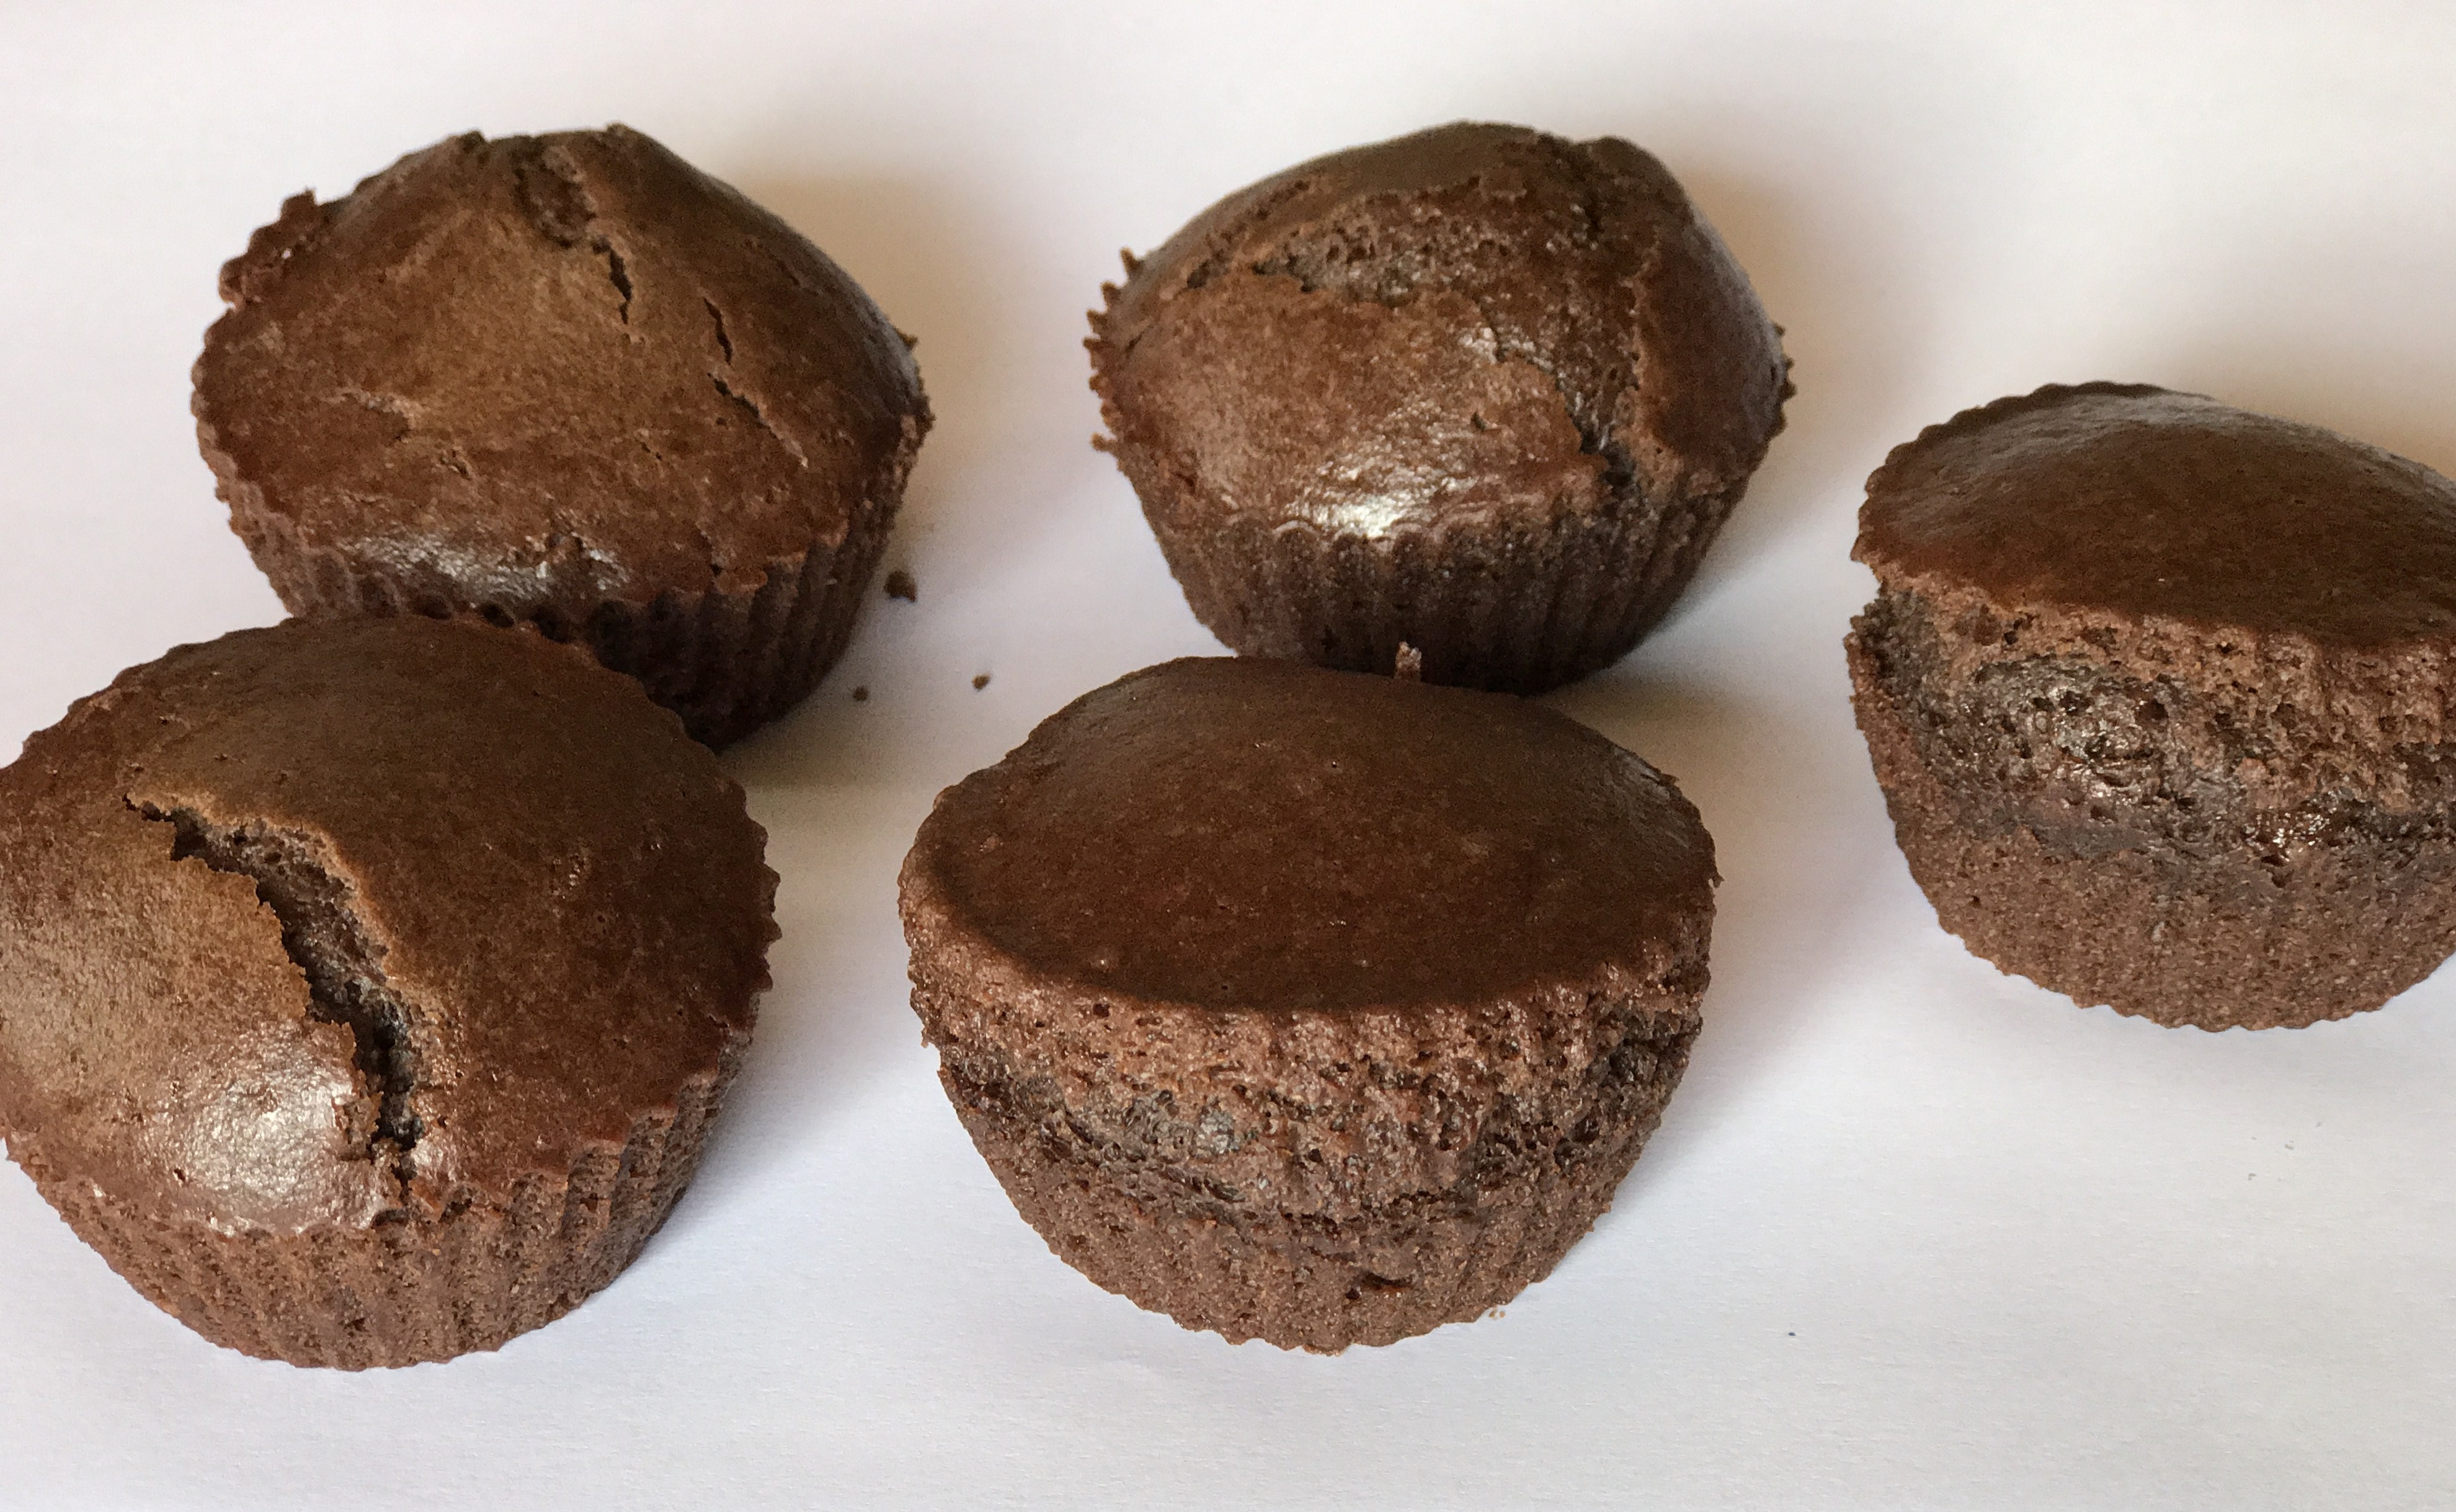
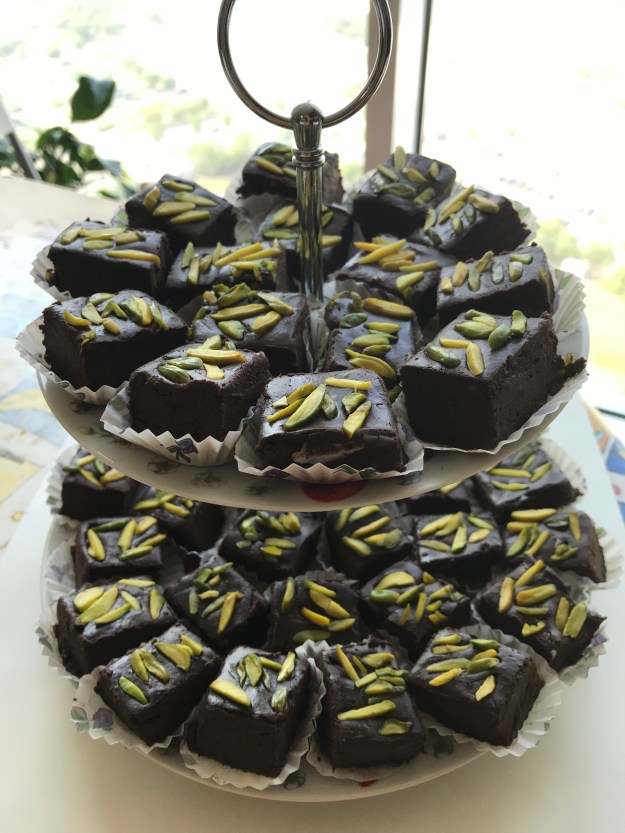
Chocolate Fudge can be a quick and easy dessert, when you know what to combine with the melted chocolate – and in what proportion. The main ingredient in a Chocolate Fudge being chocolate- one that accepts countless innovative combinations, makes the dessert a flexible delicacy. The ultimate success is visible only after the Fudge sets in the refrigerator, and one cuts it to cubes.

I can gladly say now, after a few years of attempting to make different combinations of Fudges, it has been one of my most satisfying cooking projects. Digestive cookie Fudge, Oreo Fudge, Coconut Fudge, Two-layered dark and white chocolate fudge, are a few that I have been trying out. I didn’t think I should be posting them, as many of my blogger friends are experts in the above mentioned varieties. I didn’t want to replicate those recipes, though my combinations would be a bit different. If I am satisfied that my Fudge is absolutely exclusive, I shall post them in future.

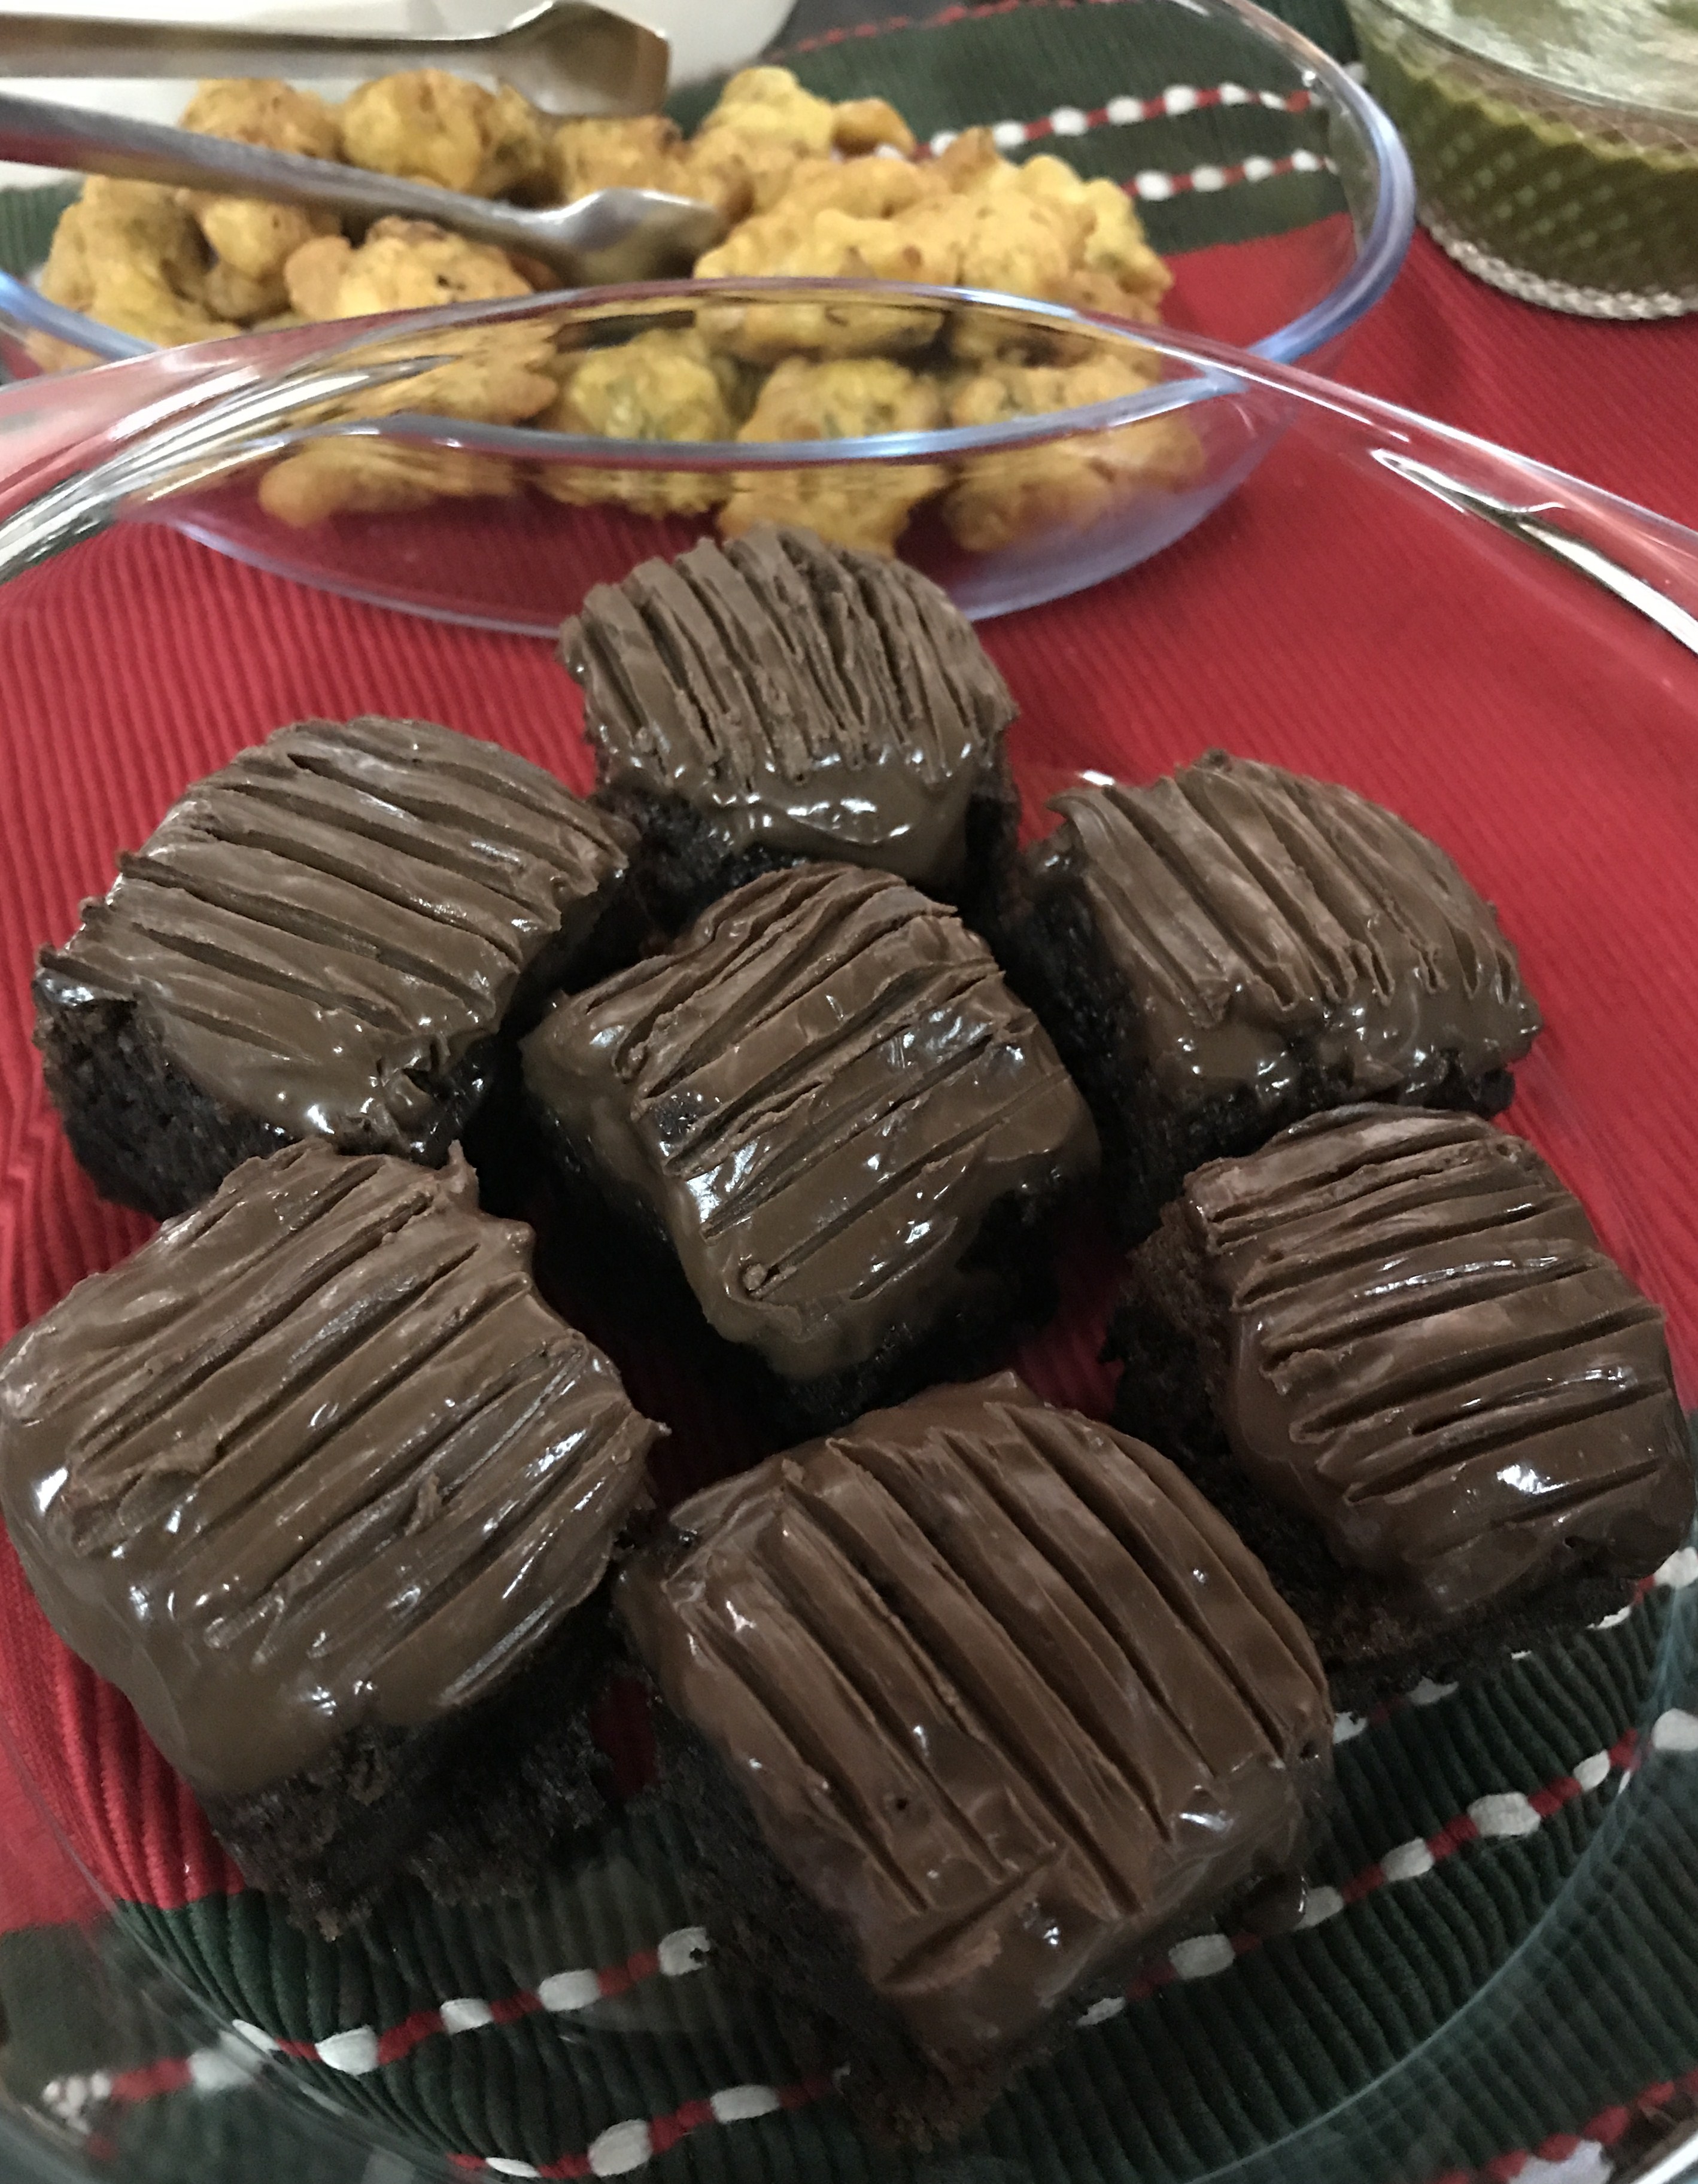
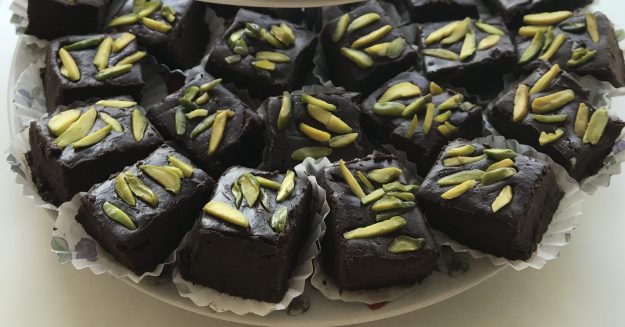
The latest Fudge, that I’ve been making, is this simple VEGAN FUDGE. It seems to be a hassle free recipe, quick to accomplish and above all, it is tasty too. Especially, when there are more desserts on the table with high sugar content, this dark chocolate fudge, which is a bit bitter, gives a balance to the over sweetened taste buds.

Now, straight to the recipe.

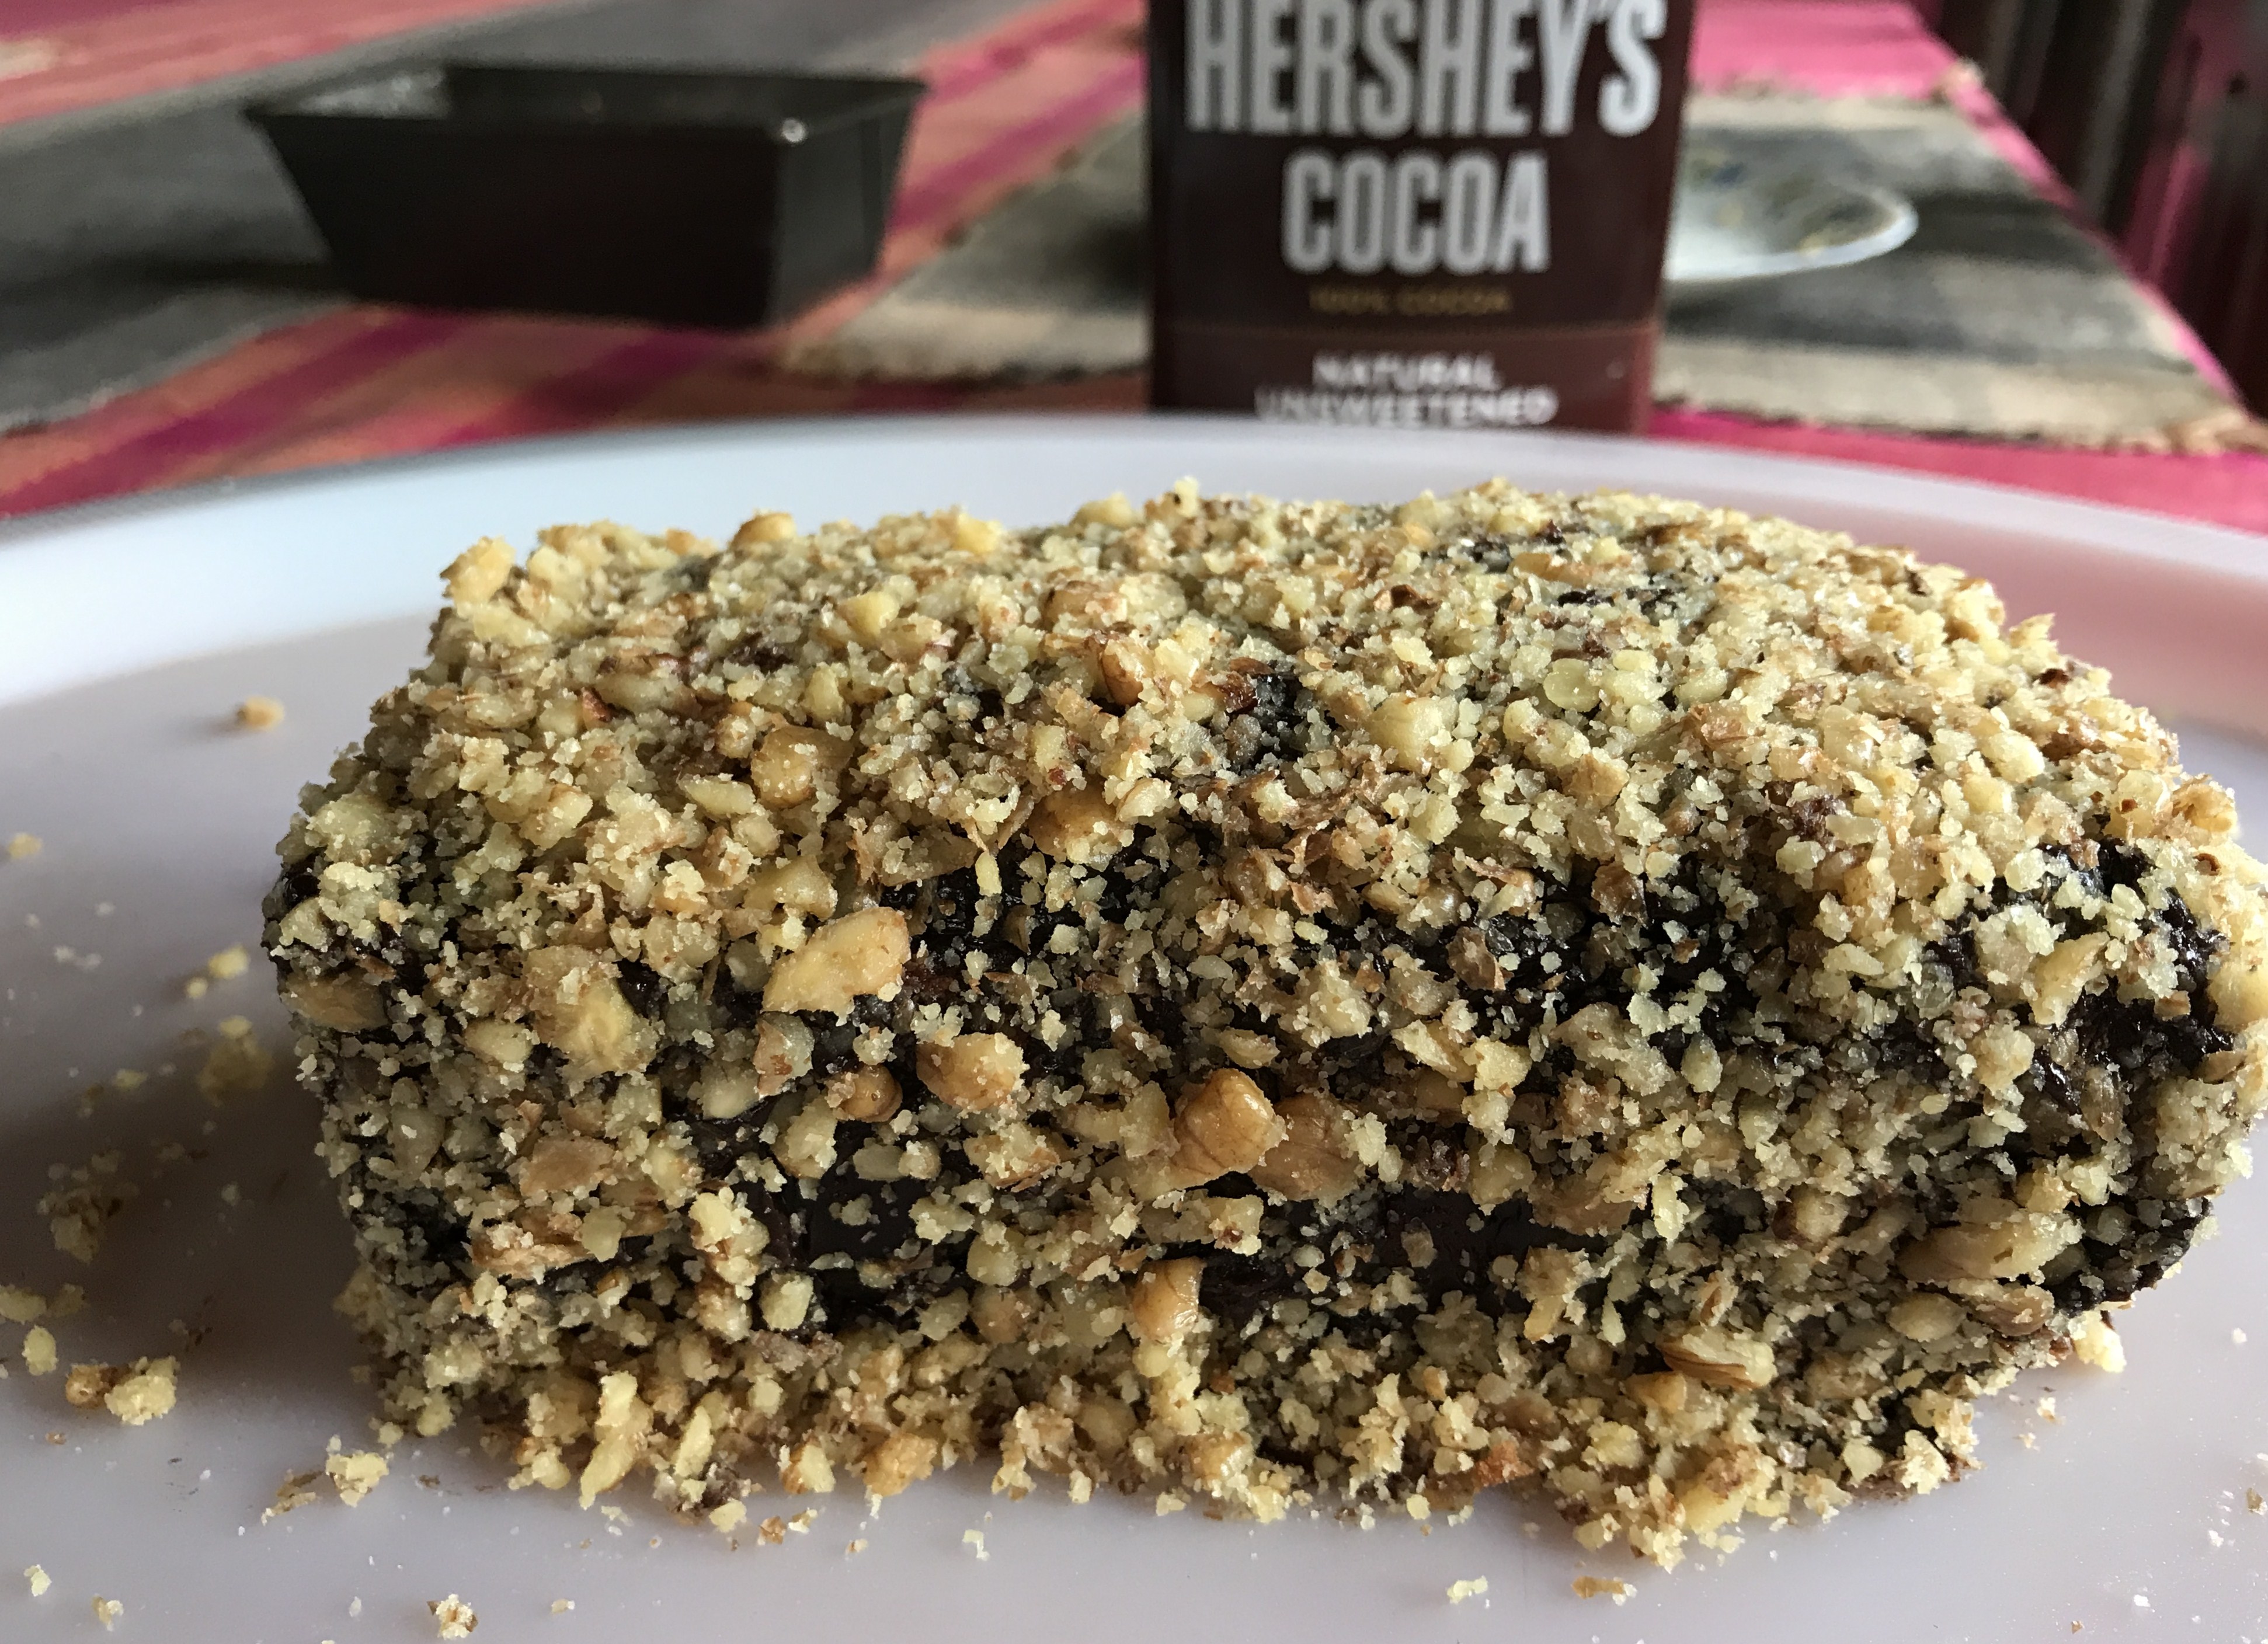
VEGAN CHOCOLATE FUDGE

Ingredients

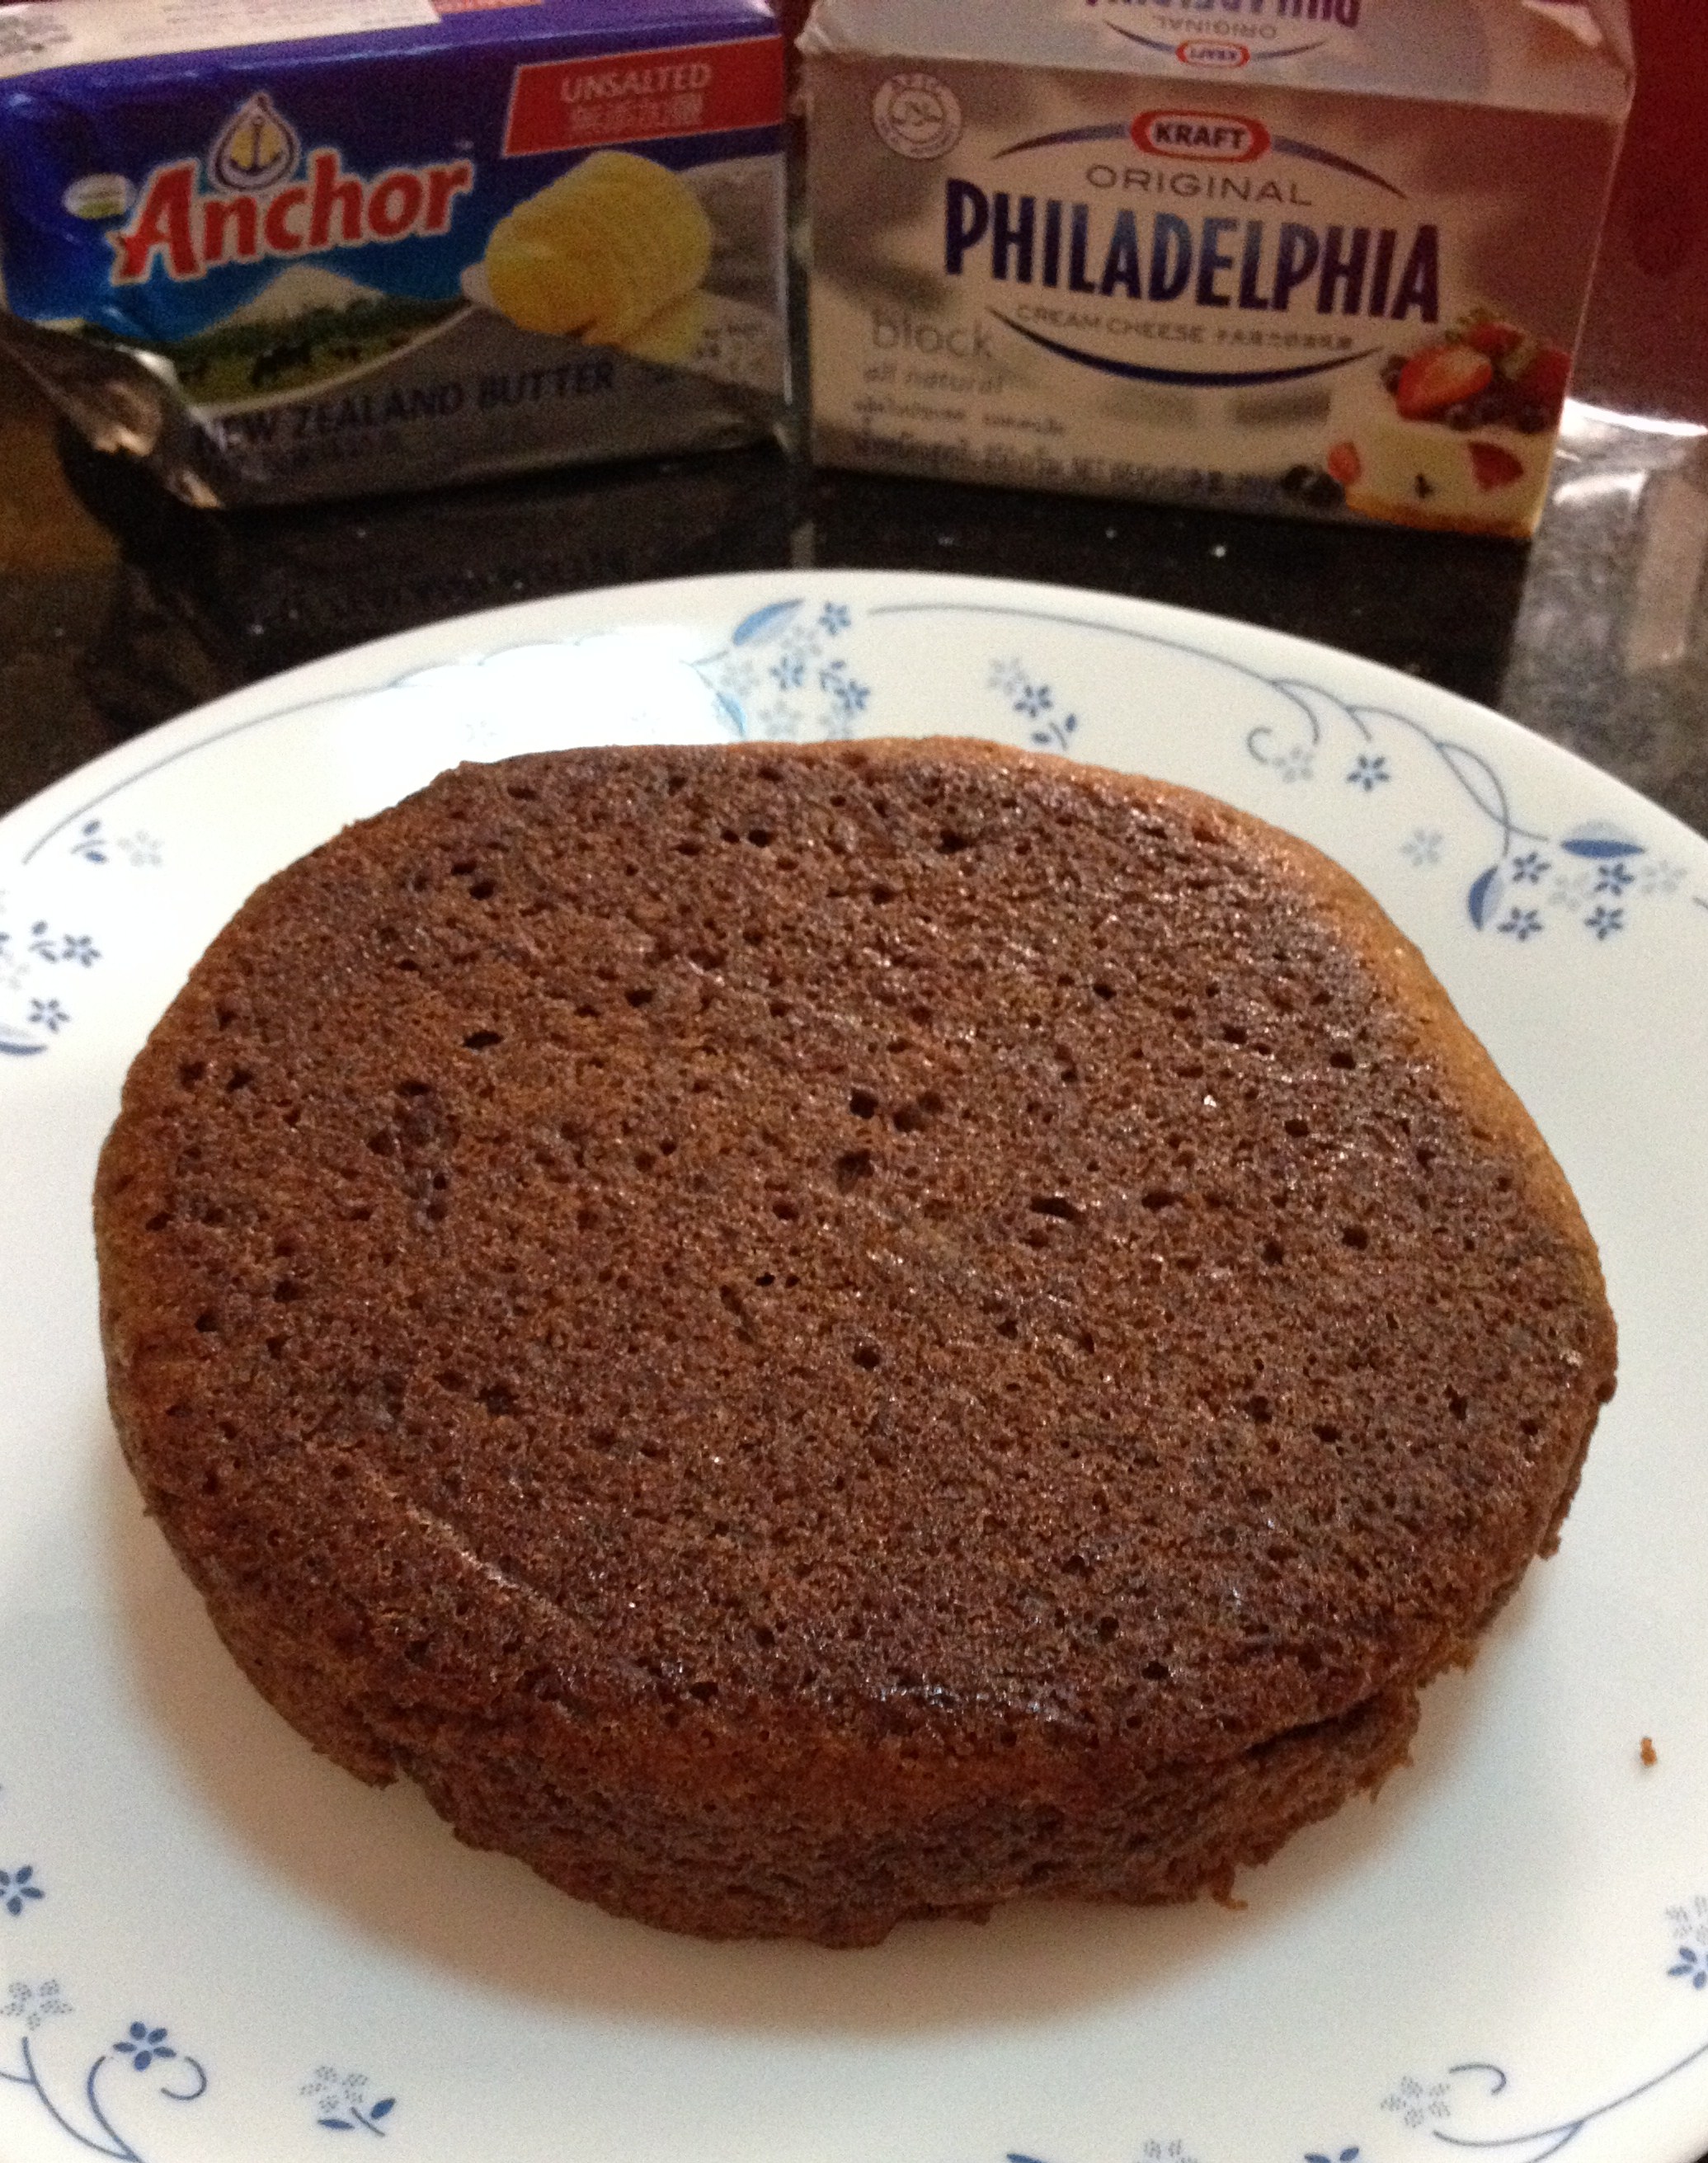
  • combination of 70% and 85% Dark Chocolate – 200 gms each (I used Lindt)
  • almond flour – 2 cups – 1 cup equivalent to 50 gms; so, 100 gms of almond flour
  • almond and coconut milk blend – 2 cups – each cup was 130 ml; so, 260 ml of milk
  • almond flakes – approximately 3/4 to 1 cup
  • chopped pistachios – approximately 3/4 to 1 cup
  • unrefined cane sugar – 4 tbsp
  • additional pistachios or any other nuts of preference – for garnish

Method of Preparation

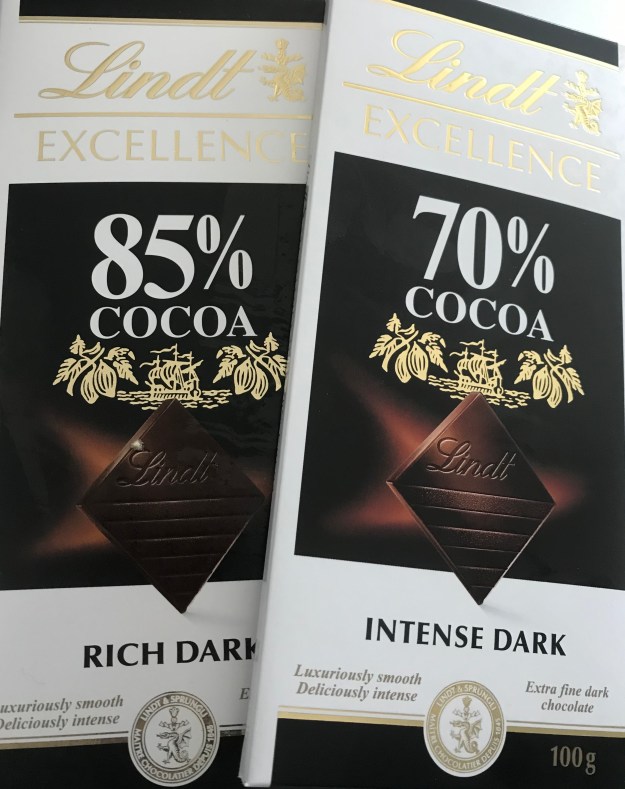
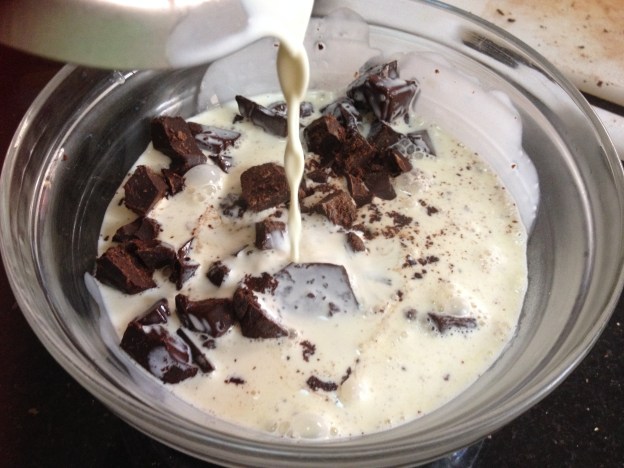
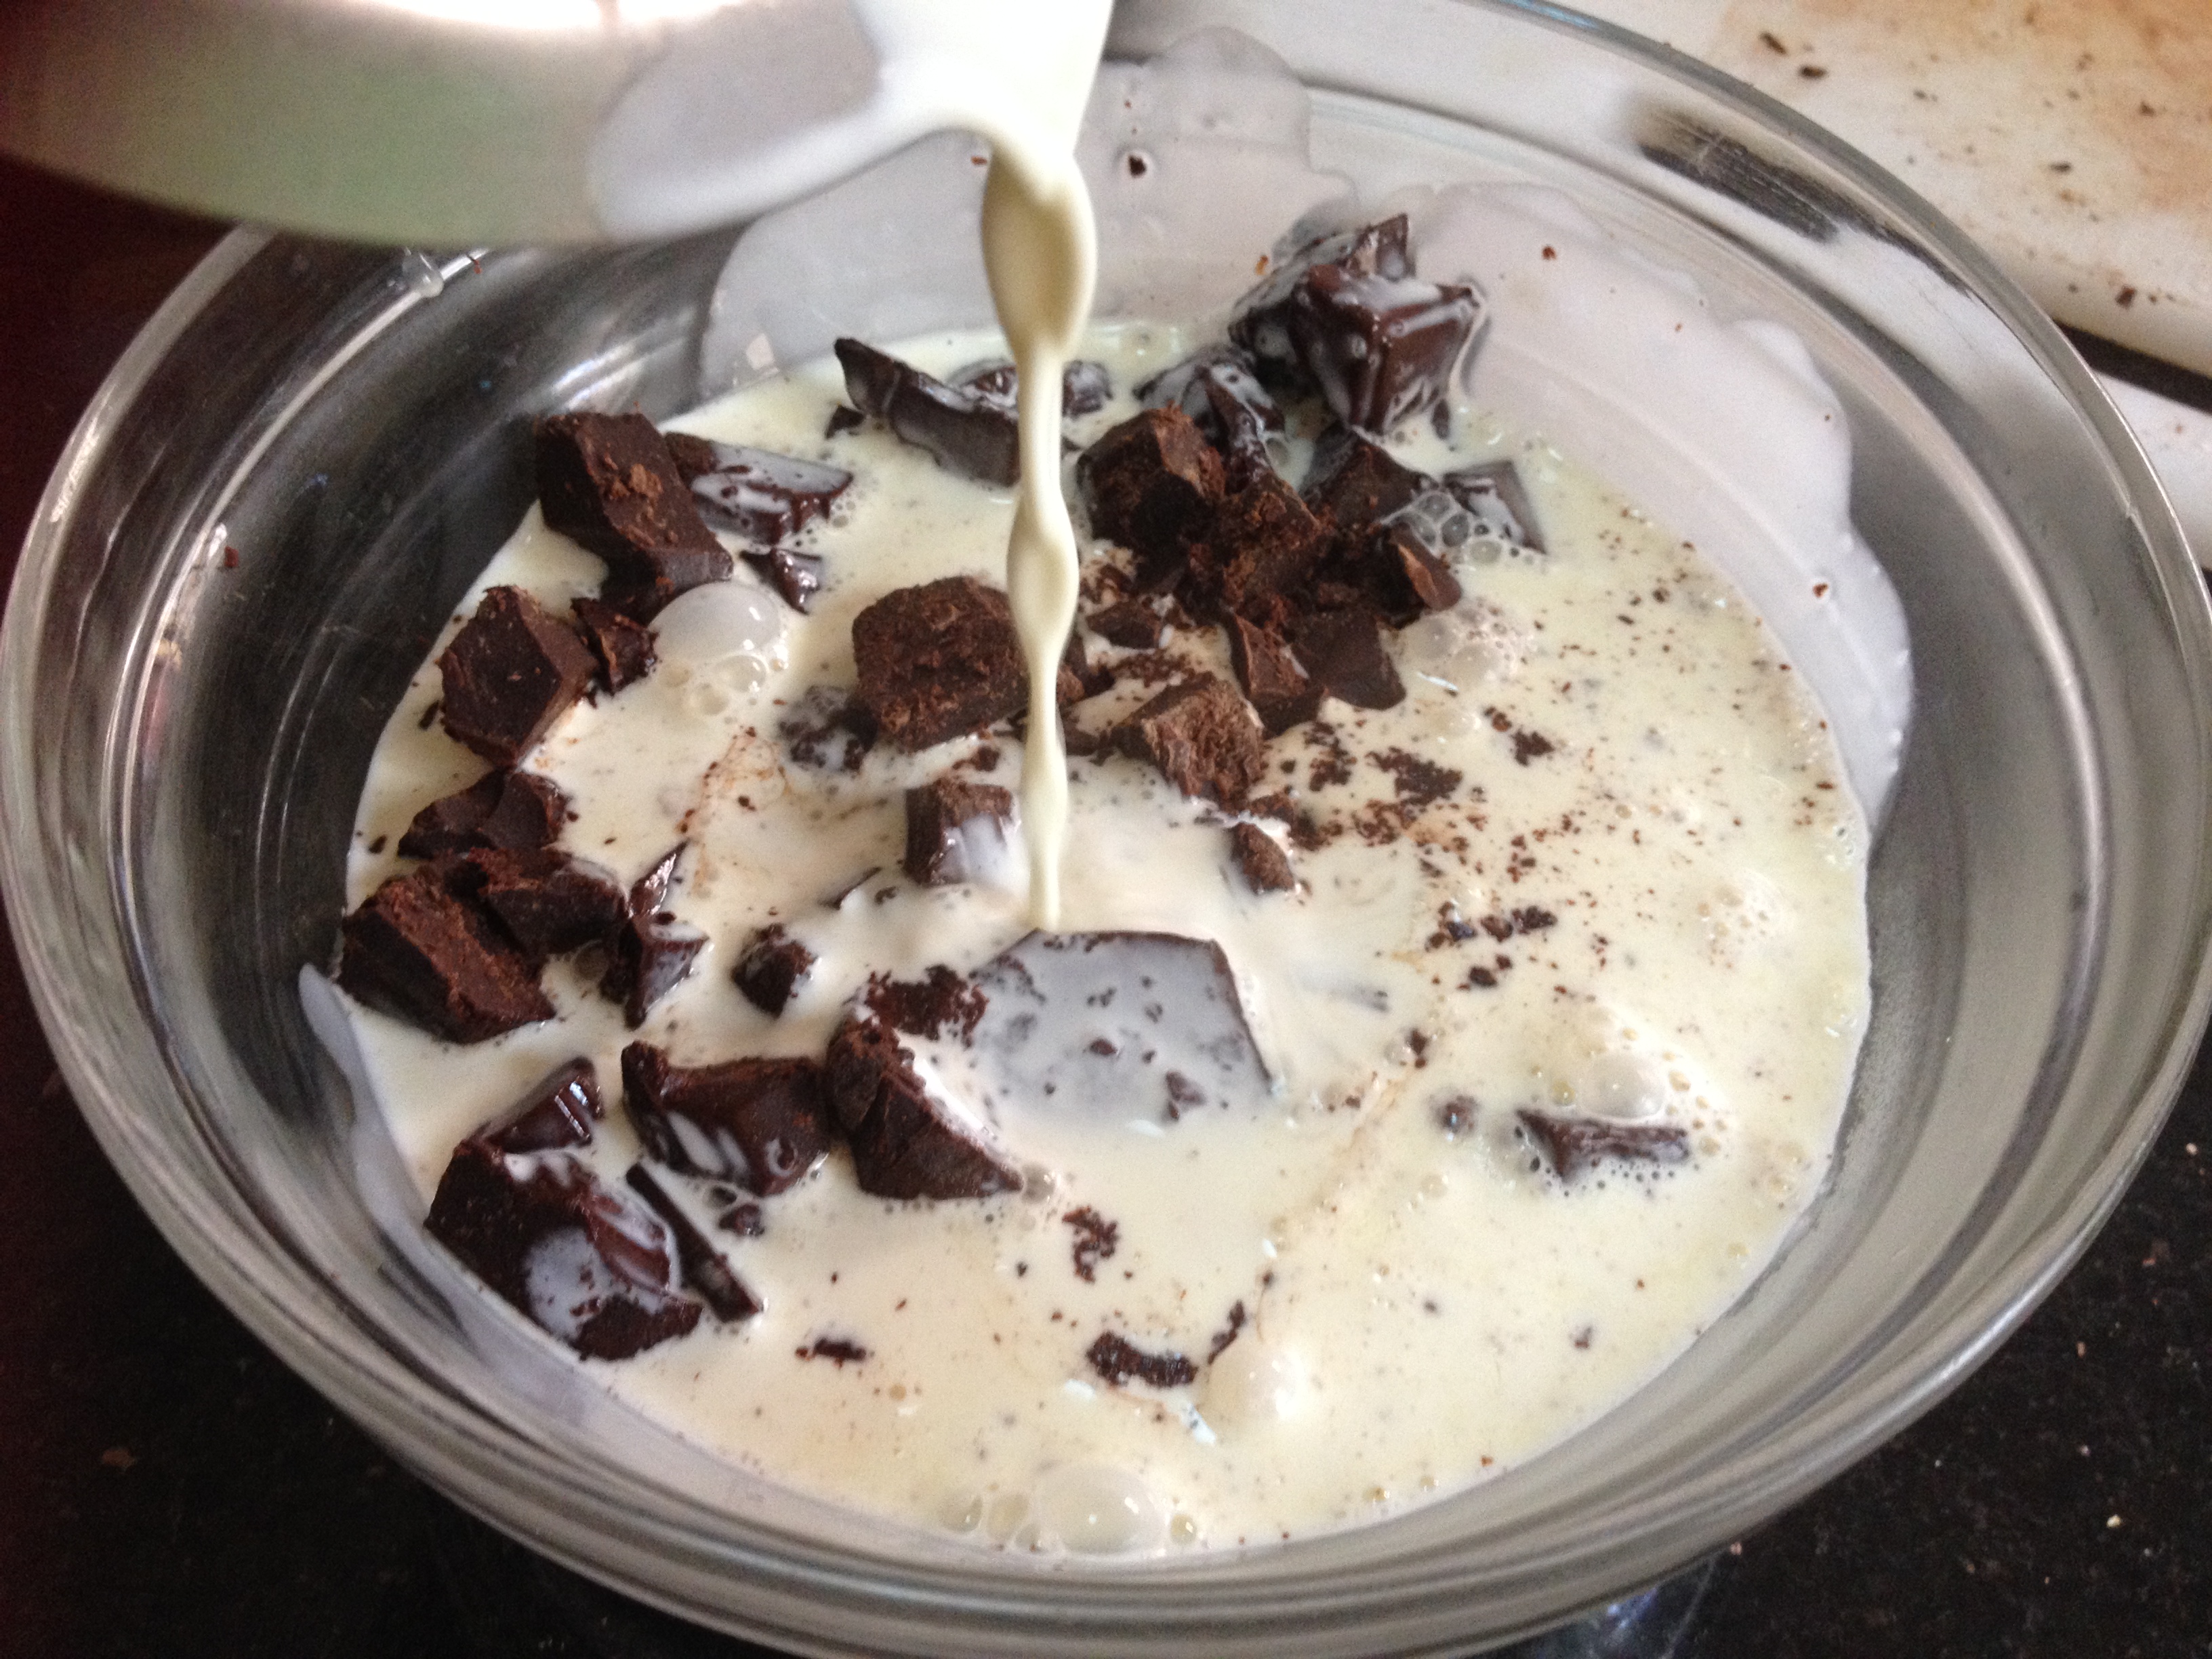
  1. Melt both chocolates (70% and 85% bars) in a double boiler

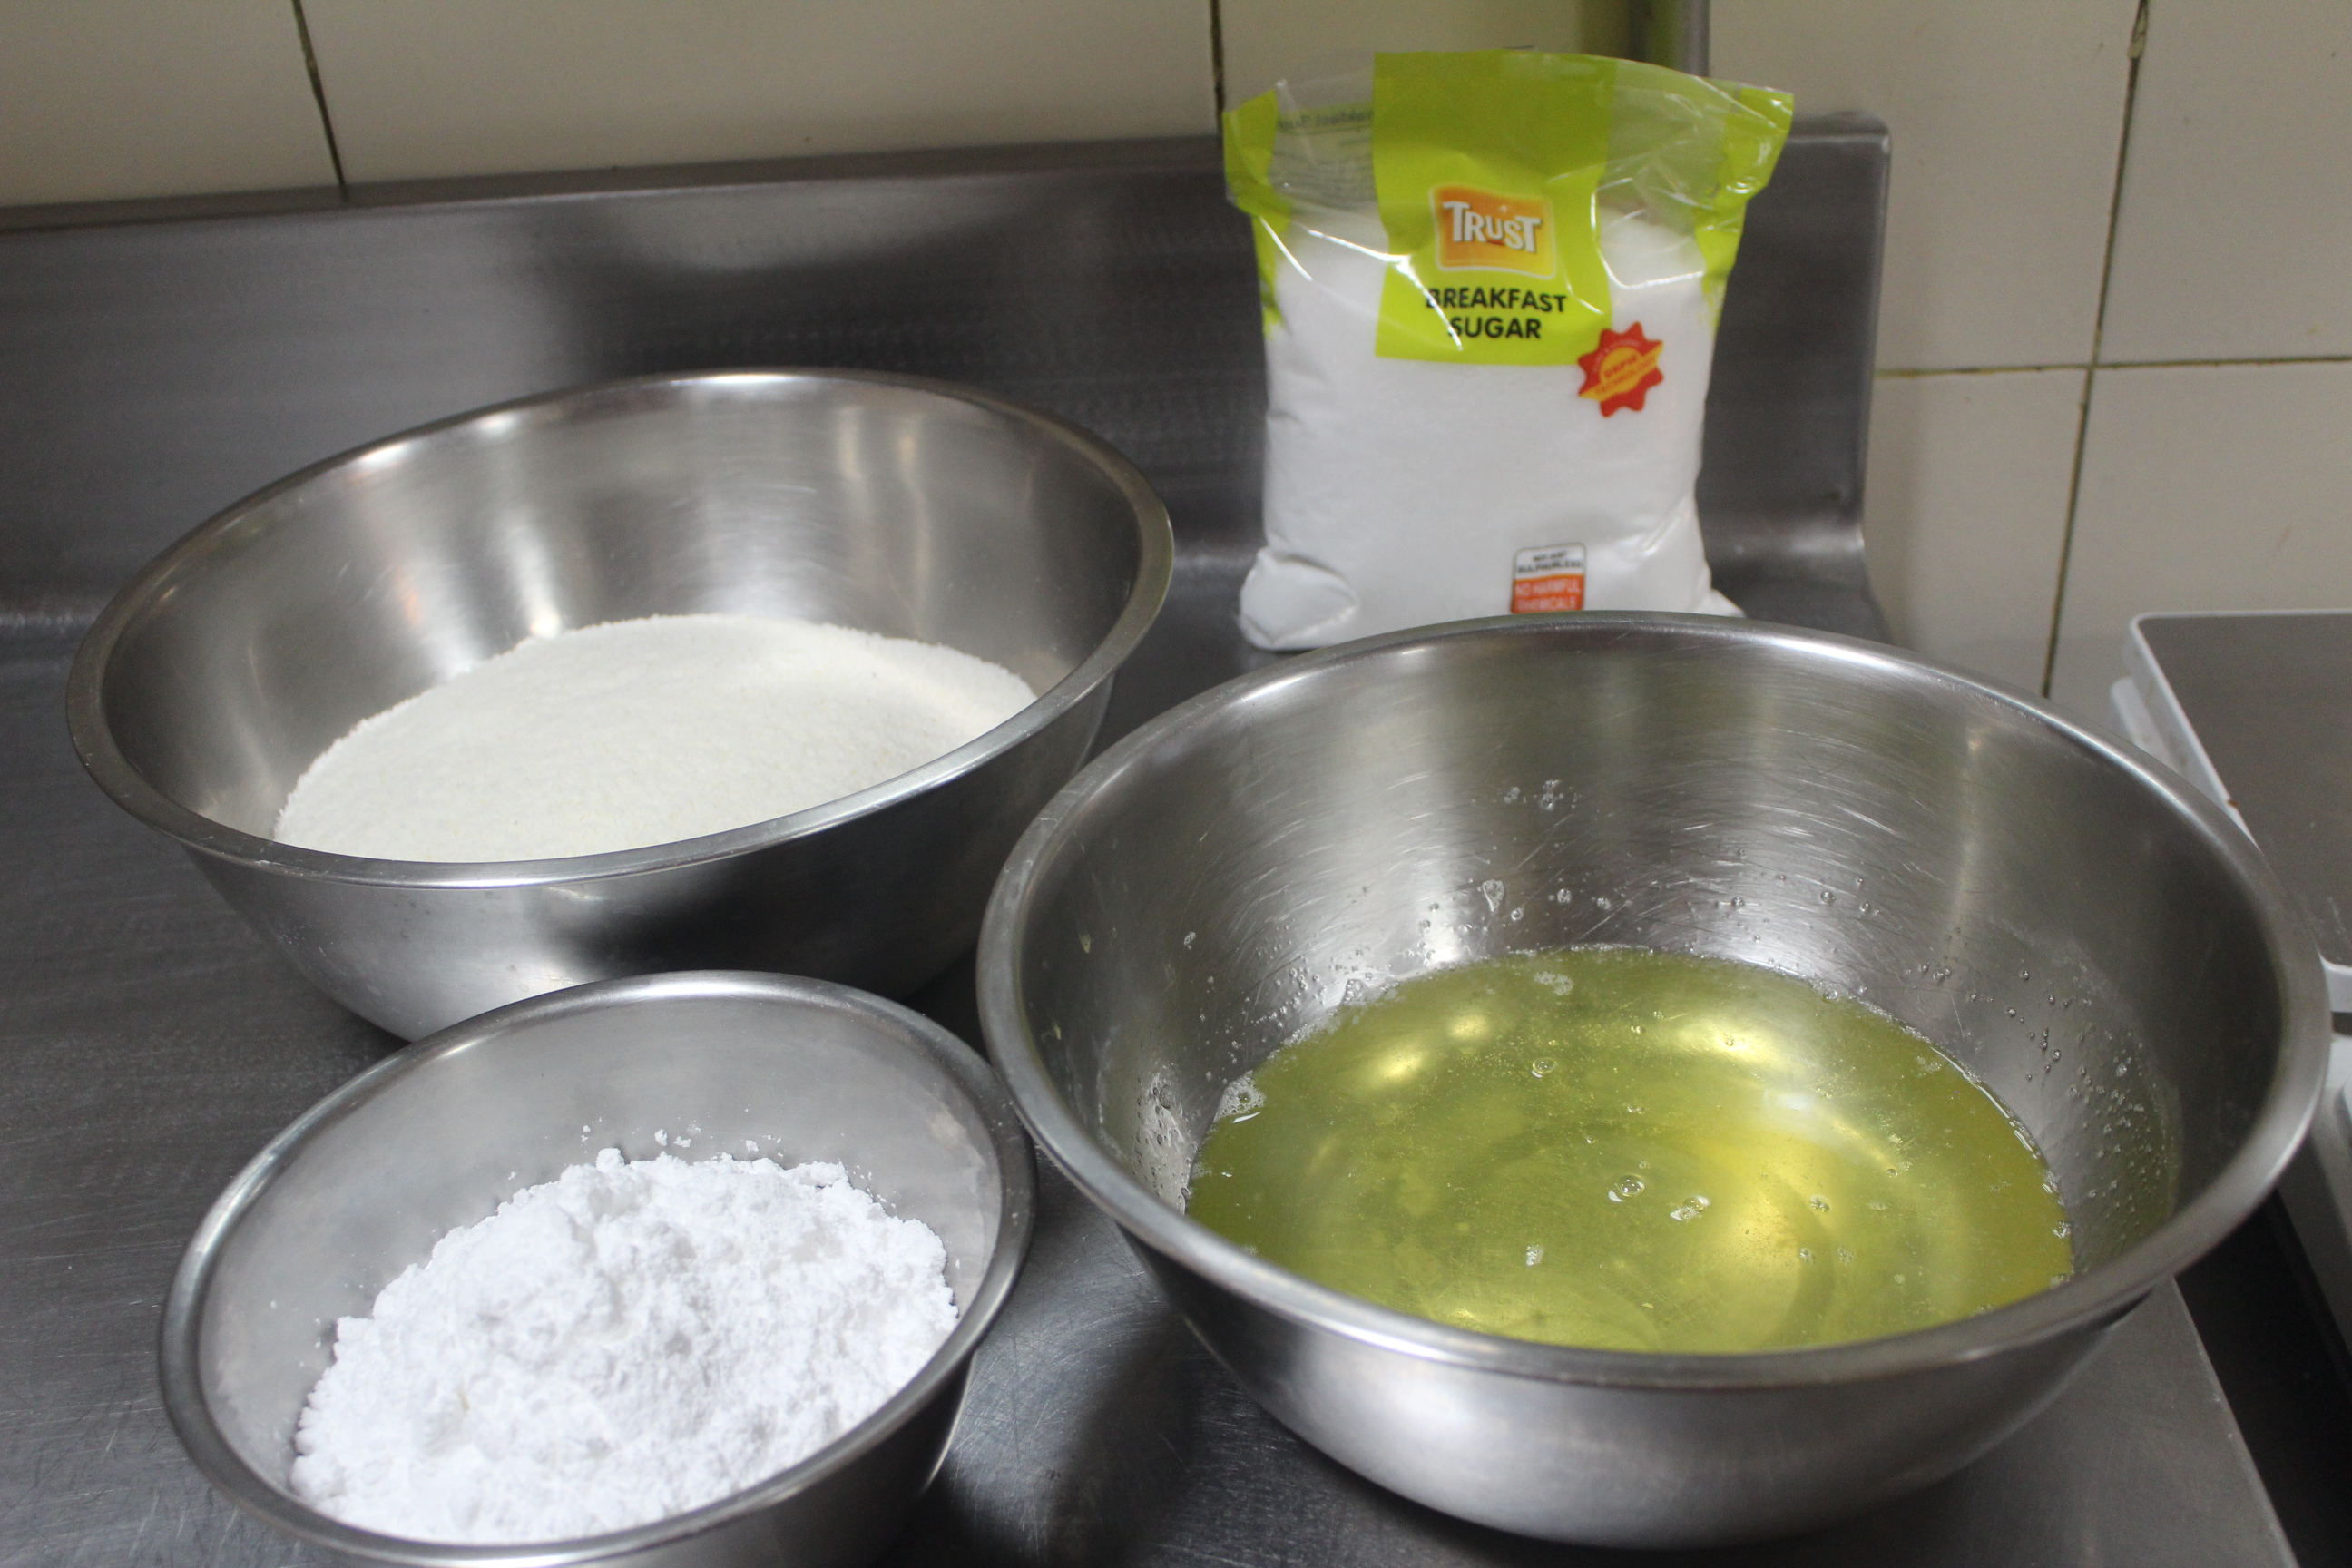
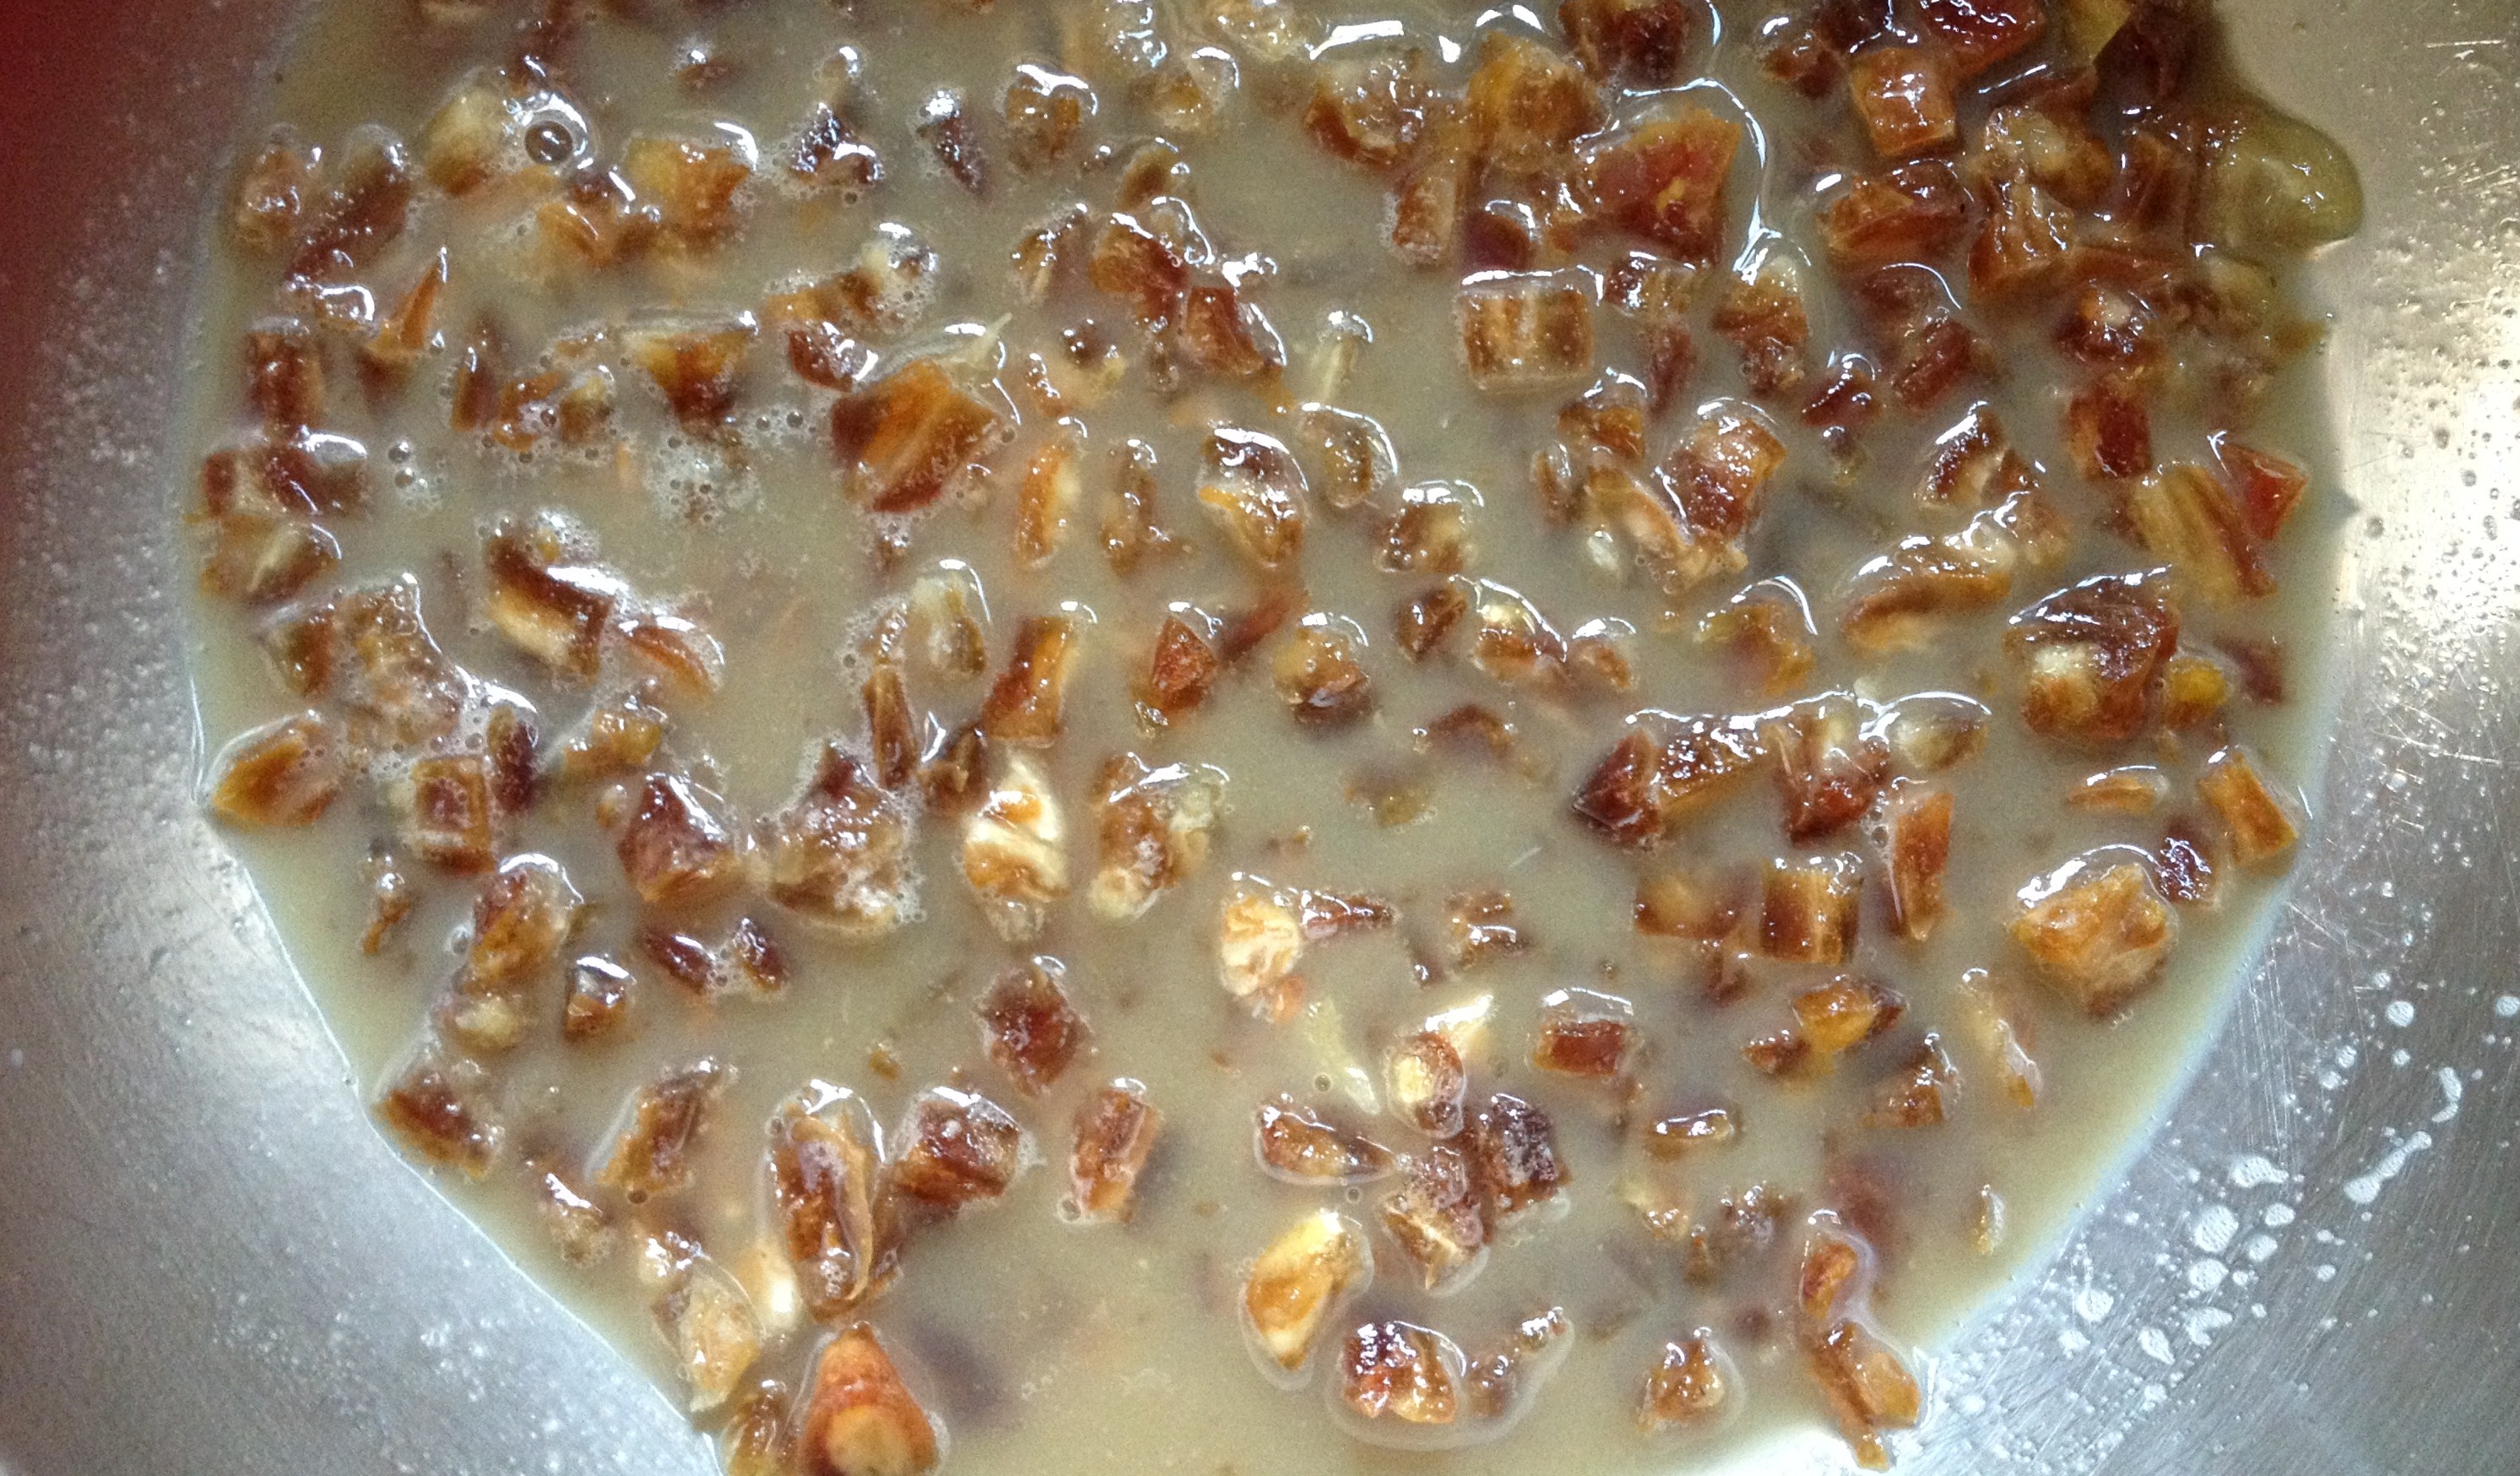
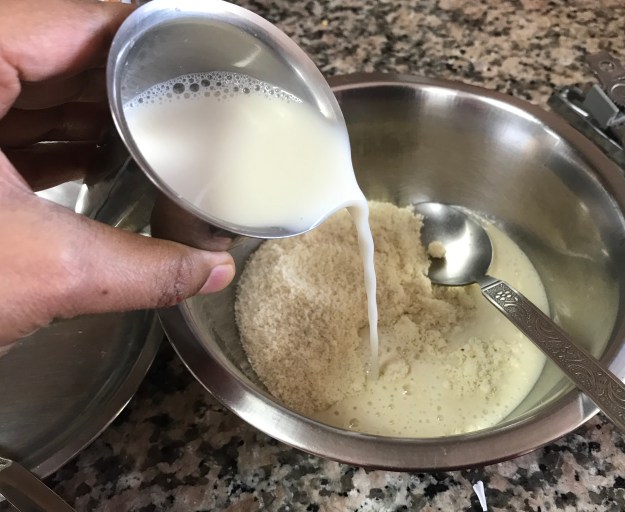
2. Mix two cups of almond flour to two cups of almond/coconut milk blend in a separate bowl
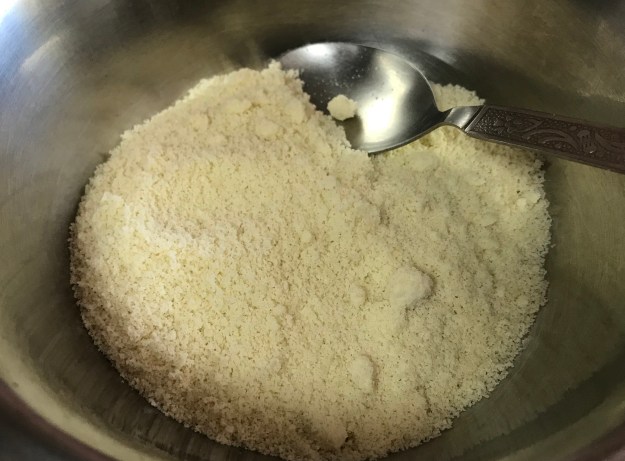
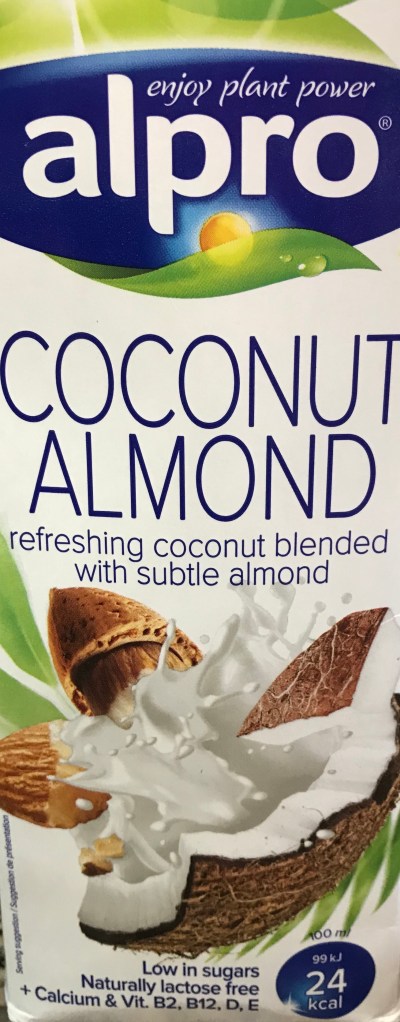
3. Place baking sheet inside a rectangular serving dish and grease it with very little extra virgin coconut oil. Keep this ready. Once the ingredients for Fudge are combined together, the mixture needs to be poured immediately into this sheeted serving dish

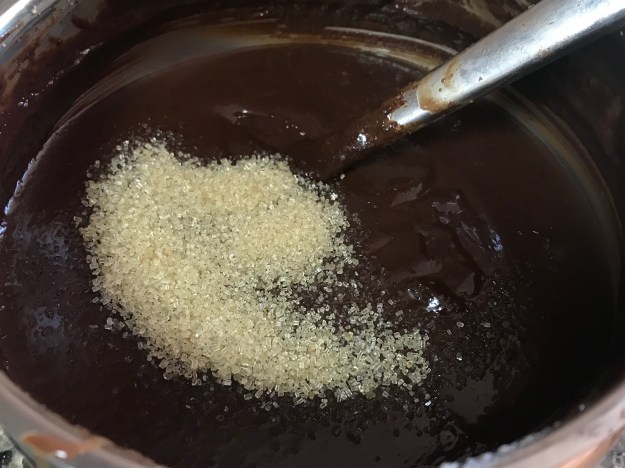
4. When the chocolate is melted smooth, remove the bowl of melted chocolate from the double boiler

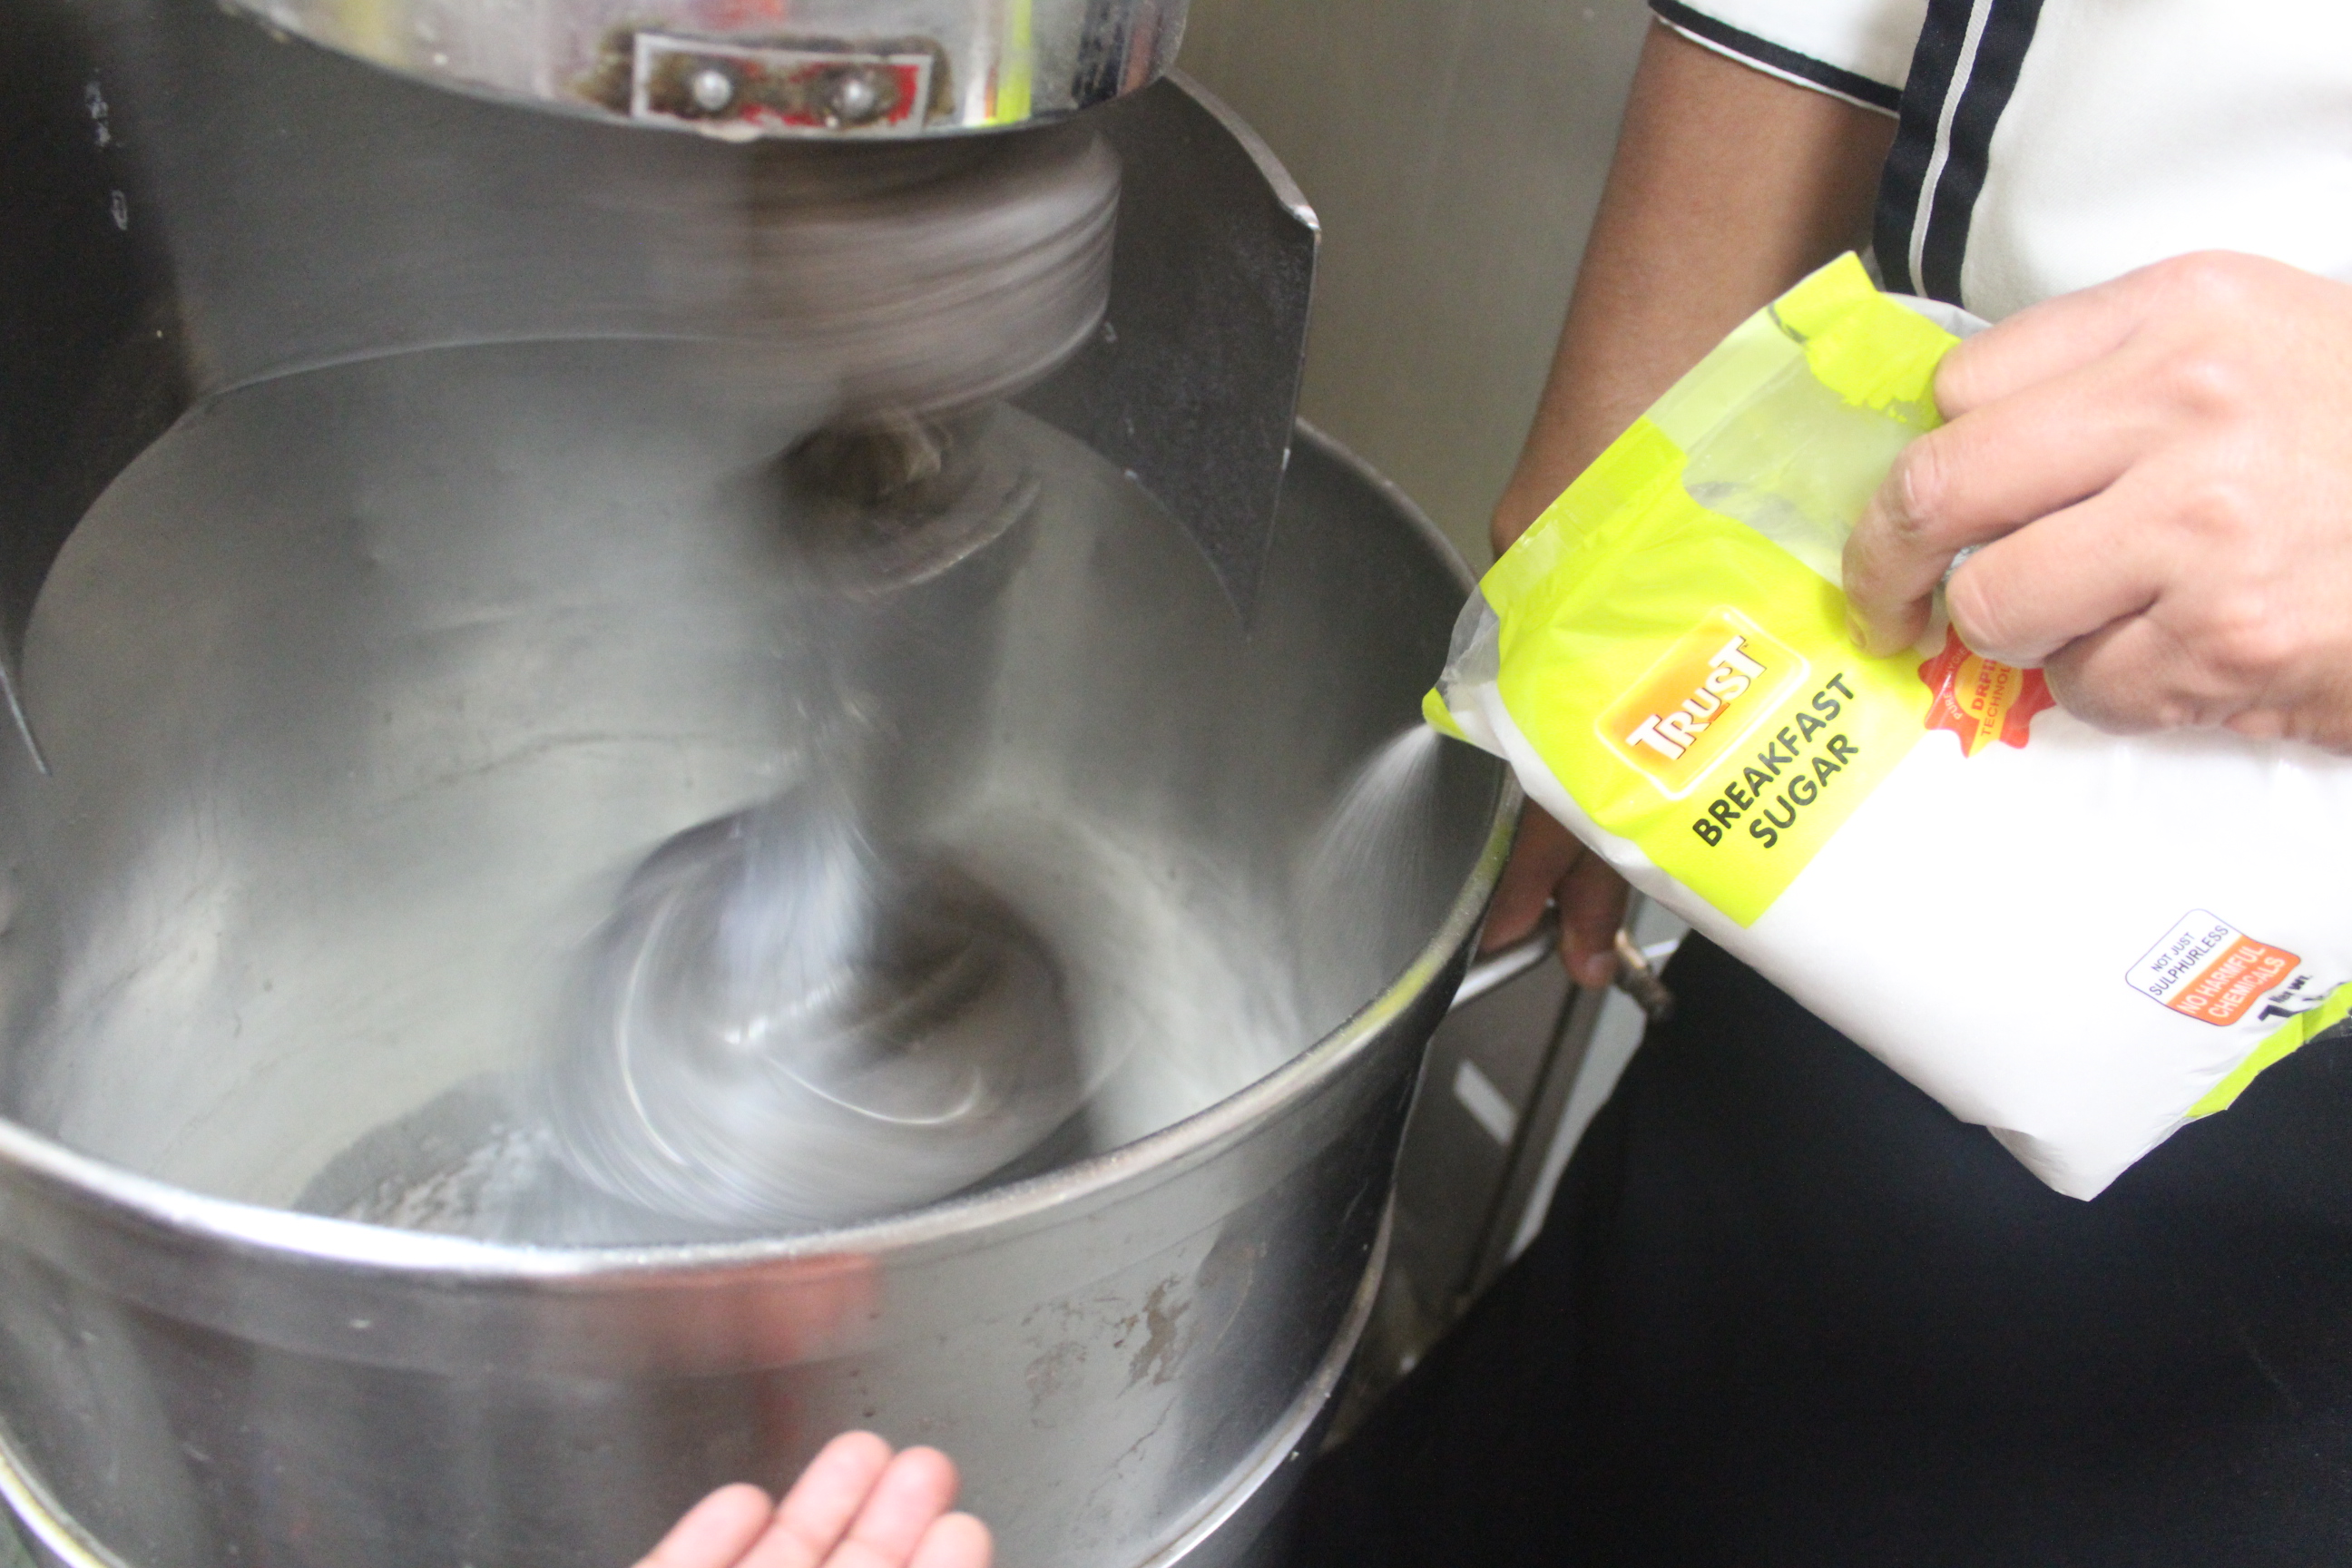
5. Add unrefined sugar to the melted chocolate

6. Mix the almond flour-milk to the melted chocolate

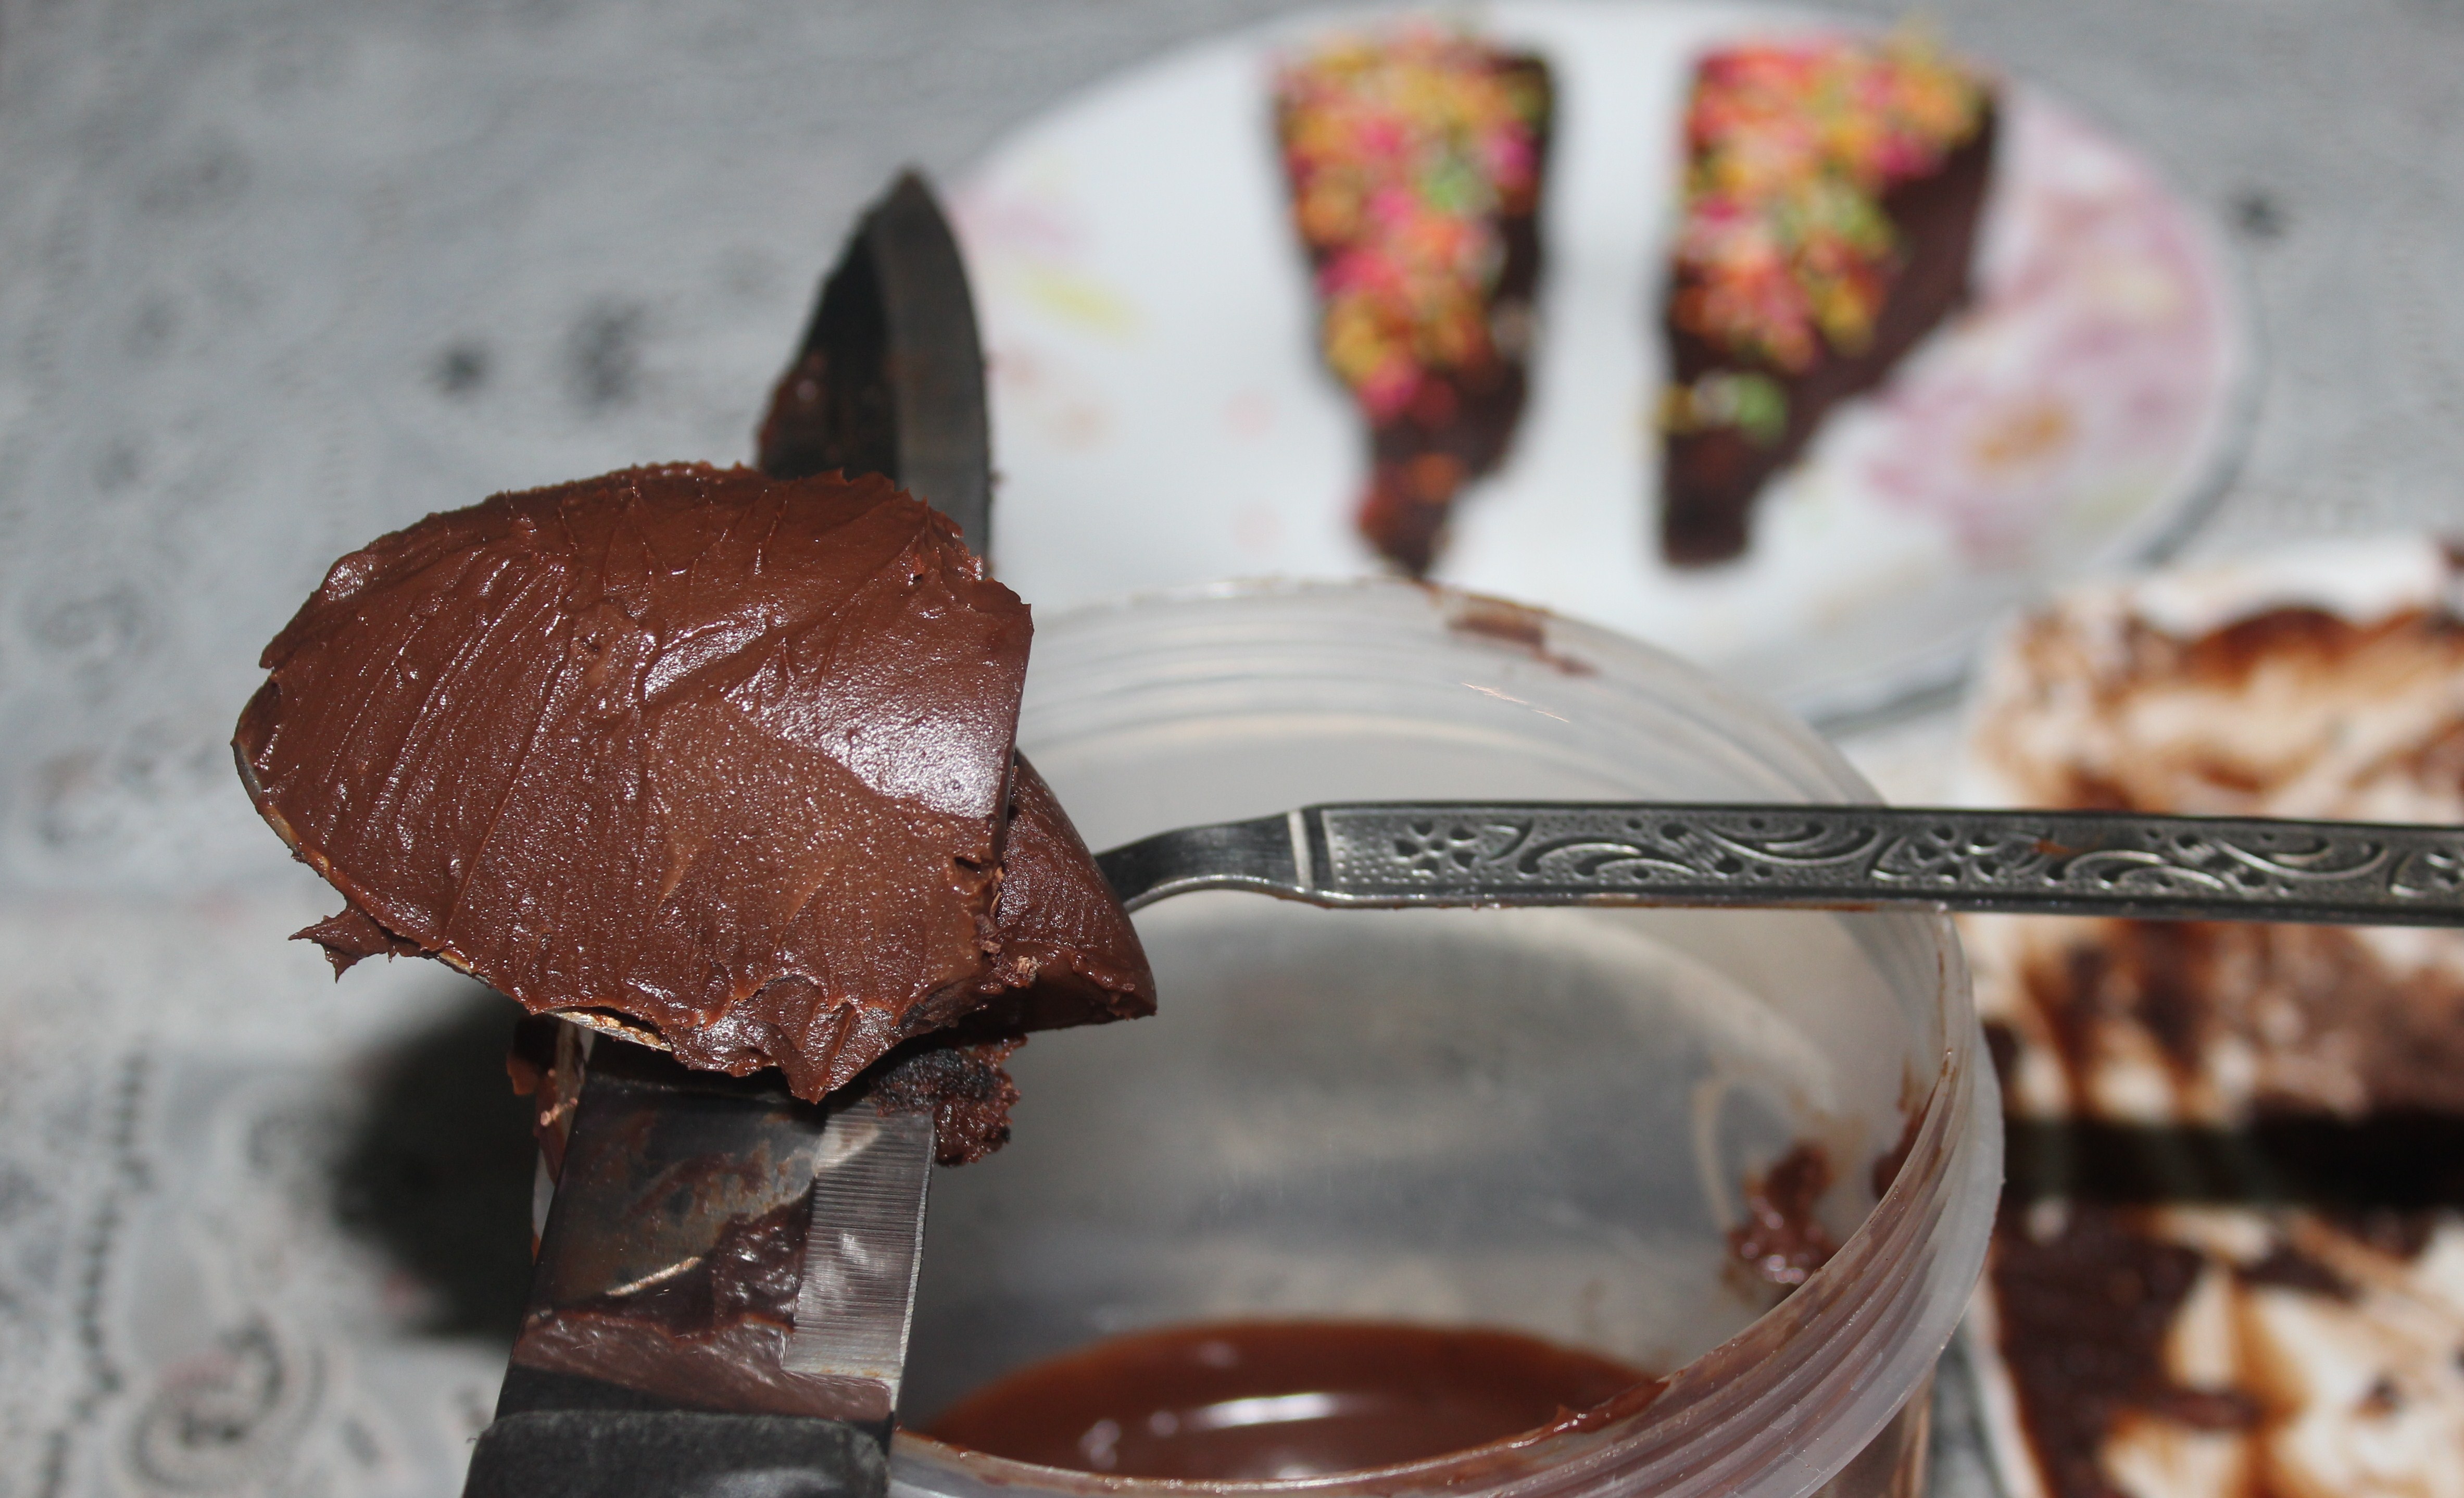
7. The consistency of the liquid chocolate would be paste like now

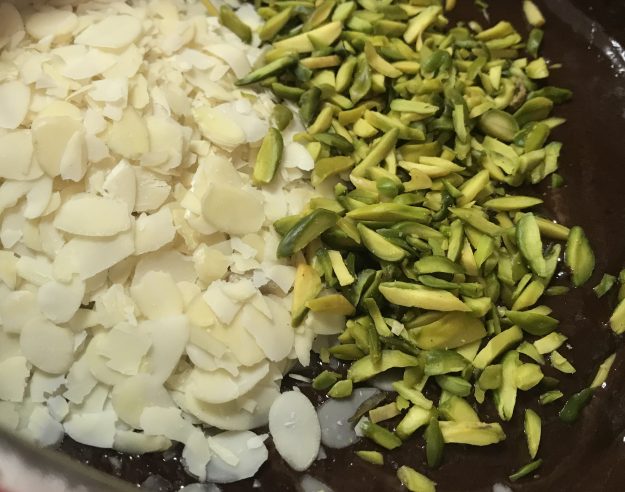
8. Fold in, almond flakes and chopped pistachios

9. Without wasting much time, pour the mixture inside the already greased sheet and spread evenly

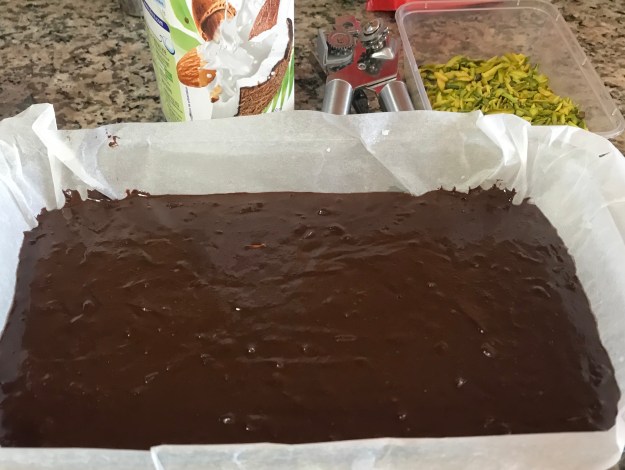
10. Place the dish in refrigerator.Let it set overnight or place in freezer for about three hours

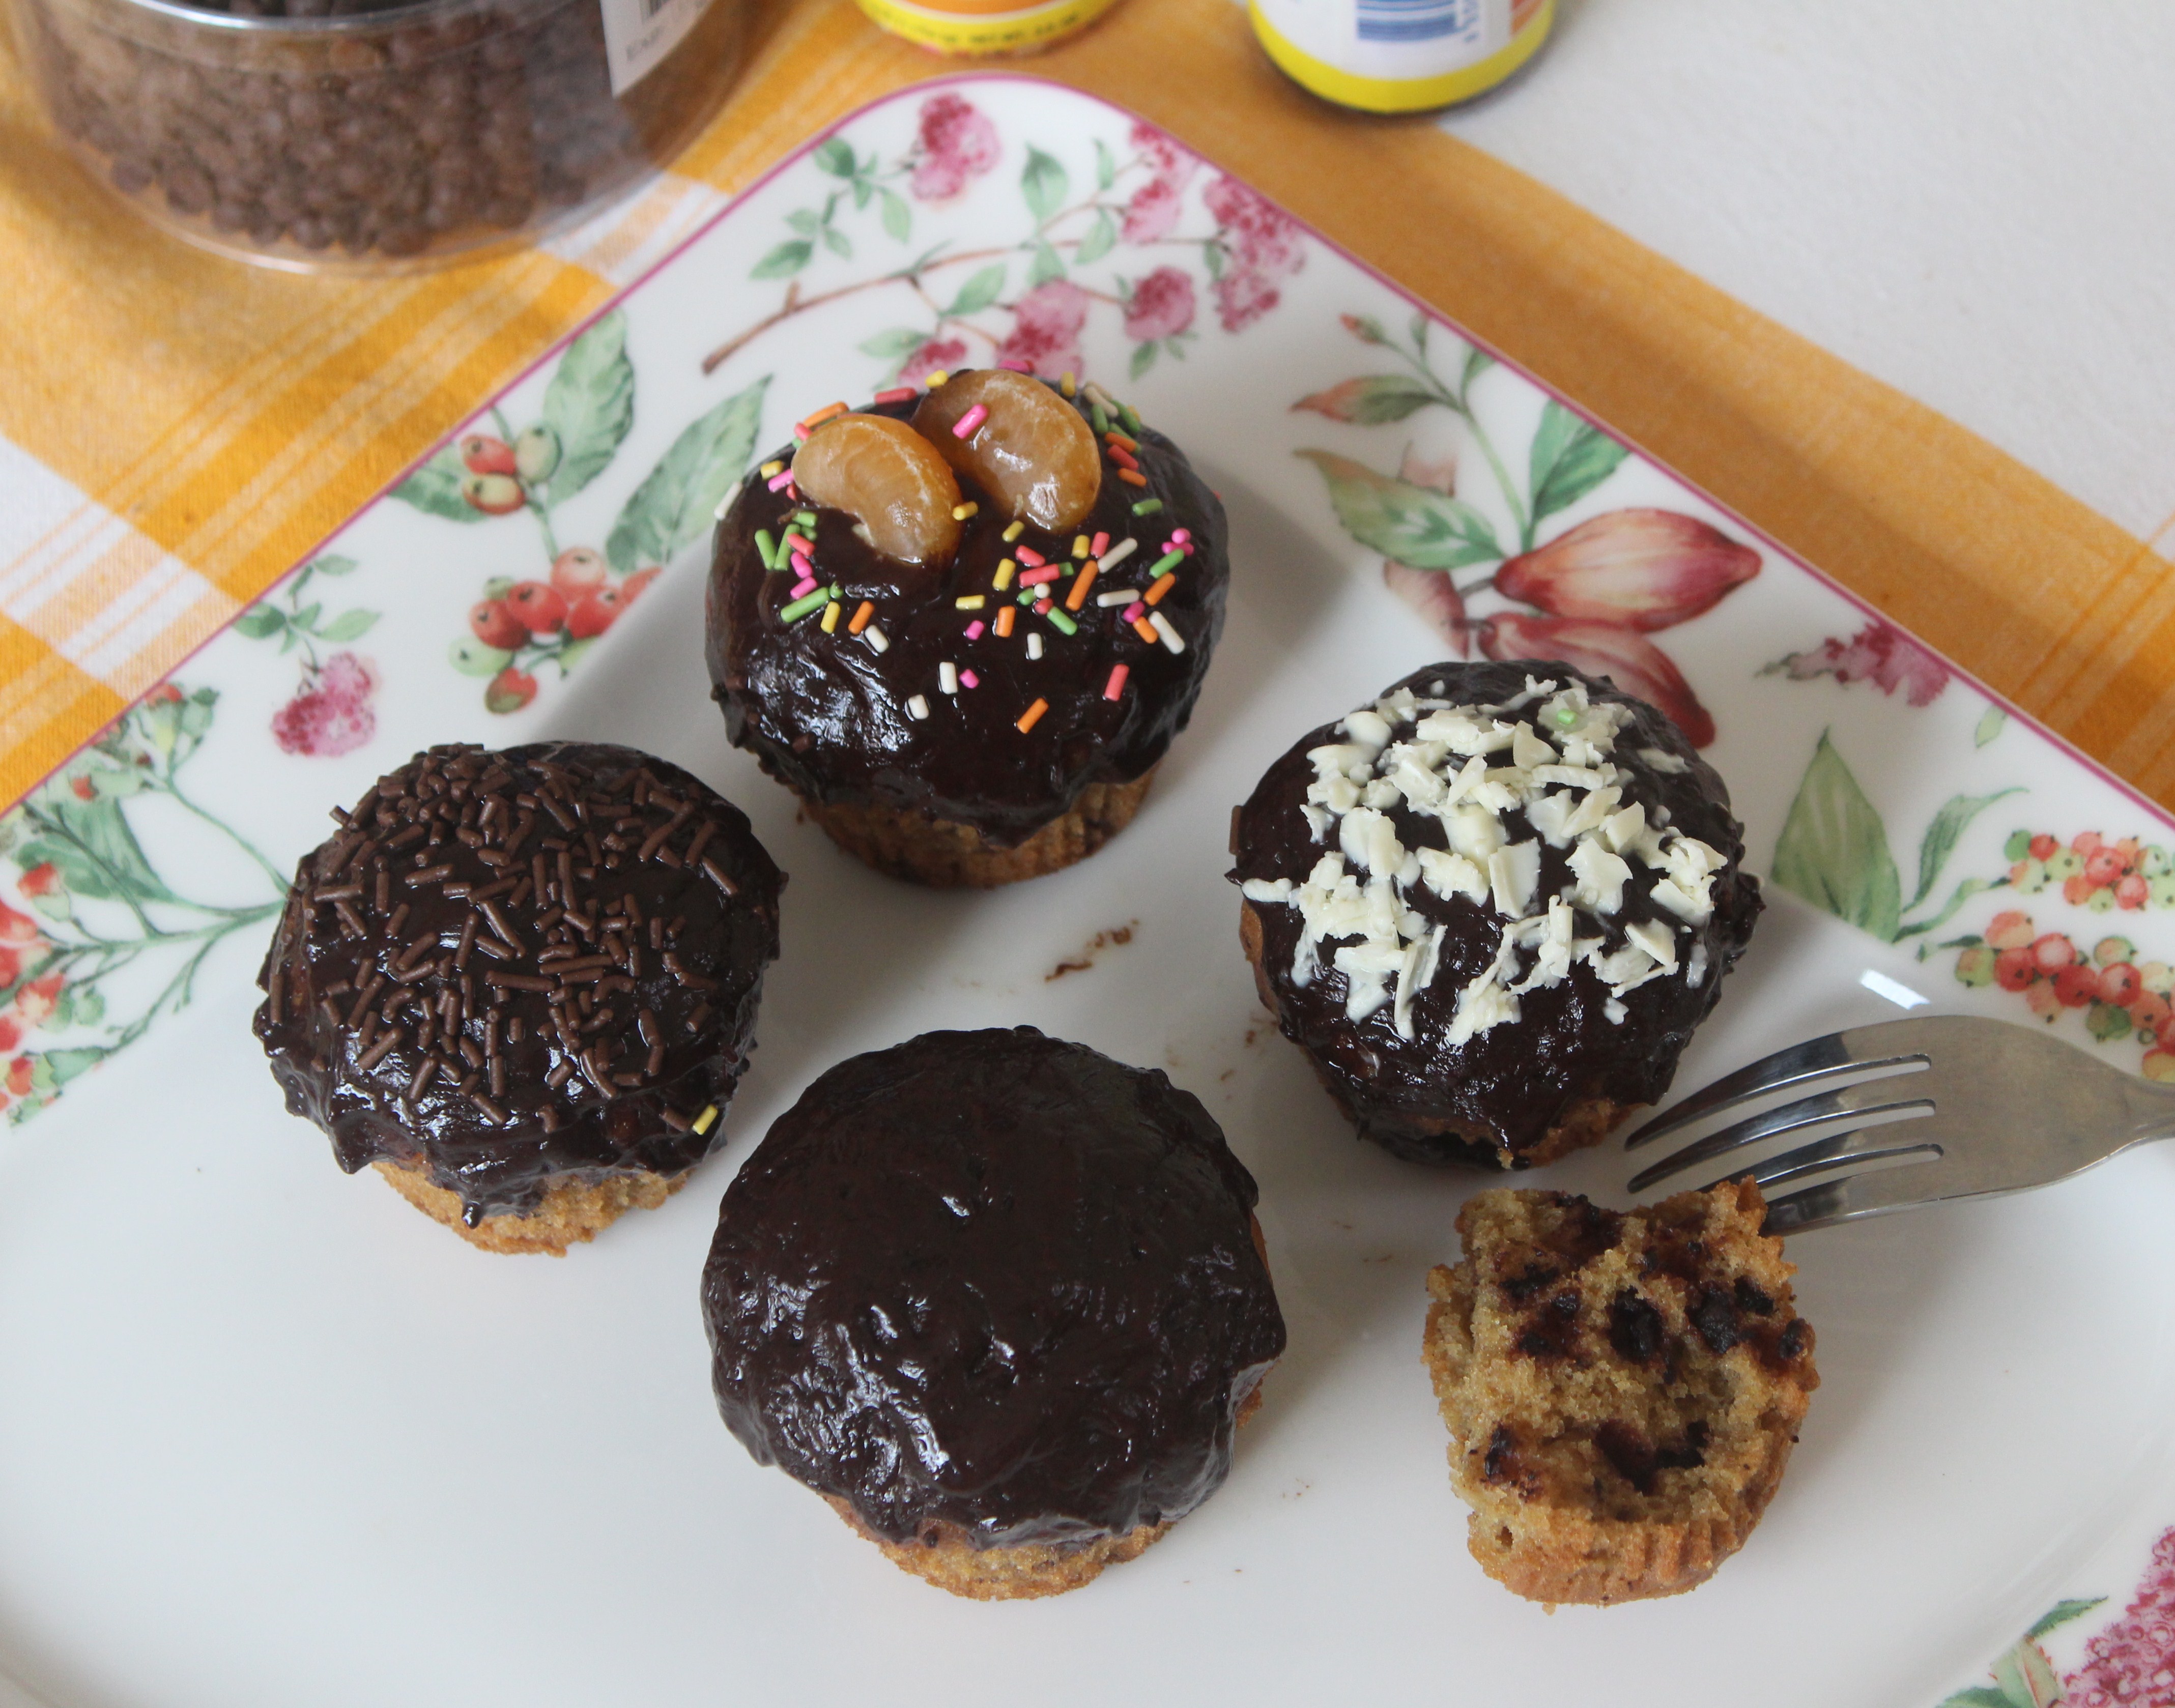
11. Once completely set, cut into squares using a sharp knife.

12. Garnish with preferred nuts or anything of your choice.

13. Feel free to alter sugar – more or less

14. Also, one can try different chocolate combinations.

Are all my Ingredients VEGAN?

While I believed my recipe was 100% VEGAN, I thought it was my responsibility to check, whether each and every ingredient that went into making the Fudge, fell into the Vegan category.

  1. Lindt 70% and 85% dark chocolate

Are Lindt chocolate products suitable for vegans? 
Some of our products are made without any animal products, such as our Lindt EXCELLENCE range with 70%, 85%, 90% and 99% Cocoa dark chocolate bars. Please always refer to the packaging for a definitive ingredient listing. 

https://www.lindt.co.uk/help/lindt-frequently-asked-questions/

…As available in their website.

2. Alpro Coconut Almond Milk

BENEFITS

100% plant-based

Refreshing anytime & anywhere

A source of calcium and vitamins B2, B12, D and E.

Naturally low in fat

Free from colours and preservatives

https://www.alpro.com/aren/products/drinks/blends/coconut-almond

…As available in their website.

3. Almond Flour/Almond Flakes/ Pistachios – Nuts are Vegan

4. Unrefined Cane Sugar

Now, this is ambiguous. Not all unrefined sugars can be Vegan. So, check out.

The process used to filter cane sugar may use bone char. So, it is not that sugar itself has animal products in it, but that some sugar from sugar cane is not vegan because it uses bone char in its processing.

Just because sugar is brown does not mean it did not use bone char either. Brown sugar is produced by refining sugar and then adding molasses back into it, so unless it is labeled, it is unclear if the sugar is vegan or not. However, sugar that is brown because it is unrefined or raw is vegan, even if it is from sugar cane. There are a couple key words to look for if you want to know if sugar is vegan. BeetUnrefinedUSDA Organic and Raw are all phrases that let you know bone char was not used in your sugar.  The labels cane, brown, granulated, or just plain sugar don’t clarify, and so you can not know without contacting the company.

https://www.vivalavegan.net/articles/293-the-sour-side-of-sugar.html

Here, I have used unrefined cane sugar.

This is yet again an eye opener, on how today’s commercial market dictates our culinary routine.

Vegan or not, I found this combination of ingredients – very light and devoid of the usual milky/creamy texture; less sugary; less troublesome to make and yet tasty.

Advertisement

Easy Ladle Cup Cake – No Eggs/No Butter

ladle cup cake (eggless)


Necessity is the mother of inventions… Any gender bias here?? But that doesn’t matter – as inventions in Indian kitchens can be attributed to mothers – mostly. So, when the urge to create something quick to be consumed quick, without left overs to cling on to the waist or bulging tummy -this ladle cake came up.

It’s certainly not my invention, it’s just a discovery and learning from various other bloggers who have done easy microwave mug cakes and brownies. I’ve followed their expertise with the slightest changes according to my needs and my family’s. As I don’t believe in microwave cooking, I opted for oven baking, to make just 6 quick cup cakes with minimum work load, no eggs and no butter too. As usual all my cakes are whole wheat cakes and this one too is.

Why I call this Ladle Cake is that the measurement used here for the basic ingredients is a ladle. Quick, easy, minimal effort and no left overs is a boon for those days of unsustainable sweet craving.
  

Ladle Cup Cake (whole wheat, eggless, butterless)

the ladle I used


Ingredients (makes 6-7 cup cakes or a small cake))

  • whole wheat flour – 3 ladles
  • Sugar (I used unrefined cane sugar) – 2 ladles
  • Olive oil – 1 1/2 ladles
  • Thick yogurt – 1 1/2 ladles
  • Cocoa powder – 1 ladle
  • Baking powder – 1/4 tsp
  • Baking soda – 1/4 tsp
  • Water – enough to make right consistency of the batter – 3 ladles appr.
  • Choco chip – 2 tsp (optional)

  
Method of Preparation


  1. In a bowl, start by mixing sugar and yoghurt
  2. Mix olive oil to sugar and yoghurt
  3. Mix 2 ladles of wheat flour little by little


4. Add little water to make the batter thinner to accommodate the other ladle of flour
5. To the other one ladle of flour, add baking powder, baking soda and cocoa powder- and mix to the batter
6. Add more water to bring batter to consistency


7. Mix the chocolate chip at the end if using. Choco chips give a moisturous texture to the cake.
8. Pour batter into greased cup cake moulds or non-greased cup cake paper moulds.
9. Bake in preheated oven at 180 degrees centigrade for 15-20 minutes, till a tooth pick comes out clean.
10.Sprinkle powdered sugar and enjoy.


Or enjoy with chocolate ganache.
  

Nut Filled Chocolates – Home made


When I bought this beautiful silicon chocolate mould, my urge to make chocolates soared up..justified isn’t it? Though there is a plan to make chocolate from scratch at home, I chose to make the easier version – nut filled chocolates with available dark chocolate. If you are like me – who doesn’t want the chocolate manufacturers to decide the amount of sugar that you would like to have in your chocolate, then choose chocolates with 90% or 80% cocoa content and add your own bit of sugar to sweeten. Else, just choose your favourite chocolate bar.


So,first step – feel free to choose your favorite – milk chocolate, white chocolate, dark chocolate with 50-70% cocoa or the bitter lot – 80%-90% cocoa. I chose to combine 80% and 90% cocoa bars, as my family loves bitter chocolate. Any chocolate you use – follow these simple steps to get your own nutty chocolate. Also, choose your own filling – I filled them with almonds and walnuts. Raisins, dates, dried prunes, dried berries, hazelnuts, pecans, peanuts and many more can be suitable variants. For a beginner like me, I thought nuts or dried fruits might be the better fillings than making cream or caramel centres.
  

Nut filled Chocolates – Home made


Essentials

  1. chocolate mould
  2. two bowls for double-boiling chocolate bar – to melt chocolate on stove
  3. one microwavable bowl – to melt chocolate in microwave


Ingredients

  • Chocolate of your choice – milk, white or dark – approximately 200 gms
  • almonds (toasted) – 15 no.s
  • walnuts (toasted) – 15 no.s


Method of Preparation

a.  Toast the nuts in oven –

  1. Preheat oven at 175 degrees centigrade and place the tray with nuts and toast initially for 5 minutes.
  2. After 5 minutes, take out and give it a shuffle. This will enable even toasting of nuts on both sides.
  3. Toast again for another 5 minutes.. checking after every 2 minutes. If they are crisp enough before 5 minutes, remove them.

  
b.  Melt the chocolate


  1. If using stove, take a pan with half filled water and place another bowl over it. While boiling, water shouldn’t touch the upper bowl.
  2. Place broken pieces of chocolate on the upper bowl and let it melt in the steam of the water in the lower bowl.
  3. If using microwave, place chocolate pieces in a microwavable bowl, and microwave in medium high for 1 minute initially. Take the bowl out, stir and microwave again for 20 seconds.. Repeat the process until chocolate is completely melted.
  4. Be cautious, overdoing might harden the chocolate.


c. Filling the chocolate

1. Pour melted chocolate until half of the silicon mould.


2. Place nuts inside. Either place almonds alone or combine both.. choice is yours.


3. Pour more chocolate to close the mould.


4. Place in refrigerator for 10 minutes or until firm. If you let to cool by itself, it might take at least half an hour to solidify completely, or even more.


5. Remove from moulds once cooled and store in air tight containers in normal temperature or in refrigerator.

The French Macaroon Workshop – Coconut Macaroons

My interest in Macaroons is not only because of my sweet tooth; but my maternal connection to the Pearl City of India – Thoothukudi, which is famous for its cashew-nut macaroon biscuits. The macaroons of Thoothukudi and its relation to macaron and maringue have been discussed in dosaikal previously.  That post was based on a Bakery Visit and learning the process of making macaroons in bulk. Recently, I had this wonderful opportunity to learn the process of making French Macaroons, from a Sous Chef. The Hotel that offers wonderful coconut macaroons to its guests in their Dinner Buffet or Breakfasts/Brunches allowed us to peep into their baking counter. That turned out to be a great workshop on my favourite Macaroons.

What else do I know best, than sharing the episode with my friends through this channel… I chose to do it as a pictoral tour.. come along!
  

The ingredients – as written on the white board for easy reference

  • egg whites – 400 gms
  • breakfast sugar – 1 kg
  • coconut powder – 600 gms
  • icing sugar – 300 gms


in display


the machine


Making Macaroons

1. Beat egg whites


2. Add breakfast sugar – which is supposed to render a sticky texture to the mixture unlike normal granulated sugar. The chef mentioned, the stores sell ‘breakfast sugar‘ which is not the same as normal sugar.


3. When the mixture reaches soft peak consistency,


mix coconut powder and icing sugar


4. Gently fold the coconut powder-icing sugar into the beaten egg whites with hands


5. Remove the mixture into a bowl


6. Drop slowly into piping bags


7. Pipe into beautiful macaroons on a silicon baking sheet


8. Macaroons made by my little chef


9. Bake at 180 degrees centigrade for 15 to 20 minutes


10. Coconut Macaroons are ready. You could serve these as cream filled double macaroons too.


Those macaroons by my little one made my day…truly awesome.

Cake in an hour – Whole Wheat Walnut Cake with Chocolate Ganache and Walnuts

  
That was a busy afternoon, with normal after school snack, home work and other activities of the young one at home. When there was news of sudden guests, I started thinking of quick and easy sweets to serve them. With just a couple of hours in hand and a desire to serve something good, if not exotic, I started surfing my brain for quick goodies. I opened the fridge to find a box full of walnuts and decided to bake a walnut cake. What started as a quick bake, turned out to be a perfect cake with additional chocolate ganache and walnut topping too.  As always, the cake is 100% whole wheat with olive oil and no butter. To reduce more, I mixed the whole batter in a blender, without any stress on hands.

Quick recipe for the quick cake…..

  
Whole Wheat Walnut Cake with Walnut Coated Chocolate Ganache


Ingredients

  • whole wheat flour – 2 cups
  • sugar – 1 1/2 cups
  • olive oil – 1 cup
  • eggs – 3 no.s
  • baking powder – 1/2 tsp
  • baking soda – 1/2 tsp
  • milk – 1 cup
  • vanilla essence – 1 tsp
  • walnuts (finely chopped) – 1 cup


Method of Preparation


  1. In a blender, beat 3 eggs – white and yolks combined
  2. Add sugar, olive oil and blend. You would arrive at a mayonnaise consistency
  3. Add 1 cup whole wheat flour and beat well in the blender
  4. Add baking powder and the rest 1 cup flour and blend well. Now, the mixture would be quite thick
  5. Boil milk in a pan and pour into a bowl with baking soda. The soda added milk would bubble-up into a frothy fluid
  6. Pour this frothy milk into the mixer jar and blend till well incorporated
  7. If one feels the mixture is still thick, add little water to make the batter a bit thinner
  8. At this point, preheat oven at 180 deg. C.
  9. While oven is getting heated up, transfer the batter into a wide jar and fold in the finely chopped walnuts
  10. Pour into greased tin. I used small loaf tins to bake tea cakes. One can bake a whole round or rectangular cake as preferred
  11. Bake the batter for 25-30 minutes or till a tooth pick comes out clean.


Chocolate Ganache with walnut topping

  • 70% dark chocolate – 150 gms
  • full cream – 150 gms
  • hersheys unsweetened cocoa powder – 2 tbsp
  • walnuts – 1 1/2 cups – little more or less – very finely chopped


  1. For the ganache, keep a double boiler on stove and place any good quality dark chocolate, preferably 70% cocoa. I prefer 70% here as there is no extra sugar needed and it is not too bitter.
  2. 70%-80% also gives me the freedom to use unsweetened cocoa powder to make it more chocolatty and slightly bitter as per my taste buds. 90% is truly bitter and adding sugar solidifies it more and that ends up in more cream for the texture of ganache.
  3. So go in for your own favorite good quality dark chocolate and combine with unsweetened cocoa powder and cream, and make your own very bitter/moderately bitter/less bitter ganache as preferred.
  4. Once the chocolate starts to melt, add cream and cocoa powder and stir well till it becomes thick enough to spread with ease. We don’t need pourable consistency here nor a thicker version to apply over the cake.
  5. Spread the ganache on the cake with ease and sprinkle the very finely chopped walnuts on top.
  6. Keep in freezer for 10 minutes to set.
  7. Cut and serve.
  8. The cake is equally good without the ganache too.


Home made Healthy Caramel Popcorn (with palm jaggery) – A Promise Kept!

IMG_3643

While on our recent flight, when my daughter asked for a caramel popcorn snack, I obviously restricted her not only due to the white sugar caramel.. but I could imagine a long list of unnecessary components dancing their way into the box. I was and am truly scared of the butter… too much salt… baking soda…. corn syrup… preserving agents and other unknown ingredients in the pack. I know I sound quite obsessed with healthy food. And as always, I promised her to make a healthier version of Caramel Popcorn at home.
Though in a while relaxing my obsession, I bought her a pack of caramel popcorn and tasted to find the original taste and texture of it. Crispy, buttery, salty, perfectly sweetened with caramelized sugar –  it definitely tasted good. Reading the ingredients, I couldn’t control the guilt of having those unwanted preservatives and unknown elements included in the pack to increase its shelf life.
Now, to keep up the promise..(by the way, I am approximately 75% good at keeping up my healthy promises in the kitchen), I decided to try a healthy caramel popcorn version not altering the taste of the packed junk that we had.
Off late, I have been quite successful in making peanut and sesame candies with jaggery syrup. With that confidence of getting the right syrup consistency, I went to fetch cane jaggery from my storage. In a corner, I saw the ‘chukku karuppatti’ specially bought from Thiruchendur Temple.


IMG_3611
Chukku Karuppatti is a flavourful/healthy combination of palm jaggery and dry ginger, moulded for storage in a hand-made palm leaf box. It is a household remedy for cold, cough and indigestion. So, you guessed right… caramel would be made from ‘chukku karuppatti’ – ‘dry ginger palm jaggery’ – that would aid in digestion too!
Here’s how I made it .. from scratch… with dry corn and no added ingredients. I prefer the taste of popped corn made from the humble pressure cooker than one made in a microwave.
Palm Sugar Caramel Popcorn – flavoured with dry ginger


IMG_3652

Ingredients

for pop-corn

  • dried corn (to pop-up) – 1 cup
  • oil – 1 tsp
  • salt – 1/2 tsp


pressure cooker popcorn

IMG_3614


for caramel

  • chukku karuppatti/palm jaggery with dry ginger – 1/2 cup

Cane Jaggery can also be substituted for Palm Jaggery

healthy brown syrup

IMG_3616


Method of Preparation

coating popcorn in palm syrup

IMG_3617


  1. Melt 1/2 cup palm sugar in 1/4 cup water either in minimum heat or by just stirring
  2. Keep the palm sugar aside at this melted level
  3. Before making caramel, it is better to make popcorn as the thickened syrup would harden quickly
  4. In a pressure cooker, take 1 tsp oil and salt; add dry corn and mix well
  5. Close the lid without the whistle and let the corn pop up in a few minutes
  6. Pop corn is ready
  7. Open the lid and keep aside and start making caramel
  8. For caramel, in a wide bottomed pan, take the already melted palm sugar and make a two string consistency syrup
  9. If one feels the quantity of syrup is too much for the quantity of popped corn, take the extra syrup and store for any other candy next time
  10. Immediately add the popcorn in the syrup and mix well
  11. Crispy Caramel Popcorn is ready
  12. Cool and store in an airtight container.


IMG_3639
It is truly a great feeling of satisfaction and pride to have fulfilled a promise given to your young one!


Eggless Whole Wheat Date and Walnut Cake


IMG_4757

Merry Christmas to one and all!!

Next on the list is an eggless date and walnut cake. This was requested by one of my readers quite some time back. I know this is a very late response, my heartfelt regrets on that… yet better late than never!

This can also be an excellent substitute to a fruity Christmas Cake. There is no need for the caramel syrup in the Christmas Cake, this cake has the true goodness and color of dates. With no empty calories, it is surely a healthy snack or dessert for kids and adults alike.
100% Whole Wheat Eggless (No Butter) Dates and Walnut Cake


IMG_4752


Ingredients


heaped cup of flour

IMG_4733


dates and walnuts

IMG_4738


  • whole wheat flour – 1 heaped cup – 175 gms
  • brown cane sugar – packed 1/2 cup – 90 gms
  • refined oil – little more than 1/2 cup – 90 ml
  • yoghurt – 4 tsp
  • baking soda – 1 1/2 tsp
  • chopped dates – 1 cup – 175 gms
  • chopped walnuts – 1/2 cup – 50 gms
  • boiling hot water – 3/4 cup – 120 ml extra water – 1/2 cup (if needed to add in the end to make the batter thinner)


soaked dates in water

IMG_4732


Method of Preparation

  1. Preheat oven at 160 degrees C
  2. Grease a baking tray and keep ready
  3. In a wide bowl, place chopped dates, sugar and hot water; Close and let it soften for 10 minutes
  4. In another bowl, add baking soda and chopped walnuts to the whole wheat flour
  5. After 10 minutes, the dates would have become soft; add refined oil to the date, water, sugar mixture
  6. To this liquid mixture, add flour – walnut mixture little by little
  7. Now, the batter would be a thick one, add 4 tsp yoghurt and mix well
  8. Use the reserved 1/2 cup water if the cake batter is very thick or use as little water as possible to bring the batter to spoonable consistency
  9. Bake for 50 mins to an hour till a tooth pick comes out clean
  10. Cool and serve the cake.


IMG_4788

Eggless Whole Wheat (No Butter) Carrot Cake with Cream Cheese Frosting


IMG_3777


Carrot Cake is something special for various reasons-  it is a healthy one as it has carrots and has a distinct spicy flavor with cinnamon and nutmeg. I remember baking carrot cake once or twice when I was young, when I didn’t know it was a winter cake. I also firmly believe climate and craving can be diagonally opposite to each other.

Now, how can I bring in winter/snow to Chennai to bake my carrot cake… then I would never have tried this wonderful cake. Remember, I come from Tamilnadu,a state where thaathas (grandpas) and aachis (grandmas) use their mufflers and pull overs for their early morning walks or temple walks, only in Maargazhi Maatham (the tamil month of Maargazhi) – mid December to mid January, when the early morning temp. would be just below 20 degrees.

This report a couple of years might summarise the actual climatic condition of Chennai, Tamilnadu –


A report recently released by the Regional Meteorological Centre, Chennai, said the actual minimum temperatures fall below 20 degrees Celsius during January and February. At times, the actual minimum temperatures varies 2 to 4 degrees Celsius below normal values. Records of the past 25 years show there is a gradual rise in minimum temperatures over Chennai ranging between 17 and 20 degrees Celsius.

The Met office recorded the lowest temperature in the last 28 years on January 27, 1982 (15.6 degrees Celsius), followed by 16.2 degrees Celsius on February 3, 1982. In 2010, the minimum temperature range went up to 17.5-23.4 degrees Celsius, with a monthly mean temperature of 21.2 degrees Celsius. http://articles.timesofindia.indiatimes.com/2011-01-19/chennai/28356276_1_lowest-temperature-degrees-celsius


This is what winter means to us the Tamils! For more on our seasons – see dosaikal.com/thai-pongal-the-harvest-festival/.

Now, with global warming there is a decrease in temperature levels – where aachi has to stay with her sweater for the whole night. Now, Phnom Penh –
‘Citizens Warned to Wrap Up Against Cold Snap’

read the headlines of Cambodia Daily.


While the ministry’s website put temperatures in Phnom Penh at 21 degrees last night, Oum Ryna, director of the ministry’s meteorology department, said in some areas of the country temperatures could drop as low as 14. degrees.  http://www.cambodiadaily.com/news/citizens-warned-to-wrap-up-against-cold-snap-48739/


So, Carrot Cake justified!!
The FLOP STORY and The JOY OF SUCCESS


too watery… not good

IMG_4437


When I tried as usual to make this cake a 100% whole wheat, eggless, butterless cake, it was a heart breaking flop consecutively 4 times. My desperation has no words to express that I even tried baking twice a day the same cake (of-course wasting nearly 200 gms of flour and other things twice in the same day . Thanks to my better half who never mentioned a word on wastage!). And that I tried converting the flop carrot cake into carrot cookies is another story.

The cake looked great from the outside – but was pudding like in the inside. Tried with crushed pineapple and once without the pineapple. One thing became sure – the cake was becoming too moist with yoghurt as substitute to eggs. Mixing all the wet ingredients – oil and yoghurt to sugar as first stage was making the mix more watery. So, adding pineapple created more problems.

Then I came across a few recipes – some vegan, some with all purpose flour and a few egg-less but with butter. A very few had a difference – where the dry ingredients were taken first and then the wet ingredients were added one by one to be immediately spooned into the cake tray and baked in the oven. By this the batter remained intact and didn’t let sugar and yoghurt and oil to become watery. I decided to give this a last try. Hurray!! This method worked well and my long awaited Carrot Cake was delivered in great shape!

Because of the continuous flops, I went in for a smaller cup size.
100% Whole Wheat Egg-less (No Butter) Carrot Cake


IMG_3745


Ingredients

dry ingredients

  • whole wheat flour – 1 heaped cup – 125 gms
  • brown cane sugar – 3/4 cup – 100gms
  • salt – a pinch
  • cinnamon powder – 3/4 tsp
  • nutmeg powder – 1/2 tsp
  • baking powder – 1 tsp – 4 gms
  • baking soda – 1 tsp – 4 gms
  • chopped walnuts – 1/4 – 1/2 cup

wet ingredients

  • grated carrots – 1 cup – 125 gms
  • refined oil – 1/2 cup – 75 ml
  • thick curds – 1/2 cup – 100 gms
  • grated ginger – 1/2 tsp
  • vanilla essence – 1 tsp


Method of Preparation

  1. Preheat oven at 175 degrees Celsius
  2. Grease a baking tray or place greased baking sheet, ready for the batter to be spooned in
  3. In a large bowl, take all the dry ingredients – flour, sugar, salt, cinnamon powder, nutmeg powder, baking powder and baking soda one by one except chopped walnuts
  4. Start adding the wet ingredients one by one  – carrots and ginger first
  5. Next, add oil and last thick curds/yoghurt and mix well
  6. Incorporate well as the baking powder and baking soda with the flour should dissolve completely, yet make it quick as the yoghurt and sugar doesn’t make the batter watery
  7. Fold in the chopped walnuts
  8. Spoon the batter into the baking tray
  9. Bake for 40 to 50 minutes or till a tooth pick comes out clean.


IMG_4705


Carrot Cakes look great with Cream Cheese Frosting – as a family we would prefer a plain carrot cake and avoid the sweet frosting. Still for the great experience of making a frosting and my latest culinary interest – please do bear with me.. my dear friends!
Cream Cheese Frosting


IMG_3795

Ingredients (Less quantity for the above small cake – I had some left over frosting too)

  • cream cheese (I used Philadelphia cream cheese) – 115 gms
  • unsalted butter – 60 gms
  • icing sugar or confectioners sugar – 110 gms
  • vanilla essence – 3/4 tsp
  • chopped almonds for topping

Method of Preparation

  1. Keep the cream cheese and butter out of refrigerator and bring to room temperature
  2. Mix cream cheese and butter until smooth
  3. Add vanilla essence
  4. Spoon in sugar and mix well till a spreadable texture is achieved
  5. Amount of sugar can be altered to individual preference – (this was a bit too sweet for us)
  6. Spread on the cake with a blunt knife or spatula
  7. Arrange chopped almonds or any other nuts of your choice or decorate as you wish.

Egg-less Whole Wheat Carrot Cake with Cream Cheese Frosting is ready!

Whole Wheat-Oatmeal Chocochip Cupcake


IMG_4602

I truly loved this cake. Raised well and fluffy and very light too, might be because of oatmeal! As a cup cake, this was also easier to pack as a break time snack for my daughter. The most delightful thing about the cake – my little princess made it herself. Most of the cakes posted in dosaikal are child-friendly in making- tested and trialled at home with my 6 year old. I give her the ingredients one after the other, while I preheat the oven; She never allows me to grease the cake tray too! So, I can bet on this, this is the best way to engage those little minds of constant energy.

I made this in a small cup measurement. Reason – with the cake series to keep going – baking a cake once a week, is too much for a small family and surely I do not want to put on those extra calories. As a kid’s snack, my kid loves to bake than to have her share.

Whole Wheat-Oatmeal Chocochip Cupcake (makes 6 cupcakes)


IMG_4609


Ingredients

  • whole wheat flour – 1 cup – 75 gms
  • oatmeal – 1/2 cup – 30-40 gms
  • brown cane sugar – 1 cup – 100 gms
  • oil (used refined sunflower oil)- 1/2 cup – 50 gms
  • egg – 1 no.
  • baking powder – 3/4 tsp
  • baking soda – 3/4 tsp
  • hot milk – 1/4 cup (more or less as per consistency of cake)
  • vanilla essence – 1 tsp
  • chocochip – 1 handful
  • chopped walnuts (optional) – 1/4 cup

*substitute 1/2 cup yoghurt in place of egg
*if yoghurt is used, quantity of milk needed might be less – adjust accordingly
*double the quantity of ingredients for more cupcakes

Method of Preparation

  1. Preheat oven at 175 degrees C
  2. cupcake tray or moulds
  3. Mix/Sift whole wheat flour and baking powder and keep aside
  4. Measure the oatmeal and mix with wheat and baking powder and keep ready
  5. In a wide bowl, beat the egg and mix sugar and oil
  6. Add vanilla essence
  7. To this mixture, add the dry ingredients (wheat flour, oatmeal and baking powder) in batches
  8. Heat milk and add to baking soda and it would turn foamy
  9. Pour into the cake batter immediately
  10. If consistency of the batter is too thick, add little more milk; the batter is good if it is spoon-able and need not be pourable
  11. Mix in the chocochips
  12. If adding walnuts, mix in little flour and then add to the batter; this would avoid walnuts settling in the bottom of the cake
  13. Spoon the batter into moulds
  14. Bake for 20-30 minutes or till tooth pick/skewer comes out clean


IMG_4626

Remember the Chocolate Ganache that I had kept in fridge? That made a good topping on the cupcake! Slightly microwaved the thickened ganache and poured over the cupcakes and decorated as per my daughter’s wish!!


IMG_3700

Enjoy.

(100% Whole Wheat, Condensed Milk) Eggless Choco Walnut Cake with (trial attempted) Dark Chocolate Ganache


IMG_4551

I have already posted a basic eggless chocolate cake previously with yoghurt (dosaikal.com/eggless-chocolate-cake/). This one is also 100% whole wheat, no butter and no eggs – but with condensed milk for a richer, more moist texture.  I wouldn’t term it as a very healthy cake – this time I give it up for a little indulgence. Of course, helps my daughter not to be tempted to the best bakery in town for white flour buttery chocolate cake.

Except for a few alien souls on this earth, most of us would relish chocolate cakes or even more chocolate frosted/iced cakes and pastries. With home made vanilla, banana, carrot or chocolate cakes – such cakes from the baker have not been really a hit at home these days – thanks to my little one’s magnanimity accepting my version of cakes! Now, what next when you go to a coffee shop for a break for Ice Chocolade,  the choice is from donuts, croissants or choco frosted cakes or pastries. Donuts are a big NO and Croissants are once in a while alright – but with Choco Frosted Cakes – I am lost myself!! Then, the little one has the best company of the mother and we indulge together – then the guilt is only mine. The little one’s inbuilt innocent mechanism digests it so well!


IMG_3650

That’s what happened last week – A break with Ice Chocolade and Chocolate Cake with Chocolate Ganache! Then, I promised her I shall try at home. I strongly believe icing is for those ‘yogic souls’ with great concentration. Icing is not my cup of tea or my piece of cake – though the piece of whole wheat cake is mine. But melting chocolate blocks and pouring on top of a cake is easier, the only problem being the finishing touch of perfection. I have tried more than a couple of times with melted chocolate topping on my cakes – tasted wonderful but not good with its looks.

Well, to achieve something you need to sacrifice something is a common phrase in Indian films and soaps since decades and no doubt that can be one of the heaviest truths of life too! So, I chose to achieve the goodness of chocolate icing not bothering about the looks of the finished product. I have also vowed to learn frosting swirls for my cup cakes. The warning signal has already been passed over to the ‘Tasting Duo of my Home’ – Father and Daughter Combo!

First the Cake.
EGGLESS CHOCO WALNUT CAKE (100% whole wheat, no butter) WITH CONDENSED MILK


IMG_4524


Thanks to these websites from which I could get an idea of the quantity of condensed milk – but I have altered the ingredients to make the cake with whole wheat – butterless and less sweeter too-

http://www.thatslife.com.au/Article/Food/Reader-Recipes/Condensed-Milk-Chocolate-Cake

http://www.love2cook-malaysia.com/2012/03/eggless-condensed-milk-chocolate-cake.html


Ingredients

  • whole wheat flour – 1 cup – 150 gms
  • cocoa powder – 3 heaped tbsp – 50 gms
  • baking powder – 1 tsp – 4gms
  • baking soda – 1 tsp – 4 gms
  • hot milk (diluted if full cream)  – 1/4 cup – 50 ml
  • refined oil (sunflower oil) – 1/2 cup – 75 – 80gms
  • condensed milk – 1/2 cup – 150 gms
  • chopped walnuts – 1/4 cup – 30 gms
  • vanilla essence – 1 tsp
  • extra warm milk – 1/4 cup – 50 ml (only to be used if batter is too thick)


the dry ingredients

IMG_4508

Method of Preparation

  1. Preheat oven at 175 degrees C and grease a round baking tray or place greased parchment paper in the dish as you wish
  2. Mix the chopped walnuts in very little flour so that the nuts do not settle in the bottom of the cake; Keep aside
  3. Combine whole wheat flour, baking powder and cocoa powder and keep aside
  4. Combine condensed milk, oil and vanilla essence in a wide bowl
  5. Mix baking soda and hot milk and it would become frothy, add this to the wet contents
  6. Fold in the flour, baking powder and cocoa powder into the wet batter
  7. If the batter is too thick, add the extra milk that is kept;  the batter need not be pourable consistency – it is right if it is a spoonable consistency
  8. Mix the floured walnuts to the cake batter
  9. Spoon the batter into the cake tray/dish
  10. Bake for 30-40 minutes (mine took even more) depending upon the oven, till a tooth pick comes out clean


IMG_4514


For the Ganache –

Now, what I learnt about Ganache –


Ganache is a French term referring to a smooth and velvety mixture of chocolate and cream. Its origin is a little unclear, but it is believed to have been invented around 1850. Some say it originated in Switzerland where it was used as a base for truffles. Others say it was invented in Paris at the Patisserie Siravdin.

To make Ganache, hot cream (cream with a 35-40% butterfat content) is poured over chopped semi sweet or bittersweet chocolate, and the mixture is stirred until smooth. The proportions of chocolate to cream can vary depending on its use, but the basic form is equal weights of chocolate and cream. Dark, milk, or white chocolate can be used to make ganache and different flavorings can be added such as liqueurs and extracts. Butter, oil, or corn syrup can also be added when a dark shiny glaze is desired. http://www.joyofbaking.com/ganache.html


I went in search for the basic dark chocolate ganache recipe with butter and framed these two..

http://savorysweetlife.com/2009/08/simply-glorious-chocolate-ganache-recipe-3-ways/ and

http://www.chow.com/recipes/28649-basic-chocolate-ganache

and chose to stick to the second but learnt from the pictures of the first!

I took the 1:1 ratio for chocolate and cream and added butter for the extra shine and glaze of the icing.
CHOCOLATE GANACHE


IMG_4537

Ingredients

  • Chocolate Bar (used 52% cocoa which is not bitter) – 200 gms
  • whipping cream – 200 gms (mine was 30% milk fat)
  • unsalted butter – 100 gms

Method of Preparation

  1. If your chocolate bar is in the freezer as mine, place it outside and bring it to normal temperature or atleast less cold to cut into small pieces and keep in a heat proof dish
  2. Bring the butter to room temperature
  3. Heat the cream in medium stove position and bring to boil
  4. Pour the cream over the chocolate pieces and let it melt – this might take 5 minutes
  5. Stir well so that the pieces are completely melted
  6. Mix the butter to choco-cream mixture
  7. Chocolate Ganache is ready to be poured and spread on the cake.

cut chocolate and pour hot cream into it

IMG_4529IMG_4530

add butter and the ganache is ready to be poured

IMG_4540IMG_4537

NOTE:

  1. This quantity of ingredients for ganache gives about 3 to 4 cups of pourable consistency.
  2. It took less than half for the above chocolate cake.
  3. The rest that I have stored – can be stored for months.
  4. I plan to make choco-swirl icing or choco truffles too!  I might try the swirls on a choco-chip vanilla cup cake!!


thickened ganache in fridge

IMG_3672


Now, I forgot to take a picture when the ganache was ready on the cake. Then, I started thinking of ways to decorate it – which as I said earlier – not my cup of tea still. I decided on chocolate curls and tried but turned out to be grated chocolate!

So, I spread the grated chocolate on top of the ganache… not really pleasing- but truly tasted good.


IMG_4542


Then I thought again of any other means of making my daughter happy –

I had already kept the ganache in the fridge and it was set well. I took it out and spread it on the cake pieces and ended it like this!!


IMG_3602


with sprinkles

IMG_3652

Believe me, the taste of Ganache was truly awesome.. just like the ones in those glass doored -wi-fied  pastry shops!!