A simple person who believes strong roots and values build up stronger generations; and good food and good food habits are one of the best gifts that one can give to their off springs.
I’m still a learner, when it comes to baking Bread. My notion is not a gluten free bread, but something different from the usual ones.
I am at a stage, where I’d like to play with yeast, to find more interesting recipes. Hence, thought of including Almond Flour in the well practiced Bread recipe. Without the gluten (wheat), bread with plain almond flour might not be a successful one. We might need other binding agents like eggs or flax seeds. Even with flax seeds, eggs would be necessary for a Good result.
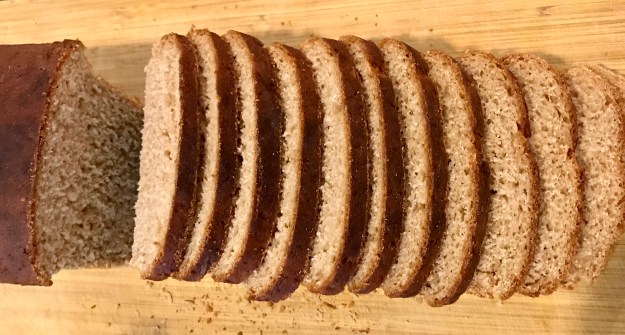
So, I chose to combine Wheat and Almond flours – in the ration 2:1. For 400 gms of wheat flour, I added 200 gms of almond flour. I also included warm buttermilk.
Buttermilk might kill the yeast. So, I had a careful eye to mix the dry ingredients first and then warm water and warm butter milk. And, immediately ran the kitchen machine. We could also proof the yeast before adding it to the flour.
Almond Flour and Whole Wheat Flour Bread
Ingredients
whole wheat – 400 gms
almond flour – 200 gas
honey – 4 tsp
salt – 1 1/2 tsp
yeast – 3 tsp
warm water – 1 1/2 to 2 cups approximately
warm buttermilk – 1 1/2 cups
oil (preferably olive oil) – 2 tsp = 1 tsp for greasing the bowl; 1 tsp for greasing the baking tin
Making the Bread
Process I
In the Stand Mixer Bowl, add wheat flour, almond flour, yeast and salt and mix well with a spatula
Pour warm buttermilk and honey; and switch on the mixer with the dough hook
Add warm water little by little, till the dough has enough water to knead
Note: Almond Flour doesn’t need water as much as plain whole wheat flour would need. That’s why, check the dough and then add water
After the initial mixing up of all the ingredients in the mixer, let the dough be kneaded for 10 minutes. Add more water, if needed while kneading
Alternatively, if you plan to knead by hand-
In a big bowl, add ingredients as in step 1, 2 and 3
Knead well until buttermilk and water gets incorporated and the dough is stretchy.
Grease the same bowl, with 1 tsp oil, and place the bread dough
Cover with a clean cloth, place the bowl in a warm place
Let the dough rise for half an hour or until double
Process II
Knock the dough, and give it a gentle knead
Grease the baking tin with the other 1 tsp olive oil
Roll the dough into loaves and place in the tin
Let the dough rise for another 1/2 hr to one hr – or until doubled
Process III
Preheat the oven at 220 degree C
Place the dough and let it bake for 30-35 minutes, more or less, depending upon the oven.
For a soft crust
Once the baking is done-
Switch off the oven
Brush the crust with butter
Open the oven and leave the bread inside. Let there be a little gap in the door, for air to pass through
Once the bread is warm, remove and let it cool completely
Let it cool, with a cloth covered
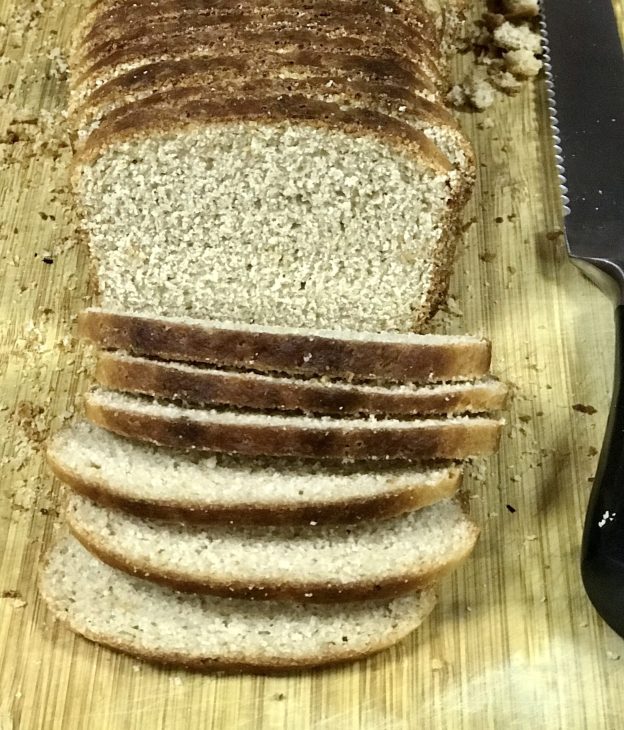
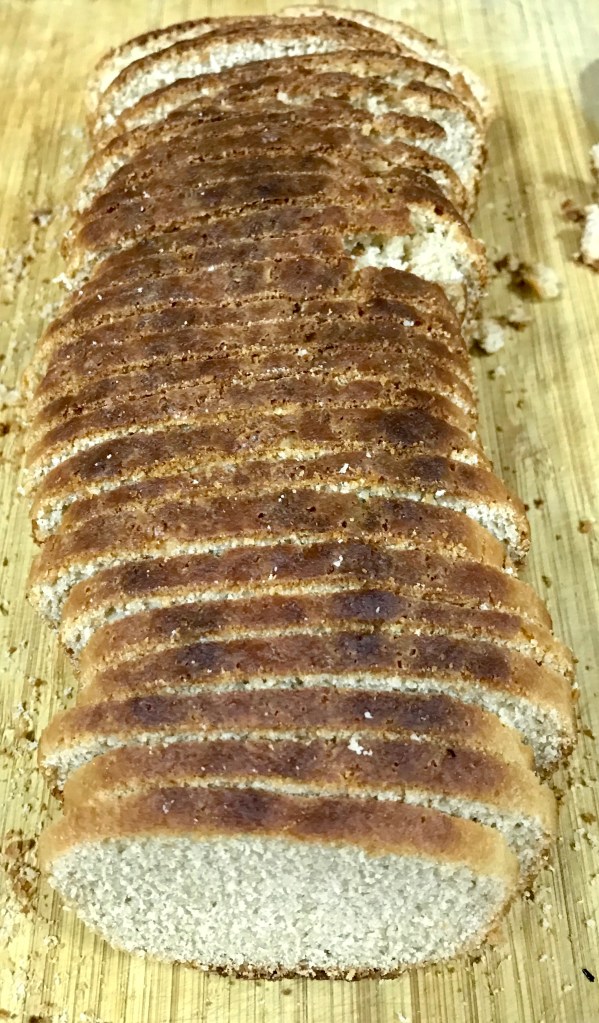
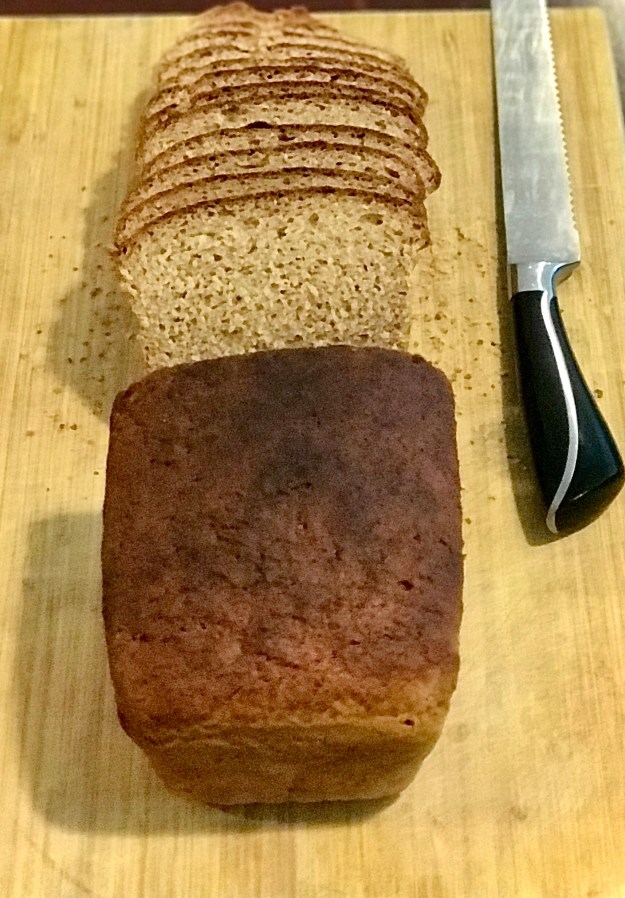
The crust of the baked bread is soft and easy to slice.
Respect for one’s own cuisine, would also result in respect for cuisines around the world, and cuisines around you. Kerala is neighbourhood to Tamilnadu; and both the states share close linguistic, cultural and cuisinical ties. Specialities like Aappam, Avial, Payasam, Puttu, Appam, Coconut Milk Curries and many more, can be found in different versions in both the South Indian States of India.
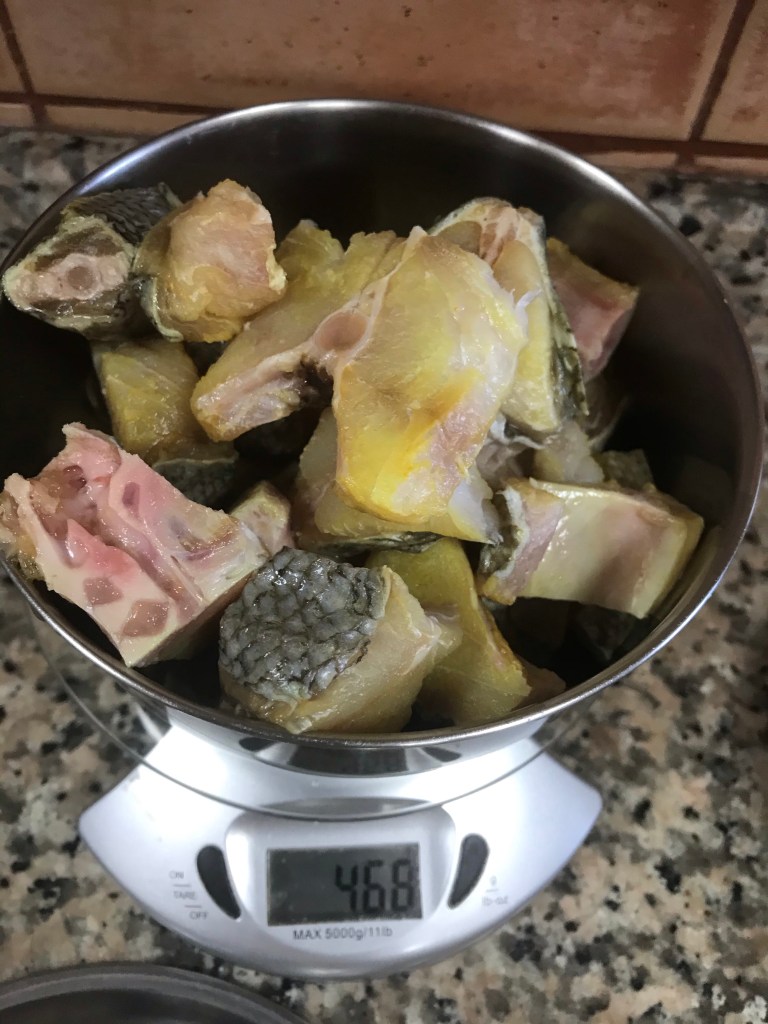
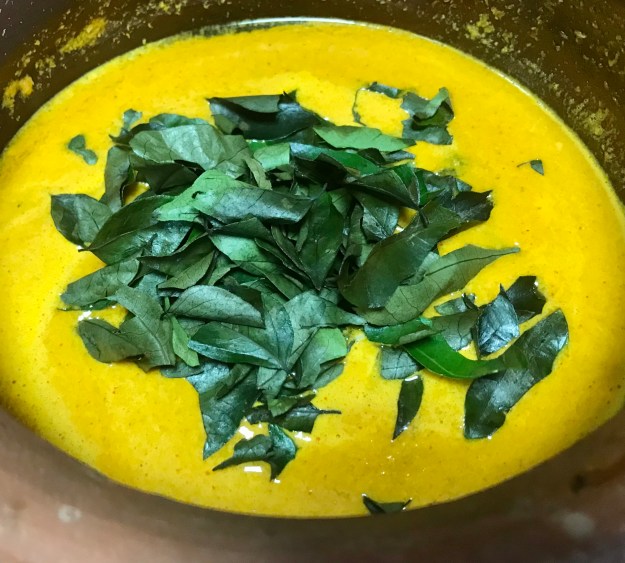
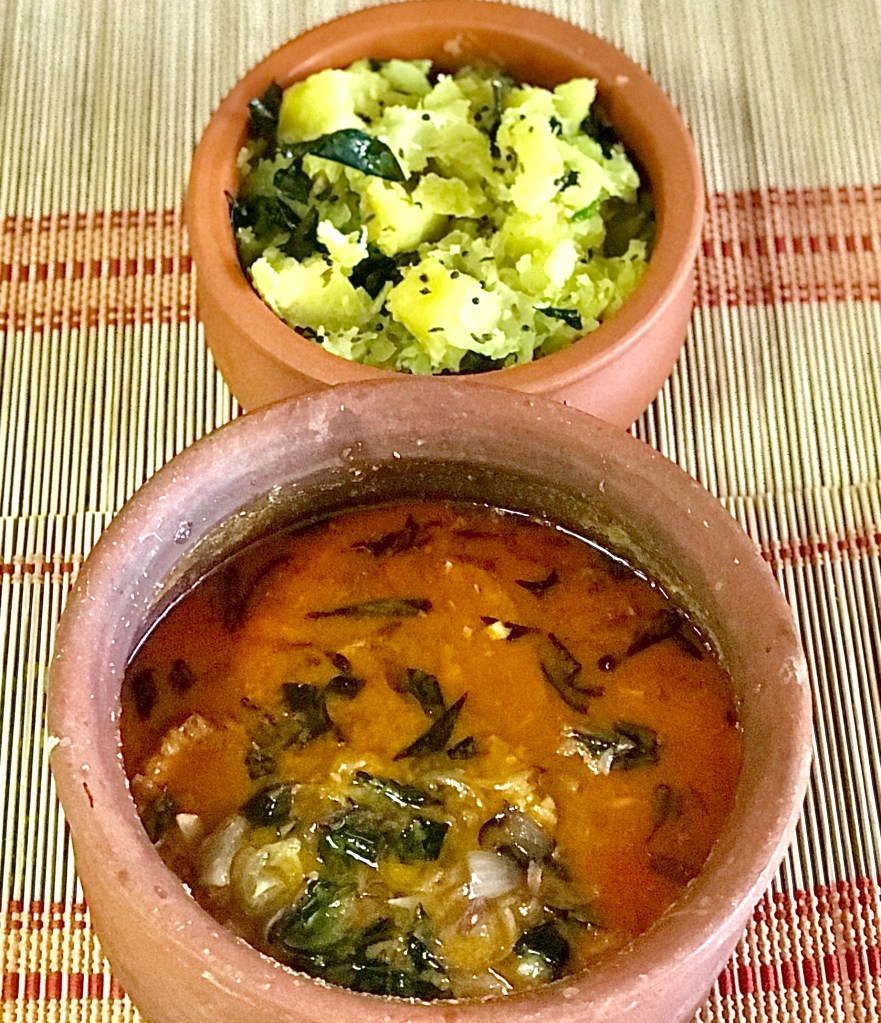
When one of my neighbours from Kerala, my good friend ‘N’, sent me Kappa and Meen Curry – Tapioca and Fish Curry – I couldn’t stop licking the curry, full of flavour. The combined flavours of Coconut and Kudampuli and shine on the curry – from the coconut oil, stayed in my mind for a long time.
Kappa or Tapioca is called Maravalli Kizhangu in Tamil. In some parts of Tamilnadu, it is also called Kappa Kizhangu. ‘Kizhangu’ is a generic term for tubers.
Kudampuli is a tamarind variety, that belongs to the species of Garcinia. It is also called Malabar Tamarind.
So, got the authentic household recipe from ‘N’ and tried to make at home. The joy of making one of Kerala’s most popular dishes- (with Kappa (cooked tapioca)- that’s two of Kerala’s traditional dishes) – was truly overwhelming.
Thanks ‘N’ for the recipe. I have to confess, mine was not as good as hers.
Kappa and Meen Curry – Tapioca and Fish Curry
Ingredients (for approximately 1/2 a kilo of fish)
Fish – clean and cut to small or medium sized pieces – 1/2 kg
For the curry
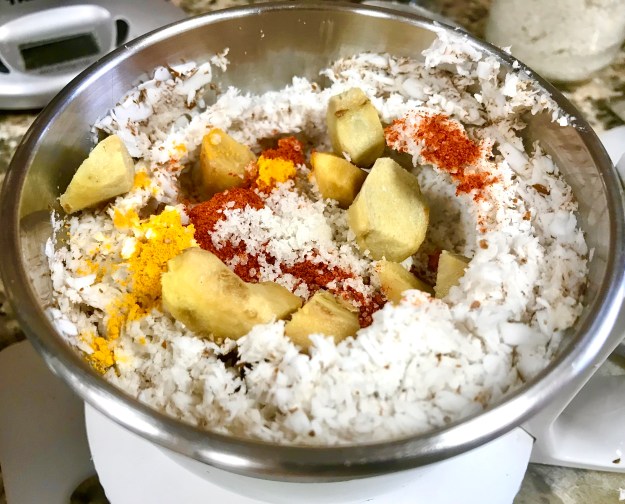
grated coconut – 1/2 a coconut
turmeric powder – 1/4 tsp
red chilli powder – 2 tsp
salt – to taste
ginger – 2 inch piece
kudampuli – 3 pieces washed and soaked in water
curry leaves – a handful
For seasoning
coconut oil – 3 tbsp
shallots – 8-10 -sliced
curry leaves – a handful
green chillies and garlic – optional
Preparing the Fish Curry
I used Black Pomfret. Feel free to use any fish; with bones or fillet as preferred
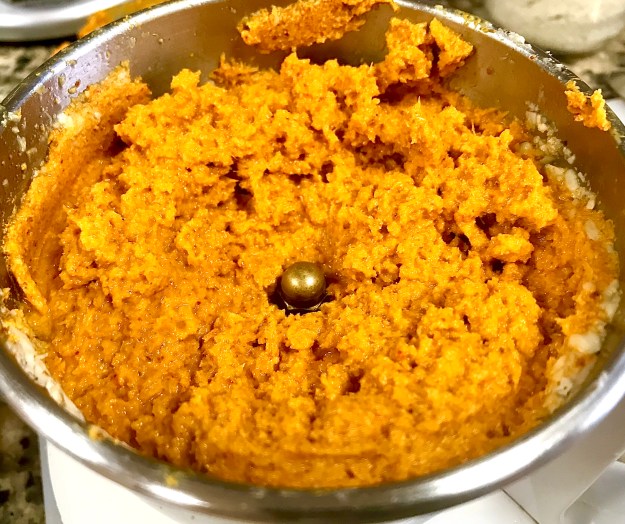
2. In a mixie jar, grind coconut, powders- (turmeric, chilli, salt) and ginger into a smooth paste
3. According to the original recipe, ginger was smashed and added to the curry. To get the flavour and spice of ginger, I blended it with the paste.
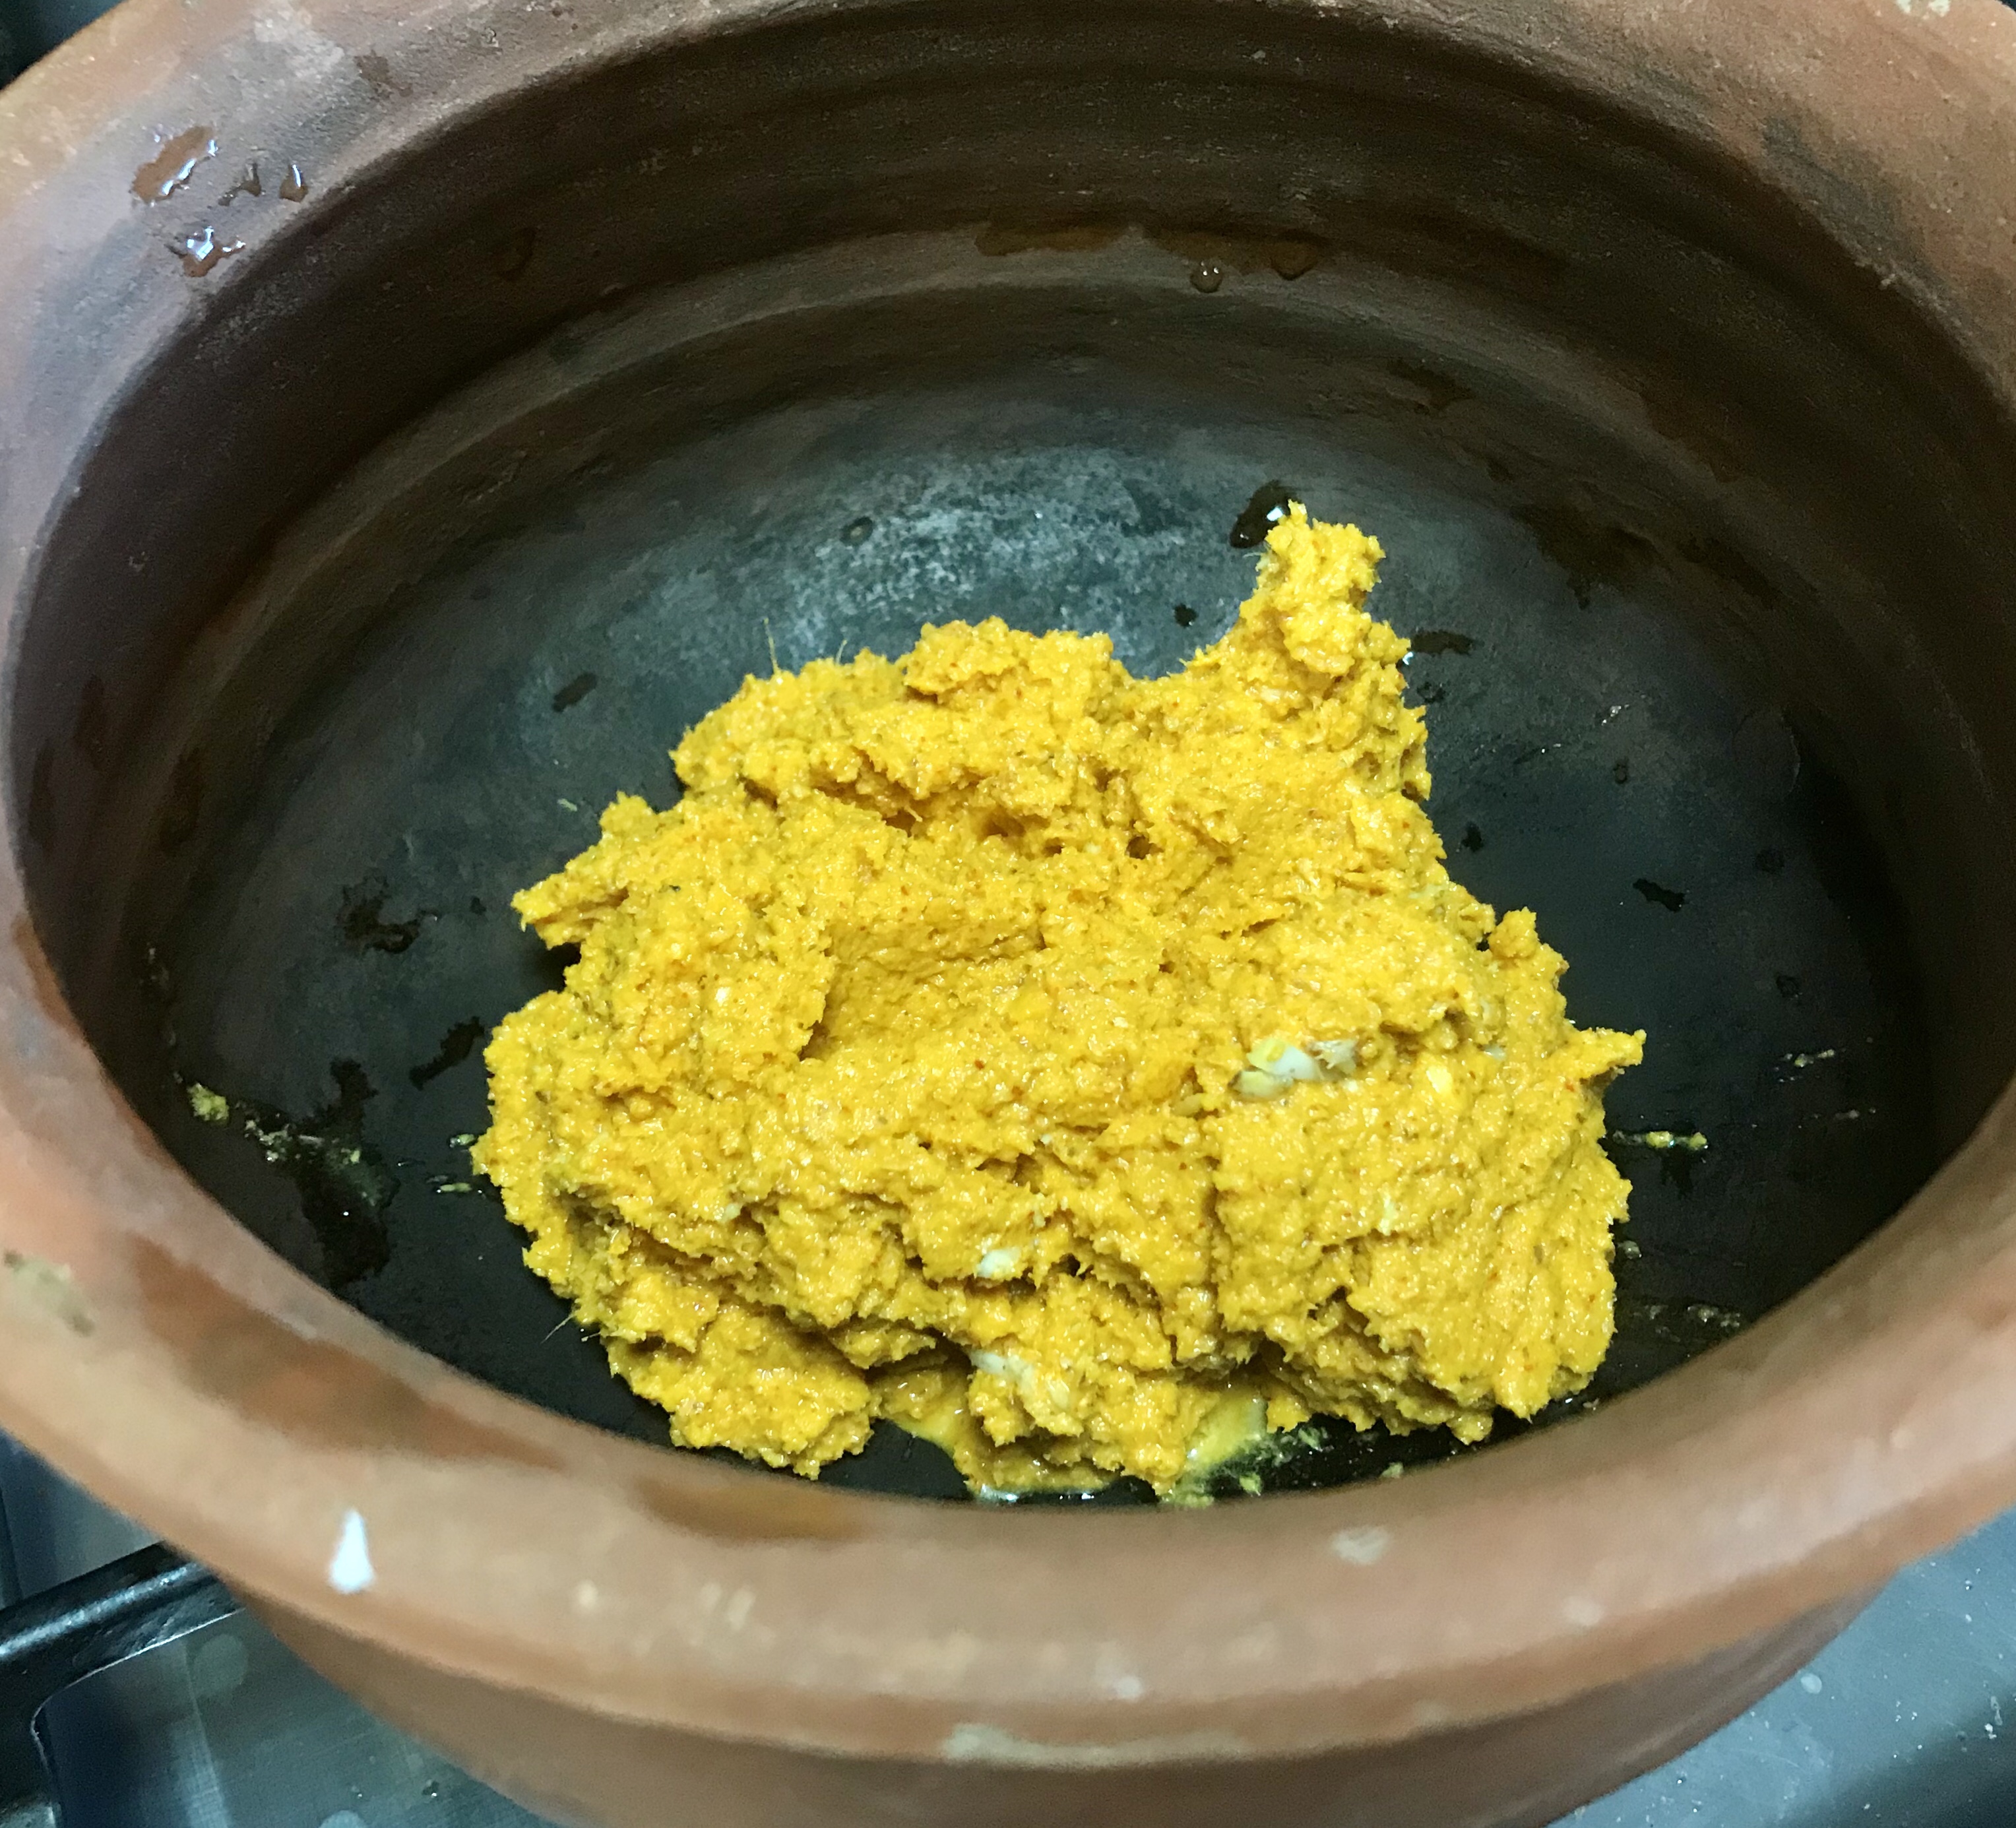
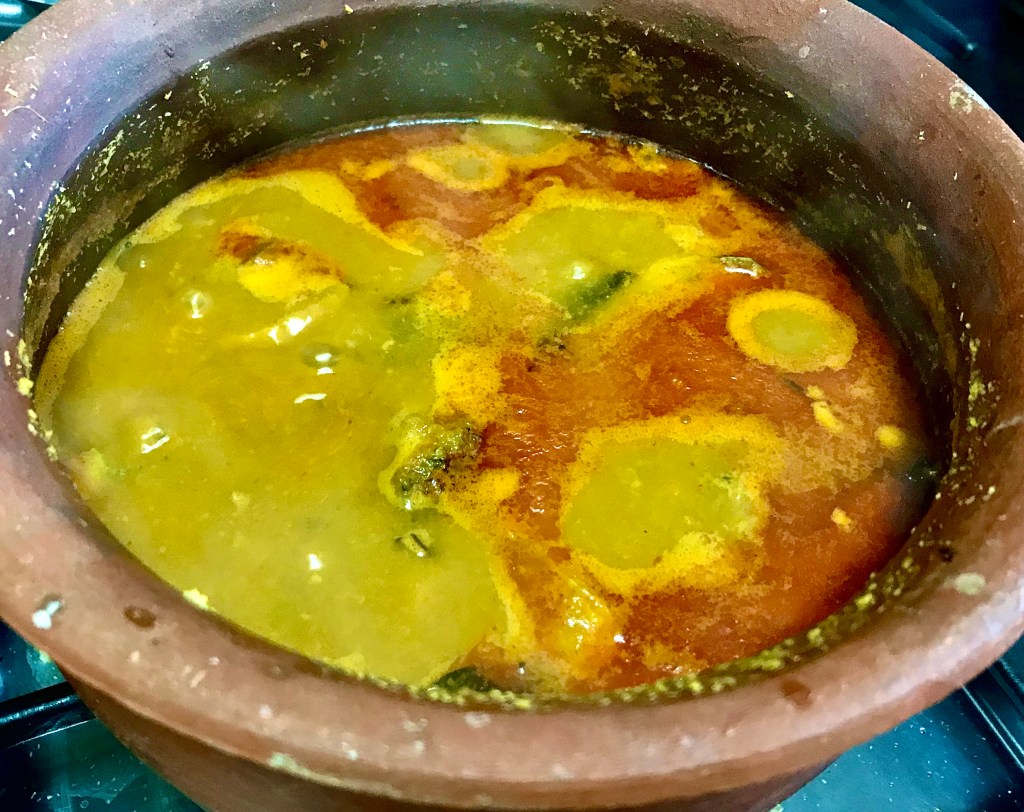
4. In a Clay Curry Pot (Man Chatti in Tamil), add the paste with enough water to make a watery curry
5. Add the Kudampuli/Garcinia with the soaked water and curry leaves
6. Check salt – add more if needed. Let the curry simmer for a while
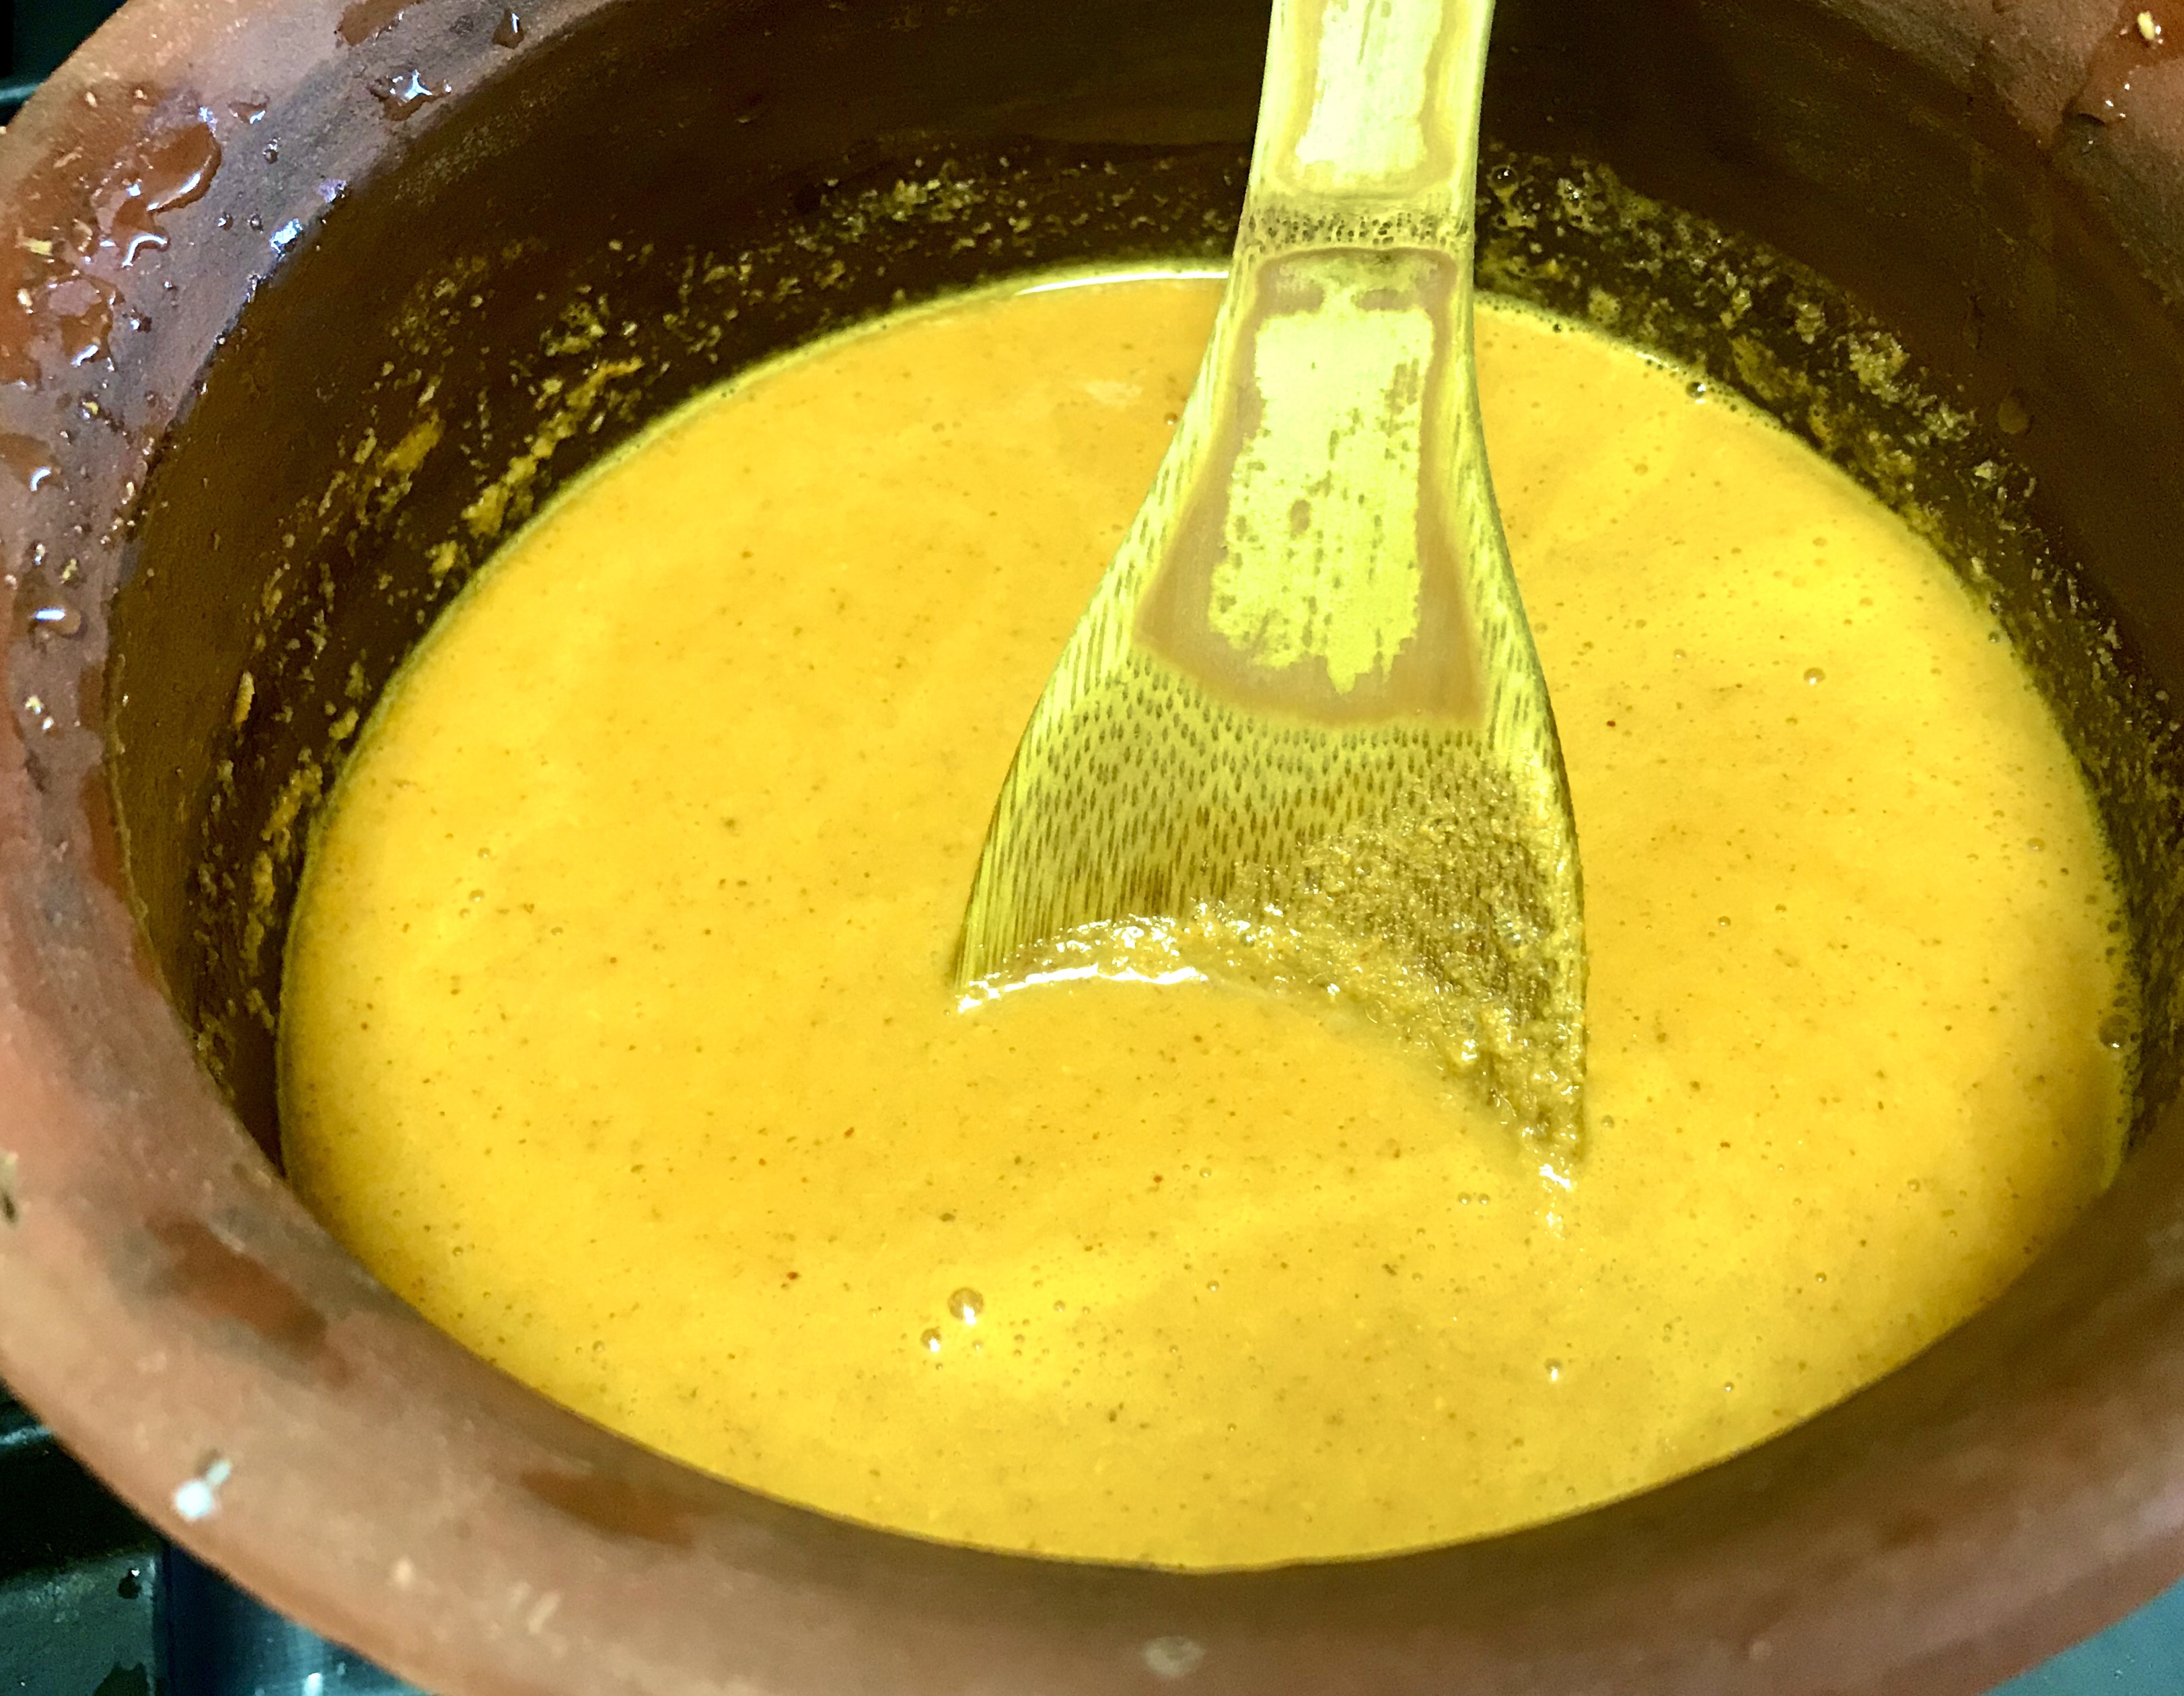
7. When the raw smell of spices change and the curry has boiled well, add the cleaned fish pieces
8. Let the fish cook in the boiling hot curry for at least 20 minutes, with stove in sim position
9. Little more than 20 minutes, the oil from the ground coconut would show up on the curry
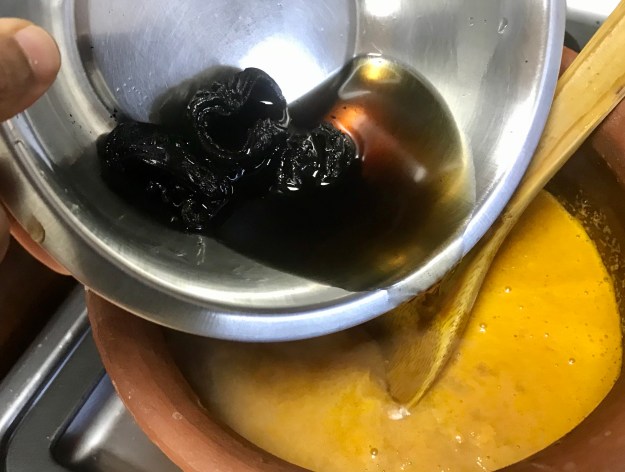
10. Check the curry. If you prefer it to be thicker, boil in medium fire – till it reaches desired thickness
11. When the curry is ready, season it.
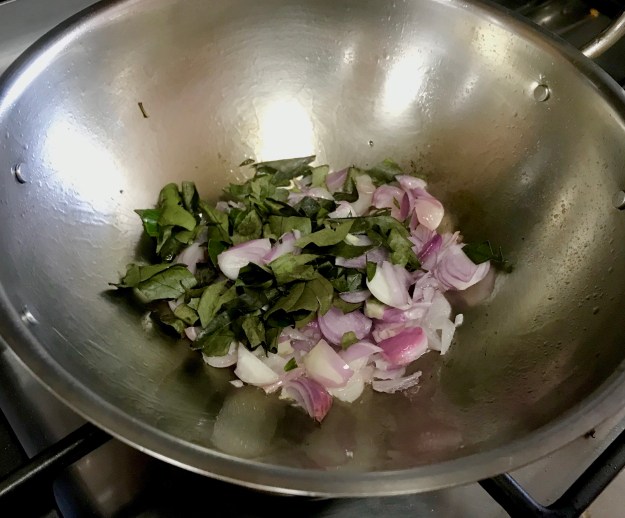
12. Heat coconut oil and add sliced shallots and curry leaves
13. When they are fried a bit, add to the fish curry
14. Half a tsp of red chilli powder fried in oil, can also be poured on top of the curry. This renders a beautiful red colour and extra flavour to the curry.
15. Serve hot with boiled Kappa – Tapioca.
16. The amounts of coconut and chilli powder can be altered as per family preference.
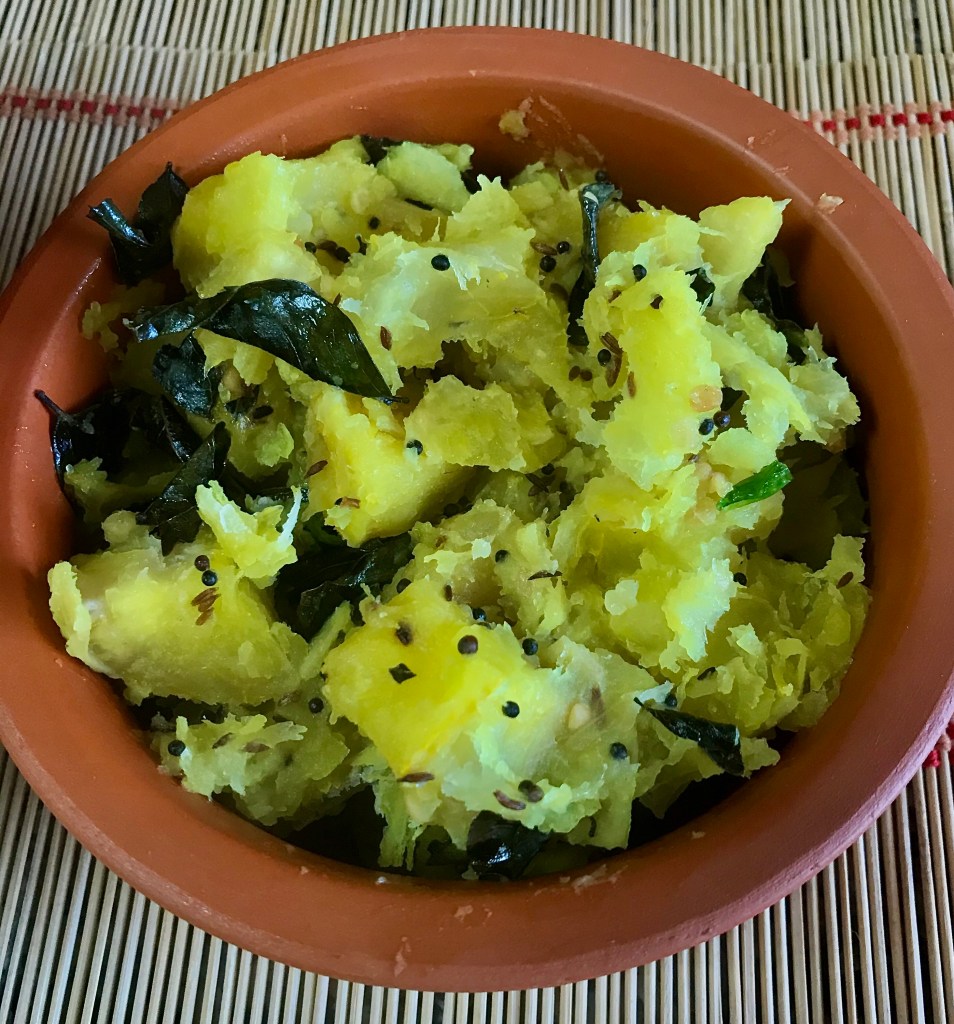
Boiled Tapioca
Peel the Tapioca.
Cut to small to medium pieces
Wash well till the extra starch is removed and is clean
In a pressure cooker, add water, salt and turmeric to the tapioca
Cook till 3 full whistles. no need to simmer
Season with coconut oil, mustard seeds, green chillies and curry leaves
Sprinkle grated fresh coconut before serving (if preferred).
Why I prefer the ‘100%’ tag is, due to the countless number of times I’ve been fooled in shops and the web – with the phrase ‘whole wheat’ bread, bun or whatever snack that claims to be whole wheat.
This whole wheat product, doesn’t include white flour at all.
After I changed my yeast and started kneading with a Stand Mixer, my home-baked whole wheat Bread has passed with flying colours.
So, without wasting much time…….
100% Whole Wheat Bread
Ingredients
wholewheat flour – 4 cups (one cup = 130mg x 4 = 520 gms)
yeast – 3 tsp – 11 gms
honey – 1/4 cup
salt – 1 1/2 tsp – 11 gms
warm water – enough to knead into stretchy and elastic dough
olive oil – 2 tsp app. (1 tsp for greasing the bowl; 1 tsp for greasing the baking tin)
Making the Bread
Process I
In the Stand Mixer Bowl, add flour, yeast and salt and mix well with a spatula
Pour warm water and honey; and switch on the mixer with the dough hook
After the initial mixing up of all the ingredients in the mixer, let the dough be kneaded for 10 minutes. Add more water, if needed while kneading
Alternatively, if you don’t have a mixer, not to worry
In a big bowl, add ingredients as in step 1 and then step 2
Knead well until water is incorporated well and the dough is stretchy.
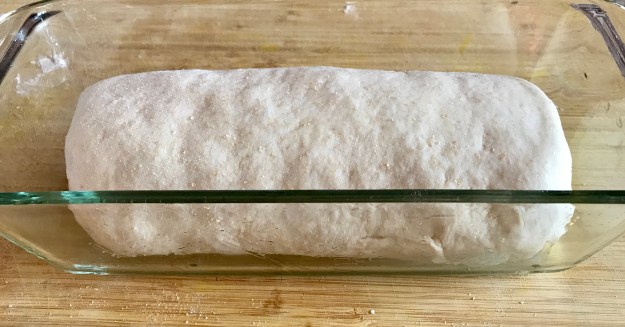
Grease the same bowl, with 1 tsp oil, and place the bread dough
Cover with a clean cloth, place the bowl in a warm place
Let the dough rise for half an hour or until double
Process II
Knock the dough, and knead well again
Grease the baking tin with the other 1 tsp olive oil
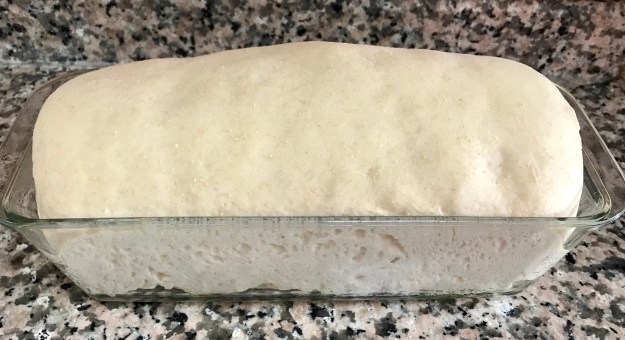
Place the well rolled dough in the tin
Let the dough rise for another 1/2 hr to one hr – or until doubled
Process III
Preheat the oven at 220 degree C
Place the dough and let it bake for 30-35 minutes, more or less, depending upon the oven
For a soft crust
Once the baking is done-
Switch off the oven
Brush the crust with butter
Open the oven and leave the bread inside. Let there be a little gap in the door, for air to pass through
Once the bread is warm, remove and let it cool completely
Let it cool, with a cloth covered
The crust of the baked bread is soft and easy to slice.
Baking might be an addictive affair. It is discouraging to see a flopped recipe. But, I feel, the aroma that the kitchen brings out, with baked goods, is one of the main reasons that make Baking, as addictive as it is. Why would one want to bake again and again, to make unsuccessful baking, successful, as though that is the only way to attain salvation??!!
After a change in the yeast brand, my bread/bun baking, has become better than before. I am working on making them more moist – as they turned out dry a few times. But, I assure, they taste excellent. My recent raisin bread too, turned out a bit dry. But, tasted awesome.
To tackle dryness, I have started incorporating buttermilk to buns. As such, while baking eggless goodies, I try to substitute with yoghurt. I prefer Dinner Rolls/Buns to be baked with butter. Though, quite recently, while I baked a butterless buns, (recipe from a cook-book I had), they came out really well. Shall bake it again, and confirm the recipe.
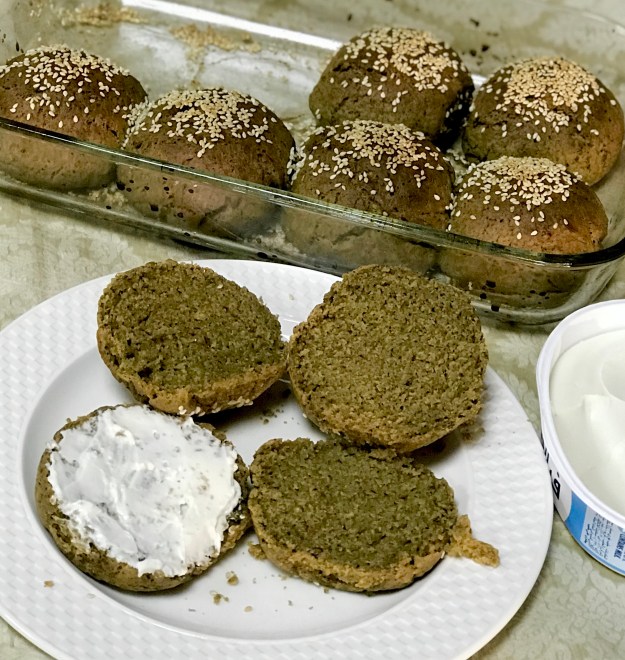
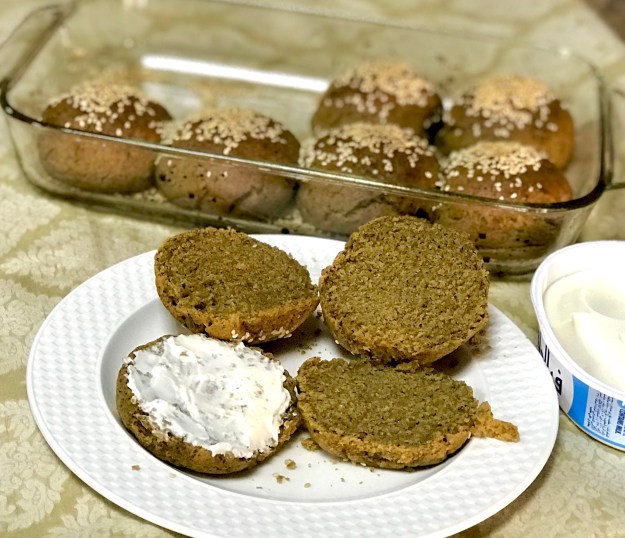
This time, I wanted to bake buns, with the excess mint leaves (I had dried indoors) and chillies and pepper…. something salt and spicy. These whole wheat buns, came out good. That’s why I couldn’t resist sharing them immediately.
100% Whole Wheat Eggless Spicy Soft Masala Buns – with Flax Seed- Sesame Seed
Ingredients
whole wheat flour – 300 gms (2 heaped up cups)
unsalted butter – 100 gms (melted and warm)
cane sugar – 12 gms (2 tsp)
powdered sea salt – 7-8 gms (1 tsp)
active dry yeast – 7-8 gms (2 tsp)
warm buttermilk – 1 cup
warm water – as needed to make a fine dough
Milk – 2 tbsp- for milk wash
For the Masala
flax seeds – 4 tsp
sesame seeds – 4 tsp (2 tsp for the powder and 2 tsp to sprinkle on top)
dried mint leaves – 1 1/2 cups approximately
dry ginger powder – 2 tsp
pepper corns – 2 tsp
red chillies – 4 no.s
oregano (optional) – 1 tsp
Method of Preparation
Making Spice/Masala Powder
Dry roast flax seeds and sesame seeds. Roast 2 tsp of the sesame seeds and reserve the rest 2 tsp for the milk wash.
2. Dry roast, dried mint leaves – a bit of roasting helps in blending well
3. Dry roast pepper corns and red chillies (as I had some home made chilli flakes, I used it too.) 4 chillies would be needed for the recipe. Since I also used the left over chilli flakes, I took 2 red chillies
4. Dry roast oregano for a very short time – oregano is optional. I added, to boost the flavour. But, the mint and others are sufficient to punch in the flavours. I roasted it a bit, again to blend well. If you don’t have oregano, use carom seeds
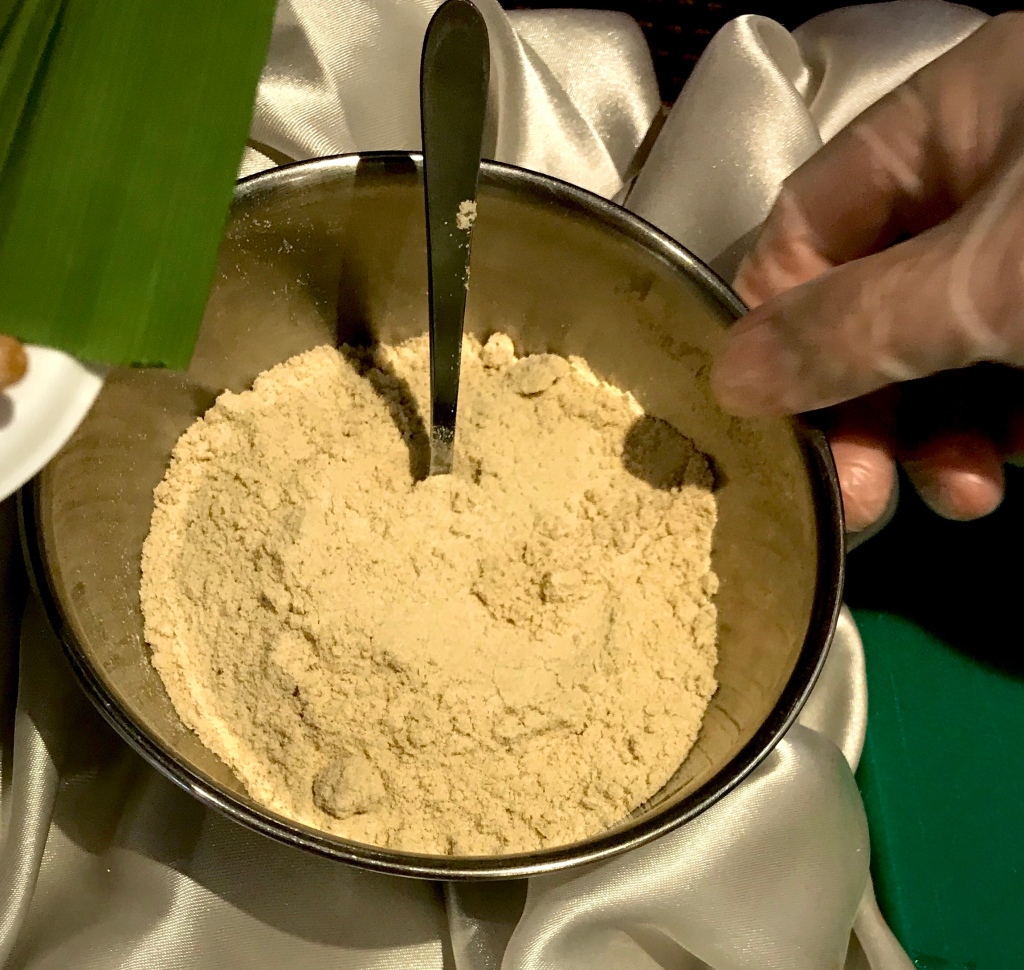
5. Blend all the roasted ingredients, with dry ginger powder to a fine dry mixture.
6. The blended powder weighed approximately 42-45 gms
Making the dough
In a wide bowl, add whole wheat flour, yeast, masala powder, sugar and salt
As I had no doubts with my yeast, I directly added to wheat flour. Otherwise, proof yeast with warm water, to check whether it is still alive
Add melted butter, which is still warm
Warm the buttermilk and add to the flour mixture
No cold liquids, as the yeast would become inactive
Start kneading the dough, by kitchen machine or by hand
Add enough warm water, if needed. My dough needed more water
Knead for 10 minutes, to a soft dough
kneaded dough
9. Place in a greased bowl and close it. I don’t use cling wrap at home. So, just close with any lid, but keep it in a moist place. I always place my yeasted dough in the oven, with the light on. I also place a bowl of hot water below or beside. This helps create a warm environment, if you live in a cold place or air-conditioned environment
10. Keep the dough for 1 hour to rise or until double
doubled
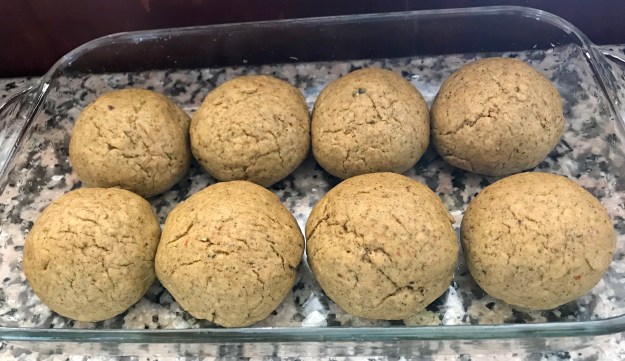
11. Once doubled, knock the dough and knead for a couple of minutes
12. Grease a baking dish or tray, or place parchment paper on the baking tray
13. Make 8 equal portions and roll into fine balls
14. Place on baking tray, spaced apart
15. Keep these buns, to rise again for 30 minutes
ready to be baked
16. Preheat oven to 220°C
17. After they rise, brush the top of the buns with milk and spread sesame seeds
milk wash
18. Bake the buns in the preheated oven for 15-20 minutes or until hard crust is formed
Remove from the oven and let them cool
buns done
Serve with the spread of choice. Tasted good with cream cheese spread and also with tangy coriander chutney.
What I’ve been cooking for the past three and a half months, seems like a whirlwind project. I am rest assured, it must be the case of almost everyone, handling a full house, during these testing times.
When I sat back and saw the clicks, my daughter wanted me to write continuous posts, under the title ‘Quarantine Diaries’. NO worries.. No diaries… this post consolidates the several dishes, those were rolled out of that sacred place in my house, called ‘Kitchen’. Later, let’s analyse a few recipes in the coming posts.
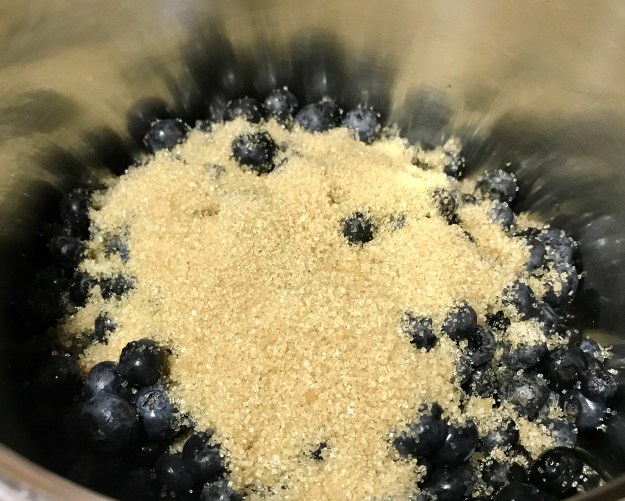
I started the month of March, with a Blueberry Jam – just two ingredients, berries and brown sugar, and of course, juice of lemon for longer shelf life.
blueberry jam
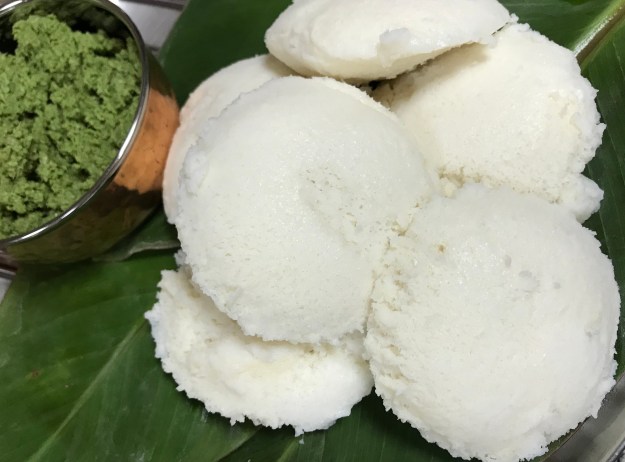
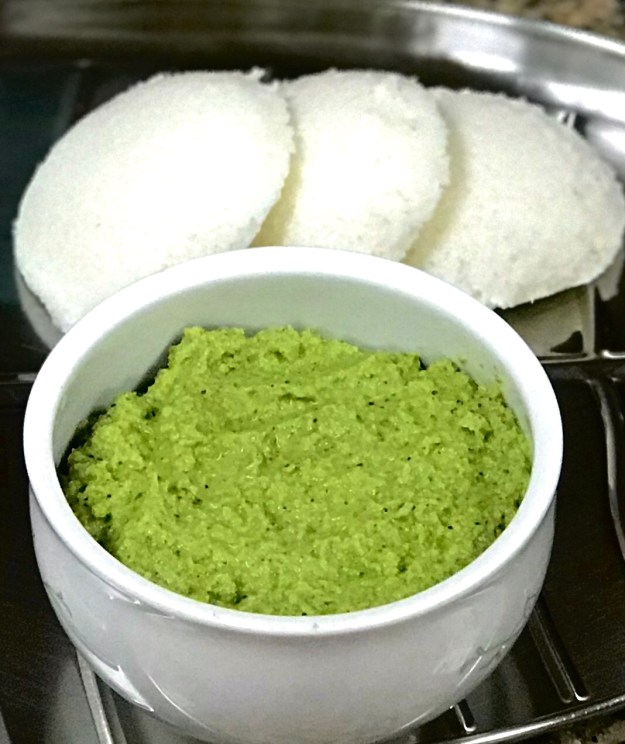
With a routine of including Millets in the diet, Millet Idlies always occupy a special place on the dining table. Samai (Little Millet) Idlis are true substitutes in colour, to the regular white rice Idlis. But these millet idlis are a healthier version, not to forget.
samai idli
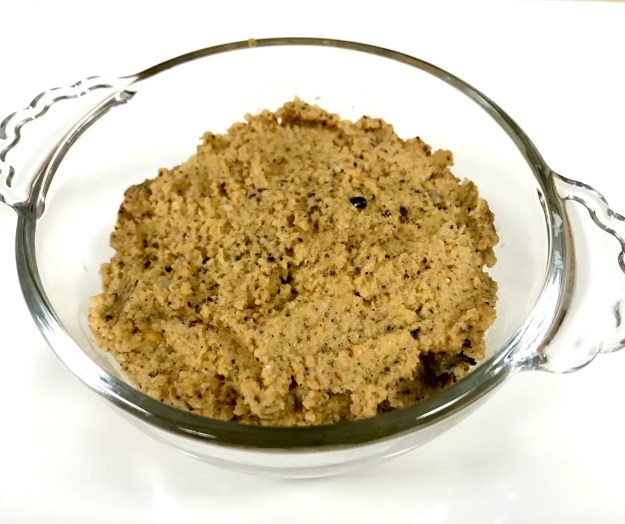
Like the Samai Idli, Kollu (Horsegram) Idlies, are awesomely light, steamed cakes packed with the lentil flavour.
kollu idli
Don’t forget the different chutneys, that were made for the idlies. A few of those, I have highlighted in the end of this post.
A chocolate cake- with whole wheat, cane sugar, olive oil, dark chocolate and toasted pistachios. The urge to cut and eat, was more compelling than a good click to post.
chocolate cake
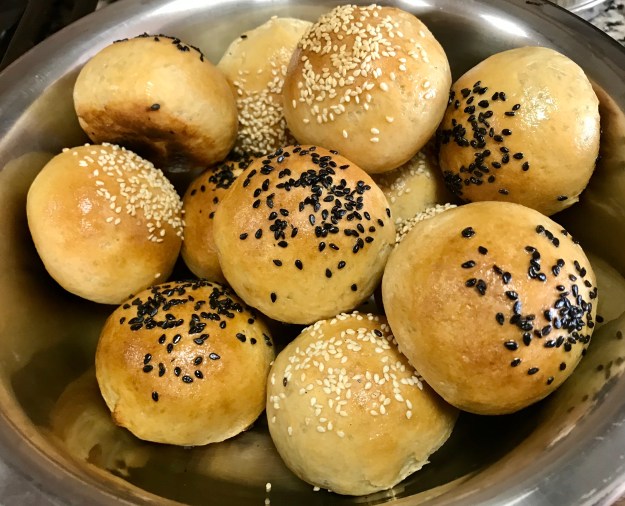
Next, came 50-50 Whole Wheat Buns, tried from an old book, I had. Though, the recipe demanded eggs, this is an eggless bun.
buns
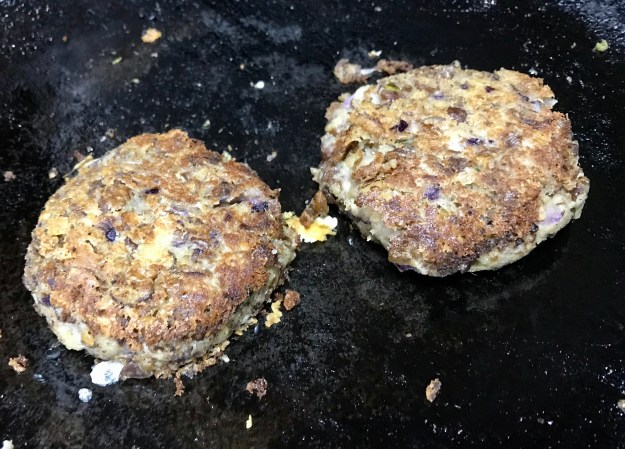
Black Chick Pea Burger with the Buns
Next, for the benefit of online learners, to munch some traditional sweets, with longer shelf life…
Coconut Burfi with Cane Sugar
and Black Sesame Burfi with Jaggery
April, started with Whole Wheat Raisin Bread – wouldn’t term it the best, but full of flavour.
raisin bread
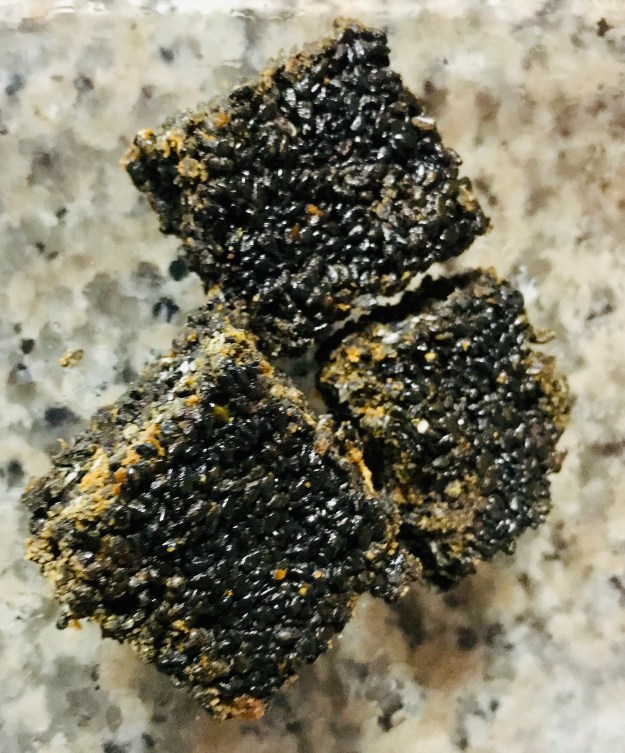
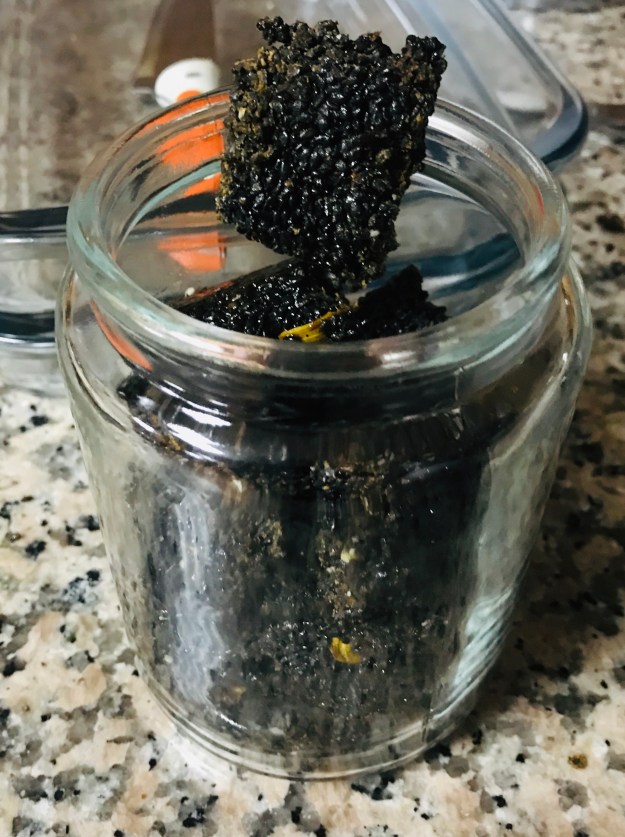
Time for a spicy powder for the health freak. Sesame and Flax seed chilly powder, to go with rice, idli or dosai.
flax seed podi
April, was also a month to try Pizza, the healthy way. Home-made whole wheat base, tomato spread from scratch and variety of toppings .. Pizza that was dreaded for the white flour, the meagre amount of veggies or meat to be searched for- in store bought frozen ones, or the branded /door delivered ones, used to be a half-yearly affair. Truly, we might have ordered pizzas twice a year.
The ill effect of making fresh pizzas at home, with loaded vegetables and with constraint on cheese, pizzas are almost a weekly bake now.
fish pizza
paneer pizza
chocolate pizza
Till date, I haven’t been quite successful with cookies. They used to be consumable, but not perfect. And I have always baked whole wheat cookies, never with white flour.
But, May started with this exception. A Good Whole Wheat Cookie!! Got the recipe from another blog, but as usual converted all purpose flour to whole wheat. It turned out to be so light and crispy.
whole wheat sesame cookies
When the need for a hot snack, with less work to fry, stir fry or sauté arose, tried baking these yummy potato wedges. Cut the potatoes, sprinkled some oil, baked for 30 mins or so. Took out from oven, sprinkled salt and spices of choice and, the baked wedges were ready.
Potato Wedges baked healthy
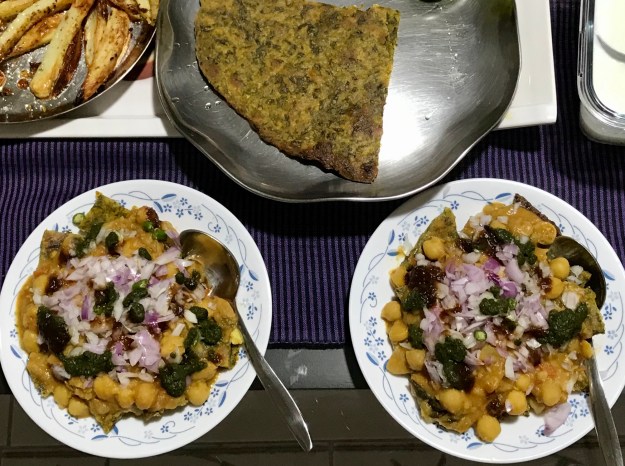
Who said Papdi Chaat needs Papdi or the crisps made of white flour. I chose to combine Papdi and Chole into a Chaat, but with a healthy twist. No matter you like it or not, its a whole meal. When I had my Methi (fenugreek leaves) Paratha dough in hand, I rolled a big pizza base out of it, and baked till crisp. That became my Papdi to go with the left over Chole curry. Add ons – home made green chutney, tamarind chutney and yoghurt.
Methi Paratha (Papdi) Chole Chaat
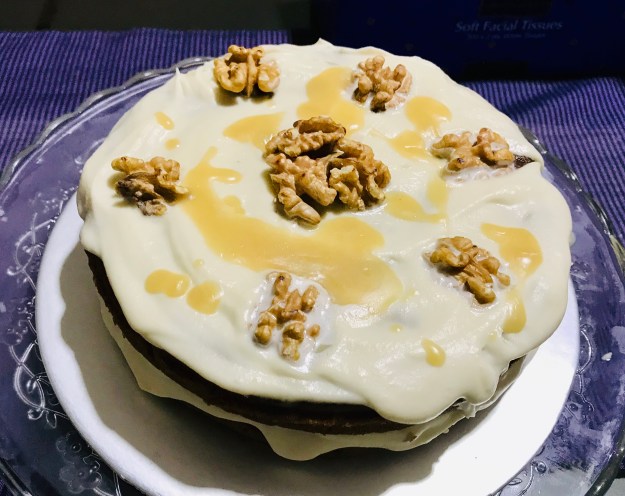
Time for a nice cake – Sticky Date and Walnut Cake – obviously with whole wheat flour and cane sugar, and eggless too. This time, I topped the cake with caramel whipped cream. With my home-made caramel, I could limit the sugar in the frosting.
Eggless Sticky Date and Walnut Cake
Next came in, Gooseberries. Lucky me, the super market had some new and fresh stock of gooseberries. The great berry, loaded with good nutrients, rich in antioxidants and vitamin C, is highly popular for its anti-ageing properties. Let’s also do a gooseberry chutney series shortly. Great plans that arise as I write..
Gooseberry Coconut Green Chilly Chutney
Gooseberry Coconut Coriander Chutney
Gooseberry Coconut Mint Chutney
Gooseberry Coconut Red Chilly Chutney
Gooseberry Tomato Red Chilly Chutney
The long list of ingredients, written on the bottle of the world’s most favourite Chocolate spread, or a Peanut Butter Spread, creates a lot of stress and anxiety. But a good chocolate spread, to go with healthy whole wheat or millet pancakes, or home made bread or buns, can be a positive change in routine. So, tried this simple chocolate spread, with a combination of 80% and 72% dark chocolate with very little cane sugar and milk. Stores well in the refrigerator, for at least couple of weeks. Choose your dark chocolate, that has no margarine, but cocoa butter.
Home made Chocolate Spread
Those were a few different, yet healthy stuff that went into the tummy. I am satisfied, I could put in some thoughtful creativity, to indulge in the above stuff.
So, here we are, at the end of the workshops at Royal Orchid – Chinese and Thai Restaurant in Abu Dhabi. A salad, soup, curry, stir fry and dessert – a beautiful journey in an elaborate platter. These demonstrations have not only rekindled my interest in the cuisines of south east Asia, but also helped me re-visit my cooking experiences of authentic Cambodian curries, in Phnom Penh, several years ago.
Thank You Royal Orchid and Chef Vitug for the beautiful culinary experience.
What I have understood in the past decade of my life, is – my mind is not as simple to operate as my smart phone. But someone, who has studied the working of our brain, and the ways it synchronises our accumulated memories, with multiple other traversing thoughts, must have disigned the working of the Smart Phone. I’ll explain why.
The Phone has become the World in our Hands. The countless number of applications, we have installed, has made our lives easy as well as complicated. That you’d agree with me. Every time, we are upto some important job on the phone, there are various other things – be it mails, messages, app notifications, advertisements and what not, or even a virus- that pop up, every now and then. This disturbance isn’t very complicated, there is always the magical touch of our hands, that can slide away the pop up menace.
Now, my memory and my smart phone. Like those pop-up messages, I have these non-stop nostalgic memories, wobbling around me. Unlike the magic of the finger, that works for my phone, the mind doesn’t understand the nuance of swiping off those memories popping up. It looks like an eternal task.
Philosophies done- the success of nostalgia is this post.
The next workshop, and the last of Thai Cuisine was a Dessert. As mentioned previously, with the luxury of having my own choice to learn, I requested Chendol.
Why Chendol?
As I have mentioned in my earlier posts, the combination of jaggery and coconut milk in the desserts or payasams of Tamilnadu, is ‘Heavenly’ to me. I believe, there is no equivalent payasam to an Adai Pradhaman or Paasi Paruppu Payasam.
With this pre-conceived notion in mind, and God sent luxury of travelling to several countries in south east Asia, when I saw the concoction of cane sugar/palm sugar and coconut milk- with several indigenous ingredients in Cambodia, Malaysia and Indonesia….. what else would I be left with – than drenching myself in the cuisinical connection of these countries and my roots in Tamilnadu!!
Chendol is basically made with green rice flour jelly, pandan leaves, palm sugar and coconut milk – served with shaved ice. Called Lot in Cambodia, Dawet in Indonesia and Lod Chong in Thailand, there are other refined versions of Chendol too. These versions are created with different ingredients – as in –
Naab Vaam in Cambodia (there are other similar desserts and names)
Bubur Kacang Hijau in Indonesia (served hot)
Chendol is a versatile creation – it comes across as a street food, cool summer drink as well as an elite dessert.
Before moving on to the making of Lod Chong/ Thai version of Chendol, let me share what I tried and relished in Cambodia, Indonesia and Malaysia – the different versions of my Tamil Payasam – in their different Chendol Avatars.
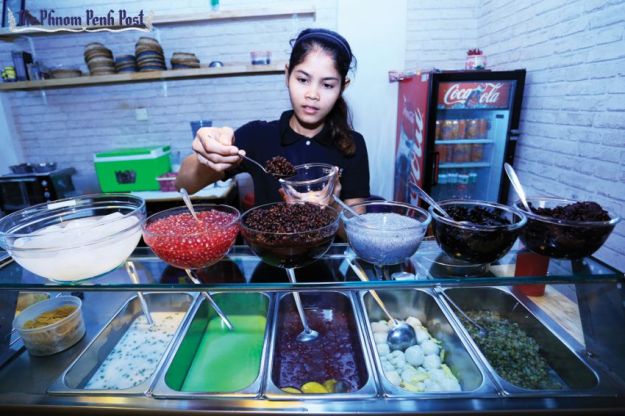
I. Cambodia’s Naab Vaam
courtesy: Phnom Penh Post
While we were in Cambodia, we used to visit a Restaurant called, Tonle Bassac (from now on TB), at Preah Sihanouk Street. The place would be a buzzing station for tourist groups, hence making the place, quite uncontrollably crowded. Yet, the speciality of TB, was their Lunch Buffet, which was a culmination of cuisines of a few south east asian neighbours. Among the impressive live kitchen and a vast spread, my favourite was their dessert. Leaving aside the usual pastries and fruits in the dessert section, the Cambodian variation of Chendol was very impressive, on the first visit.
First, when I saw green mung, red mung, tapioca pearls, jellies in different colours, soaked basil seeds in several bowls – I was surprised. Then I watched people combine their favourites among the above, with palm sugar syrup, coconut cream and crushed ice.
What I tried first needs no guess. Green mung, palm sugar syrup, coconut cream and crushed ice. It tasted exactly like Paasi Paruppu Payasam. While Payasam is always a very hot affair, here the dessert was cold with crushed ice. Seemed quite interesting and refreshing.
Every weekend I would crave to try different variations of the same dessert. “Thanks ‘TONLE BASSAC’!”, for introducing me to the Khmer version of my favourite Payasam.
Since, I couldn’t find pictures of the dessert from restaurant TB, I searched the web. The combined dessert is called by several names- with different combinations. What seemed almost similar to what I had enjoyed in TB, was Naab Vaam.
a. Blogger Cindy Her’s post on Naab Vaam showed it all. Additionally, she had also published a separate post on making of green chendol.
b. As a street food as well a comfort dessert, an article in Phnom Penh Post – showcased the delicacy in its elaborate best – from a son who learnt the art from his mother.
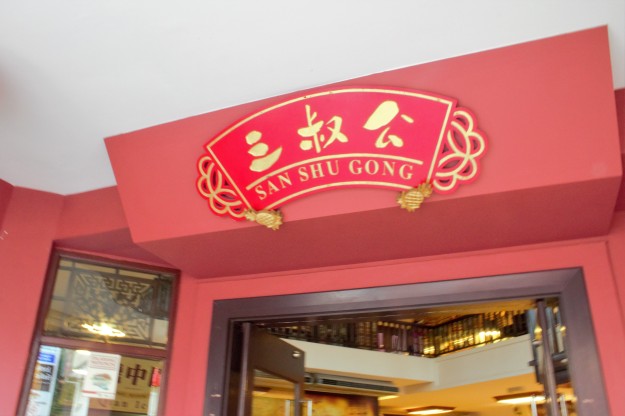
Next, when we travelled to Malaysia, we spent a day in Melaka/Malacca.
We started the day, by visiting the Dutch Square in Malacca, then, proceeded to one of the authentic Tamil restaurants in Little India for lunch. Post lunch, we had a relaxed stroll in Jonker Street.
After a long walk, when we were tired – we found San Shu Gong – a Chinese shop, well stocked with numerous Chinese products. What was the main cause of interest comes next-
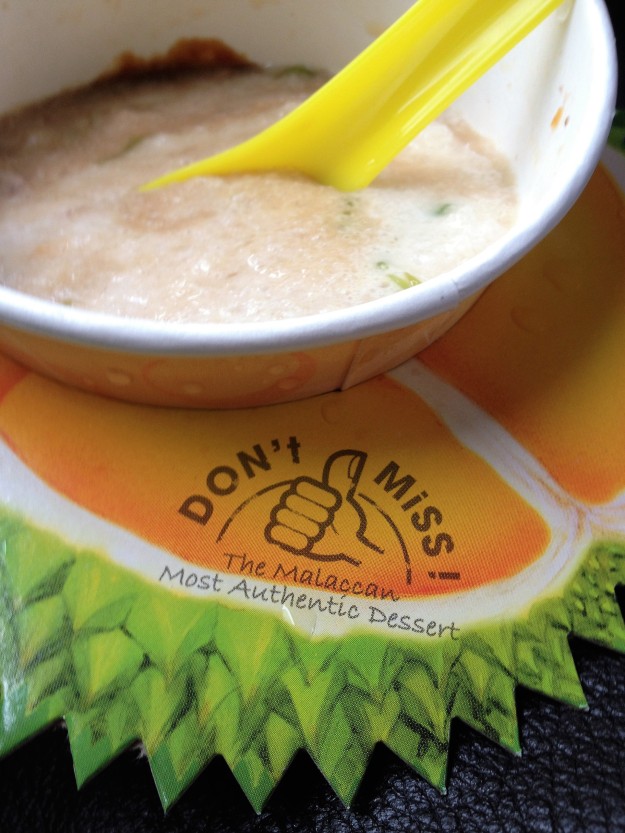
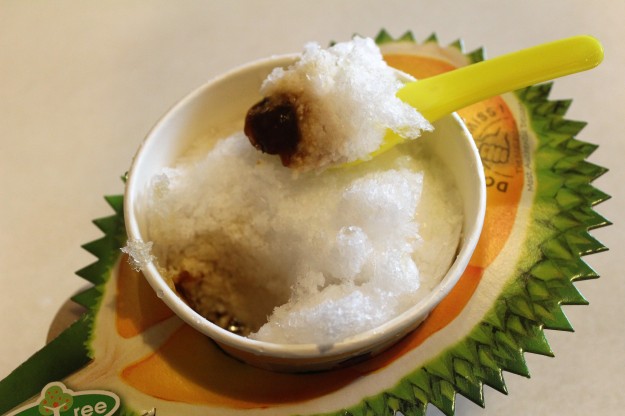
This shop had a coffee/juice shop, which also served one of south east asia’s most sought after desserts – Chendol. This version of chendol was with a twist – it was the Durian Chendol. Durian, might be the most dreaded fruit worldwide, for its distinctive odour. I was courageous enough to try the Durian version. Sorry Durian Lovers!!! That was not meant for me – my tongue still doesn’t forget the strange strong flavour.
Thus, the Durian version of Chendol, has become a distinctive memory for my taste buds too.
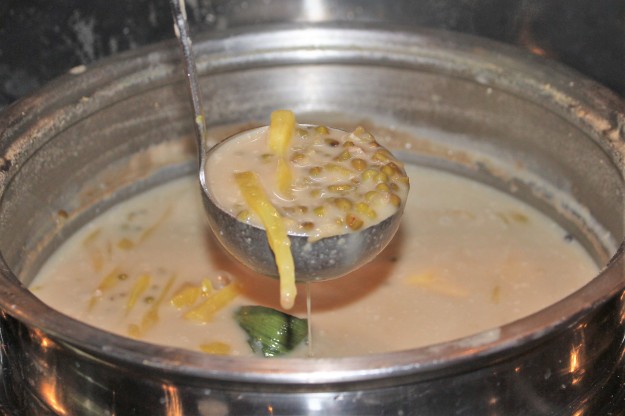
III. Bubur Kacang Hijau of Indonesia
The flavour of Chendol, was going to travel with me. In our trip to Indonesia, we spent the first four days in Bali, before visiting the Historical Temples of Yogyakarta. The elaborate breakfast was scrumptious. There was this extremely delicious Sweet – steaming hot coconut milk-palm sugar-sweet potatoes-jack fruit-green mung – the ones that I remember right….with fragrant Pandan Leaves.
Again, my favourite Payasam in another version….this time, in another South East Asian country.
Now, tell me- why should Chendol and its versions come striking- at regular intervals – strong enough to push me down in the soft cushions of Nostalgia so often??
Further, such fond memories associated with Jaggery, Palm Sugar and Coconut Milk from childhood (with Payasams made by Amma), stretched towards the years in Cambodia- that I spent exploring South East Asian Cuisine and History – seemed popping back again, now in Abu Dhabi.
This time, I didn’t try to swipe off the striking Nostalgia.
In the workshop at the Royal Orchid’s, to end with a Dessert, I chose Chendol – but wanted to see how the green mung noodles went into the delicacy. The Thai version of Chendol is called Lod Chong.
Thai Lod Chong/ Green Mung Chendol
the dish’s name describes what happens when you push hot and gooey dough through small holes and how it leaks out as elongated worm-like noodles. “Lod Chong” in Thai means exactly that, “leaking and escaping through the opening“. https://thaifoodmaster.com/thai_traditional_dessert_recipes/
Chef Vitug, made the special Chendol recipe suitable for home cooks, without the Thai noodle press. The press is a simple steal press, available in Thai department stores.
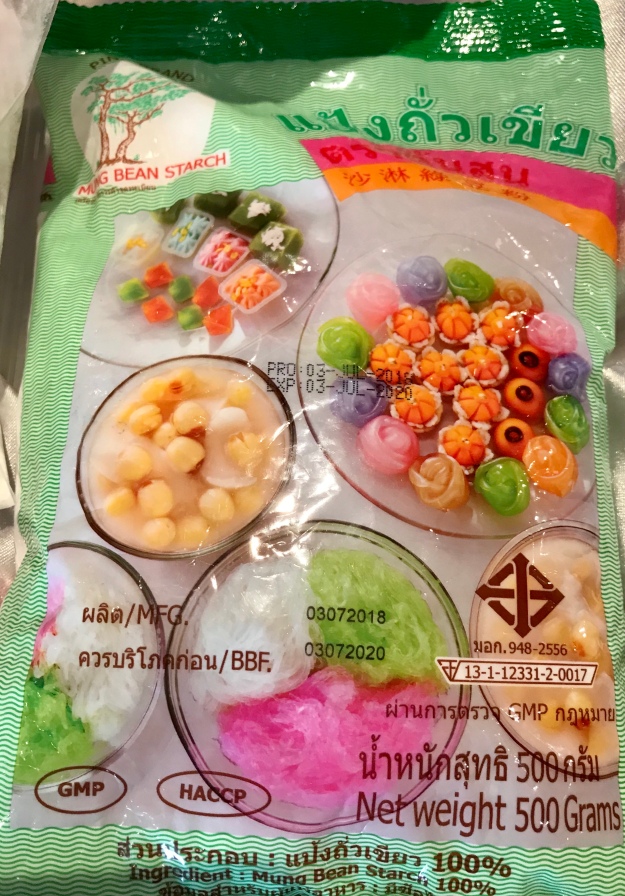
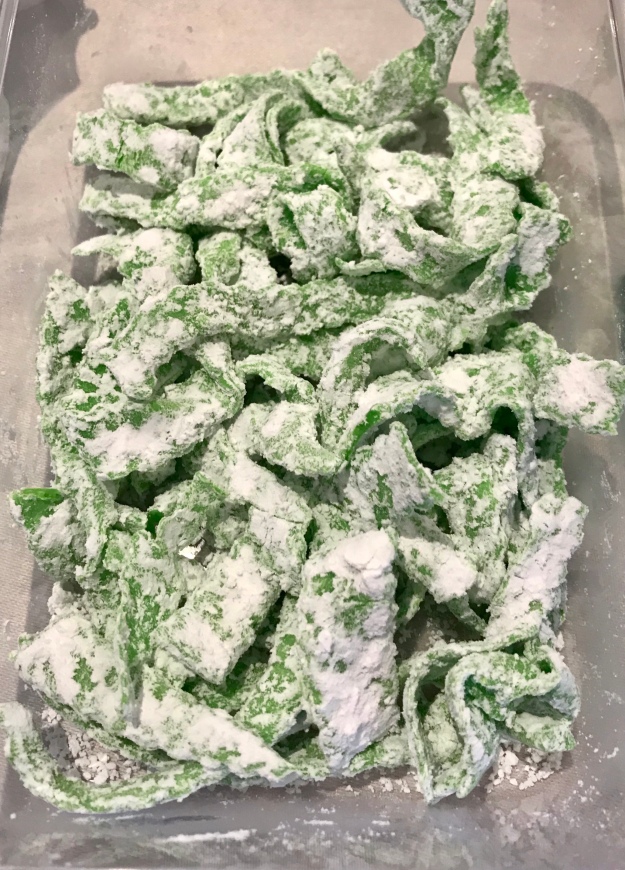
Here, Chef made mung bean strips floured with rice flour, which would later be cooked in hot water.
green mung bean starch available in stores in thai section… and the strips
ingredients to make Chendol –
mung bean strips made with pandan leaf extract
coconut milk – pandan scented and candle scented
glutenous rice flour
palm sugar syrup
pandan leaves
This could be the easiest way to make Chendol at home, with no compromise in flavour and taste.
So much so, I could make my own Chendol version at home, after the workshop.
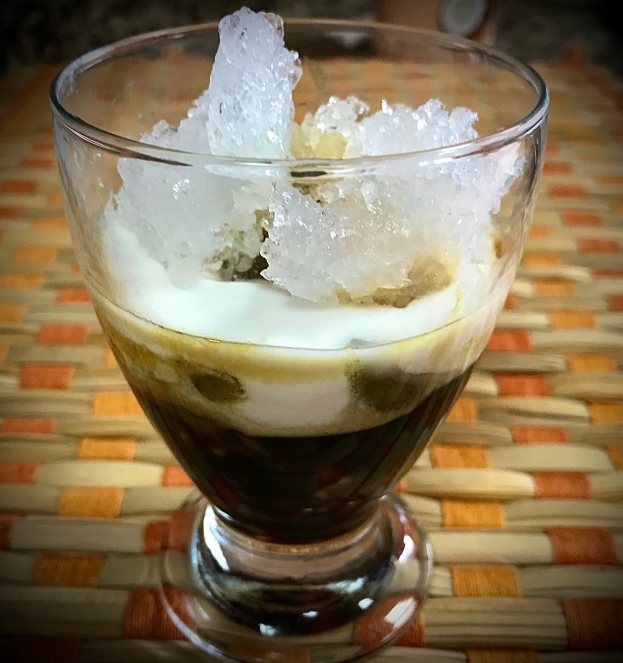
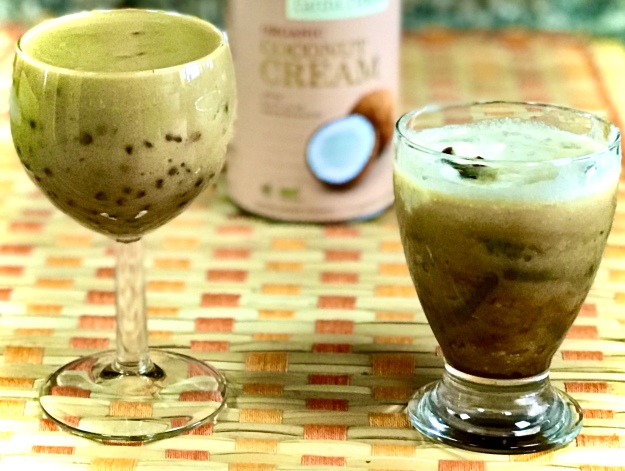
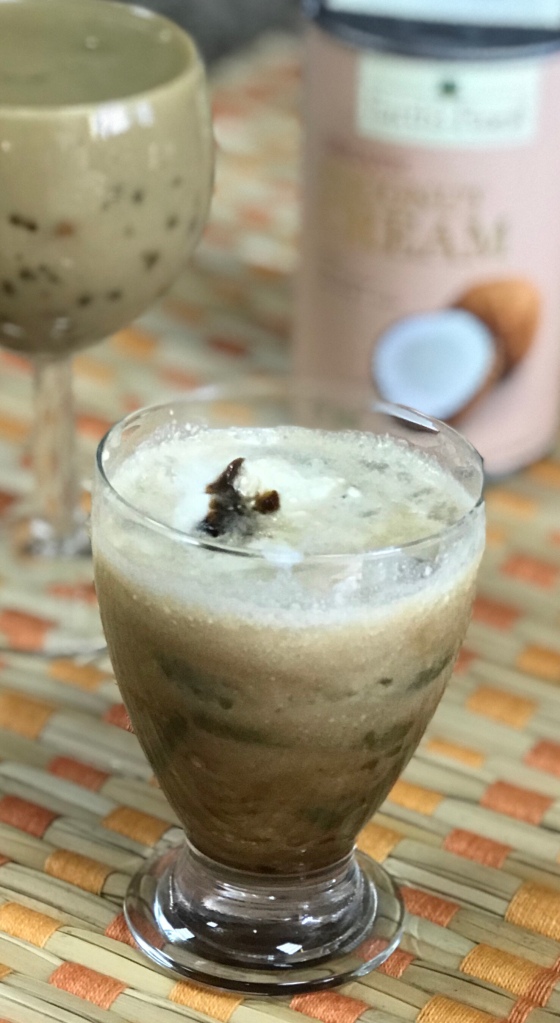
My Chendol
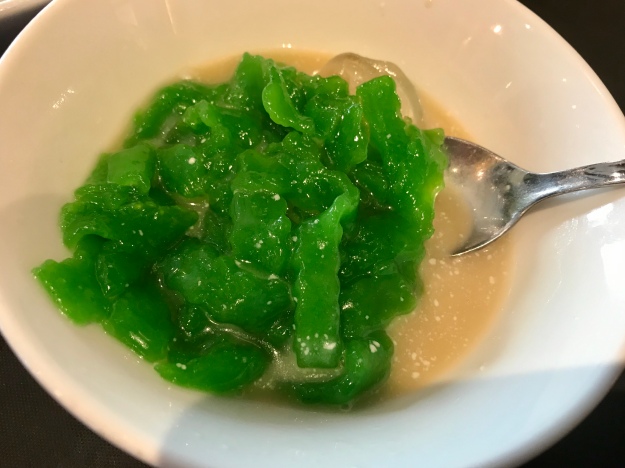
Left – Chendol with Sago / right – Chendol with green mung and sago with coconut milk
Making Chendol ..
Method of Preparation
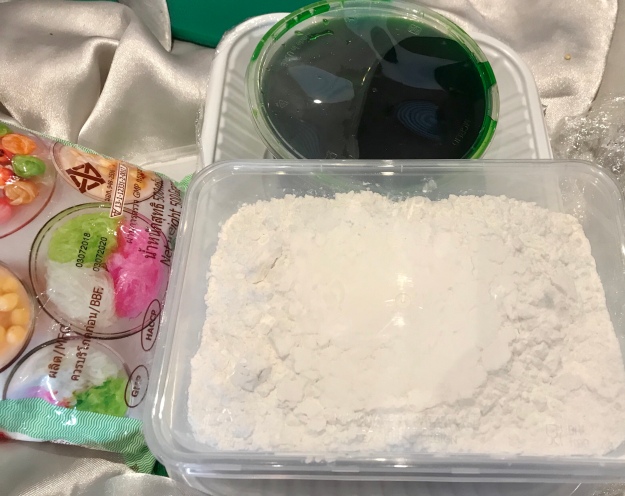
Make Pandan extract –
Blend Pandanus leaves with water. Strain the pure green liquid.
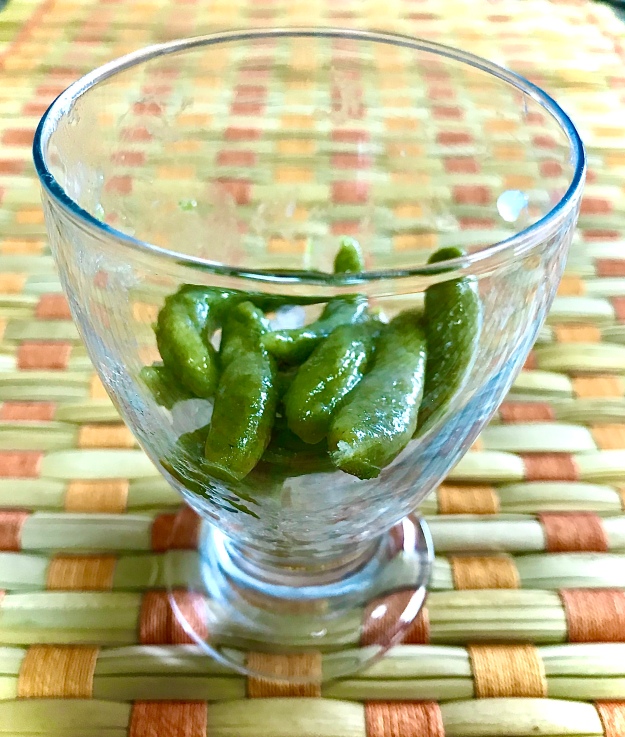
2. Make Chendol strips
Take Green Mung starch; mix with a little salt and pandanus extract and enough water to make a stiff dough
Roll into a thin sheet. Cut strips
Coat the strips with rice flour
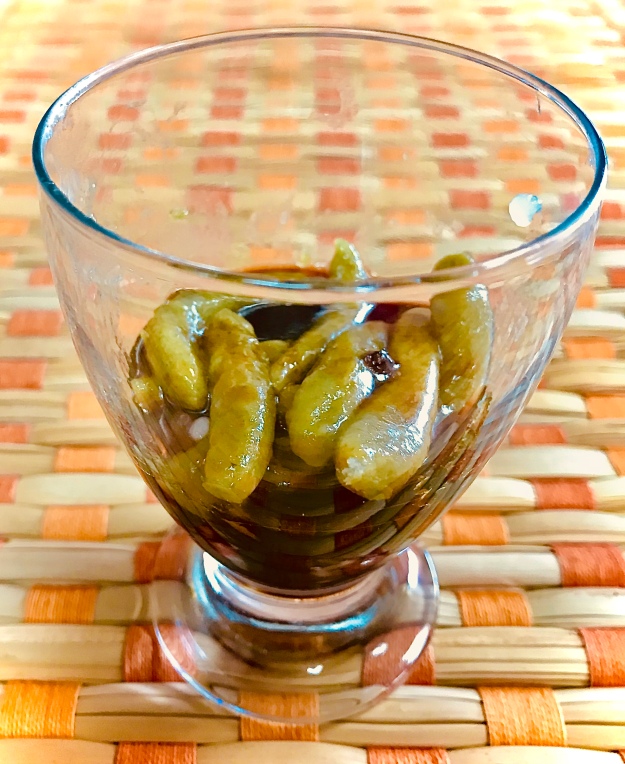
3. Palm Sugar Syrup
Melt palm sugar in water. Place a tied bunch of Pandan leaves in the liquid. Make a semi thick syrup. Keep aside.
4. Heat up Coconut milk .
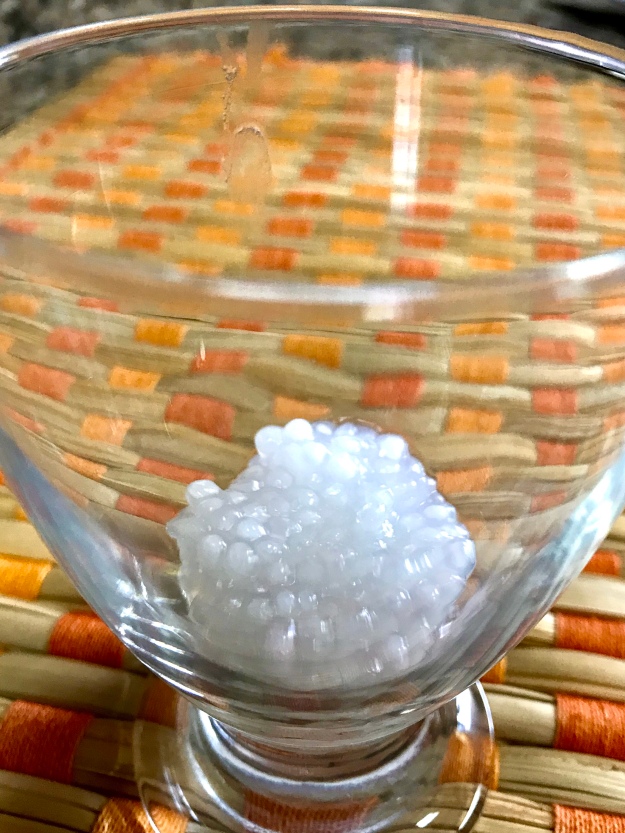
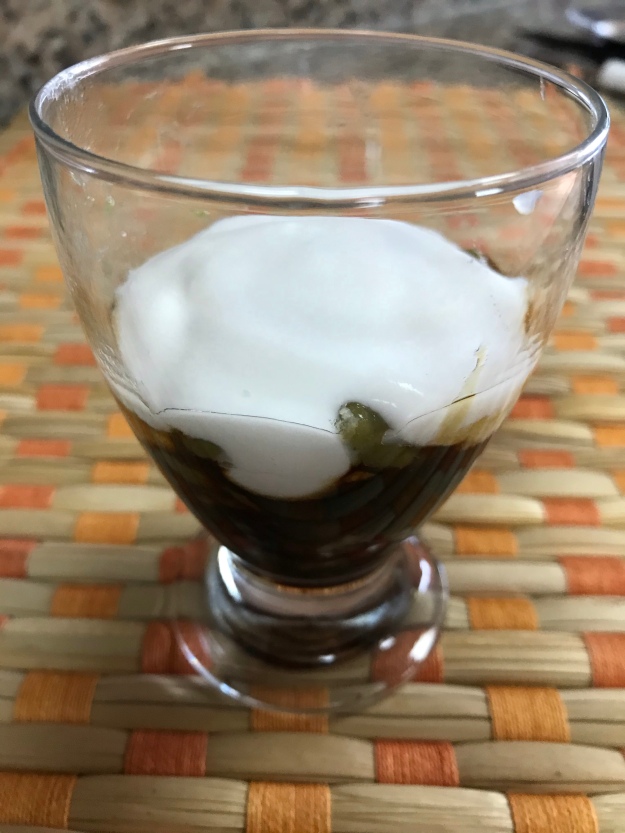
5. In a bowl or tall glass as preferred, place bean strips
photo represents my version at home..
6. Add palm sugar syrup
7. Pour in coconut milk/cream
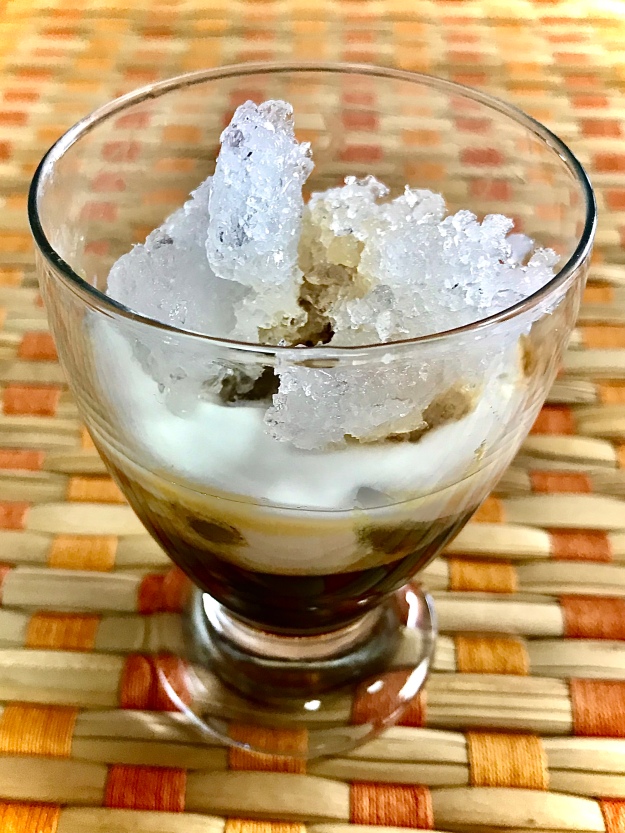
8. Add crushed ice or ice cubes
9. Enjoy the dessert.
10. Feel free to add sago, cooked green or red mung, jack fruit, banana, soaked basil seeds or cooked and sweetened red rice too.
Phat Kaphrao or Pad Kaprao is also known as Phat Krapow or Pad Kra Pao. Holy Basil is called Kaphrao or Krapow in Thai Language. It is different from the normal Basil.
The differences lie in several areas with the key area being flavor. Thai basil is known primarily for being sweet. It has a strong licorice and anise note that allows it to stand out in Thai curries and soups. The anise note is so strong and so sweet that you can eat Thai basil raw.
Holy basil brings another flavor profile to the table in that it is intensely spicy, so much so that it is sometimes referred to as hot basil. When consumed raw, holy basil has a slight numbing effect on the tongue that is similar to the effect of Szechuan pepper. The flavor is more like a combination of black pepper and clove than like the sweeter notes of Thai basil. It tends to get even spicier as it is cooked.
As a stir fried dish, Phat Kaphrao can be made primarily with chicken, prawns or meat of choice. It can be a vegetarian stir fry with vegetables, with the omission of both fish and oyster sauce. Just make it with light soya and dark soya sauce. The fresh combination of ingredients would make the vegetarian dish deliver its flavour.
Let’s plunge straight into making Phat Kaphrao.
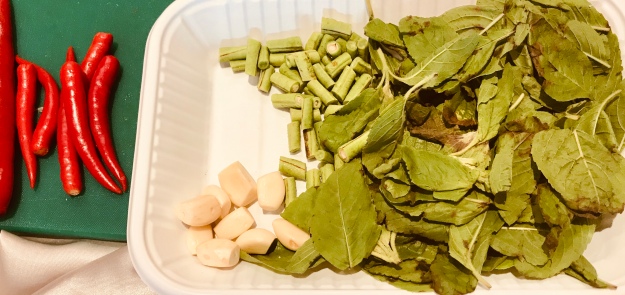
Ingredients
cooking oil
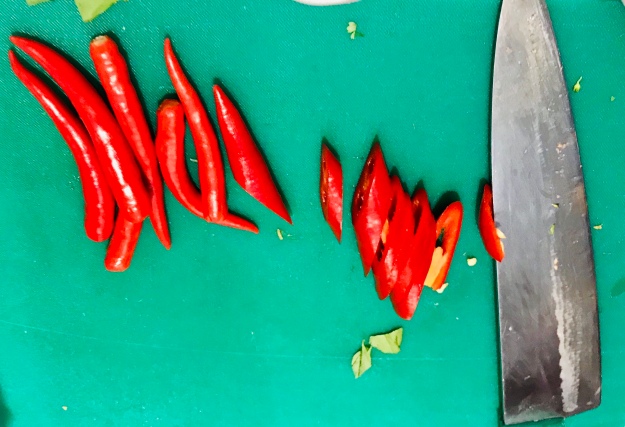
spicy red chillies
garlic
long beans
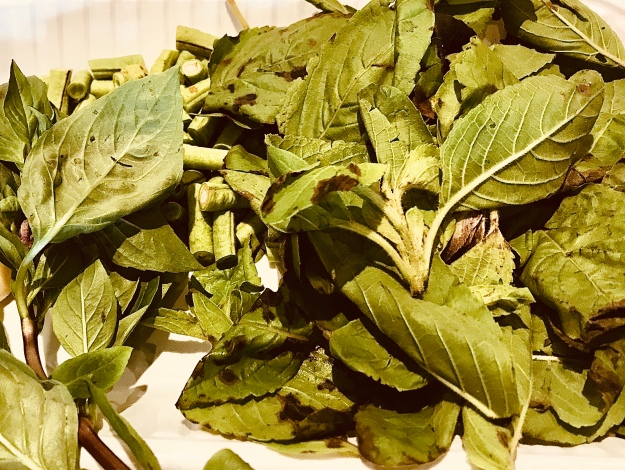
holy basil leaves
vegetable stock
fish sauce
oyster sauce
light soya sauce
dark soya sauce
chicken powder (optional)
salt
Note: the spice level demonstrated here is on the higher side. Please adjust chillies as preferred.
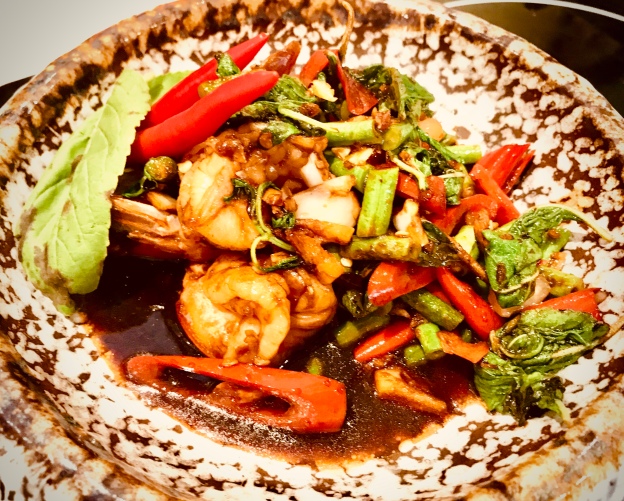
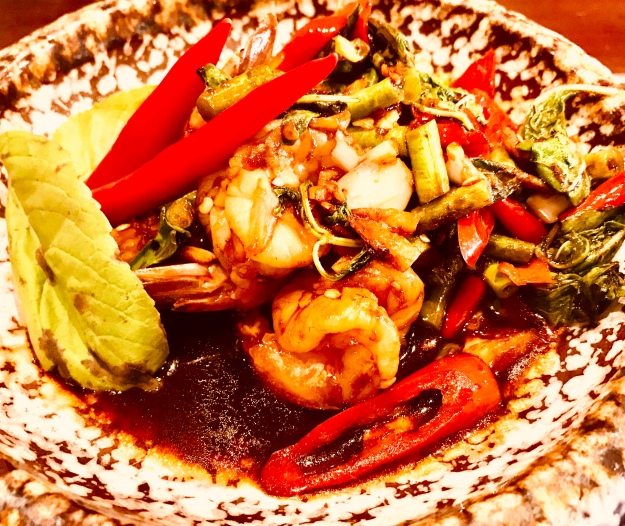
Making of Stir-fried Holy Basil
Chef Vitug demonstrated the stir fry with prawns .
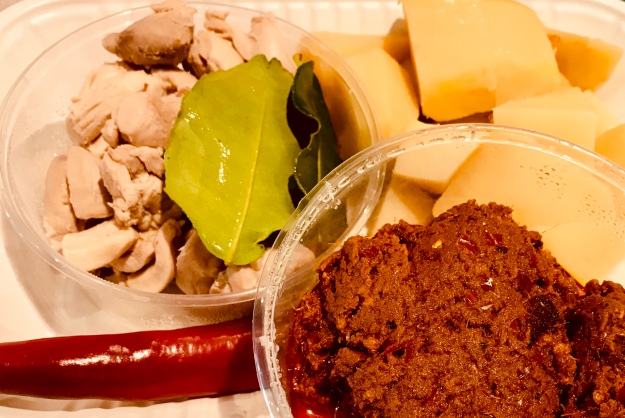
Having enjoyed the tangy Salad and the refreshing Soup, it was time to plunge into three of the most favoured curries of Thai Cuisine- Green, Yellow and Red Curry.
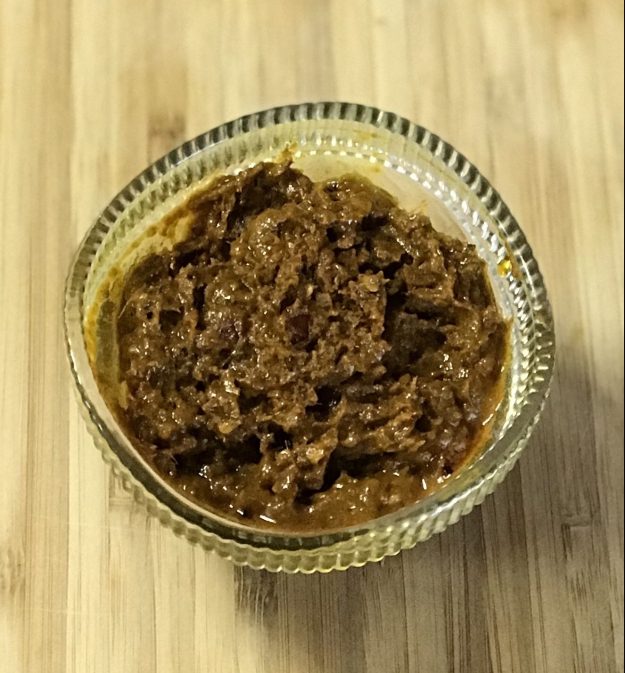
Chef showed the difference in the curry pastes, while making the three flavourful, yet distinct curries.
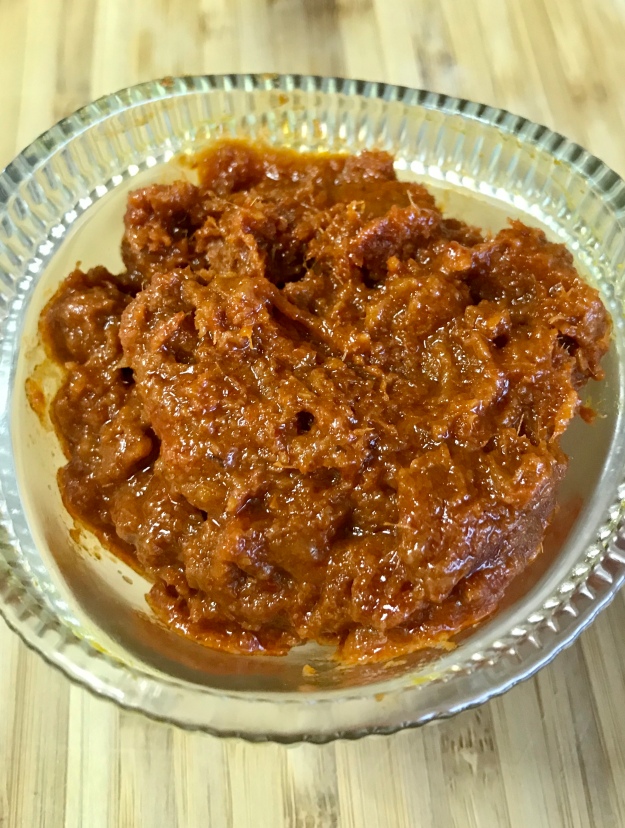
red curry paste
green curry paste
yellow curry paste
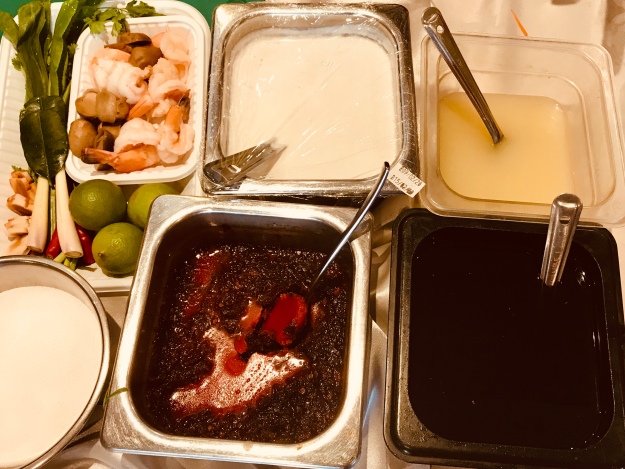
The basic herbs and spices that are blended to make the three curry pastes are – garlic, shallots, galangal, shrimp paste, kaffir lime rind, coriander root, cumin seeds, lemongrass, salt, white peppercorns.
There is one specific ingredient that is added to the explicit curries, to make it the colour of choice.
Green curry – Pandan Leaf extract, which gives the green colour to the curry. Not red chillies, but green chillies are added.
Red Curry – Dried Long Red chillies give the red colour.
Yellow Curry – Red chillies are added for spice; freshly ground turmeric is the key ingredient for the yellow curry.
NOTE: Since most of the bottled curry pastes available in the market, would have shrimp paste added to it, please check the ingredients before purchasing. If one needs a vegetarian curry paste, ask for it. There are a few brands that make vegetarian Thai green/yellow and red curry pastes.
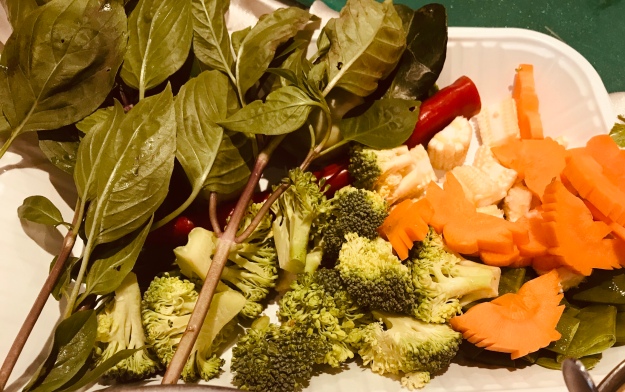
Flexibility to combine with vegetables, meat or sea food
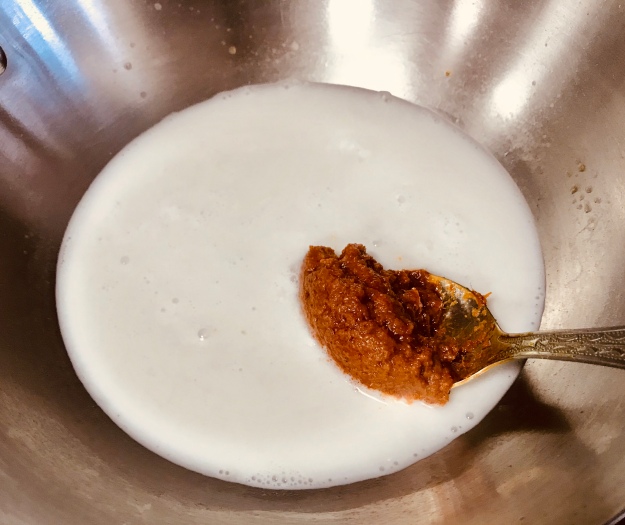
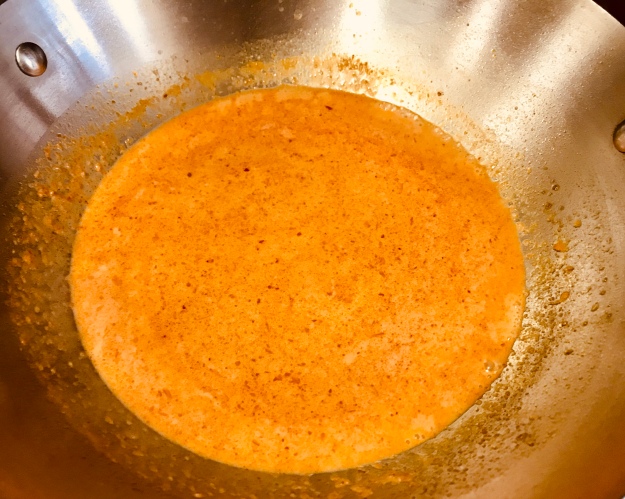
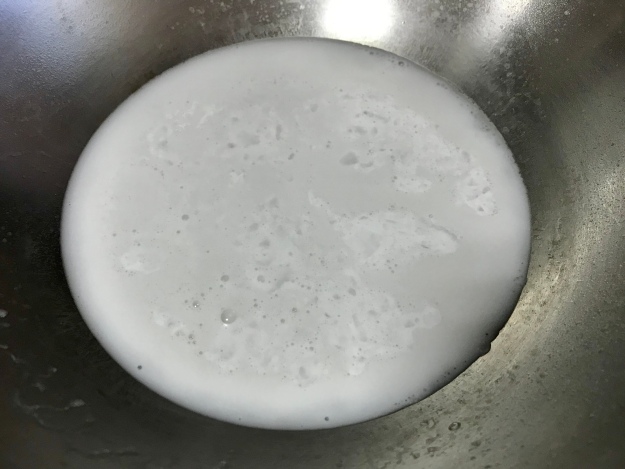
Whether one desires a curry with vegetables, or has an appetite for non-vegetarian stuff – feel free to experiment. The aromatic blend of spices goes well with vegetables, meats, fish and prawns alike. The extravagant taste comes from the final amalgamation of rich and creamy coconut milk with the spice paste.
These are a few common combinations-
Green Curry with vegetables
Red Curry with Chicken and Eggplant
Yellow curry with chicken and potatoes
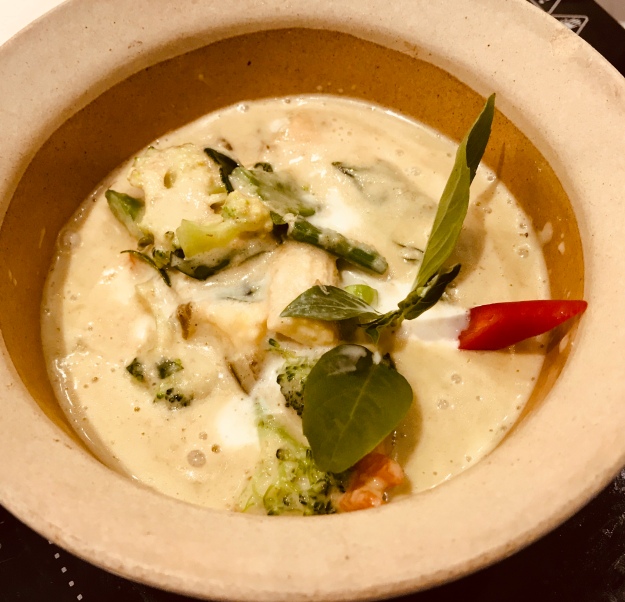
The video shot was that of Thai Green Curry. In order to show the colourful variation the paste makes, when mixed with coconut milk, I share these photos…
Red Curry
Yellow curry
Making of Thai Green Curry – VIDEO
That truly simplified cooking Thai curries. Didn’t that!!
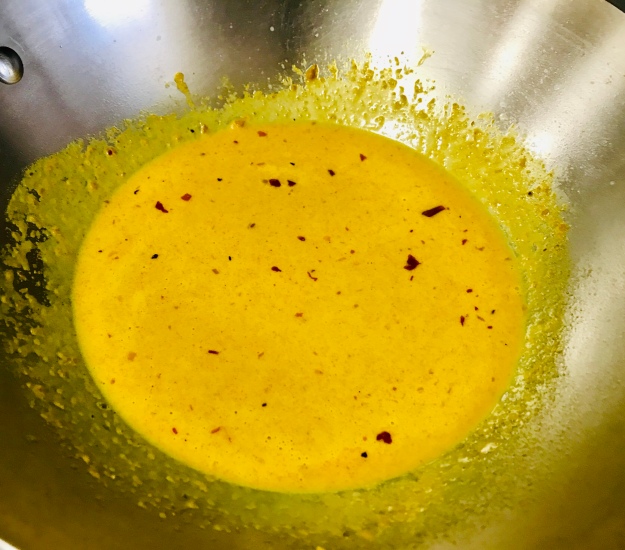
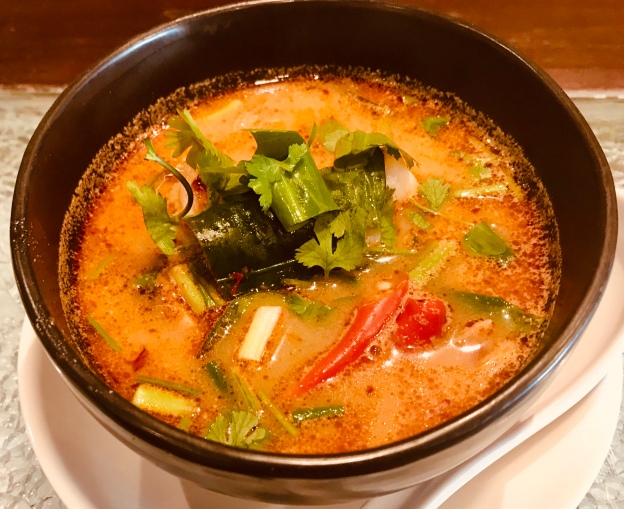
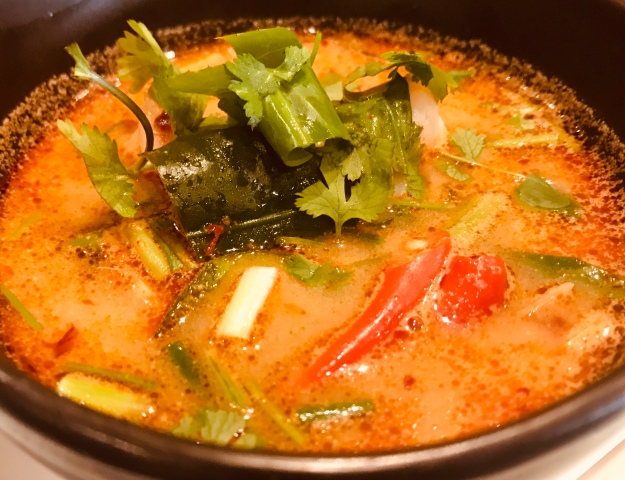
The next on my learning list was a soup, after salad. Tom Yam is a much sort after Soup. Packed with citrusy punch and flavours of Thai herbs, it is a refreshing soup usually made with shrimps. But, Tom Yam can change roles and still be appealing to your palate-
a) Cook as a vegetable soup with shallots, tofu and mushrooms (avoiding fish sauce);
b) try other combinations like – chicken, lamb, or meat of your choice;
or c) make it a meal, with noodles in the soup.
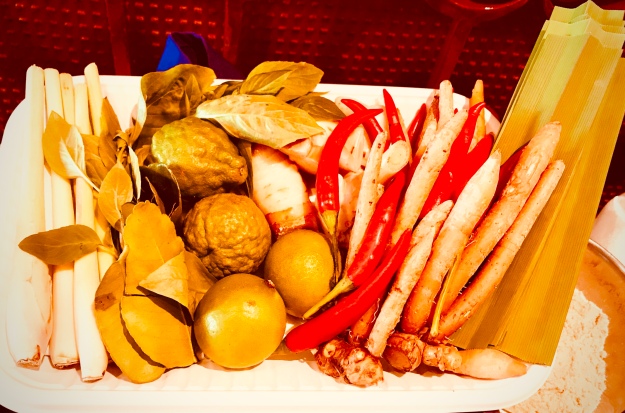
These are the basic spices and other ingredients for preparing Tom Yam Soup- (except the pandan leaves in the end – reserved for our dessert later)
Lemongrass
kaffir lime leaves
galangal
red chillies
thai parsley
lemon
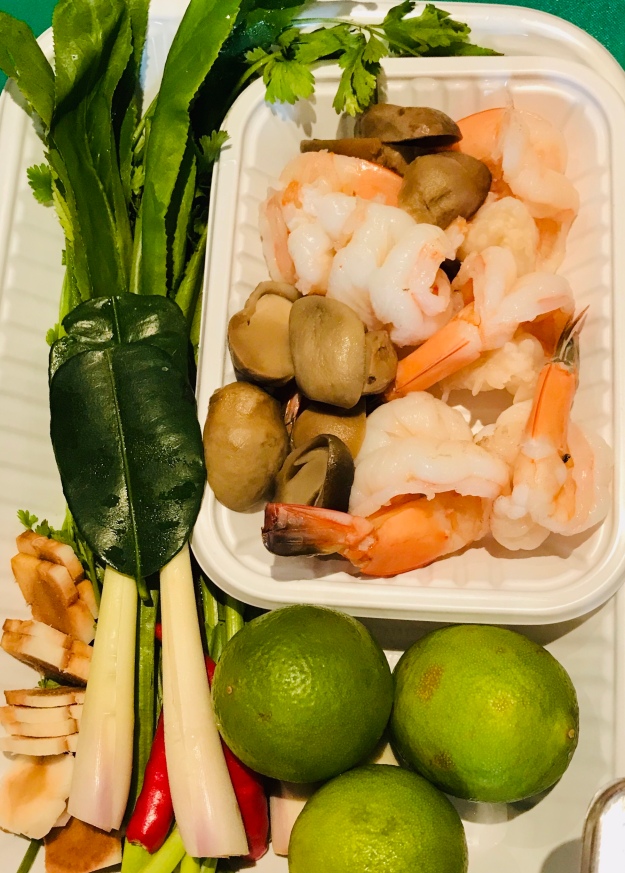
For the proteins-
prawns
mushrooms
and for garnish –
thai parsley
coriander
for the special Thai flavour
lemon juice
fish sauce
tom yam paste
coconut milk
and chicken powder, which is optional
Tom Yam Goong/Thai Tom Yam Soup with Prawns
Getting things ready for Tom Yam
Making the soup
Making Tom Yam
Boil stock (of your choice)
Add cut lemon grass, kaffir lime leaf, galangal and red chillies
While the stock boils well, add prawns and straw mushrooms
Season with lemon juice, fish sauce and tom yam paste and let the prawns and mushrooms cook well
Once done, add coconut milk and chicken powder (if preferred)
The soup is done. Add chopped parsley and switch off stove
Serve hot garnished with chopped coriander leaves.
Food Industry is huge, with a capital H. To sustain in a society of varied culinary interests, plus to sail across the ever rising wave of competition is a volcanic task. The hard work and struggle to bring up a restaurant and also, remain popular in the food industry, for several years is certainly a huge victory.
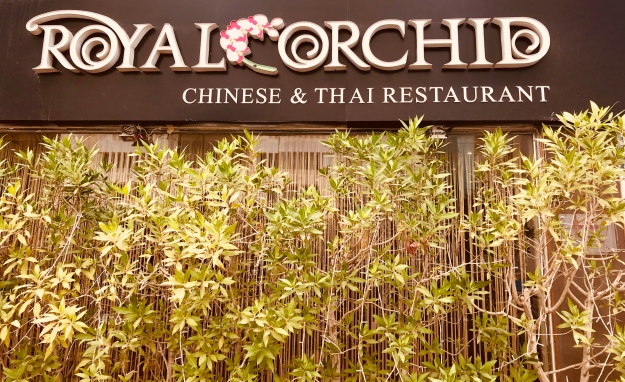
The Royal Orchid Group of Restaurants, is a Hugely successful Chain of Restaurants in Abu Dhabi. After coming to Abu Dhabi, I have seen the flavours of the restaurants under the group, spread aroma in several of the social occasions.
We have been mesmerised by the enthusiasm and zeal of the Founder and Owner of the Royal Orchid Group, the Septogenarian Mr. Vinay Varma and his Dynamic Lady Mrs. Nira Varma.
So, when the Captain of the Chain Mr. Varma, accepted my request for a learning session of some of their speciality foods, I was elated. When he left it to me, to choose from any of their restaurants, my greed to make the best use of the opportunity knew no limits.
Below are the speciality restaurants under the big roof of Royal Orchid Group.
I chose, one of my favourites- Thai. A very big Thanks to their open-mindedness..
Thai cuisine might be one amongst the most popular cuisines around the world, next only to anybody’s own native food. The freshness of ingredients and aromatic flavours of the spices, would rule your palate for several hours.
Having lived in Cambodia, we have been fortunate to have savoured several dishes of South East Asian cuisine. As a blogger, I have certainly been lucky to have learnt a few distinctive dishes and sweets of Cambodia.. like-
Neighbourhood Thailand, it’s history and flavourful food are always a big thumps up for me. I wrote three travel posts on Bangkok- its historical places and food, way back in August 2013 (The Charming Capital of Thailand). When I read that post now, I see that I’ve written about tasting Brown Rice, Crispy Fried Mushroom and Spicy Vegetable Curry/ Yellow Rice, Chicken in Spicy Curry and not to miss the desserts – Sticky Rice and Mango and Coconut Ice cream.
So, here I am, in Abu Dhabi, ready to learn a few more Thai dishes. Life has been very kind to me…isn’t it?
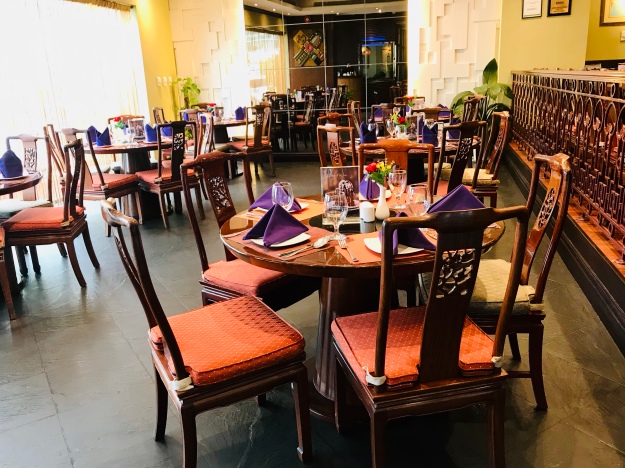
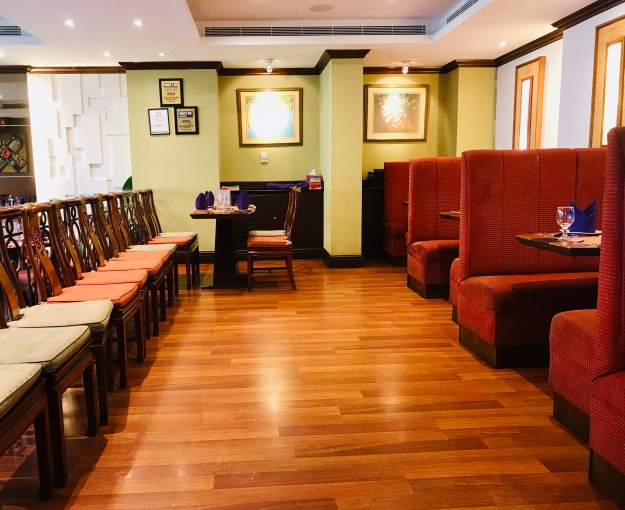
Royal Orchid is a Chinese and Thai restaurant, which has the logo- Inspired by the Far East. That truly suits me too! With elegant interiors and comfortable seating arrangements, it boasts of authentic Chinese and Thai flavours – straight from wok to your plates.
I requested for a workshop/demonstration on a full course Thai Meal with- a salad, a soup, a curry, a stir fry and a dessert, which I chose from few of my favourite dishes.
Chef Vituk of Royal Orchid, who hails from Thailand, was a very patient, grounded personality. After meeting a few chefs recently, I think, patience is a virtue of Chefs. And, they are more than that. They are specialists in the art of combining traditional and contemporary flavours that surprises customers. They present the simplest of dishes in exceptional ways that enthrals food connnaisseurs. Above all, they are blessed with the culinary art that embraces our appetite.
Let me share the dishes I learnt one by one.
I. Thai Green Papaya Salad – three ways
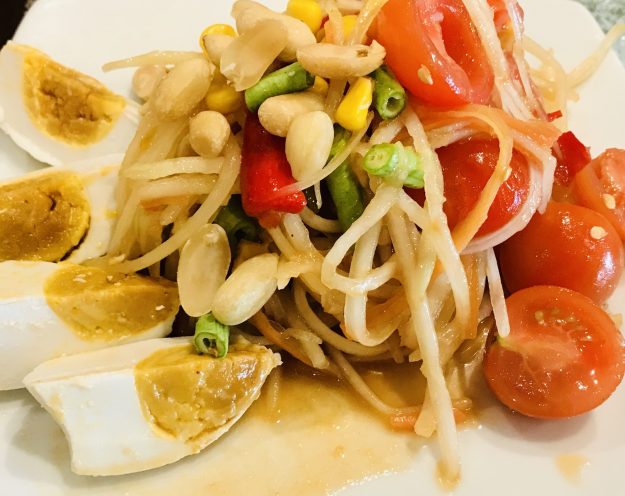
Som Tum Kai Kem – Green Papaya Salad with Salted Eggs
Som Tum Sua – Green Papaya Salad with Rice Noodles
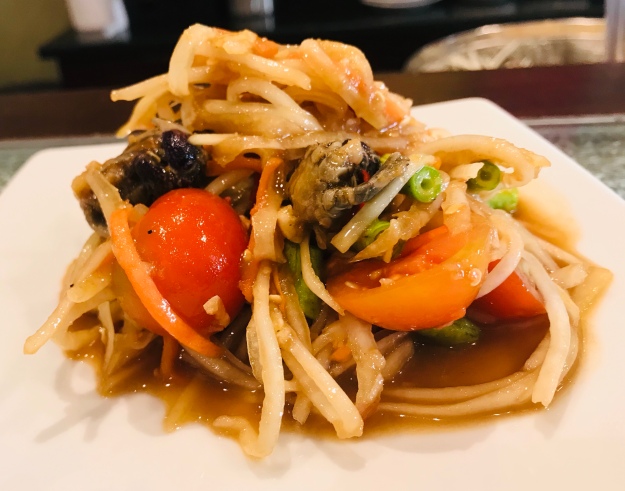
Som Tum Phoo Plara – Green Papaya Salad with Salted Crab
I have also uploaded videos that show the making of Thai Green Papaya salad, demonstrated by Chef.
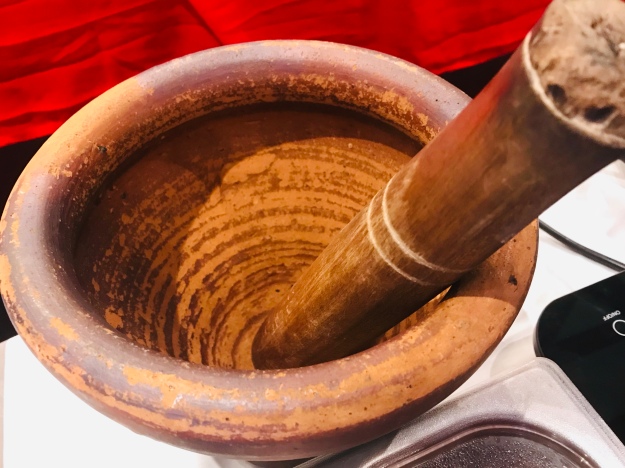
The Quintessentials
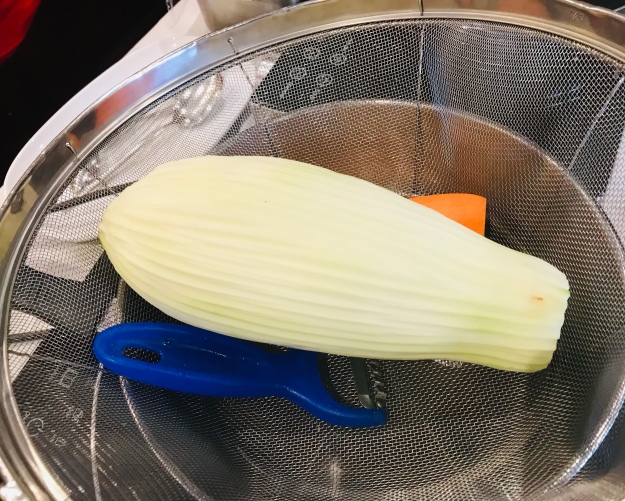
mortar and pestle
green papaya
and the grating technique
The basic ingredients for the different versions of papaya salad, remain pretty much the same. Slight differences in the choice of sauces and spice level make the variations taste better.
Ingredients
garlic pods
long red chillies
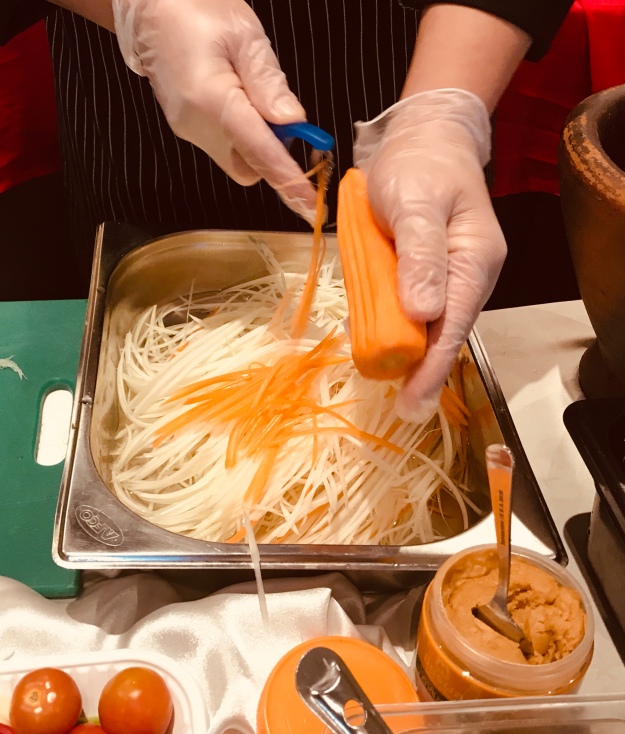
green papaya
carrots
corn
long bean
cherry tomatoes
seasoning
fish sauce
salad dressing
lemon juice
tamarind juice
palm sugar
coconut sugar
Note:
Normally, fish sauce is added. But here, if one wishes to prepare a vegetarian papaya salad, omit the eggs and fish sauce. Instead use a salad dressing, which might be a combination of light soya sauce and palm sugar.
The spice level of this salad is on the higher side. I would suggest reducing the garlic and chillies, if one prefers a medium spiced salad.
Getting ready
The art of grating papaya for the salad
Keep the grated papaya in ice cold water, for at least 10 minutes. This helps keeping the vegetable crunchy.
1. SOM TUM KAI KEM – GREEN PAPAYA SALAD WITH SALTED EGGS
making of the salad
2. SOM TUM SUA – GREEN PAPAYA SALAD WITH RICE NOODLES
making of the salad
3. SOM TUM PHOO PLARA –GREEN PAPAYA SALAD WITH SALTED CRAB
making of the salad
Thanks Chef. That was an amazing experience. But, plenty more to come. Come along with me..