This is my first non-vegetarian recipe. Born in a vegetarian family, married into a non-vegetarian family, a cook in true spirit, I am now a non-vegetarian – who likes to experiment on chicken, fish and lamb dishes but would prefer a vegetarian diet for myself.
As a teenager, though I had tasted chicken secretly (inquisitive to know what it tasted like) with cousins (of course our parents know it all now), bringing meat home and cooking was not an acceptable thing initially. When I was married I was a complete vegetarian – not even eggs were allowed! Times have changed since then.
These are some of the reasons why I continue cooking non-vegetarian food –
1. When I started cooking non-veg. food, I found that chicken and lamb struck very well with any masala and gave remarkable results. So, not knowing anything about the intricacies of speciality non-veg. cooking of Tamilnadu, I used (and still use) the same methods of cooking vegetarian spicy dishes and was successful too.
2. Initially when I started hosting – I could sense that the buffet table was kind of incomplete without the non-vegetarian dish. Even with a lavish spread of vegetarian items, one non-veg. dish did some unexplainable magic.
3. Especially when kids were invited, they were delighted or (if I sound too self-praising) – they were satisfied with rice and chicken or rice and lamb curry. This made it easier for parents too.
4. This one I think should have topped the list. When my husband introduced me to his well wishers as his newly wed wife, while they welcomed me into the set-up, they expressed their concern about the taste buds of the man of the house and his survival without chicken, lamb or fish at least once a week. Wherever I was invited, even people whom I met for the first time, took so much care to make me understand how difficult it was to live without chicken and fish, more difficult to live with a wife who wouldn’t cook all those humble curries and the most difficult – to ask (request?!) the newly wed wife to cook some chicken curry where the man knows nothing about cooking!
5. Of course reason no.4 did not make me cook chicken curry – but I must confess – the nature of my husband to forgo non-vegetarian food to make me comfortable made me try this in full swing and I remember I cooked a simple lamb curry and rice as a surprise lunch (taught by one of those friends). How bad he felt to have put me in such a terrible situation cooking something alien and the big lecture I received on that are different episodes of the story!
It was first ‘cooking for friends but not tasting technique’; Then came, ‘tasting the gravy to serve but not eating technique’; Then, there was enlightenment – cooking, tasting, eating and more cooking, tasting and eating! It is a stress free life now!
So, ‘forgoing non-veg. food for vegetarian wife technique’ did it all!!
So, the first call I made was to my mother-in-law and told her I started cooking non-veg. at home. A very caring mom-in-law that she still is, told me to stop. Though she was happy for her son, she didn’t want me to take the trouble as I grew in a vegetarian family – she didn’t want my parents to feel bad too. Like a true enlightened soul, I stuck to my new Principle. Since then, she has been my special tutor in non-vegetarian studies – especially in the art of cleaning and marinating meat and the special fish kuzhambu – which I have not perfected even after so many years.
So, now to some cooking –
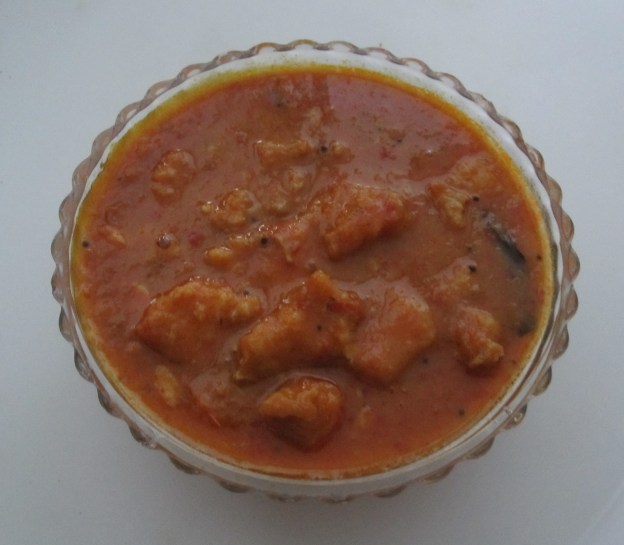
Kozhi Thokku/Chicken Thokku
Thokku can be a thick gravy or a thick paste. With medium or high level spice, this can go well with rice, chappatis or idli/dosas. Unlike chutneys which are ground to pastes and served immediately, thokkus are cooked for a long time to make it a pasty consistency – and are quite filling too. There can be vegetarian and non-vegetarian thokkus. They can also be stored for at least three days due to the thickening process involved. Certain pickles are made in the thokku form and can be stored for months.
This chicken thokku is an aromatic, flavourful dish – simple and easy to cook too.
Ingredients (serves 2 persons)
- kozhi/chicken – 400 gms
- oil – 2 tbsp
- chopped coriander leaves – to garnish
Finely chop –
- ginger – small piece
- garlic – 4 cloves
- onions – medium size – 2 no.s
- tomato – small – 2 nos./big – 1 no.
Dry powders –
- turmeric powder – 1/2 tsp
- red chili powder – 1 tsp (adjust according to spice need)
- coriander powder – 1 tsp
- pepper powder – 1/2 tsp
- garam masala – 1 tsp
- salt – to taste
Optional –
- finely chopped green chillies – 1 no. to make it more spicy
- lemon juice – 2 tsp

Method of Preparation
- Clean, wash and cut chicken to medium size pieces. Chicken can be boneless or with bones as per family preference
- Chop ginger, garlic, onions and tomatoes separately
- Usage of more tomatoes makes the colour reddish, consistency pulpy and reduces the taste of garam masala. What we need is a dark brownish colour with a thick paste consistency with the aromatic flavour of garam masala intact. Hence, if the tomato is big, take one and use two if small in size
- Heat oil in an Iruppu chatti/Kadai
- Fry chopped ginger and garlic till golden brown
- Add chopped onions and fry till golden brown
- Add chopped tomatoes and all the dry powders one after the other
- Mix well and sprinkle little water, not to allow chicken to burn at the bottom of the kadai
- Close the kadai and cook in sim position
- With the lid closed, chicken would release water and let it cook in the same released gravy
- Add very little water if chicken sticks to the kadai. Normally, no extra water would be required
- When chicken is done, open the lid and cook till gravy thickens
- When a semi thick gravy consistency arrives, it would start coating the chicken; When the coating becomes thicker and turns to dark brown in colour, thokku is done
- Garnish with chopped coriander leaves. Serve hot with rice, chappatis, idlis or dosais
Note:
- Chopped green chillies can be added along with dry powders to make thokku more spicy. This is purely optional.
- One might also add some lemon juice after the stove is turned off. This would give a tangy flavour to the spicy chicken thokku
- The quantity of chili powder can be altered according to the spice level of chillies and need of the family.