Category Archives: Cakes and more

100% Whole Wheat Banana Cake (Butterless, Eggless)


100% whole wheat cake
IMG_3599

A long line of festivities and longer line of sweets and snacks have been in display at homes. Why not start a CAKE SERIES… while Santa is on his way!

I have always wanted to increase the list of cakes in dosaikal. The main reason is not simply a passion to bake – but to bake HEALTHY as much as possible. So, how about having a favorite snack without the guilt of adding more empty calories?!

And especially for those little ones who are always tempted towards donuts, pastries, french fries and many more in the same category of junk with white flour – why not let them have their share with fewer restrictions – with these cakes made of 100% whole wheat, without butter and mostly without eggs too!


IMG_4454

And for adults too – these butterless delicacies can certainly help reduce those extra calories! So, don’t control your cravings.. just indulge!!

The recipes have reached this stage after a series of trial and error experimentation and I have also tried to follow a few recipes from fellow bloggers and converted the butter, egg and flour into oil, yoghurt and wheat as the previous cake recipes.

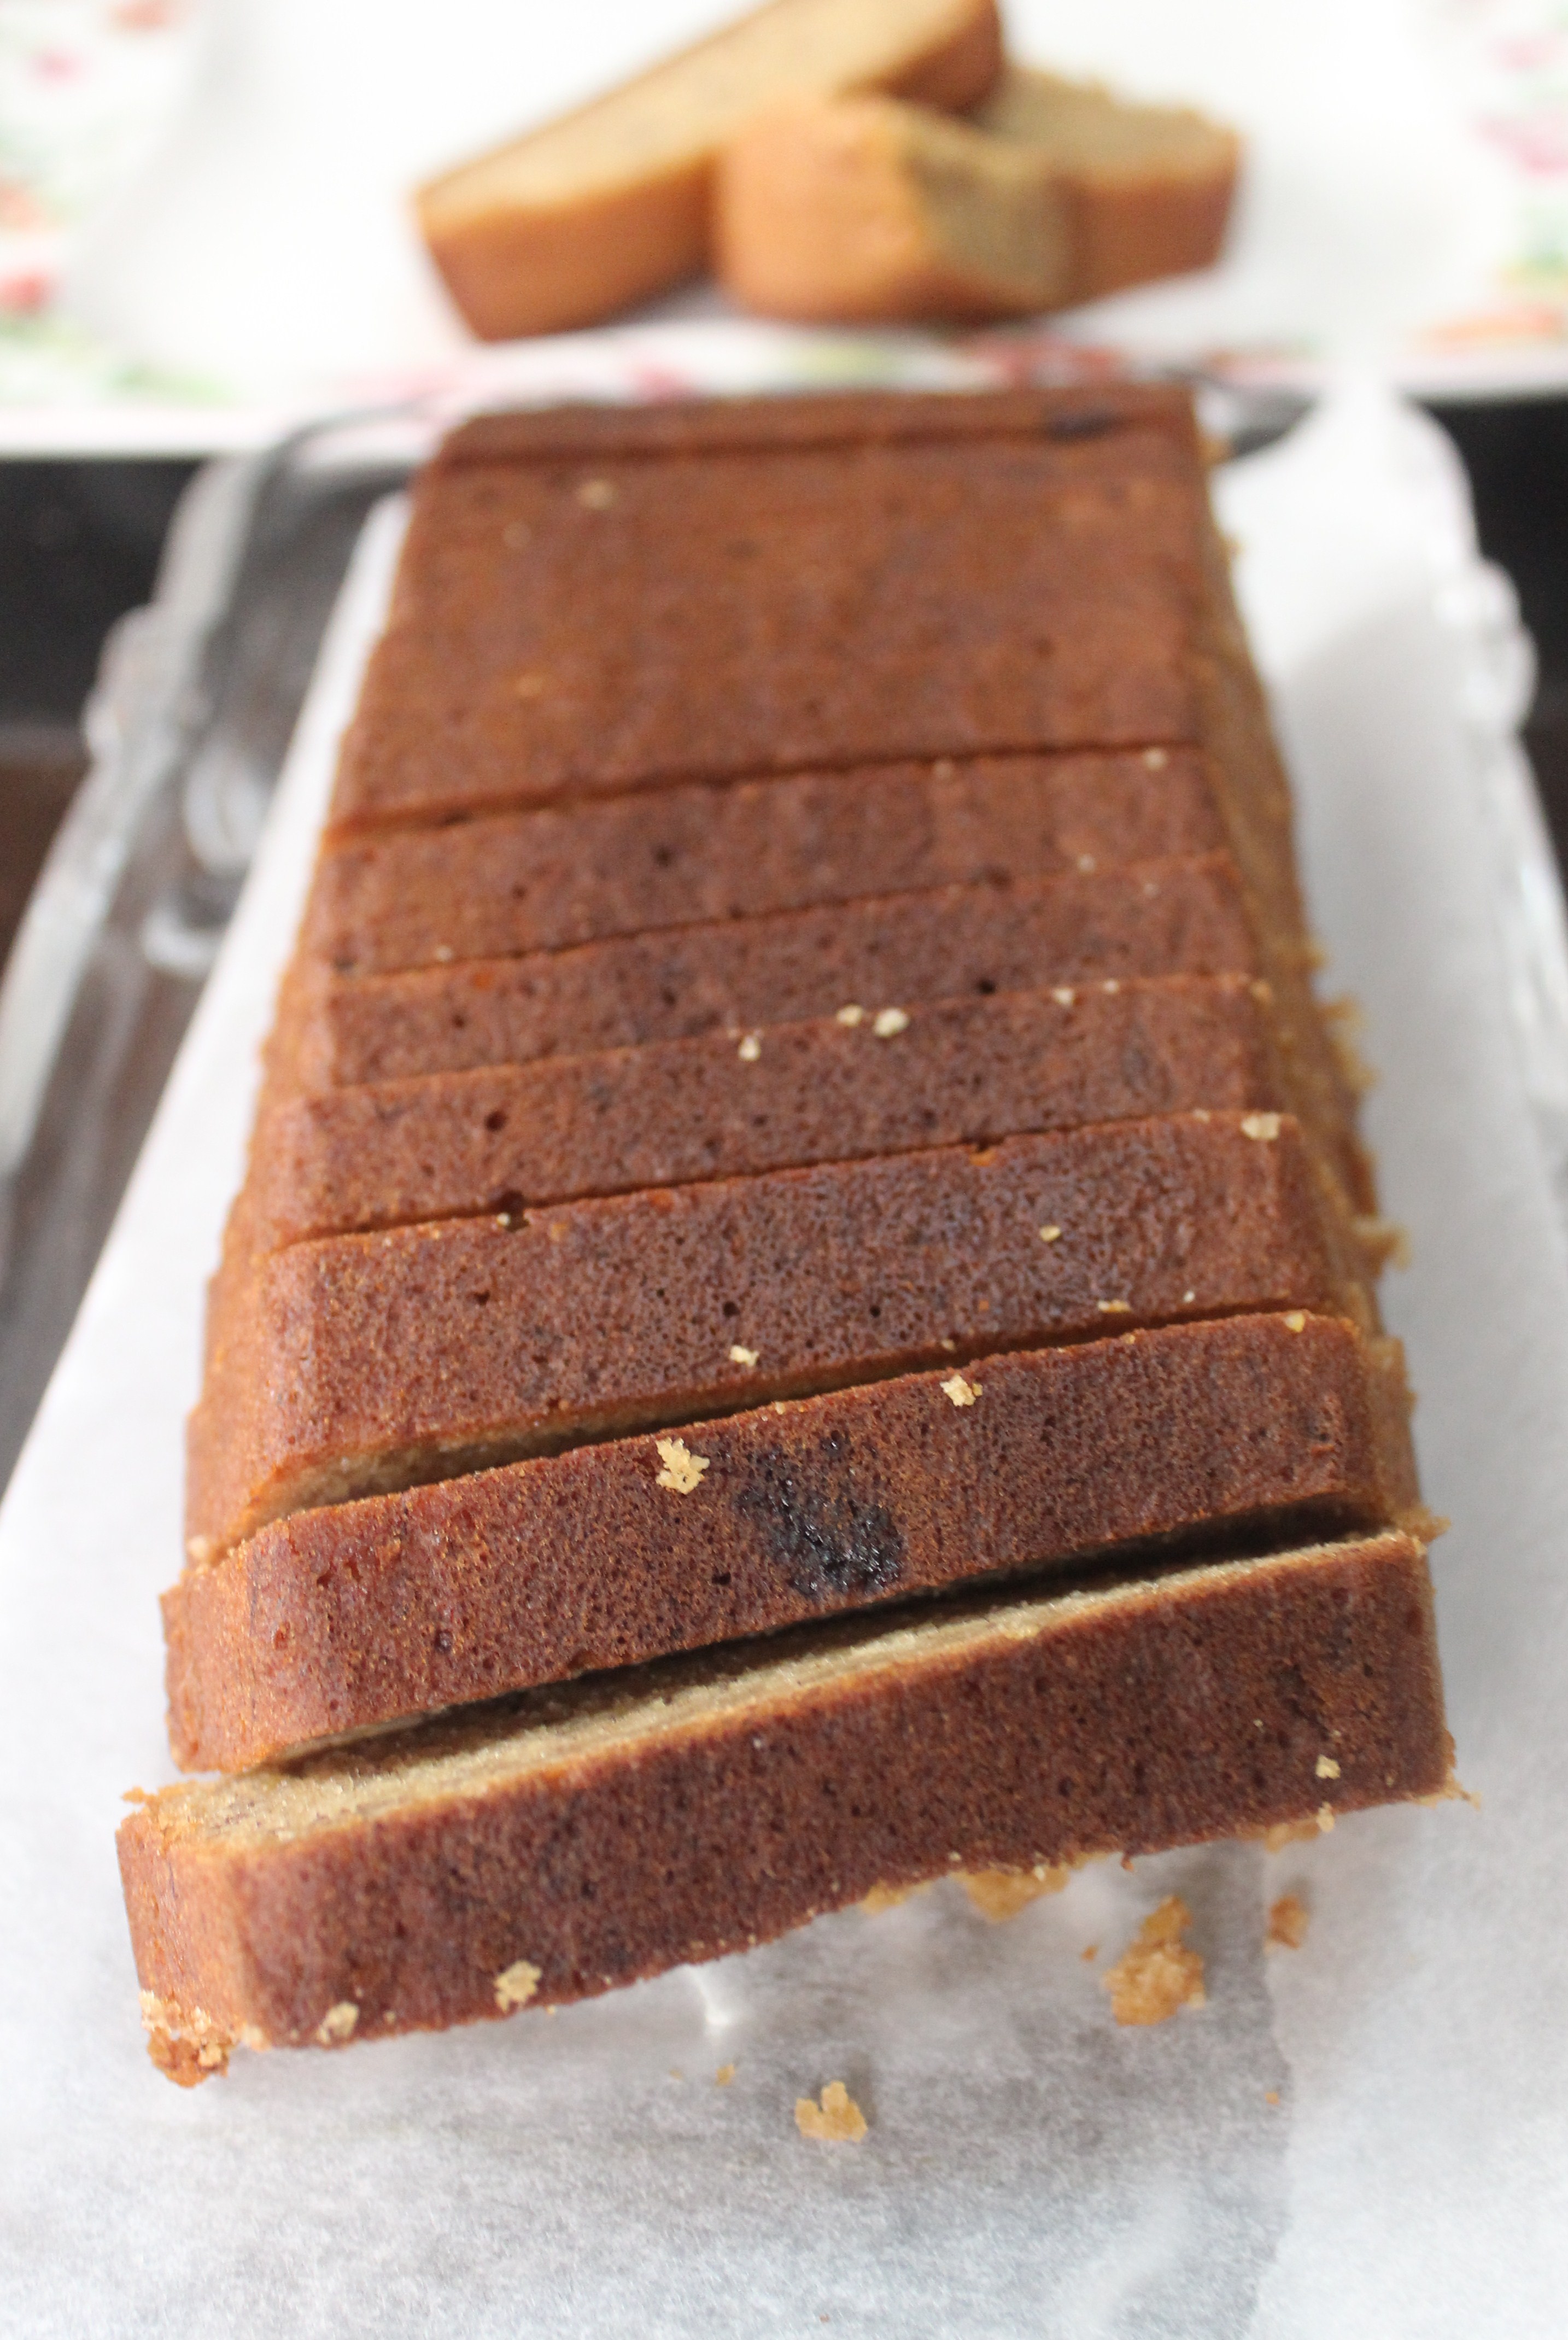
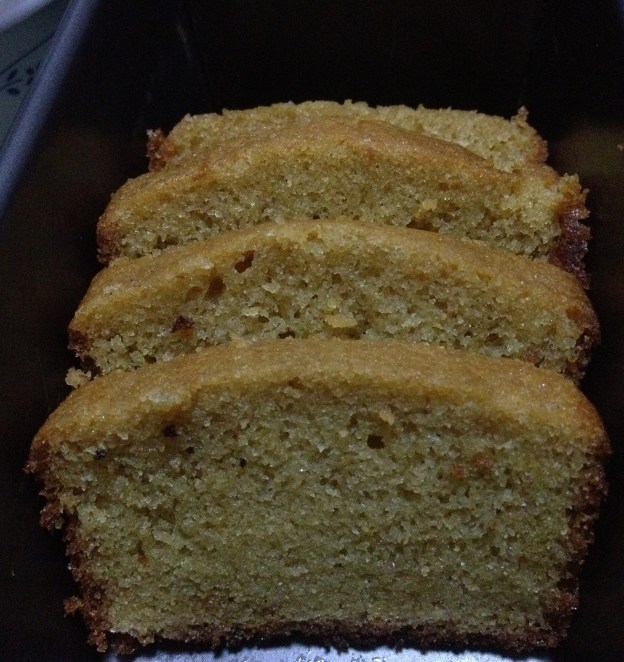
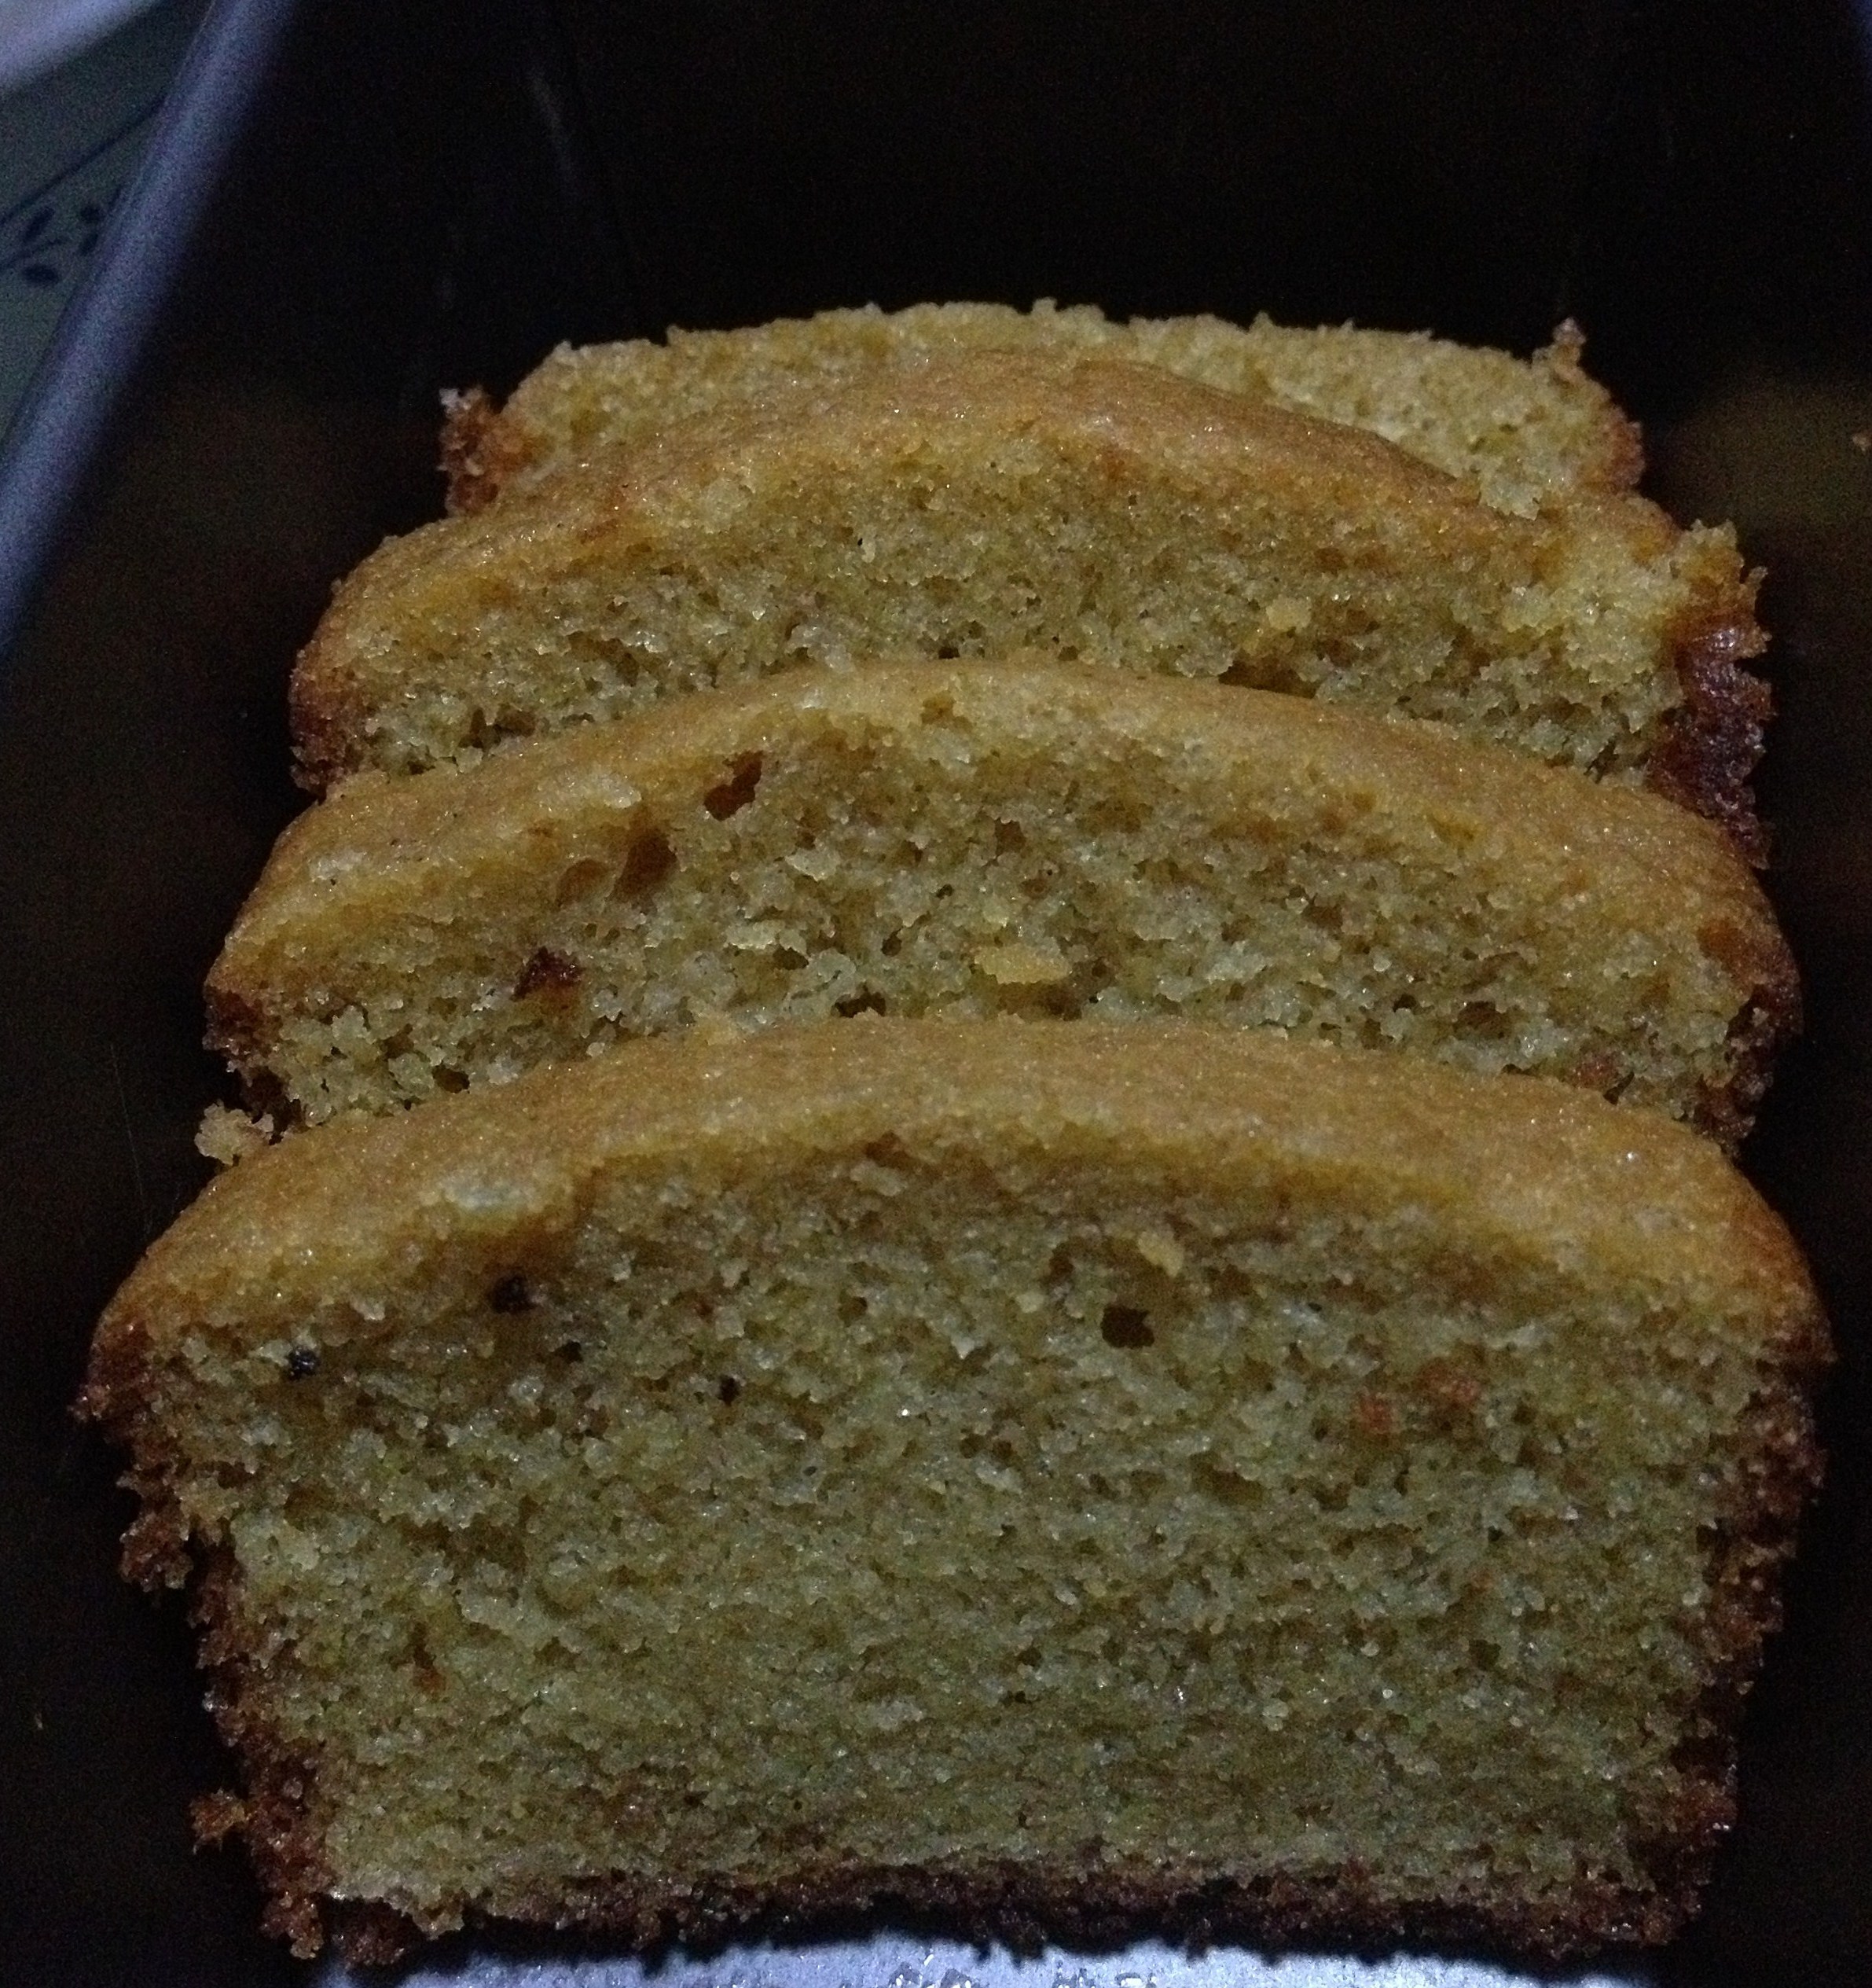
Let’s start with Whole Wheat Banana Cake, adapted from the recipe of one of my friends. The cake she had made was made to ‘Bakery Perfection’, with the flavor and aroma of banana. For me, after a few flops, this combination of ingredients turned out to be good and almost perfect for an experimentation.
100% Whole Wheat Banana Cake (Butterless and Eggless)


IMG_4456

Due to continuous flops, I preferred to experiment with a very small cup measurement. The cup I chose was a small bowl which measures 75gms of wheat flour, equivalent to a small tea-cup.  The proportions of flour, sugar and oil can be done with any cup measurement, but calculating the quantity of baking powder and baking soda might be difficult with cup measurements. Hence, the weight in grams is also given for perfect ratios.
Ingredients

  • whole wheat flour/gothumai maavu/atta – 2  cups/150 gms
  • brown cane sugar – 1 cup/100 gms
  • refined oil (I always use sunflower oil) – 3/4 cup/75 gms
  • yoghurt – 1 cup levelled – appr. 80-90 gms
  • well ripen bananas – 4 no.s small – 1 cup/125 gms when mashed
  • baking powder – 1 tsp/4 gms
  • baking soda – 1 tsp/4 gms
  • hot milk – 1/2 cup
  • banana essence – 1 tsp (can also use vanilla essence)


had a lovely brown colour in the bottom – thanks to the gas oven

IMG_3555

Method of Preparation
Keeping things ready

  1. Preheat oven at 170 degrees C or if gas oven keep the knob at 4
  2. Grease the required cake tin
  3. Sift wheat flour and baking powder and keep aside
  4. Mash the bananas with spoon (original recipe); I blended in a blender

Preparing the Batter

  1. In a wide bowl, mix oil, sugar and yoghurt
  2. Then, add banana essence and mashed bananas and mix well
  3. Dissolve baking soda in hot milk – this will form into a foamy white mixture and add this to the above batter
  4. Fold in the sieved flour-baking powder
  5. Spoon the batter in the cake tin. Smooth top with a spatula
  6. Bake for 25 to 30 minutes, depending upon the oven – till skewer comes out clean. A bigger cake would need more time.


and the upper crust soft and lighter in colour

IMG_3580

Butter and Egg Wheat Cake


Ms. Vanitha asked for the Basic Wheat Cake (https://dosaikal.com/basic-wheat-cake) with butter and eggs instead of oil and omission of eggs. So, I tried the cake this weekend. It came out really well, not to mention the guilt of having butter in the cake. My daughter was very happy to beat the eggs and I went back to my younger days when I used to blend butter and sugar for amma. Truly a lick of butter and sugar beaten together is a joy forever….So, I decided to indulge the previous weekend!

The cake came out very good – soft but intact; with the flavour of butter and eggs and perfectly moist.

Butter and Egg Wheat Cake

IMG_1926


Ingredients

  • wheat flour – 100 gms
  • sugar (I used brown cane sugar) – 75 gms
  • butter– 100 gms
  • egg – 2 nos.
  • yoghurt/curds – 3 tblsp
  • water – 3 tblsp
  • baking powder – 1/2 tsp
  • baking soda – 1/2 tsp
  • vanilla extract – 1 tsp


Method of Preparation

  1. In a wide bowl, beat butter and sugar – enough to melt sugar
  2. Whisk eggs separately and add to the blended butter and sugar
  3. Powdered sugar can also be used for easier melting
  4. Add vanilla extract and mix
  5. Mix baking soda and baking powder with gothumai maavu/wheat flour/atta
  6. Start adding flour little by little to egg, sugar, butter mixture
  7. When the batter has become a bit thick, add yoghurt to set right the consistency
  8. Add all the flour and if needed add water to bring batter to thinner consistency
  9. The yoghurt I used was full cream yoghurt. So I added water to the batter to make it thinner.
  10. Grease a baking pan and dust it with a light coating of flour
  11. Pour the batter into the pan
  12. Preheat oven at 200 degrees centigrade and bake for 25 minutes
  13. Check at 20 minutes with a tooth pick – if it comes out clean, cake is ready
  14. Baking time might vary, depending upon the oven. So, it is better to check at 20 minutes
  15. Remove from oven and let it cool to serve.

Eggless Chocolate Cake

Here comes a Chocolate Cake – Eggless!  I prefer using eggs in my cakes… it’s just that I like the texture of the cake when eggs are used. But, I try to bake eggless cakes for my friends who do not include eggs in their diet.

As usual, butter is substituted with oil and all-purpose flour with wheat flour.   Eggless cakes are also baked using condensed milk – here yoghurt is used instead. Of course, another healthier option – brown cane sugar is used in place of white sugar. 


Eggless Chocolate Cake 

Ingredients

  • wheat flour – 1 small cup – 100 gms
  • brown cane sugar – 3/4 cup – 75 gms
  • cocoa powder – 1/4 cup – 25 gms
  • cooking oil (I used sunflower oil) – 1/2 cup – 50 ml
  • yoghurt/curds – 1 1/2 cups – 150 ml
  • baking powder – 1/2 tsp
  • baking soda – 1/2 tsp
  • milk – a little (if needed)
  • salt – a pinch
  • vanilla extract – 1/2 tsp


Method of Preparation

  1. Sieve wheat flour, cocoa powder, baking powder and baking soda and keep aside
  2. In a wide bowl, mix oil, sugar, yoghurt and vanilla extract till sugar melts
  3. Add the sieved dry ingredients little by little
  4. If batter is thick, add milk as needed to make a batter of pourable consistency  and lump-free too
  5. Pour in a greased tray
  6. Bake in a preheated oven at 200 degrees centigrade for 20 minutes
  7. Check with a tooth pick
  8. Cake is ready when tooth pick comes out clean
  9. Cool and serve.


 forgot to take a snap before i started cutting…


Note:

  1. If one needs more sugar, can be added
  2. Quantity of yoghurt can be reduced or diluted with  very little water
  3. Nuts, especially walnuts can give the cake a nutty taste
  4. This cake gives nearly 20 small pieces – quantity can be altered for bigger or smaller cakes – checking at the right time is important!


Christmas Fruit Cake

Any place of worship – be it a temple, church, mosque or any other religious place – being worshipped for number of years, especially centuries has a special aura. Prayer, Meditation, Chanting, Devotion, Peace and many more things occupying the worship area –  make it a special place. I experience Peace and Tranquility in a temple – one of the reasons being the religious stories that I have been fed with, since childhood. When I grew up, I was pulled towards the ancient past of the 1000 to 1500 year old temples of Tamilnadu and the history and literature of the Tamils behind those walls and the stone inscriptions of the historic past on the walls of the temples. 

I experience the same unexplainable respect for the ancient past and people of the past when I enter a Church which depicts valuable stories of history. The architectural beauty of Cathedrals amazes me and I tend to travel to another world!

Though this post comes a couple of days after Christmas, I thought I could share a few photographs of some of the most beautiful and powerful religious monuments that we’ve visited in Europe. Capturing those magnificent architectural marvels in a camera everyone would agree, can never be satisfying.

In Germany…


pictures of koln cathedral


frankfurt dom or cathedral


In Switzerland…


bern cathedral


cathedral de loussanne


In France…


notre-dame, paris


st.denis bascilica, st.denis


In Scotland…


St. Giles’ Cathedral, Edinburgh


glasgow church


A few other christmas clicks that we relish…


christmas eve in brussels


santa at kaufhof shop, dusseldorf


Now, some culinary business for Christmas!

The best Fruit Cake or Plum cake I have ever tasted is the Thoothukudi Bakery Plum Cake. Thoothukudi, the original tamil name of the place, the Britishers changed to Tuticorin for their safe pronunciation. This is a port city in down south Tamilnadu.  It holds a special place to me because of several reasons – 1.  it is the place from where my mother comes from; 2. the place I started my schooling as a child; 3. After we shifted to Chennai, it was my only favourite holiday destination to spend the school annual vacations at grandparents’ place!

It  is famous for Pearls – it is also called muthunagar or the pearl city and Salt Fields.  Thoothukudi also holds a special place in Indian Freedom Struggle as the First Swadeshi Ship was launched here in British India in 1906 by V.O. Chidambaram Pillai.

Now, Thoothukudi is also famous for its Bakery Foods. Thoothukudi Macaroons are very famous- a little change – macaroons are famous – but not many people would know it comes from Thoothukudi/Tuticorin. I have enjoyed  kilograms and kilograms of macaroons while young and even now, thaatha used to bring us from the bakery and additionally send for our friends in chennai to enjoy the true flavour of Thoothukudi. Beyond Macaroons, the most enjoyed bakery product used to be the Plum cake. So, when I wanted to bake a Christmas cake at least a bit similar to thoothukudi plum-cake, I searched the net. I found http://elitefoods.blogspot.com/2008/12/christmas-plum-cake.html where Viki, the author of the blog had additionally mentioned, the cake was similar to the plum-cake of thoothukudi. I tried it with some minor changes, keeping the basic structure intact. It was certainly a good fruit cake, but not as good as thoothukudi plum-cake as I had made those changes. Thanks Viki for the recipe!

As usual, I replaced all-purpose flour with wheat flour/gothumai maavu/atta. I used cooking oil instead of butter.  I used fresh orange juice to soak candied fruits instead of rum or brandy. Since dates, raisins, candied fruits and caramelised sugar has been used, the quantity of sugar is reduced. As I had candied cherries and apples, I used them – candied plums, pears, prunes and apricots make the cake more ‘fruitful’.


the christmas cake


Christmas Fruit Cake

Ingredients (gives 2 medium size cakes)

  • wheat flour – 1 1/2 cups
  • sugar – 3/4 cup
  • eggs – 3 no.s
  • oil – 3/4 cup
  • baking powder – 1 tsp
  • baking soda – 1/4 tsp
  • salt – 1/2 tsp
  • vanilla extract – 1 tsp
  • caramel syrup – 1/2 cup

to soak in 1 cup orange juice 

  • candied cherries -1/4 cup
  • candied apples – 1/4 cup
  • dates – 1/2 cup
  • raisins – 1/2 cup

finely chopped dry fruits – 1 cup

  • cashew nuts
  • almonds
  • walnuts

spice mix

  • cloves – 3 no.s
  • cinnamon twigs – 1/2 inch twig
  • nutmeg powder – 1/4 tsp
  • dry ginger powder – 1/4 tsp

Caramel Syrup

  1. Take 1/4 cup sugar and 1 tbsp water in a utensil and let it boil in medium heat
  2. After a while, the syrup would start becoming brown in colour
  3. When it becomes darker, add 1/2 cup warm water and mix well
  4. Be careful while adding water to the very hot caramelised sugar, it might sprinkle and cause burns
  5. Caramel syrup is ready


soaked fruits into the batter


ready to be baked


Method of Preparation

  1. Soak candied fruits, raisins and chopped dates in orange juice for minimum 12 hours
  2. Finely chop dried nuts and keep aside
  3. Make fine powder of spices
  4. Take a wide bowl or a cake blender in a processor can be used
  5. Beat eggs, sugar and oil
  6. Add caramel syrup, spice mix and soaked fruits without the juice into the blender
  7. Add wheat flour, baking powder and baking soda and blend well
  8. Add salt and vanilla extract and mix well 
  9. Add the left over orange juice if needed
  10. Mix the chopped nuts in 1 tsp flour so that nuts do not settle in the bottom of the mixture
  11. Preheat oven at 175 degree celsius
  12. Grease a baking tray and sprinkle some flour
  13. Pour the cake mixture into the tray and sprinkle chopped nuts
  14. Bake for 40 to 50 minutes and check with a tooth pick to see if done
  15. After nuts were sprinkled,  I did not mix it. That is why, nuts remained on top and formed a nutty covering. If mixed a bit, nuts would have mixed well in the cake for a better nutty flavour throughout.


Cake done!


the last pieces left for the click..


Wishing you all Merry Christmas!!

Grilled Sandwiches without grill

On a weekend morning, when I wanted to serve something quick and simple with coffee – but a hot one in the -1 degree chillness outside – an old-time favourite came to my mind. This is not a traditional one, but something which was not a usual ‘complete meal’ in conservative households when I grew up; might have been a foreigner food those days – surely not anymore!  They are the ‘Sandwiches’!  In my school or college days, a request to invest in a sandwich maker/sandwich griller did not have an encouraging outcome. But making one – not only tasty but hot, crispy outside with a flavourful filling inside used to be very interesting. Like chinese, continental or any other food made the Indianised way – sandwiches are also Indianised, sometimes south Indianised! Fusion music and fusion cooking cannot be avoided you see. Even in the dosai varieties, apart from the usual masala dosa, the stuffing inside the dosais can be of numerous varieties – paneer dosai, paneer-capsicum dosai, cauliflower dosai, manchurian dosai and so on and on and on -non stop.

The same way, the filling inside sandwiches can also vary – anything from fresh vegetables to left over cooked vegetables – especially spicy. If left over dry vegetable is not spicy, a spread of spicy coriander chutney would fit very well as a spread instead of butter/margarine. But wait – this post is not about the filling and preparation of sandwiches – but in the method of making grilled sandwiches without a sandwich maker/sandwich griller. One of my aunts settled in Pune,  a beautiful city in the state of Maharashtra taught me this way (a wonderful cook herself – an expert in home-made bhelpuris to pizzas)! Thankyou Chithi (Aunt)!

Coming back to my need for a hot grilled sandwich – I put my sandwich griller aside and came to the stove to make a grilled sandwich without a grill. A cast iron pan serves best – it holds heat and grills evenly.  This is how I did it –

Ingredients

  • brown bread – 2 slices
  • butter/margarine – 1 tsp
  • potato curry/any other dry vegetable – enough to spread on the slice

Method of Preparation

1. Fill bread with potato curry or any preferred filling with or without cheese

2. Heat a cast iron pan on the stove

3. Grease with 1/2 tsp margarine

4. Place the filled in bread slices on pan

5. Spread 1/2 tsp margarine on the top slice


6. Press it well


7. When it is lightly toasted on one side – turn it


8. Cover with a lid/plate which exactly closes the slice 


9. Place a heavy utensil/pan/stone – anything which would press the sandwich well


10. In sim position, let it be grilled for 2-3 minutes – check at this point


11. The side facing the fire would be evenly brown and crisp

12. Cut it to halves and serve.


If one prefers to make grilled sandwich in a sandwich maker/griller, please go for it!

Baking Cakes Healthy! – Oats and Apple Cake

Passion for traditional food has always been there within me. But, when I was young and started trying my hands in cooking, I would attempt only exotic recipes from cookery books. Biriyanis, Pulavs, North Indian Specialities, and especially Cakes and other baked items used to be favourites. There was always amma and aachi to make the Tamilnadu specialities.

One such item which was always on my list of exotic recipes was cake. Cakes are hugely popular among young and old ones – irrespective of age. The soft, fluffy, sugary, sometimes nutty – vanilla, strawberry, pineapple, caramel and the king of all flavours if I can say – chocolate – cakes and their flavours steal the show in many places.

I remember amma baking cakes on stove – in a cake making vessel with sand as the base inside. First, sand used to be filled in the cake making vessel and preheated on the burner. The cake baking vessel looked like an idli kopparai or traditional idly steaming utensil. The cake batter would be prepared, poured in the metal baking tray, which would be placed on top of preheated sand and the vessel would be closed with lid. After an hour or so, cake would be ready. In the meantime, the exotic smell of cake being baked on top of sand would spread in the house… kids waiting for the minute to open and have the king and queen’s share!

Now, with oven in every household, cookery books, blogs and cookery classes – baking cakes have become a household affair – everything made easy. Though, baking cakes of different varieties has become easier now, I have always not been a great fan of the self-raising flour/all-purpose flour or maida as it is called locally. Maida, a refined product, too fine and sticky is considered as empty calories and quite often a waste material to the system. The usage of maida in my cooking is near to nil. So, I try baking a bit healthier cakes. Sugar is another empty calory intake – I try substituting sugar with other healthier options. Not compromising on the fluffy texture and basic nature of cakes, I have tried some cake varieties. At least, the guilt feeling of having an empty calorie sweet is reduced and the cake is also made fibrous and more nutritious for kids!

I always told my daughter sugar was bad. I substitute jaggery for sweetness in her porridges. Till today, she is not interested in the various sweets made at home or outside. She always says ‘sugar is bad amma’! So, when I started baking cakes with whole wheat flour, she immediately asked me – can we bake cakes without sugar? I seriously took that in mind and tried it. Next time she said – ‘butter is also bad amma’ – so I started baking cakes with whole wheat flour, any natural sugar substitute like raisins or dates with very little unrefined cane sugar and oil instead of butter.

When I plan to bake a cake,I would take out all ingredients and arrange them and just call my daughter to mix. She is the true mixer at home. My work is to give her all the ingredients and after she blends them well, keep the baking tray inside the oven. (I lend a helping hand to bring it to proper consistency). Though she loves to beat the eggs and roll the batter, she doesn’t try tasting any of them. She only bakes for others. Just that the sweet tooth forgot to appear till today!


Oats and Apple Cake


hands of my little one beating the cake batter


arrange apple pieces


Ingredients

  • whole wheat flour – 50 gms
  • Oats – 50 gms
  • cane sugar – 75 gms
  • eggs – 2 nos
  • refined oil – 50 gms
  • milk – ¼ cup
  • apple – 1 small
  • baking powder – ¼ tsp
  • baking soda – ¼ tsp
  • Vanilla extract – 1 tsp

Method of Preparation

  1. Take sugar and oil in a wide bowl and mix well
  2. Beat eggs well
  3. Mix eggs with the sugar – oil mixture
  4. Sieve whole wheat flour, baking powder and baking soda twice
  5. Add oats to the wheat flour and mix well
  6. Slowly fold in the flour with the egg-sugar-oil mixture little by little
  7. Add the vanilla extract for flavour
  8. To bring the batter to better pouring consistency, add milk
  9. Cut apple into long slices
  10. Grease a baking tray and arrange apple slices
  11. Pour the cake batter on top of slices
  12. Preheat oven at 200°C
  13. Place the cake batter in and bake for 30 minutes
  14. Check after 20 minutes with a knife if the cake is done
  15. If the knife comes out without batter sticking to it, cake is done. If batter sticks, take it out at 30 minutes.


baked well


Note:

  1. This is a small cake and might give about 12 small pieces.
  2. If one needs a bigger cake, just double the quantity of all ingredients
  3. Sugar content might be less in this cake – if one feels to add more, sugar quantity can be slightly increased.