Monthly Archives: July 2018

Karumbu Chaaru/Sugarcane Juice in a Trendy Outlet in Chennai


On a hot summer day, quenching the thirst with colas in different colours and flavours, or go for sugar filled so-called fruit juices may be the choice of sophistication. Whether that’s really a healthy option seems to be incomprehensible for most of us. The shops filled with bottles and television channels clogged with cool drink advertisements are not enough proofs. But the sale of packed juices and hands of citizens of all ages with these cool stuff, stand proof to our degenerating health ambitions.

Why don’t we stop being carried away by false advertisements? Why don’t we monitor our food choices more strictly? The magnetic pull of the beautifully arranged cans/bottles/tins is so hard to resist… that our shelves and refrigerators are storehouses of junk bombs.

It is no doubt, eating fresh fruits or drinking fresh fruit juices are better options than storing canned juices. So, during my stay in Chennai, when I came across this trendy little outlet called CANE4U with catchy captions on natural sugarcane juice, I couldn’t resist peeping in.

Who wouldn’t like Karumbu Chaaru – Sugarcane Juice…. one of nature’s best juices and a source of world’s favourite sugar??


Come along .. let me take you in.

The shop had enough space to seat 12 people. The interiors were filled with information on health benefits of sugarcane. And the list of sugarcane juice combinations with other fresh juices was an innovative option.
  

various combinations with sugarcane offered


and mocktails


The juice extracting machine is almost as huge as a room .

stored sugarcane is stored in a corner-


Now, to clean, fresh juice- step by step…

  1. fresh cane is sent in-


2. squeezed fresh juice is dispensed-


3. and after extraction-


4. ready for take away.   You can also take your own container and fill your favourite combination.


They have several branches in Tamilnadu-

Cool isn’t it!!

Advertisement

Kariveppilai Yennai/Traditional Hair Oil with Curry Leaves


Kariveppilai is the Tamil name for Curry leaves. It roughly translates as neem leaf used in curries –  Kari+Veppilai – Veppilai is Neem Leaf. It looks almost like neem leaf, but doesn’t carry the bitterness of neem. The wonderful aroma of the curry leaf when fried, makes it a great agent for seasoning in many dishes. Having known the medicinal effects and health benefits this exceptional tree possesses, the Tamils have been including the curry leaf in varied usages.


They are considered to have anti-diabetic, antioxidant, antimicrobial, anti-inflammatory, anti-carcinogenic, and hepatoprotective (capability to protect the liver from damage) properties. The roots are used for treating body aches and the bark is used for snake bite relief.

The main nutrients found in curry leaves are carbohydrates, energy, fiber, calcium, phosphorous, iron, magnesium, copper, and minerals. [1] It also contains various vitamins like nicotinic acid and vitamin C, vitamin A, vitamin B, vitamin E, antioxidants, plant sterols, amino acids, glycosides, and flavonoids. Also, nearly zero fat (0.1 g per 100 g) is found in them.

https://www.organicfacts.net/health-benefits/herbs-and-spices/health-benefits-of-curry-leaves.html


Apart from these scientific facts, the main benefits that home makers for generations have been telling their off springs are-

kariveppilai/curry leaf is-

  •  good for eyes
  • good for digestion
  • important in maintaining darker hair colour
  • a natural coolant

  
When we used to leave aside the fried curry leaf from the chutney, from the sambar, from the kuzhambu/curries on our plates, amma would scold us to chew and finish it off. We would reluctantly do it or sometimes quarrel and throw it away. Then she would secretly add the leaves -powdered- in many dishes… we would unknowingly consume it.  Now, as a mother, I am scolding my daughter to wipe the plate clean chewing all extra curry leaves, and am also trying to inculcate the valued curry leaves in many dishes, without my child’s attention. No fault here with the curry leaf, but some genetic disorder of setting aside chewable things from blended dips.


Curry leaves are herbs that are known to have essential nutrients that help in conditions like weight loss, blood pressure, indigestion, anaemia, diabetes, acne, hair loss, et al. These aromatic leaves, also known as kadi patta, have nutrients like copper, calcium, phosphorus, fibre, carbohydrates, energy, magnesium and iron. They also possess many types of vitamins like vitamins A, B, C and E and amino acids beneficial for health. 

https://www.ndtv.com/food/curry-leaves-benefits-use-kadi-patta-for-your-health-beauty-and-hair-1861407


The specific usage of the curry leaf in preparing Hair Oil is the topic of this post. Curry Leaf Oil is a great coolant for the hot climate of the southern part of India, especially Tamilnadu. It also tackles early greying of hair and aids in hair growth – whether applied as oil or consumed in various dishes. 

I have used kariveppilai yennai when young and still see appa (father) use it. We also make fun of his moustache having turned grey sooner than his hair, thanks to the kariveppilai yennai/ curry leaf oil. The aroma of curry leaves slowly cooked in coconut oil for the purpose of black, thick hair, takes me to my childhood.


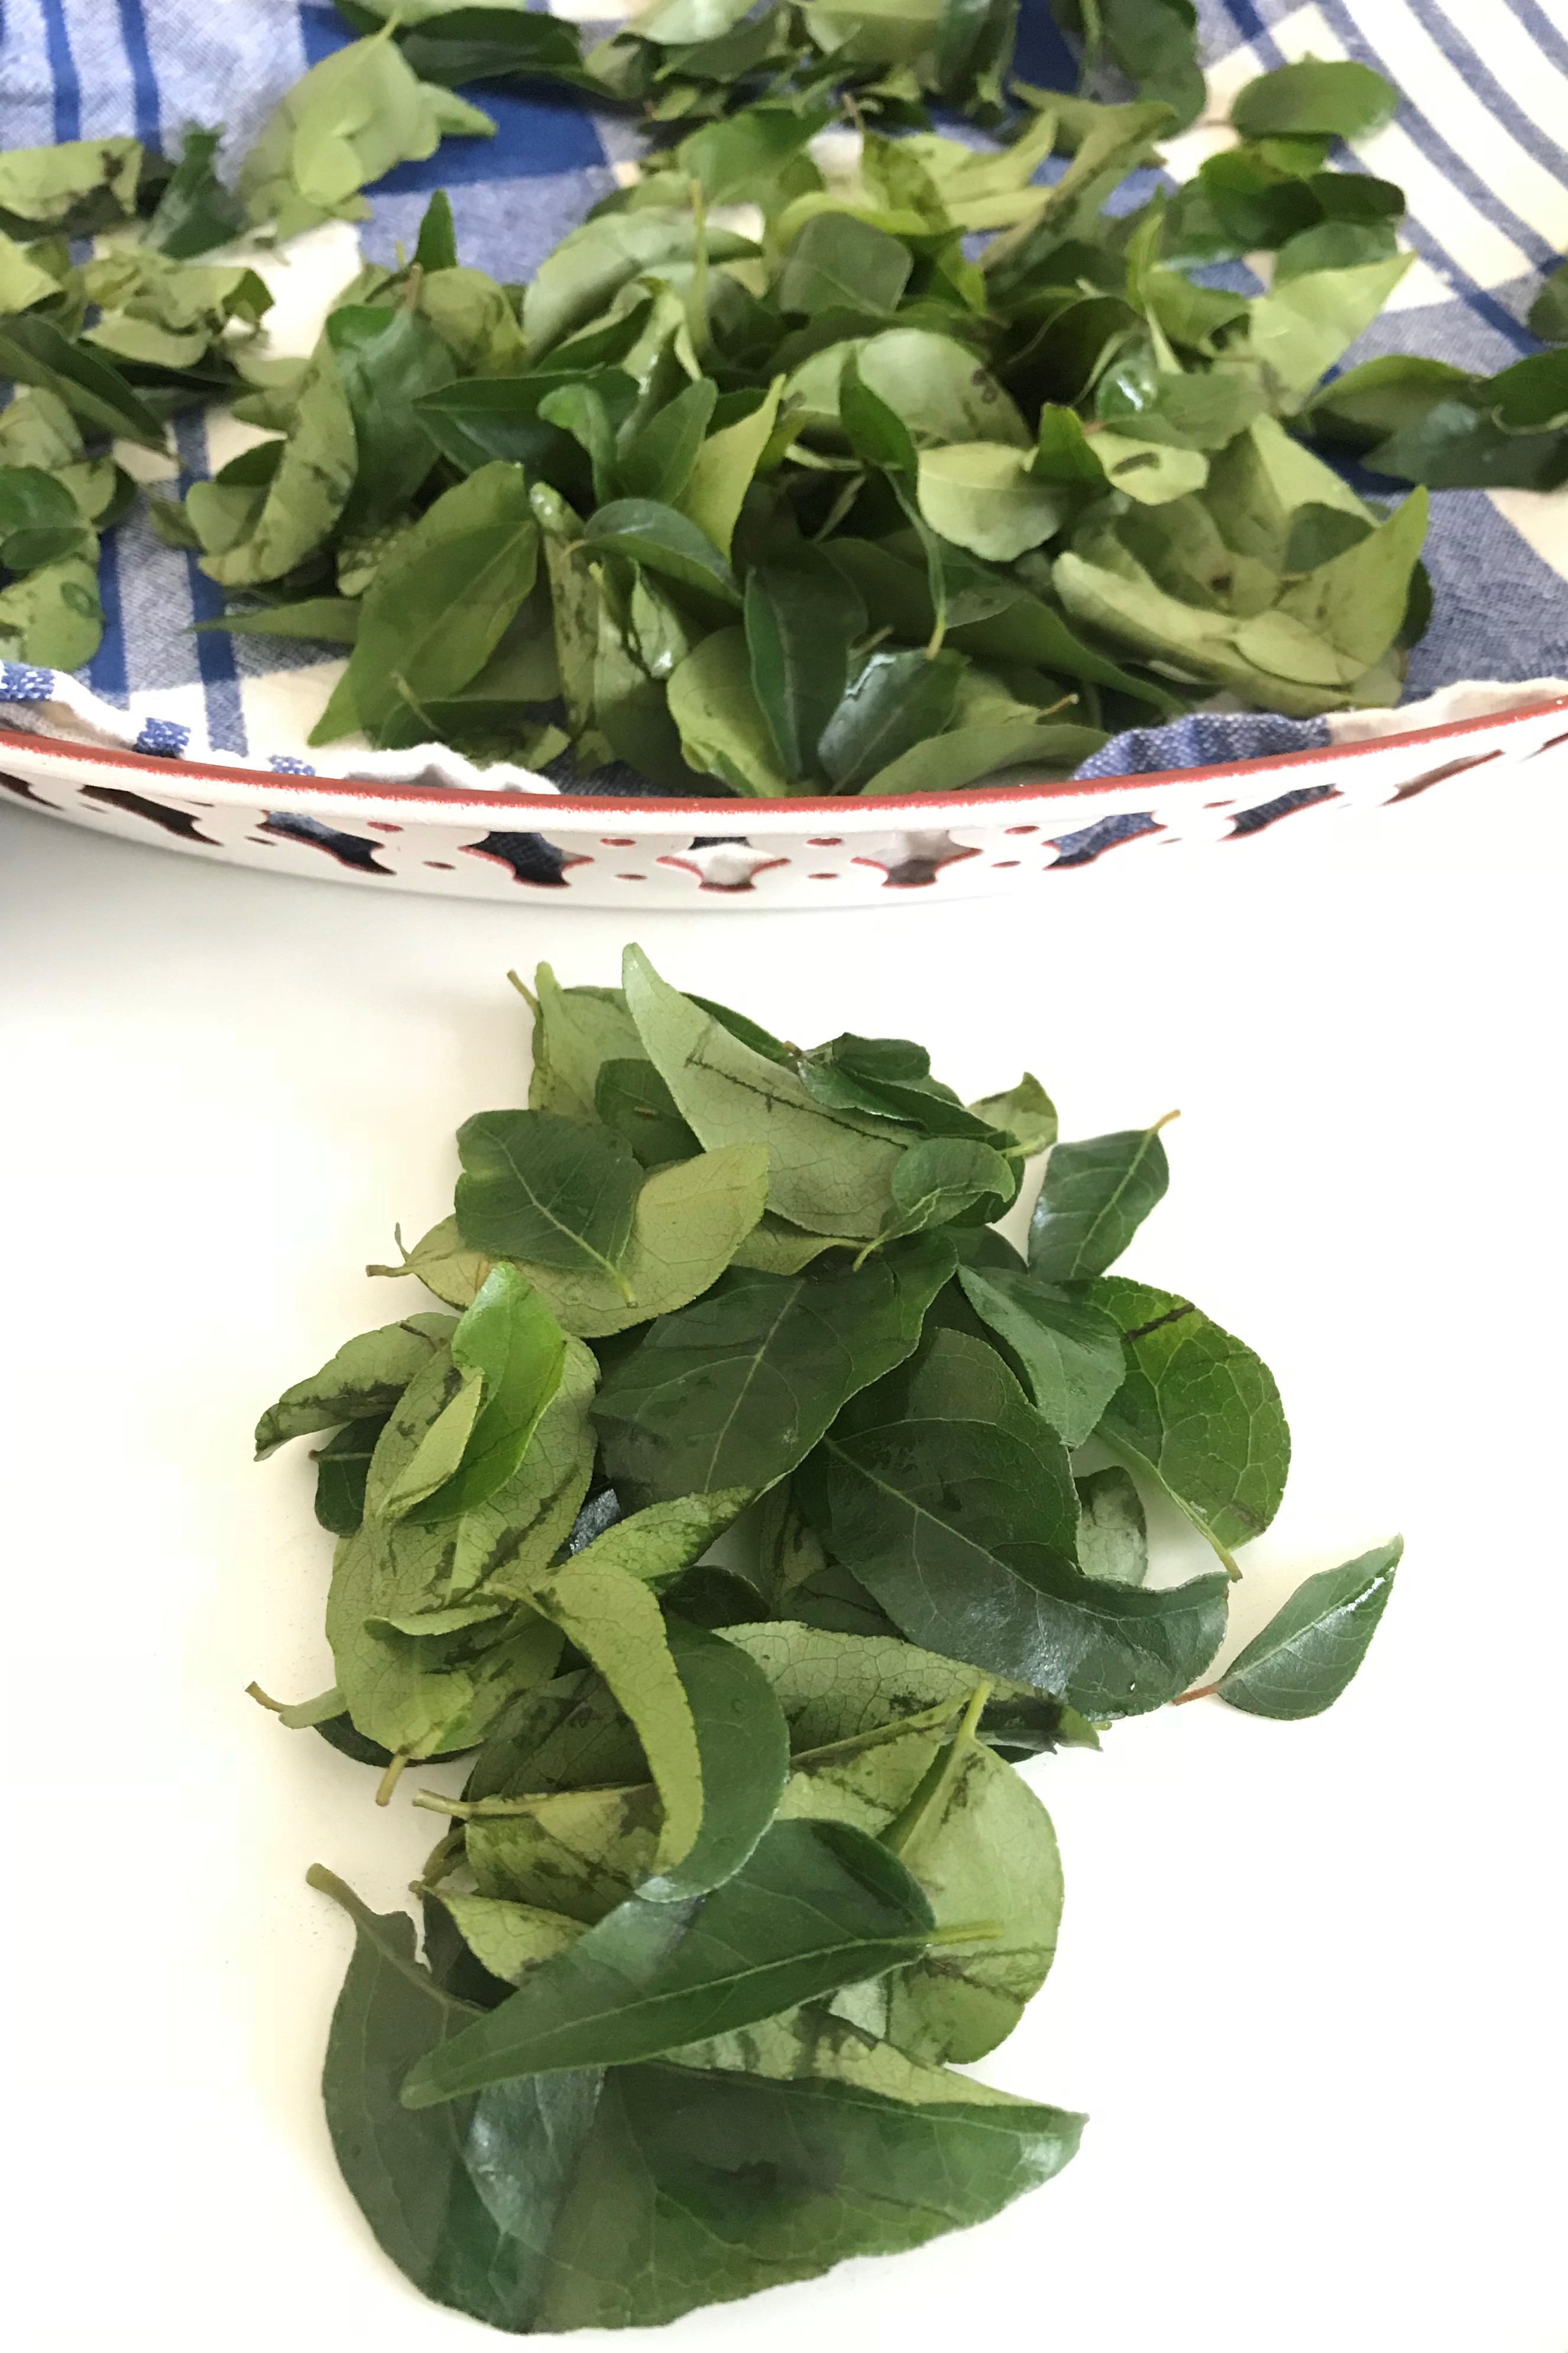
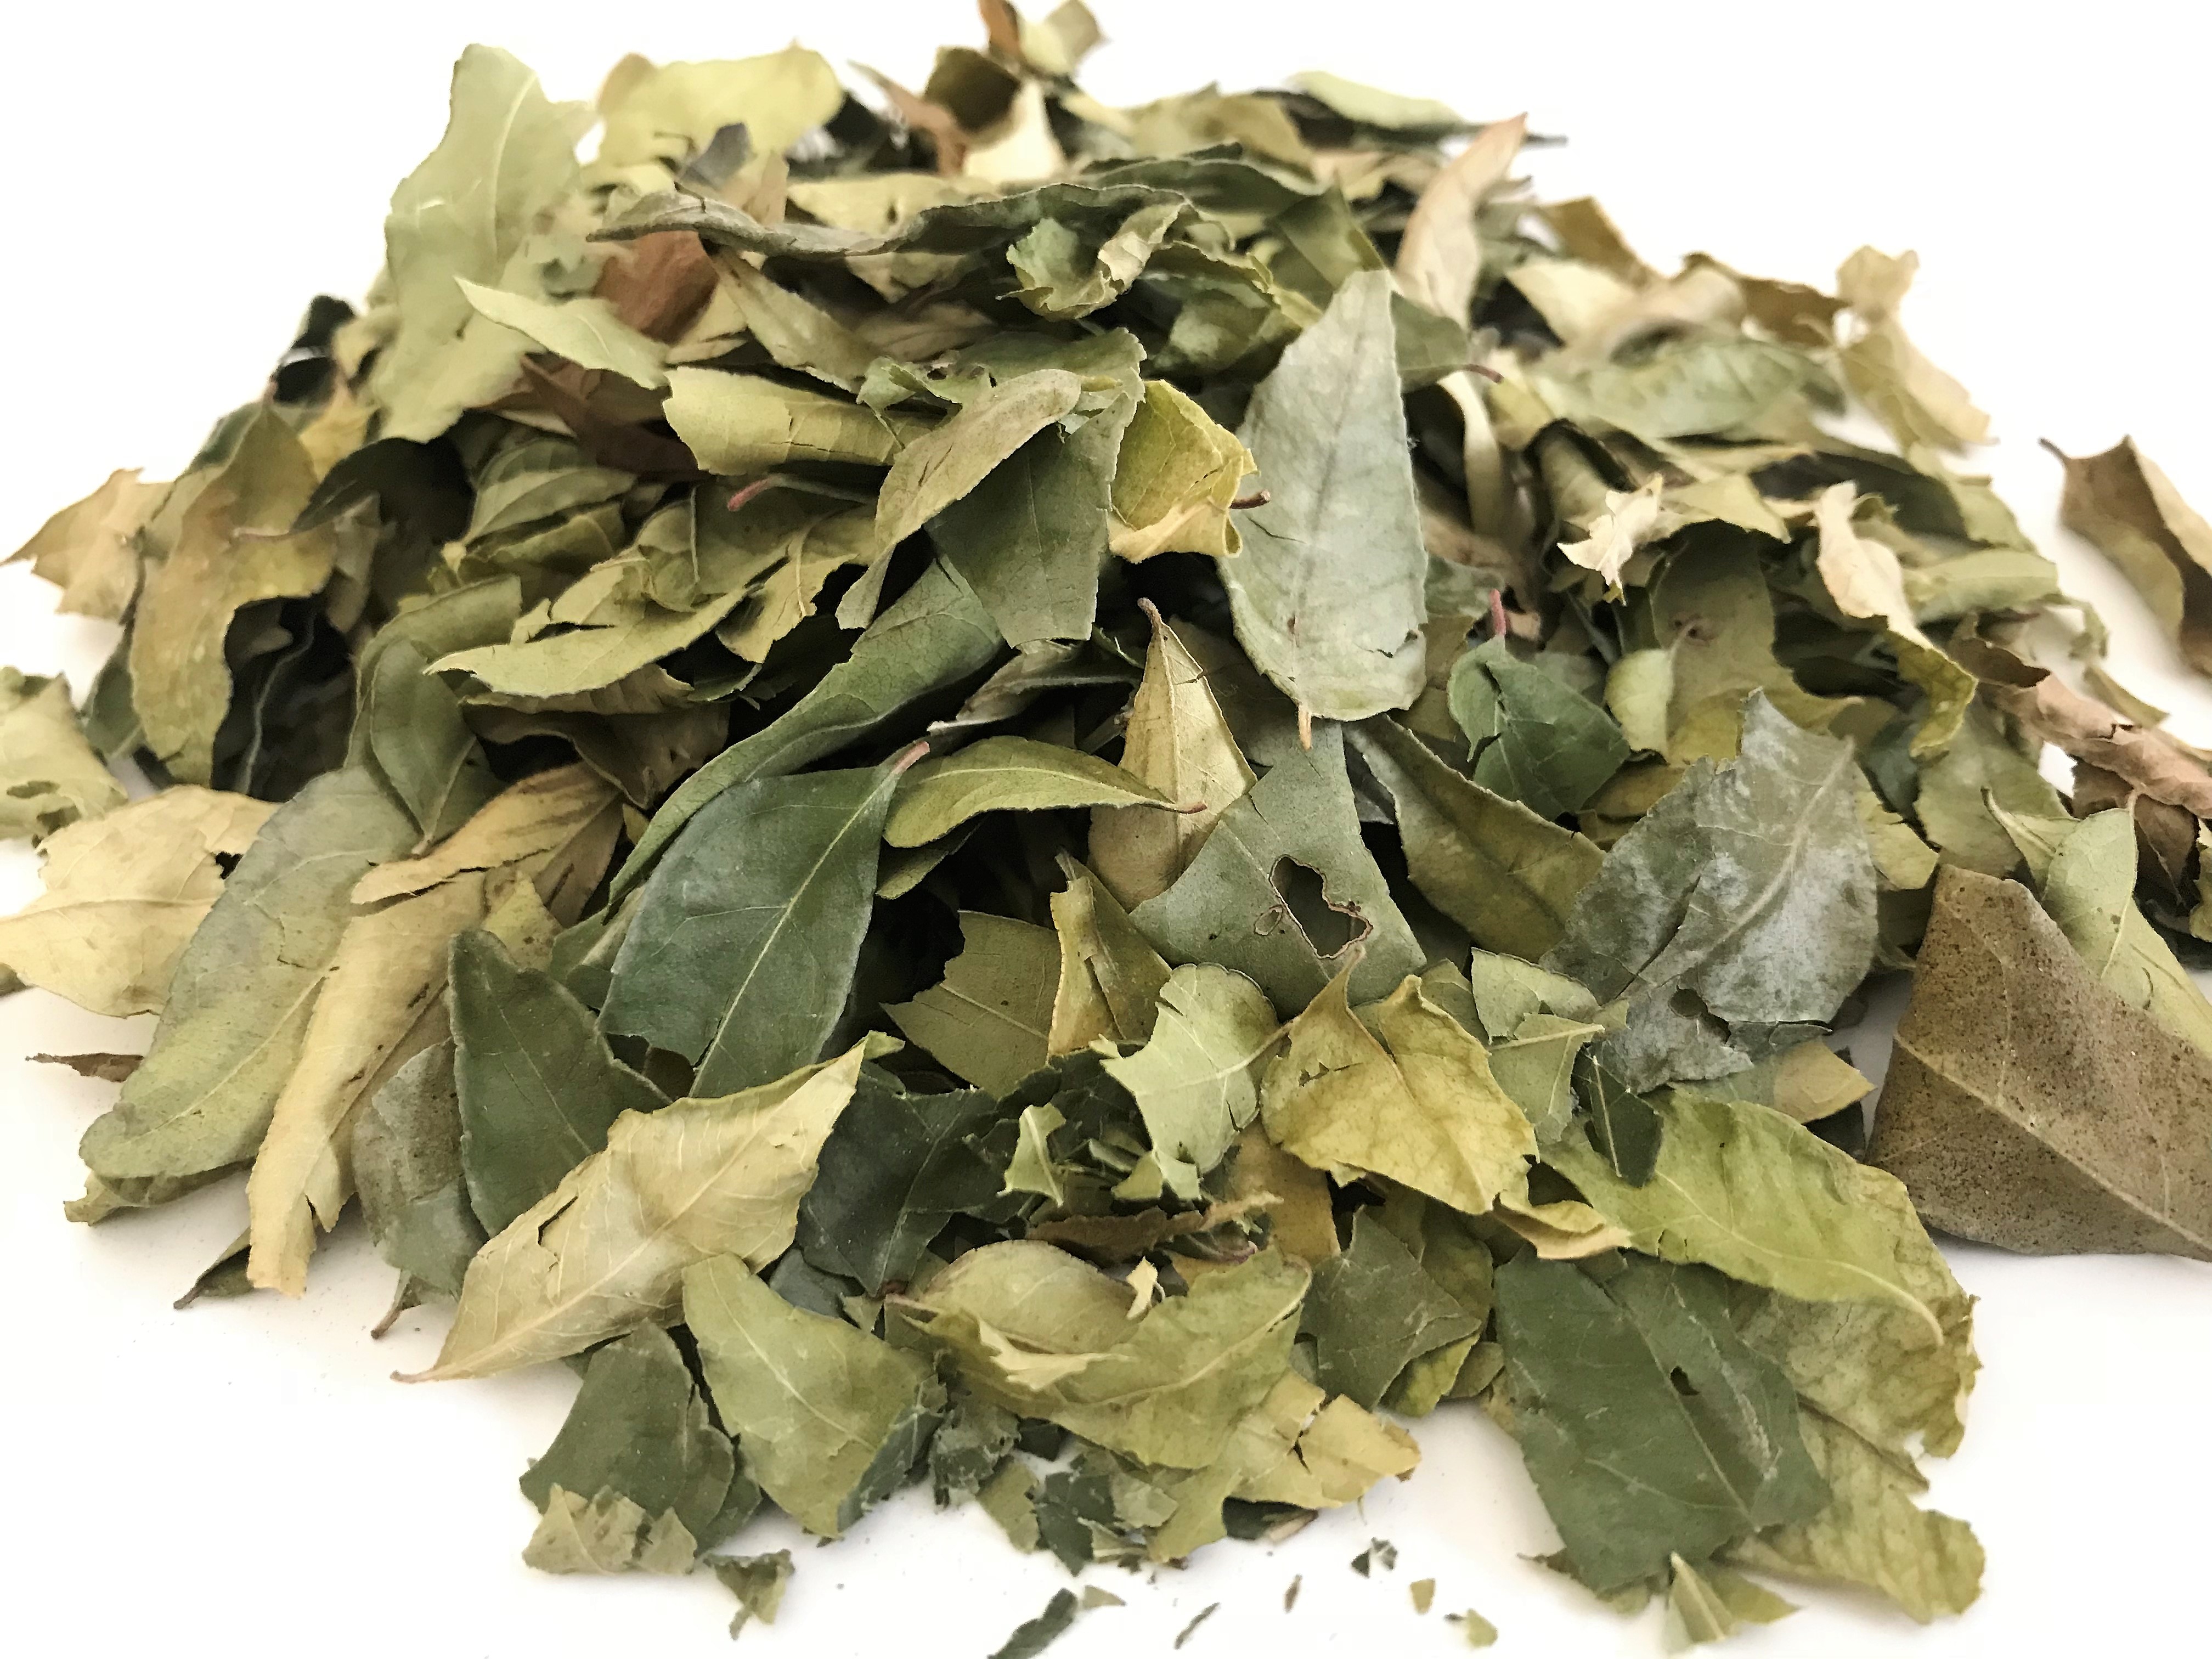
fresh and dried leaves

  
Original curry leaf oil is made in a more refined/step-by-step process-

Curry leaves are blended with very little water – in those days made into a paste with ammi – roller stone

  1. They are then flattened into thin round cookies – approximately 1 1/2 to 2 inches diameter, on a muslin cloth or plastic sheet
  2. These are sun-dried for days until the ground curry leaf sheets come out of the cloth, completely dried
  3. These dried thins are slow cooked in coconut oil, until the colour and aroma of the curry leaf is completely extracted
  4. This is done when the oil stops to splutter or approximately 30 minutes of slow cooking
  5. Extra curry leaf thins/sheets are stored for next oil preparation
  6. The same is done with marudhani/henna while making henna oil.

  
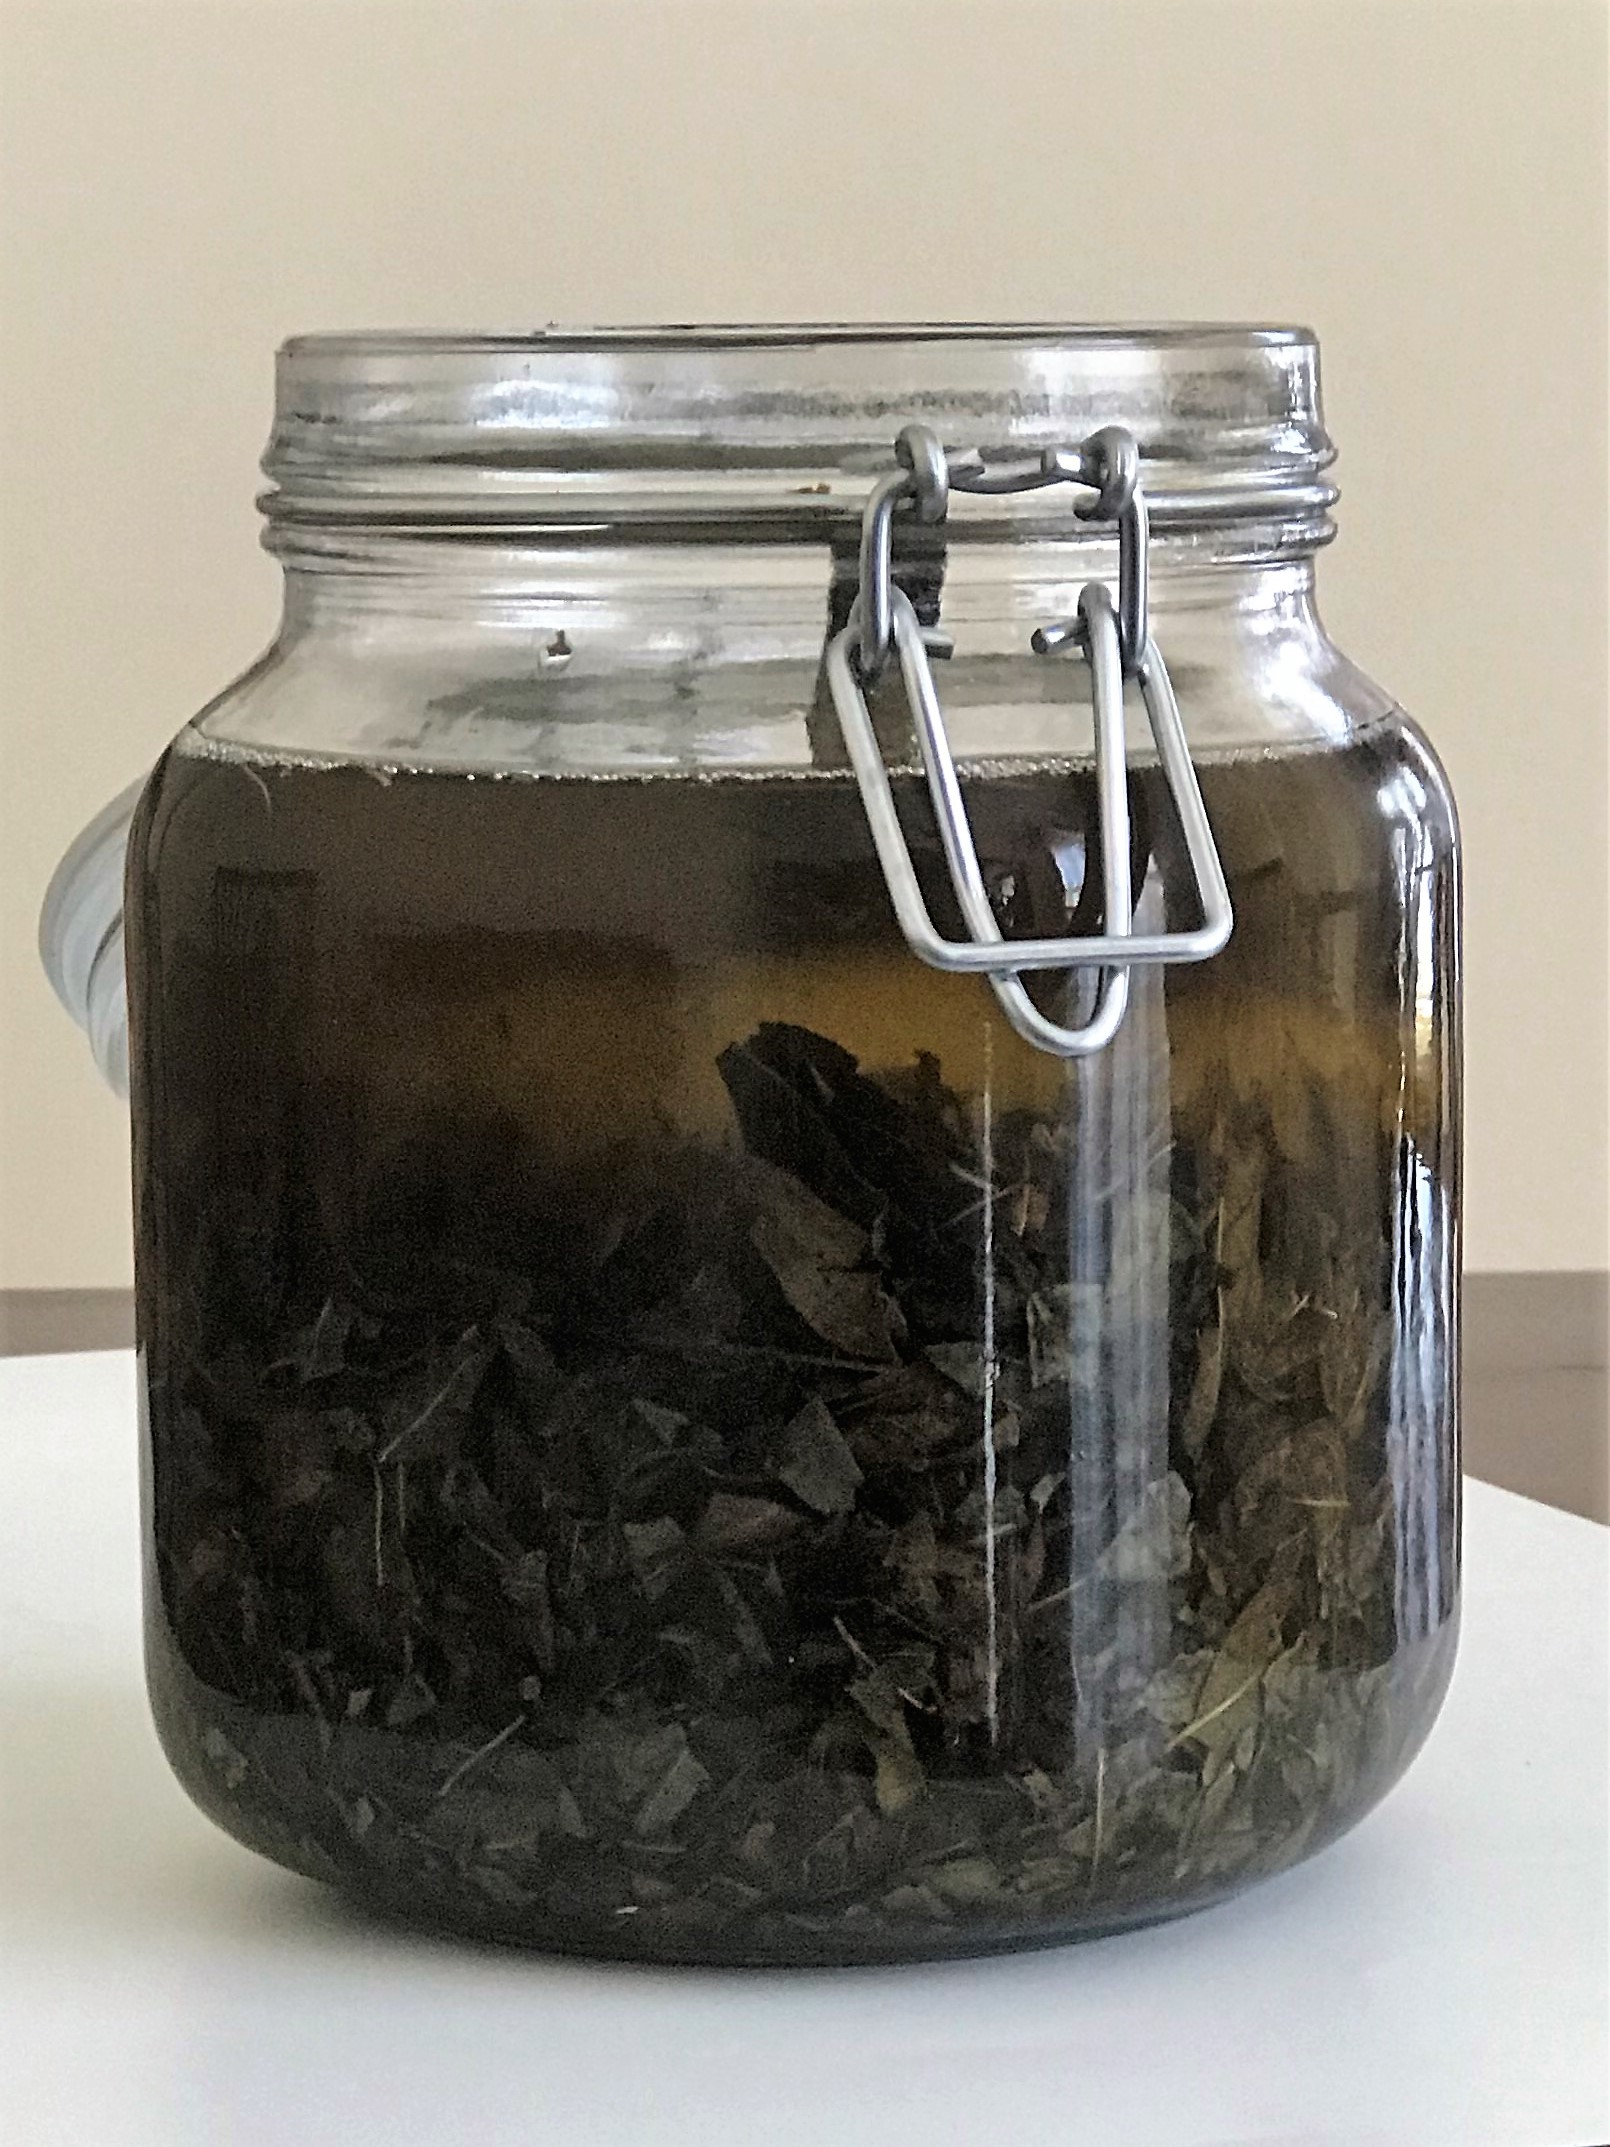
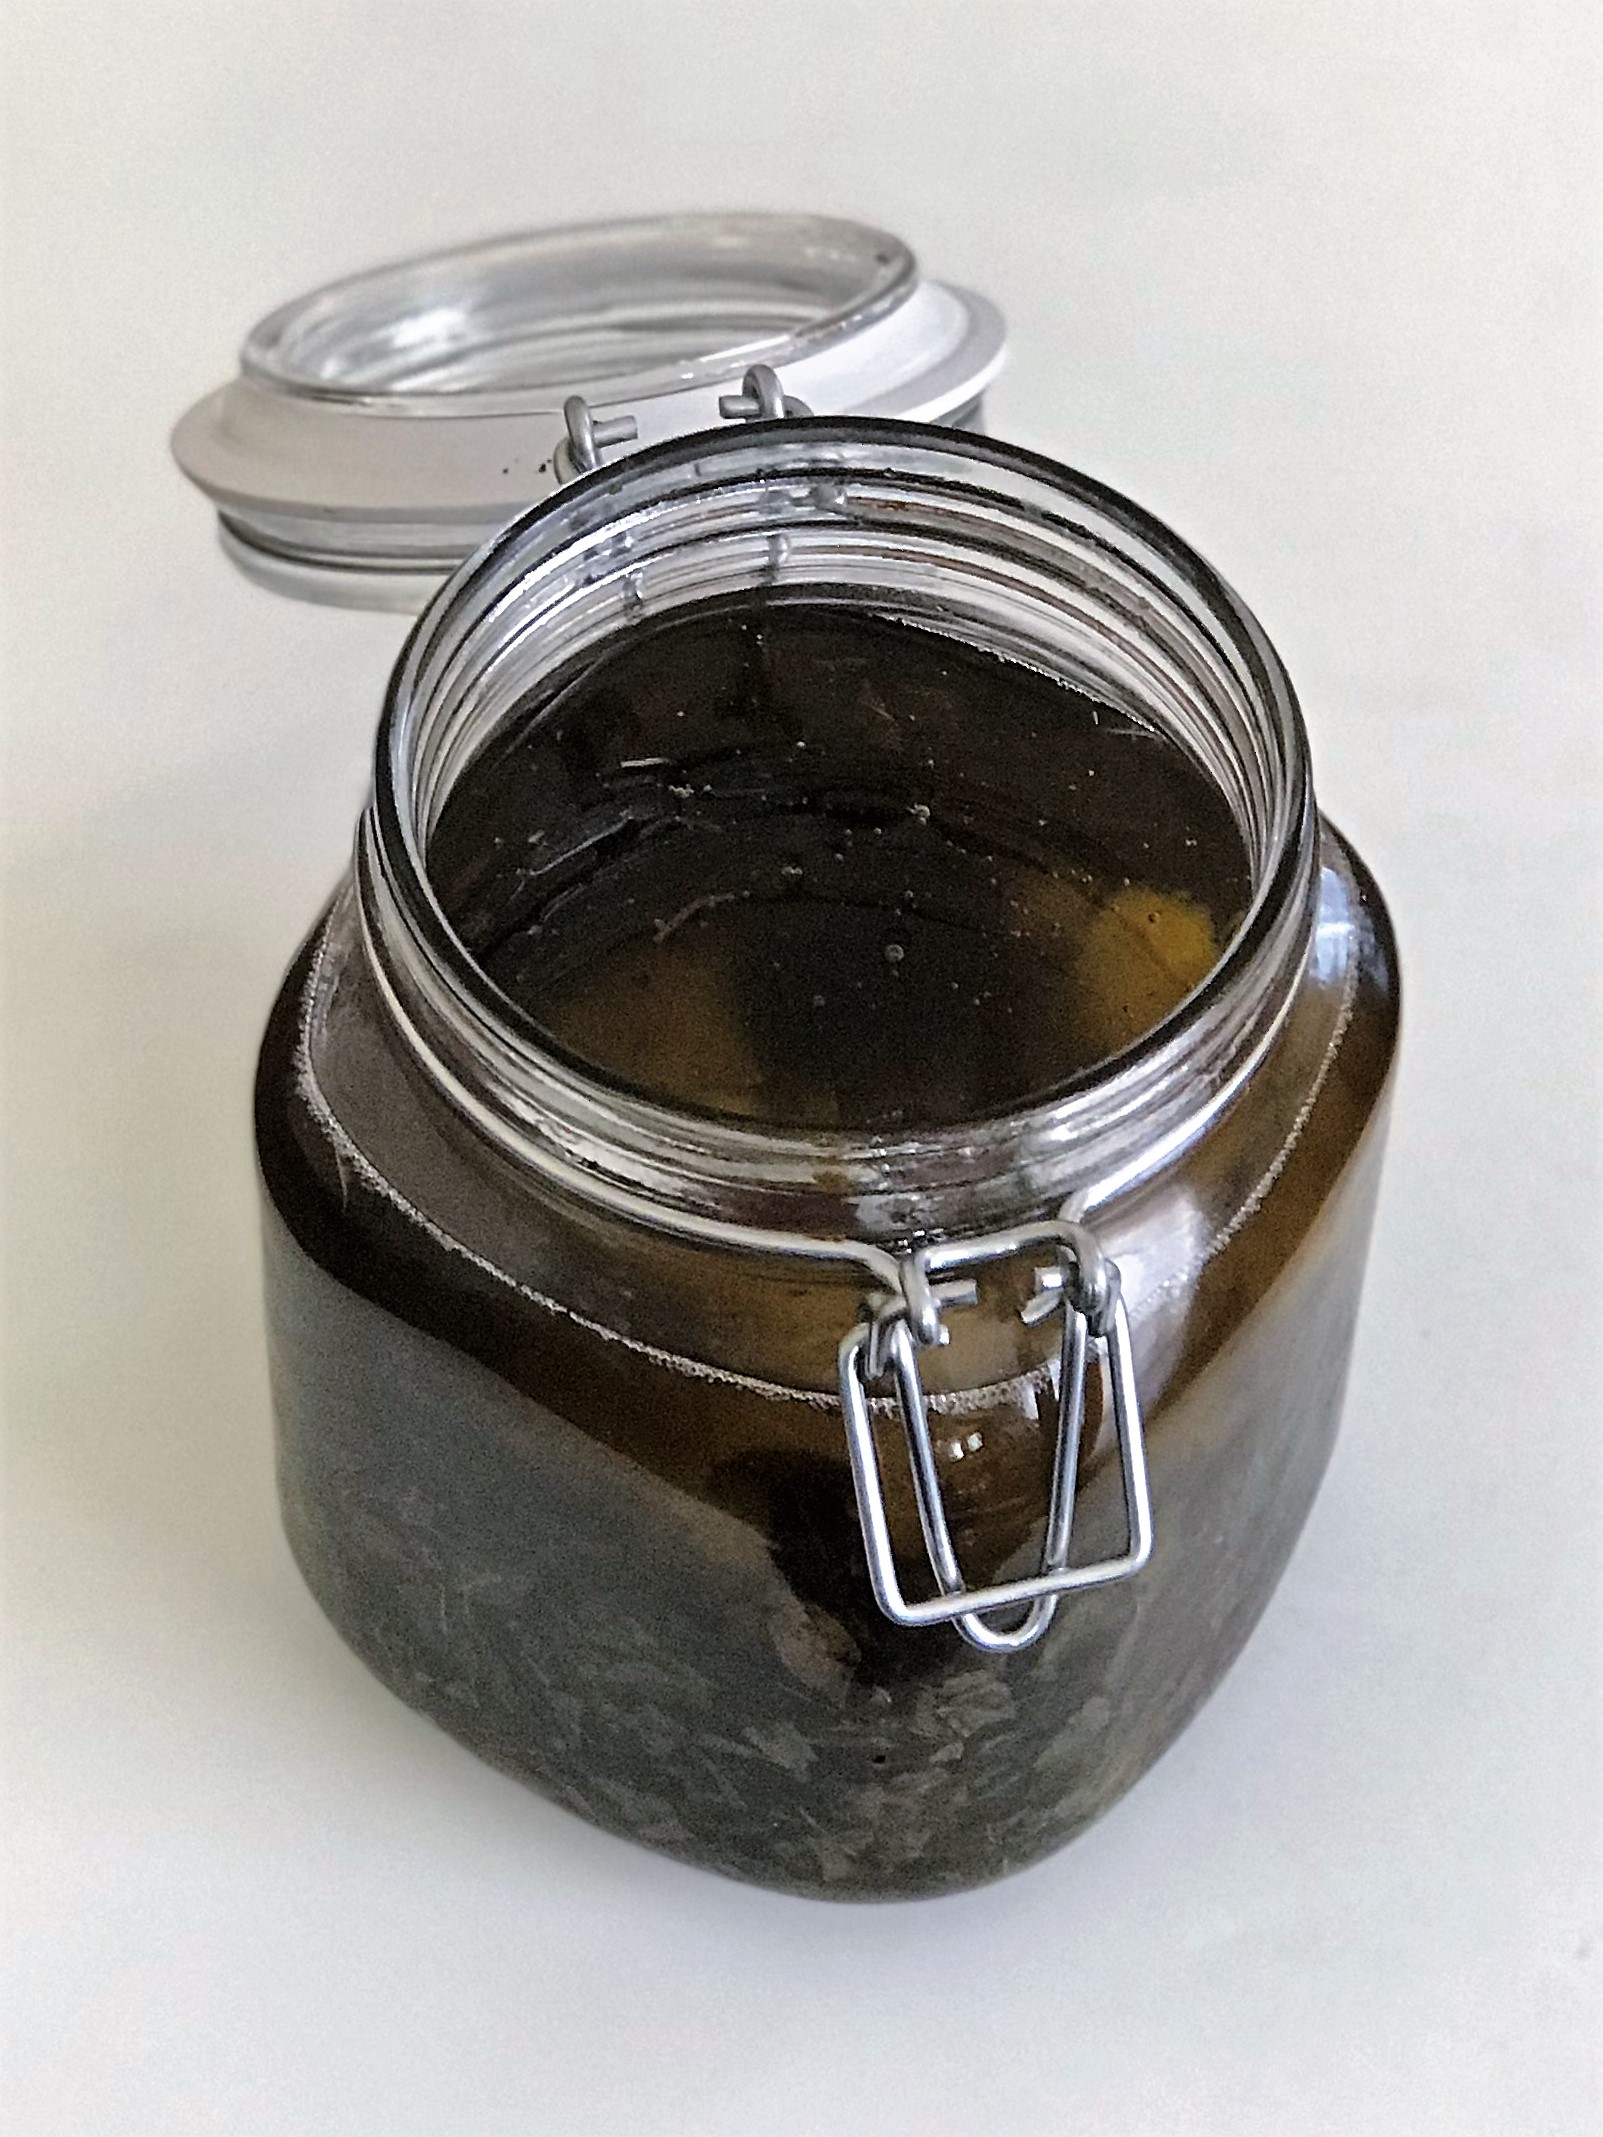
Here, I have not followed the same procedure. I took the short cut method of sun drying kariveppilai directly and slow cooked in oil. There is no compromise in the quality of oil, in comparison to the previous traditional technique – the aroma and colour seems to be the same.  While using the curry leaf thins/sheets, they would settle down in the bottom of the bottle and leave a clear residue on top, but here- the dried curry leaves occupy more space in the bottle and yet, the oil on top is a clear residue. Later, when the oil is mixed too much with the leaves, one can filter and use.
  

Kariveppilaii Yennai/ Hair Oil with Curry Leaves


Ingredients

  • good quality pure coconut oil – 1 litre
  • dried curry leaves – appr. 6 cups

  
Method of Preparation
  

Sun dried curry leaves

  1. Pluck curry leaves from tree/plant or buy enough from the vendor
  2. De-stem leaves and wash very well
  3. Spread on a clean cloth and pat dry


4. Place the cloth in a sunny area and dry well in the sun – might take  few days to completely dry without moisture


5. Once the leaves are dried, they are ready to be used in the oil.

  
Making the Oil

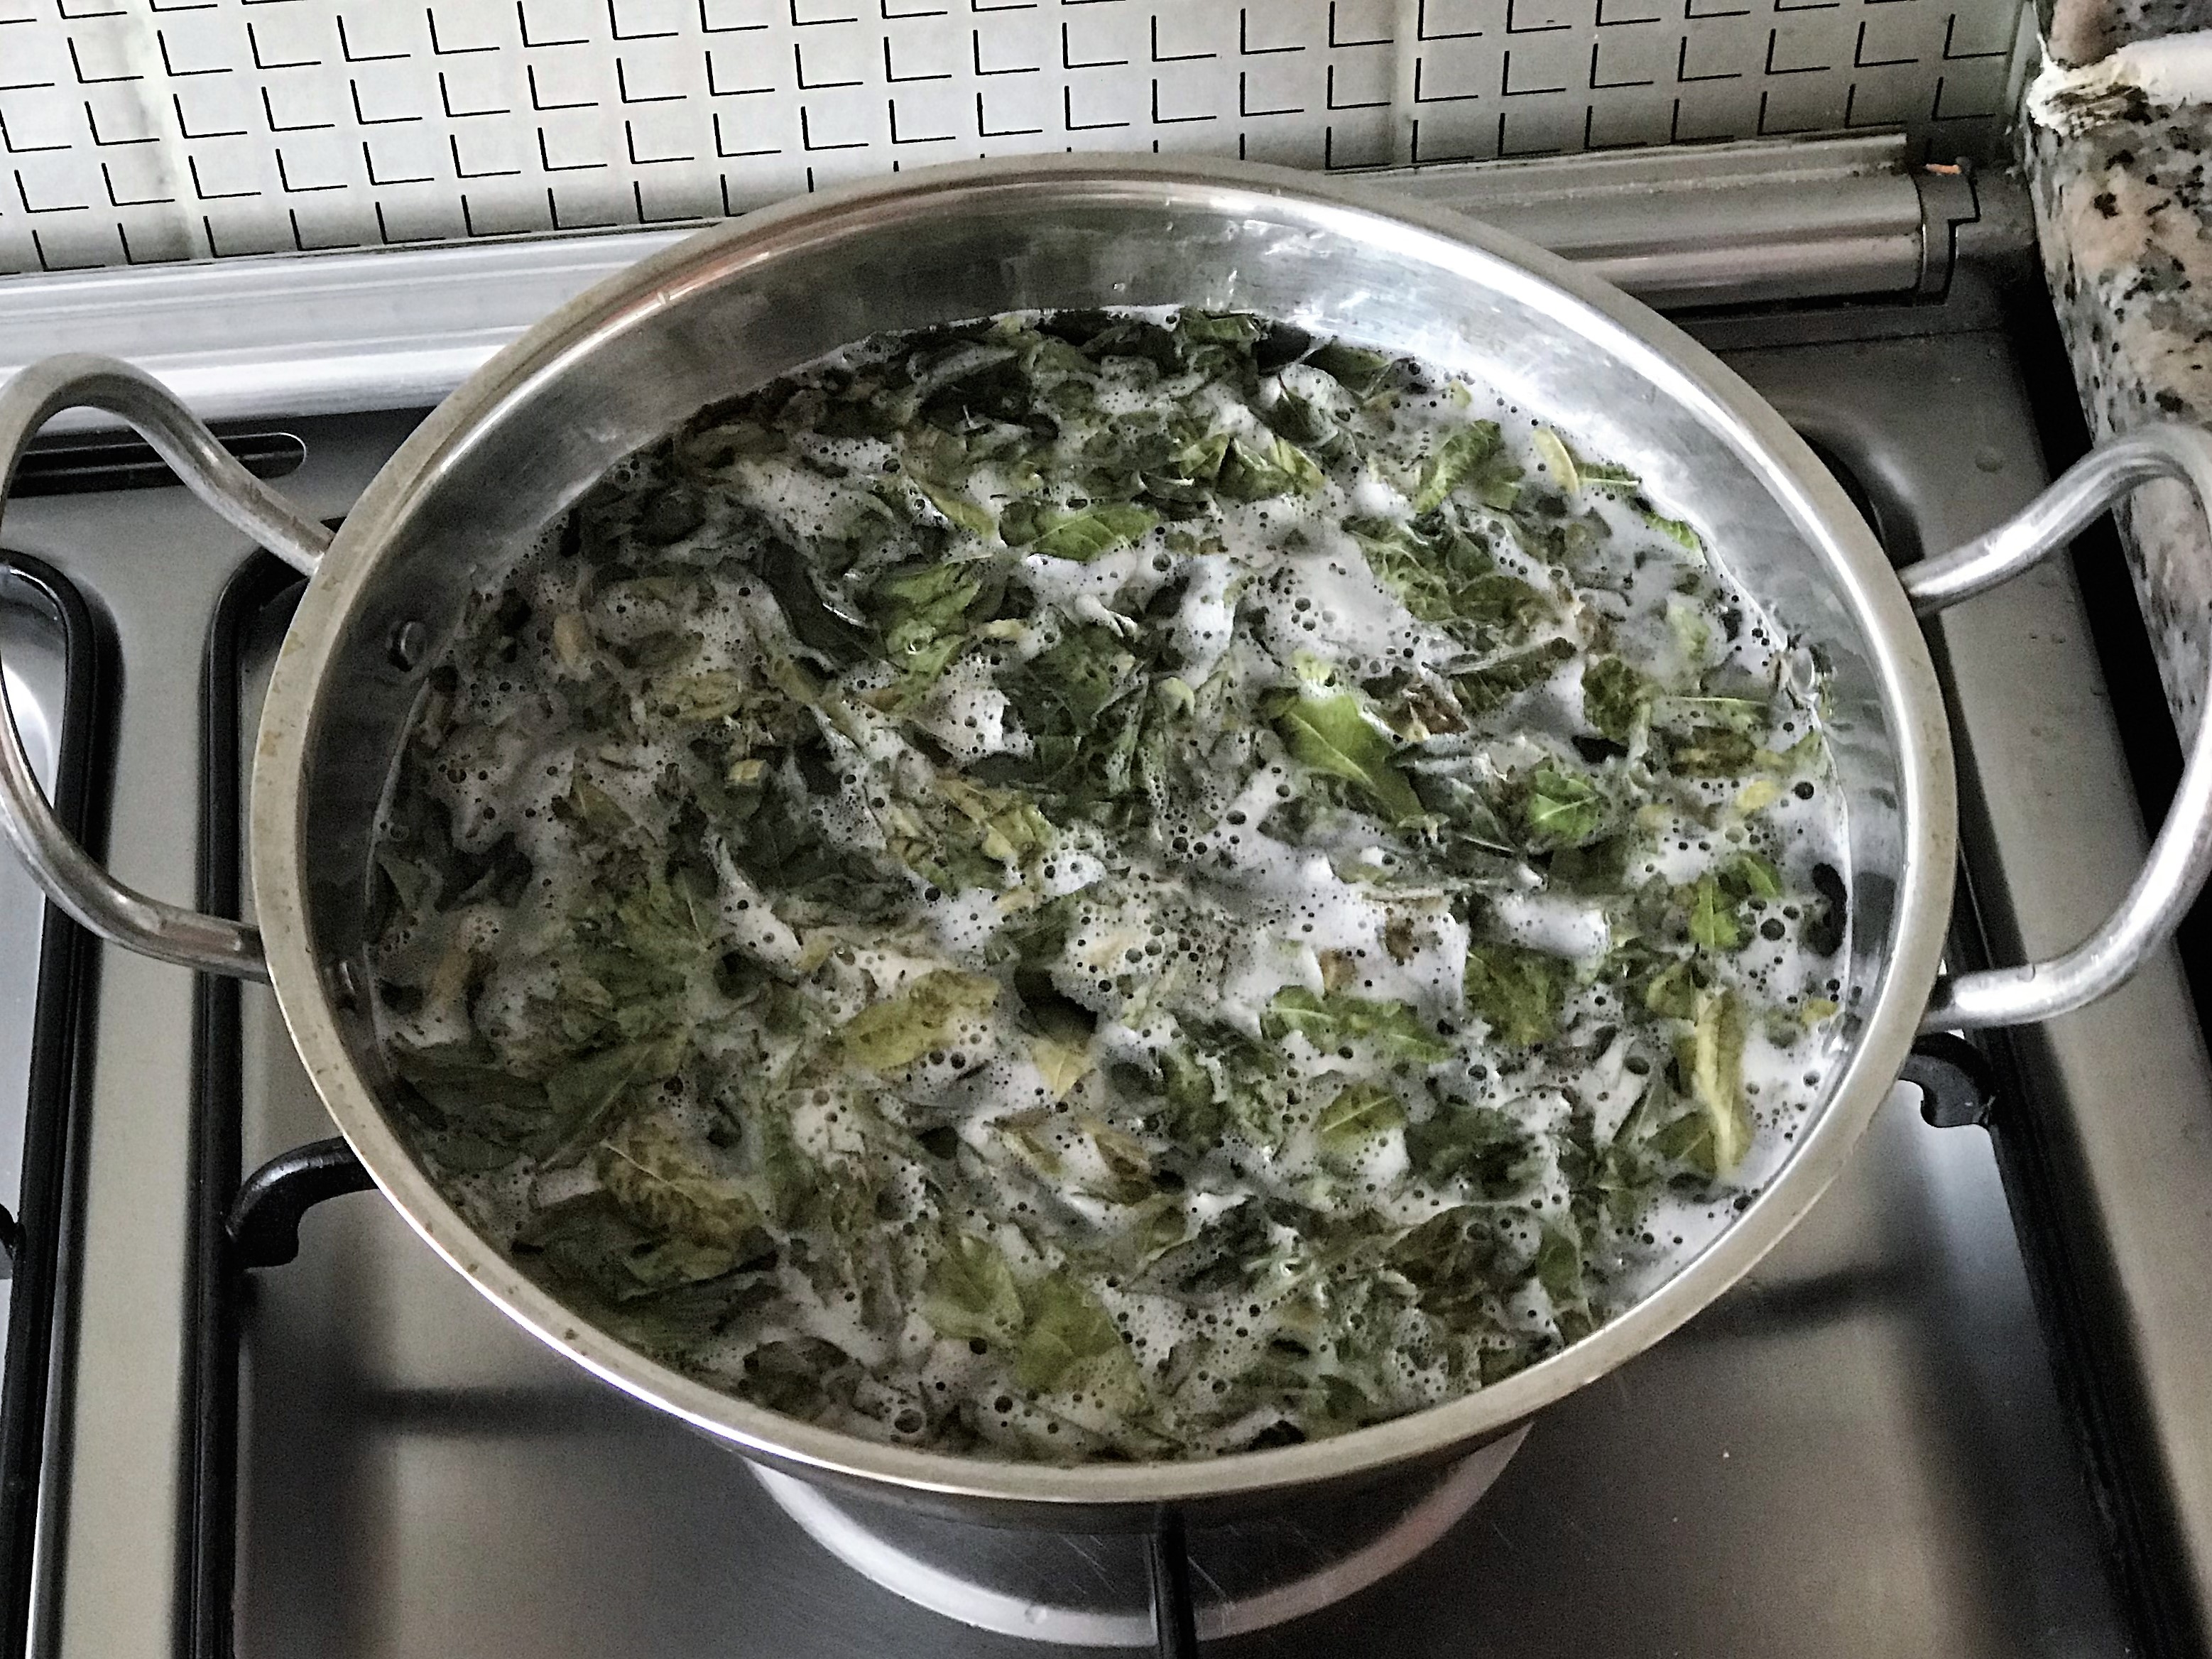
  1. In a wide pan, pour pure coconut oil – see label for aromatic ingredients, other oils which might have been mixed with coconut oil. We need only 100% coconut oil – preferably cold-pressed. Most branded coconut oils are refined, can’t help.. proceed.
  2. Measure 6 cups dried curry leaves and mix in the oil, before it turns hot. If dried leaves are added after oil is heated up, the leaves would be fried and  would give out a burnt smell. Hence, drop the leaves in, while the temperature of oil is normal.


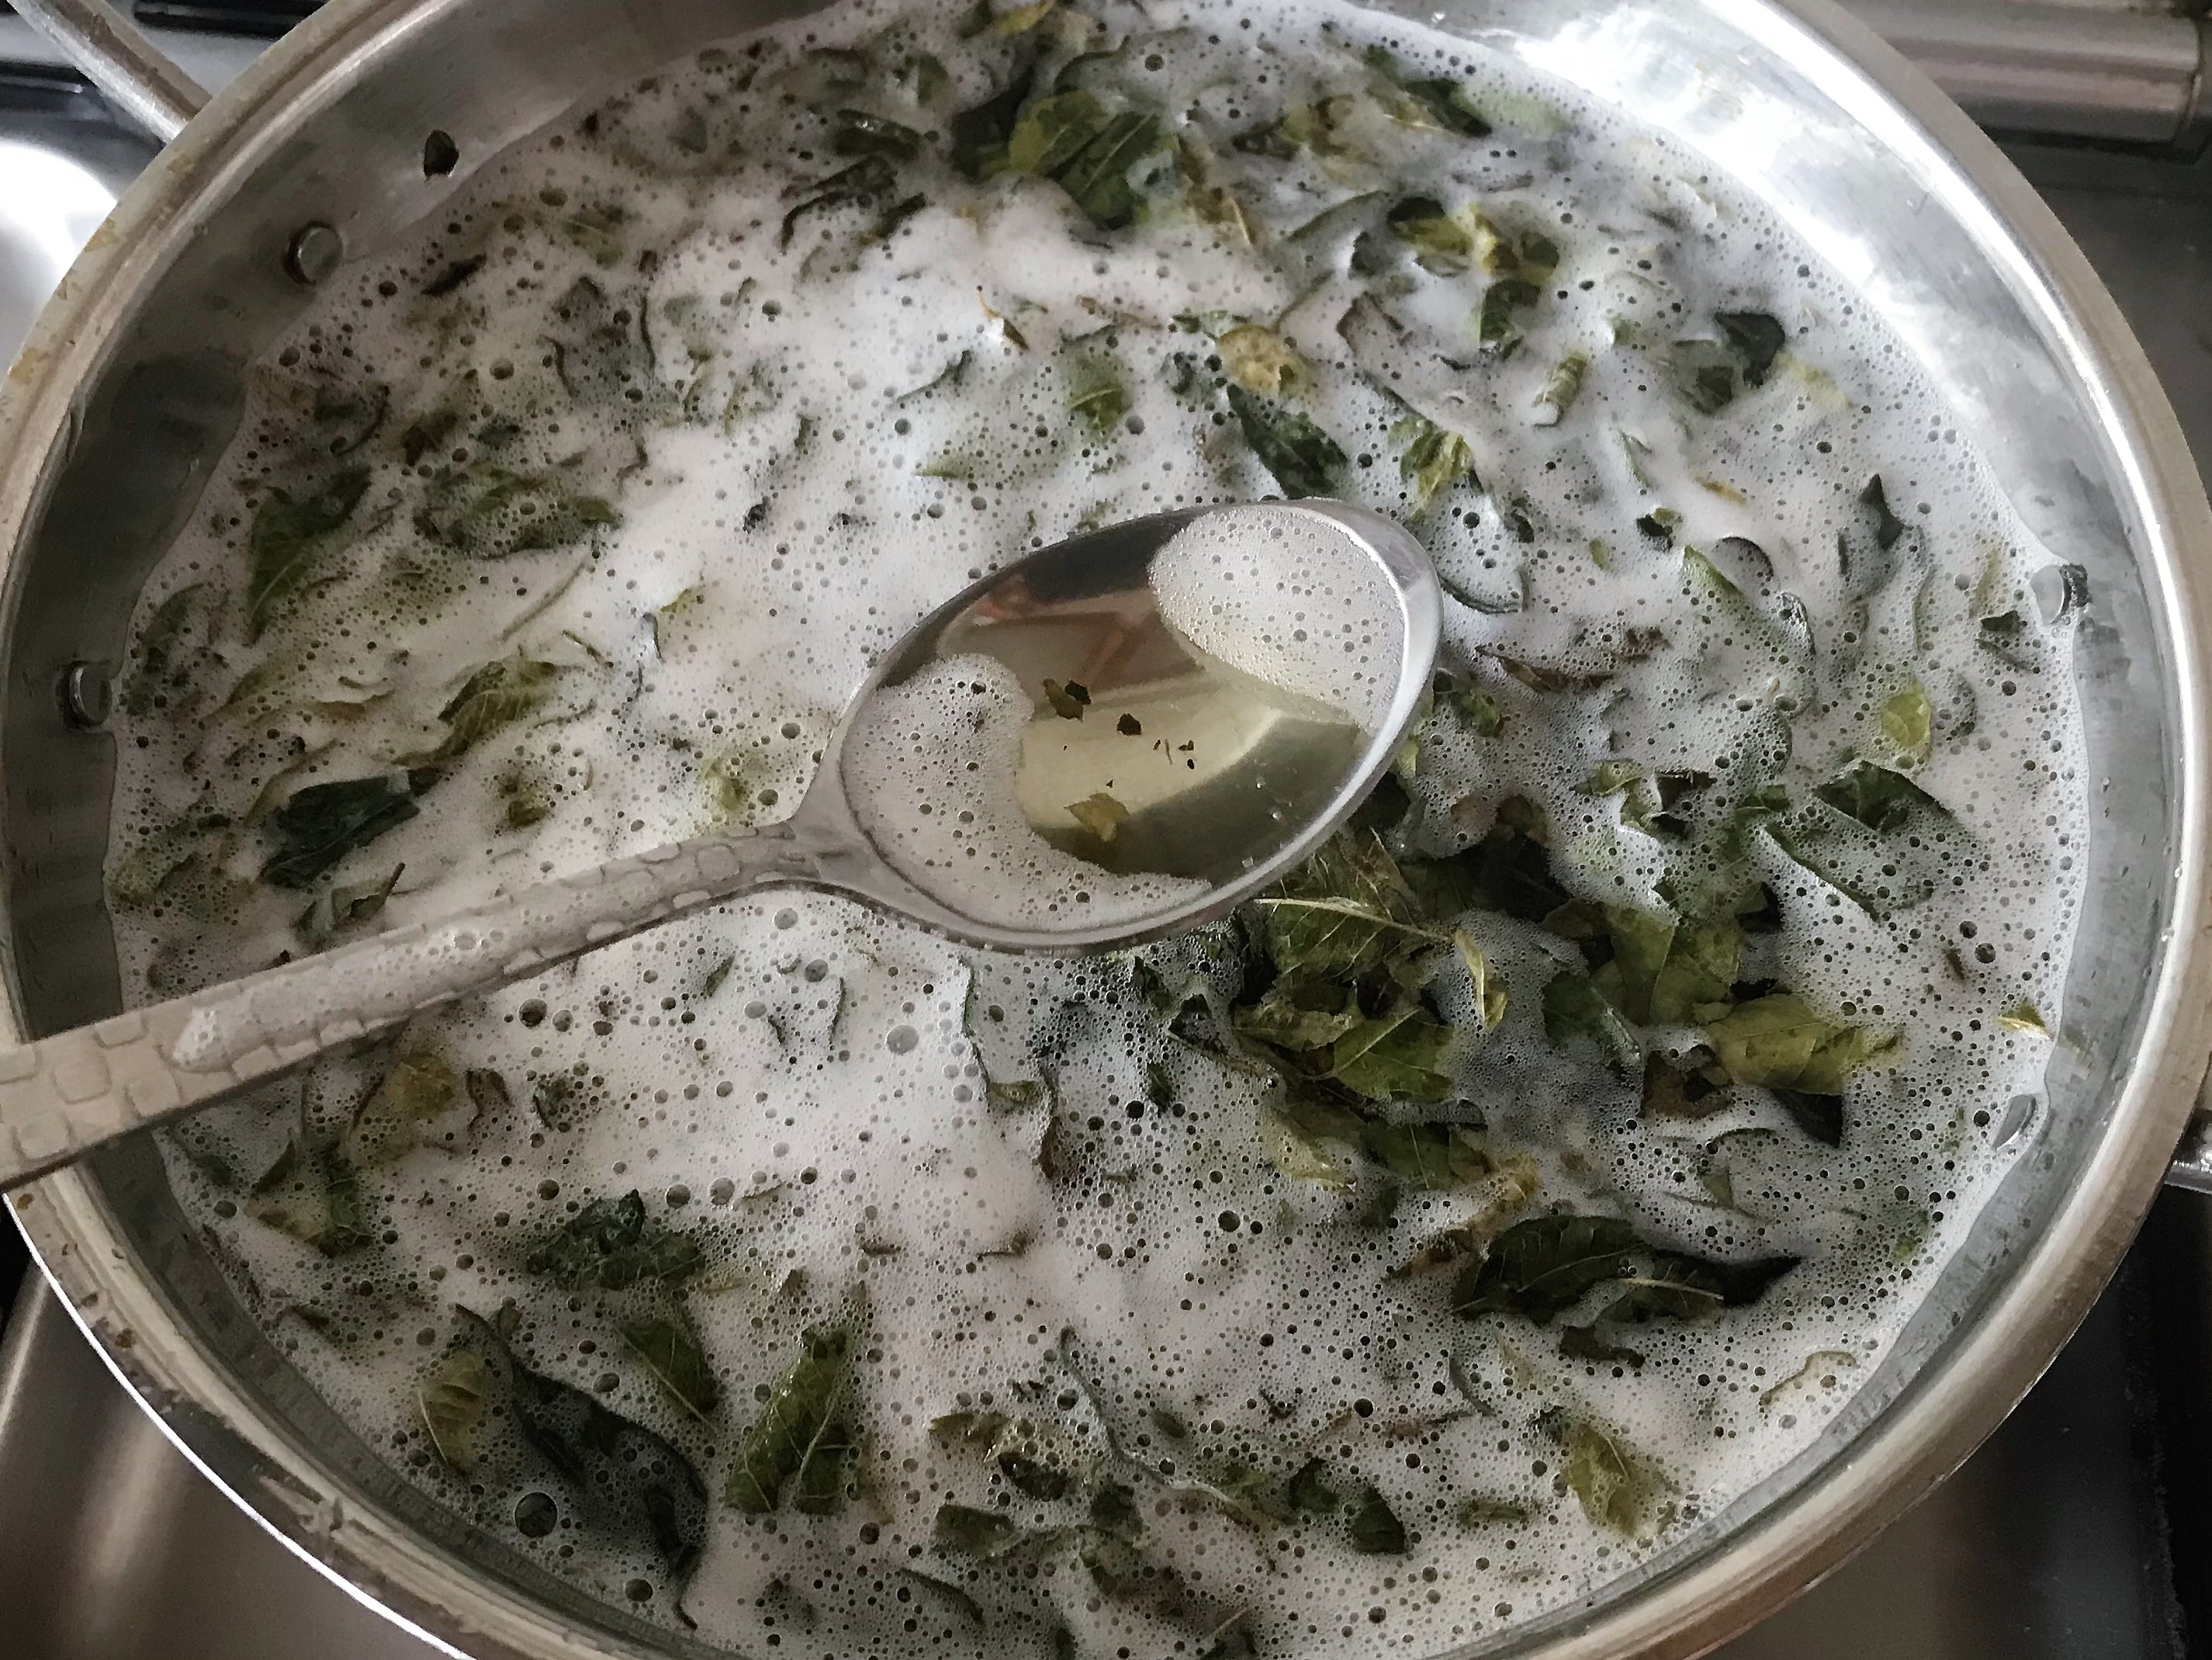
3. Once the oil starts to heat up, simmer the stove and let the leaves cook in oil for about 30 minutes, till the colour of oil starts to darken.


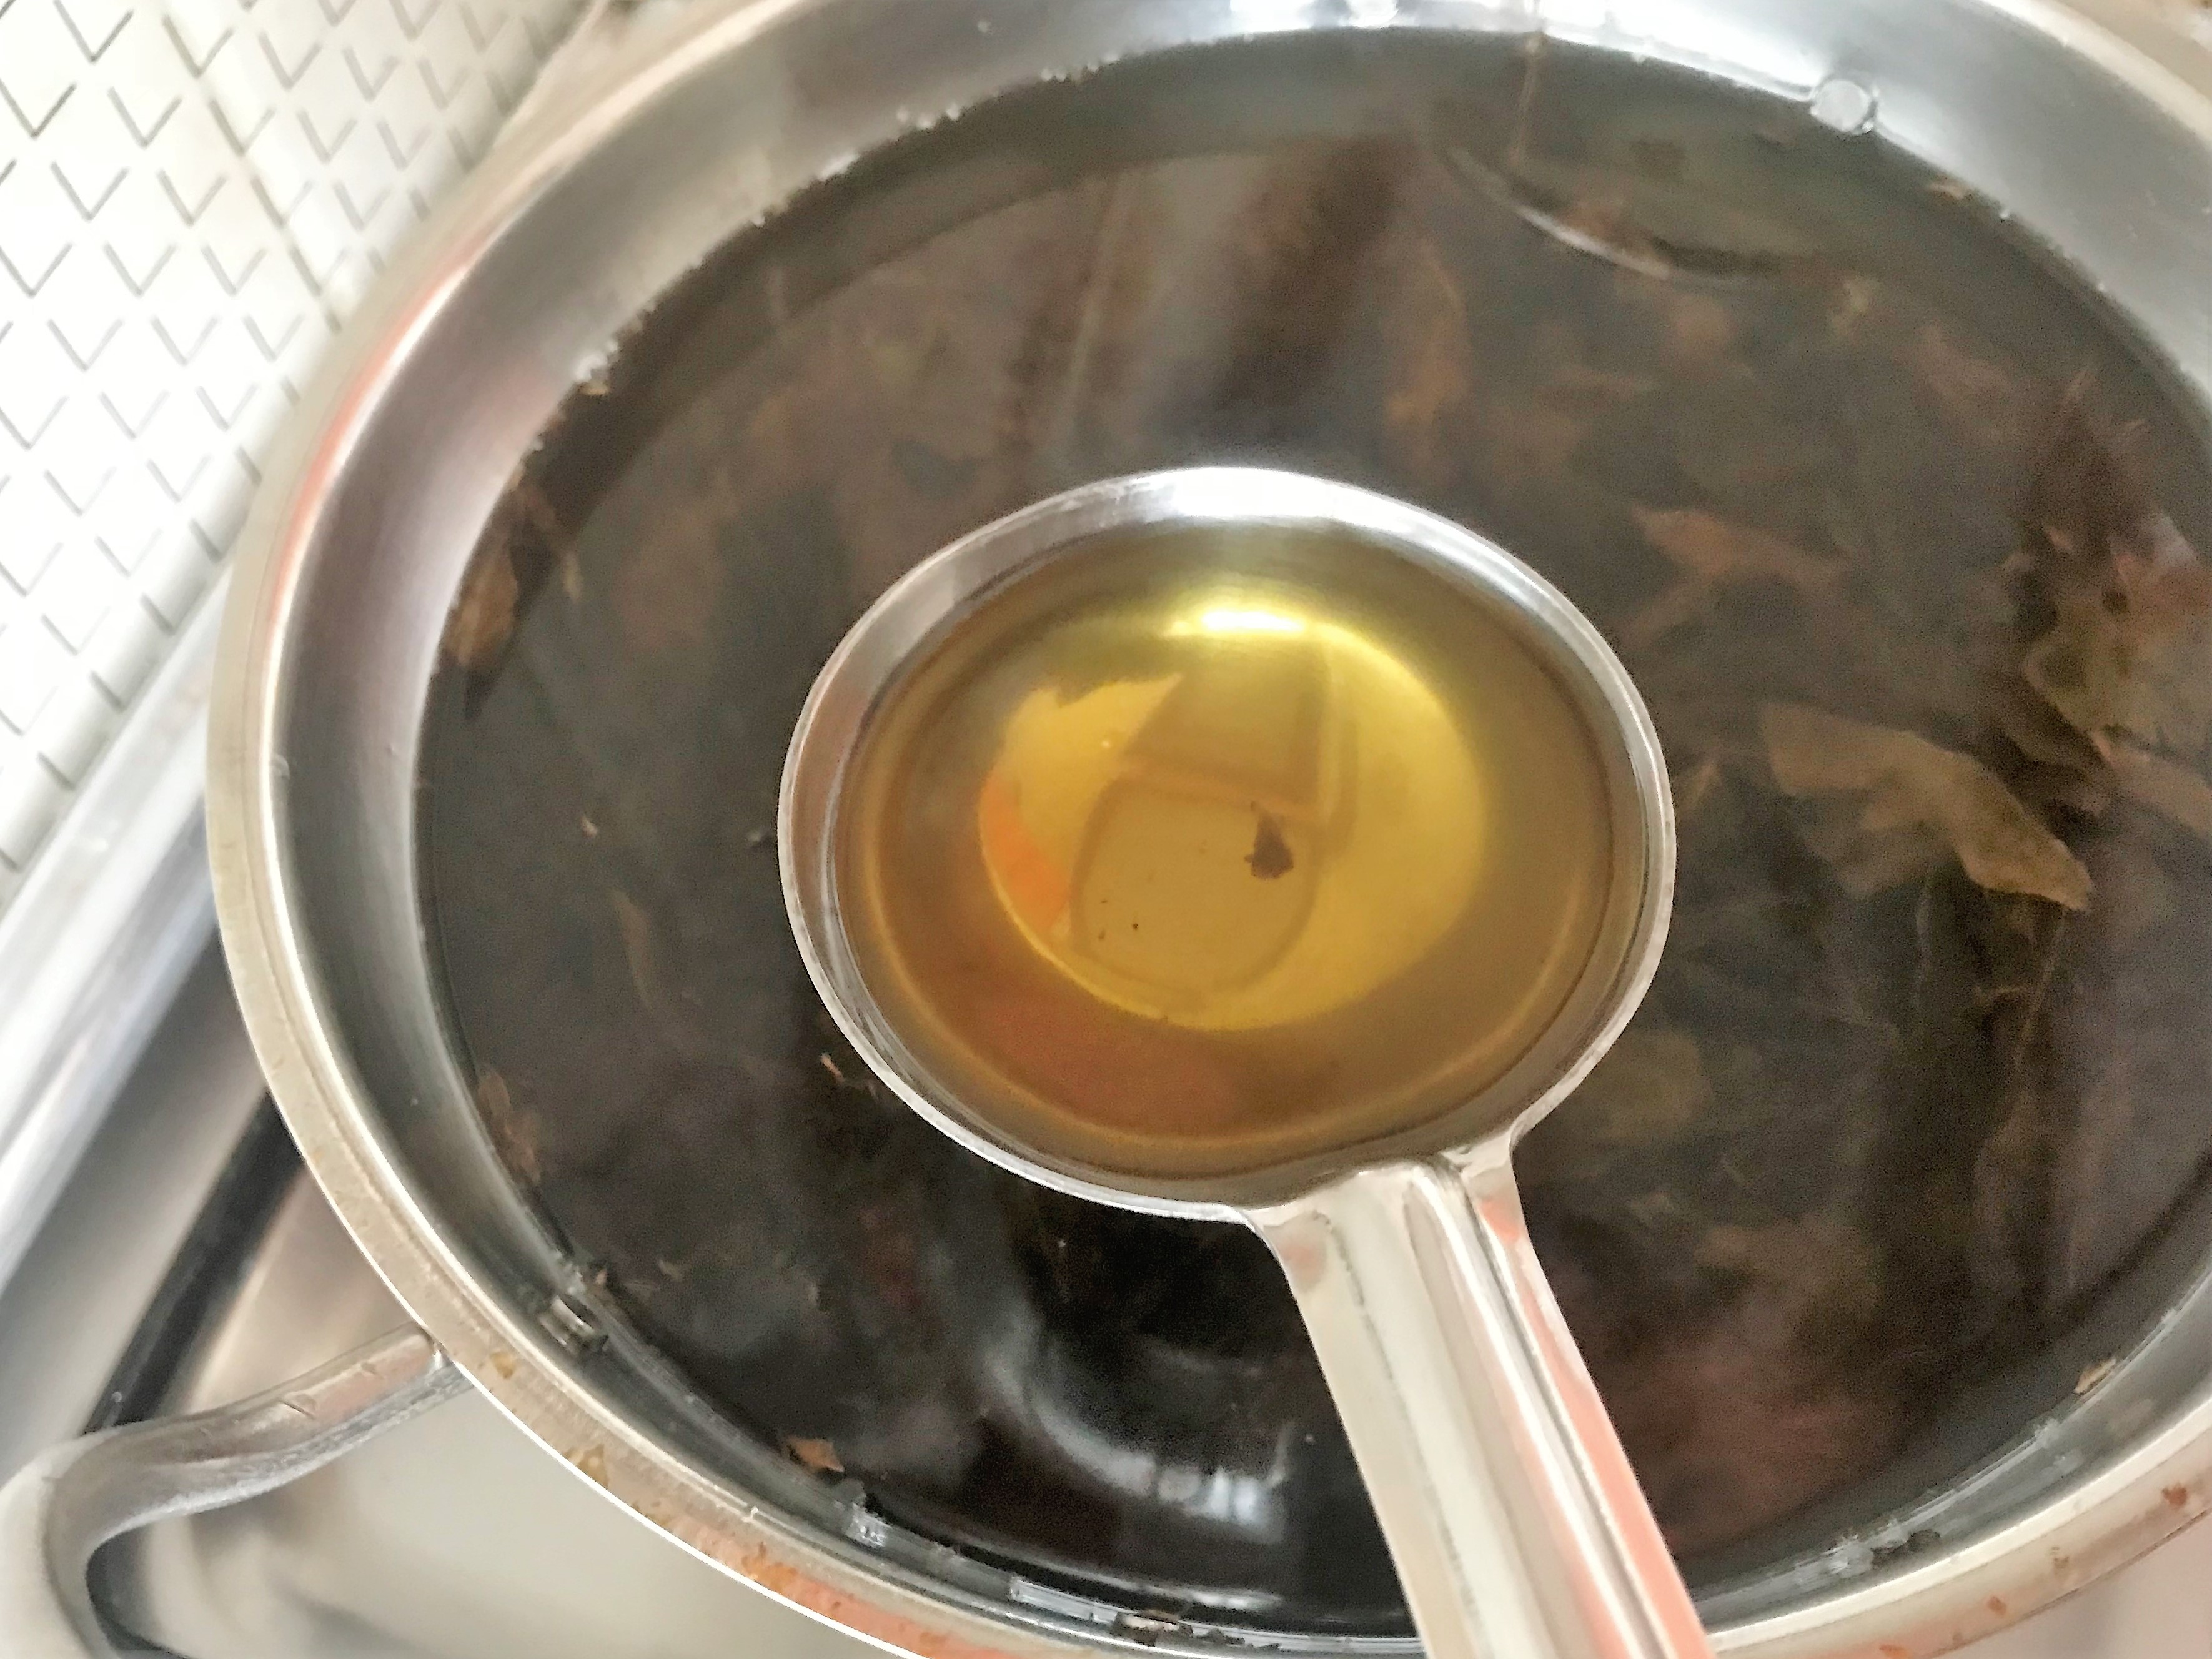
a little later – darker oil

  
4. Switch off and let the oil cool.
  

5. Store oil with curry leaves in a bottle and use everyday.


Cool Summer Drink – Pudhina Paanagam : Lemon and Mint with Jaggery

  
Pudhina Paanagam is a subtle variant to Paanagam – lemon jaggery juice and Pudhina Kulir chaaru – Mint Cooler.

Paanagam is a combination of lemon and jaggery water and is an acidity regulator. Hence, it is a preferred drink during fasts. It soothes the stomach and cools the system.

Pudhina Kulir Chaaru or Mint Cooler is basically extracting the flavor of mint in boiling hot water, not blending in a mixer. The previous recipe has sugar in it.

Here, in Pudhina Paanagam, I blended fresh mint leaves in lemon-jaggery juice. This has the soothing effect of lime and jaggery, packed with freshness of blended mint leaves. The colour is pleasingly green and the strong flavour of mint hits your palate to travel in and cool the tummy.

I avoided the usual cardamom in Paanagam as it might clash with the mint flavour. Chukku Podi/Dry ginger powder is added for easy digestion.


Pudhina Paanagam/Fresh Mint-Lemon-Jaggery Coolant

  
Ingredients (serves approximately three)

  • juice of 5 lemons (medium sized)
  • filtered jaggery water – preferred sweetness
  • fresh mint leaves – destemmed – (1/2 cup for each glass of juice) – appr. 1 1/2 cups
  • chukku podi/dry ginger powder – 3/4 tsp
  • additional water – as required

  
Method of Preparation


Jaggery Syrup

  1. I would recommend making jaggery syrup at home, filter and store for various purposes. This is one way, we might avoid depending upon crystal sugar for immediate usages.
  2. Heat jaggery in water in sim flame until it completely dissolves. Strain and then boil for 5 minutes… it would be neither syrupy nor watery.
  3. Cool and store in fridge.

  
Paanagam

  1. Mix juice of lemons and mix the jaggery syrup. The quantity of syrup is per one’s sweet preference
  2. Add dry ginger powder

  
Pudhina Paanagam

  1. Clean and de-stem mint leaves
  2. Wash well and blend together with lemon, jaggery syrup and dry ginger powder
  3. Add enough water to make 3 glasses of juice
  4. Strain and drink. If one prefers without straining , that’s perfect too.


Say ‘NO’ to refined – white sugar! – Candied Walnuts with Jaggery


Caramel seems to be omnipresent…. be it chocolates, ice creams, milk shakes, macchiatos, puddings, cappuccinos, cakes, frostings and the list is endless. If not a weight watcher, I am certainly a health watcher. When craving (especially to indulge in sweets) takes a huge leap, I try to substitute with my favourite unrefined forms of sugar. My immediate choice is palm or sugarcane jaggery which involves dissolving and filtering from scratch. The next in line to make Urundai/Sweet Balls, I prefer raw unrefined palm or cane sugar for direct usage.

When we went to dine in this beautiful restaurant, the dessert served was vanilla ice cream with caramelized/candied walnuts. The hot, gooey, a touch of bittery sweetness in the caramel that coated crispy walnuts was truly awesome. After a while when the caramel coat hardened a bit, it was a wonderful crispy cracker. Though I relished the taste of it, the guilt of having something with white sugar hit me hard, as usual.

Hence came this recipe. I substituted jaggery with sugar. The kadalai mittai- peanut crackers, ellu mittai- sesame crackers, pori urundai- puffed rice crackers…. all native sweets of Tamilnadu, made with jaggery syrup caramelized to perfection – for the crunchy bite came to my mind. When we could make caramel popcorn with jaggery syrup, why not caramel walnuts? Yes we can. There is no butter or clarified butter to add extra calories.


Candied Walnuts (with jaggery syrup)
 

coated well


Ingredients

  • walnuts – 2 cups
  • vellam/jaggery – 1 cup grated
  • water – 1/2 cup
  • elakkai podi/cardamom powder – 1 tsp
  • chukka podi/dry ginger powder – 1 tsp

  
Method of Preparation


  1. Dry roast walnuts until crisp –
  • Preheat oven at 350°F. Place walnuts on butter paper/cookie sheet.
  • Bake for appr. 10 minutes- couple of minutes more or less . Do keep checking frequently.


2. to caramelize jaggery

  • On a stove, dissolve 1 cup jaggery in 1/2 cup water
  • After jaggery has dissolved completely, strain for impurities
  • Take a hard bottomed chatti/pan, pour the filtered jaggery water
  • Add cardamom powder and dry ginger powder- cardamom for flavour and dry ginger for quick digestion
  • Let it boil until syrup consistency is reached
  • Once the liquid becomes syrupy, simmer the stove and wait for the required three string consistency or hard ball stage.


3. Hard Ball stage in syrup

(courtesy: http://www.sanjeevkapoor.com)
  

4. Next step is a quick and swift one – otherwise the syrup consistency would turn disastrous.

5. When the syrup is perfect hard ball consistency, drop quickly the roasted walnuts and mix well until every walnut is coated perfectly.

6. Spread on a greased plate.

7. When the walnuts are cool, they would be crisp. Store in an air tight container. They taste awesome when hot too.
  

bird’s nest with caramelized jaggery